Category Archives: Uncategorized

Mixed media for textiles Part 5 Development

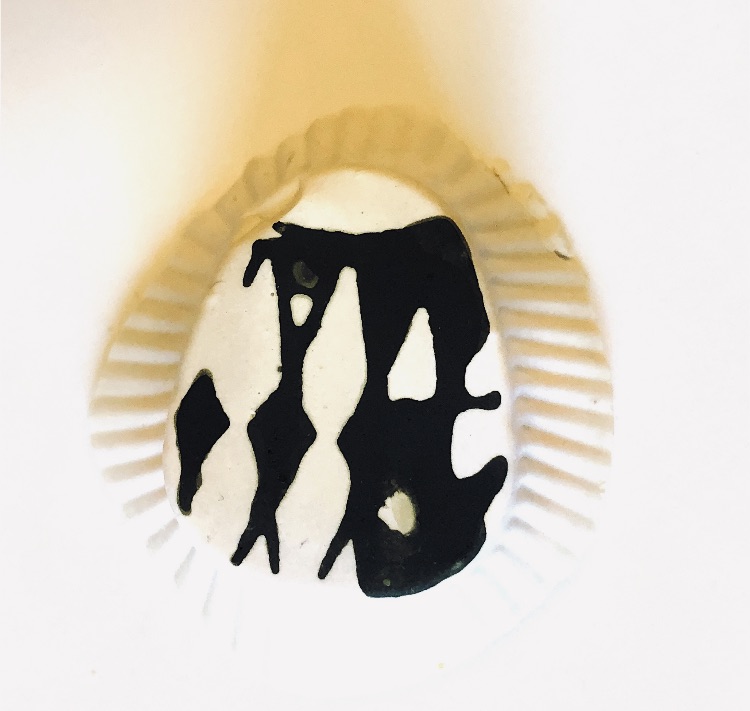
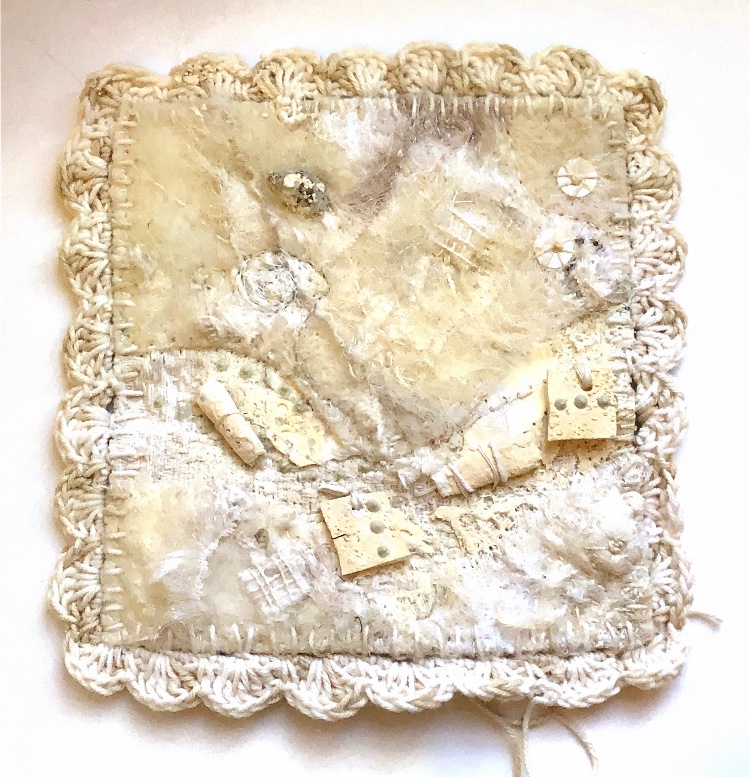
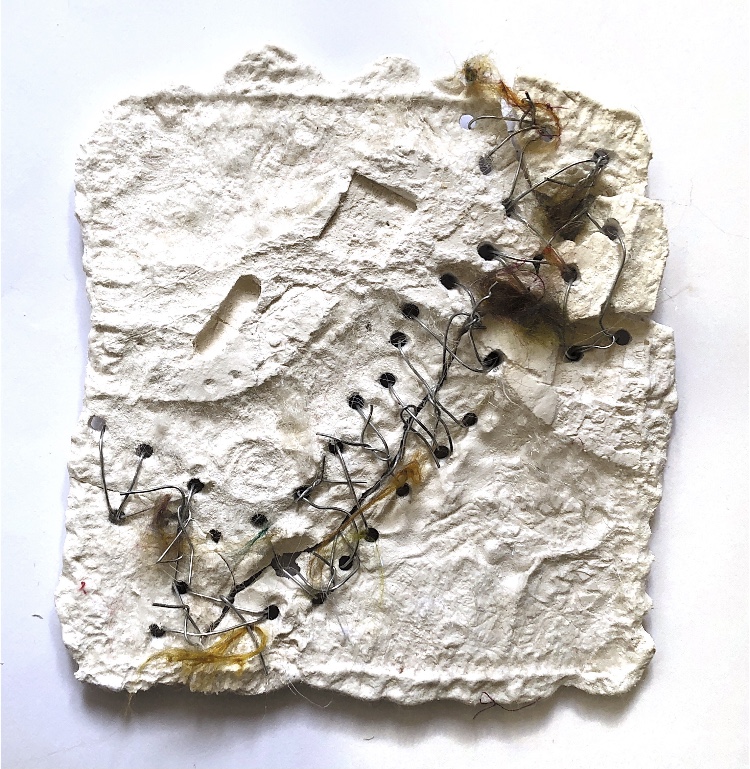
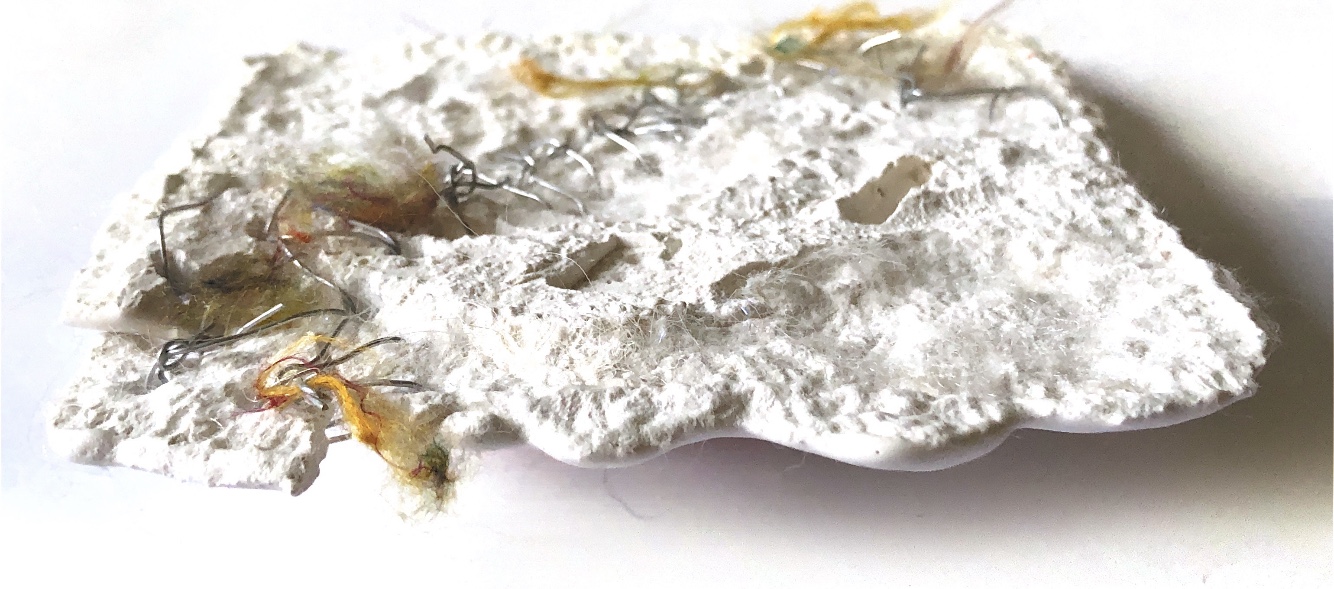
Following feedback from my tutor I decided to develop my collection of pieces from Part 5. The first thing I did was to add a bit of green watercolour to the small plaster sample, (Fig. 1) thereby tying it in with the other samples more closely. This can be seen in the group pictures. This small addition has made a huge difference to how the pieces fit together, I didn’t want to colour the cube but the plaster within the wire holds the colour really well for a subtle yet important splash of green.

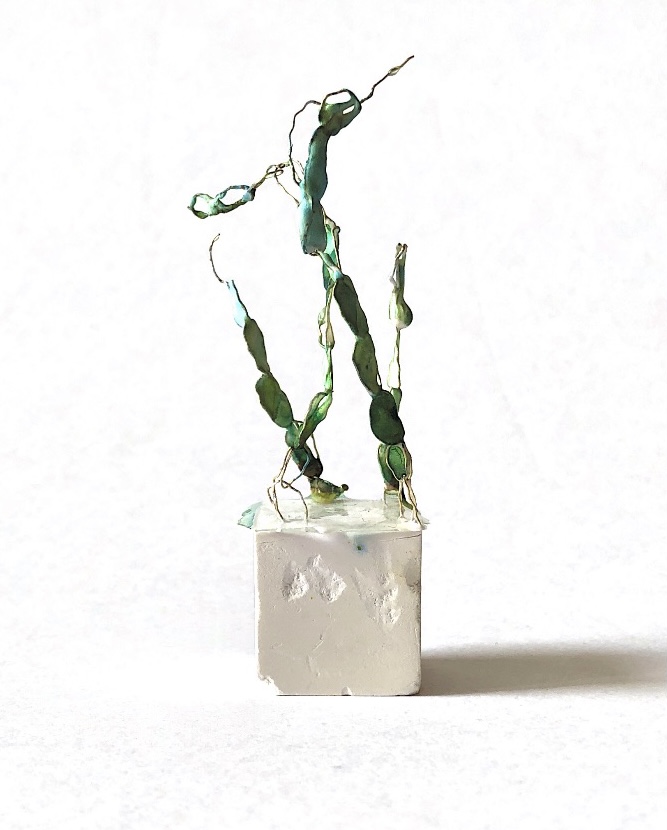
Fig. 1 Small plaster sample with added green colour

************************************

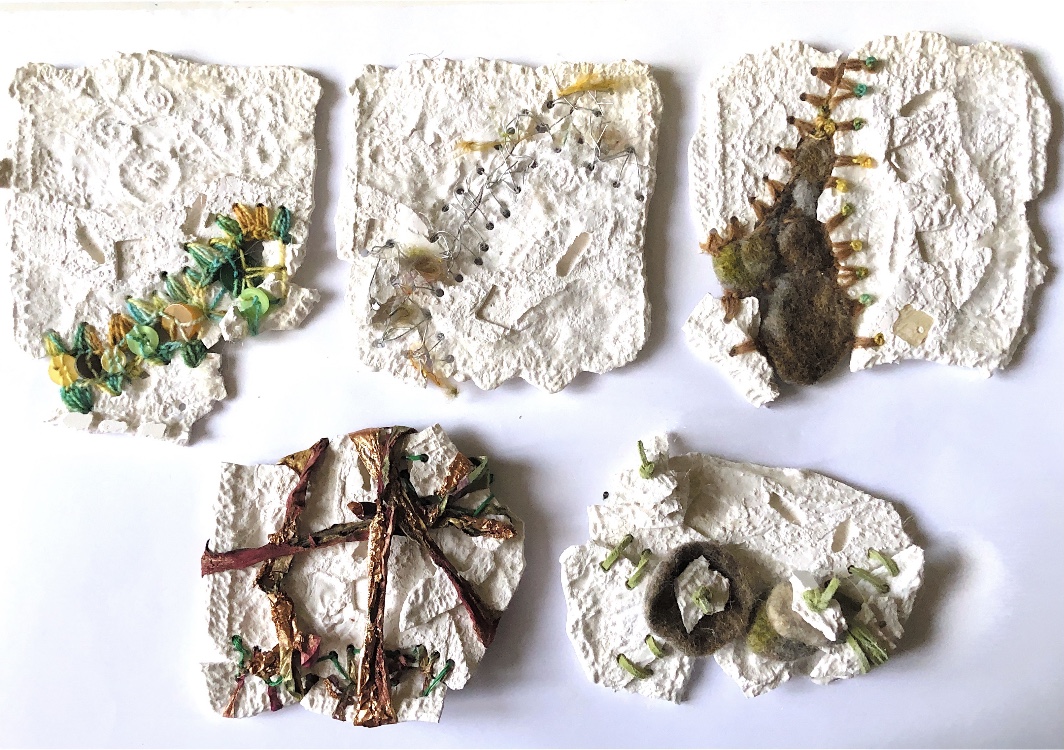
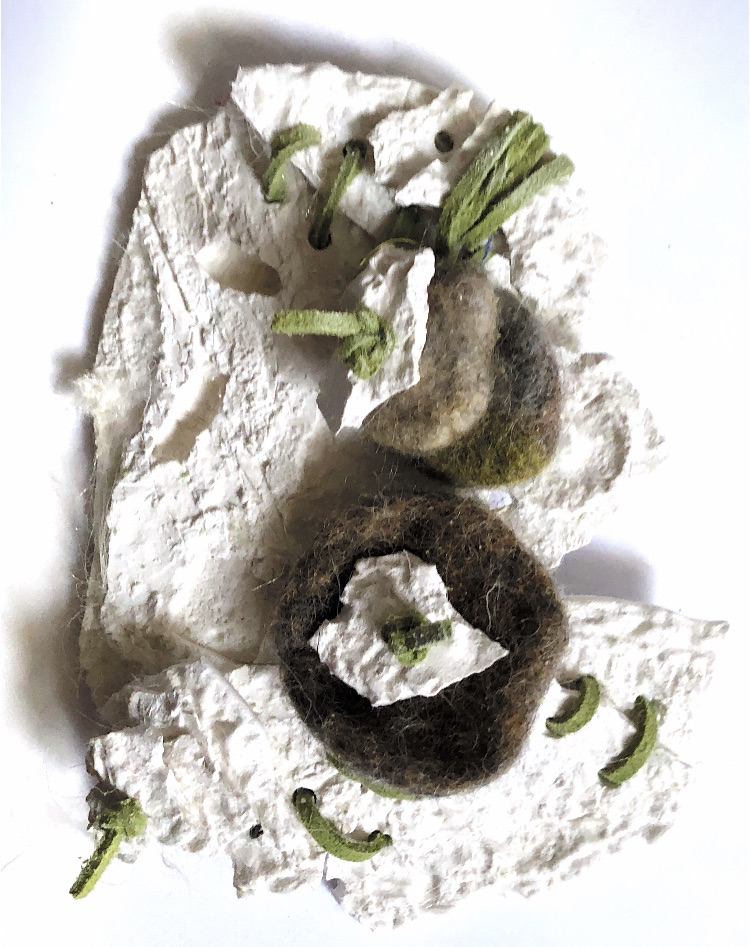
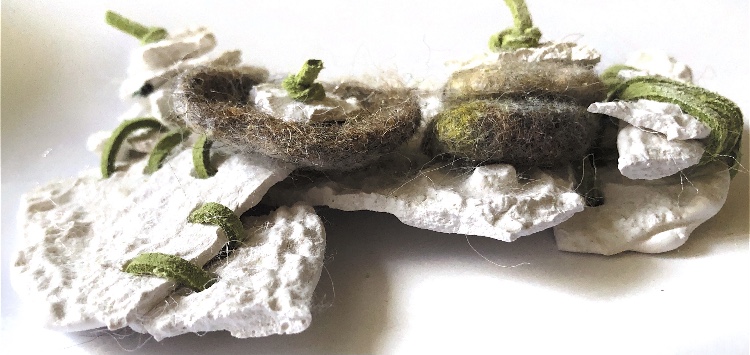
I then researched the work of Richard McVetis who makes small cubes with fabric and stitch. I was interested to see how he displays his work, – he groups his pieces in different arrangements and situations with plain backgrounds. With this in mind I then arranged and photographed my collection in different groupings. I also took more close-up photos capturing details and cropped images. (Fig. 2) I think the stacked cubes work really well, highlighting the beautiful greens, white, and the patterns within the cubes. The close up images distort the pieces into unrecognisable shapes and patterns.

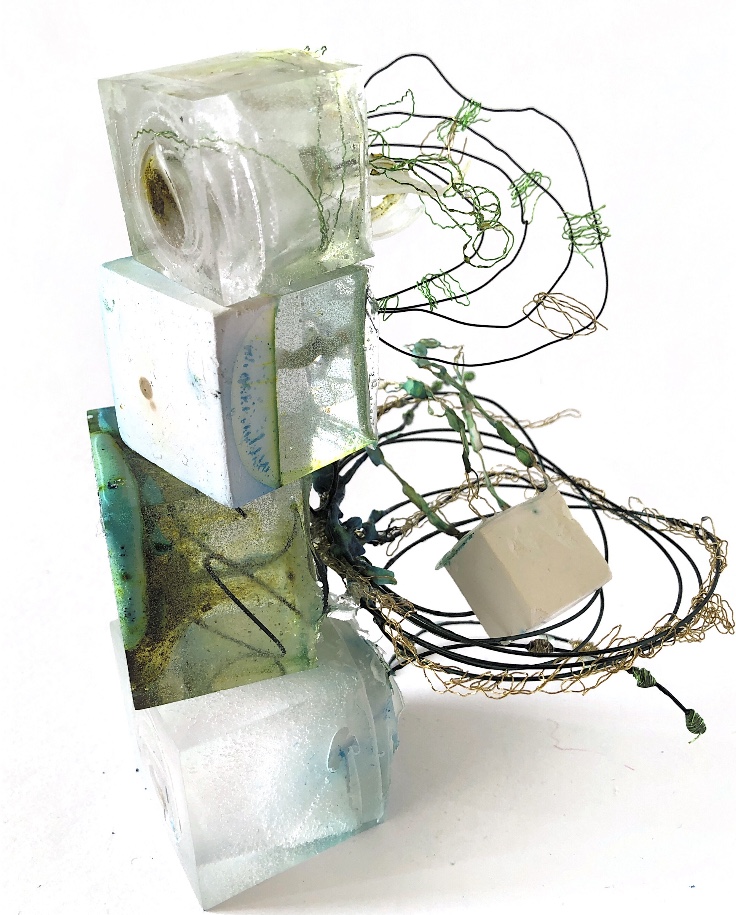
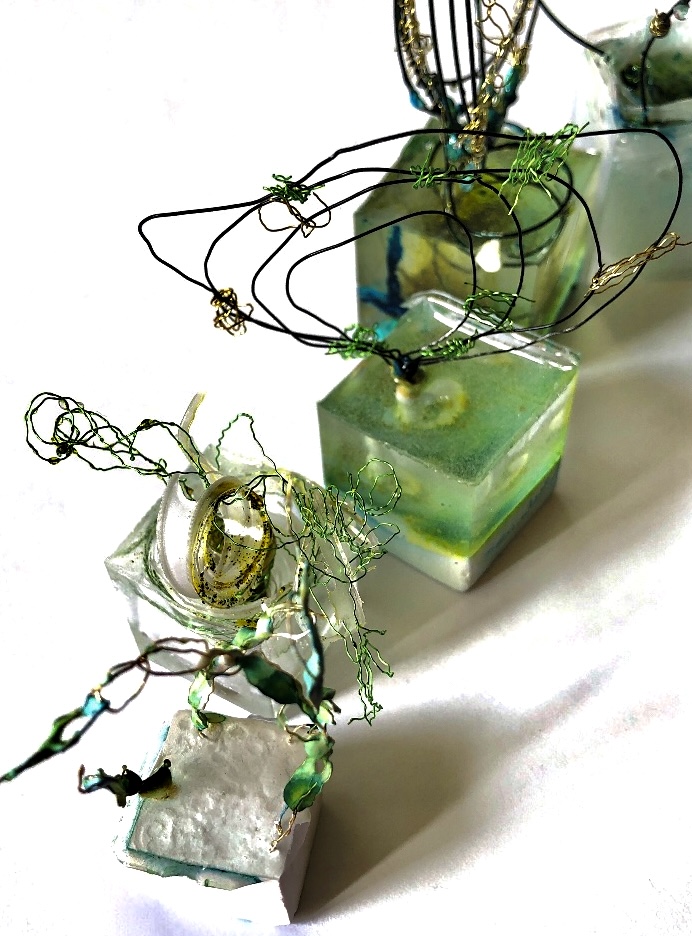
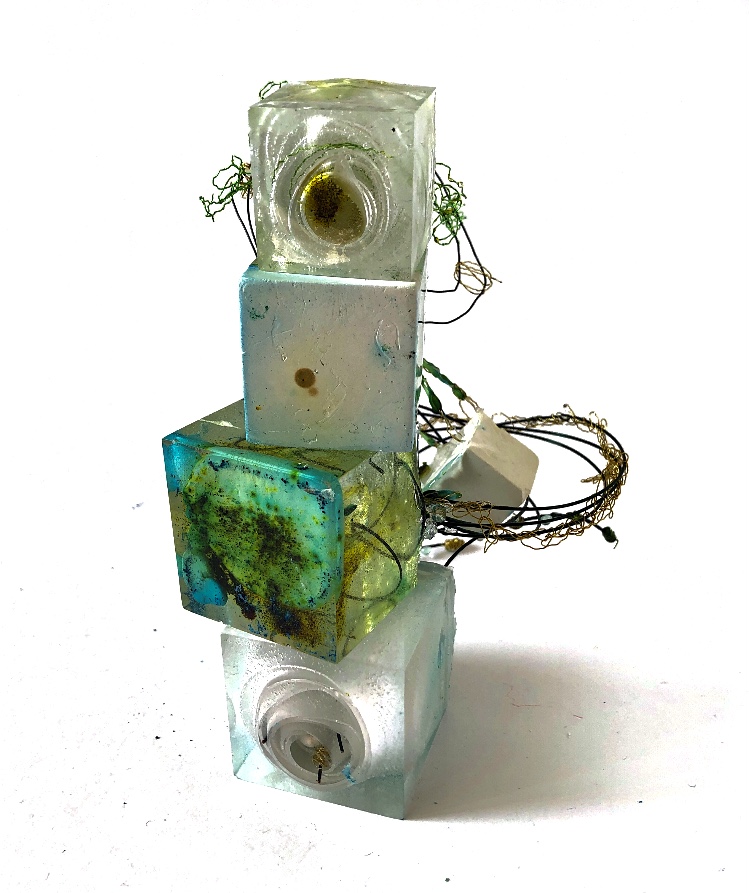
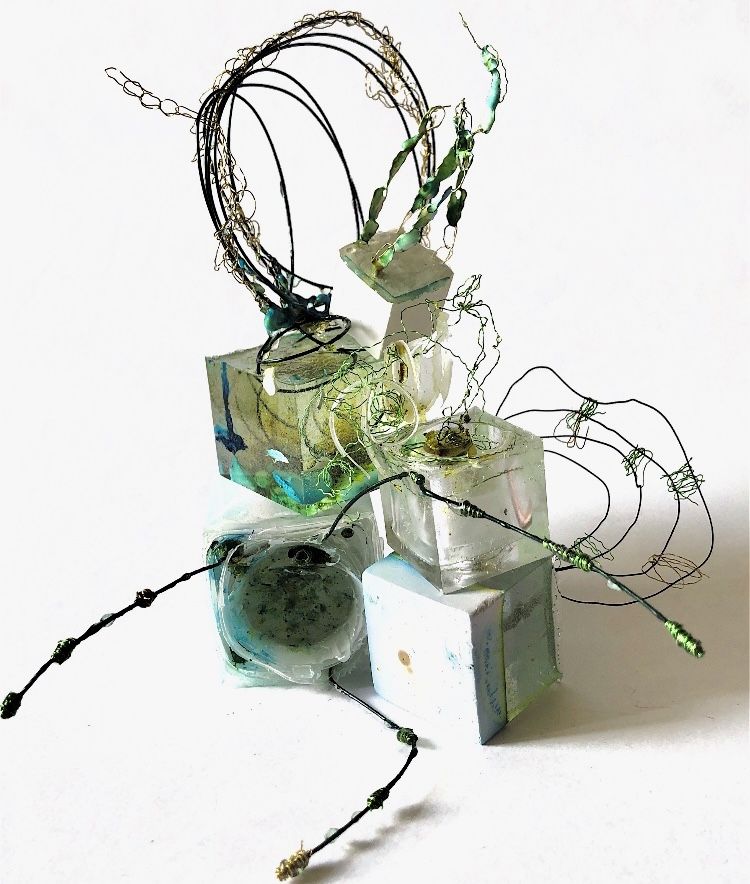
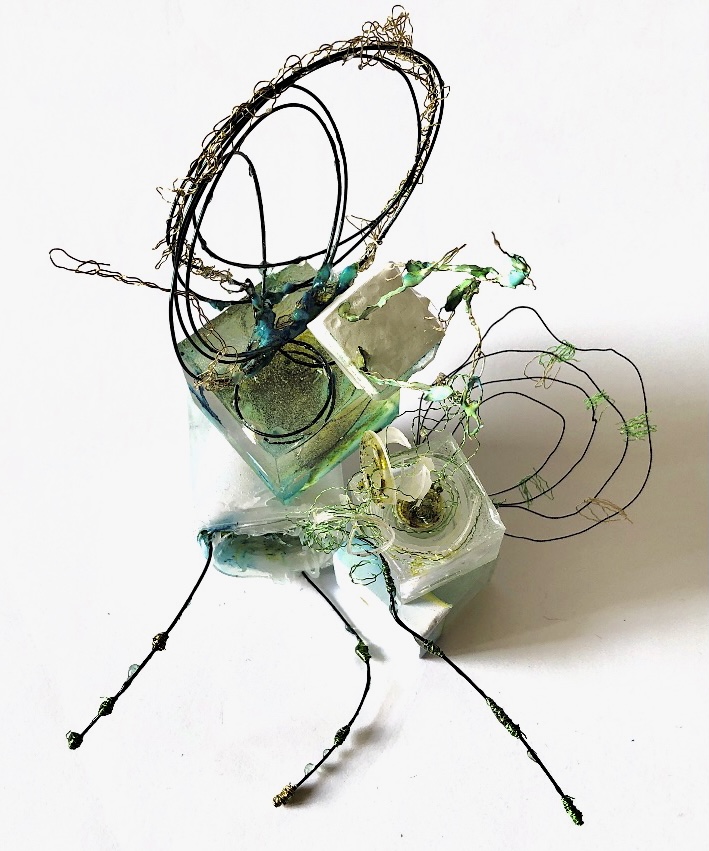
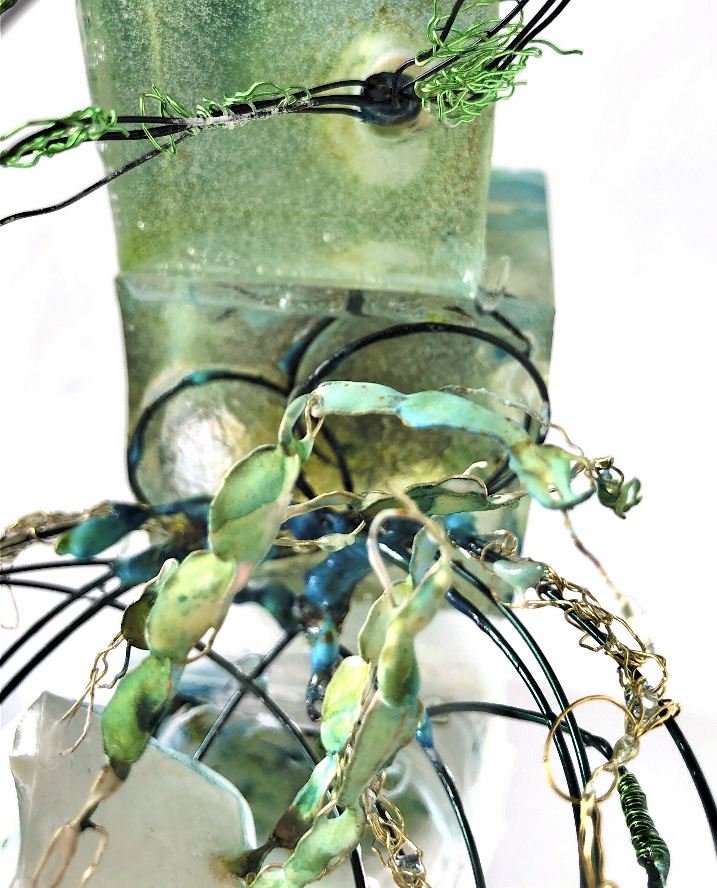
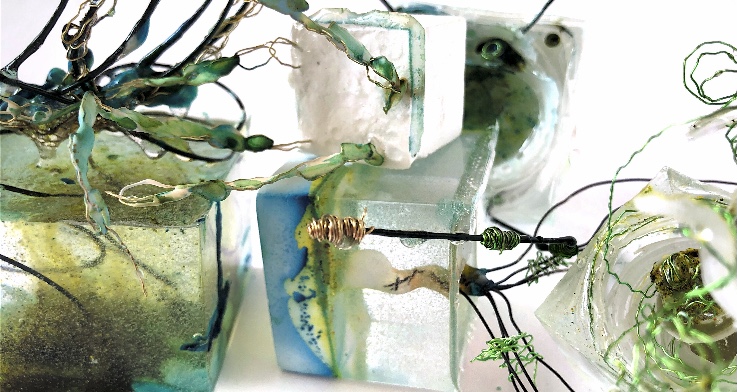
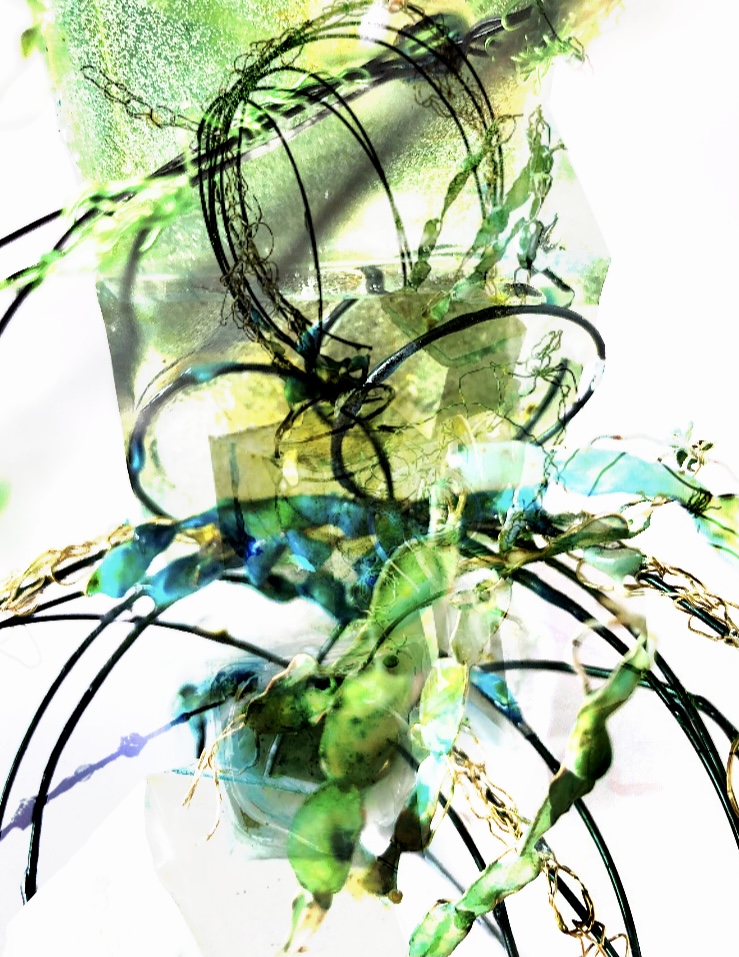
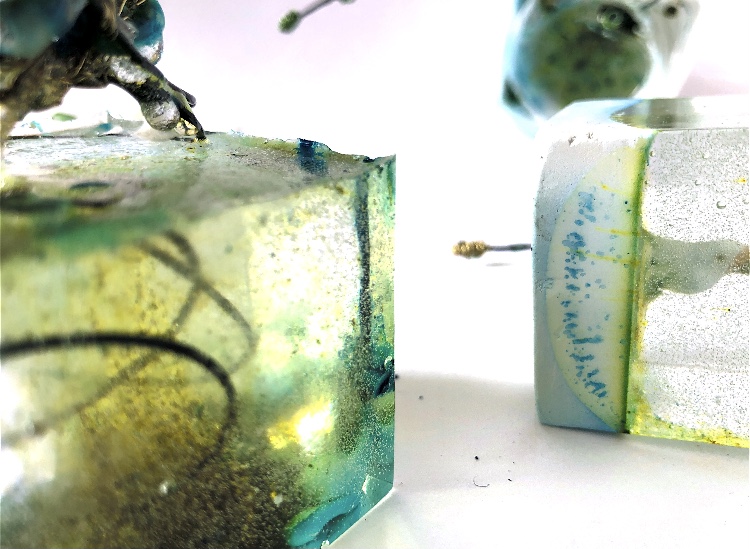
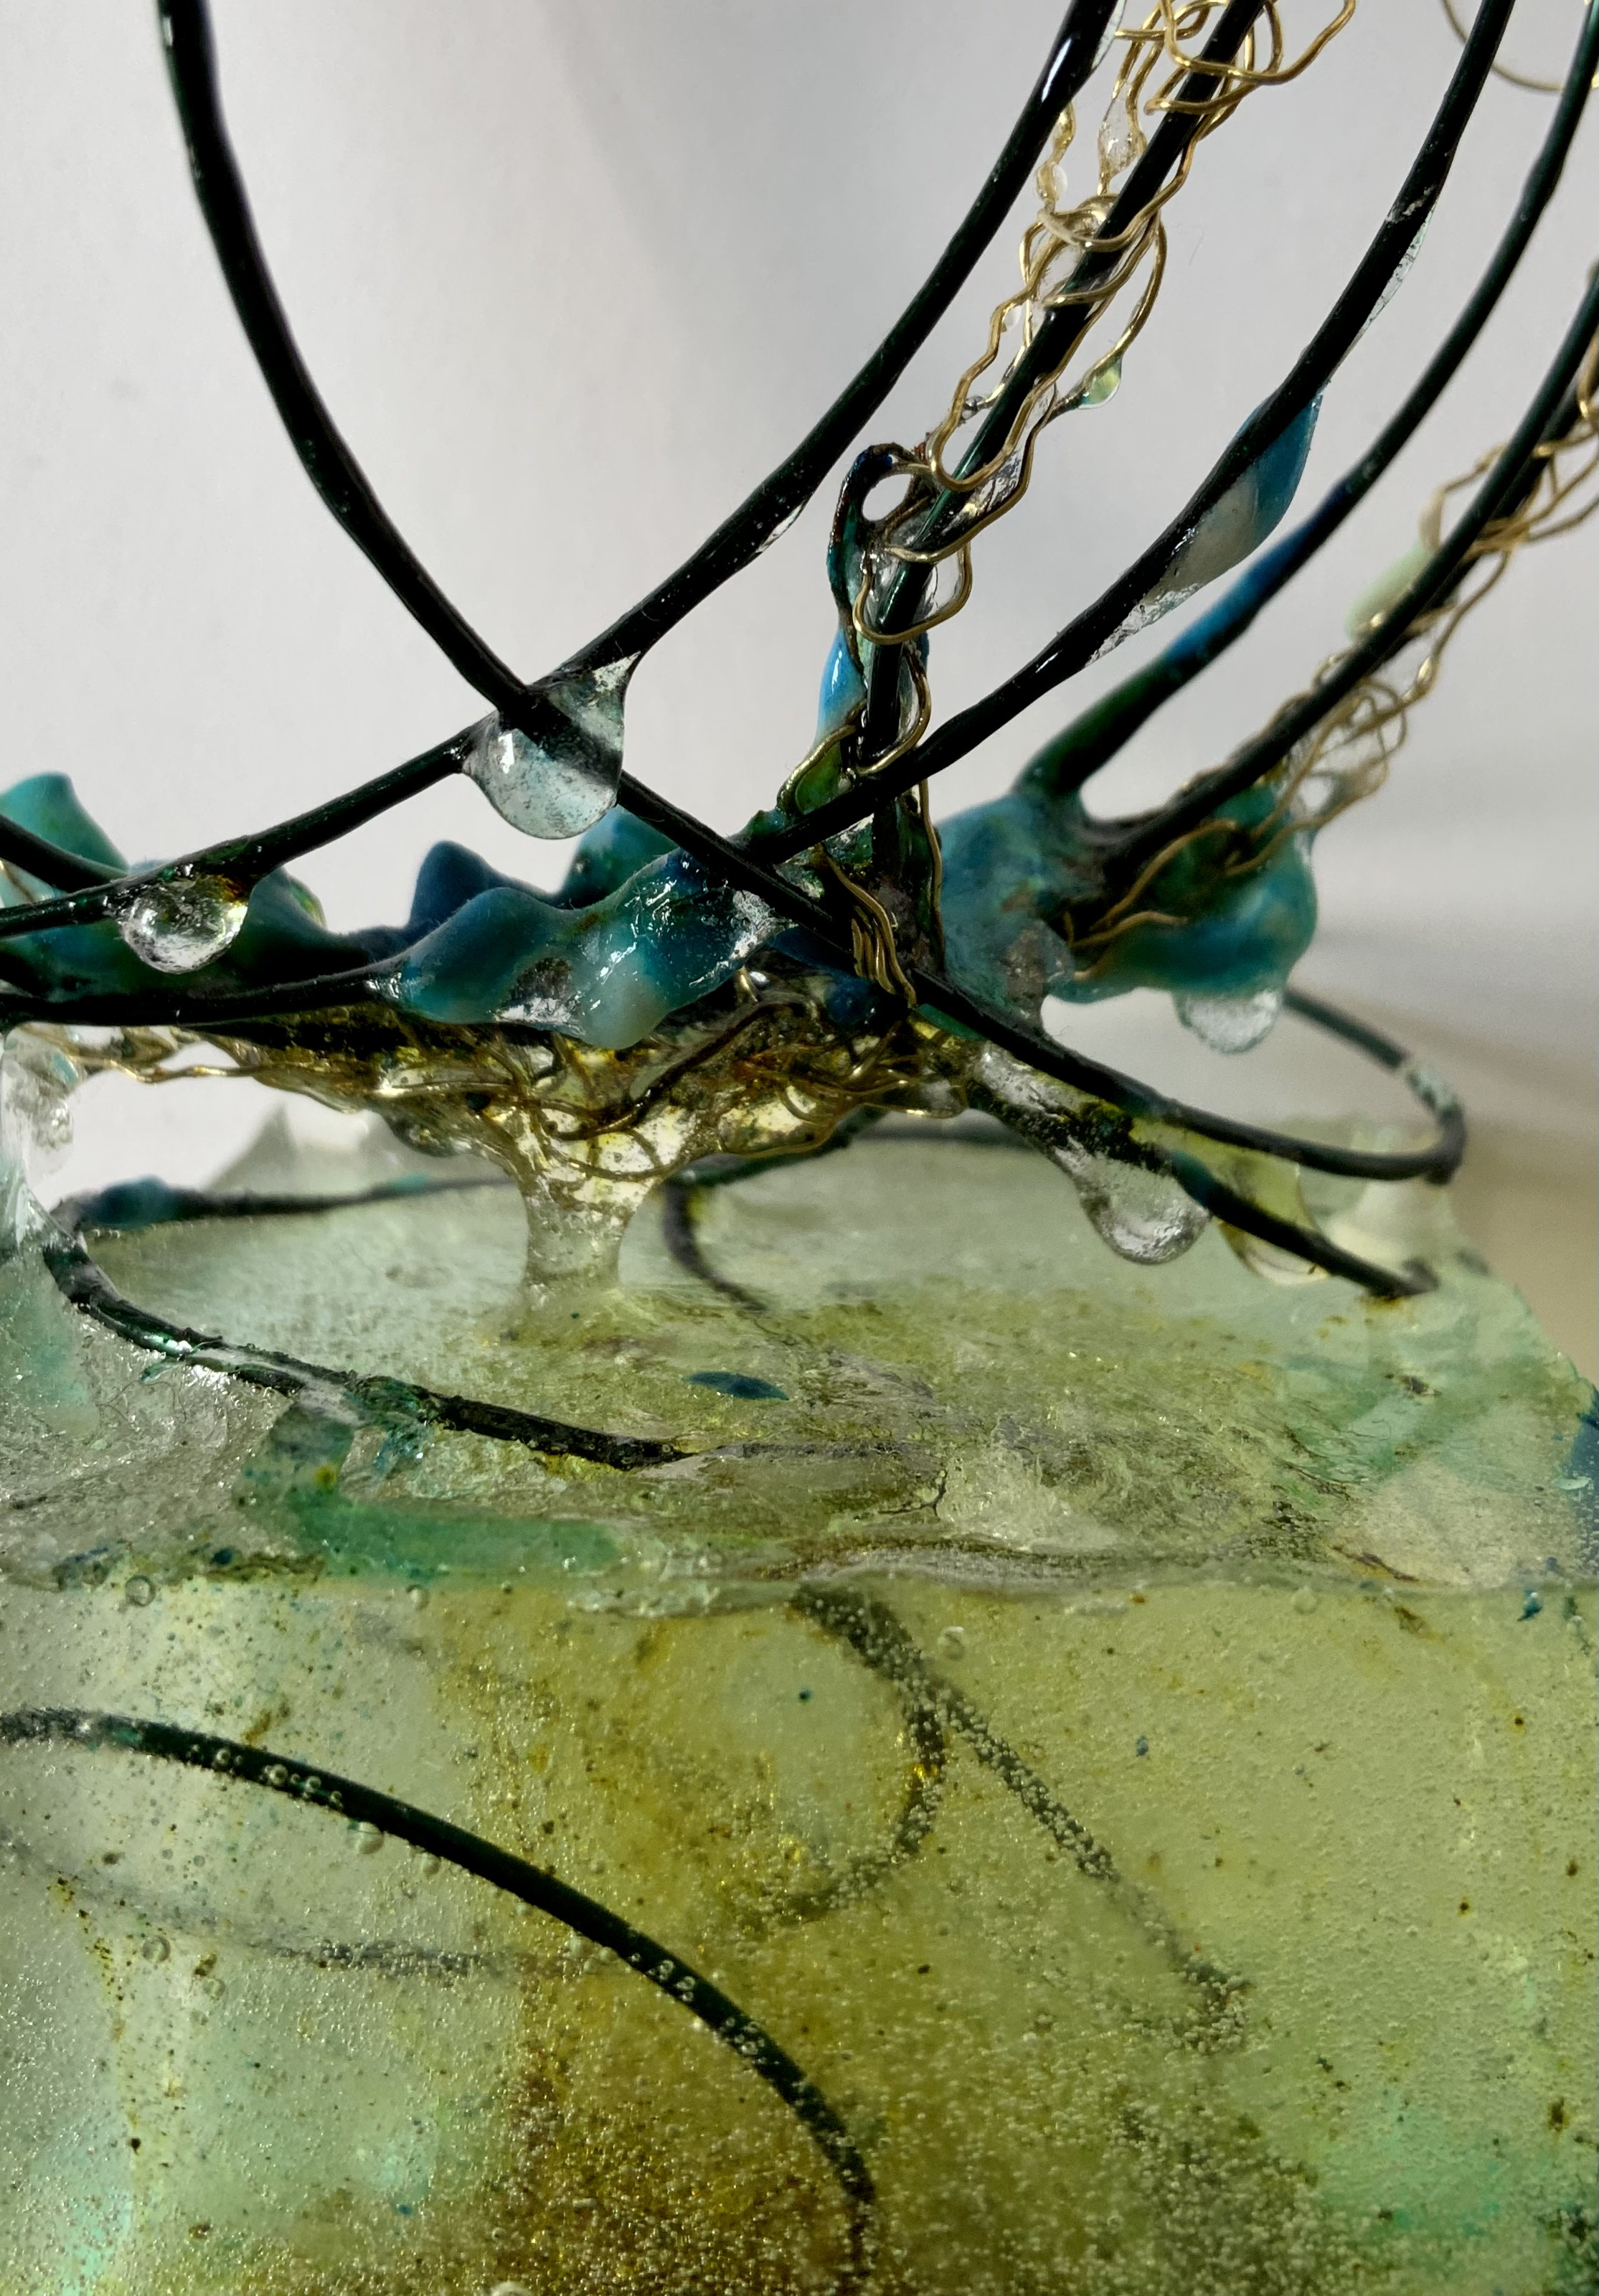
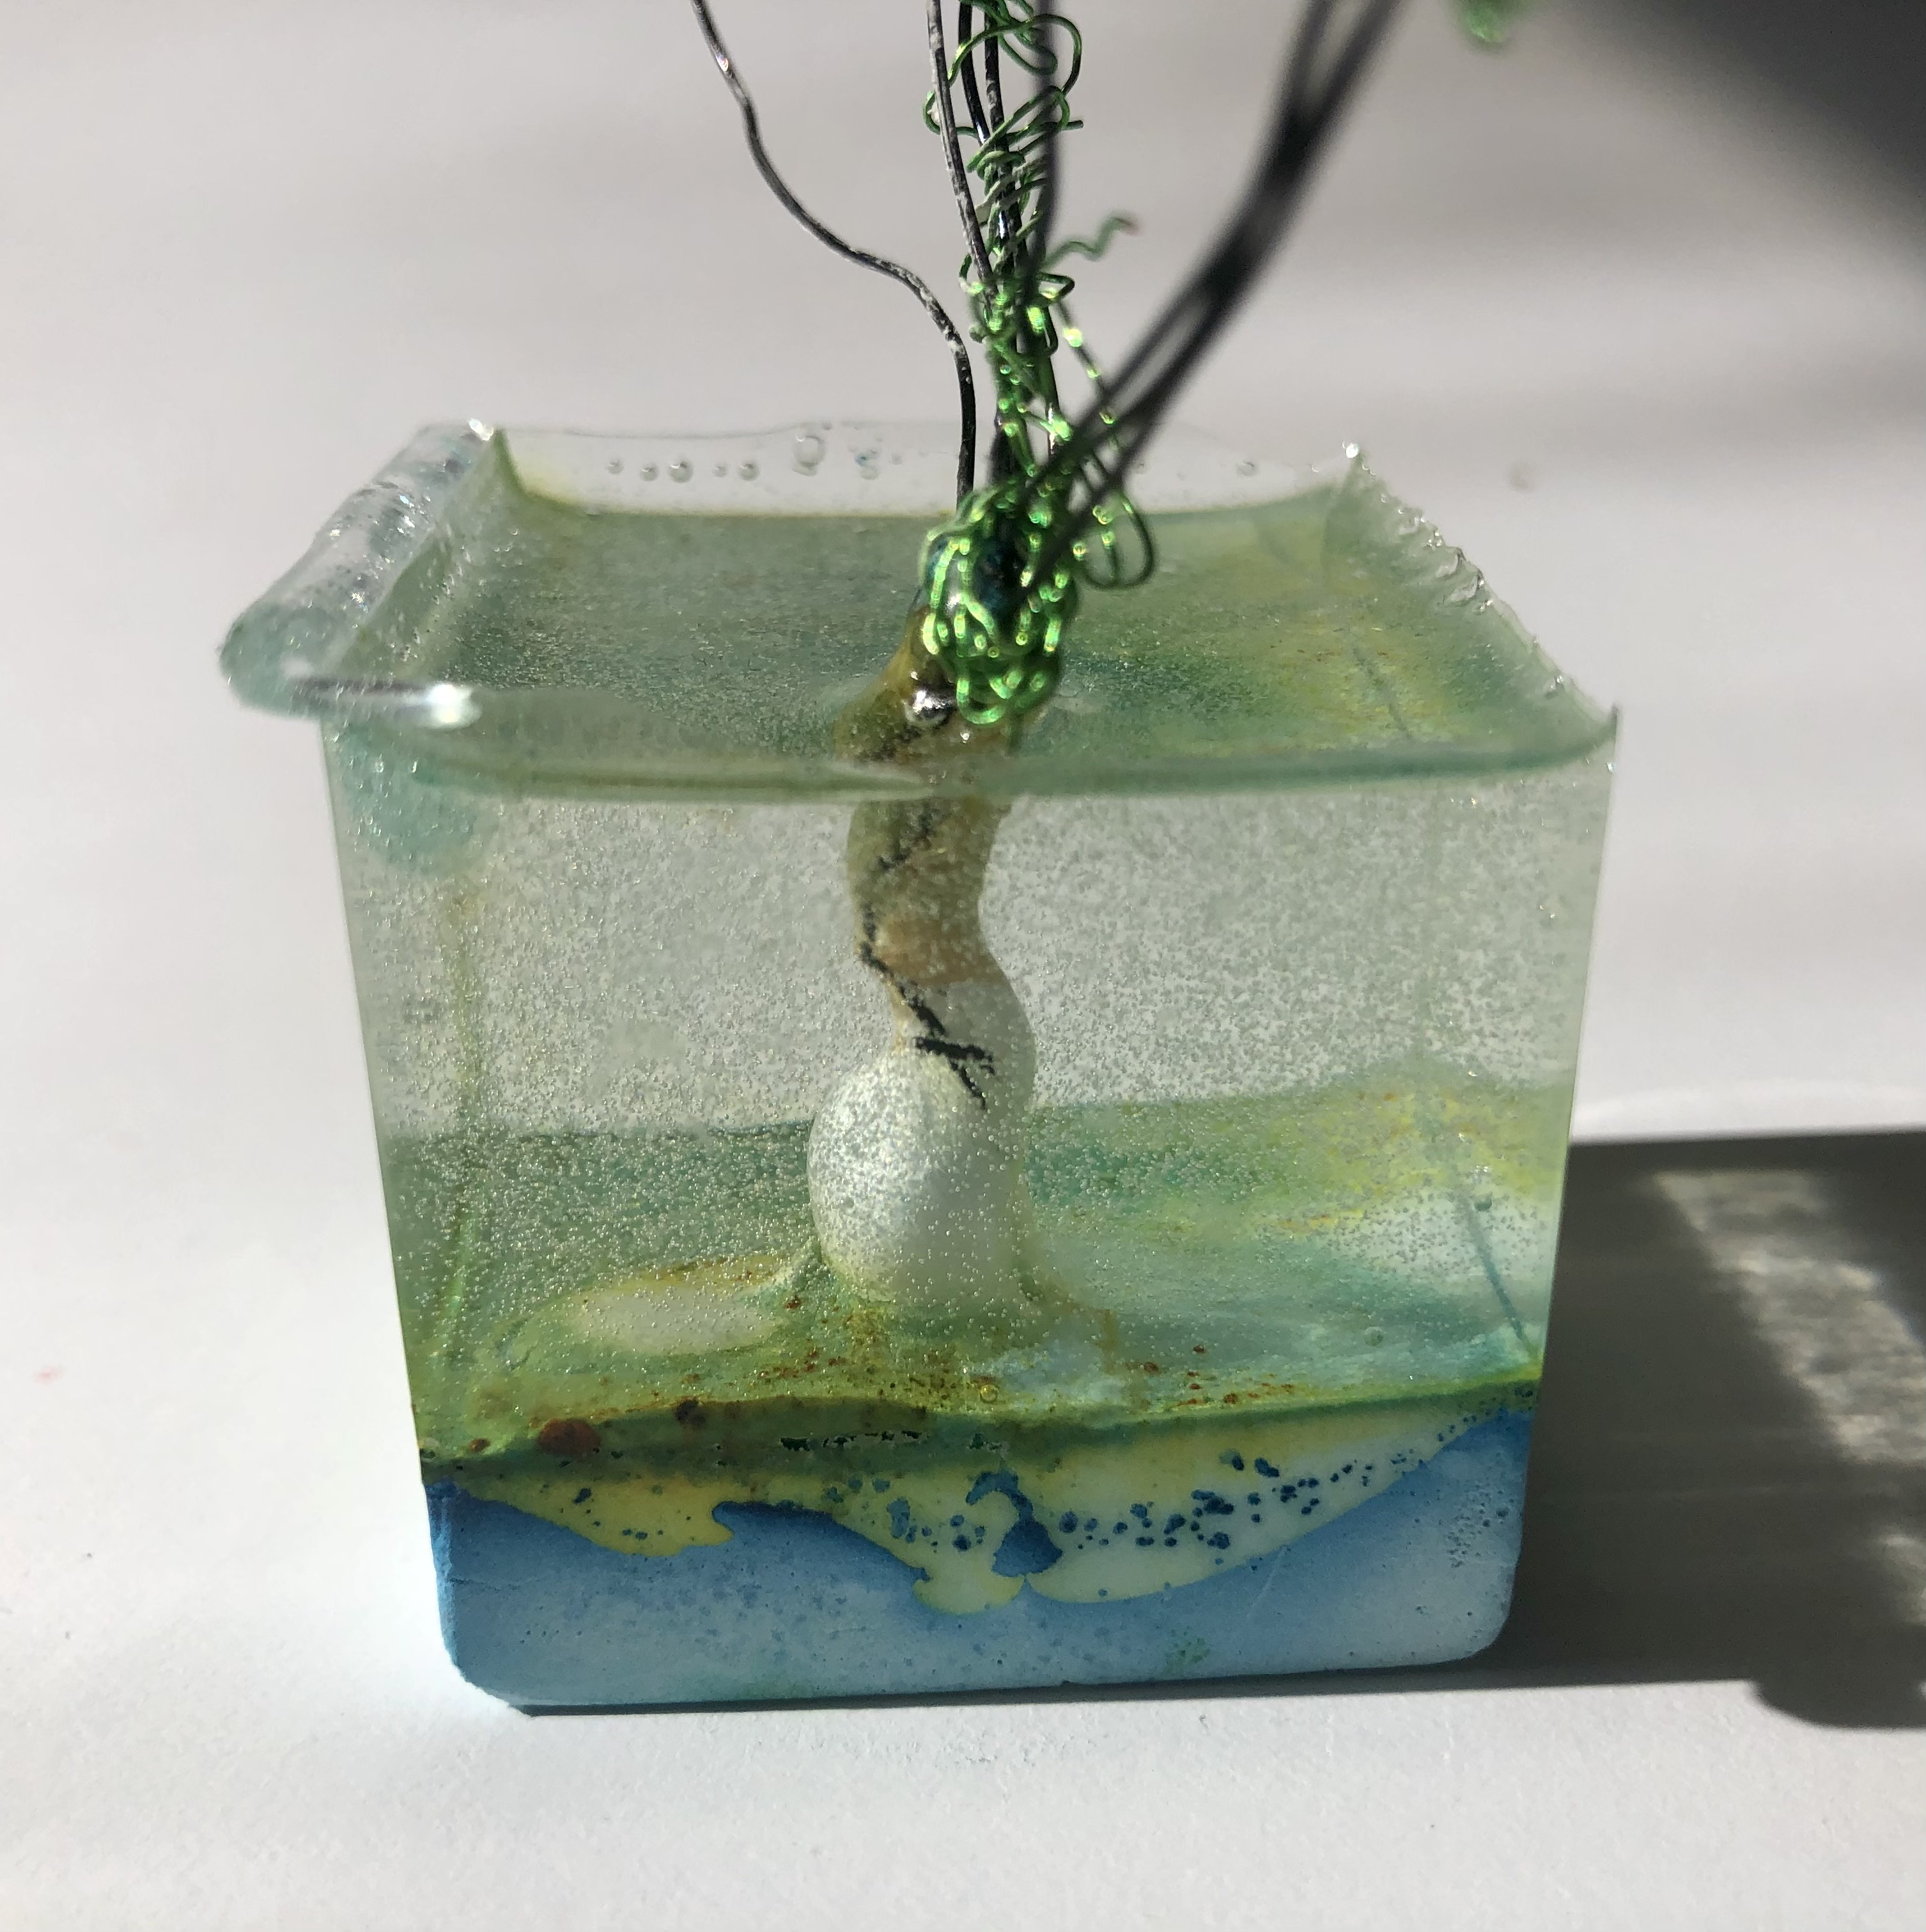
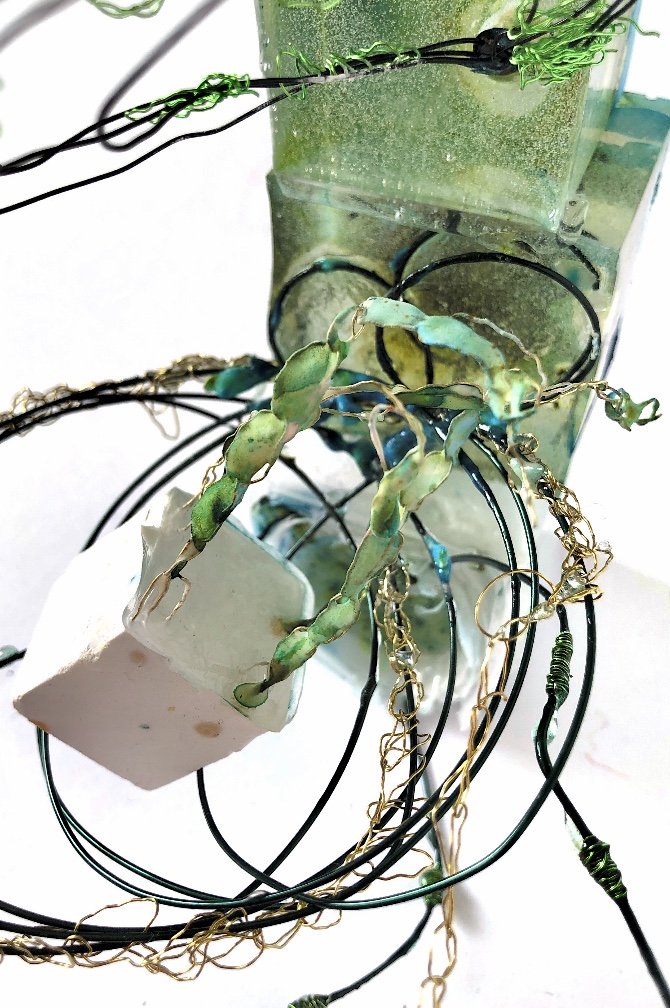
Fig.2 Different arrangements and close ups

********************************

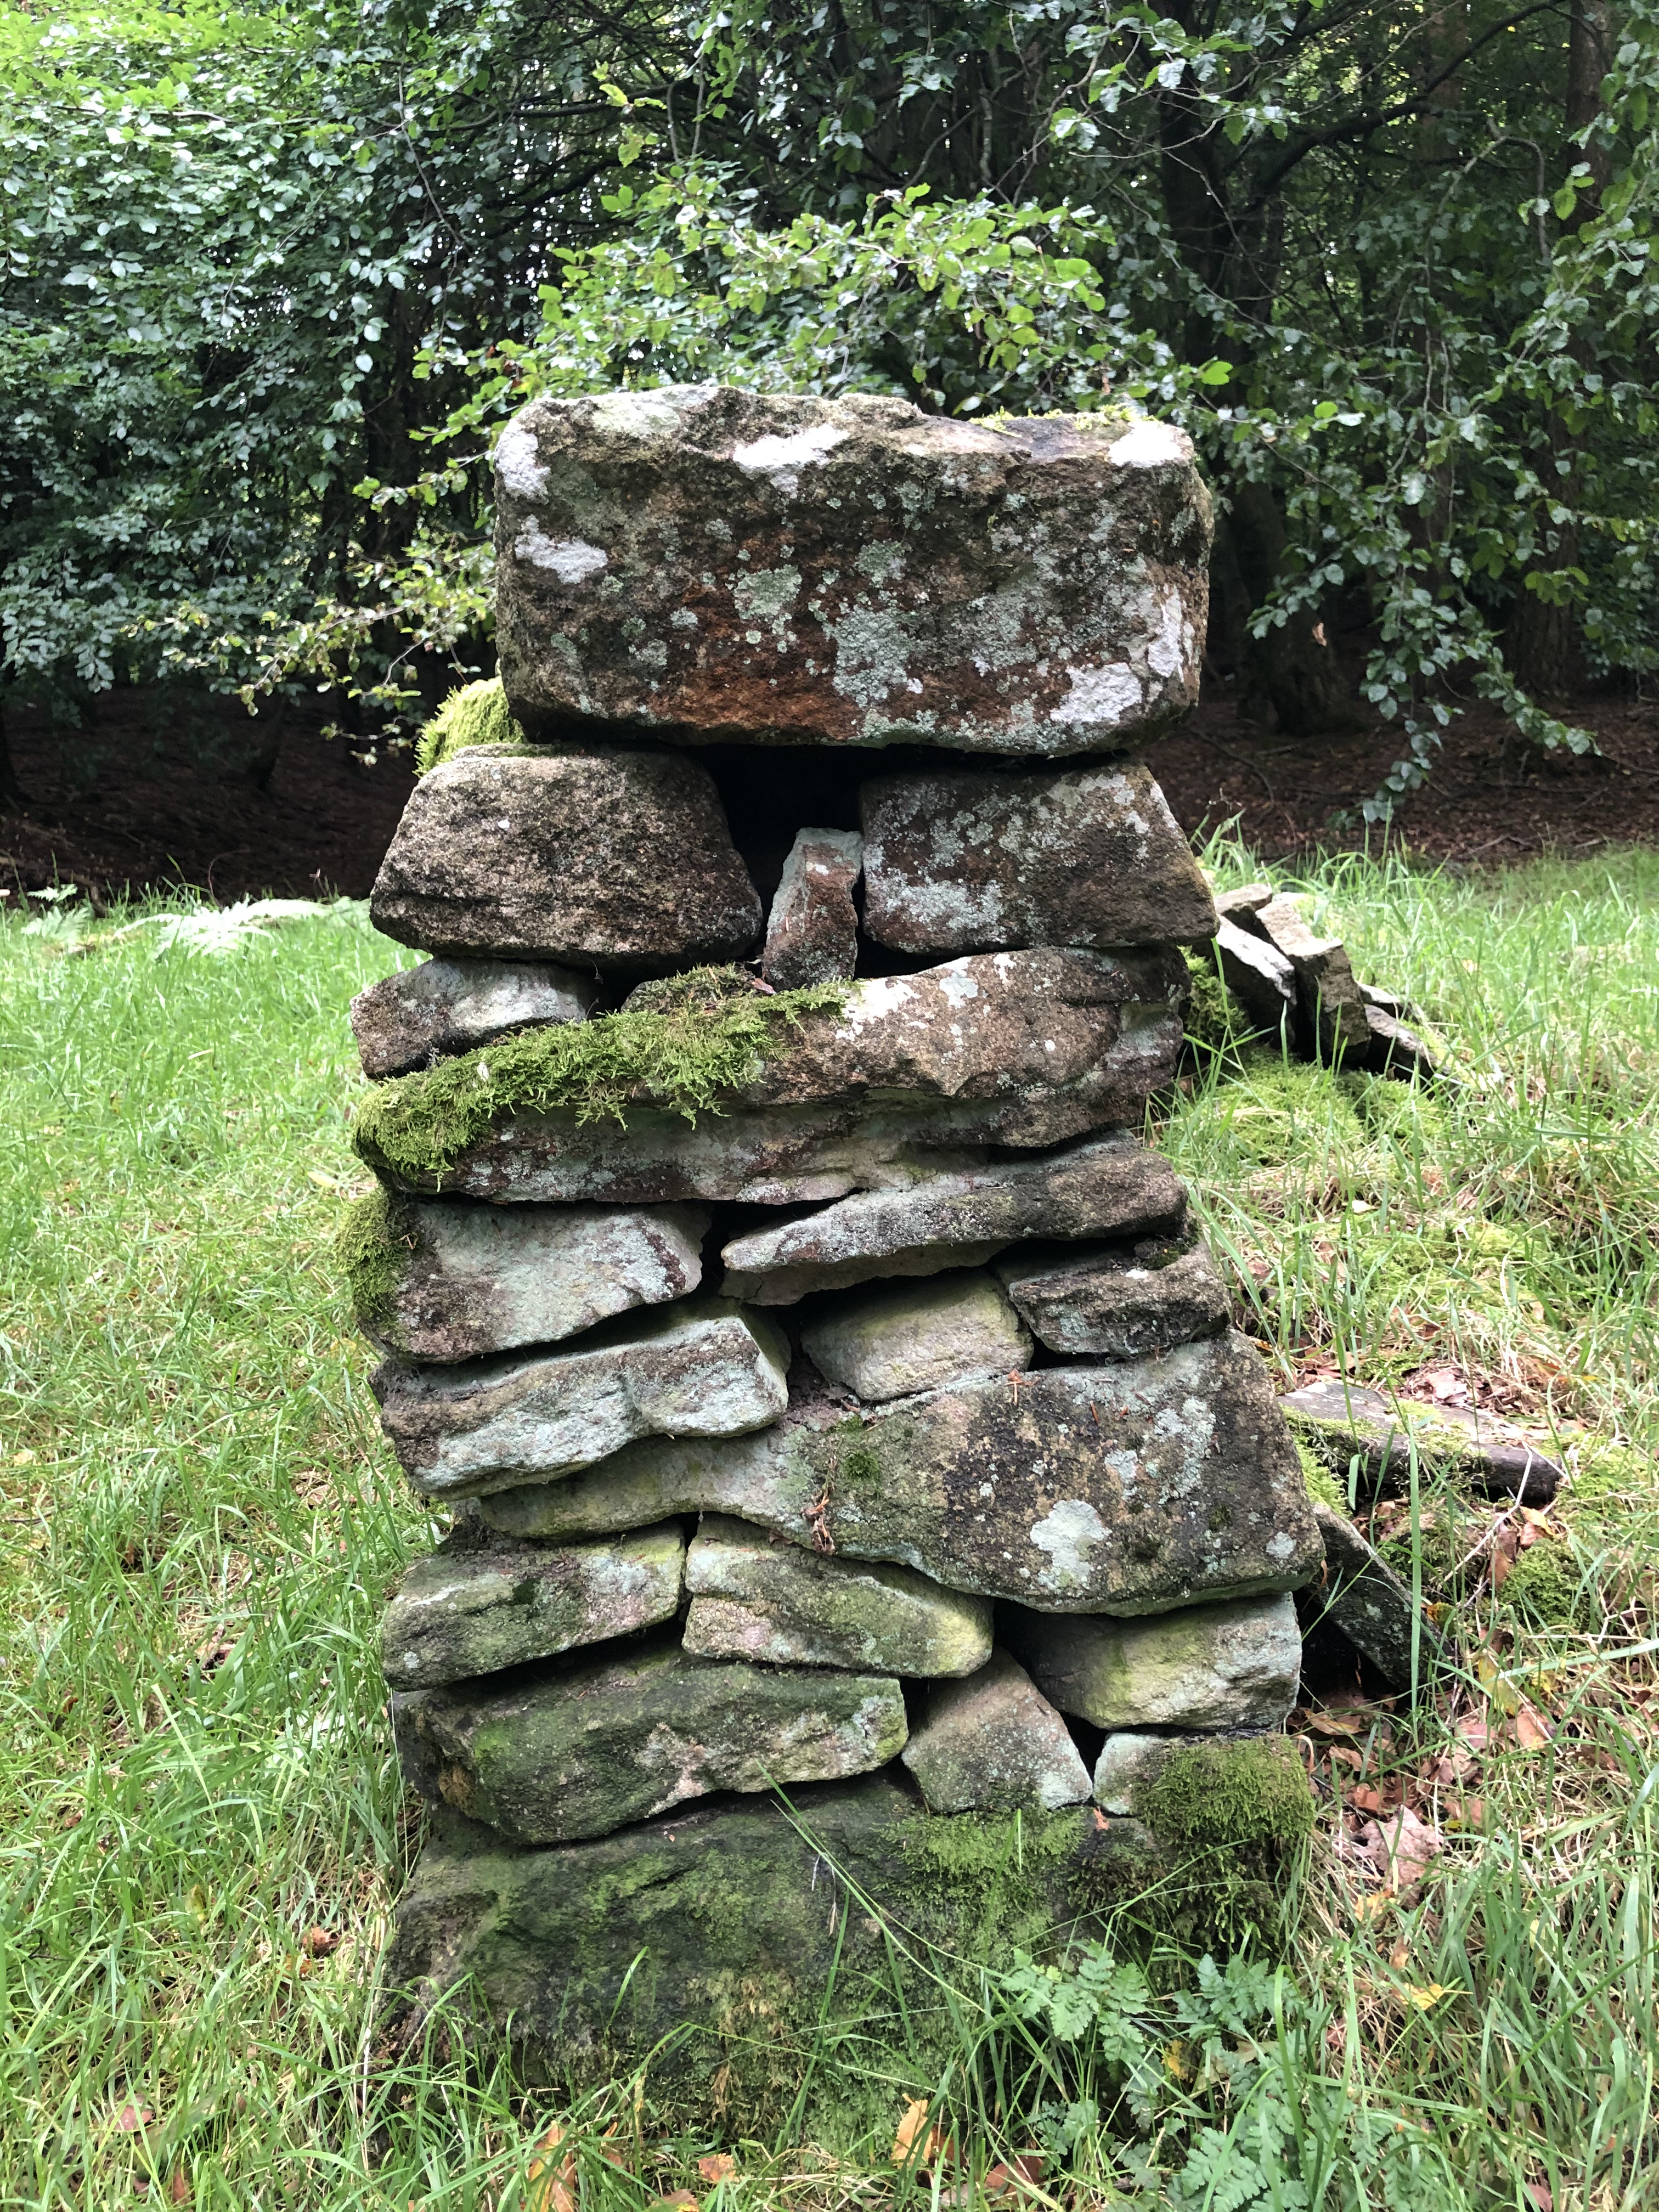
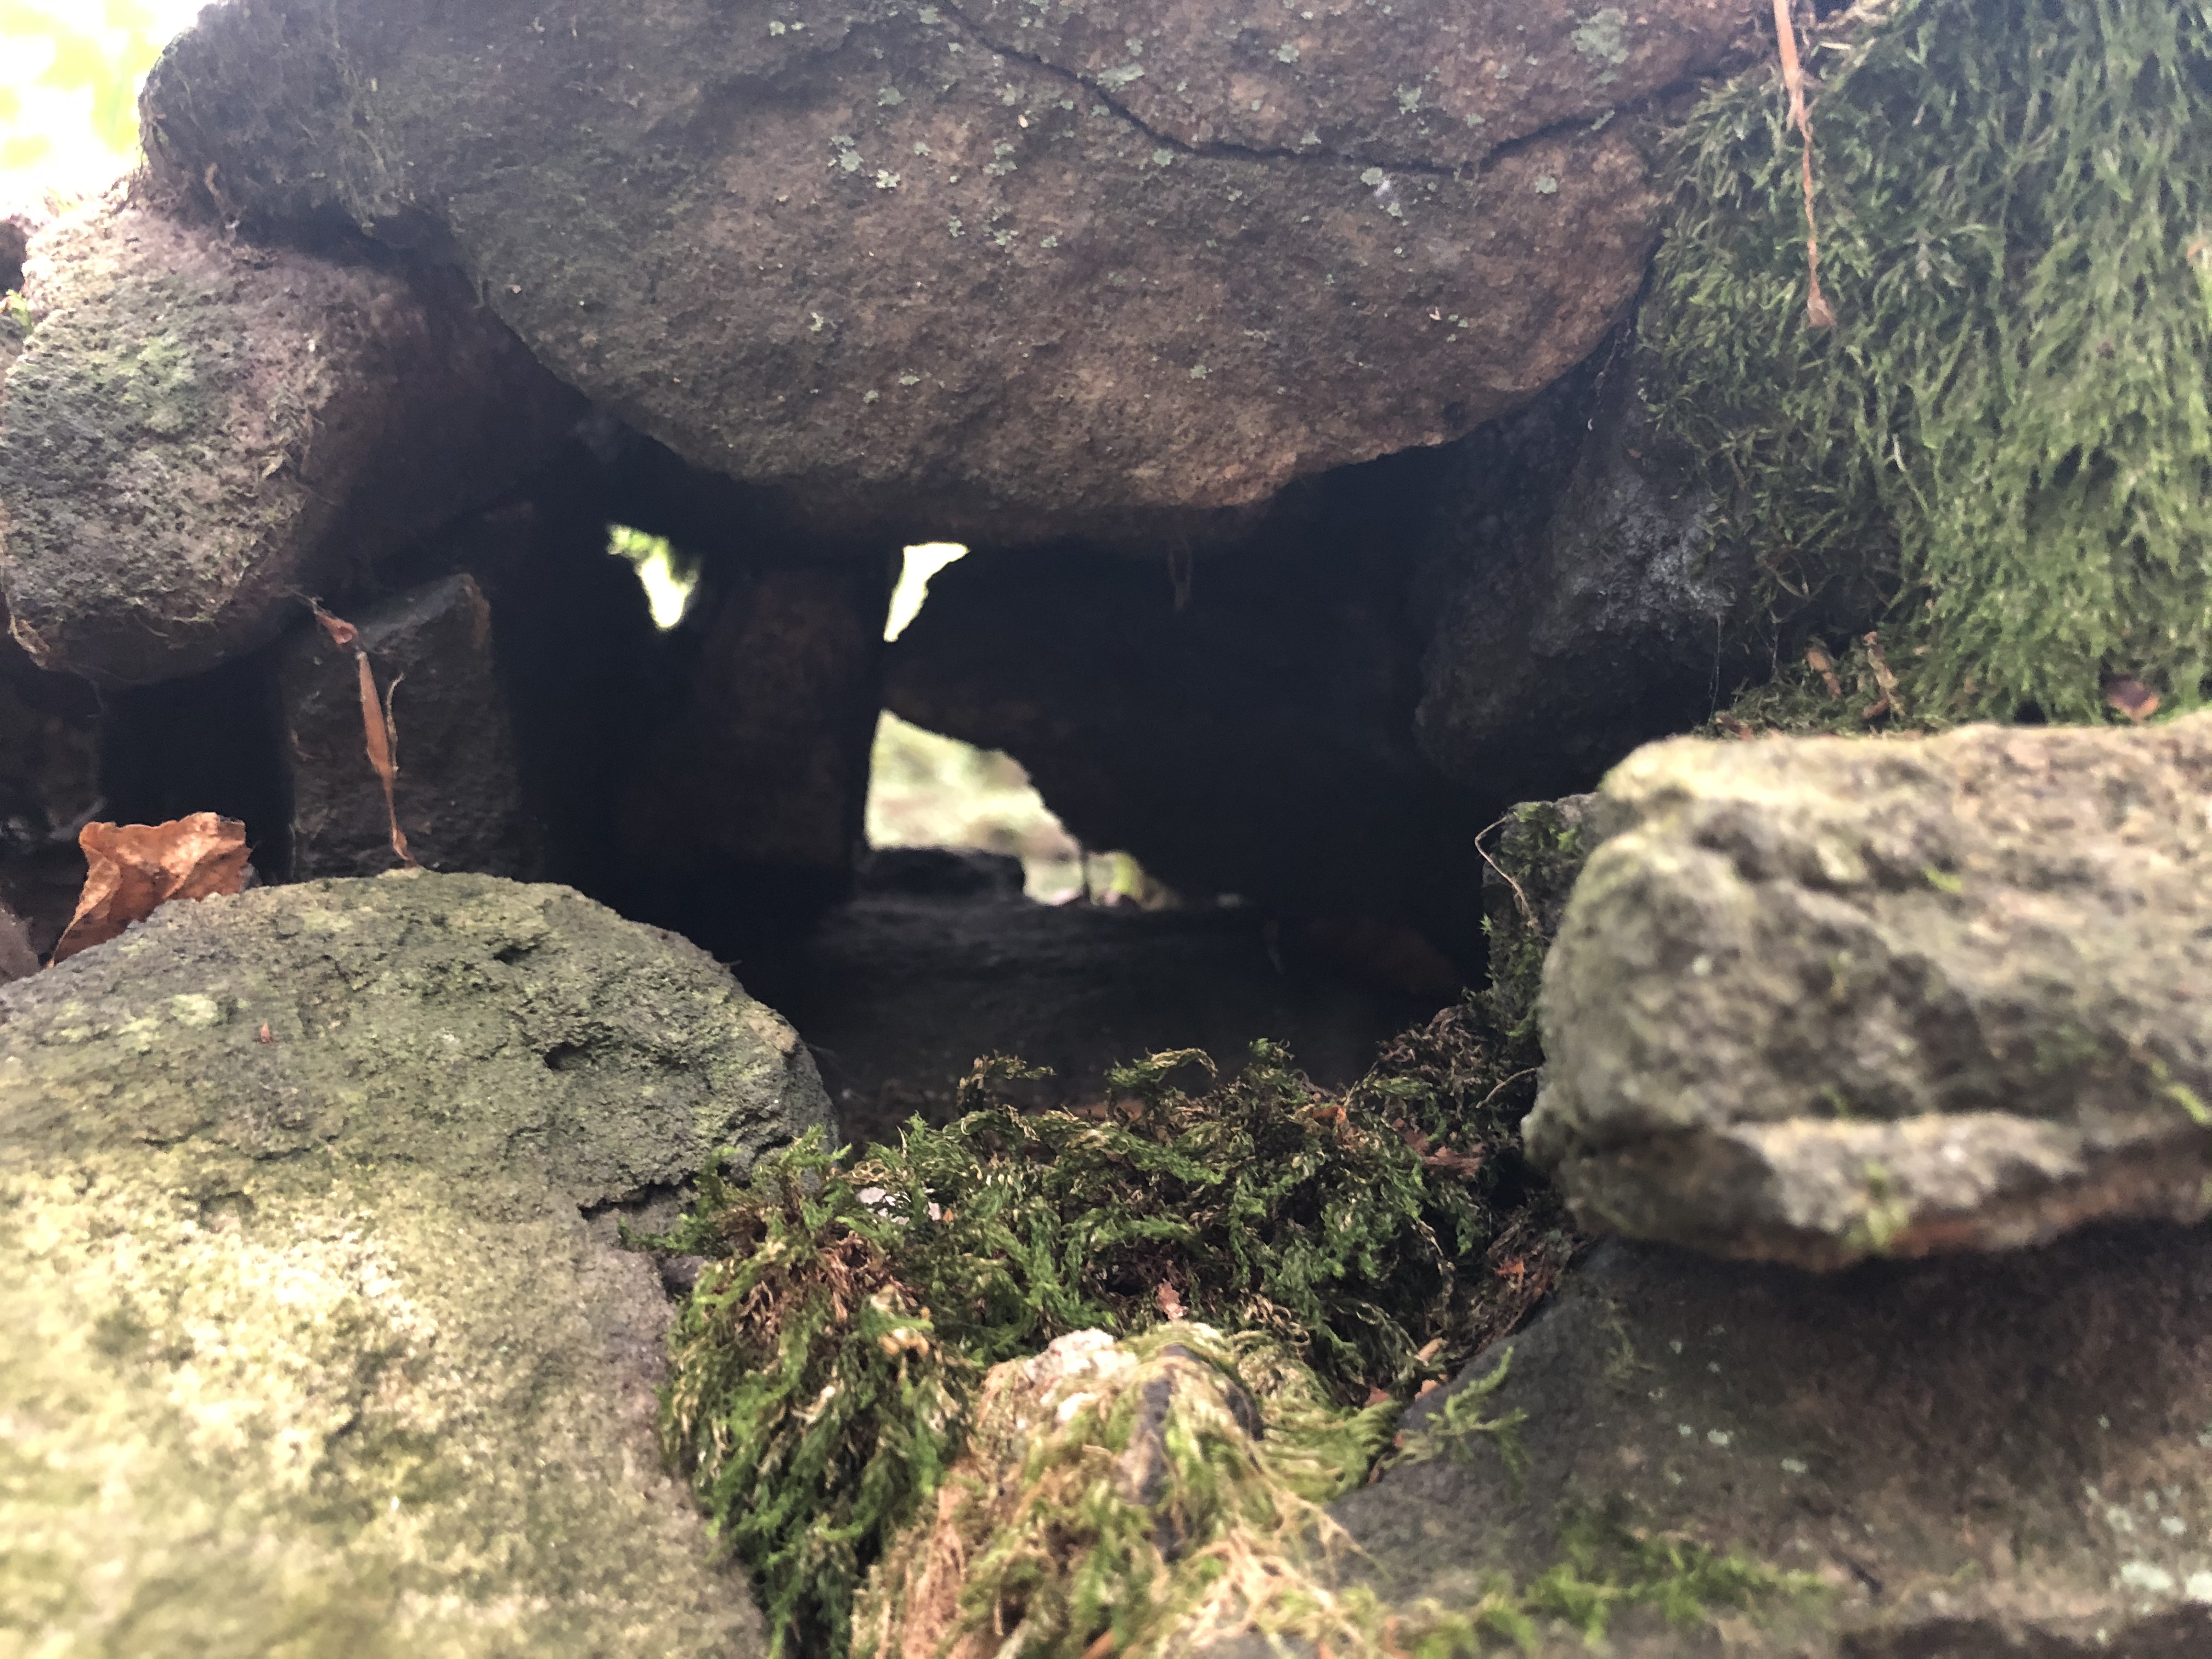
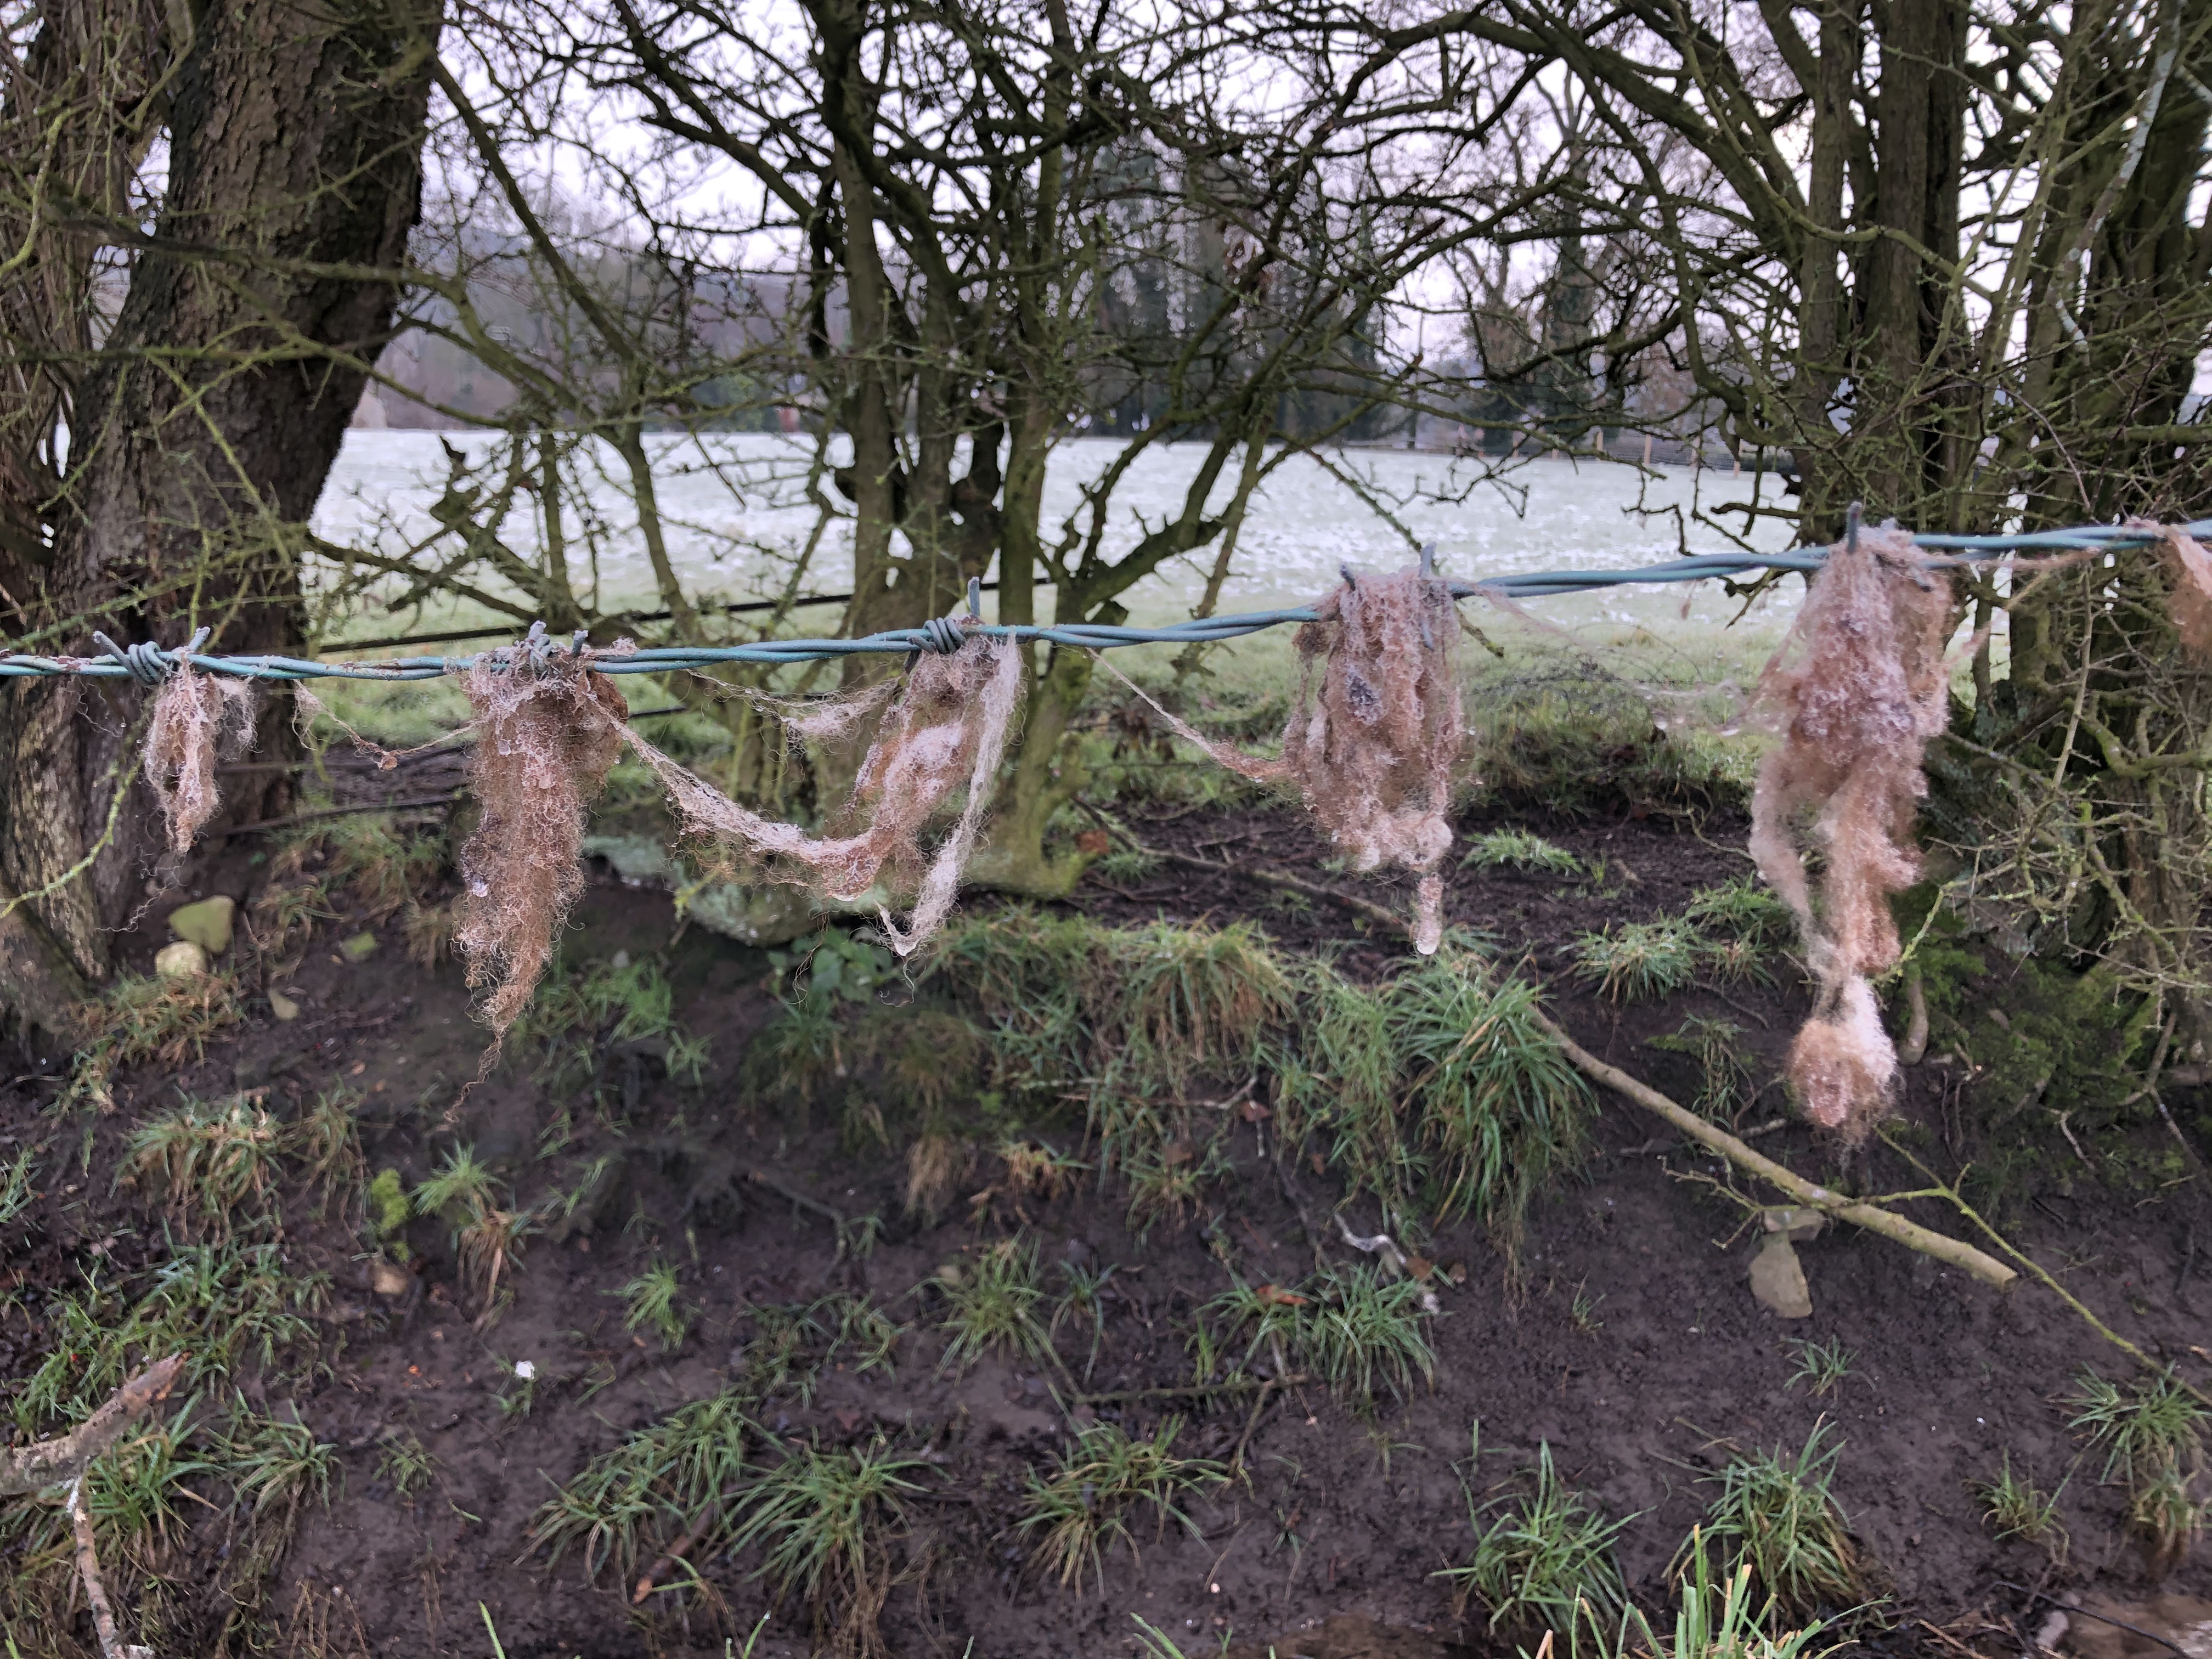
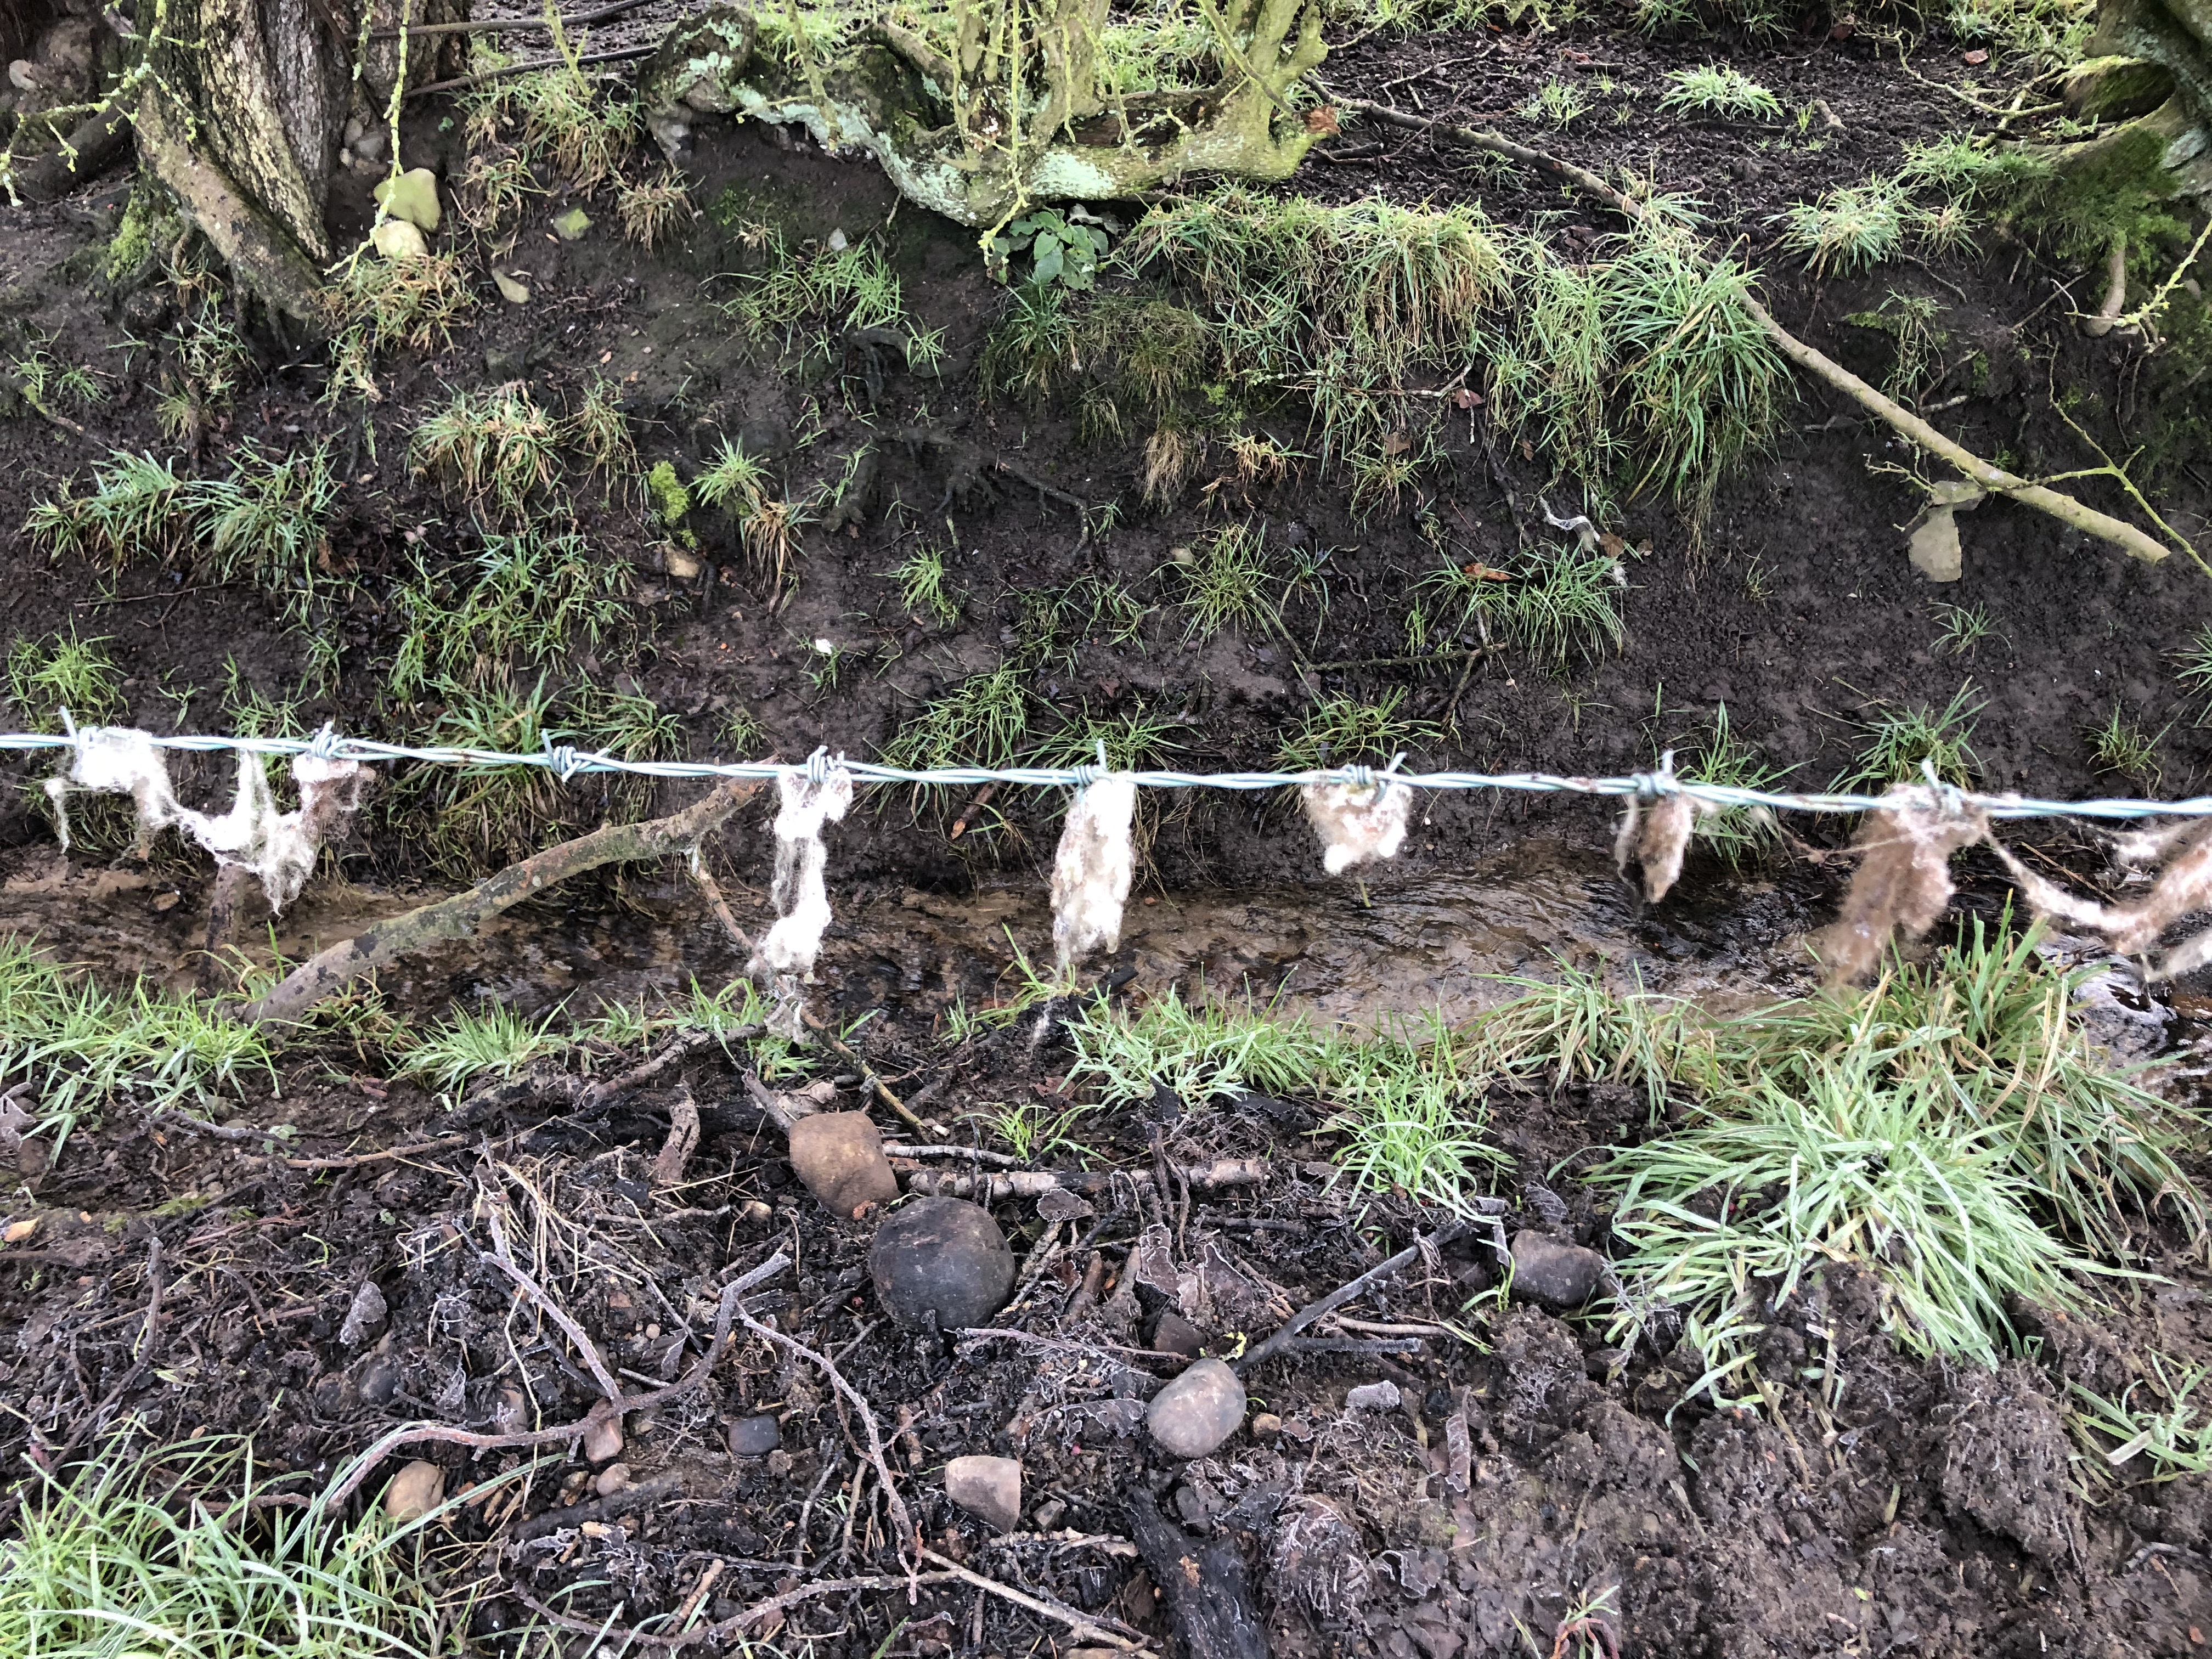
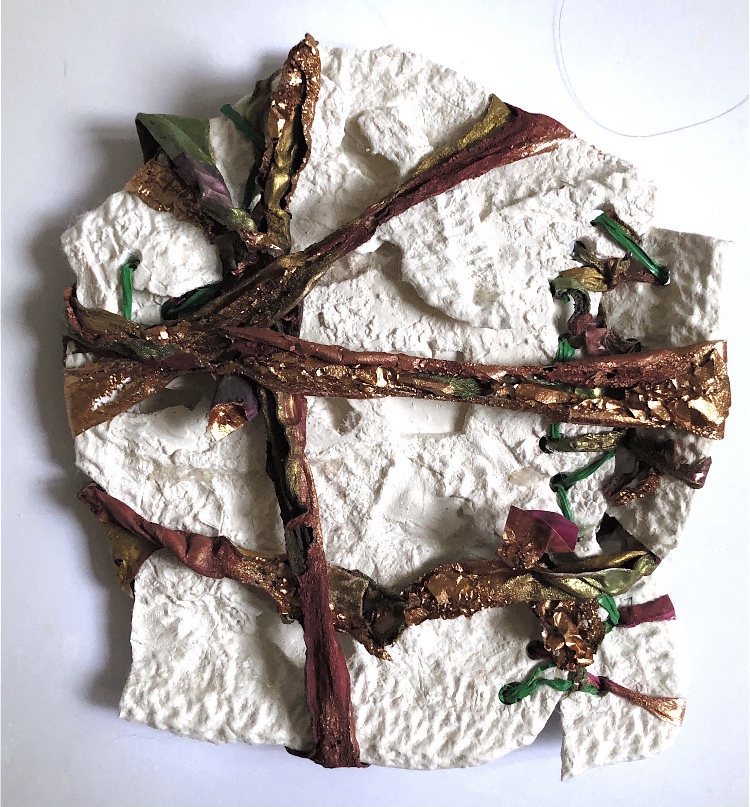
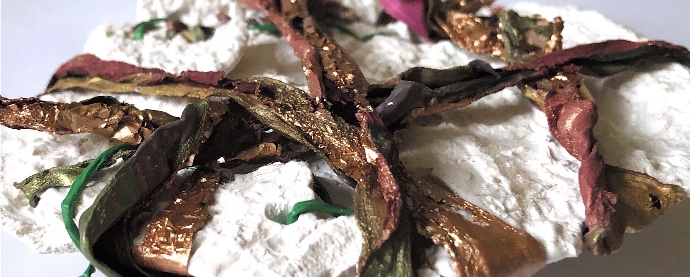
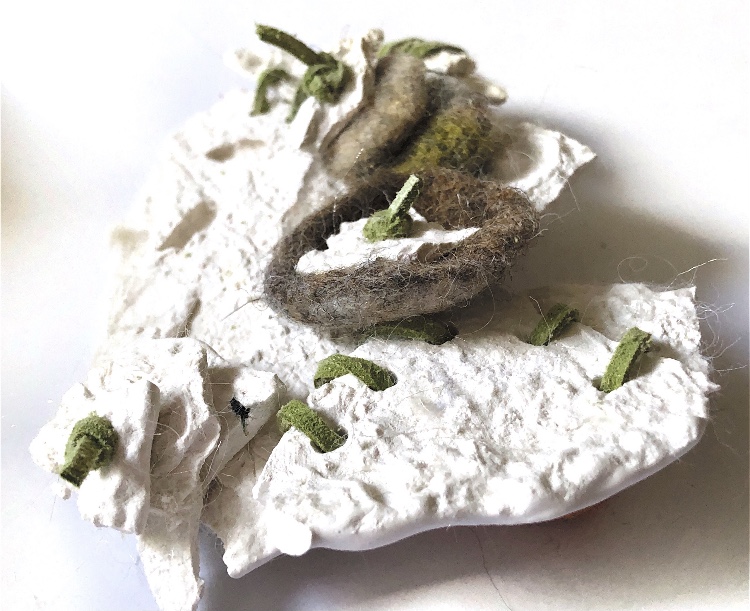
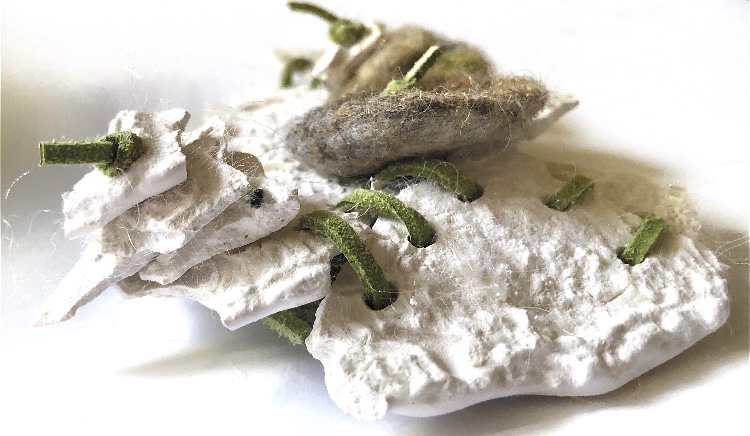
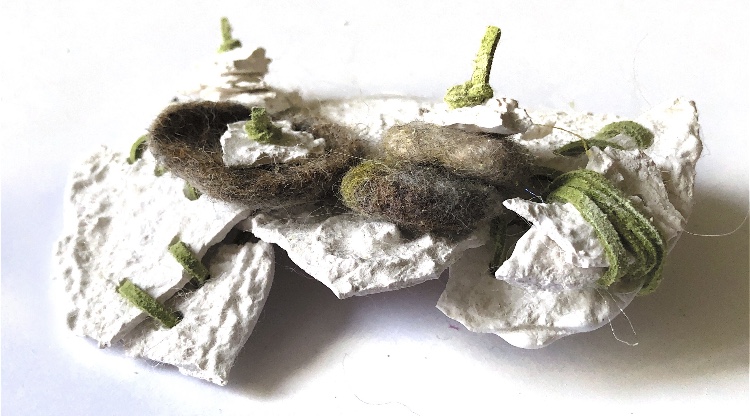
To change the feel of the images I set the samples among sequins and beads, and then took them outside to photograph in the garden, (Fig. 3). I was able to use the wire to hang the pieces on a tree which was very effective, I like the organic nature of the leaves and flowers contrasting with the hard plaster, resin and wire sculptures. I also particularly like the photo bottom right in Fig. 3 where the stark white cube is resting on a branch and the wire tendrils almost seem to be part of the plant. Once again I am really drawn to contrasts of colour, material, shape and texture.

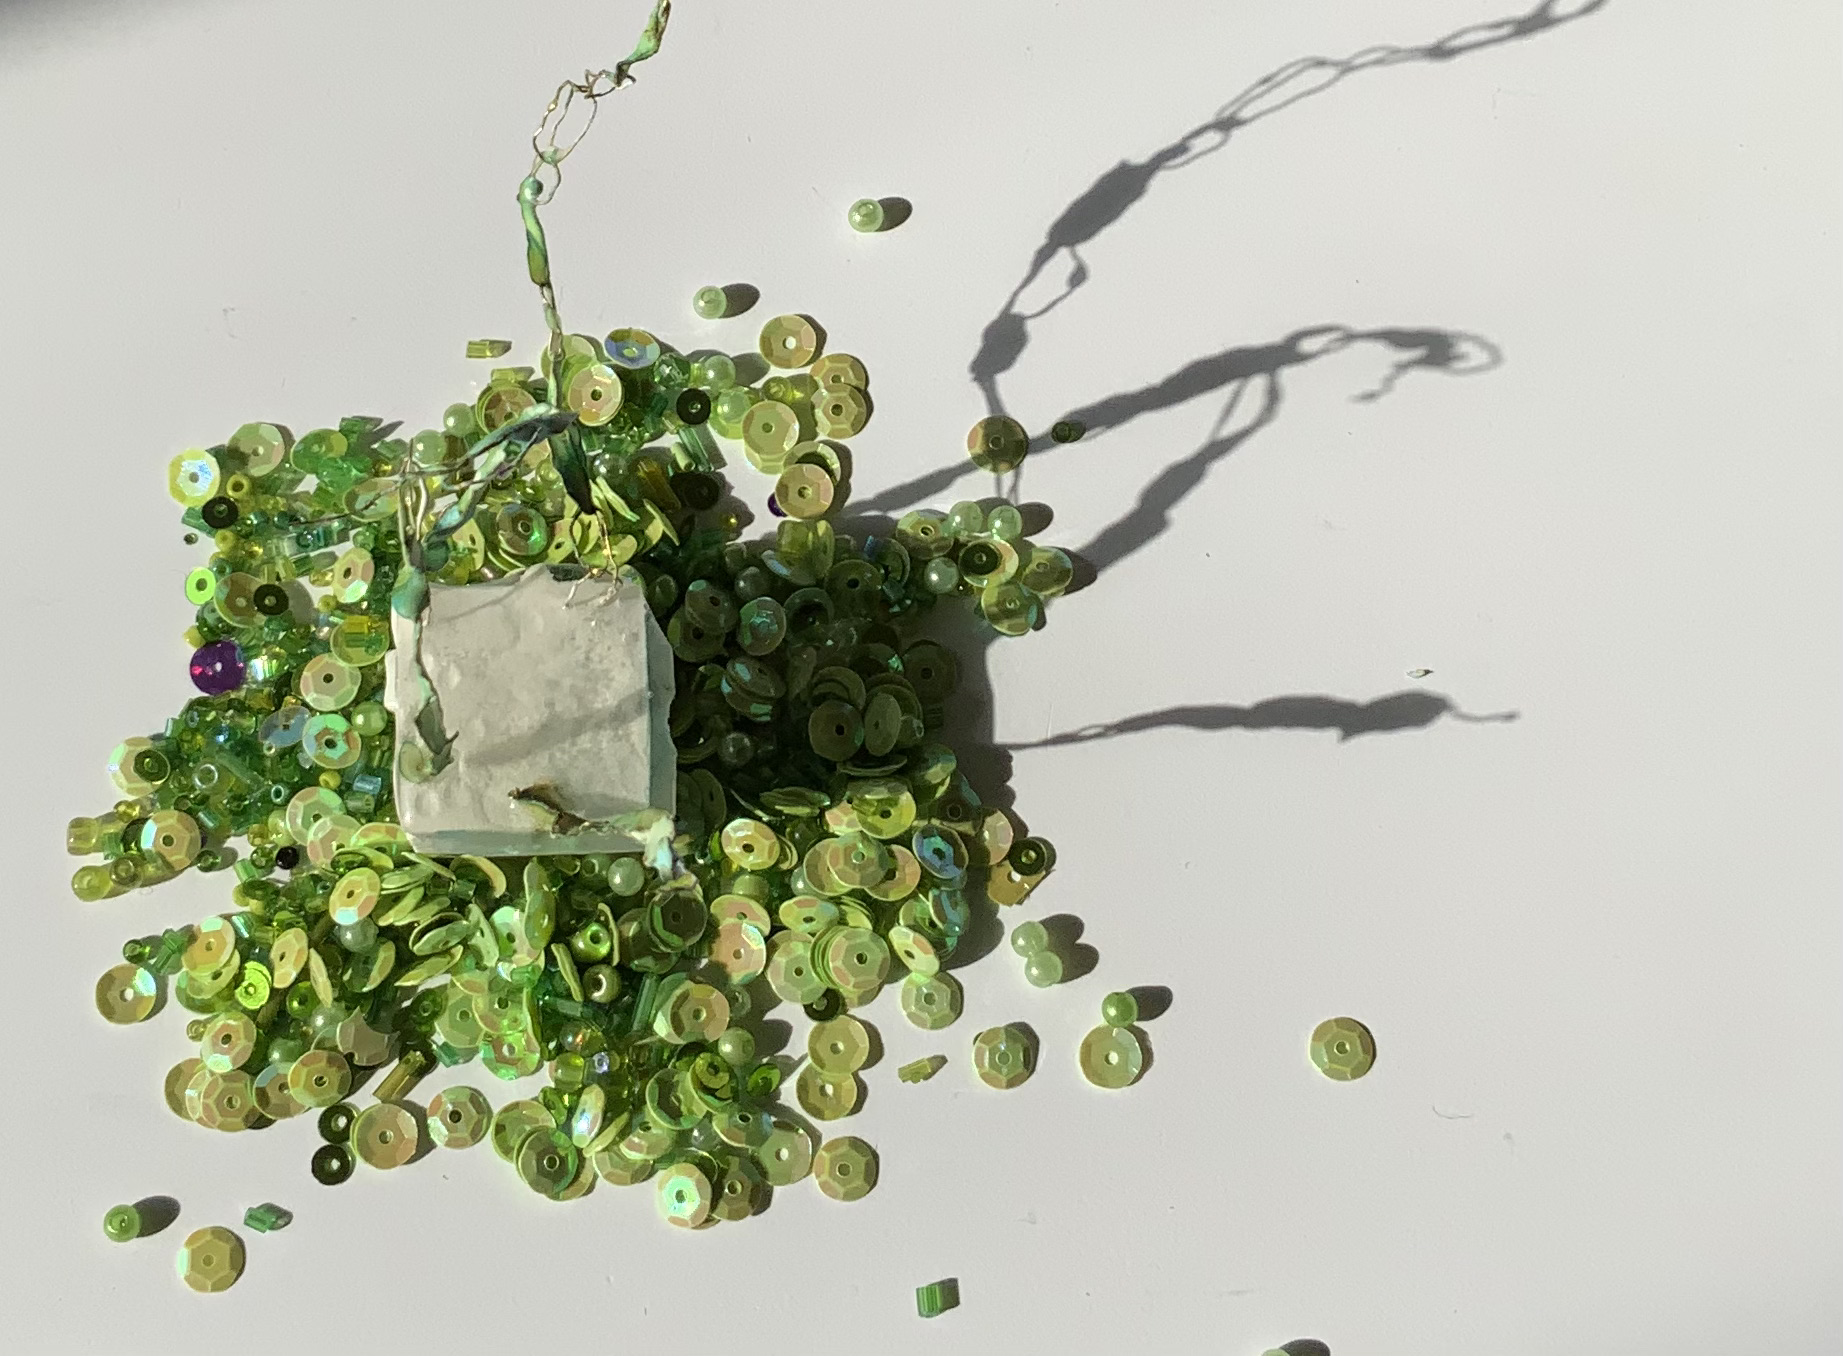
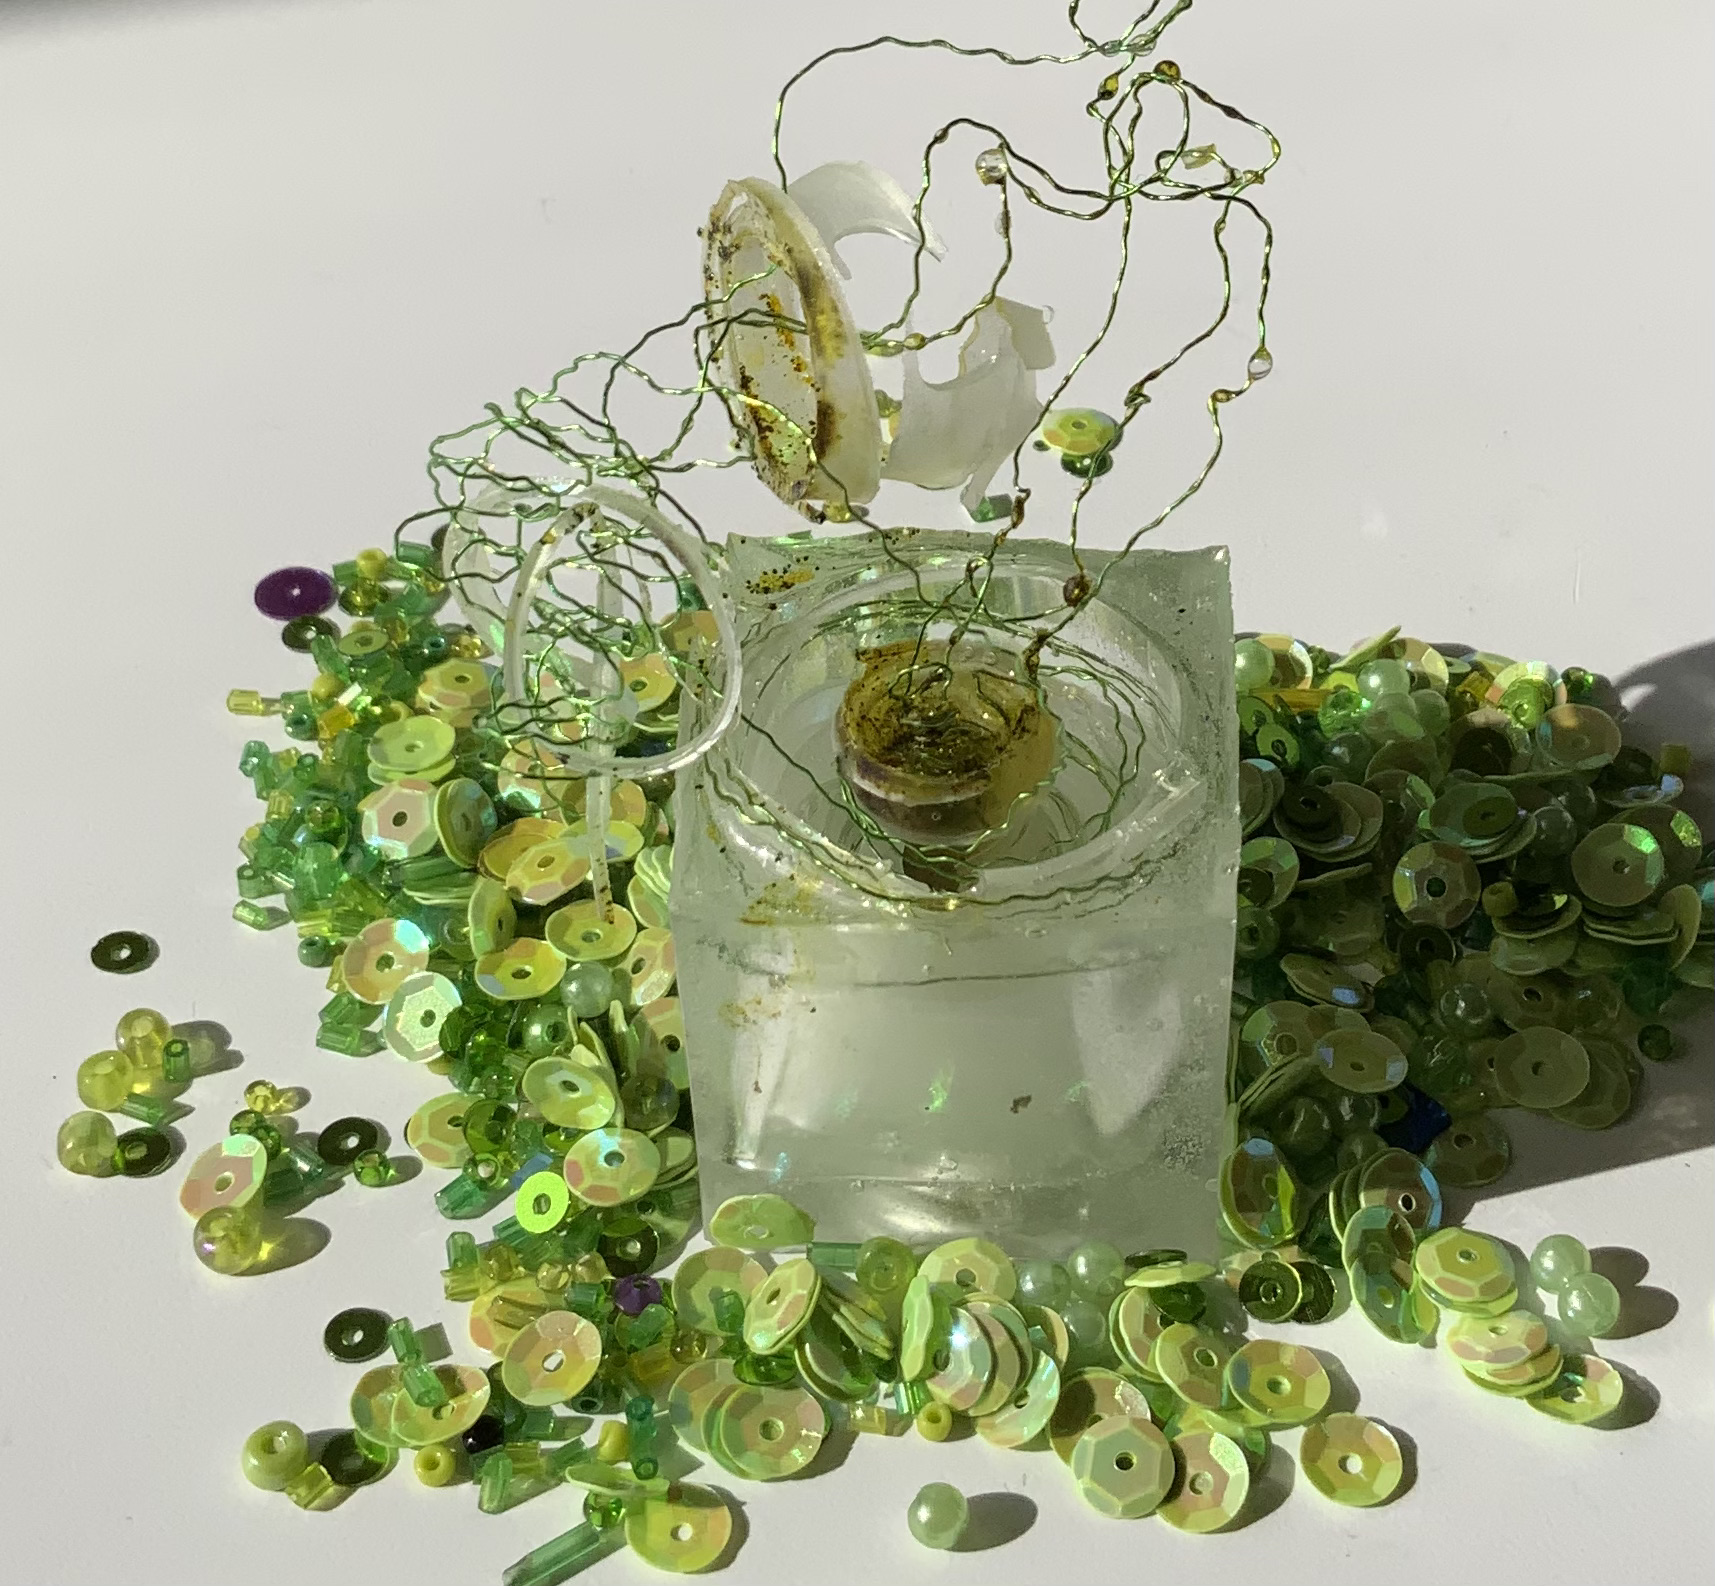
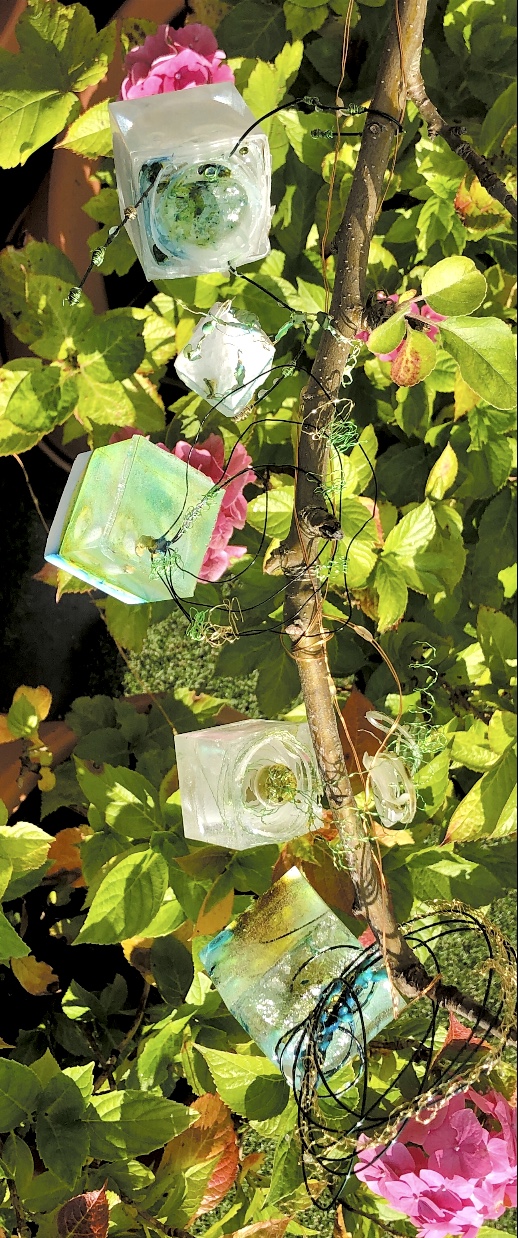
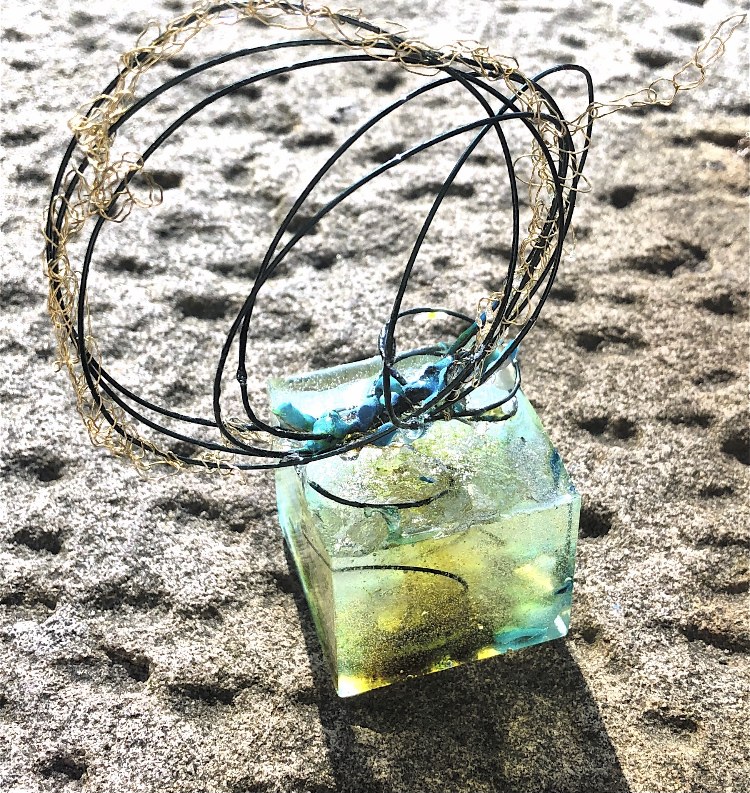
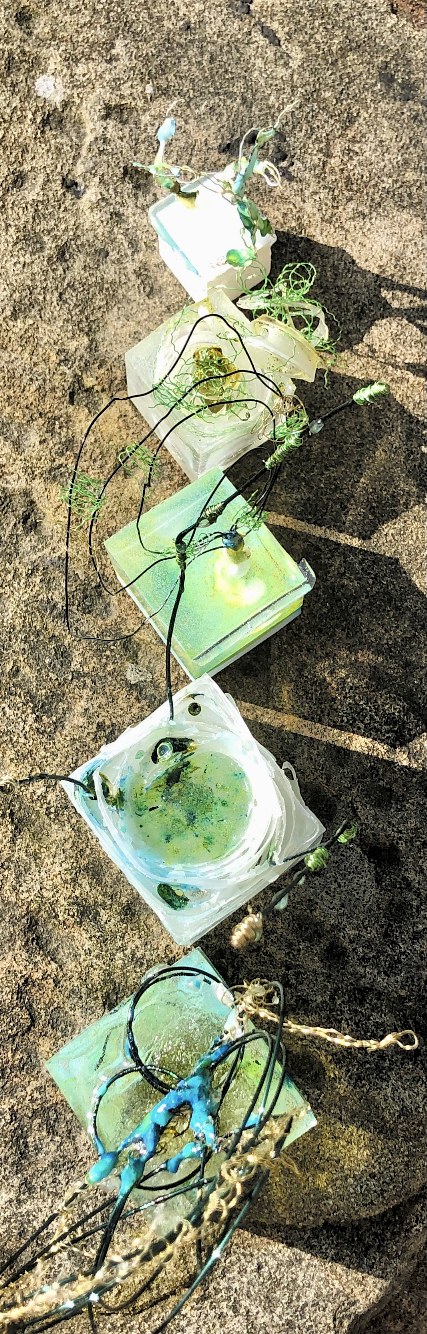
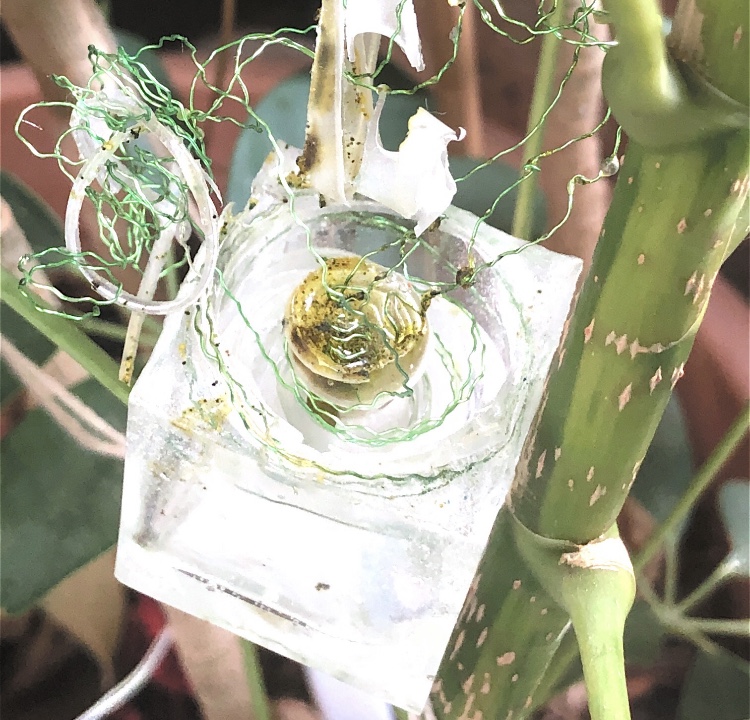
Fig. 3 Different situations

***********************************

I noticed that Richard McVetis sometimes uses a dark background to photograph his work. I found when I took photographs that the black background wasn’t always as dark a contrast as I would have liked, but by scanning and using some photo manipulation I was able to achieve a really dark backdrop and effective images, highlighting the colour and translucency of the blocks, the ethereal fragility of the swirls of fine wire, and the strong wire circles that seem to hover in the air. Layering of the images has added further pattern and ideas for applique, paper collage and stitch. (Fig. 4)

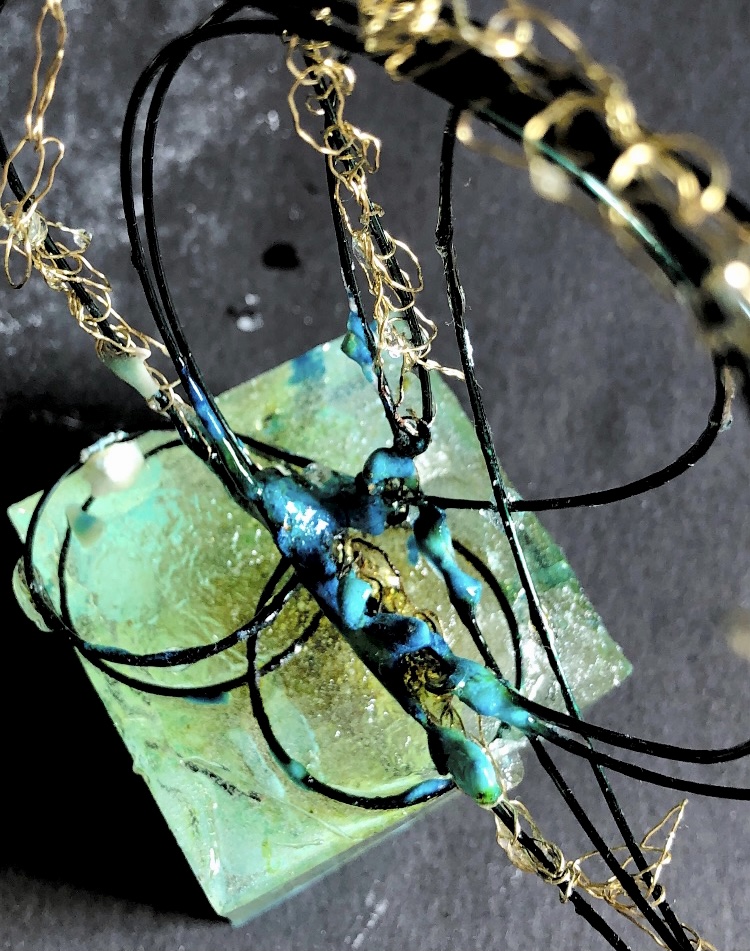
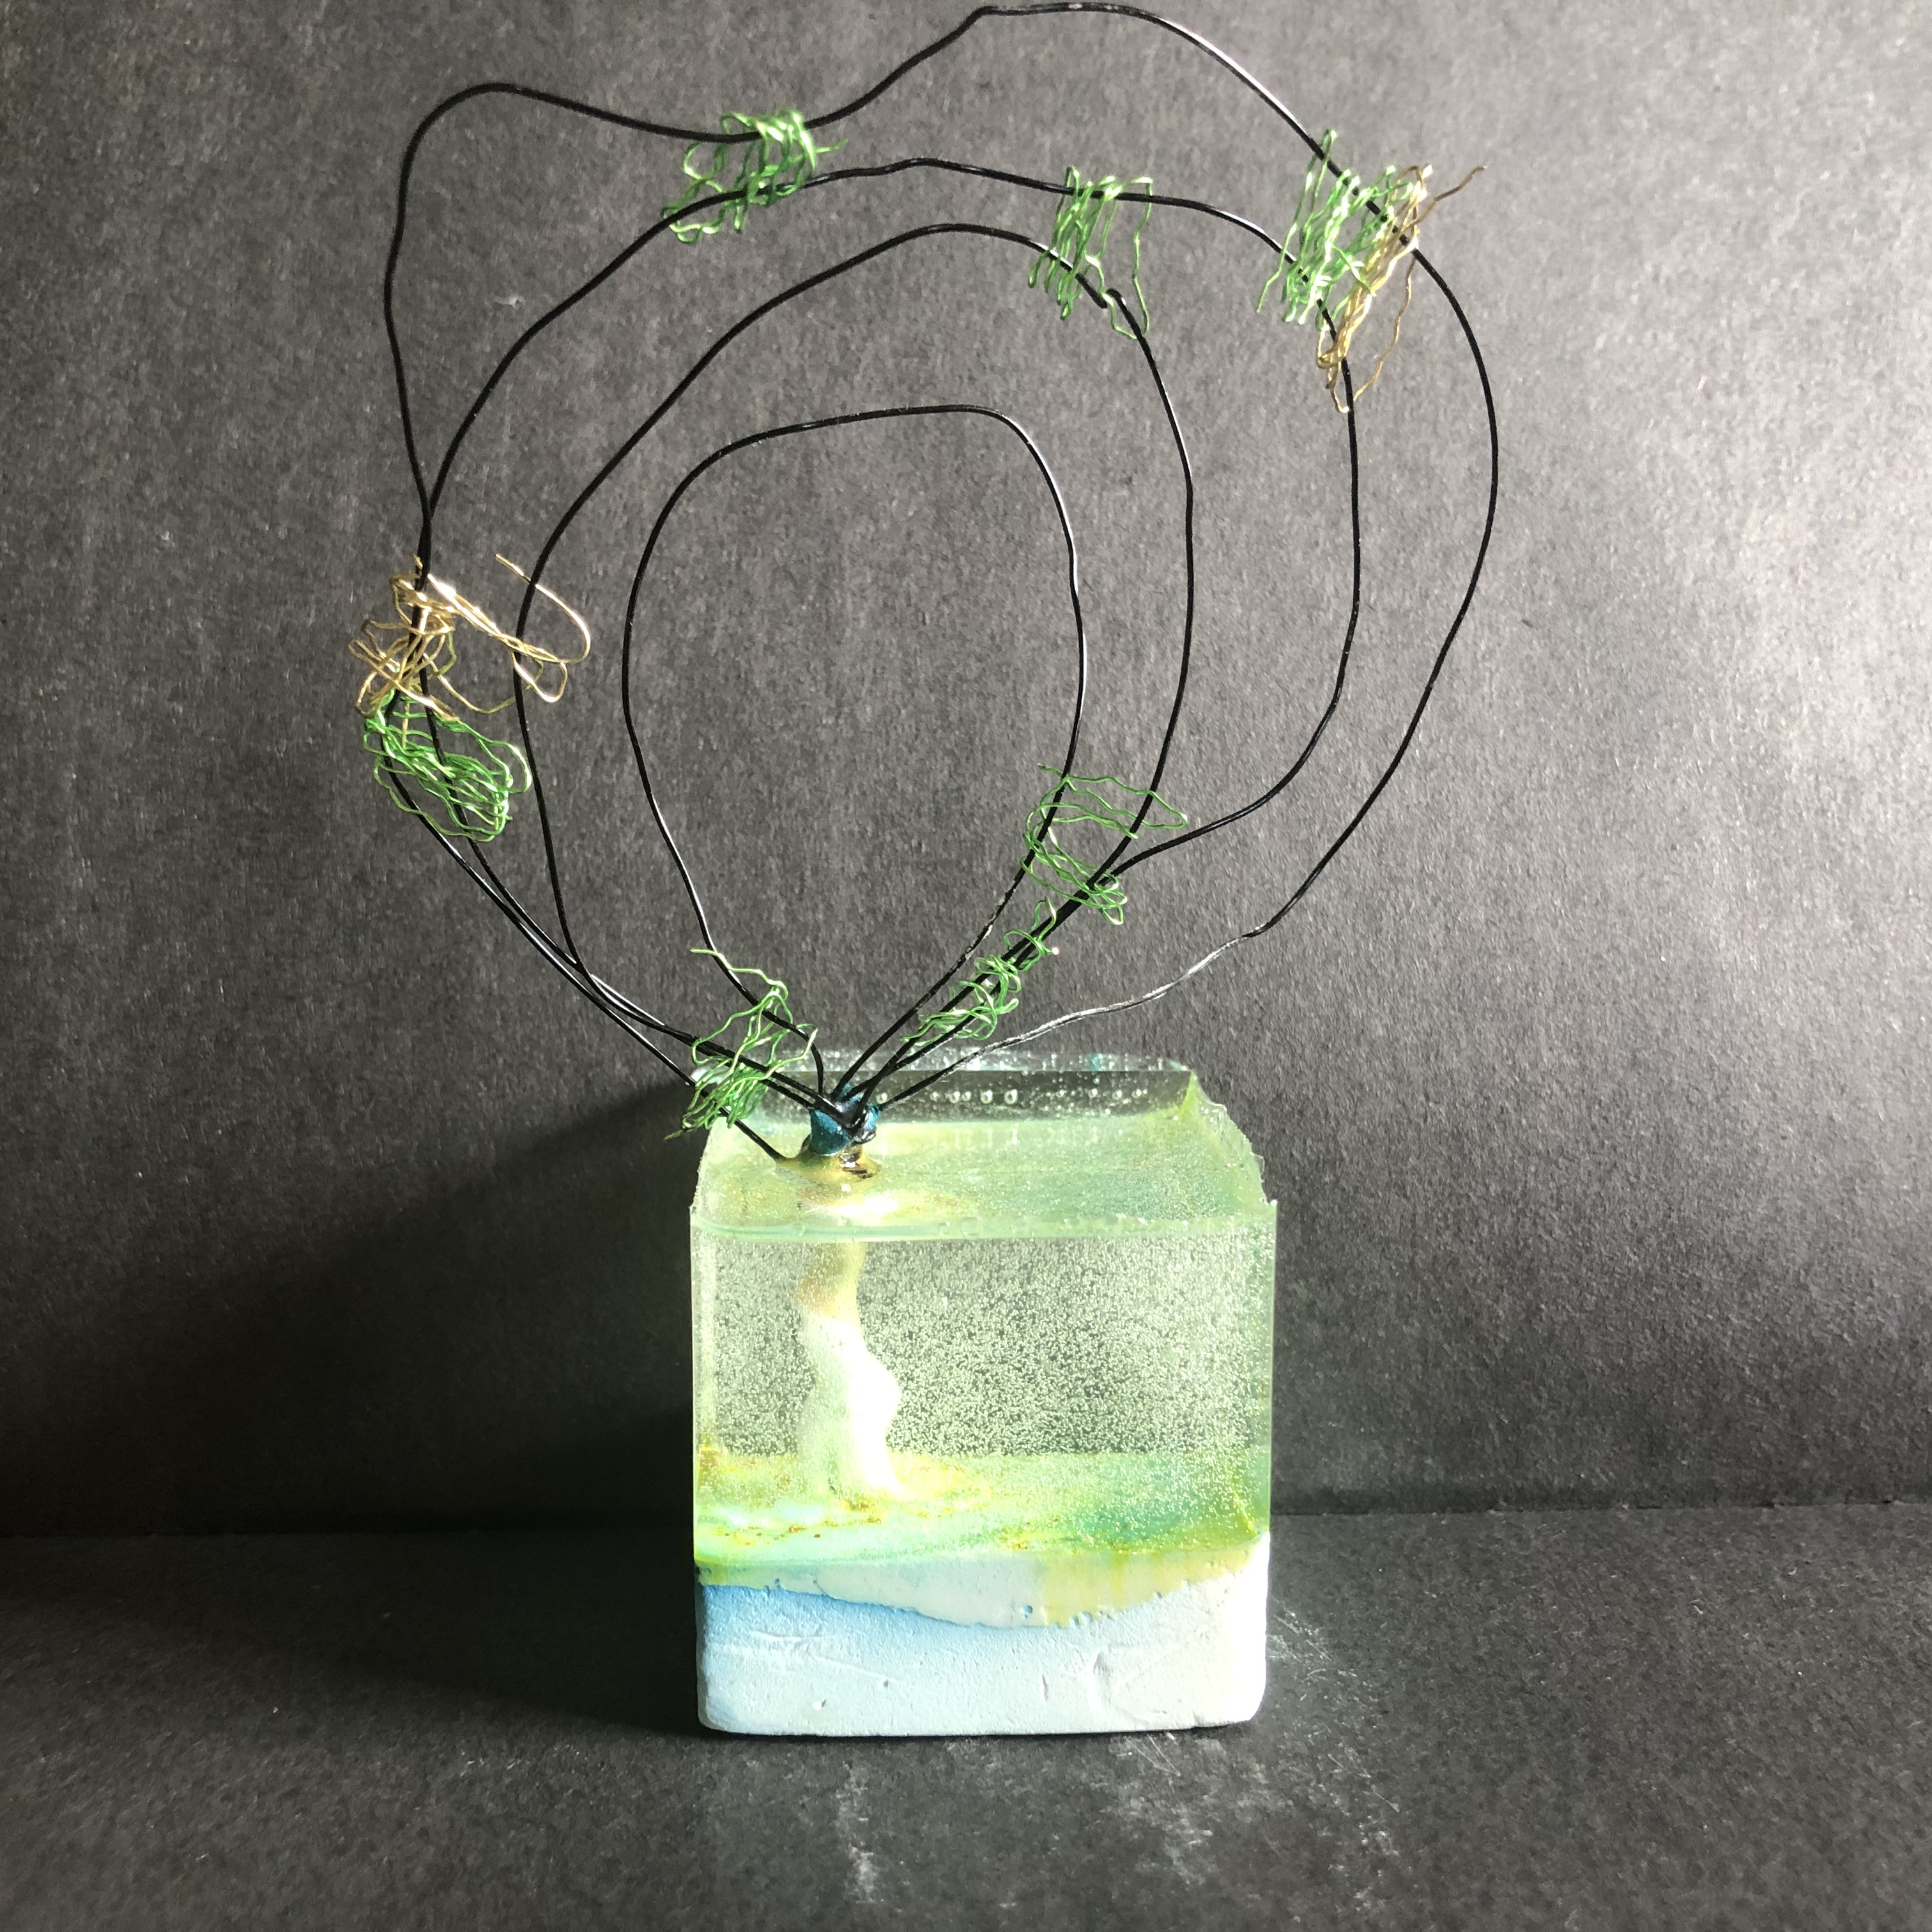
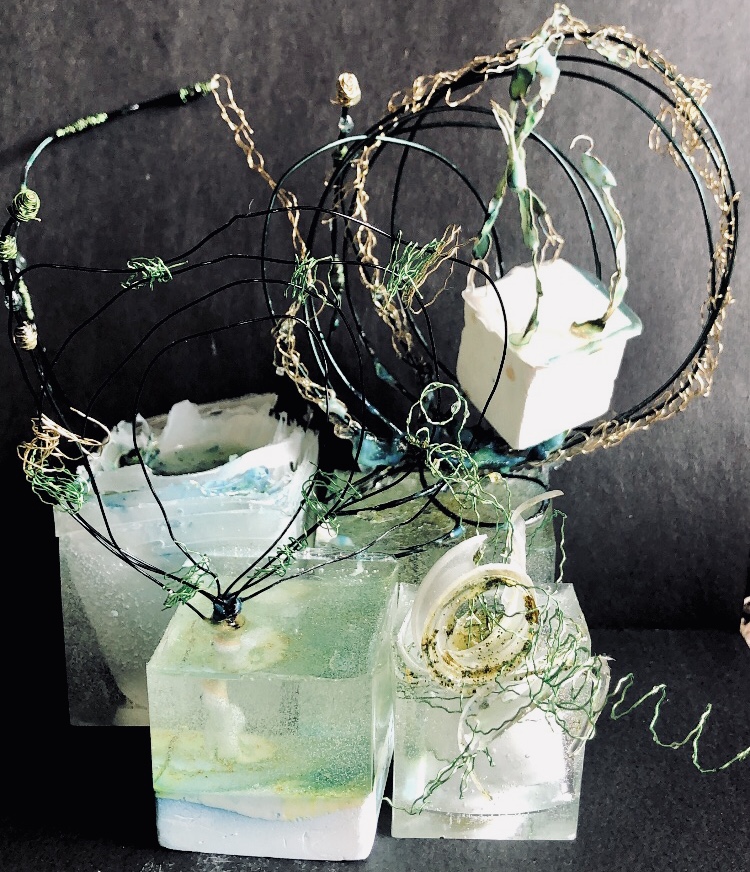
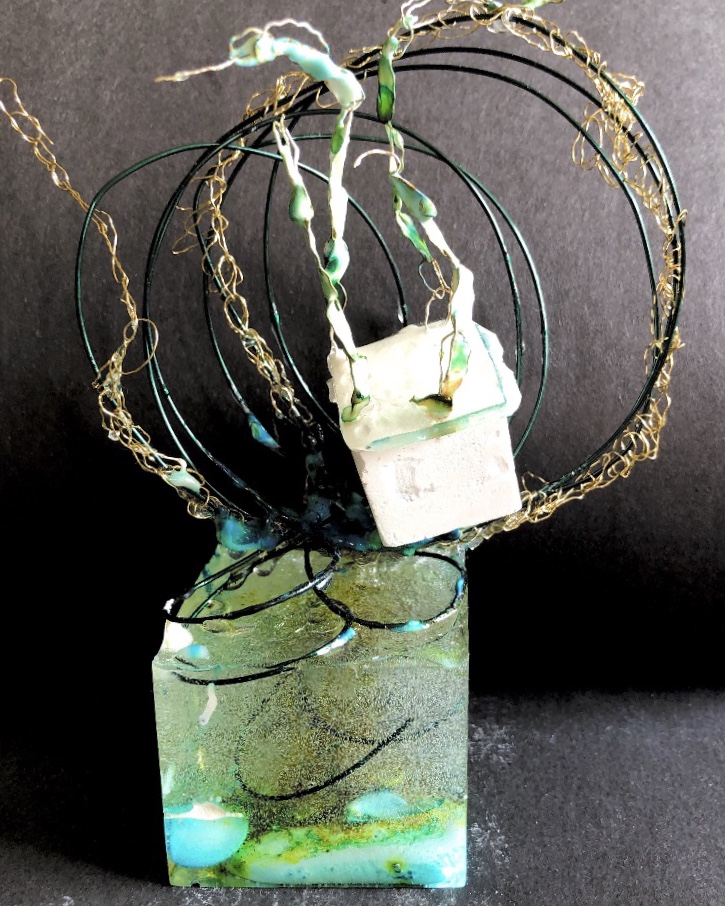
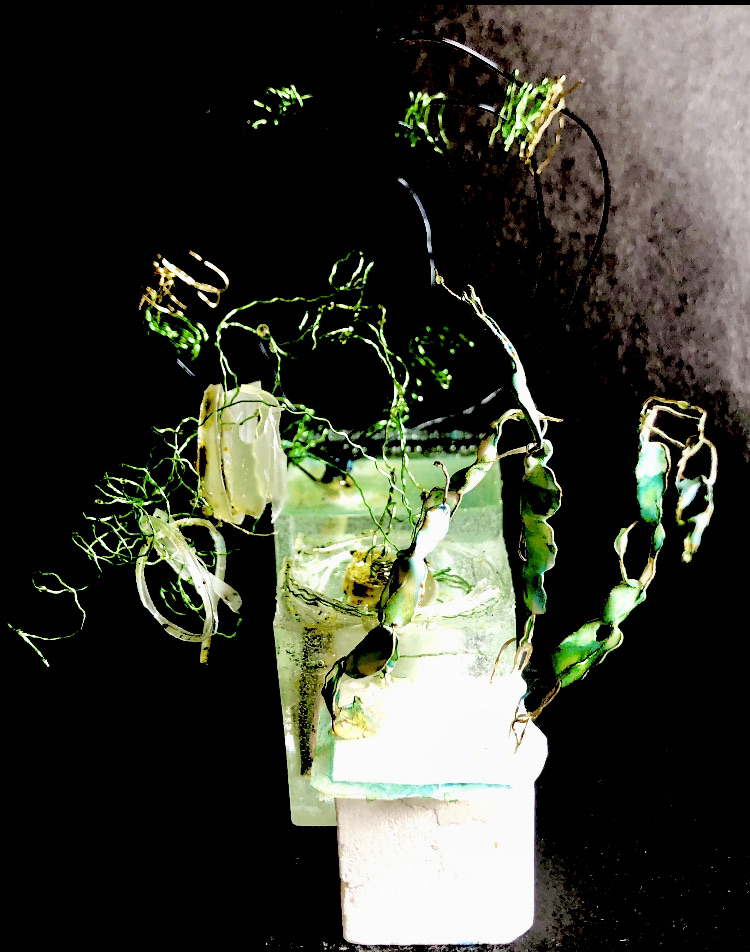
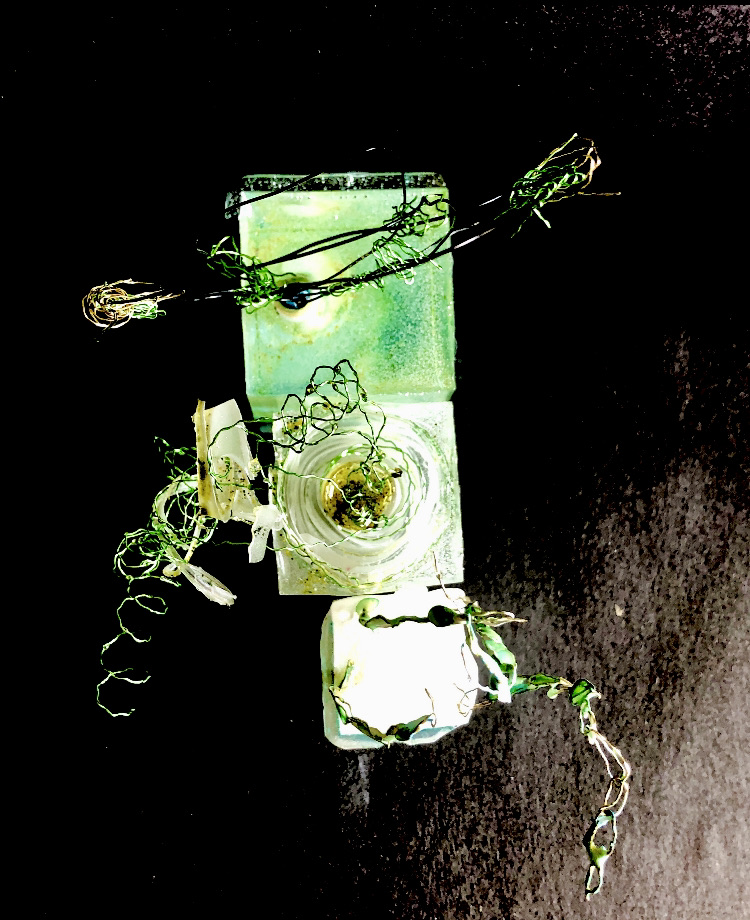
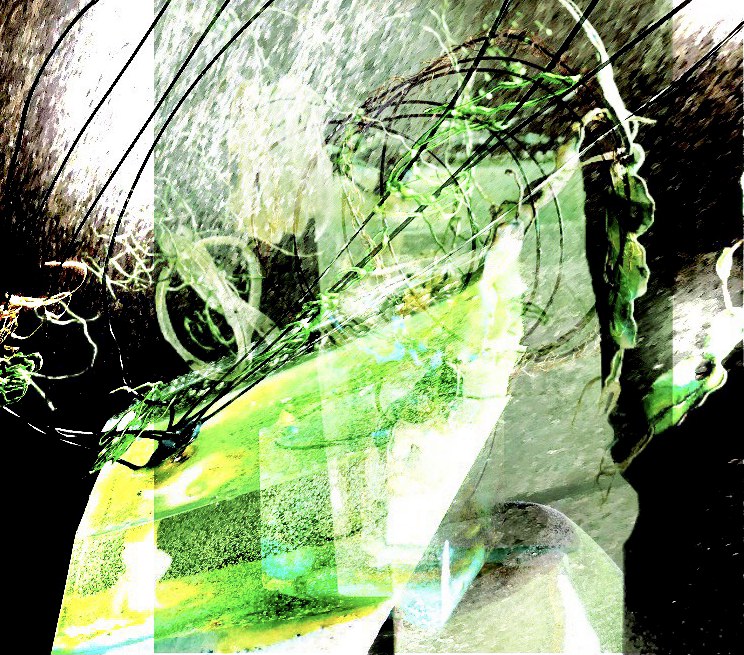
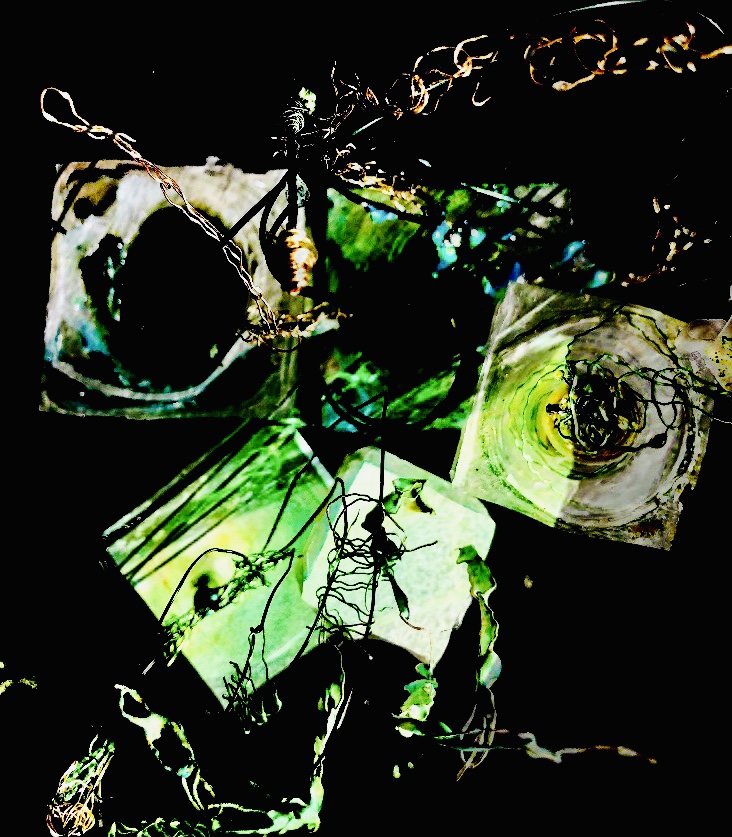
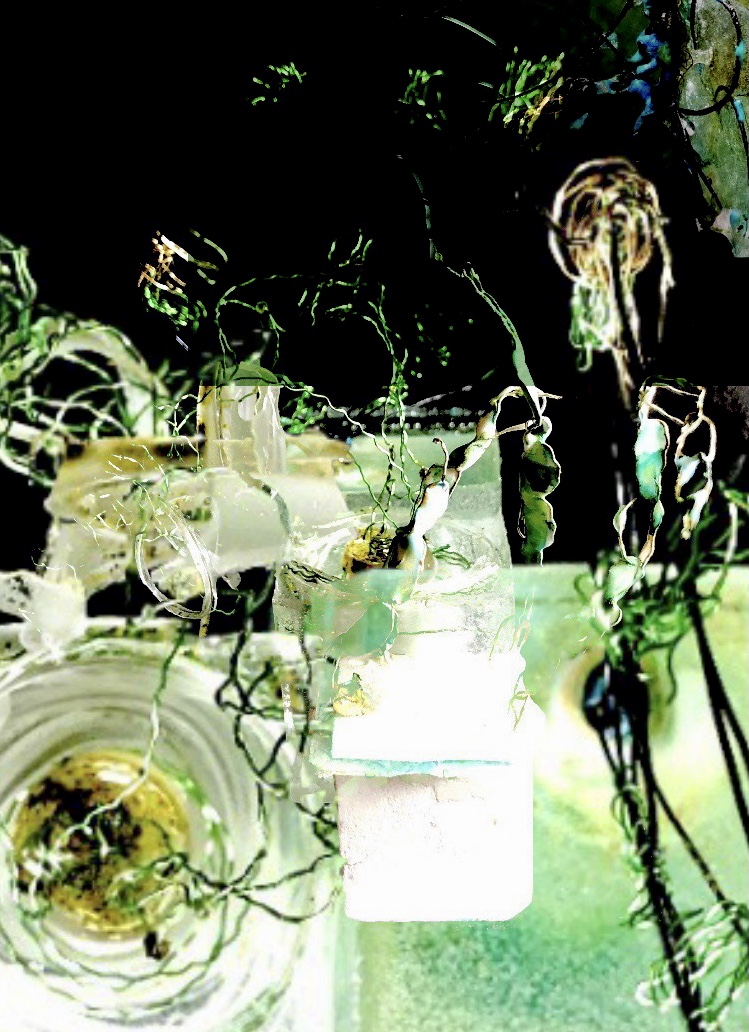
Fig. 4 Experimenting with a dark backdrop

********************************

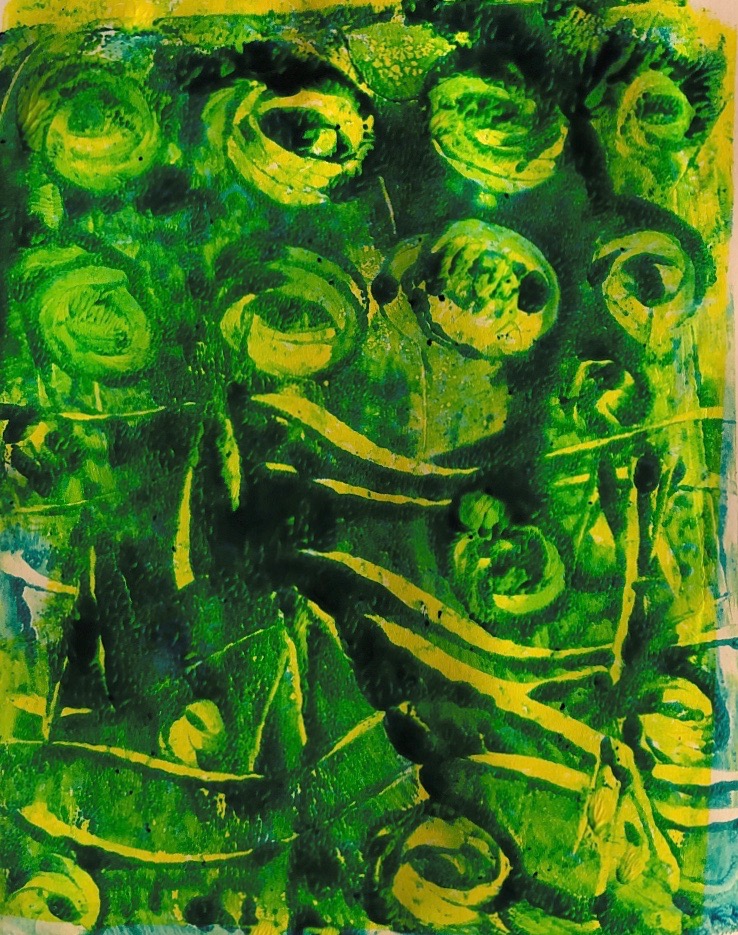
Playing around with colour inversion produced some beautiful results and a whole new colourway to explore, (Fig. 5). Some of the images below have been overlaid with the original pictures to add some other colours back in.

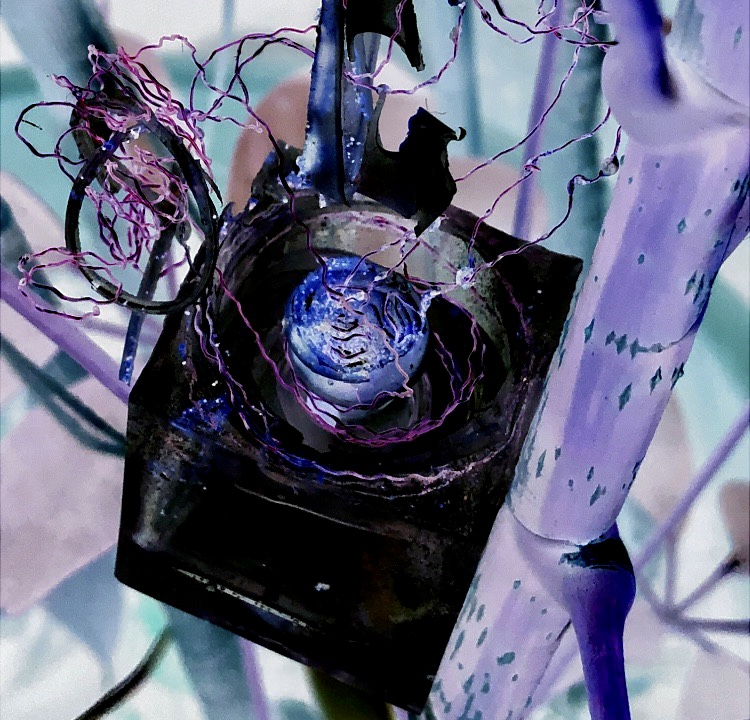
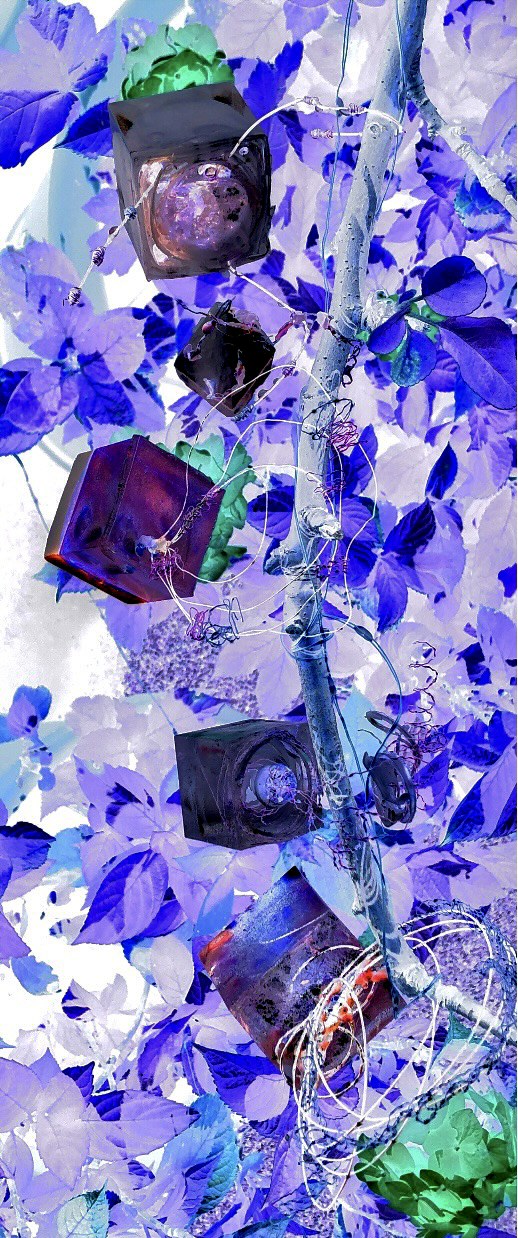
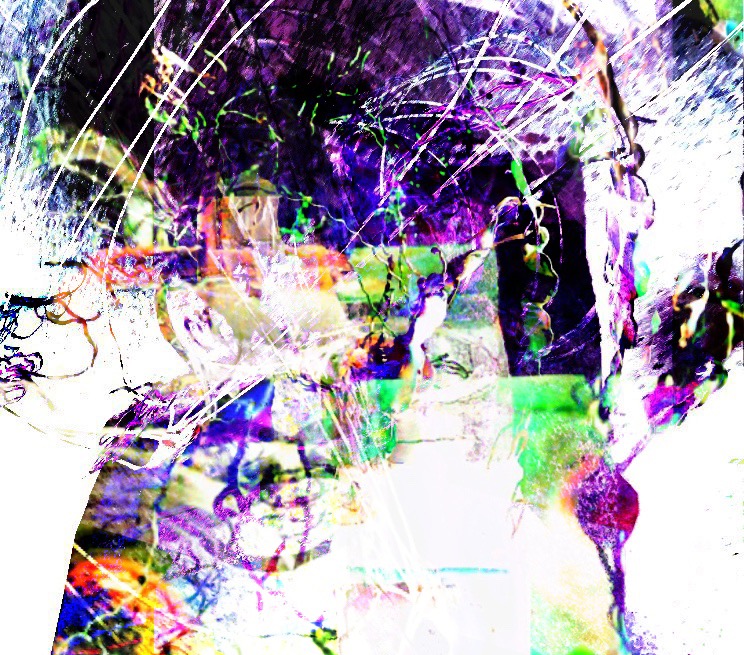
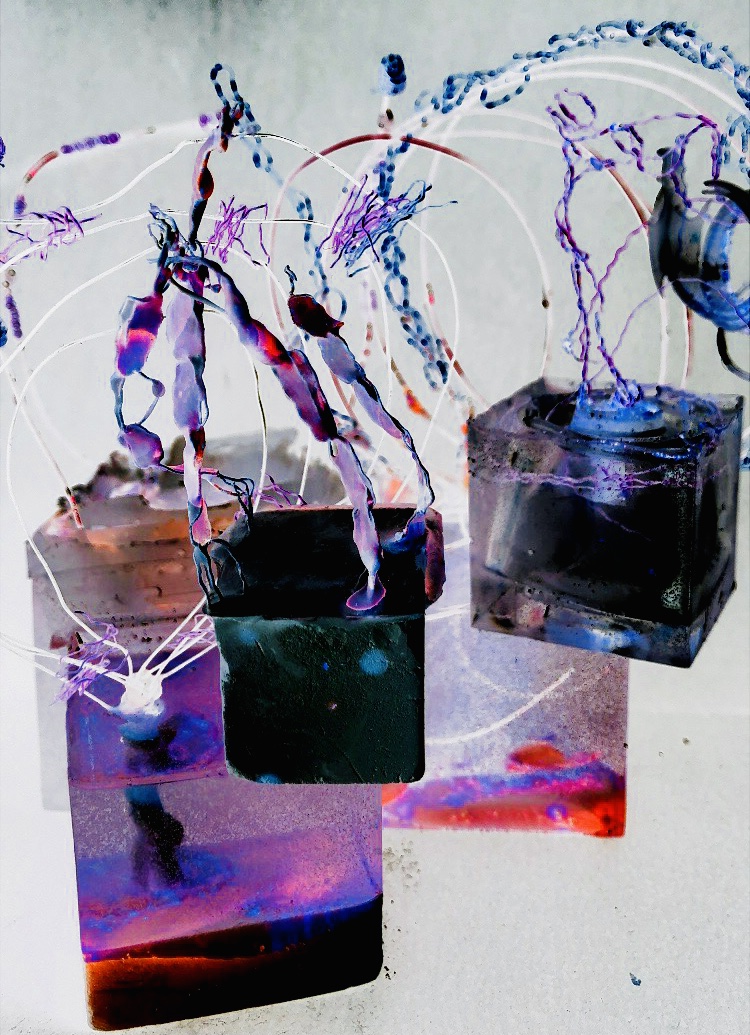
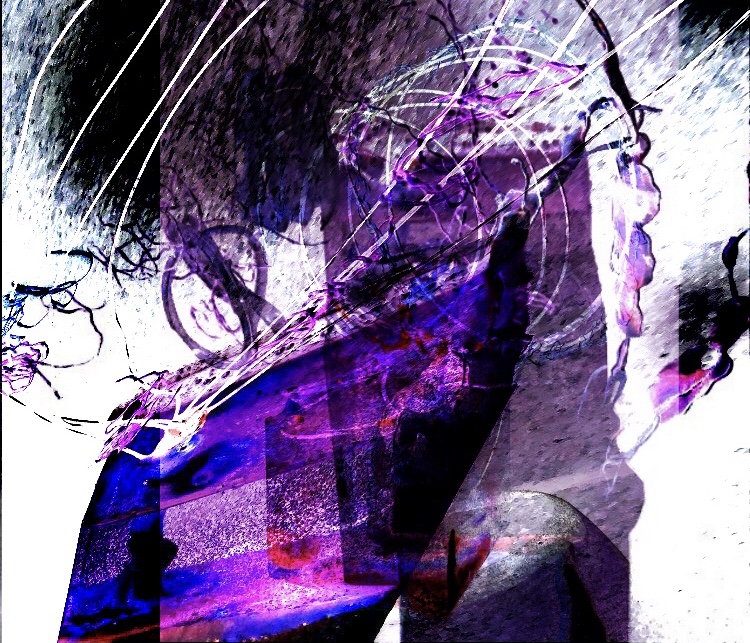
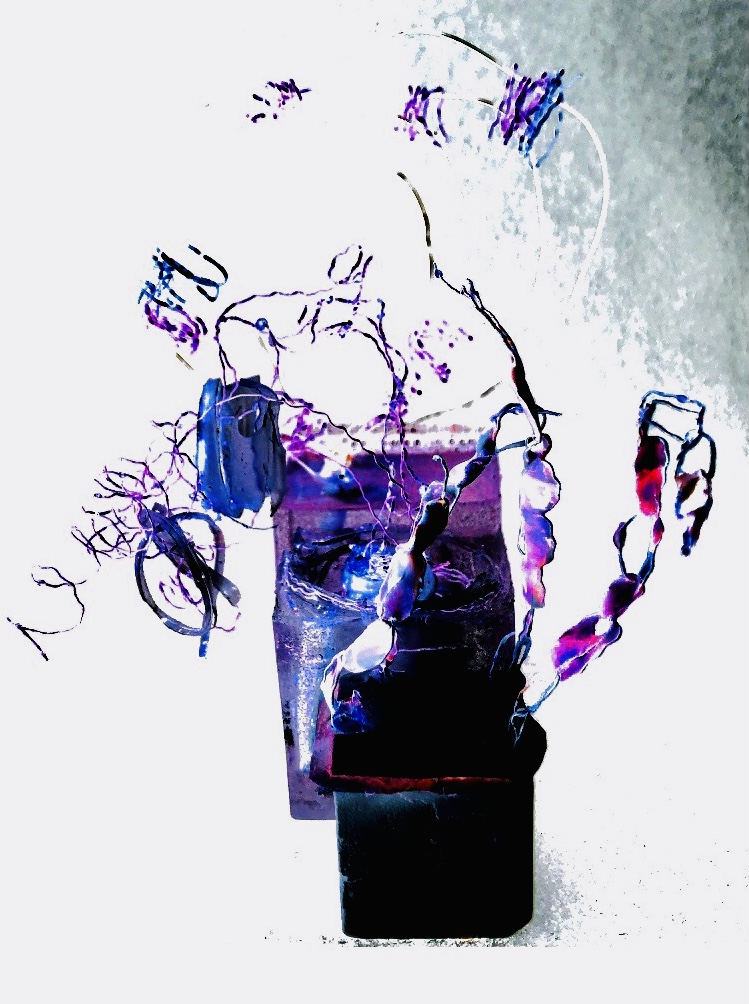
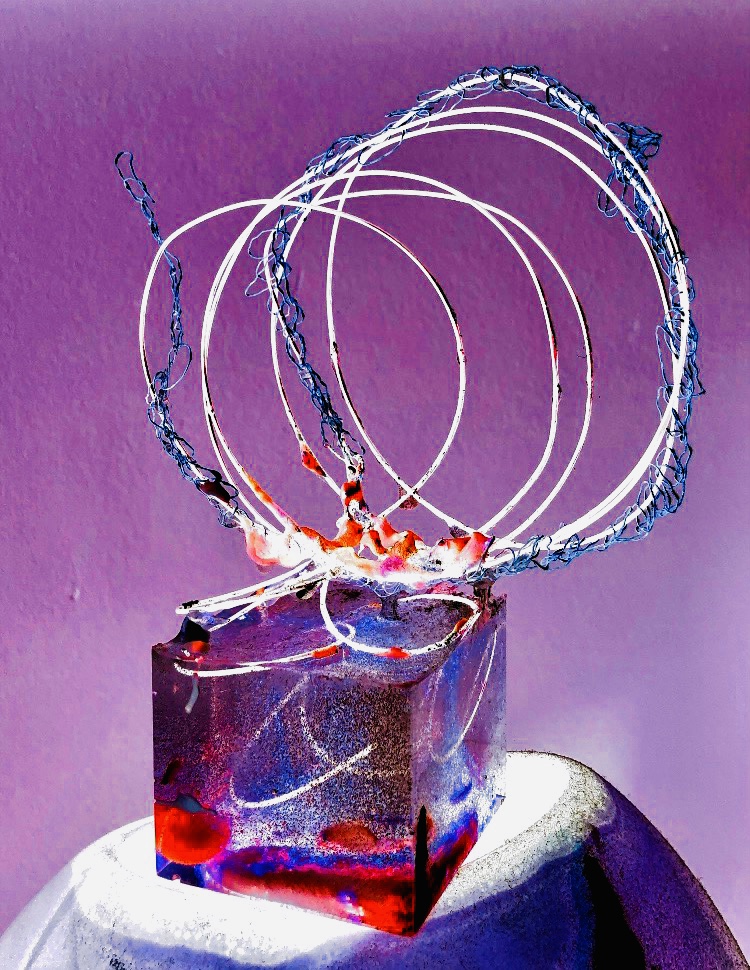
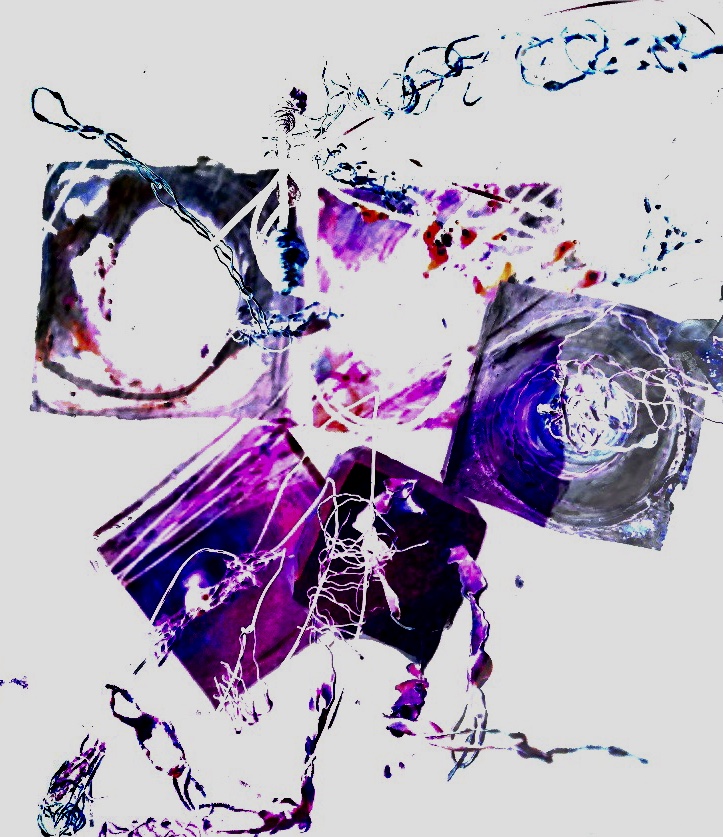
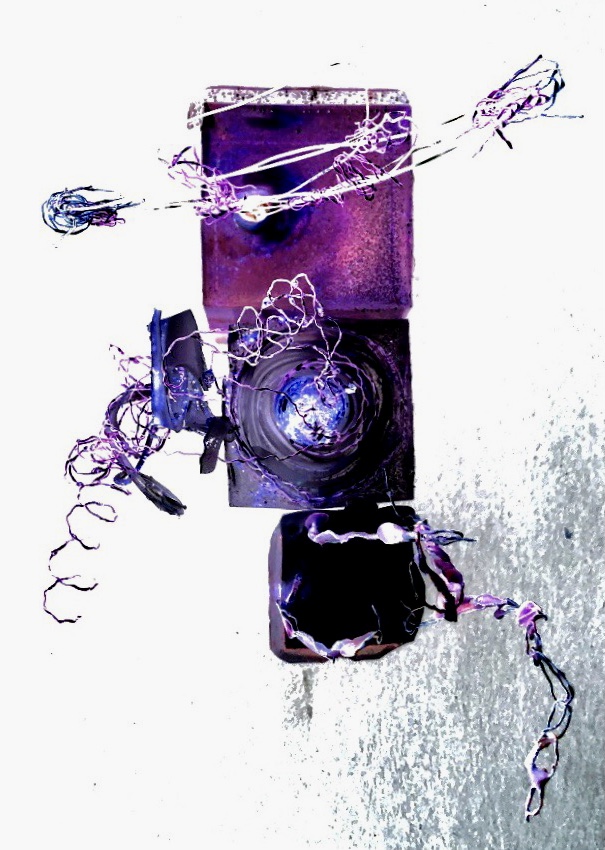
Fig. 5 Inversion of colours, and layering

*******************************

Playing around with my photos I was able to create mirror images and repeat patterns as ideas for prints, borders and stitch patterns. Some of these are reminiscent of kaleidoscope patterns. (Fig. 6)

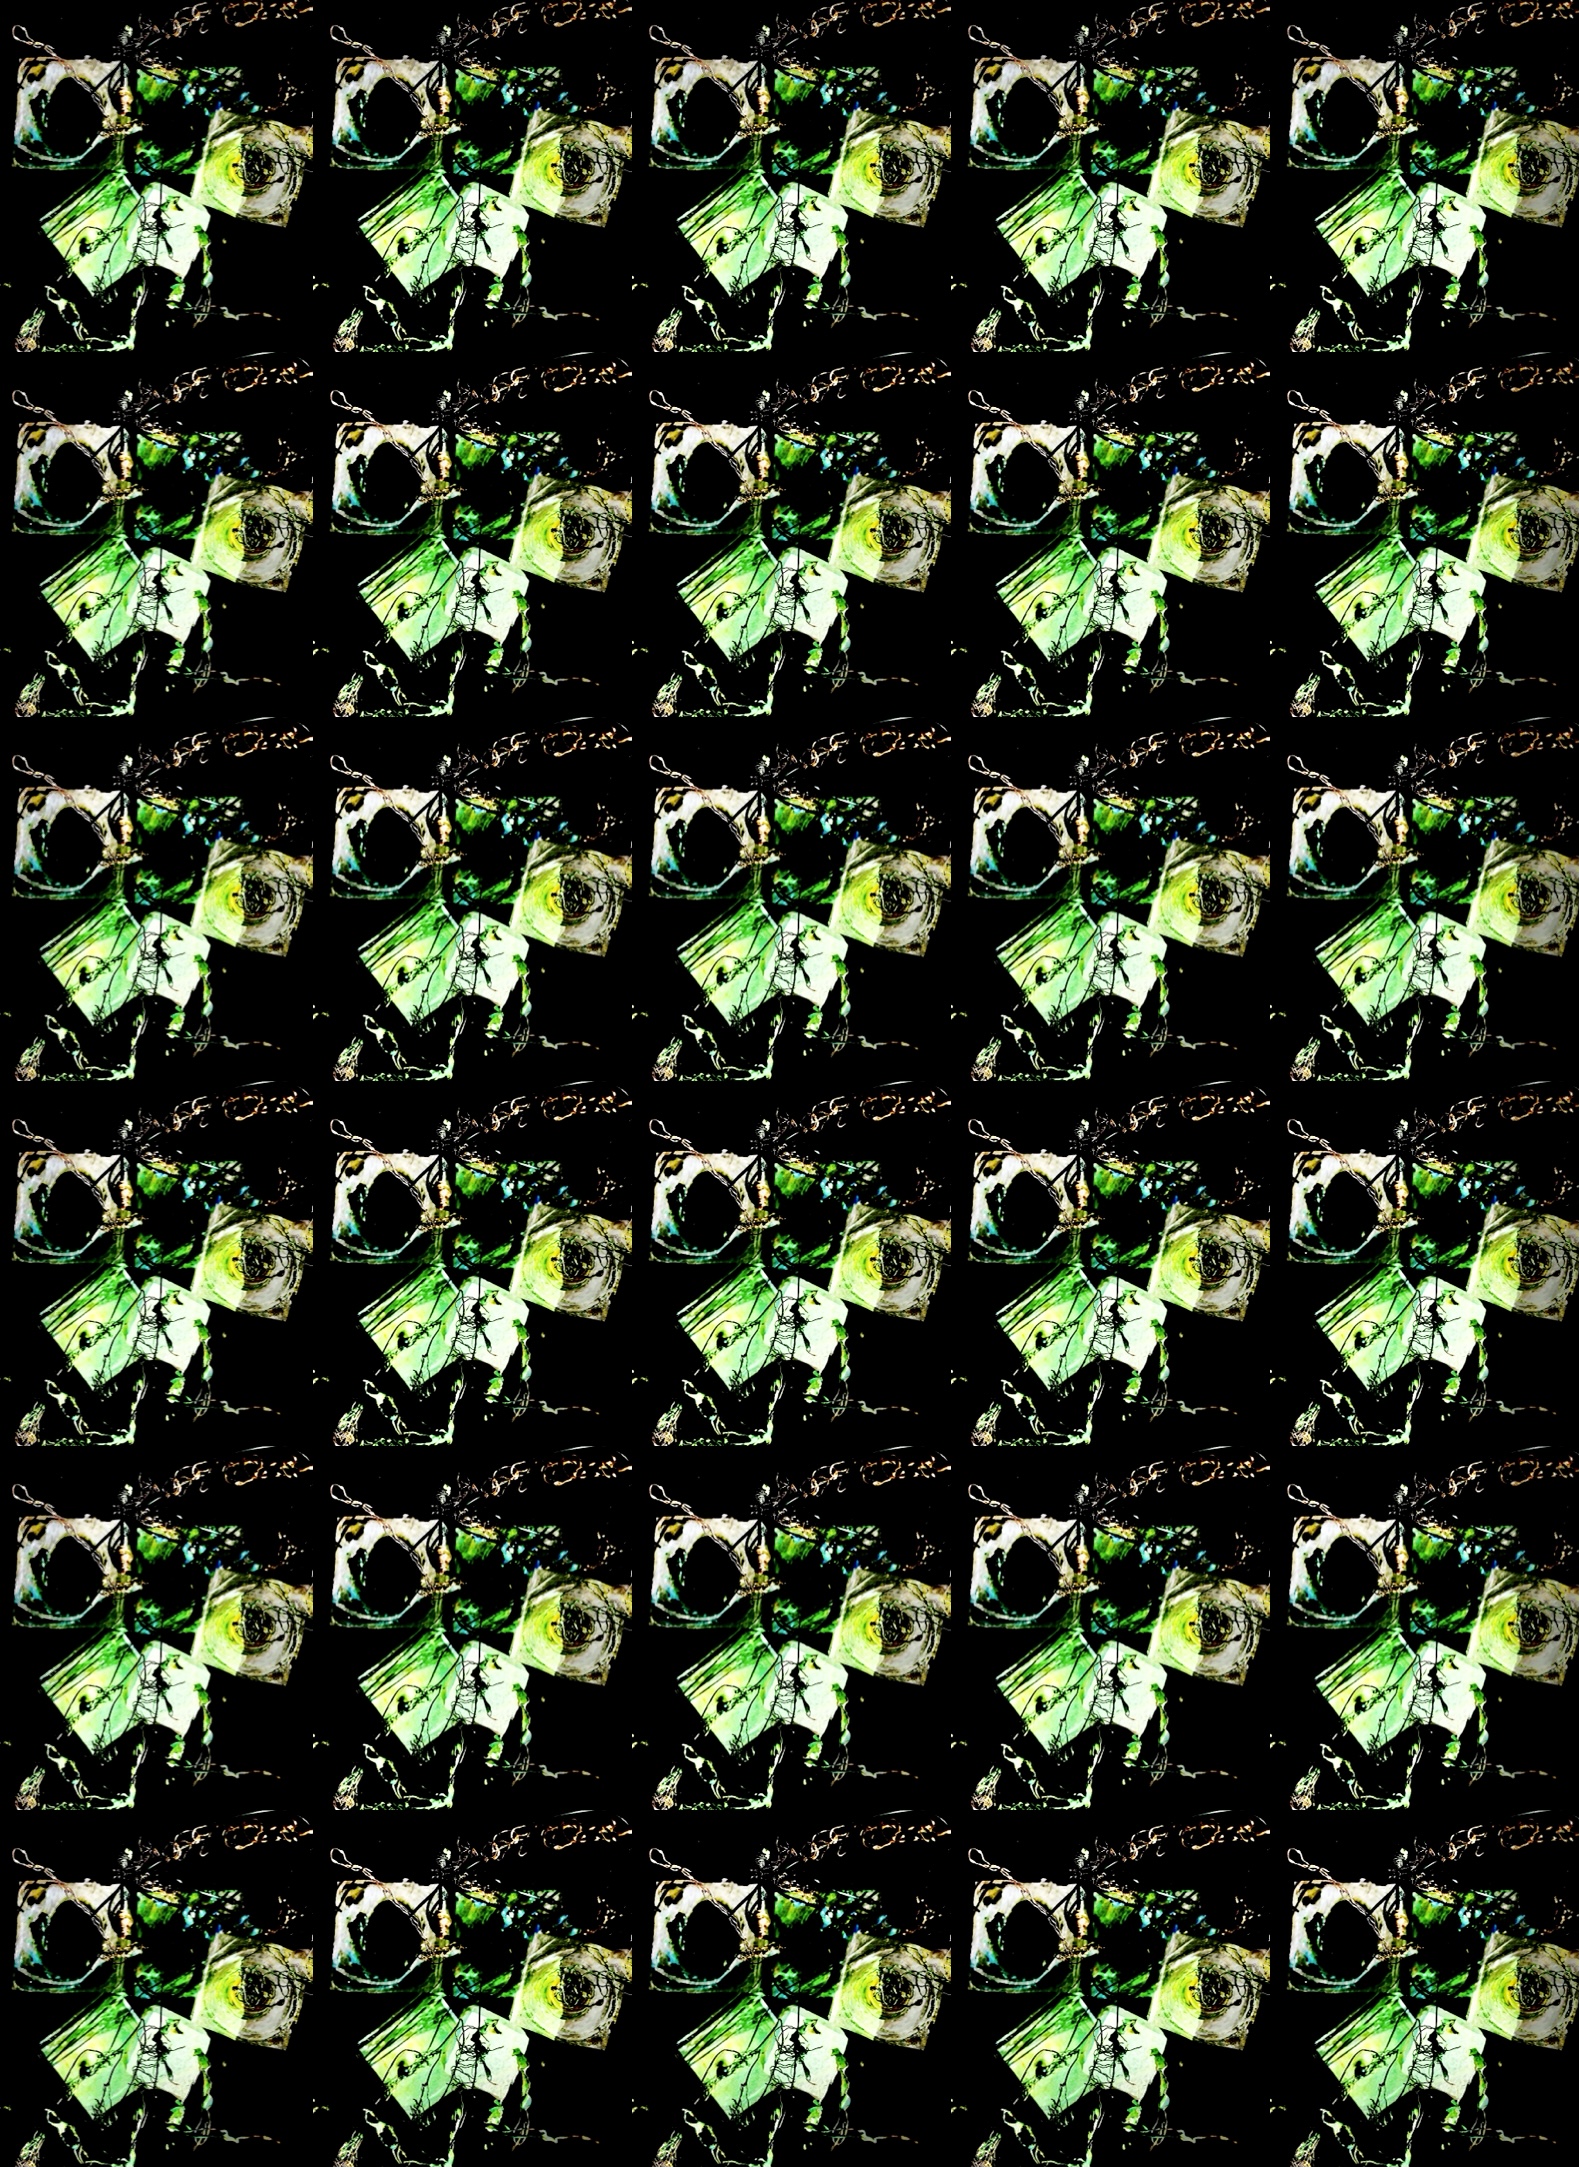
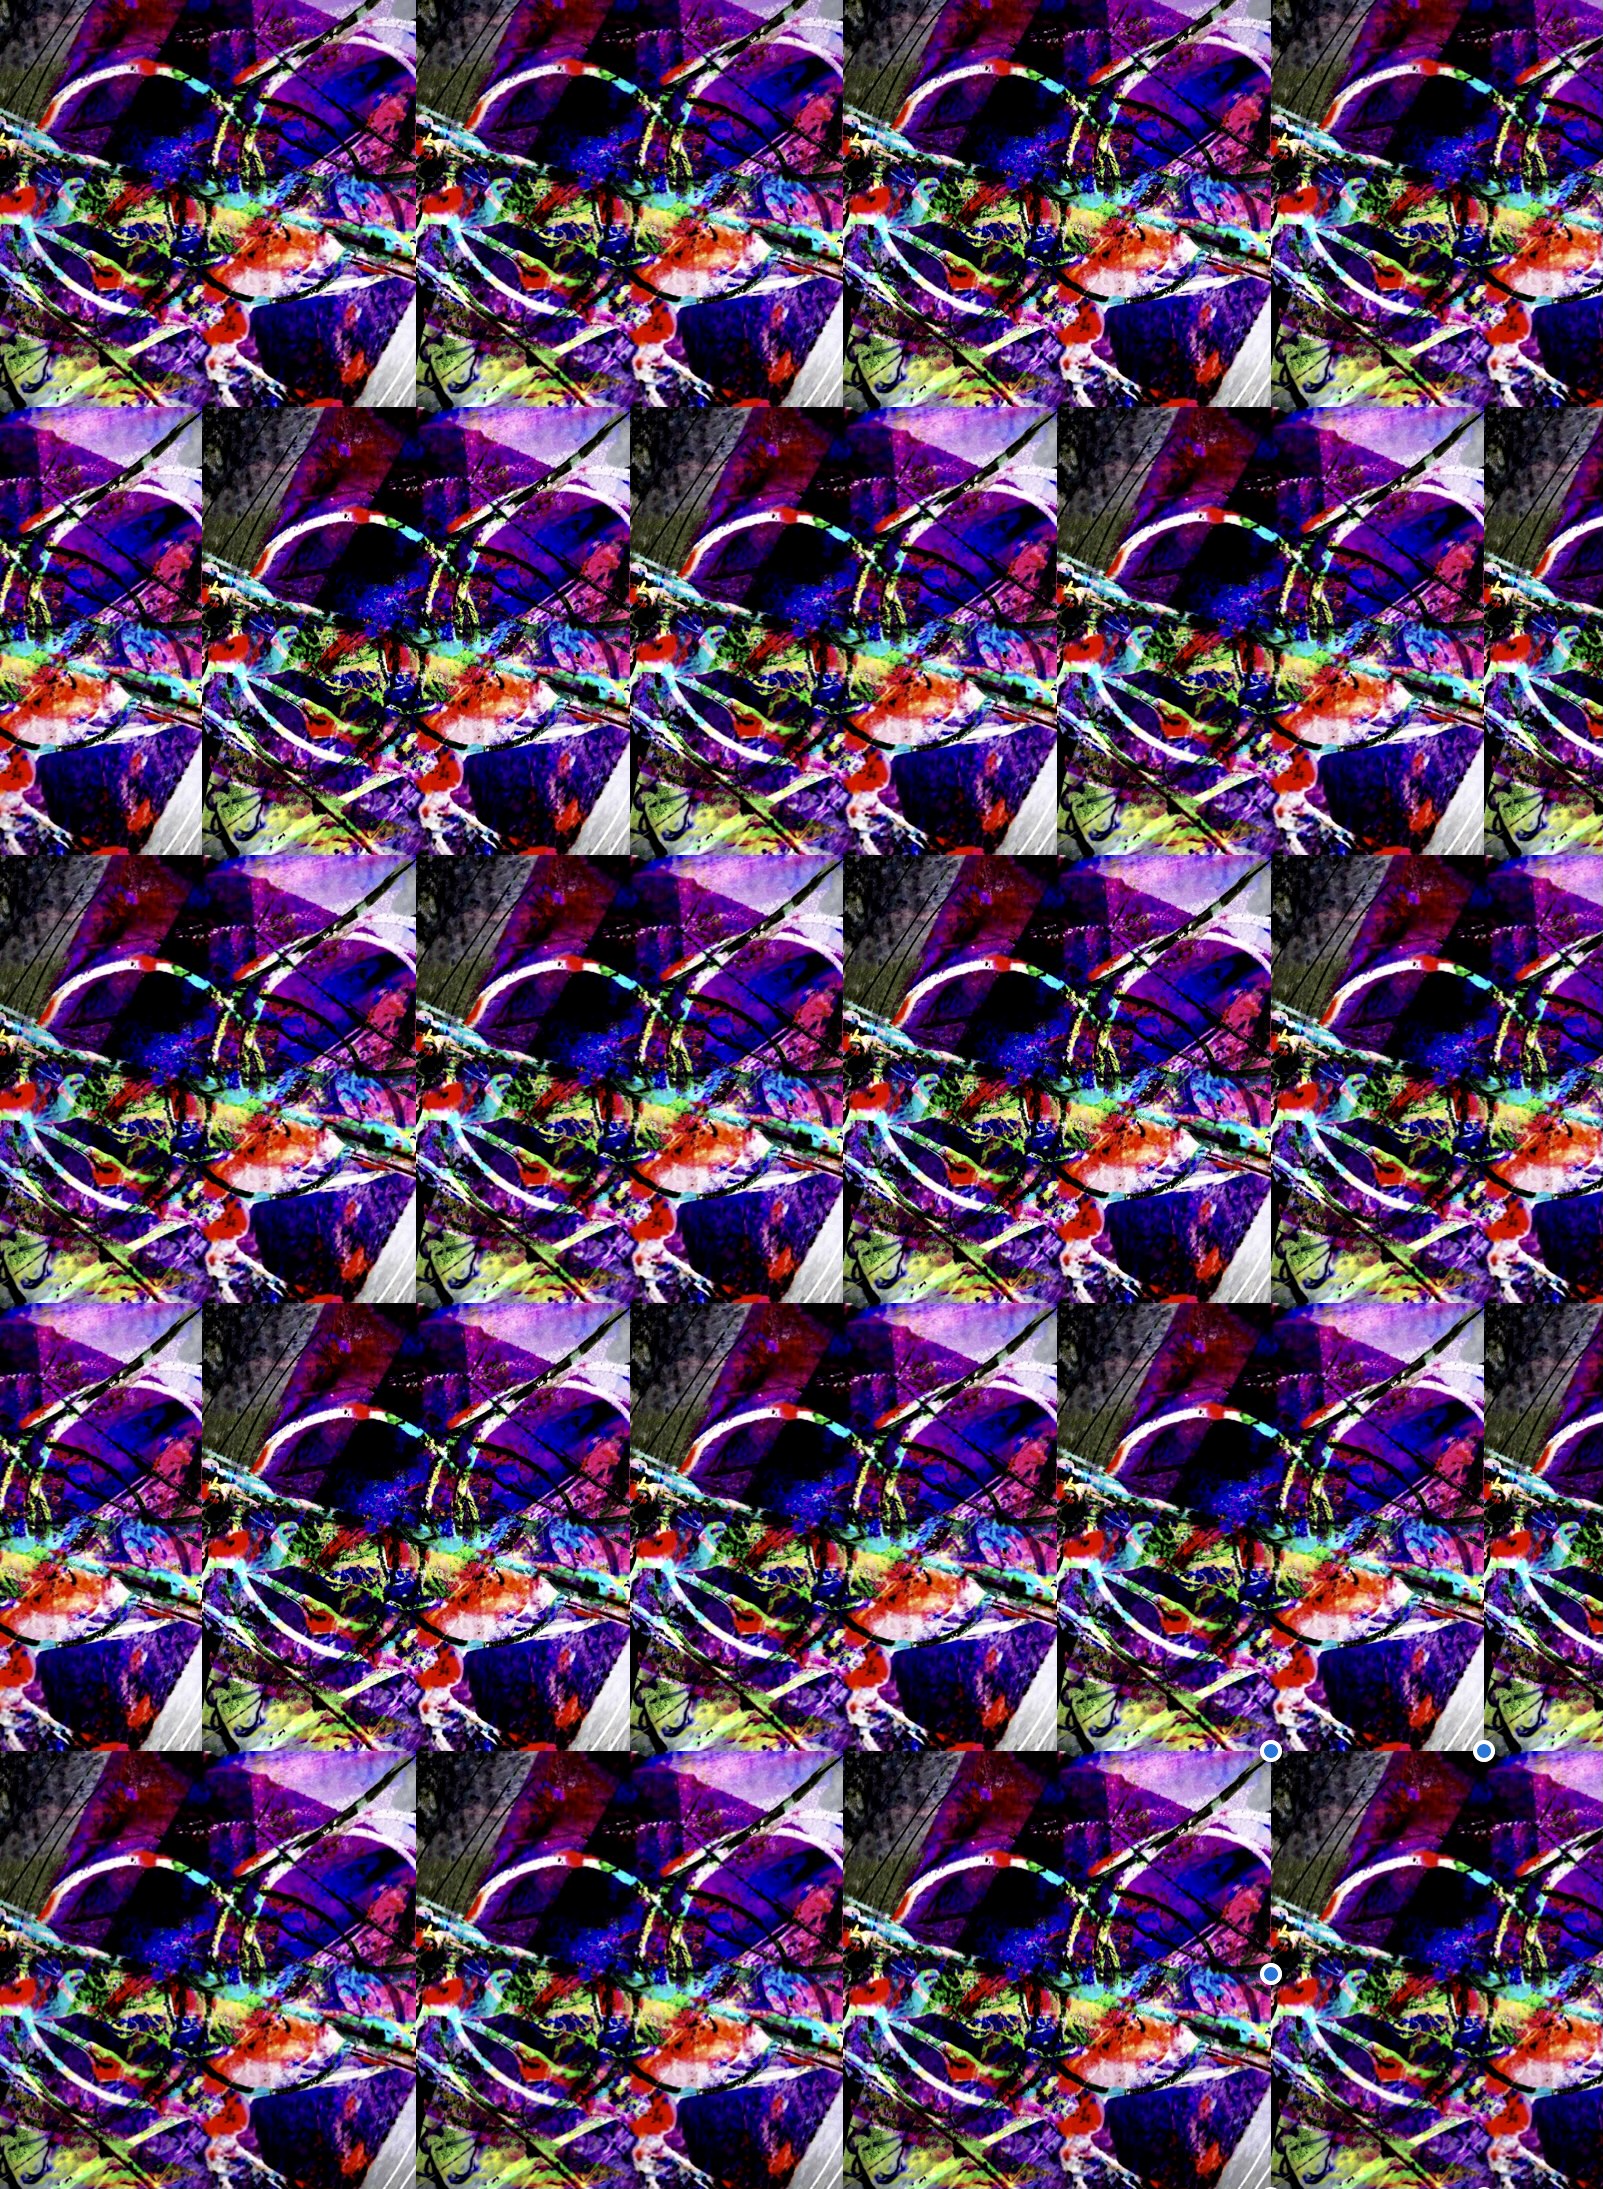
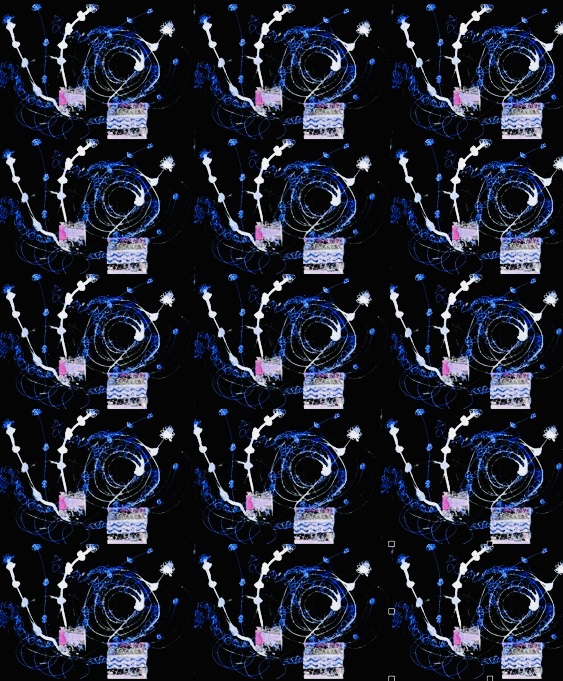
Fig. 6 Mirror images and repeat patterns

********************************

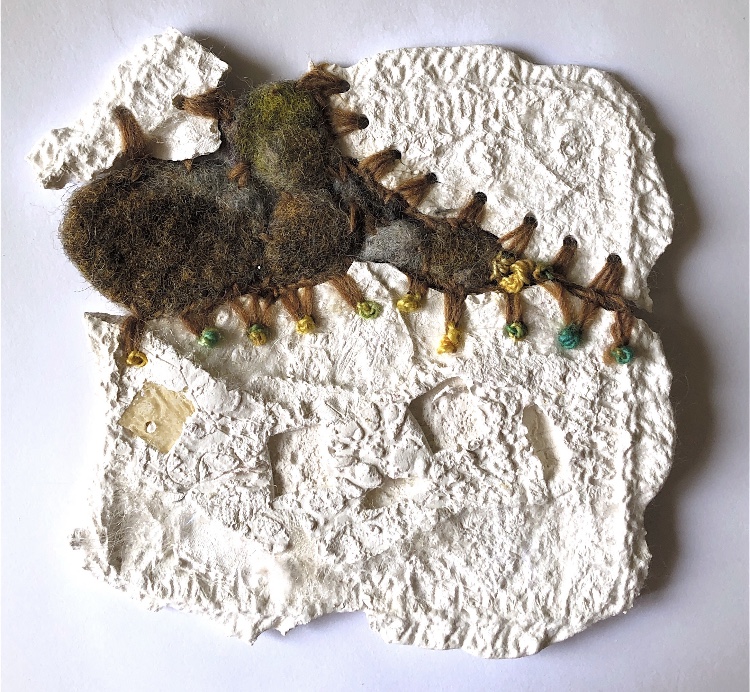
Using one of my layered photos as inspiration I scaled up my line drawing to A2 size and then added colour to make a linear image with lots of shapes and lines to inspire some fabric work. I then used this to make a fabric piece with scraps of fabric and machine stitching. (Fig. 7)

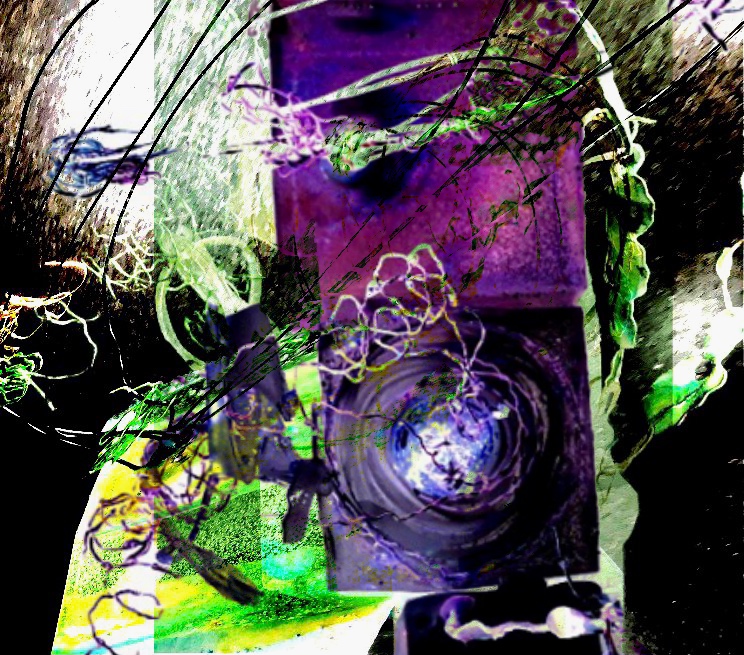
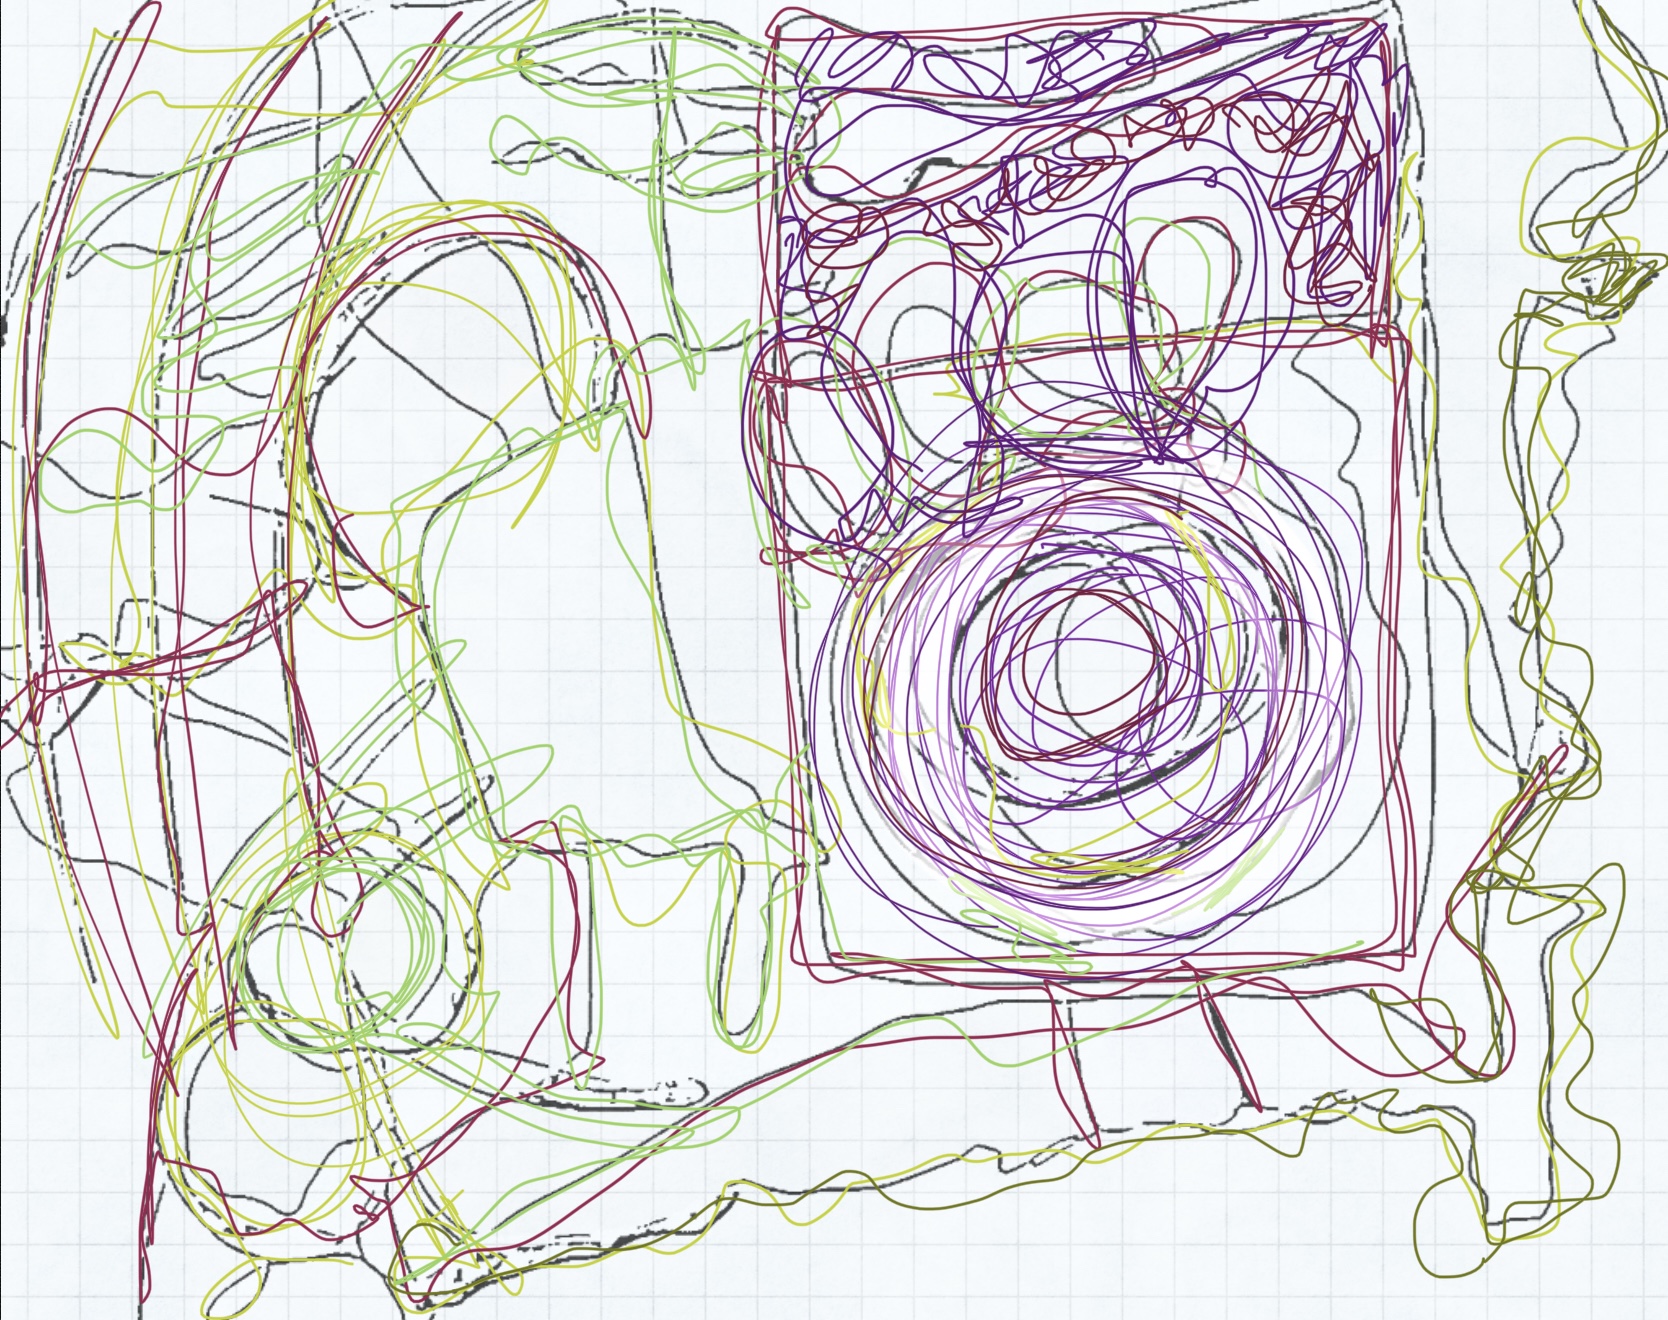
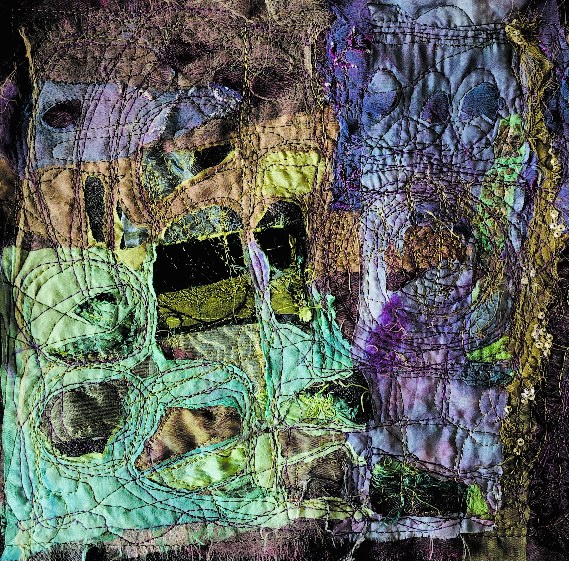
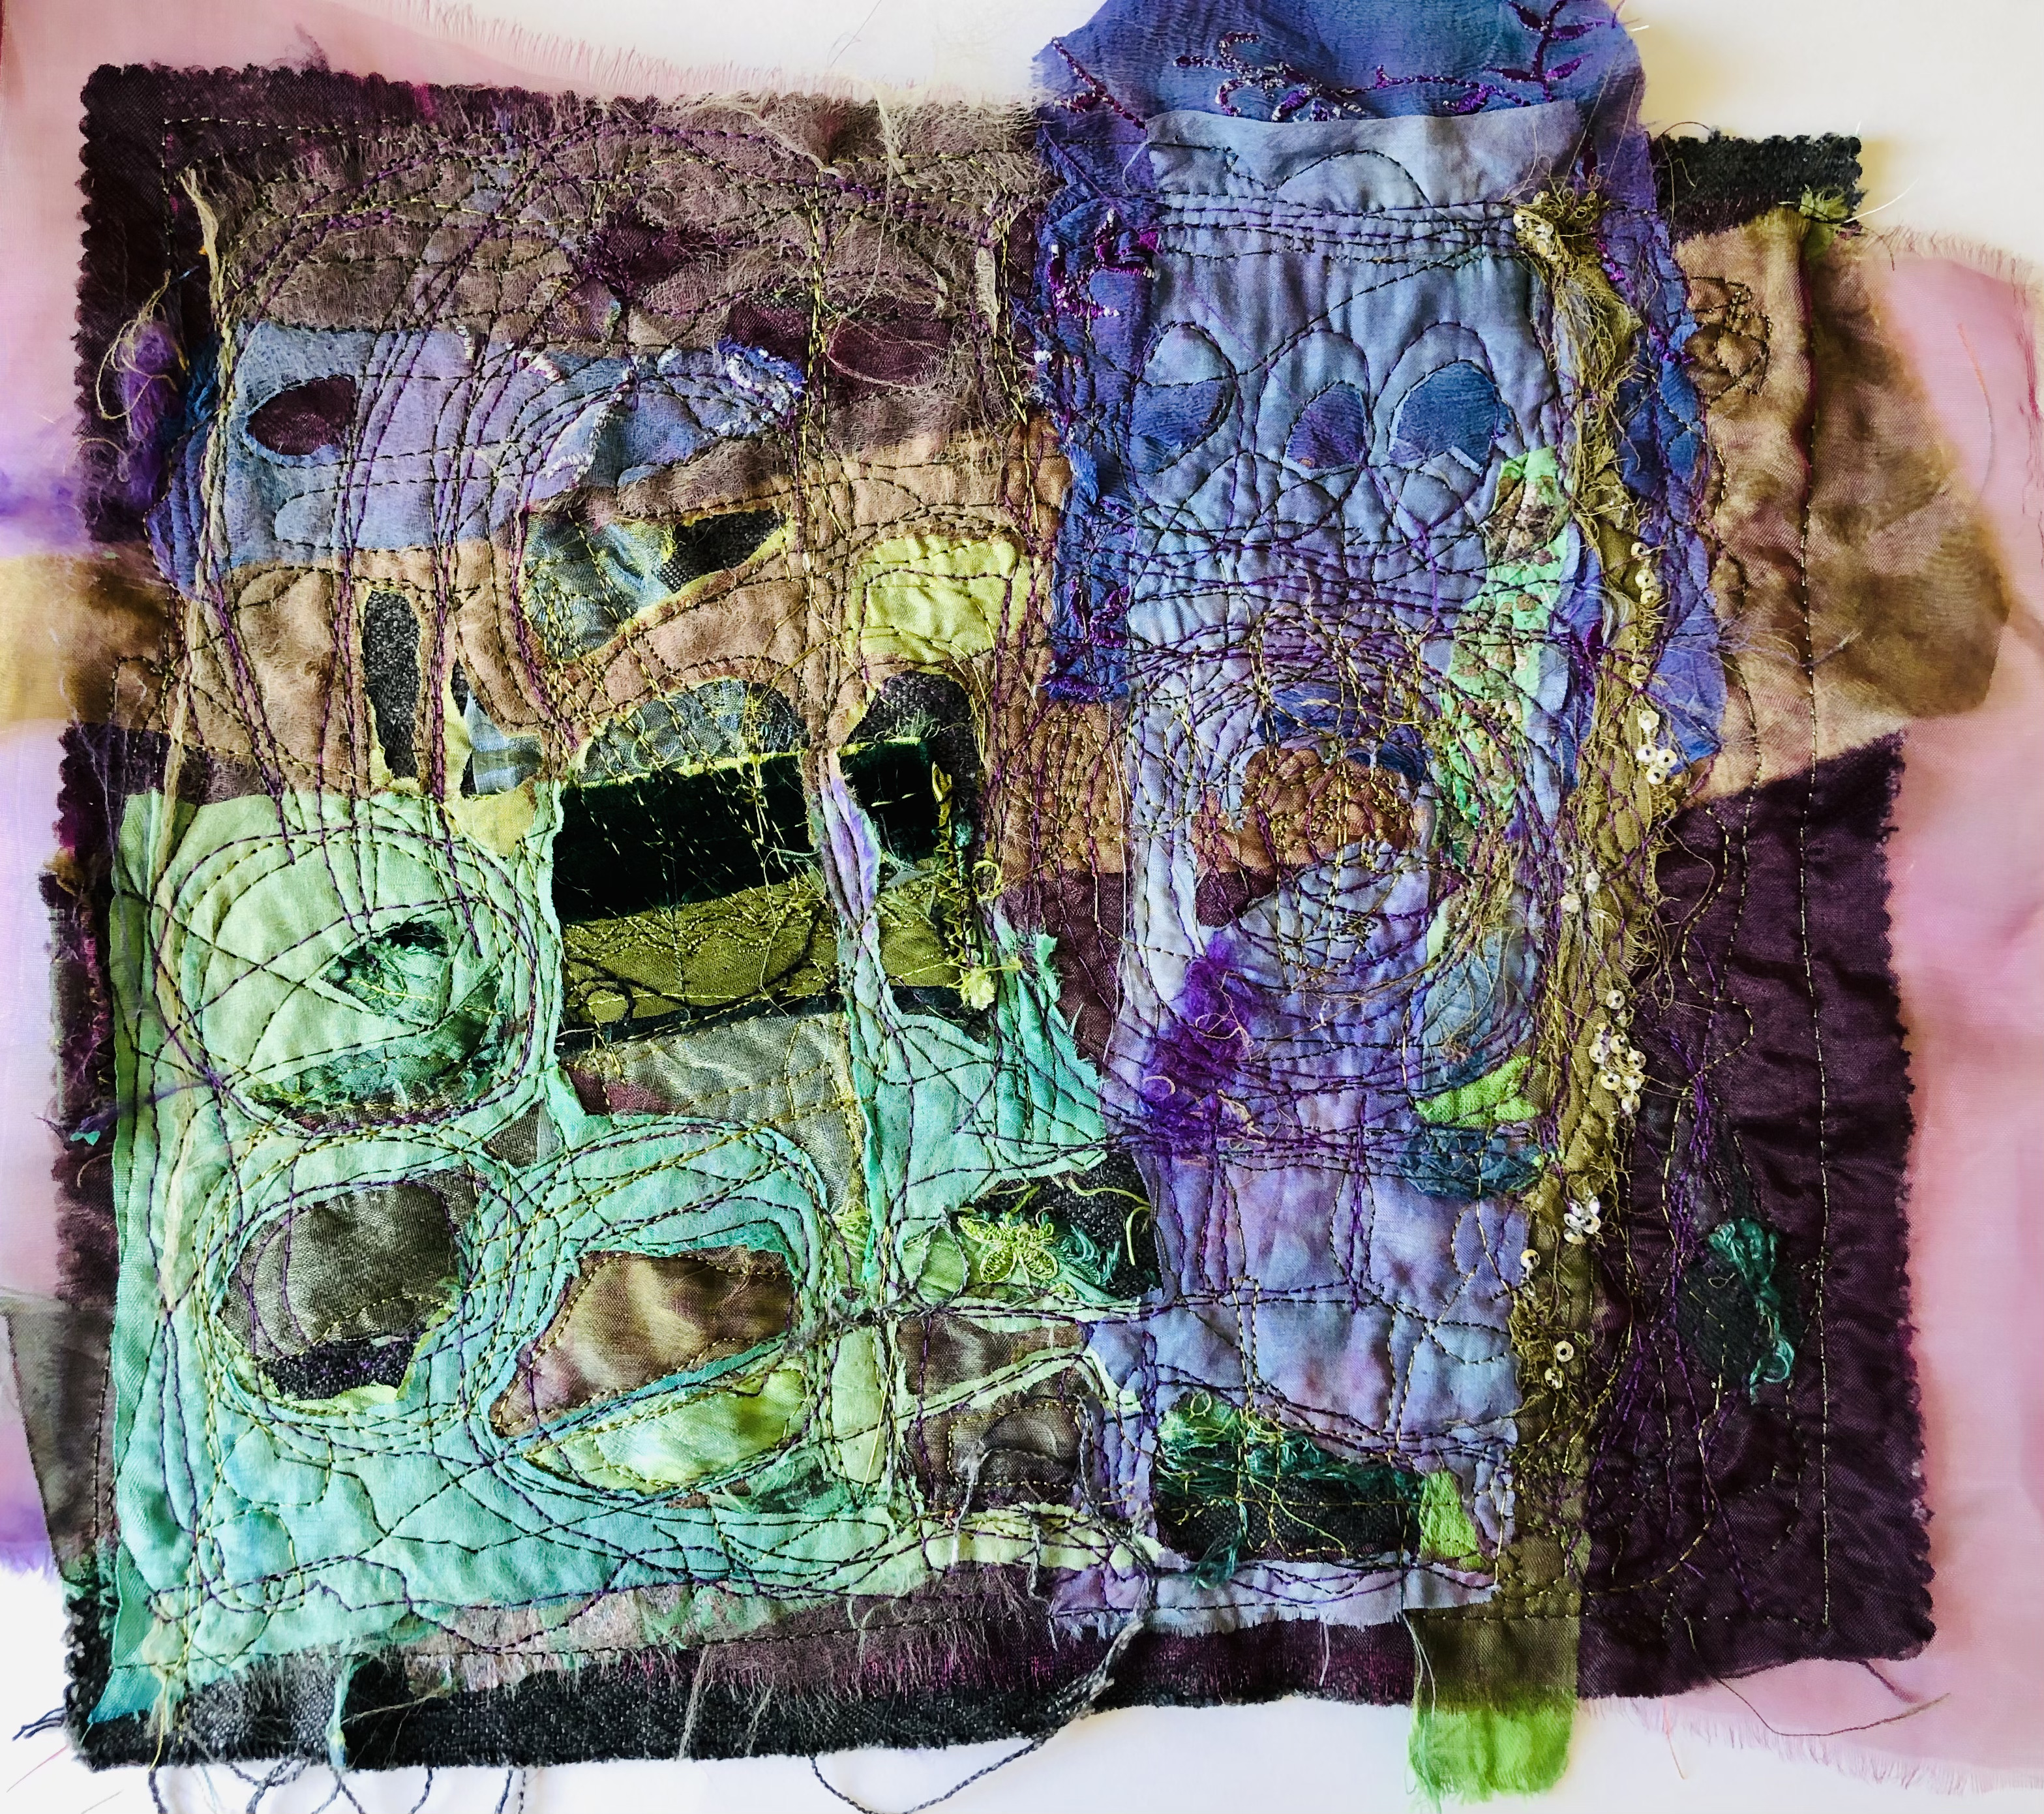
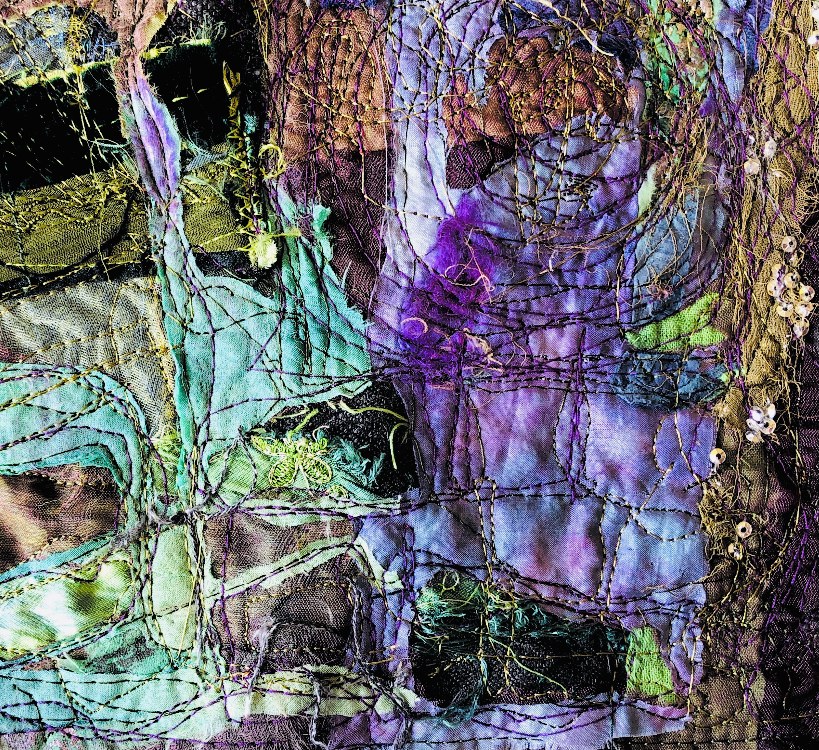
Fig. 7 A2 size Continuous line drawing with added colour. Stitched piece.

********************************

Working with lots of different threads I made crochet samples inspired by one of my resin pieces. (Fig. 8) Freeform crochet worked well for this subject with its uneven swirls and texture.

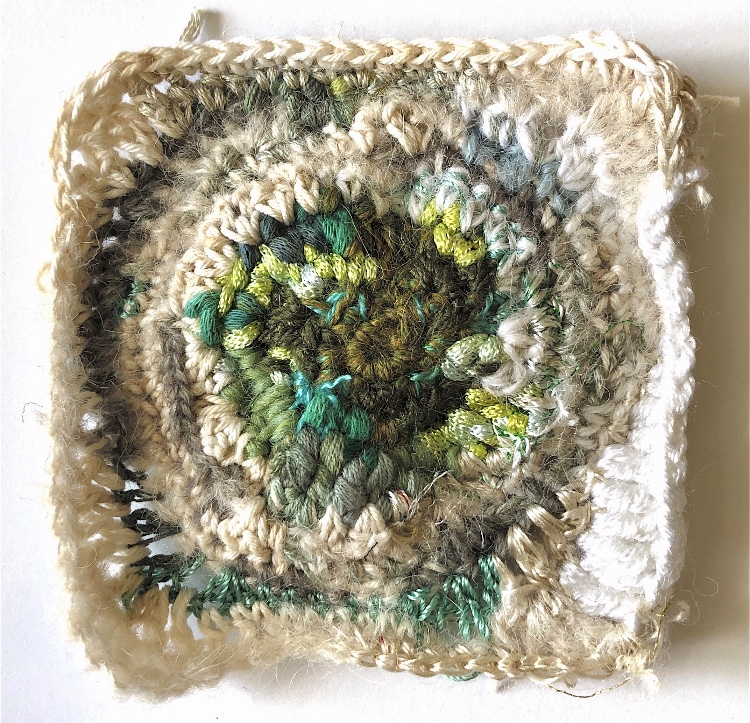
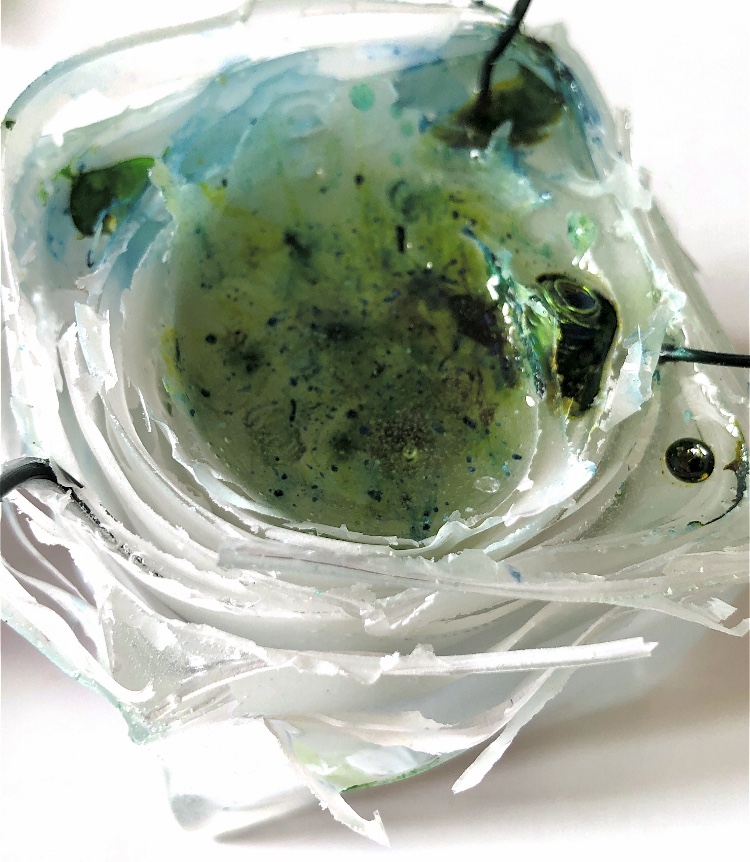
Fig. 8 Crochet samples.

******************************

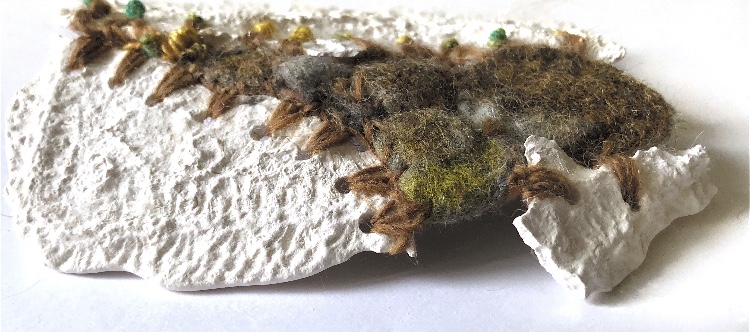
Adding hand stitch and playing with the colours added more interest and development to the earlier stitched piece. (Fig. 9)
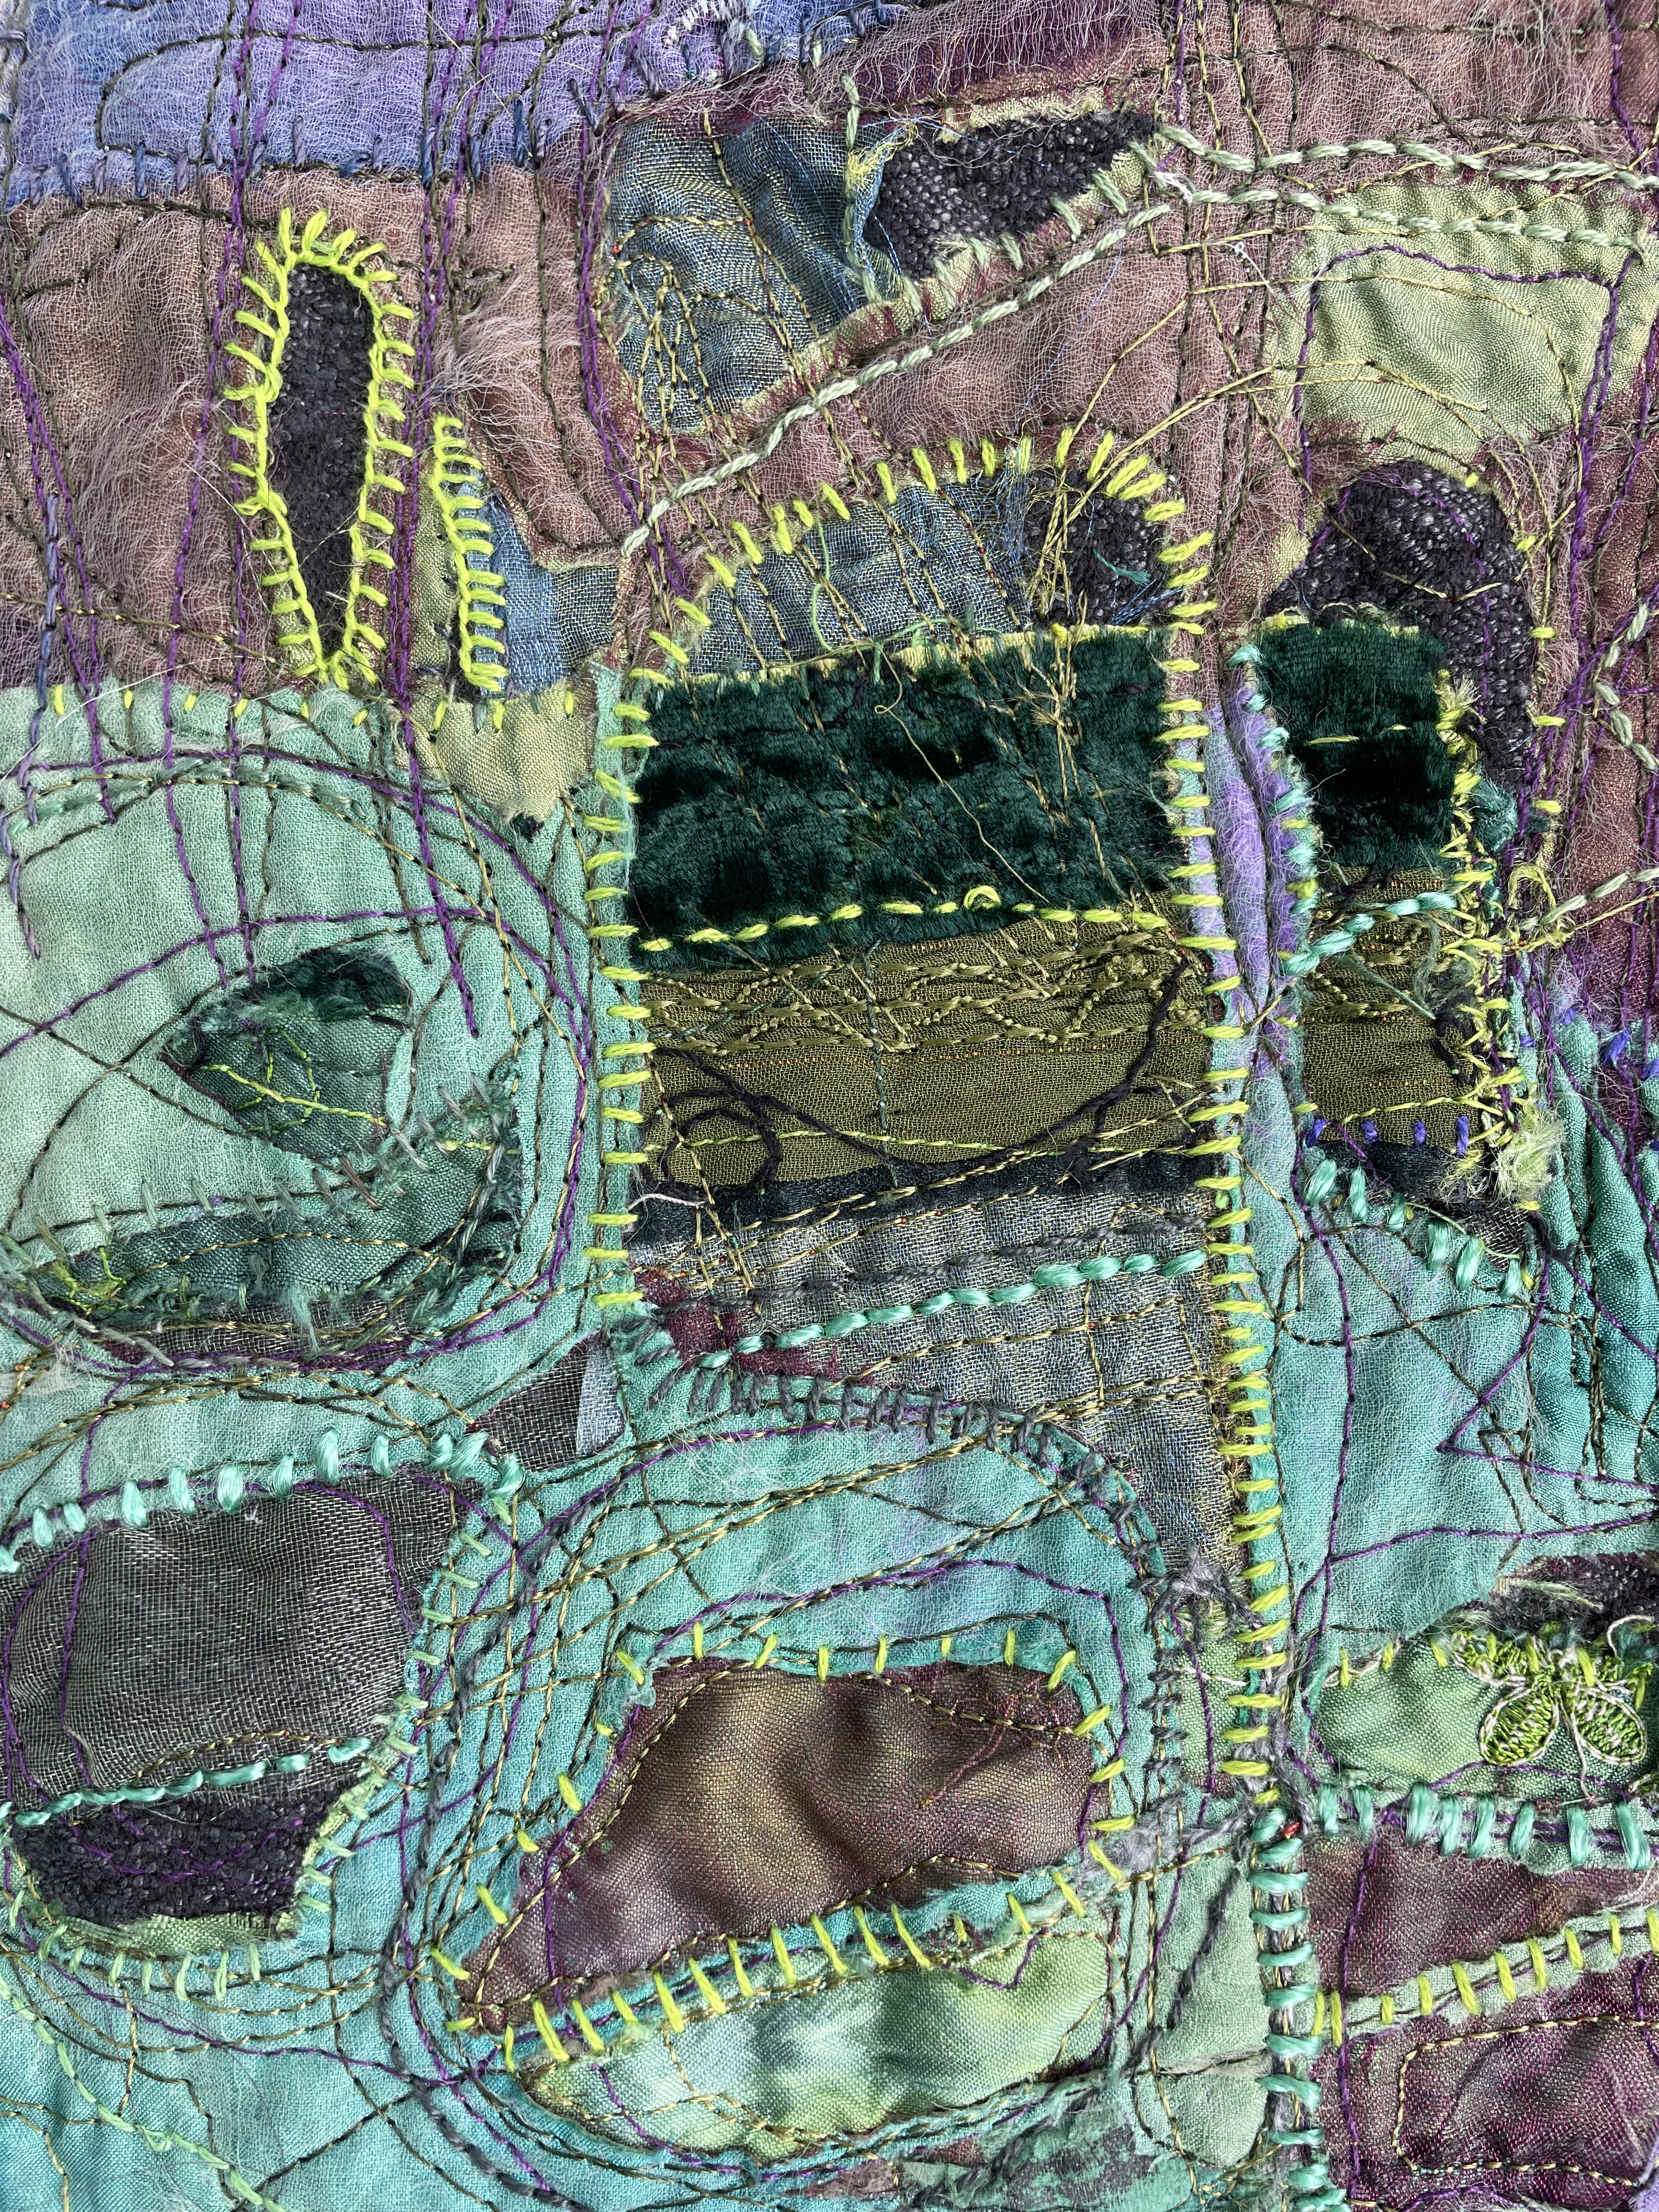
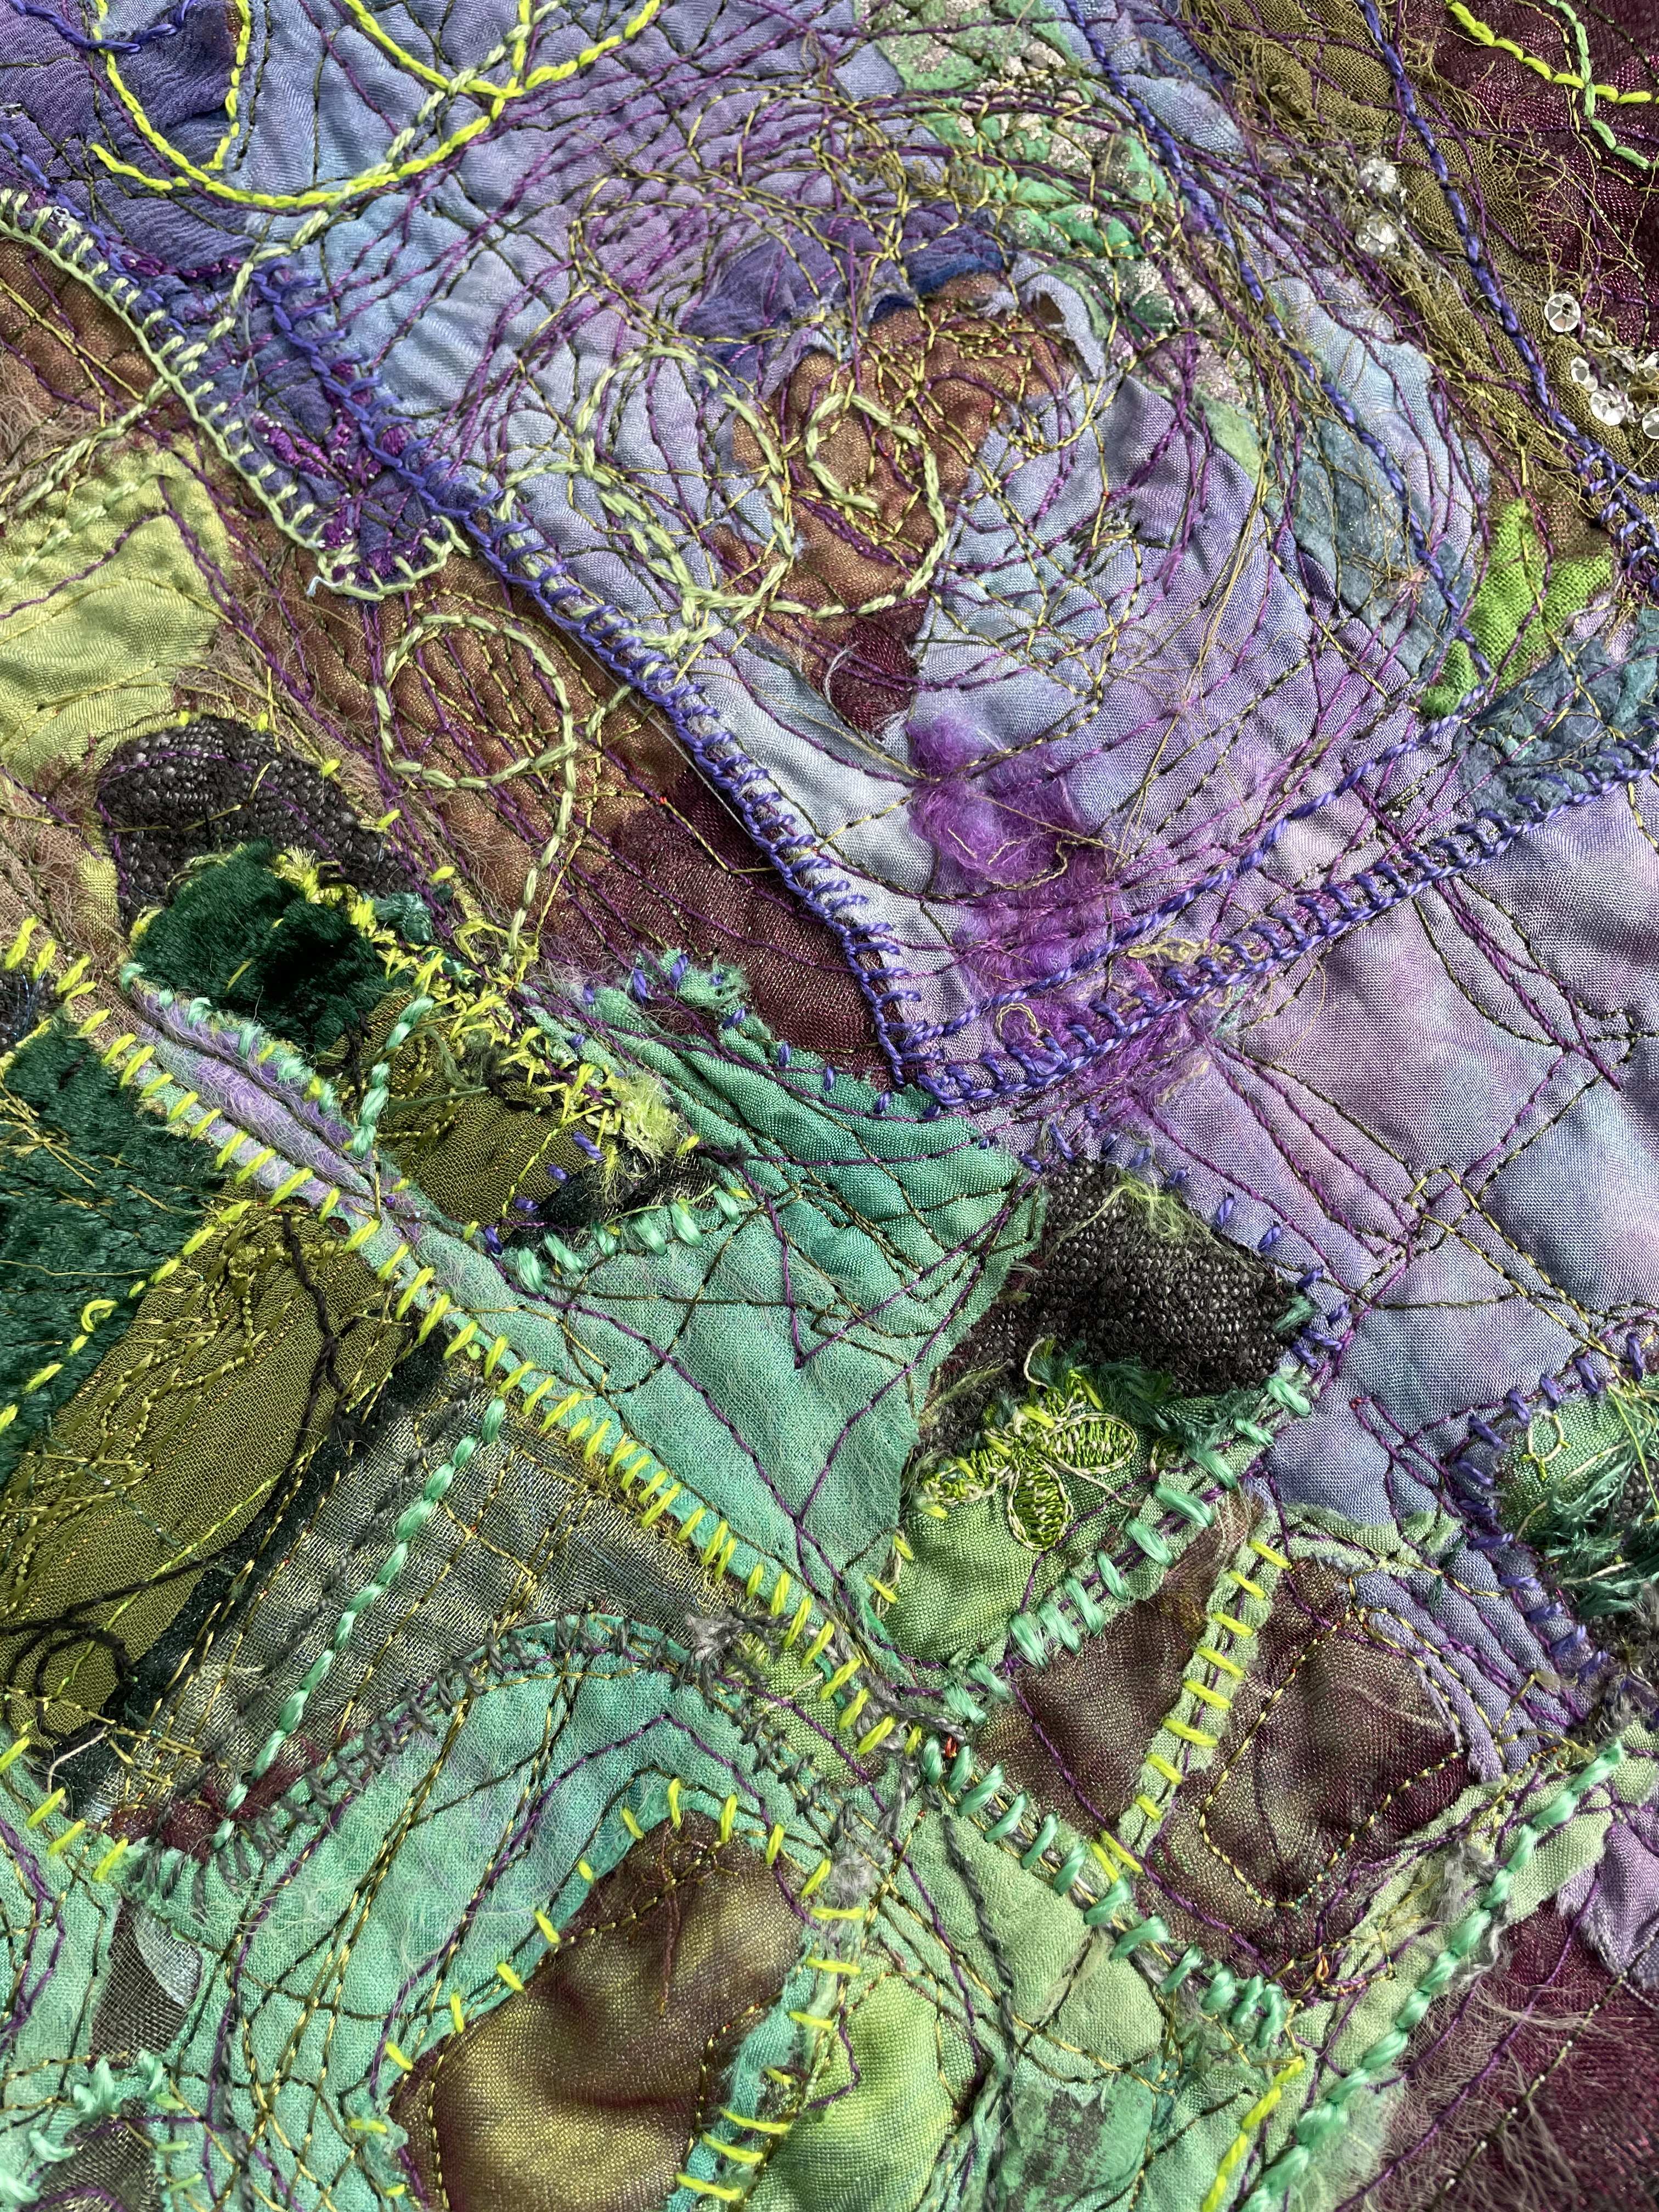
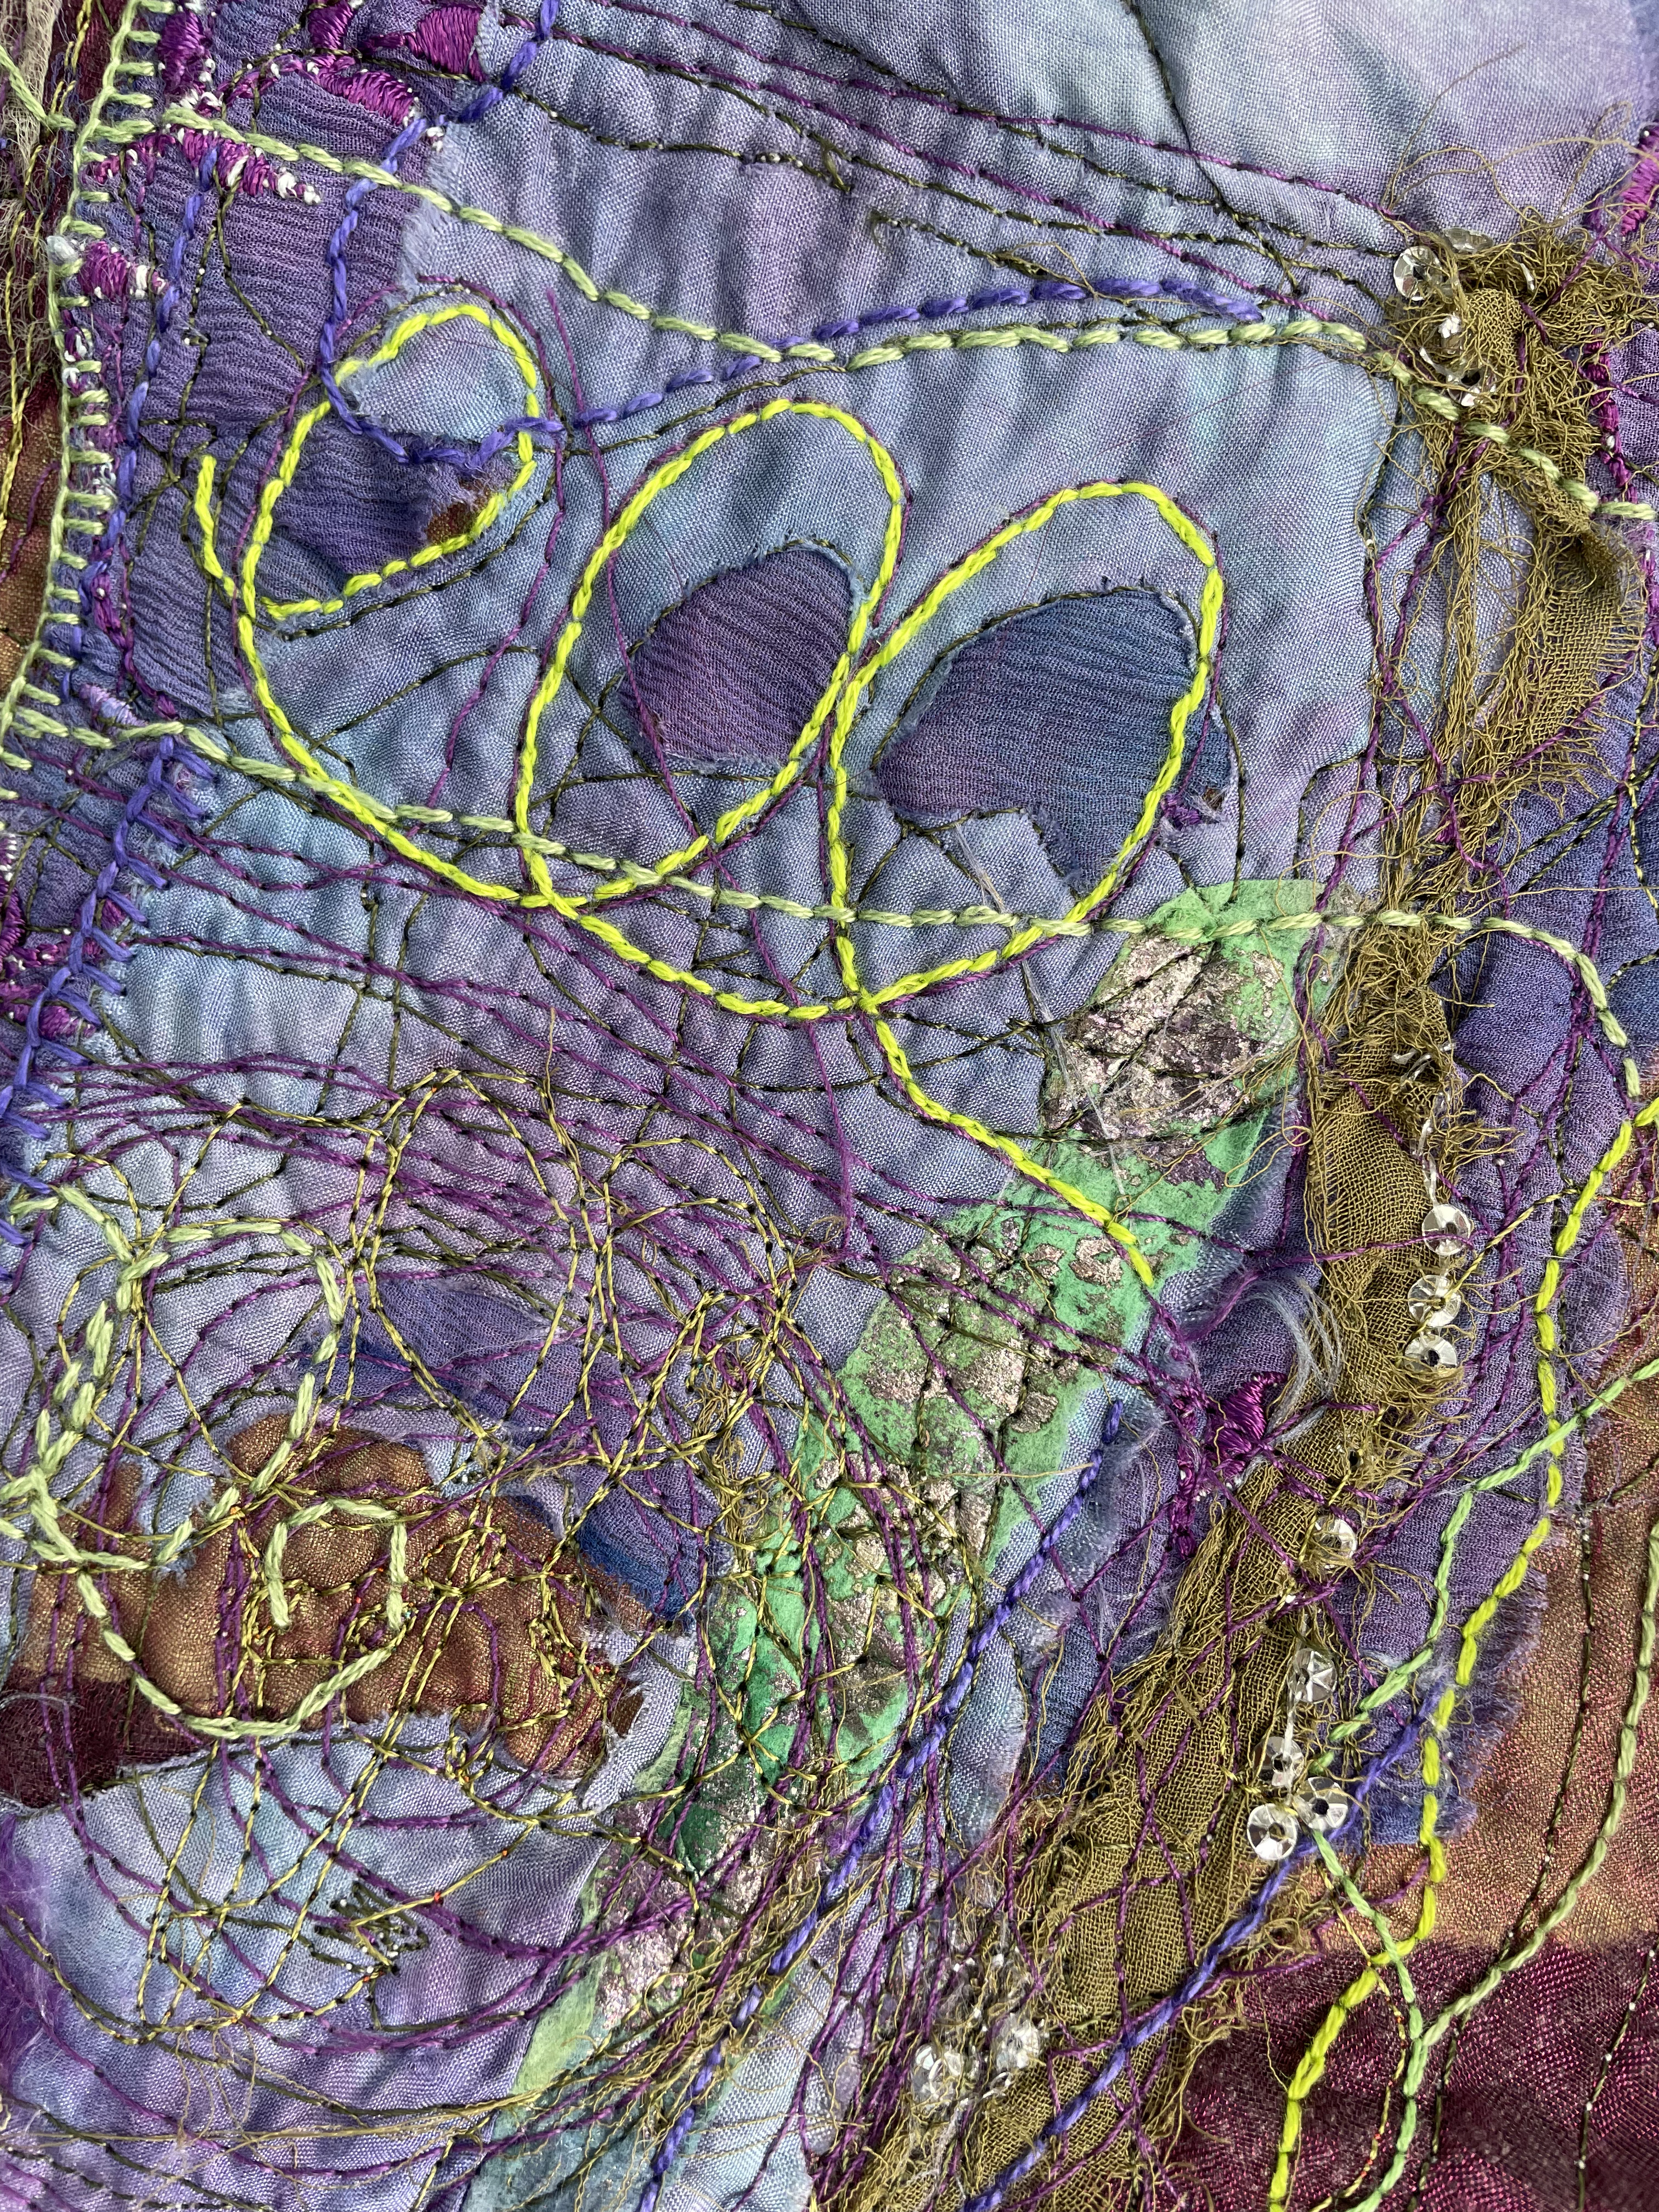
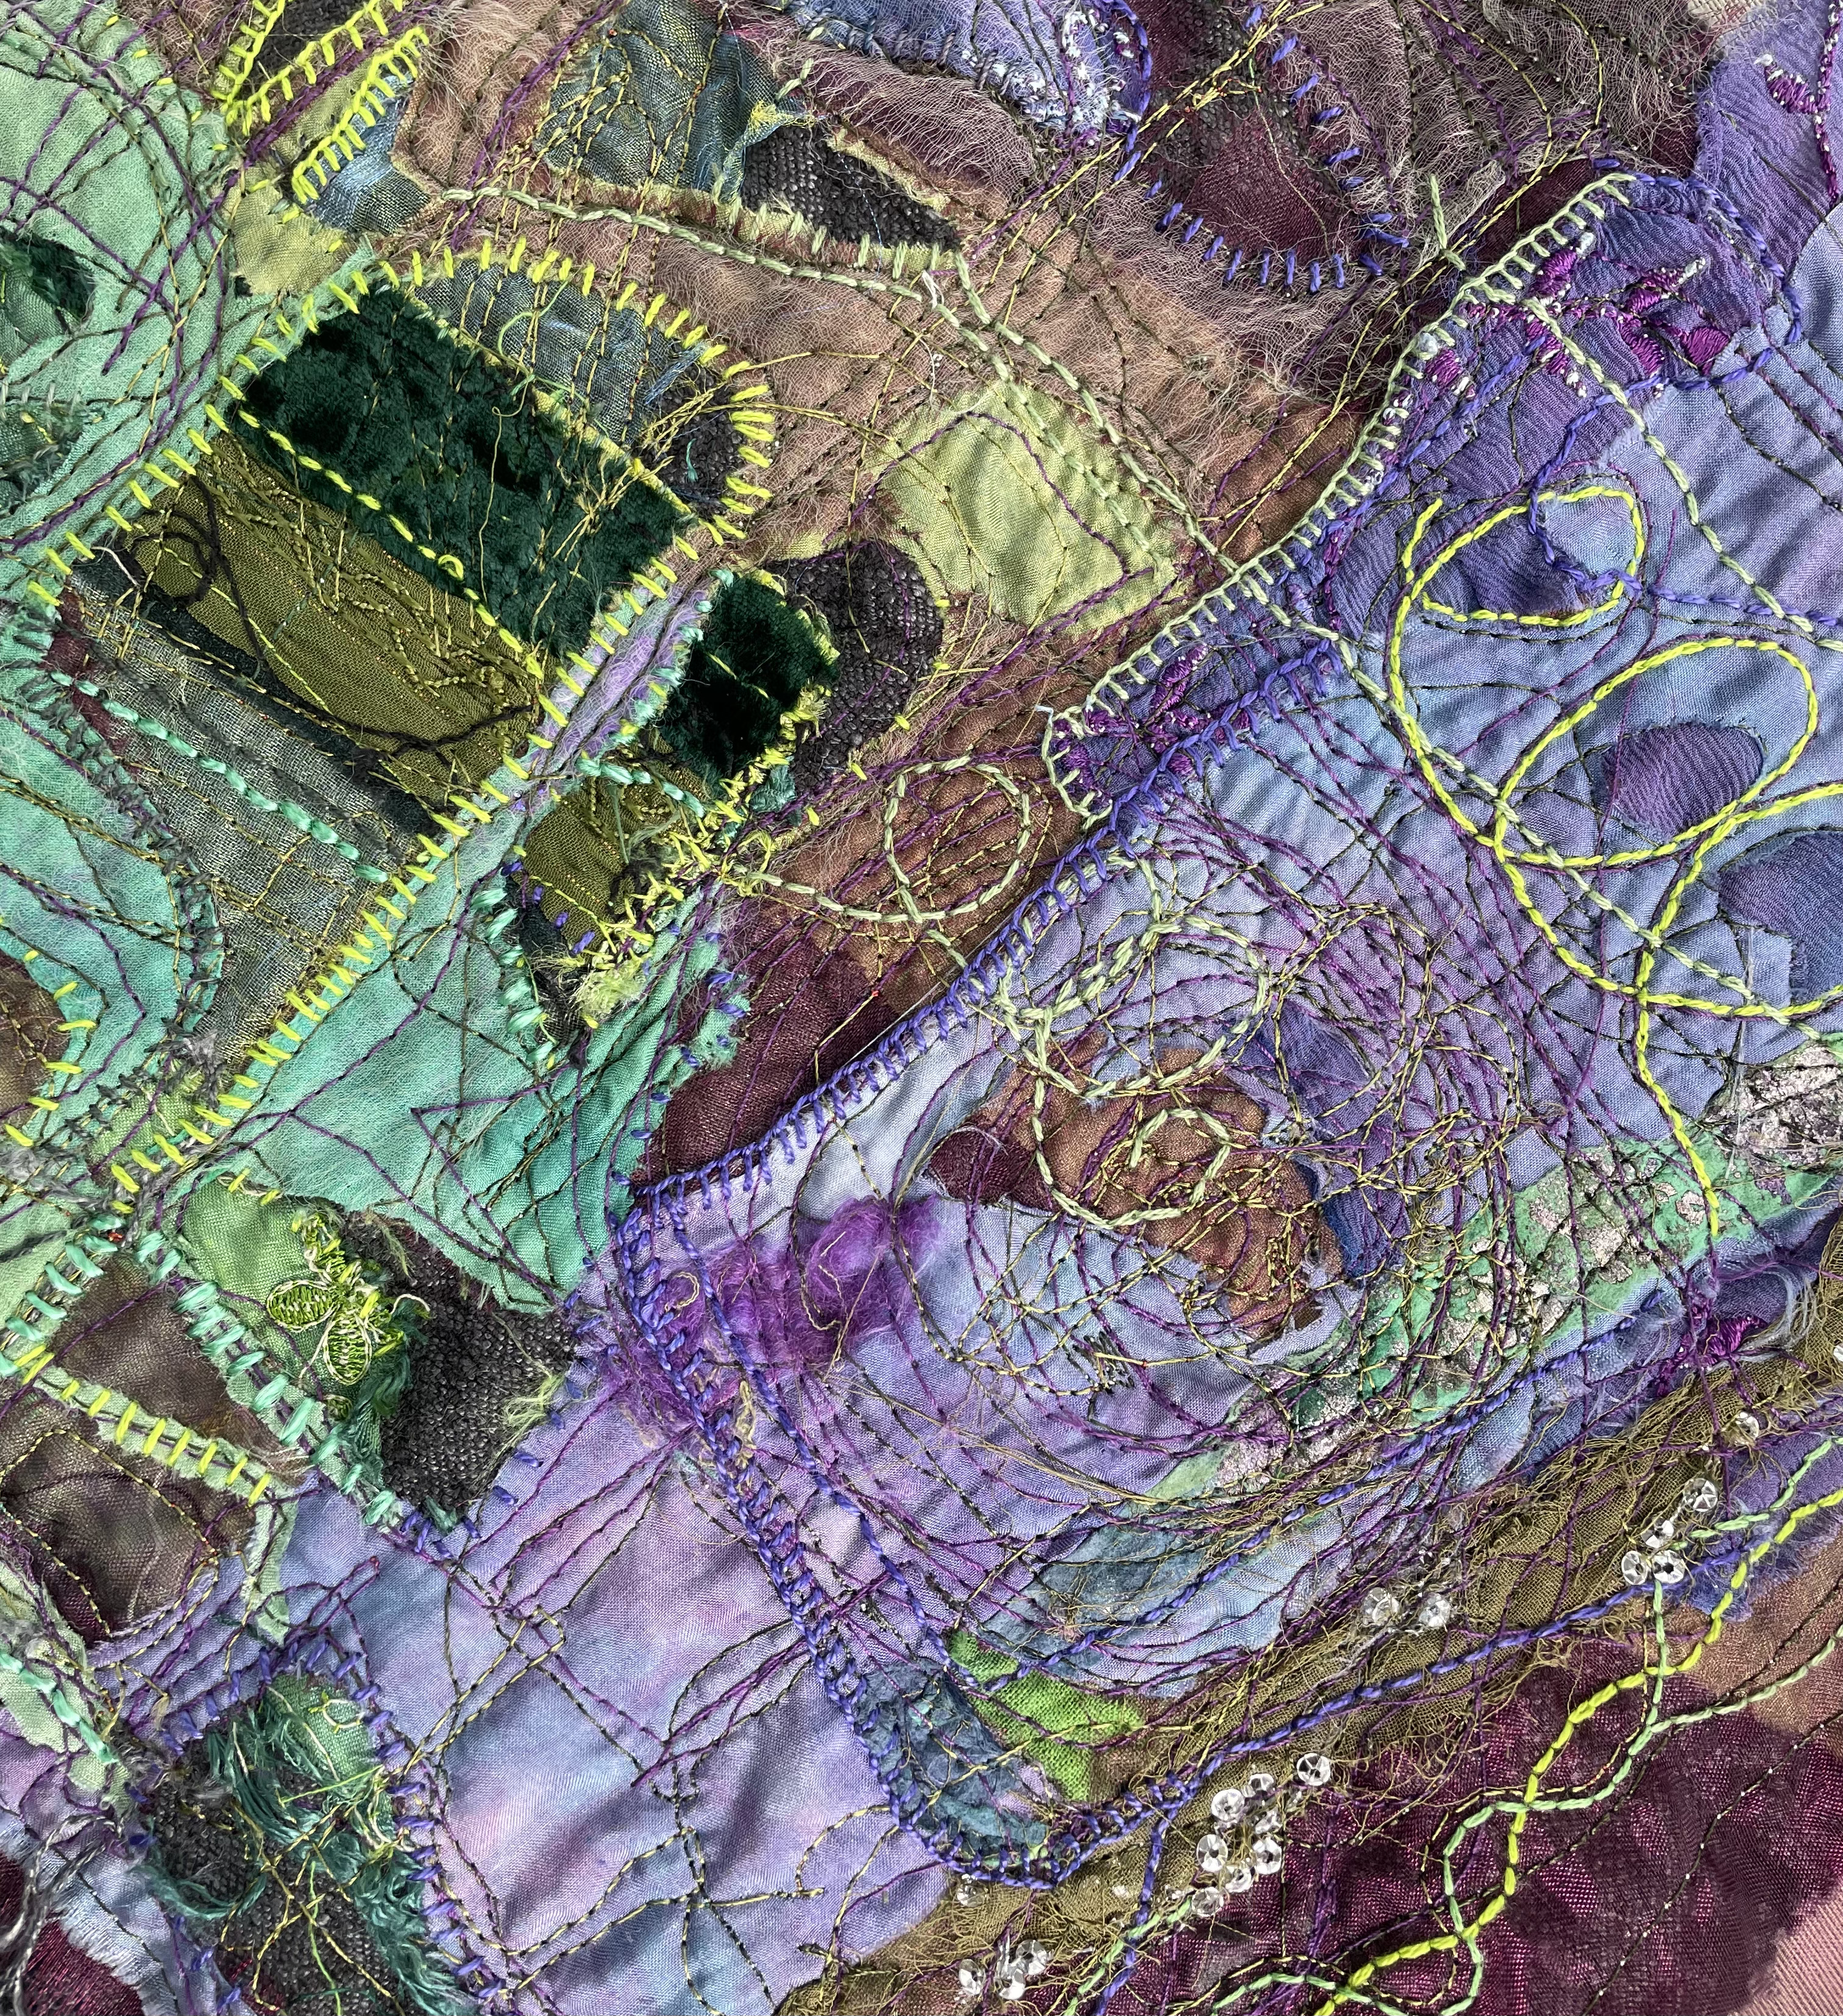
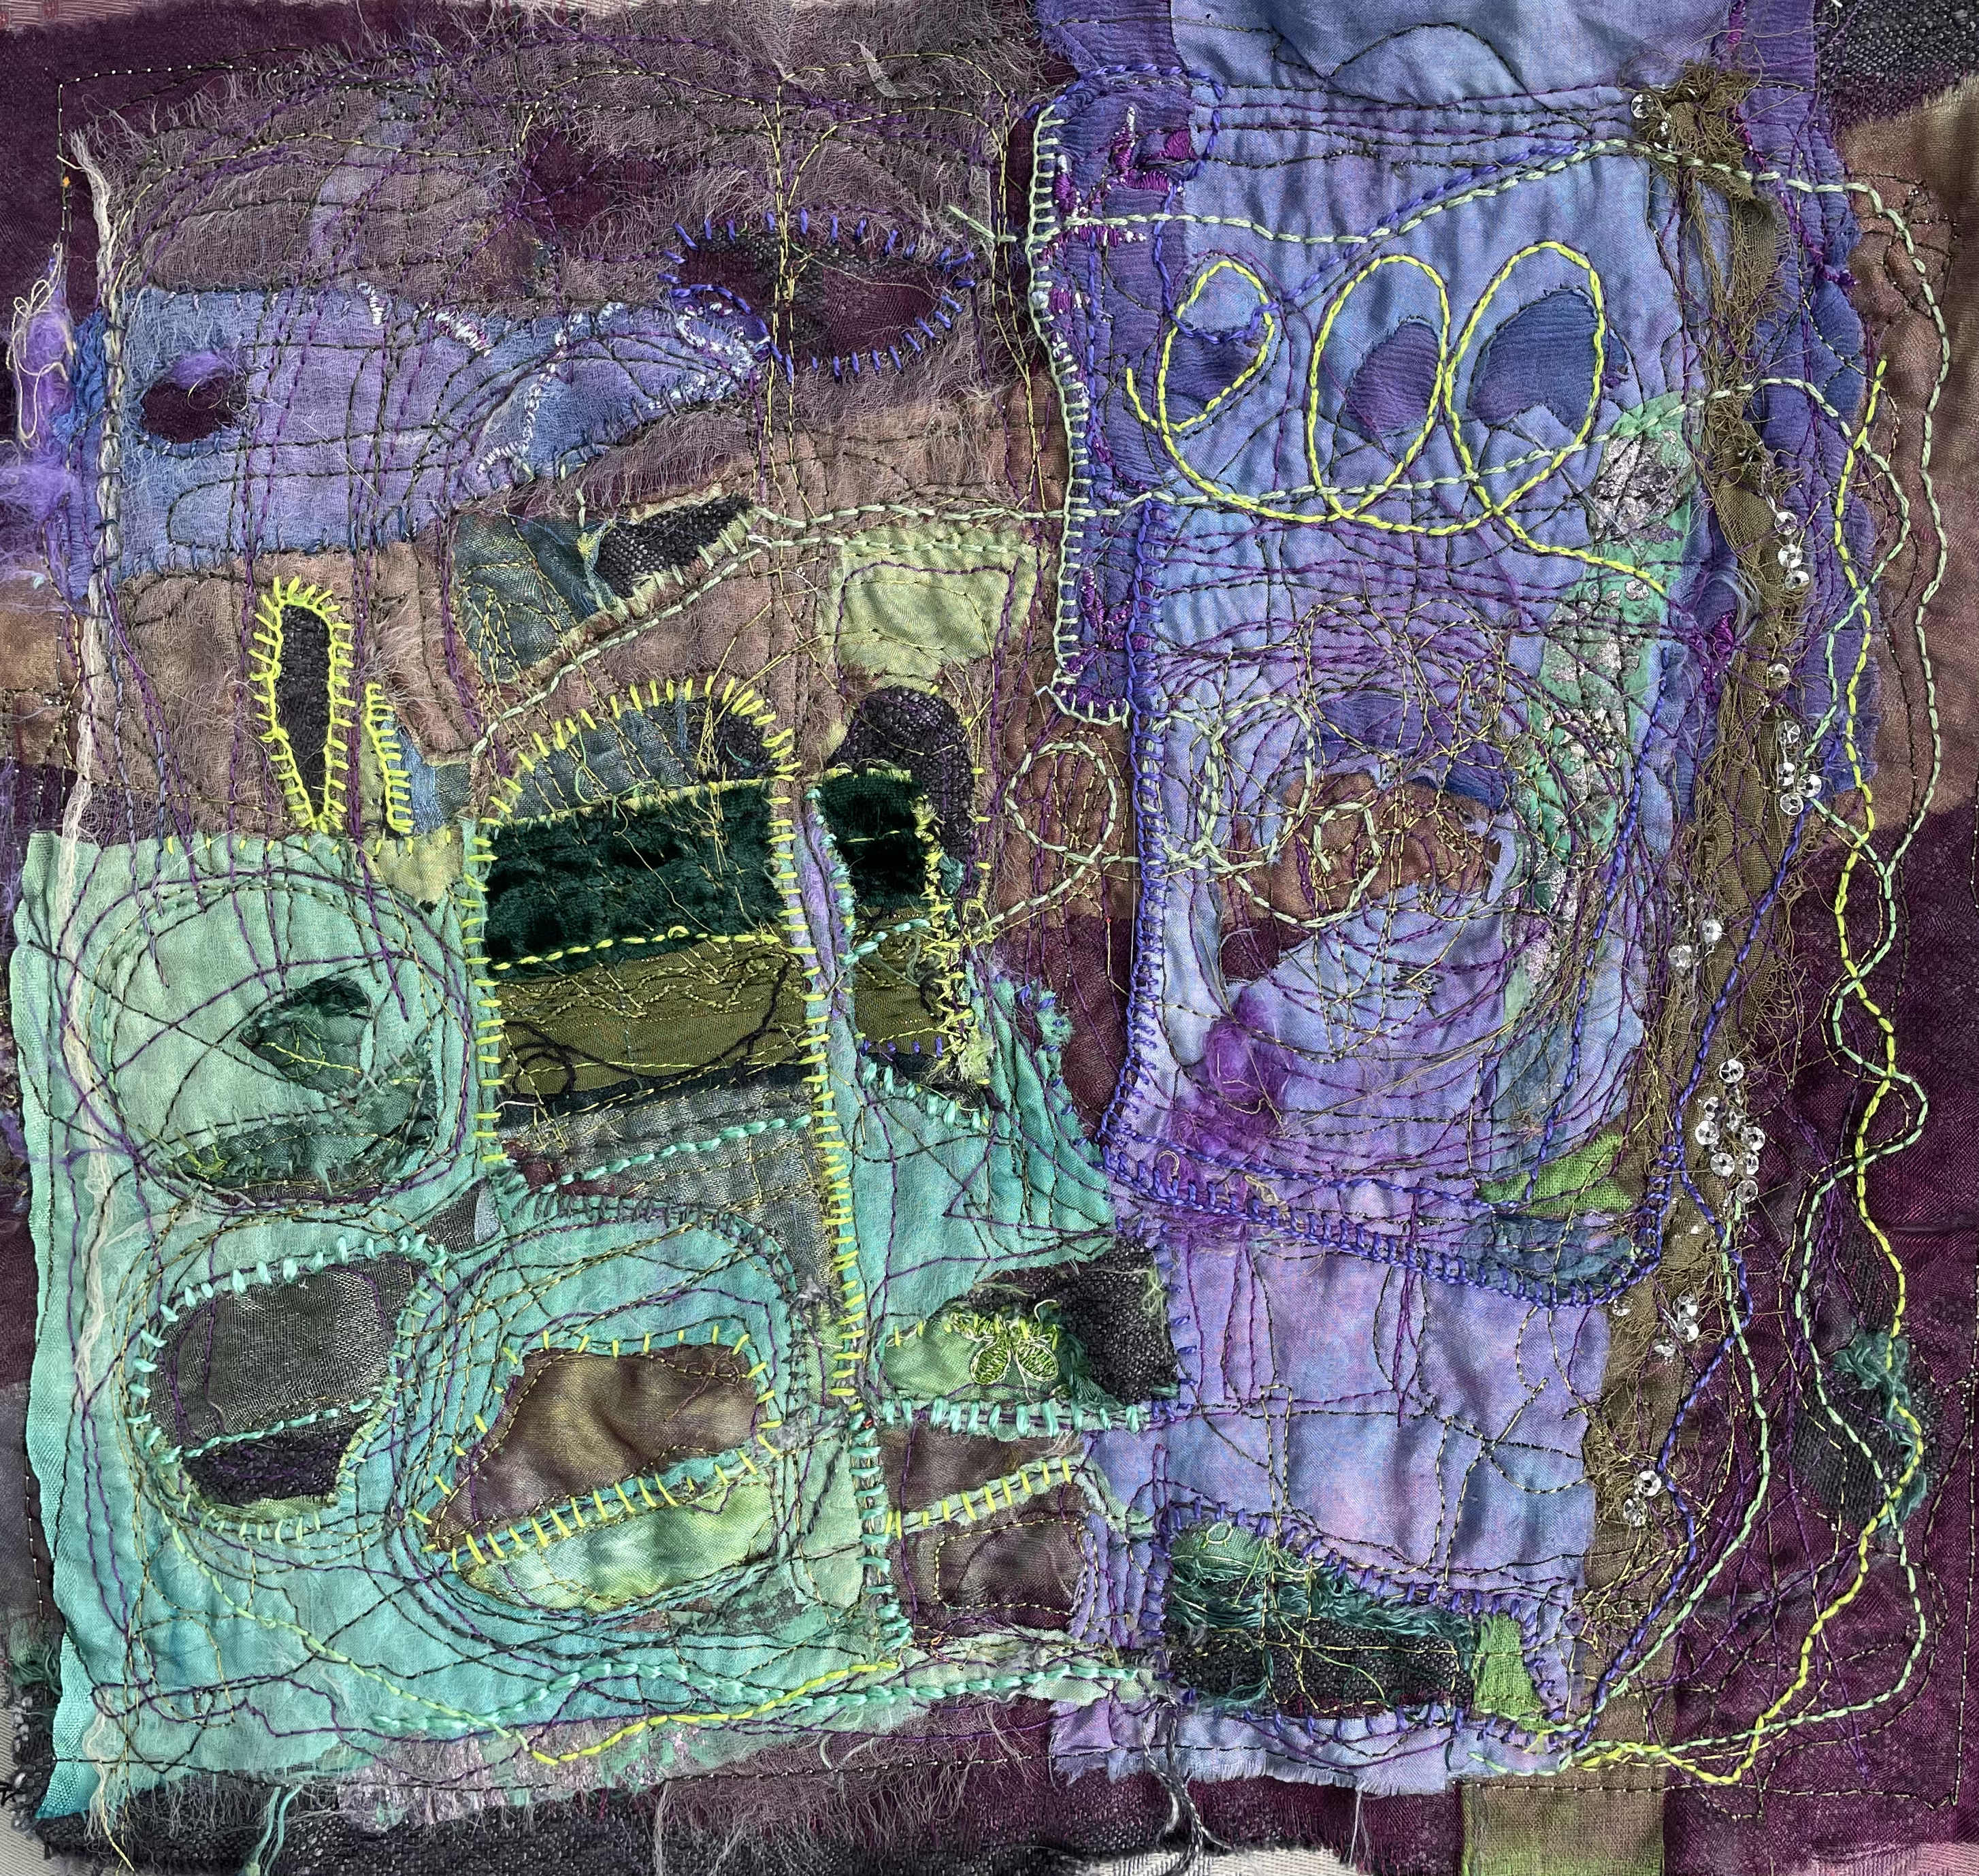
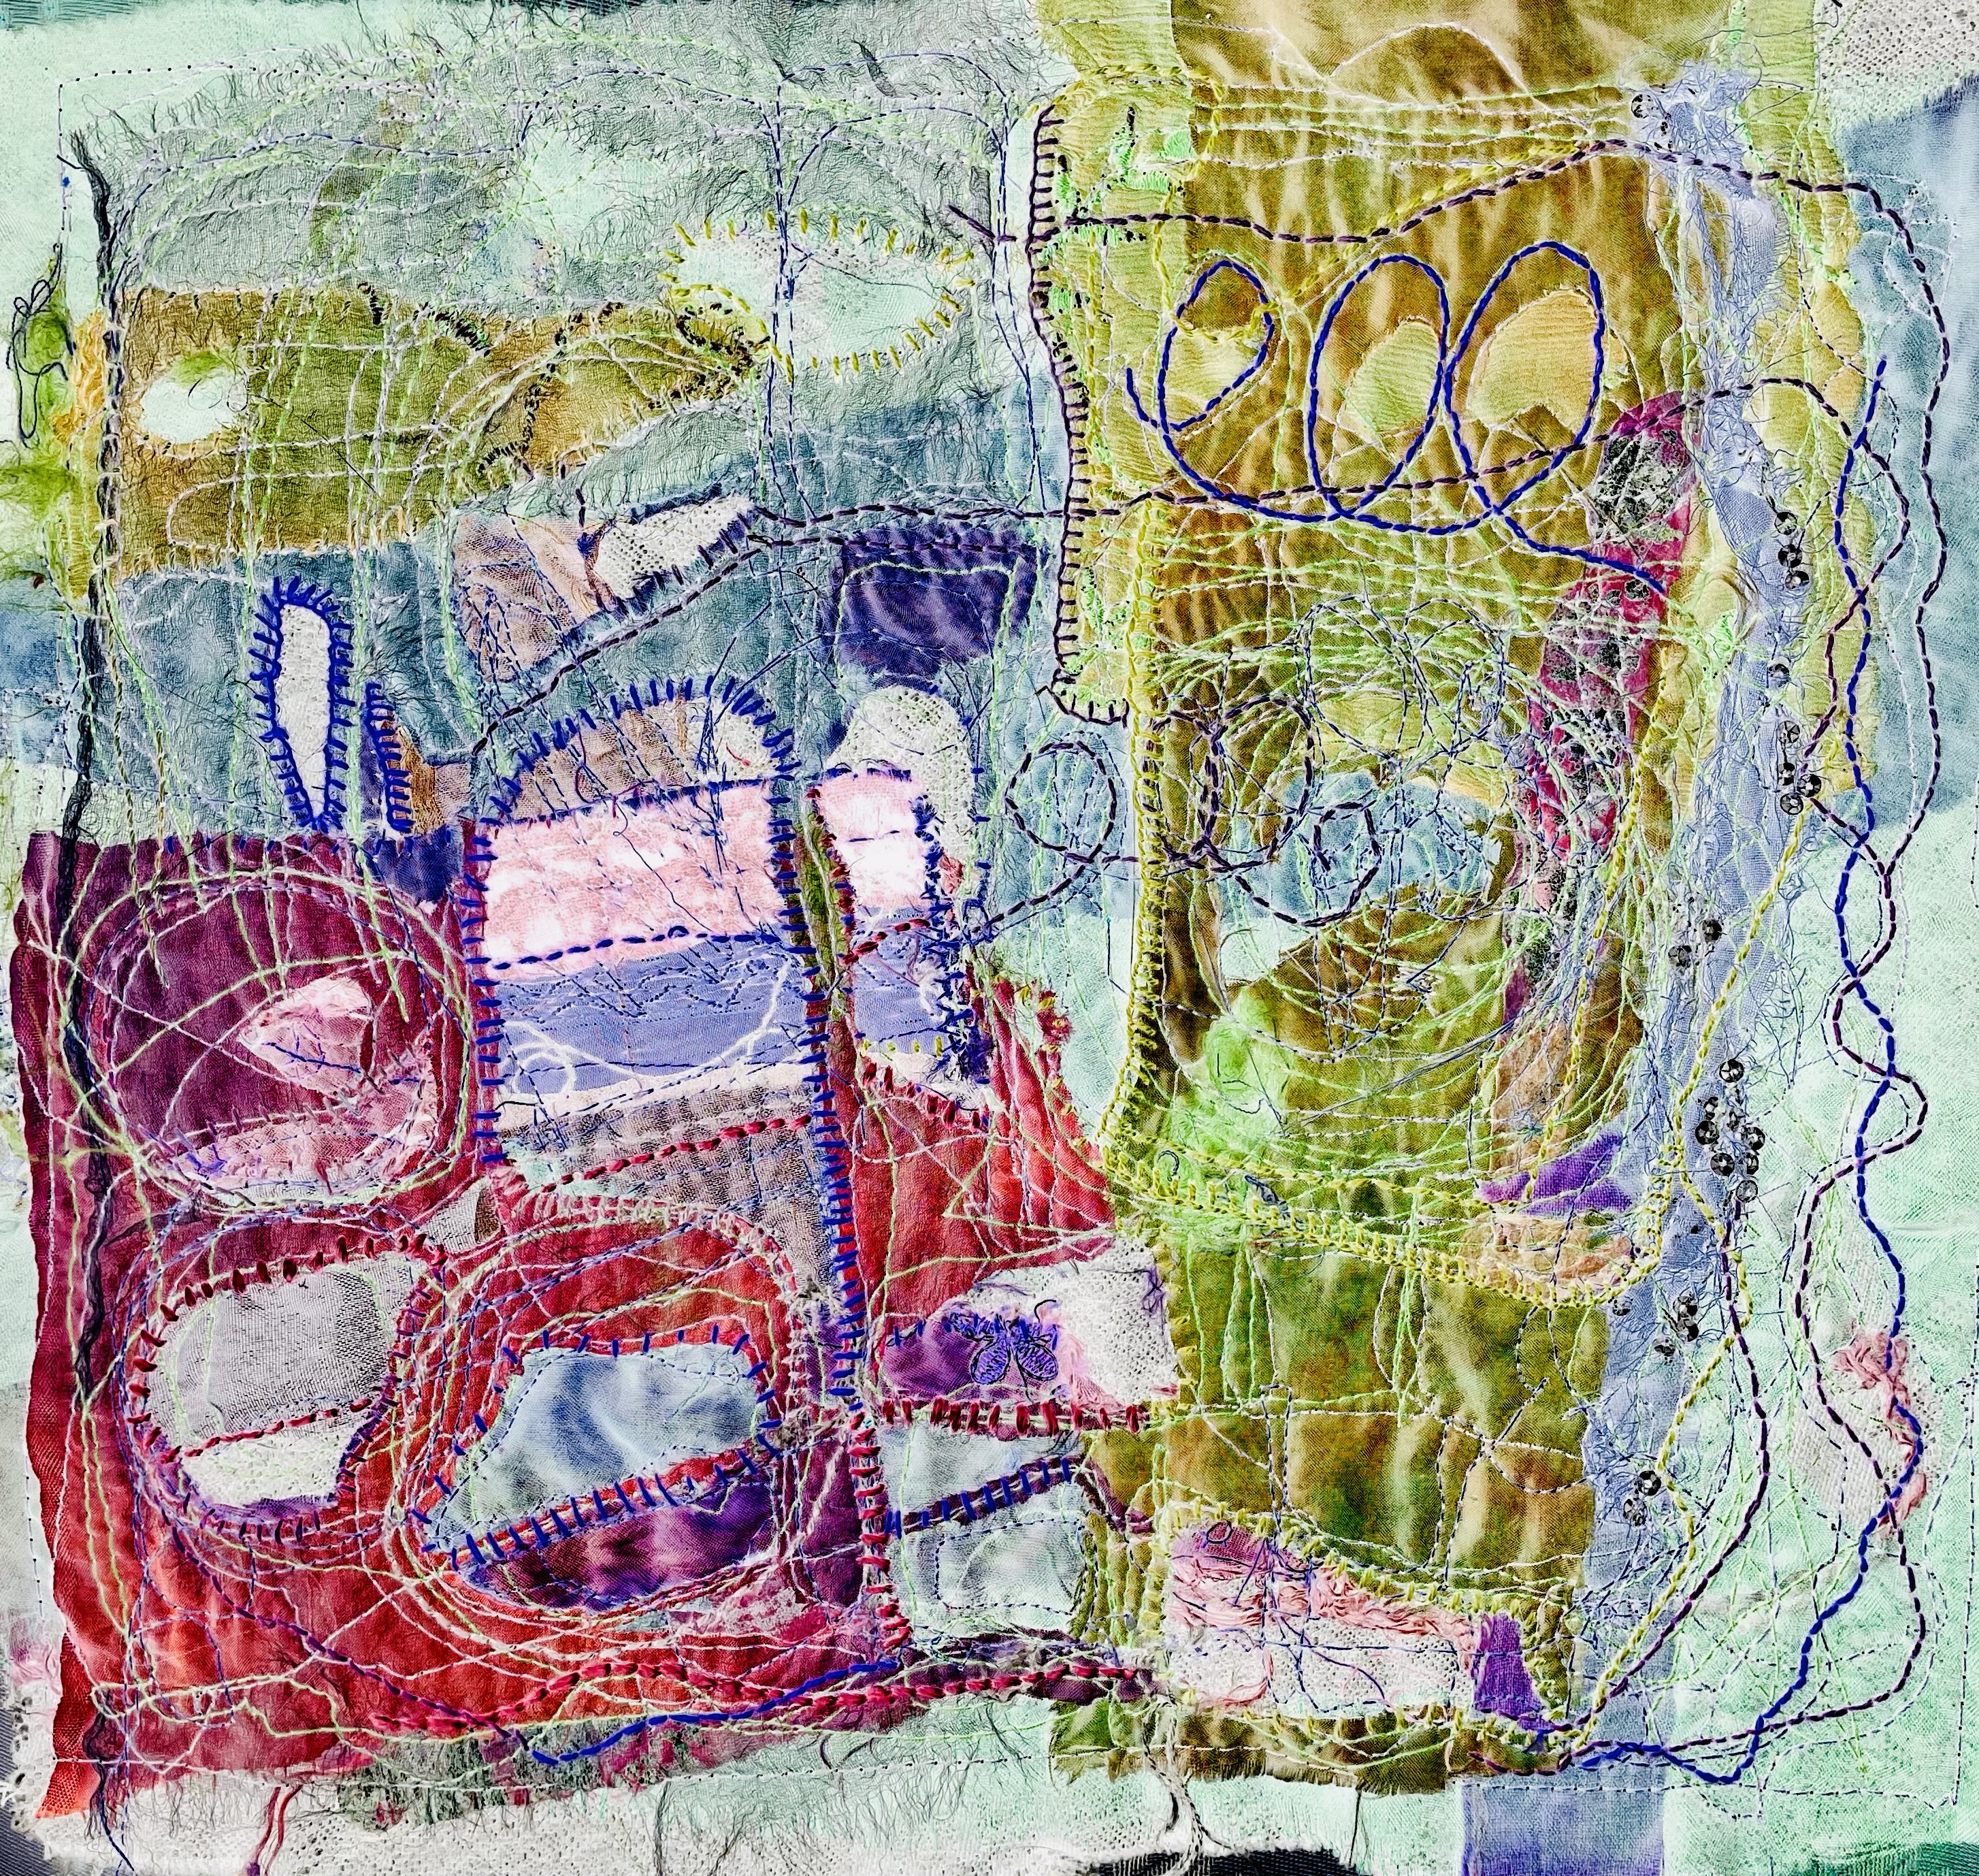
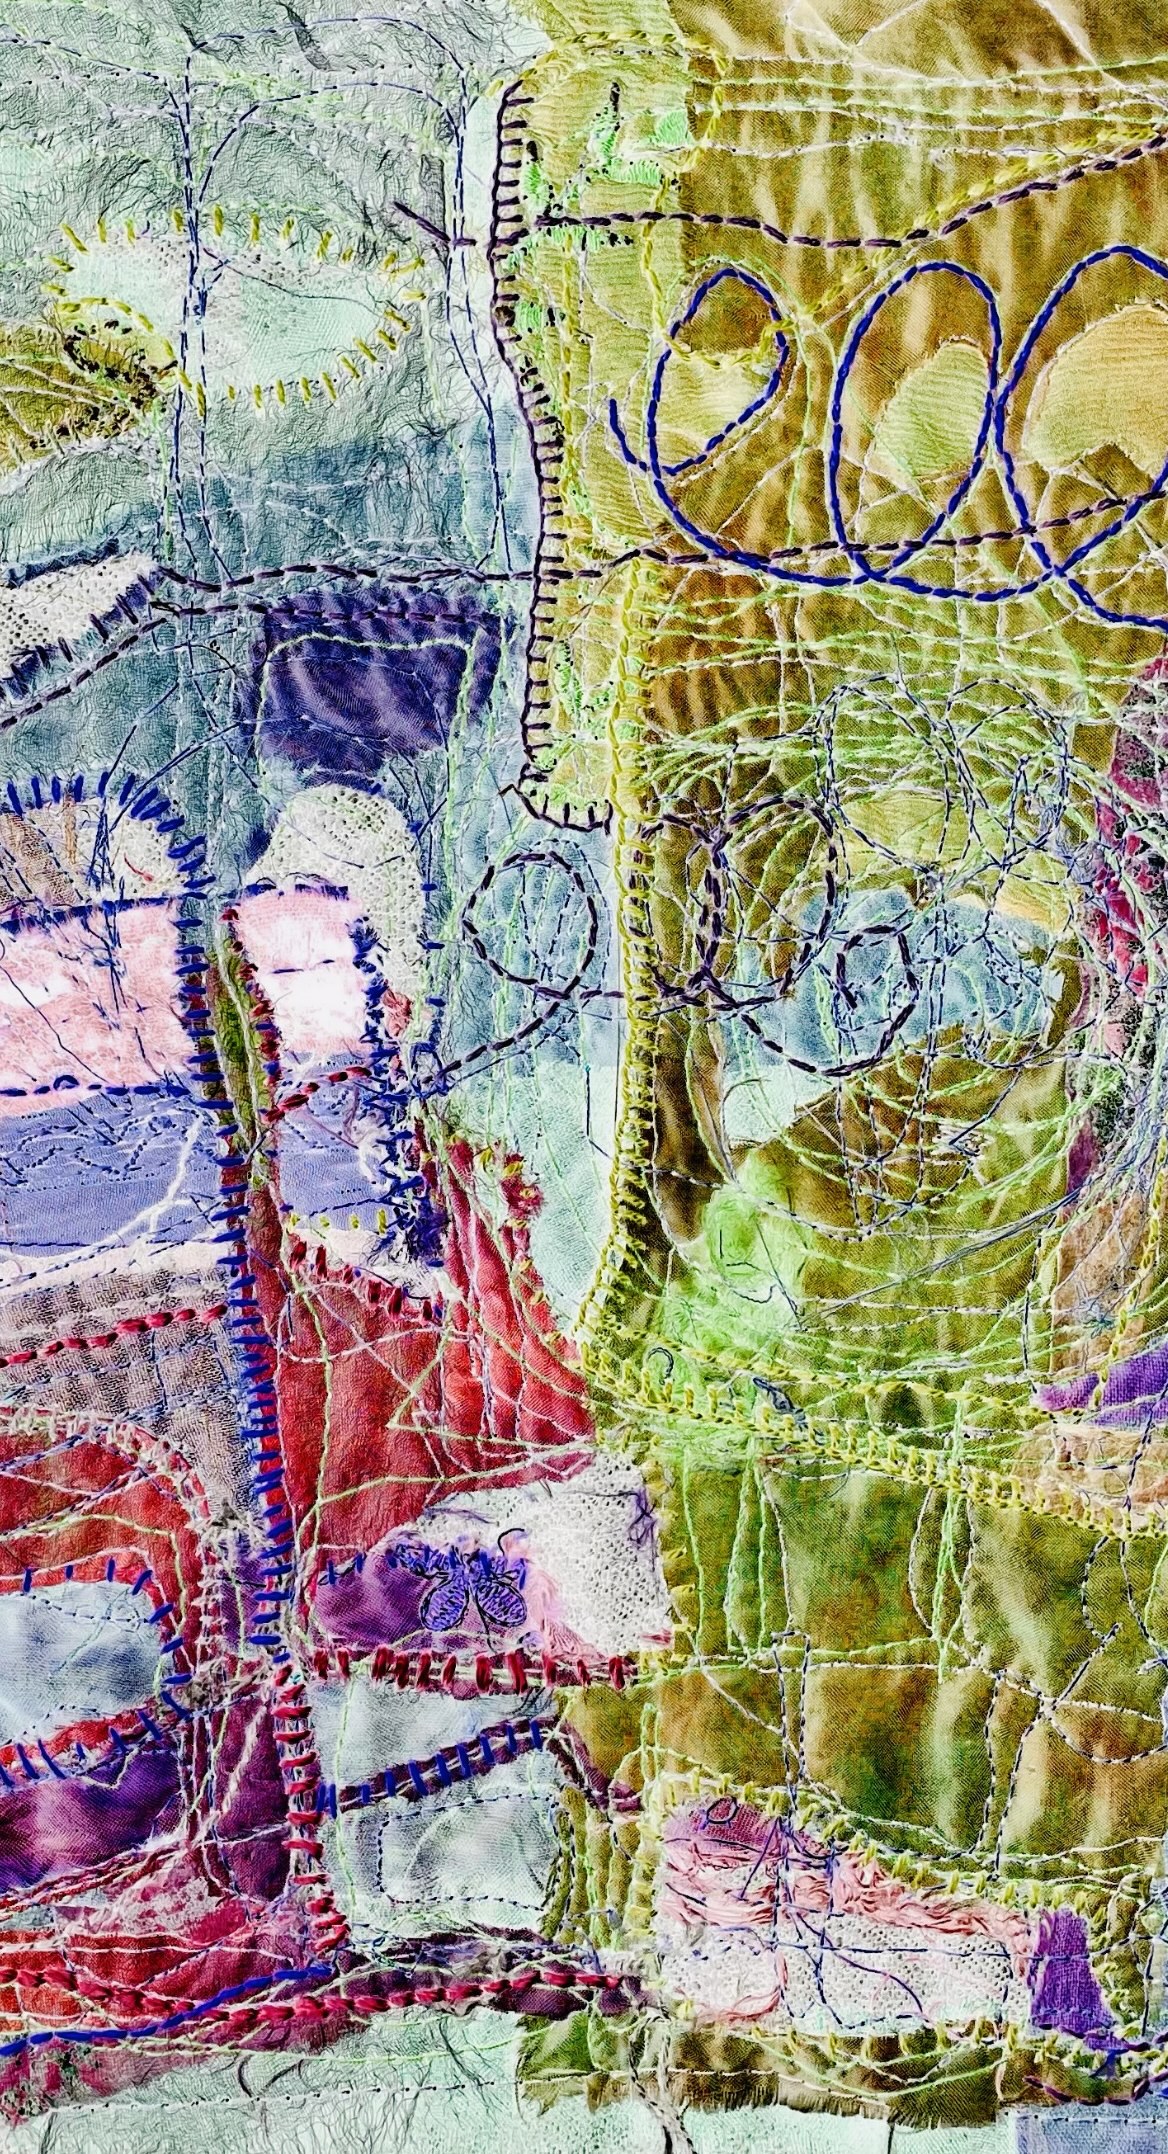
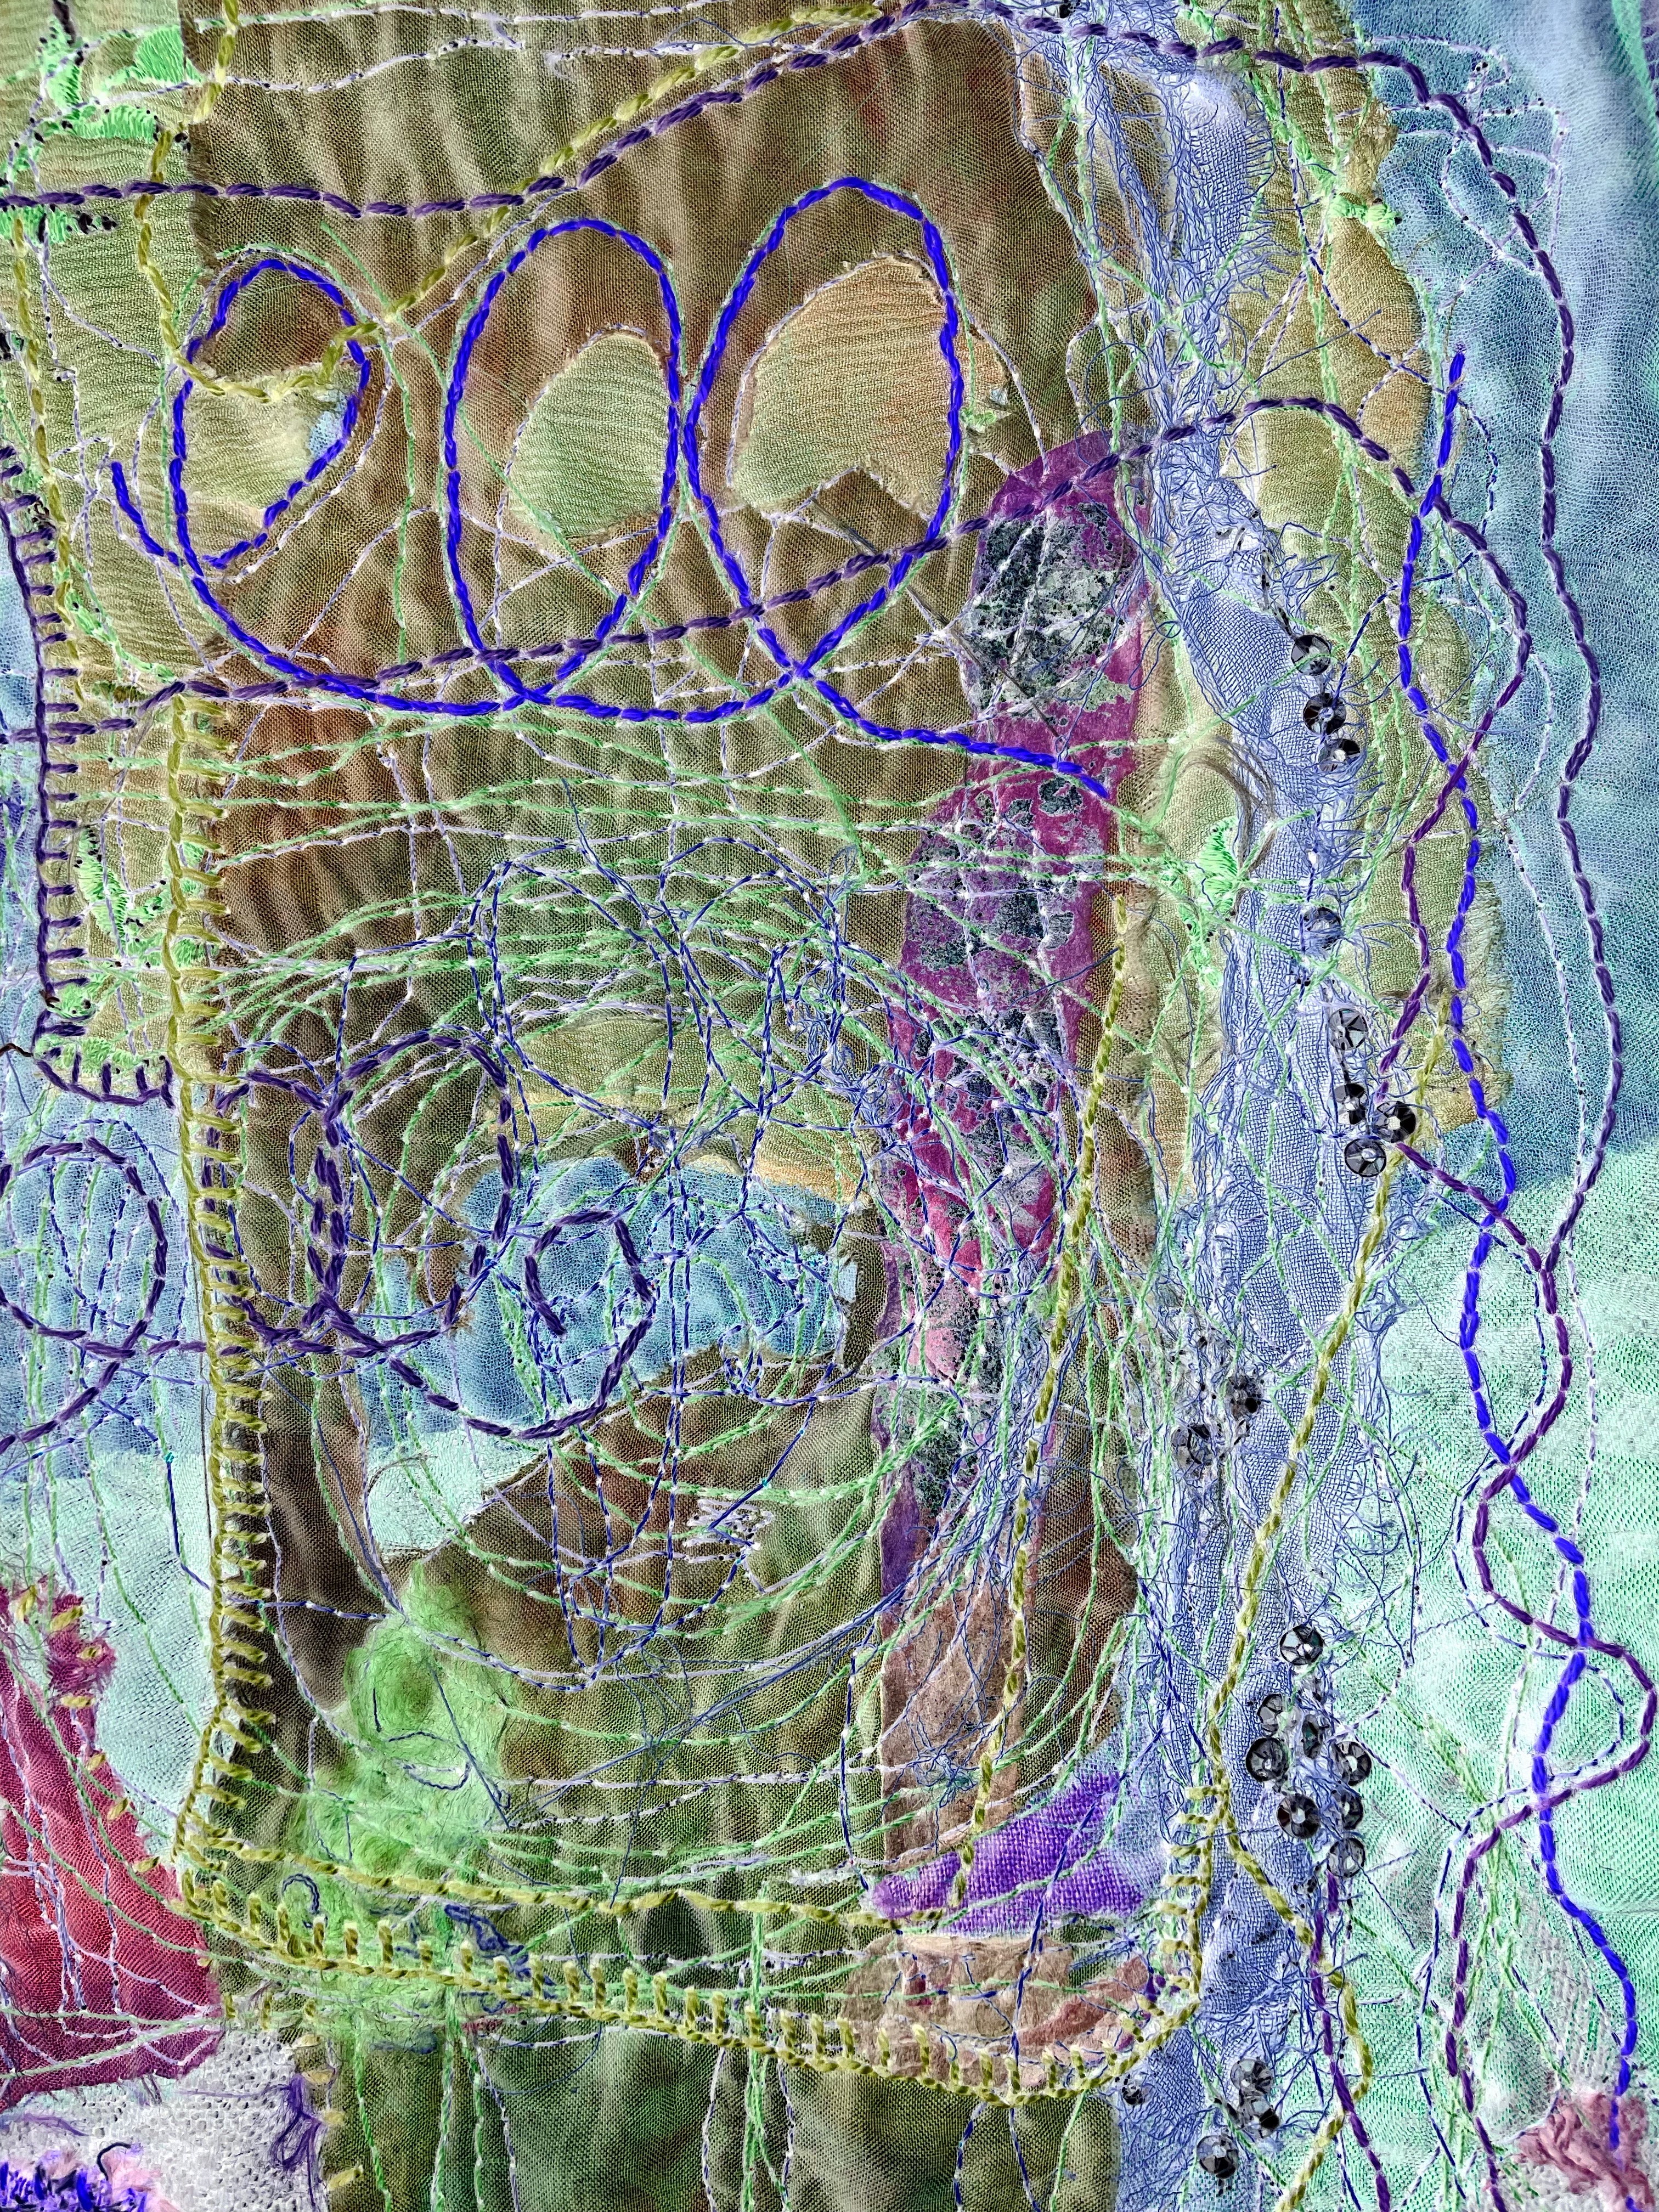
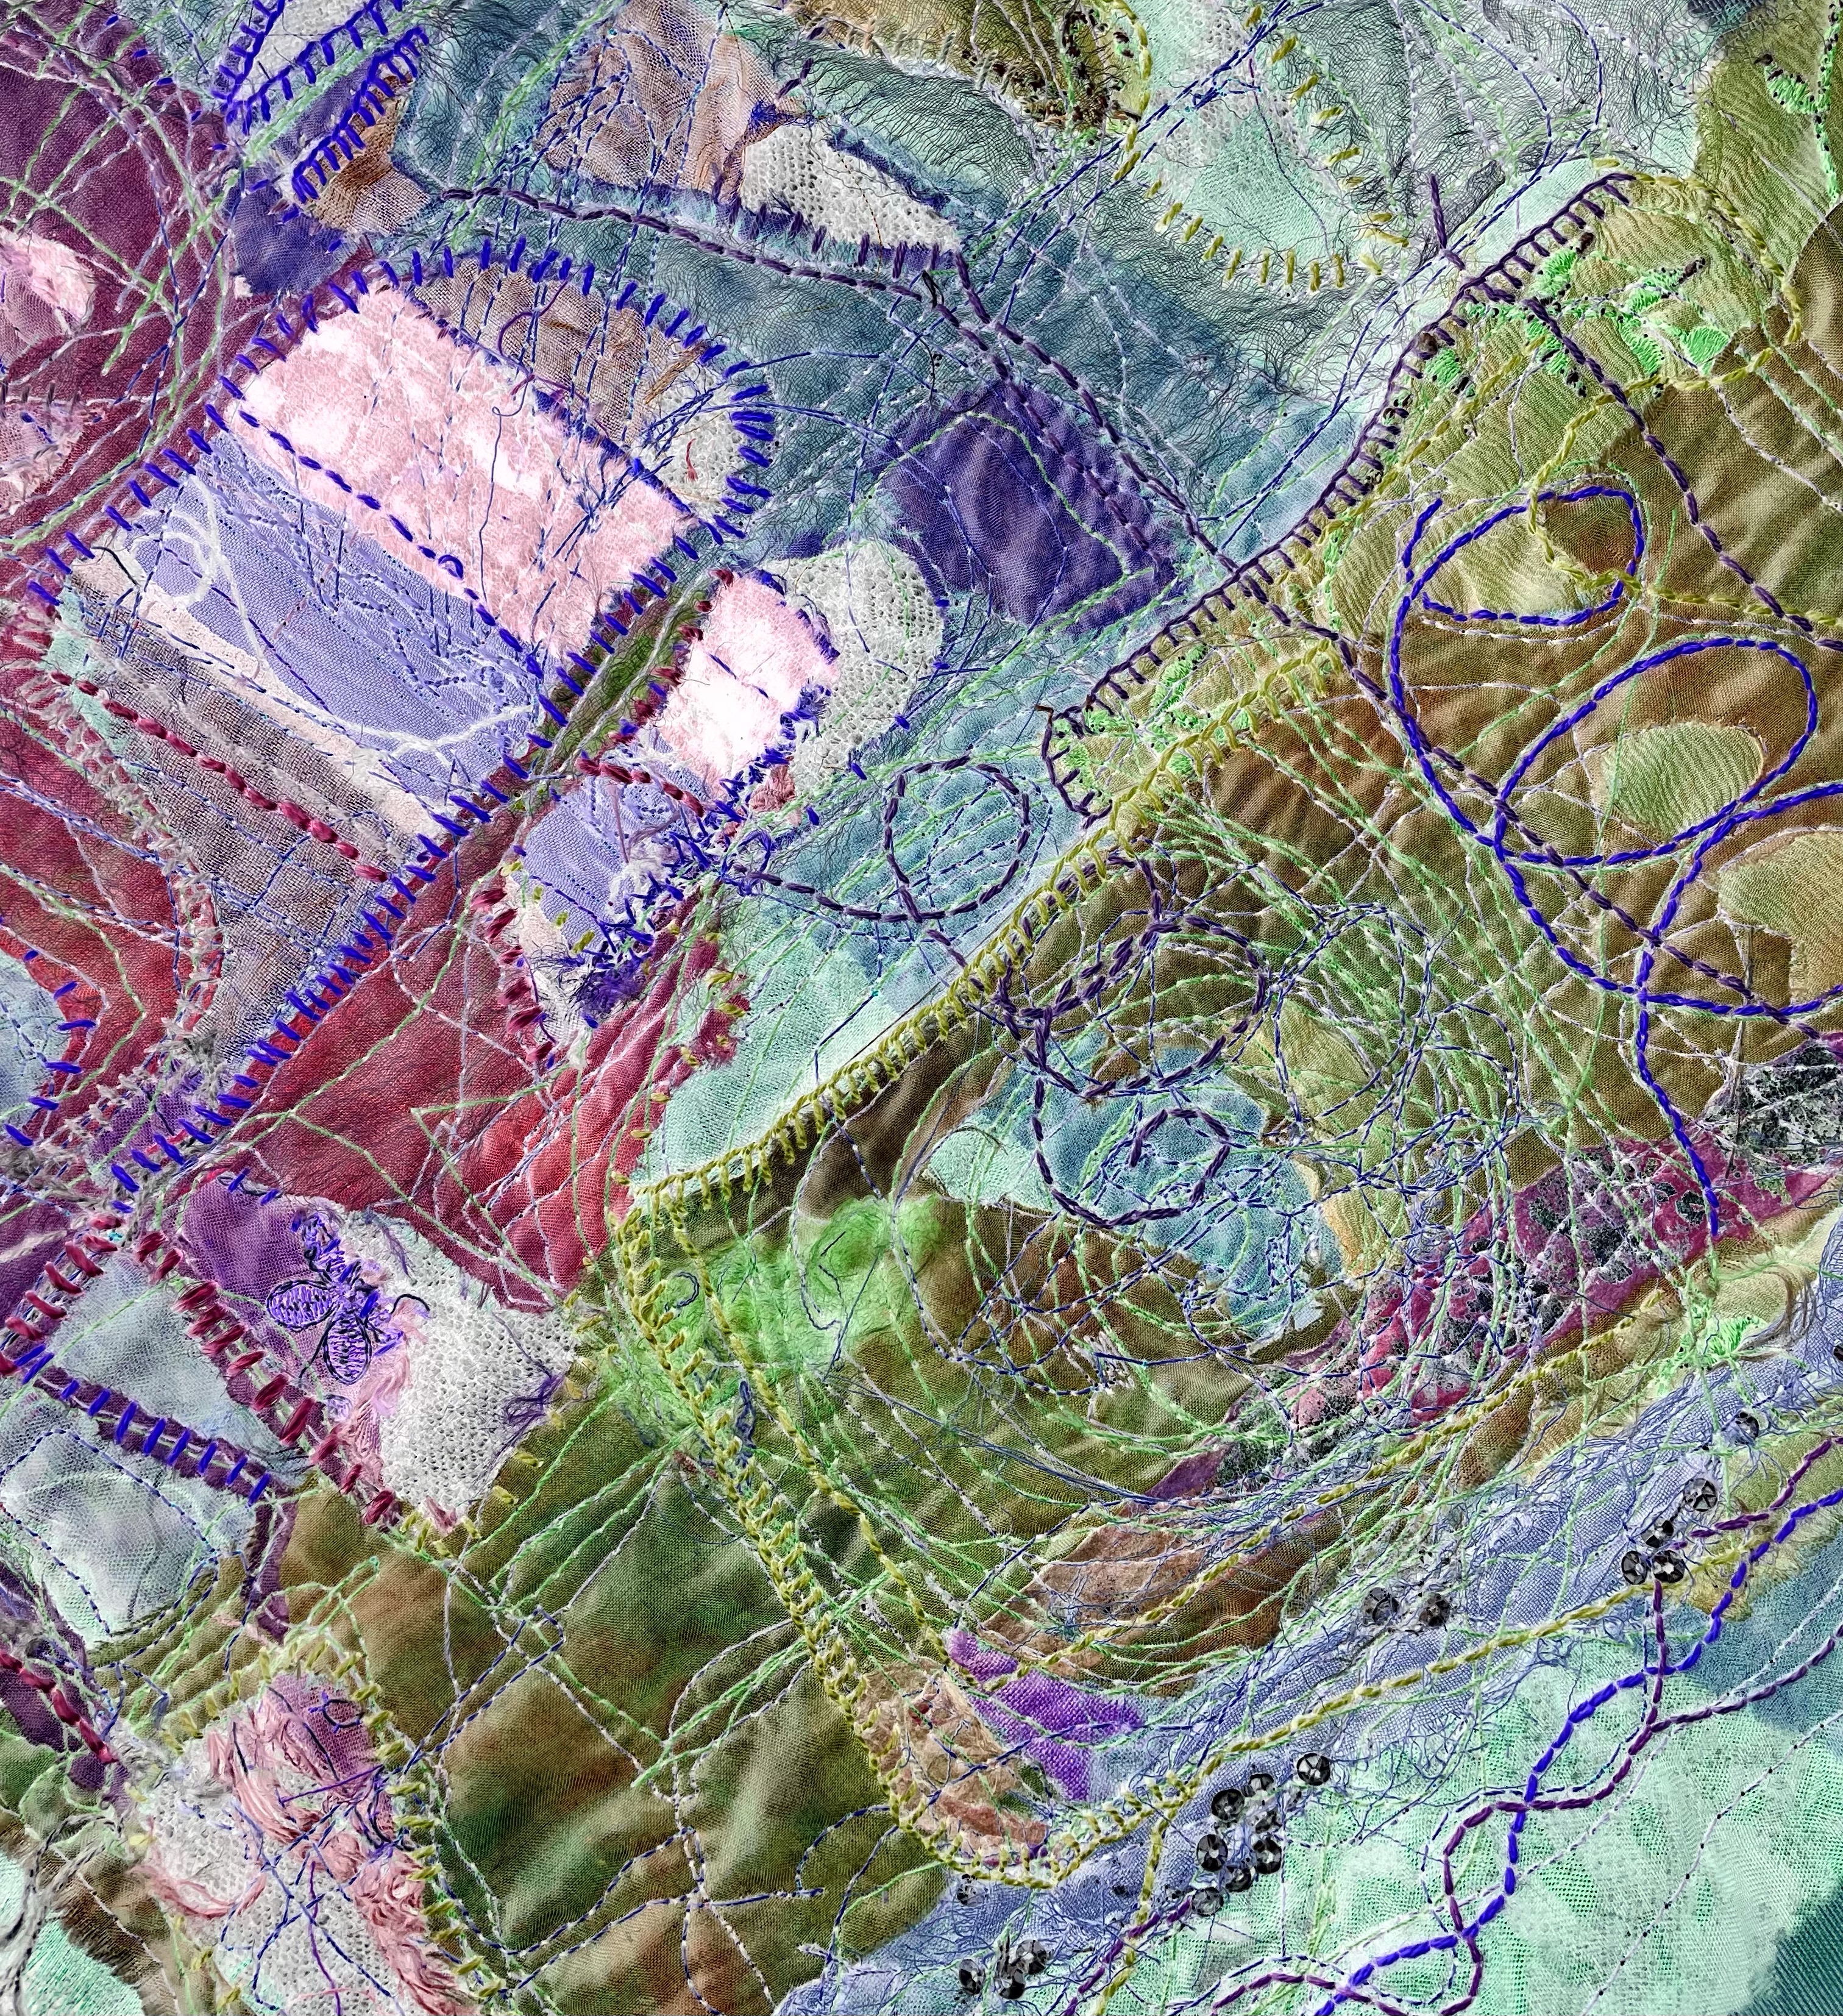
Fig. 9 Hand stitch

*********************************

Continuing to work with and develop my final piece has stretched my imagination and given me further ideas for colour and shape exploration. I would like to push this further and try to incorporate resin and stitch at some point in my studies, and as an initial experiment I took some photos of my stitched piece with the resin and plaster cubes. (Fig. 10)
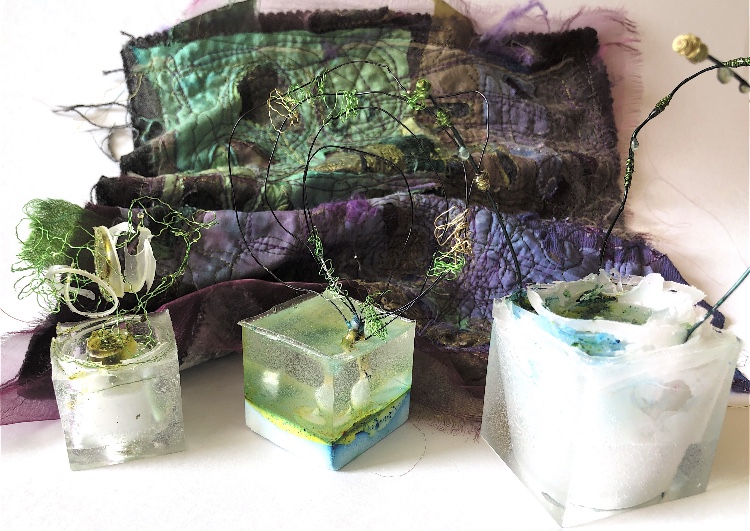
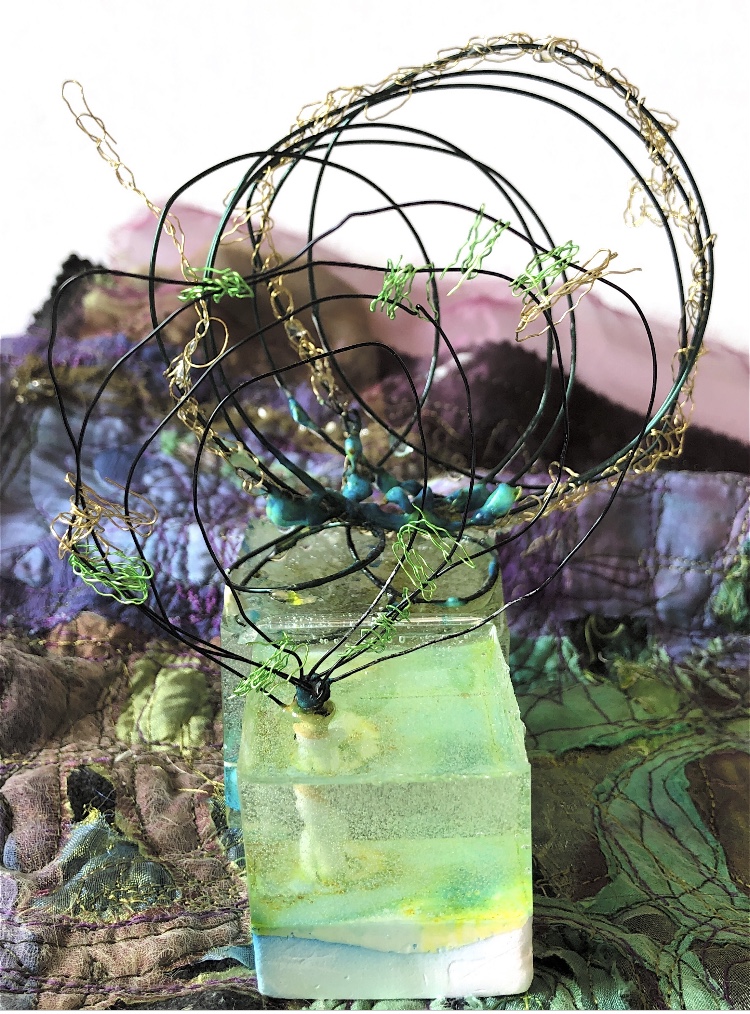
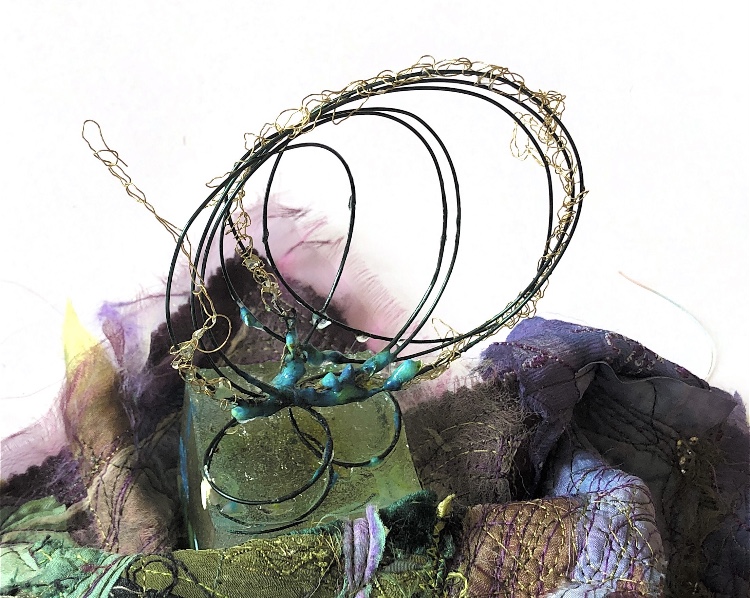
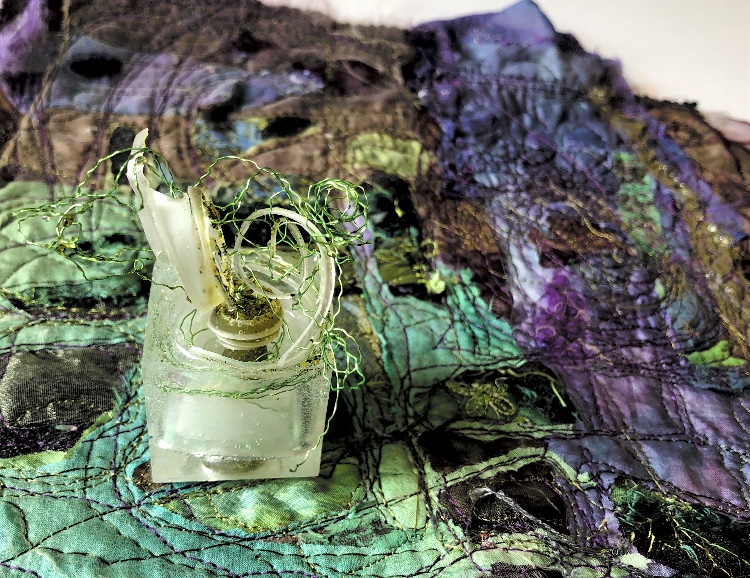
Fig. 10

*****************************

Lots more to experiment with here but for now I need to stop and move on. I am much more confident having pushed myself to try different colour combinations and pattern designs and I am excited to take these skills with me to my next Module.

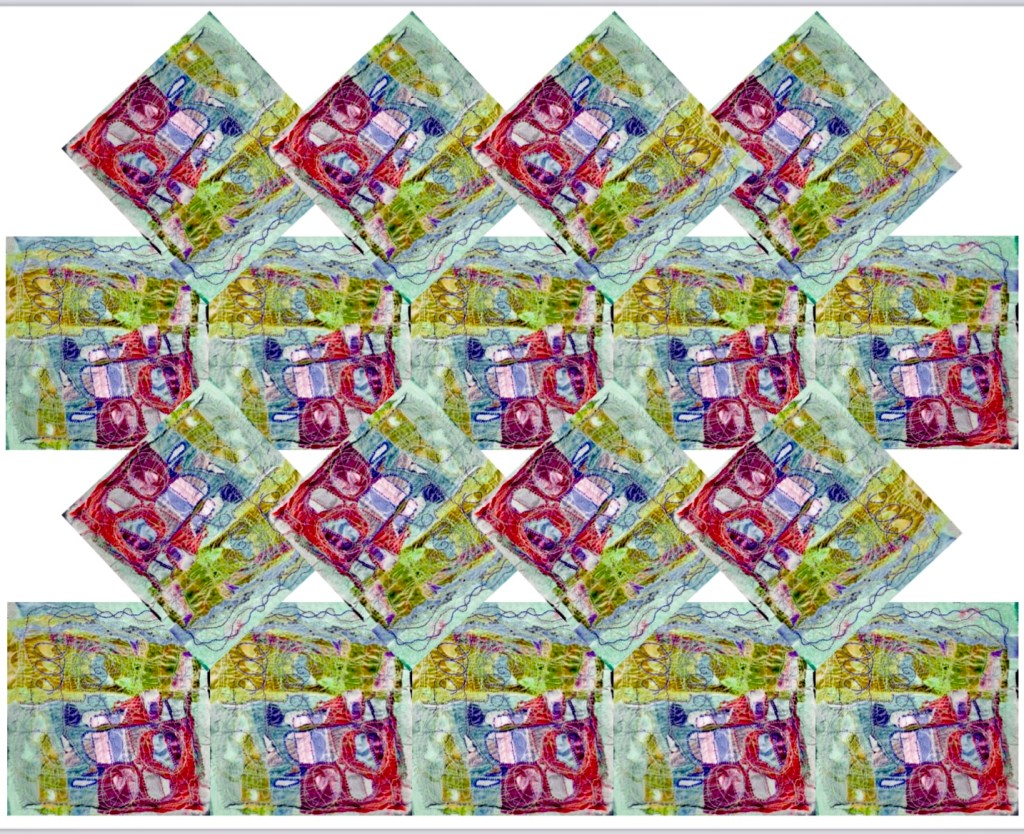
Fig. 11 Block pattern – maybe an idea for a print block?

Through this process of reflecting on feedback and evaluating my work with drawing, printing and making, together with research into other artists, I feel I have progressed my skills and gained a deeper understanding of how to progress through a cycle of inspiration, research, making, reflecting, drawing and remaking, pushing in new directions with an open mind towards taking risks.

Mixed media for textiles Part 5 A Final Piece Stage 7 Reflection of the course and assessment criteria

Reflection of the course

Looking back through my work for MMT5 I can’t believe how much I have done. I can also see how my understanding of reflection, and development of samples has improved during this course.

I started by looking at my sketchbook work and can see my progress in how I draw, the experimental use of materials and how I then use this process to develop my samples further. During Part 3, I gained understanding of texture and surface through my sampling and drawing, and also played more with scale, and mark-making. This led to further experimentation with shapes and textures as I progressed. I also used my prints to make collages, and in turn used a previous collage to inspire a collagraph print. Overprinting worked well and created interesting patterns with potential for further development. I gained more insight into how this continuous cycle of sampling, drawing, and making, works.

I have used my research of suggested artists, and those that I have discovered myself, in my work. In particular the work of Christo in my wrapping samples, and the art of Peter Wray in my printing experiments. I do try to research and then not look again at the artworks I admire for fear of copying them but they still influence me. While working with plaster molding I piled up some of my small samples to make assemblages reflecting my research of Edward Palazzo. I have discovered many amazing makers during my research and this has made me more playful and experimental in my approach to trying out new ideas and materials. I have tried not to be so caught up in the outcome and take more risks which I think is evident in my final piece. I think much more in 3D now rather than a flat image; I am interested in using assemblage, and using cast pieces alongside other media such as print.

I have tried to think outside the box, for example I made little fabric and knitted bags as molds for plaster of Paris, and pushed the qualities of resin in my final piece. My tutor has been instrumental in this and I have responded to her feedback about paring back and taking more risks. I have tried combining materials in a different way eg. plaster and resin, and used the theme of contrast in my work. I also can see how I have continued to develop the results as a continuous cycle.

One thing I am aware of is that I do a lot of sampling and these are some of my best pieces, so when it comes to a ‘Final Piece’ I have struggled sometimes. However in Part 5 I continued to push the experimentation with the materials and tried not to overthink it. I also tried to keep the pieces relatively simple and not worry too much about the links between them. I think I have achieved this and embraced the happy accidents such as the circle of resin coming free when I pulled out the silicone. I am happy with my final collection and I think it clearly demonstrates that I have responded to feedback, continued to learn and develop, and taken risks.

Reflection of learning criteria

Demonstration of technical and visual skills I have used so many materials during this course and have found new and exciting ways to combine them and to find new ways of using them. My observational skills continue to develop with the use of different drawing implements, inks, paints, wire, printing, and embroidery, to respond to my samples. I have excellent skills in composition and design which I demonstrated with my collage, printing and assemblage, and I have clearly documented the progression of my ideas.

Quality of outcome I have created a diverse and exciting collection of samples, using skills and knowledge gained from each exercise to take risks and experiment further. I have made a wide range of textural samples with different shapes and qualities, from crumpled paper to heated plastic and resin. I have joined these in imaginative ways using crochet, wire, and stitch with paper and natural materials. My judgement has developed as I have taken time to sort my work, giving consideration to the learning process as well as the outcome. I have taken on board tutor feedback and developed my skills in discernment and risk taking.

Demonstration of creativity I have used my imagination to continually experiment with combinations of materials and using them in a different way. I printed on plaster shapes and ceramic tiles as well as more usual materials, and experimented with using colour in resin. I particularly like combining themes of the natural and the man made worlds, and using contrasting textures and shapes to make samples. My work with collage and cast shapes, and my final piece using resin, plaster and wire explores these ideas further. I invented a technique to insert silicone into resin to create fine, fragile spiral layers which could be manipulated further when dry, and also dripped wet plaster into resin to create strange shapes.

Context I have continued to read articles in books, magazines and online about artists and makers, both relating to their practice and their ideas and influences. I have been to Farfield Mill in Cumbria recently and talked to studio makers – in particular a man who makes rugs from offcuts of Harris tweed, which got me thinking about how we can recycle and resource materials. I was also interested in the work of Valentine Sabin who works with textiles, collage and print – relating to a lot of my work in this course, I particularly like how she related the theme of her collages to the materials used to make them. I have also been investigating and joining in with Craftism workshops. I try to read about and view as much as possible about the world of art and craft and to bear in mind what I have seen and learnt in my own work.

I have found my own artists to research as well as those suggested and have related to this research while sampling. I am continuing to develop my reflection techniques and try to do this as I go along, which has helped consolidate my thoughts moving forward. My learning log is clearly labelled and exciting to look at with clear photos of my samples and sketchbook work.

Textiles 1 Mixed media for textiles Part 3 Molding and casting Project 1 Molding from a surface Developed samples

Sketchbook quick drawing – ideas for manipulating and embellishing samples using joining and wrapping

I found these lovely pictures and did a bit of brainstorming about colour, shape and texture.

These pictures were taken on a walk and show a broken fence tied together with coloured string, a dry stone wall with top edge stones, a stone stack, stacked stones with moss, barbed wire with sheeps wool caught on the barbs, a dry stone wall with moss, and more barbed wire.

I made the following group of samples by pouring a thick plaster mix onto textile work I had made previously (see sample below). As I said previously, when I first tried this technique I was too impatient and the casts broke, however this time I wanted them to do just that so I could rejoin the pieces.

In order to sew I needed to drill holes along some of the edges – some of the pieces broke further but as I was going for an organic theme this didn’t really matter.

One of the textile pieces used to cast. It was quite hard to remove the plaster but once I had, the textile pieces were ok.

Group of 5 samples

Fig 1. Photos of pieces crocheted together with buttons

Fig.2 Photos of pieces joined with wire and wool fibres caught on wire barbs

Fig.3 Photos of pieces blanket stitched and rejoined with felt pebbles in between

Fig.4 Photos of pieces wrapped with coloured Tyvek and plastic, heated to appear weather worn

Fig.5 Photos of pieces joined with green leather thong, with stacked felt pebbles and pieces of plaster.

I have found plaster great to work with as it picks up tiny detail and in its natural colour it resembles stone. Mixing this with other materials is exciting as this adds colour, shapes, different texture, pattern and height. I have tried not to do too much embellishment on each piece to allow the cast plaster to be the main constituent; this means the 5 pieces work well as a group. Taking inspiration from nature and man made countryside images allowed me to focus my embellishment in terms of colour and execution.

Looking back to my previous samples I can see that assemblage is a real inspiration for me to carry forward.

Bookbinding

Due to lockdown there are no physical courses running so I thought I would run my own for myself!! I wanted to make some small books so with the aid of excellent ‘how to’ books by Sue M. Doggett and Alisa Golden and various Internet sites, I made a range of notebooks using different methods. I used fabric that I had printed previously to cover the boards to make covers, and cartridge paper together with some wrapping paper to make pages. Waxed thread was used for the stitching, – I stitched signatures together and then stitched them to each other and in some cases to the covers using long stitch, coptic binding stitch and stitching over tape.

I had a lovely weekend and learnt some new techniques. I hope to use these techniques to bind samples, sketchbook pages and to make more books as pieces of art in their own right.

Textiles 1 Part 5 Building a collection. Initial thoughts

‘The studio is a laboratory, not a factory. An exhibition is the result of your experiments, but the process is never-ending. So an exhibition is not a conclusion.’ (Chris Ofili)

I definitely think that my way of working is experimental and that my working space is a laboratory as opposed to a factory. I find it very difficult to make more than one of anything, so each sample has to develop or be incorporated into the next sample or finished piece.

My workroom (laboratory) is messy and has lots of things going on at once that may or may not link. Of course the downside of this approach is that I have many unfinished projects and samples. Some of these may be put away and reflected on at a future date, inspiring thoughts and ideas at that point.

I agree that an exhibition captures my thoughts up to that point in time but is never a conclusion. It may be that I will conclude a particular theme, but pieces will always be there to be revisited, inspire and also sometimes to be cut up and included in some other experiment.

Looking back at the work I have produced so far I can see that it is all work in progress, and that although some will be developed or used to inspire further work, nothing is final. I am valuing my experimental work more and more and at the end of the course I hope to use all I have learned to inform my ideas and practice for future projects.

Return from isolation

I have now returned from 5 weeks at sea! I was supposed to join a cruise ship for two weeks to teach craft classes to the guests but due to Covid-19 I was not able to leave the ship. There was no virus on the ship but no ports would take us so I stayed on the ship for 5 weeks, continuing to teach craft with the materials I had. See pictures below.

Now I’m back and following a move of my craft room from upstairs to downstairs (where there is more light) I’m ready to get started again.

Textiles 1 Part 4 Yarn and linear exploration Research point 1

Yarn research

Researching different companies involved in design of yarns and marketing them showed that the biggest themes at present as in every part of life are sustainability, traceability and innovation.

Some companies such as ‘Woolmark’ and ‘The Campaign for Wool’ focus on education, innovation and a collaboration between wool ‘growers’, designers, retailers, manufacturers, artisans and interior designers.

‘Woolmark’ has a clear website with fashion photos, free courses ,and education which all promote the use of wool. The site concentrates on the properties, production, and finished items rather than specific yarns used. However it does present information about wind and water resistant woollen fabric with yarn produced by the latest spinning techniques. There is traceability from the farms with the sheep through the supply chain to the designers working in conjunction with the company. There is also an innovative process for creating ‘wool denim’ which would make use of the properties of wool to create warm, lightweight denim fabric along with cotton.

‘The Campaign for Wool also has a clear inviting website highlighting HRH The Prince of Wales as the patron. An interesting statement is that woollen garments typically have a life of 2-10 years whereas “fast’ fashion garments are discarded after 2-3 years. This company has an annual wool week in the UK with courses and exhibitions championing the use of woollen yarn.

‘Cotton Inc’ is a not for profit organisation which provides resources and research to help companies develop and market cotton. They can help with quality, innovation, sustainability, and creating a profitable product from the cotton fibre to the finished product.

The ‘Cotton Inc’ site had links to yarn producers and spinners and I chose one to explore further – Cap yarns. This company’s site showed swatches of knitted yarns from their range, with blended fibres creating slubs, streaks and a vintage feel. They have developed a denim look yarn based on the use of a indigo warp and natural weft in woven denim; the resulting yarn has a blue base with a white slub, mimicking the denim look. The look can also be altered for the customer by different dyeing techniques.

‘Invista’ is a company specialising in nylon, polyester and polyurethane products. It focuses on the strength, flexibility and innovation produced by these materials, and is currently developing new products such as a carpet that can capture dust and allergens until they are vacuumed. This company makes a diverse range of products such as the nylon polymers used to make cell phones, and those used to make strong backpacks.

‘Lurex’ has a website showcasing the beautiful yarns it produces with pictures of garments, fabrics and each of its yarns. It has yarns that are transparent, holographic, rainbow effect, translucent and iridescent, with an emphasis on sparkle, glamour and an antique look to some of them. There are glow in the dark yarns, and enamel effect yarns which give a painterly look. The yarns are used for weaving and knitting for fancy effects. I was interested to see information about how some of the effects are achieved for example the creation of gimp which has a central core of viscose with lurex twisted around it, and with a black core gives an antique look to the result. Lurex seem to have a large presence for these types of yarns and their website presents the different products and colours with beautiful photography and clear photos with plenty of information.

‘Pittimmagine’ is a company which presents big shows including catwalk shows, to champion word-scale excellence in yarns. They present ideas that bring fashion, art, sport and design together. They sponsor a student.

‘Heimtextil’ is another company presenting trade fairs, focussing on cultural trends and colours from around the world. It promotes sustainability.

This is an ongoing piece of research and will be added to as I progress.

Printing

Having finished assignment 3, I thought I would have a go at some breakdown printing – not good for me as you have to be patient to let the screen dry!! It was just about dry when I used it to release the colour and patterns and it worked well I think.

Then I had a go with my Gelli plate – using the same colours.

Here is my screen drying off ready for some more breakdown printing. That will be tomorrow when it is dry…….

The four prints below came from this screen – the orange got a bit lost when I pulled through with green. I think next time it would be best to use a darker/stronger colour for the dried on layer.

Things I like

Kimonos

Haiku

Insects

Birds

Sashiko

Wabi Sabi

Botanical drawings

Abstract paintings

Japanese art

William Morris

Green

Silk

Crochet – especially fine work

Hand stitching

Kantha

Molas

Winter trees

Pebbles

Rock pools

Seaweed

Mismatching patterns

Decoration

My daughters ( not to stitch though)!!