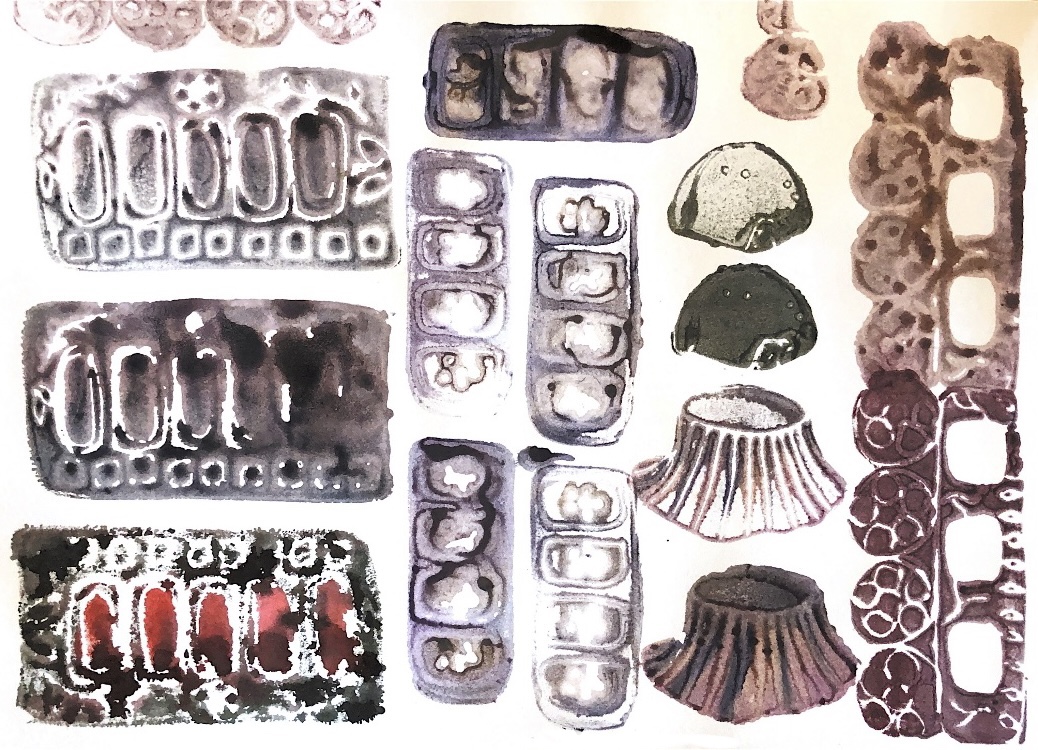
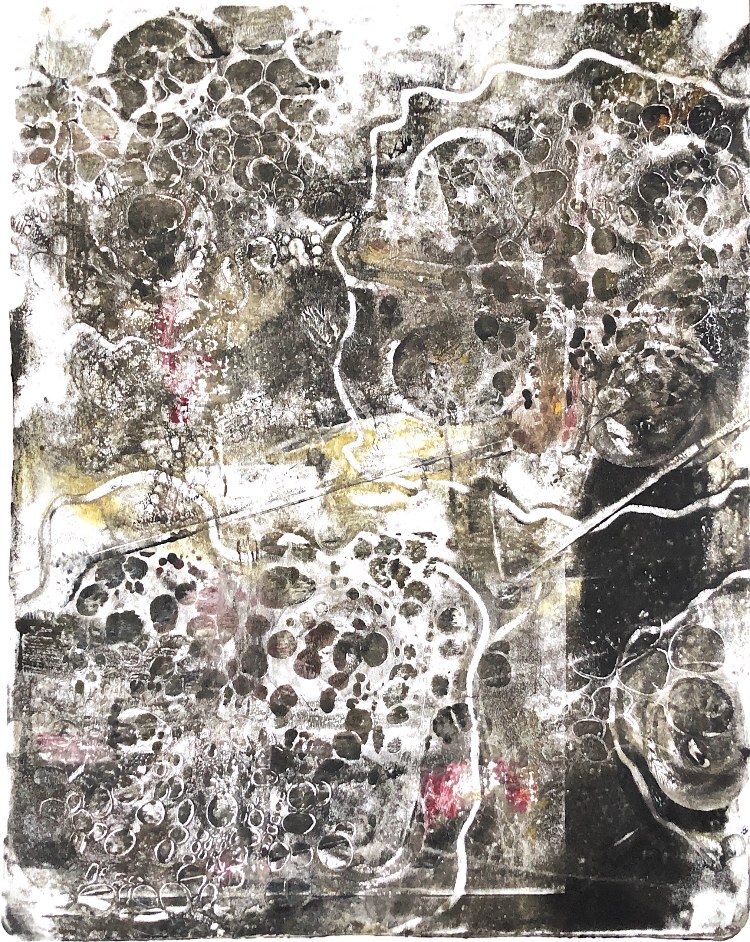
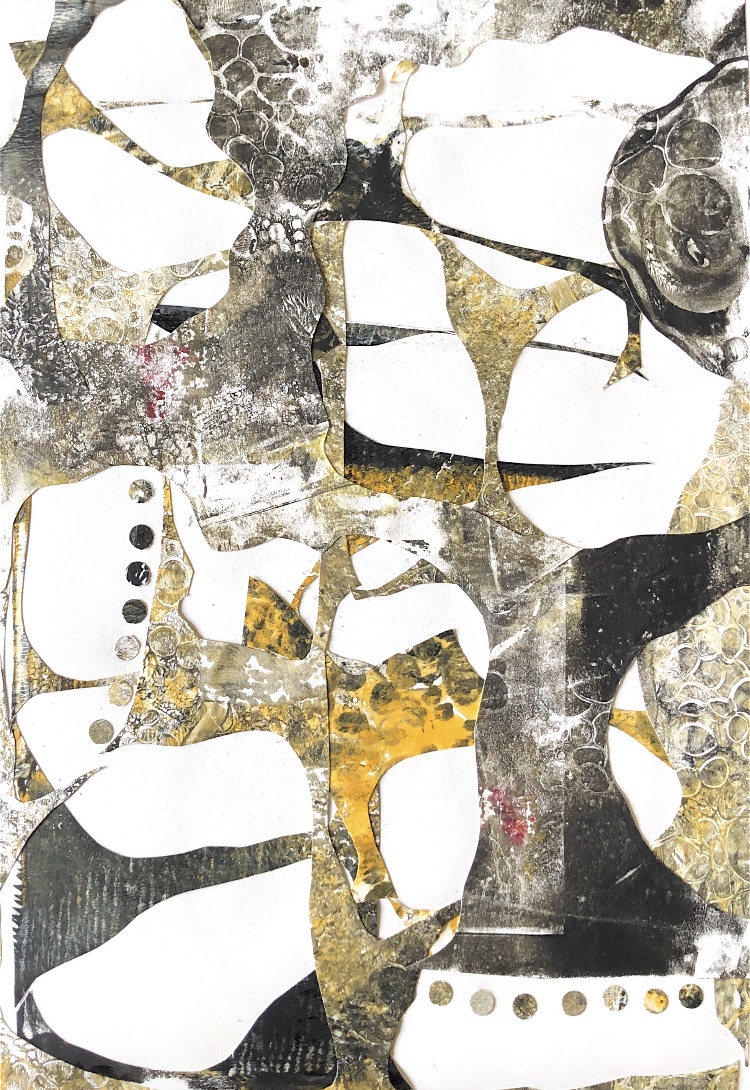
Category Archives: MMT PART 3 MOLDING AND CASTING

Mixed media for textiles Part 3 Molding and casting Reflection

Demonstration of technical and visual skills

Throughout this module I have used a wide range of materials for each exercise and clearly documented in my learning log my ideas, and inspirational sources. I have pushed myself to expand my techniques for drawing, improving my observational skills and thinking carefully about composition. I became interested in assemblage while researching the work of Louise Nevelson and used this as inspiration while using plaster of Paris. I carried this technique through to my collage work. I built on my strengths of working with colour, shape and texture together with surface manipulation and made some well thought out samples. I like my learning log to be visually stimulating and exciting and to demonstrate my design skills.

Quality of outcome

I made a lot of successful samples, exploring different materials, which I photographed clearly and presented effectively in my learning log with clear explanations. During the sorting exercise I used judgement to decide which samples had worked well to provide inspiration, and also those from which I had learnt even if the outcome wasn’t to my liking. I am pleased with the work I selected at this stage although I do sometimes find it hard to narrow it down to a limited number of samples. I have clearly documented the progression from initial to developed samples.

Demonstration of creativity

I have taken more risks both with my sampling and also with my drawing. I have mixed different materials and techniques in an experimental way, linking with previous exercises such as joining and wrapping. I have presented sources of inspiration and tried lots of ways to interpret these. I am really pleased with the way that my mark making skills have improved by using different materials and also varying the scale. The observations are freer and more exciting, providing lots more inspiration to move away from the original inspirational source and find my own creative voice. My colour choices are carefully thought out and documented.

Context

I have researched a number of artists, some of which were not on the suggested list, and referred to these within my log during the sampling process. I have looked at methods and ideas from a wide range of magazines, books, internet sites, and also from my peers in my stitching group who give me feedback during our weekly Zoom meetings. I regularly look at the work of The Textile study group, and the Internet site Textile artist.org.

During my sampling I have also looked for inspiration from artefacts such as Roman remains, and nature, including man made structures such as dry stone walls.

I am reflecting constantly on my progress and trying to think of things in different ways so as to learn and grow. I am always excited to try new ideas and to look at other artists. My head is full of ideas to take forward to the next module.

Textiles 1 Mixed Media for Textiles Part 3 Molding and Casting Stage 4 Sorting

Fig 1.

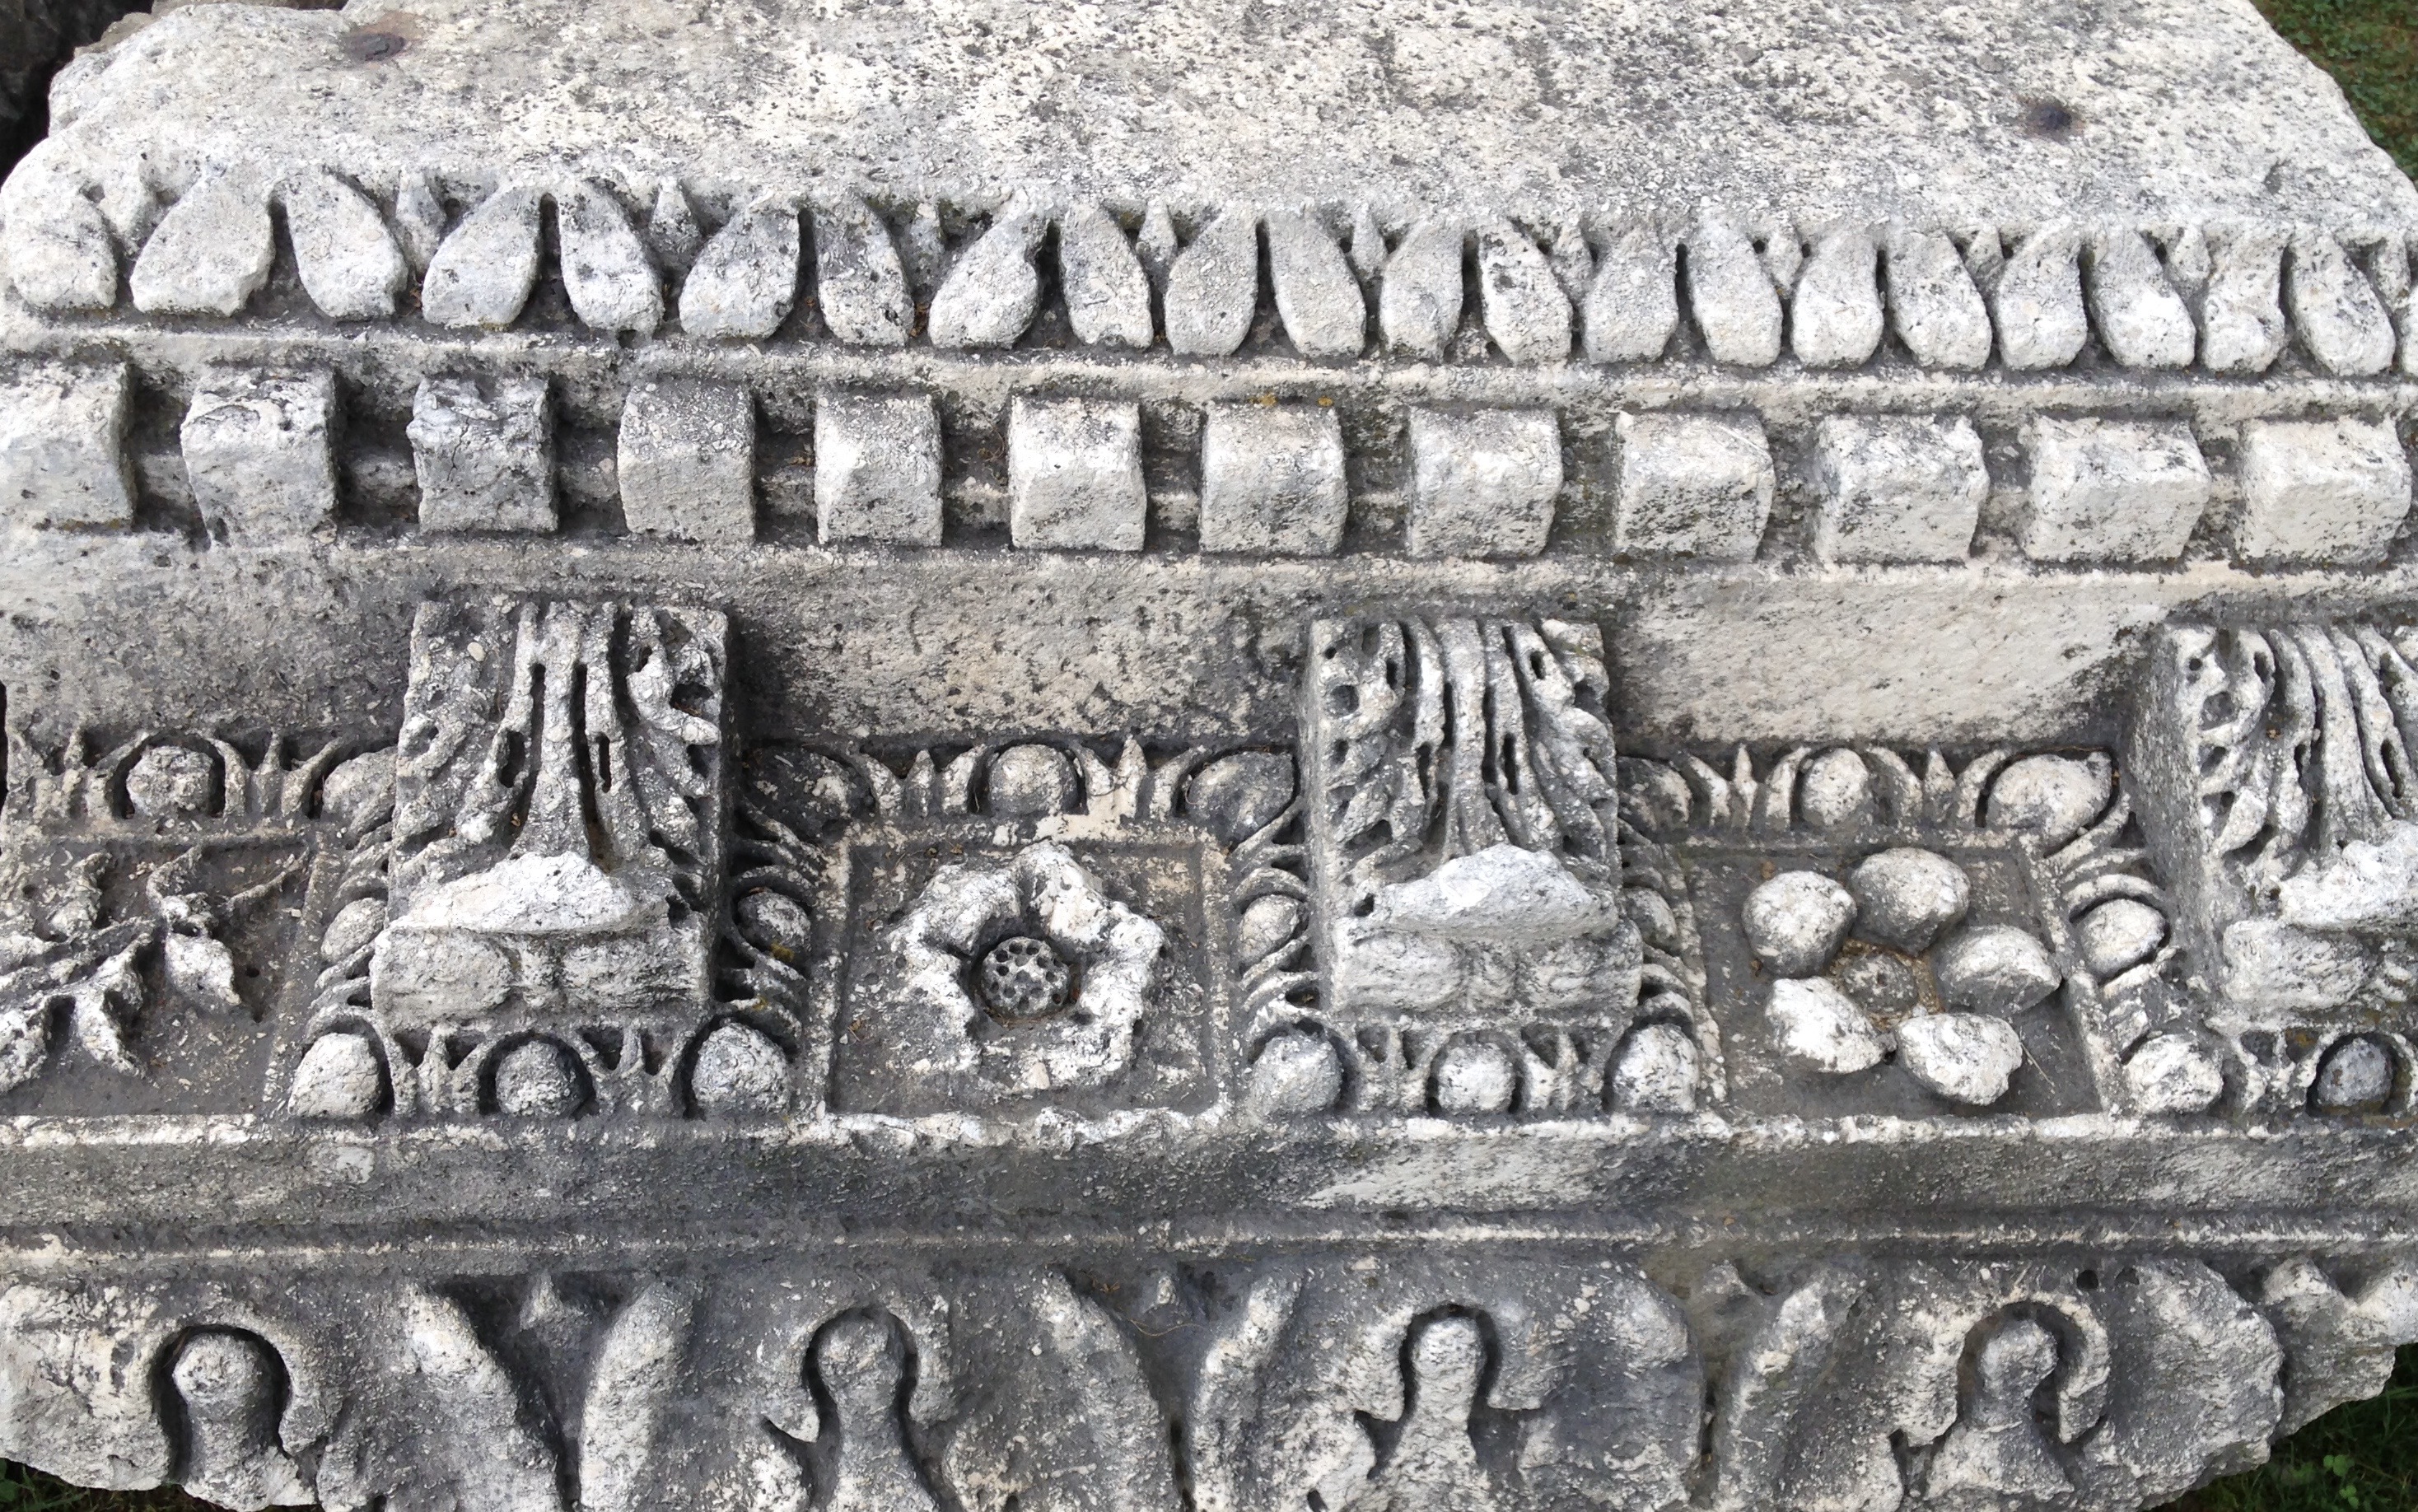
These two materials, paper mache and plaster of Paris are very different to use but once cast could be put together to make assemblage pieces. I was inspired by Roman ruins with intricate patterns, and by the work of Louise Nevelson who uses separate individual sculptures to assemble into a larger piece, usually one colour.

These individual pieces are beautiful in their own right but once combined with others they take on new meaning and create a whole new piece of art.

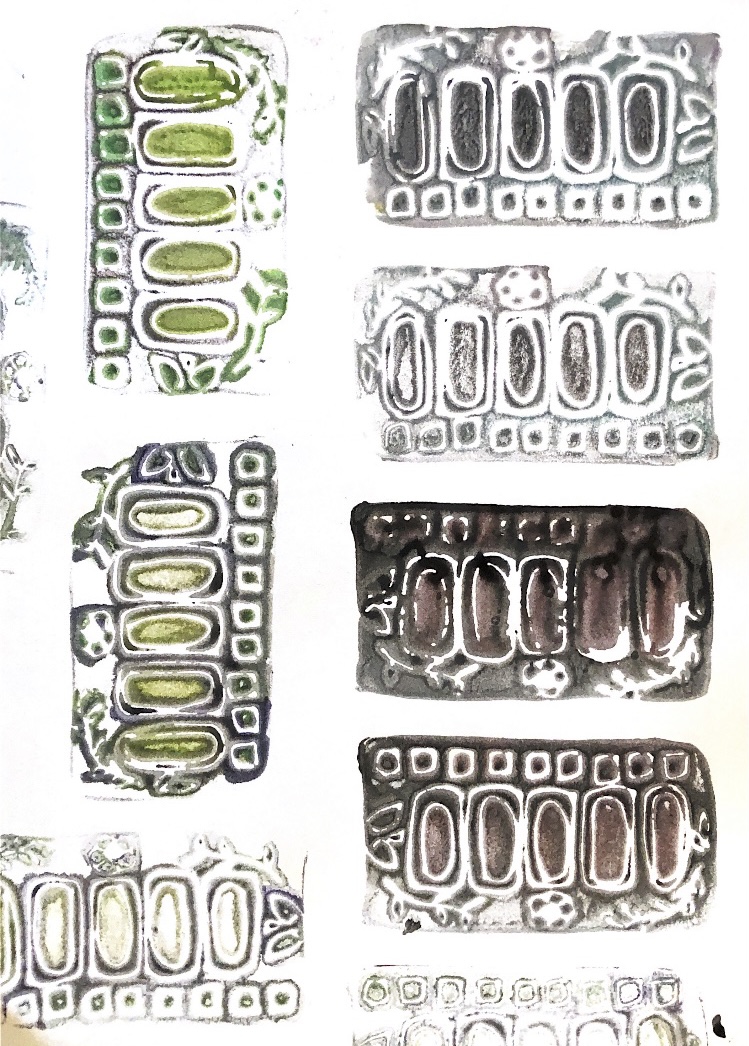
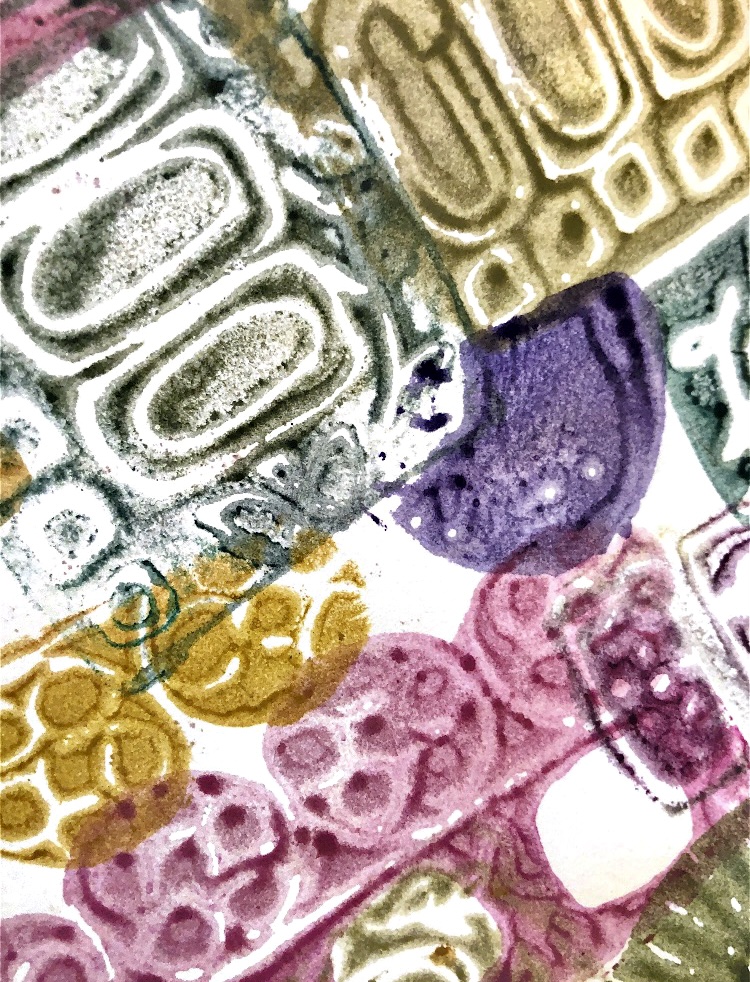
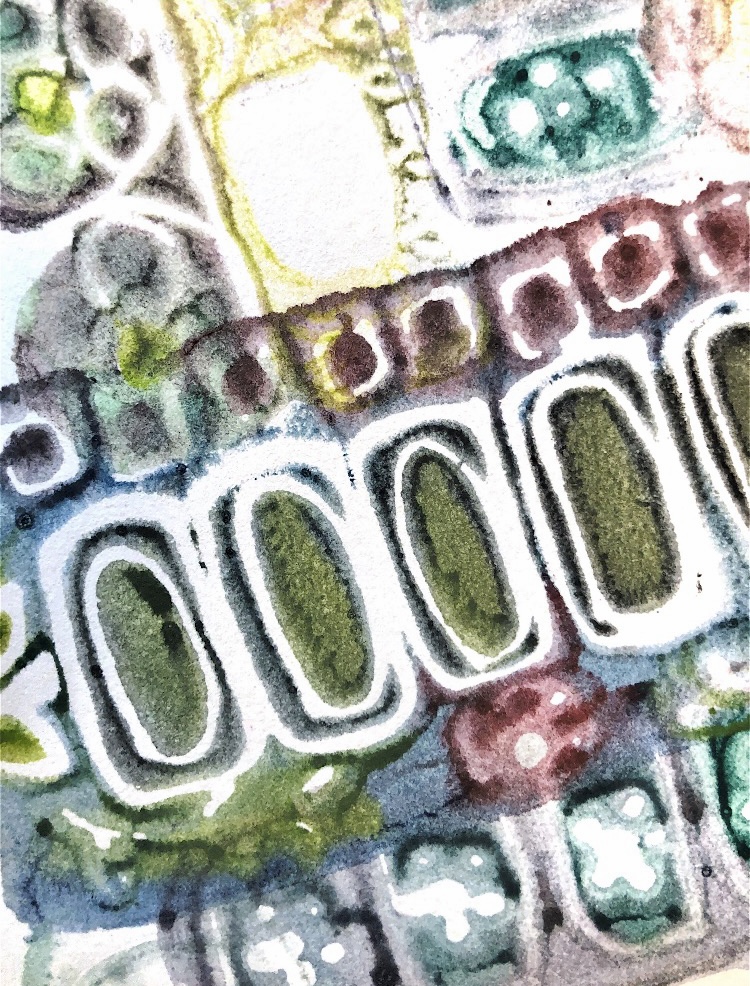
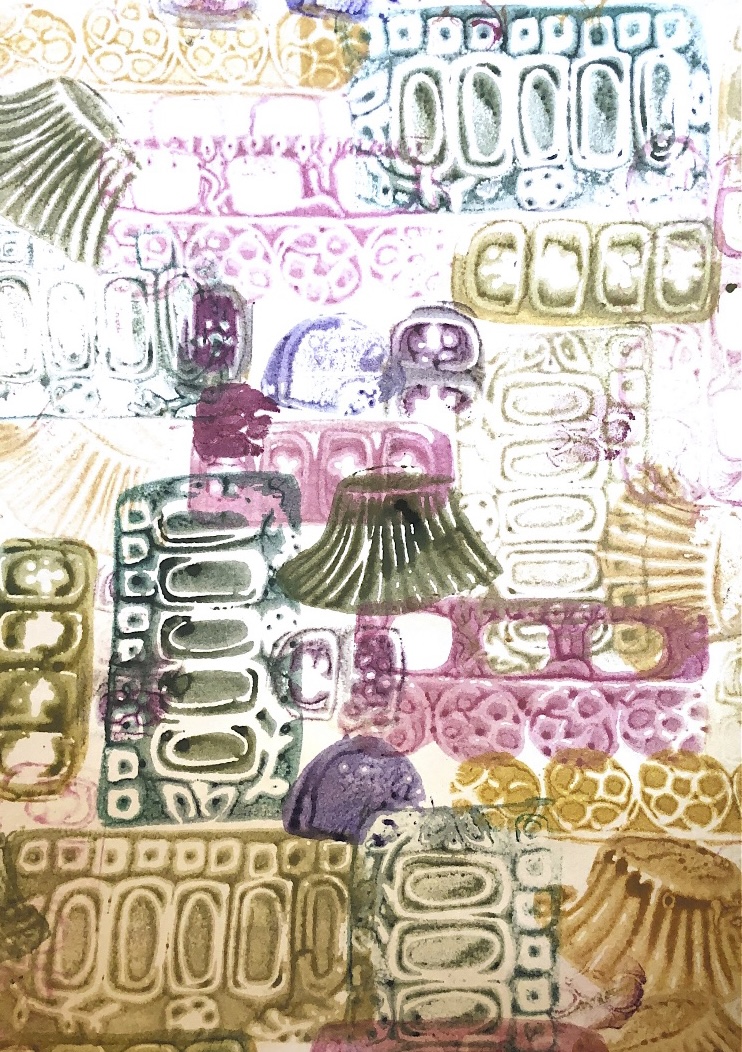
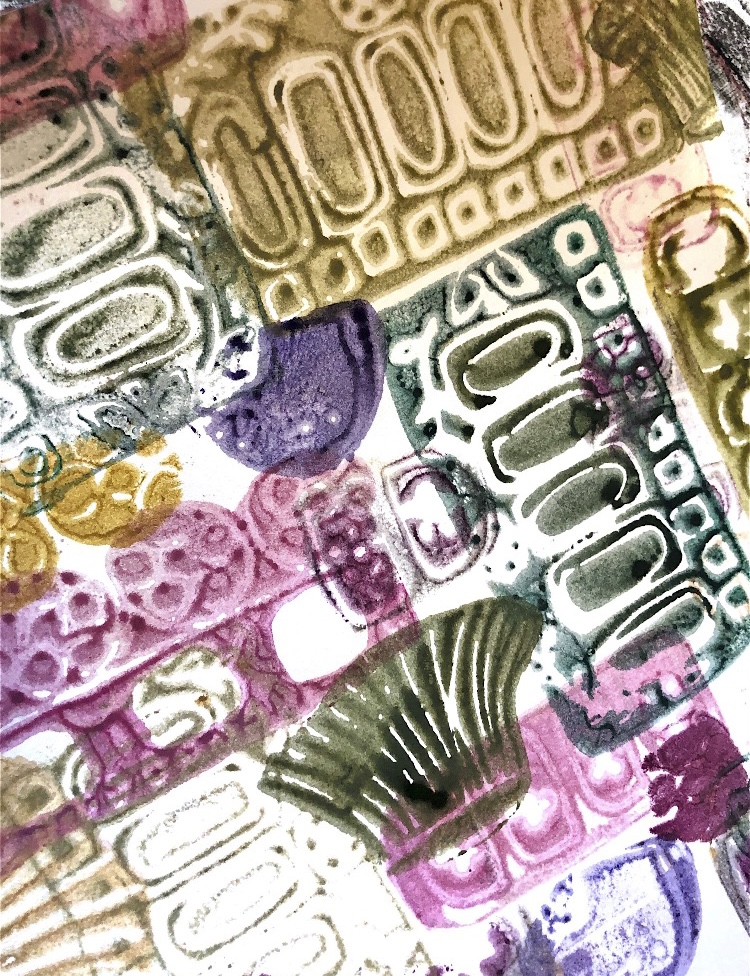
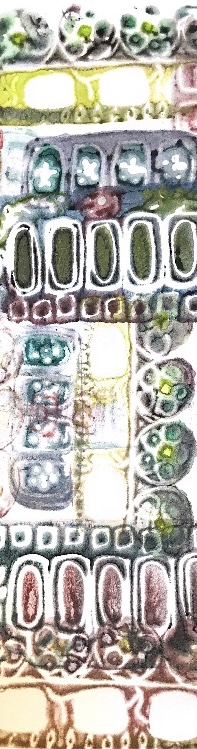
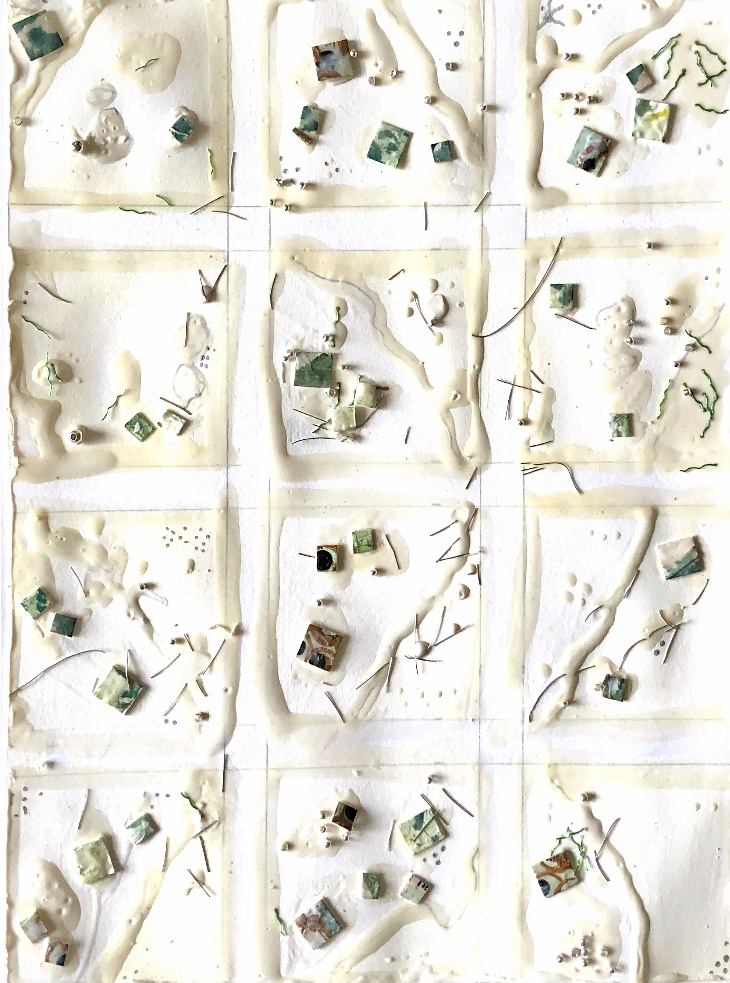
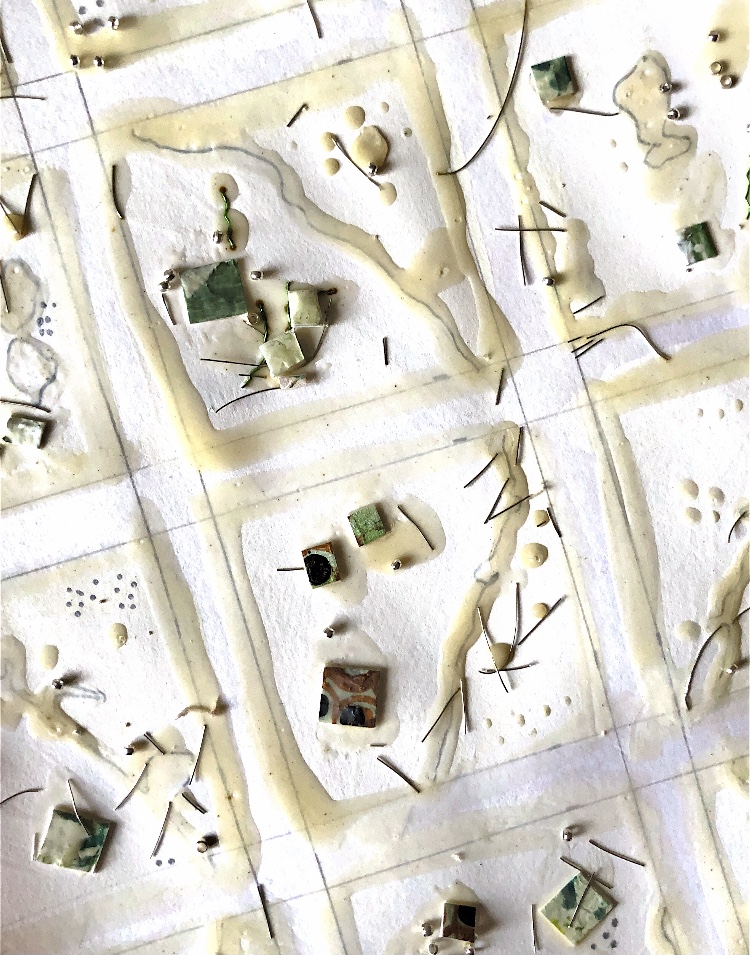
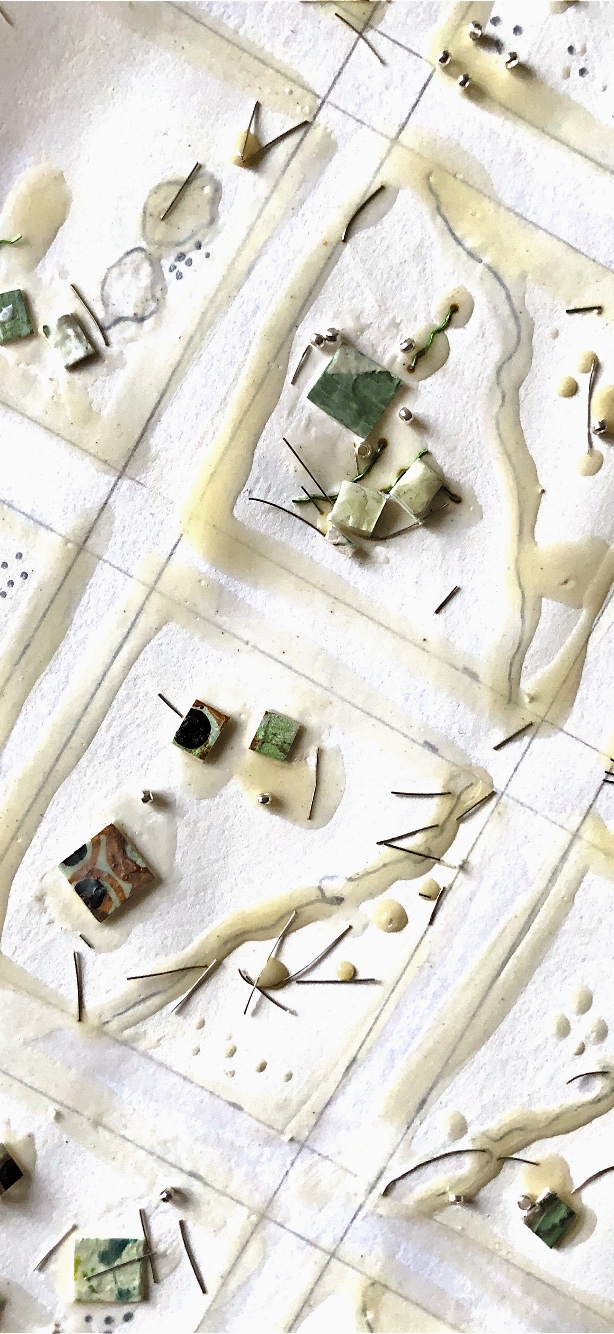
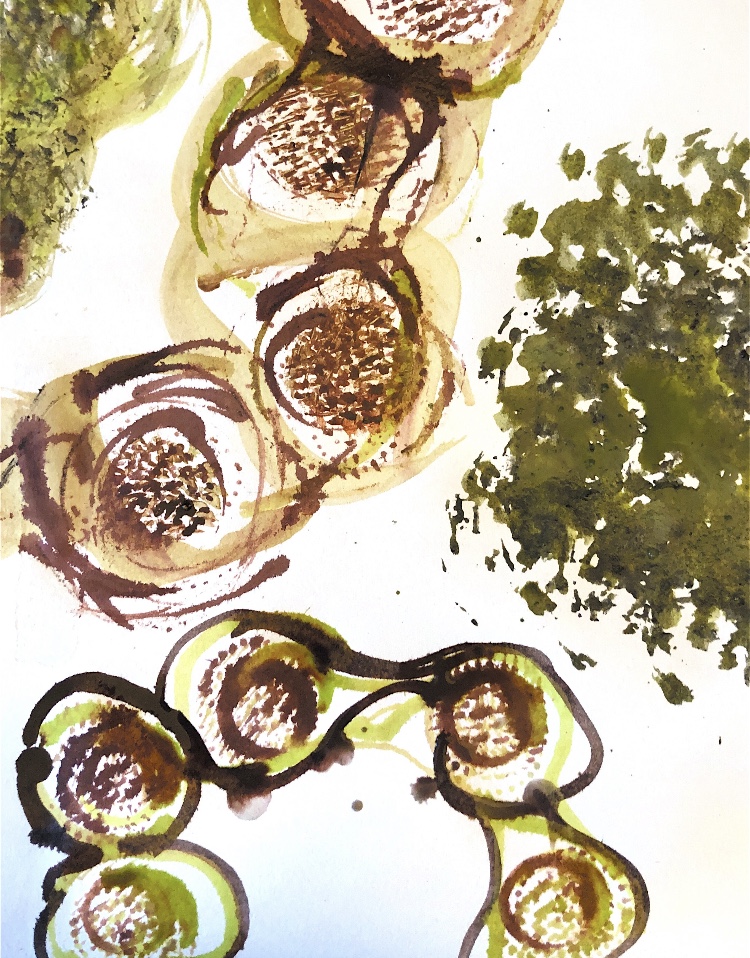
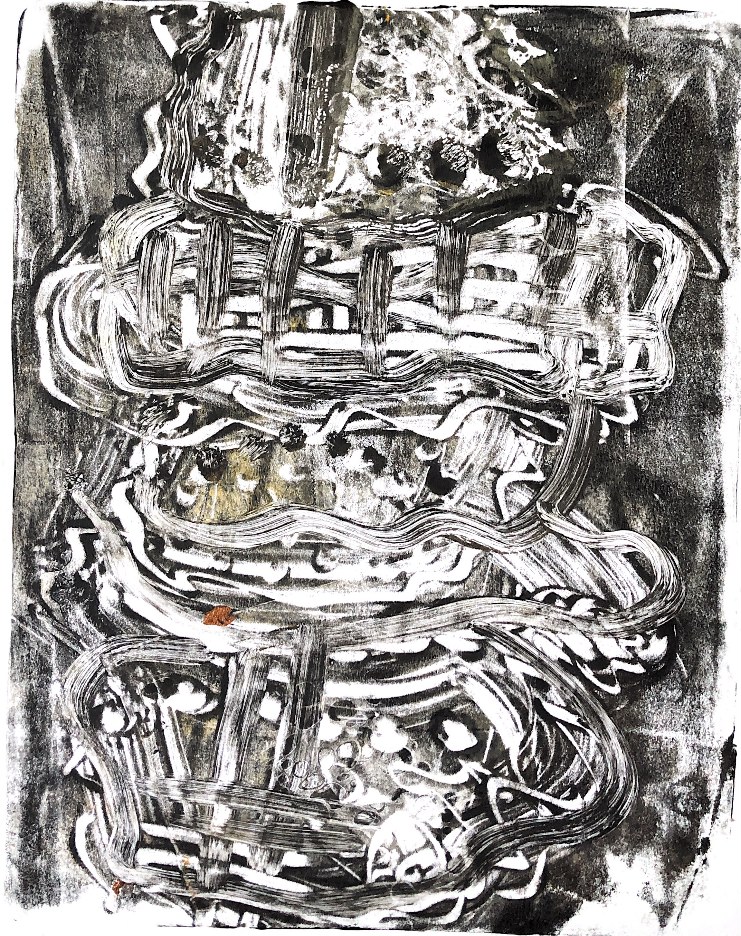
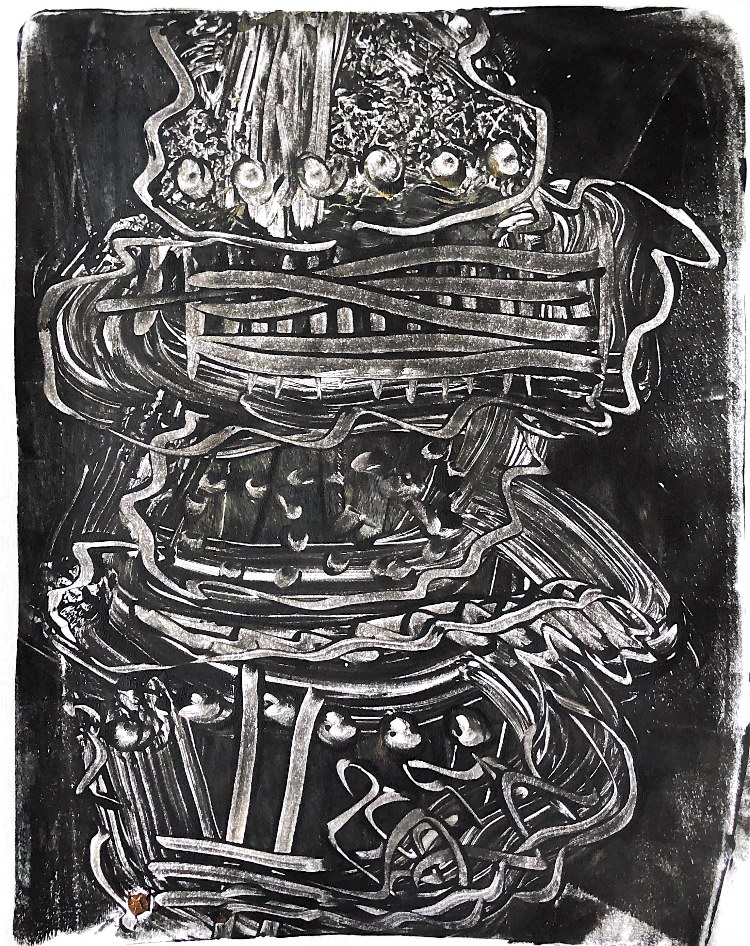
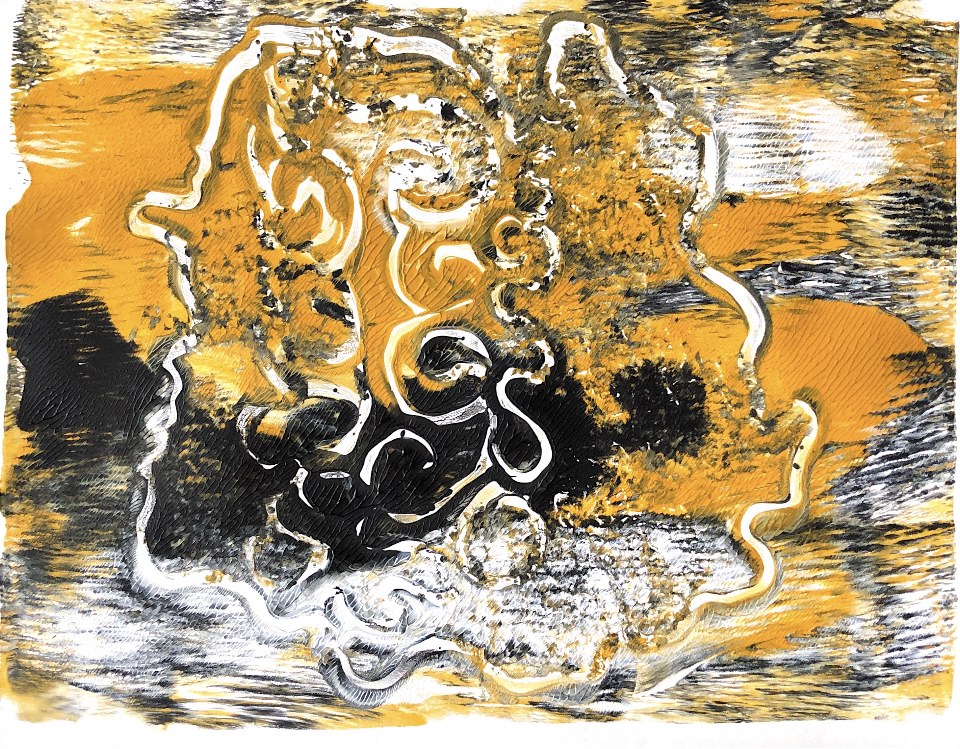
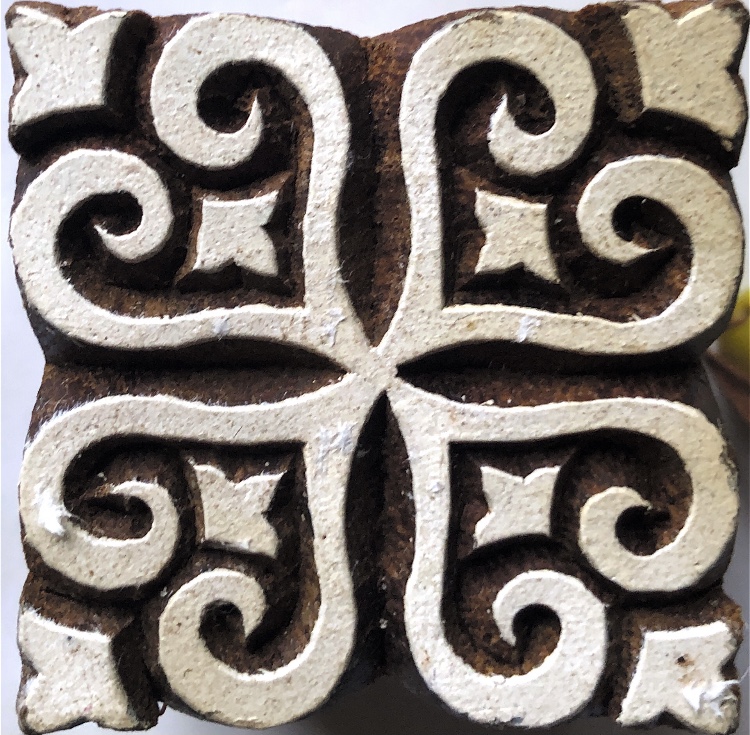
I made individual print blocks and combined thes to make print assemblages which I am pleased with. I have added some colour to some of them. These would make lovely fabric prints and ideas for stitch.

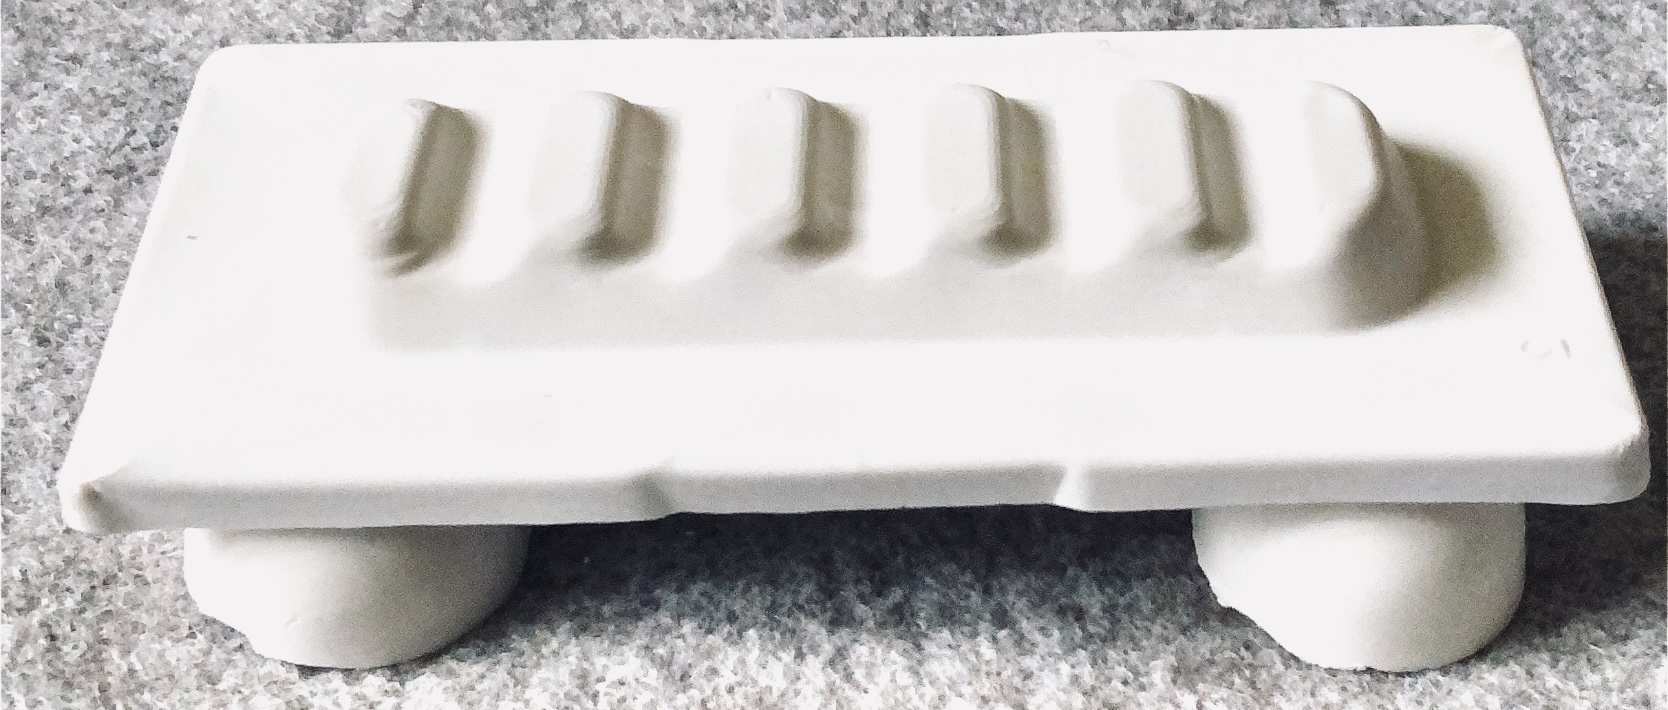
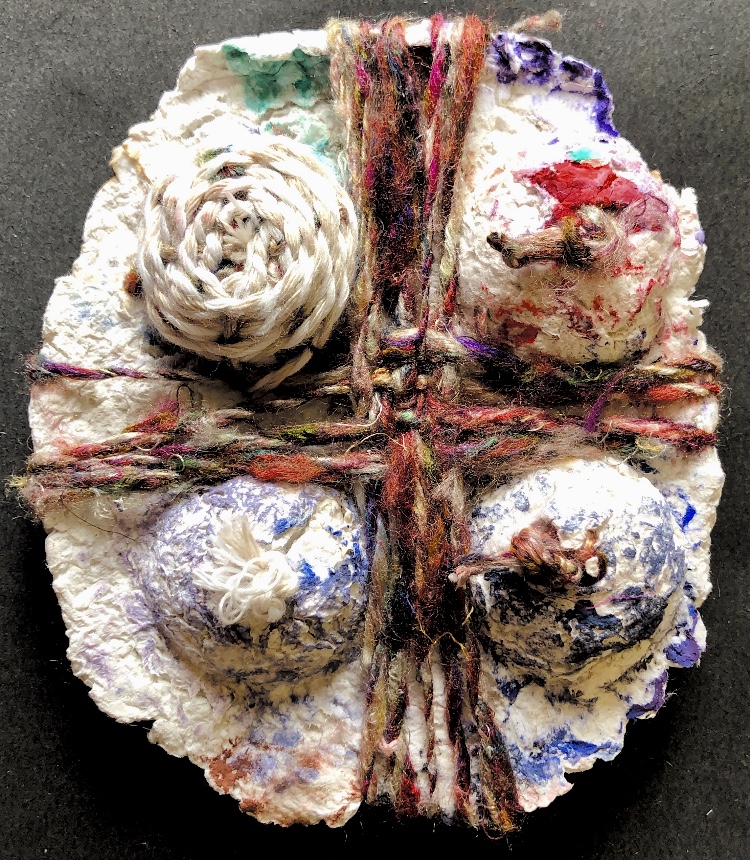
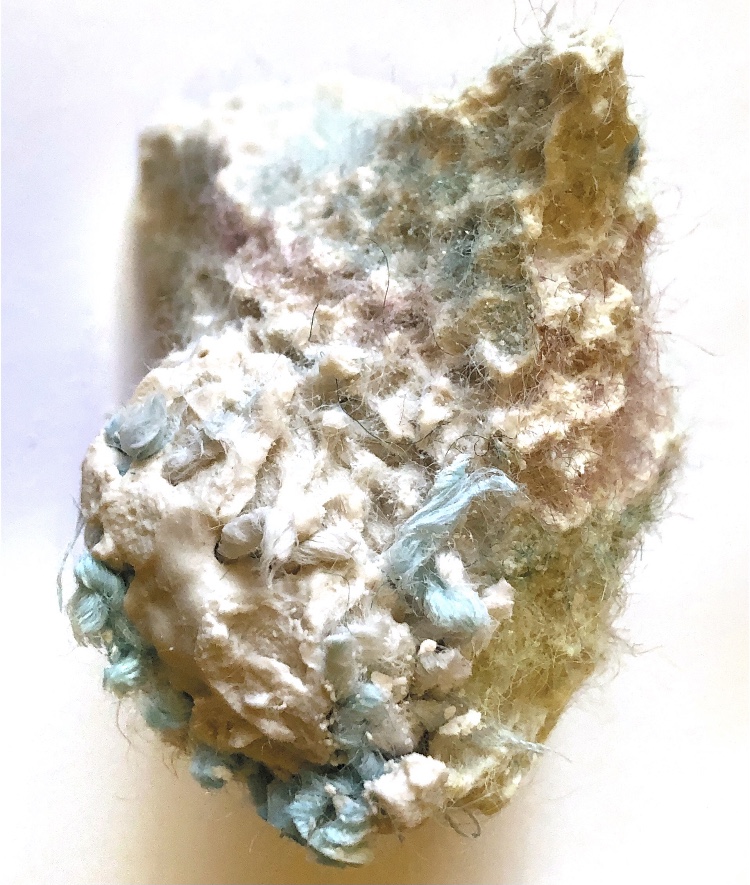
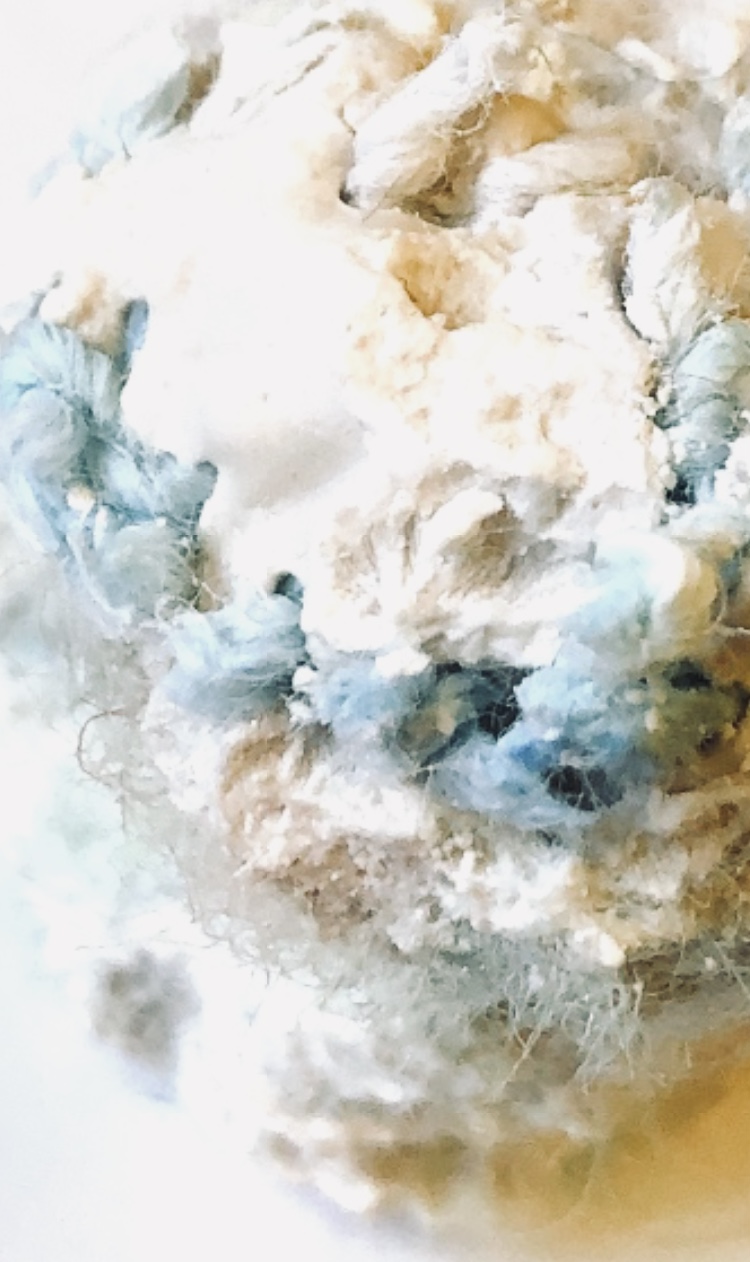
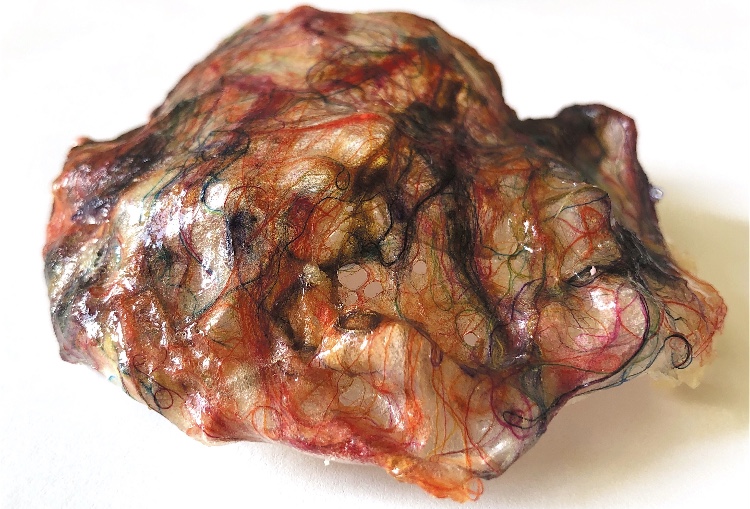
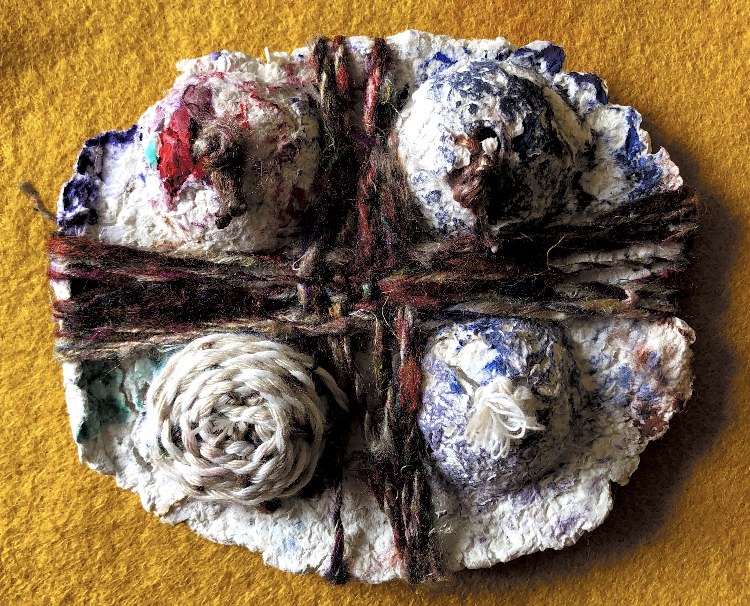
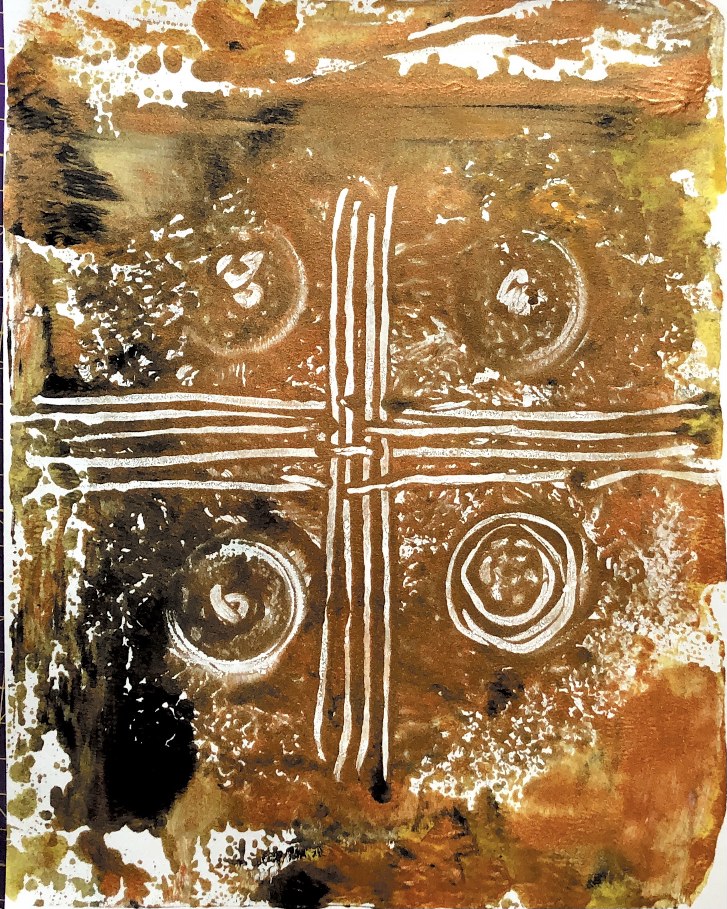
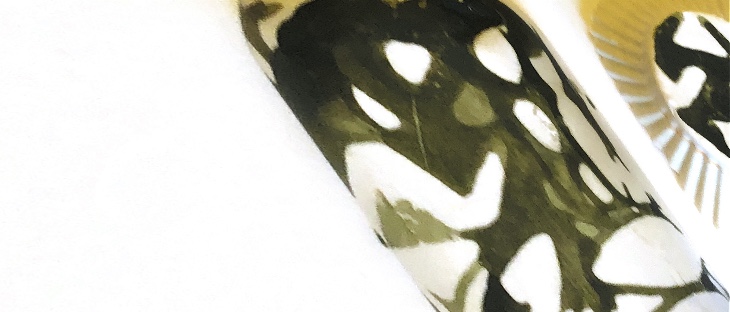
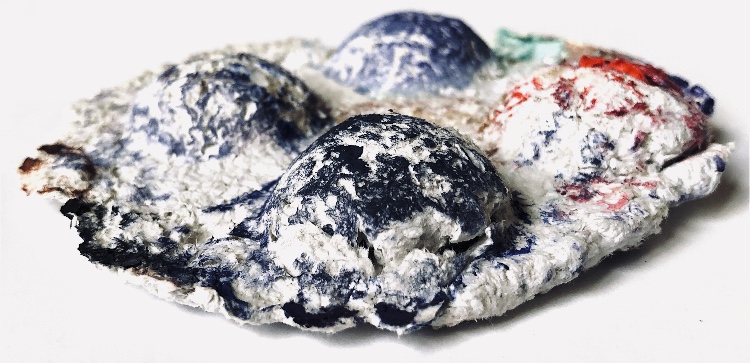
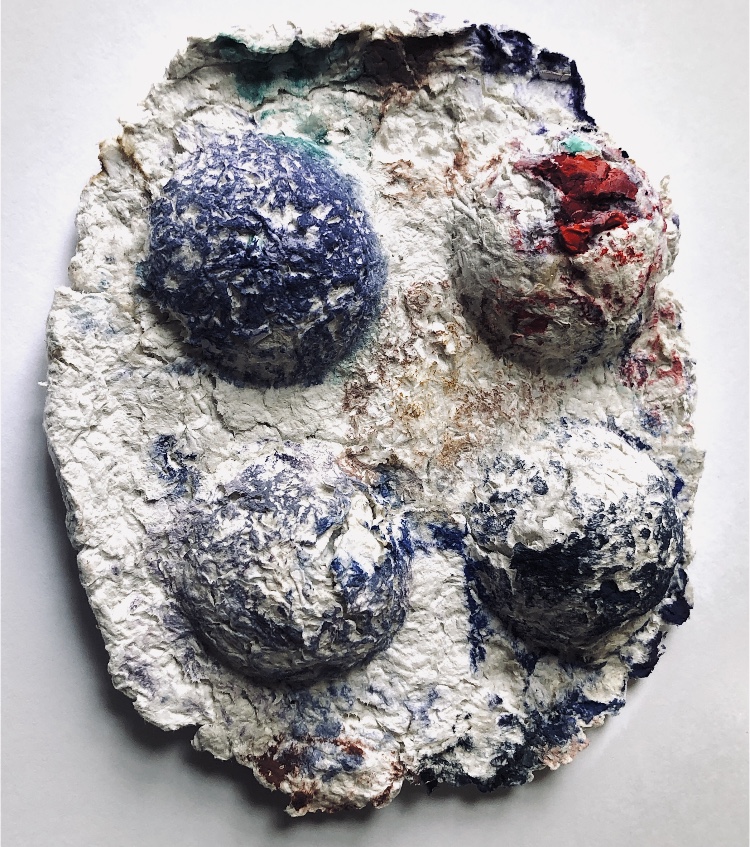
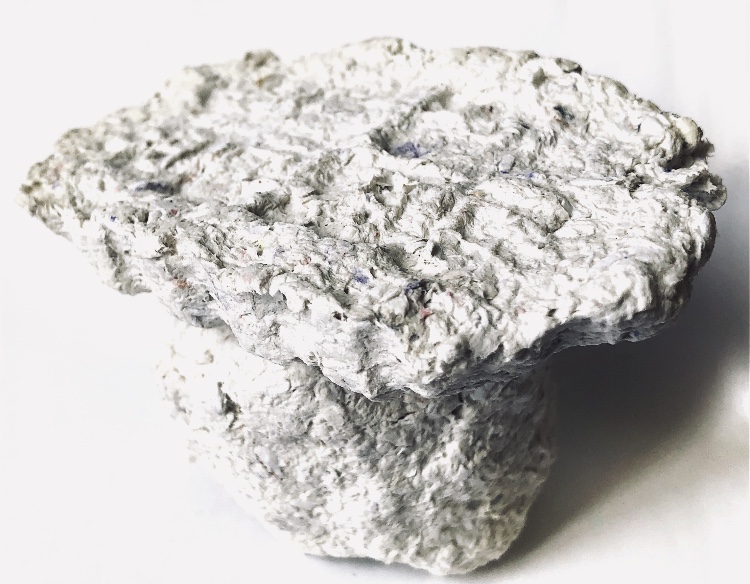
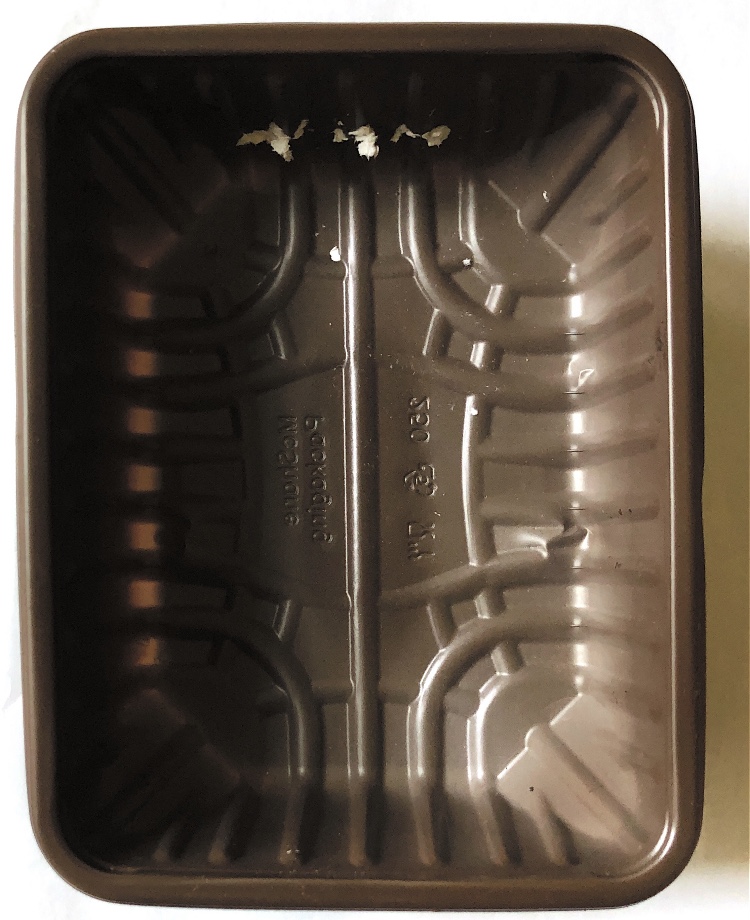
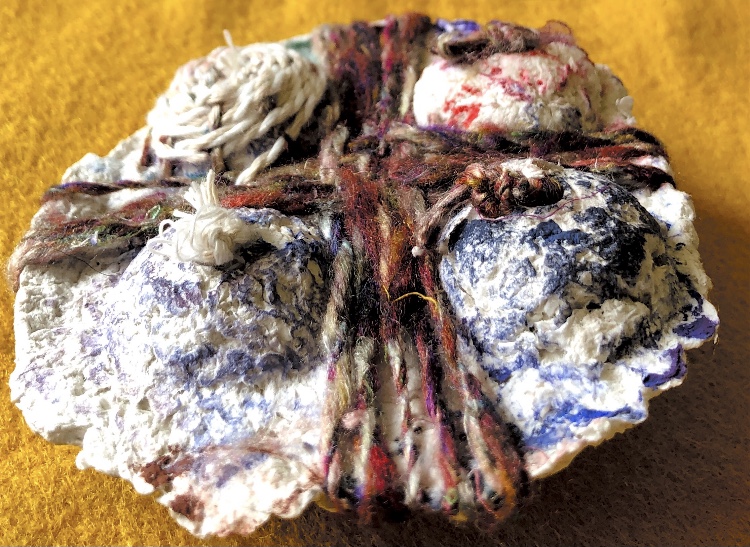
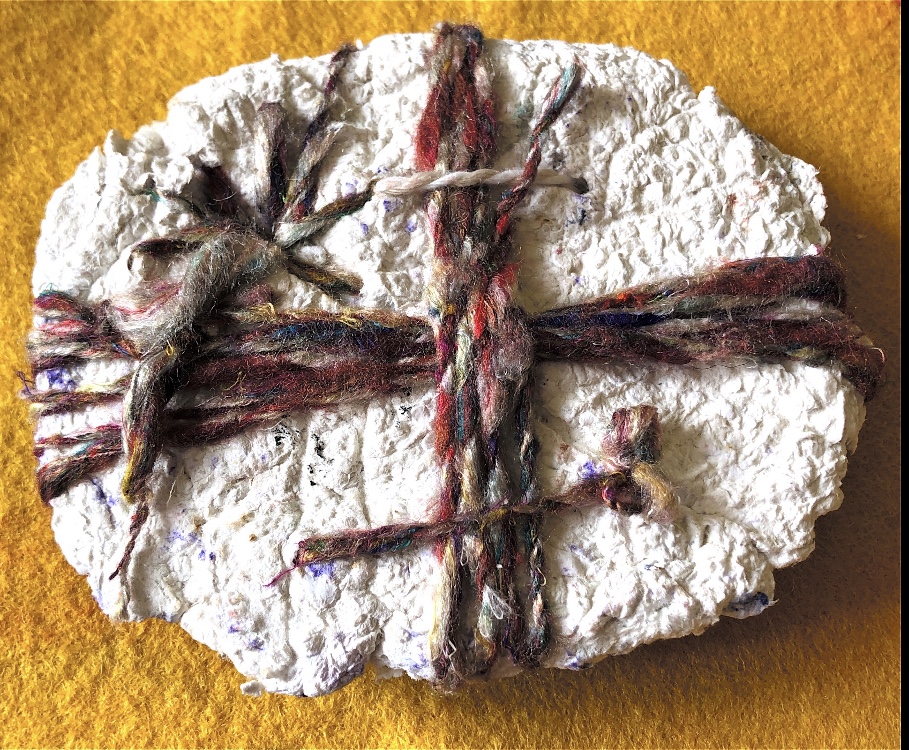
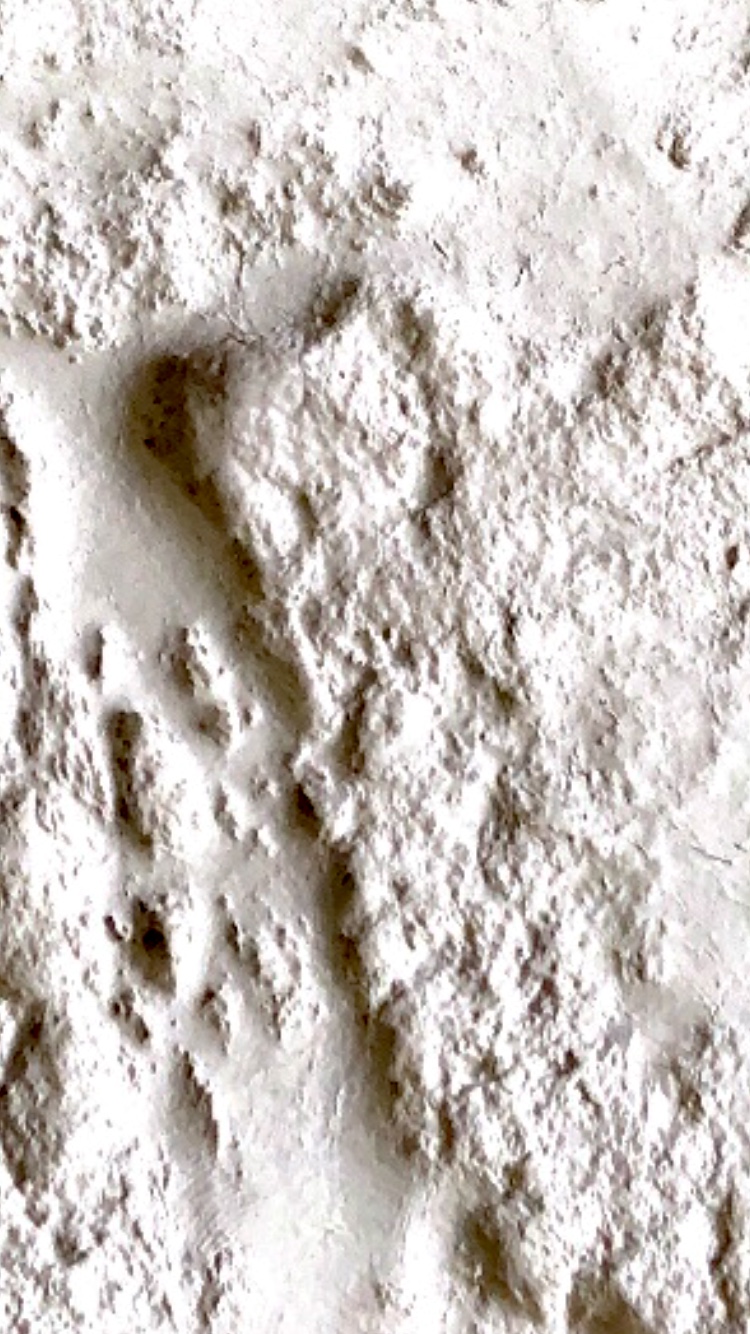
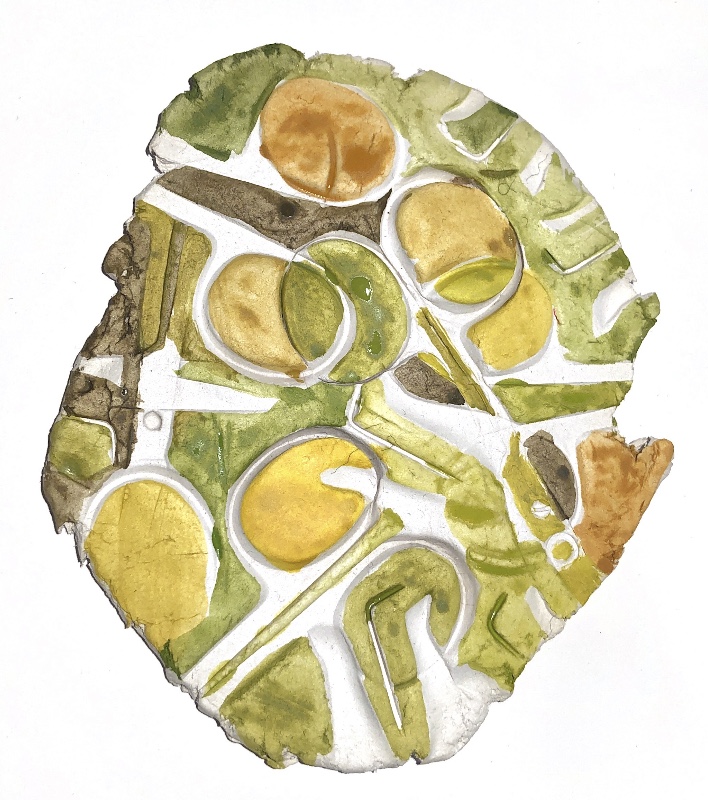
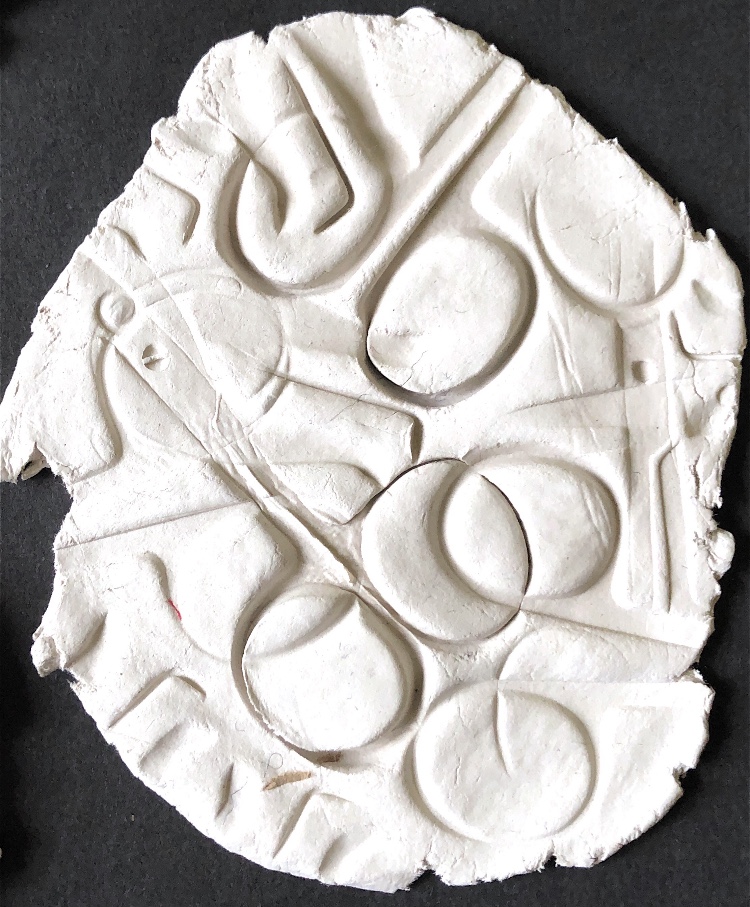
Fig.2 For this piece of paper mache I used a paint palette to cast and as a result the material picked up colour in places. I used wool in matching colours to wrap and weave the sample. The colours did not create the natural feeling that I wanted so I chose to use different colours for monoprinting and collage to document the sample.

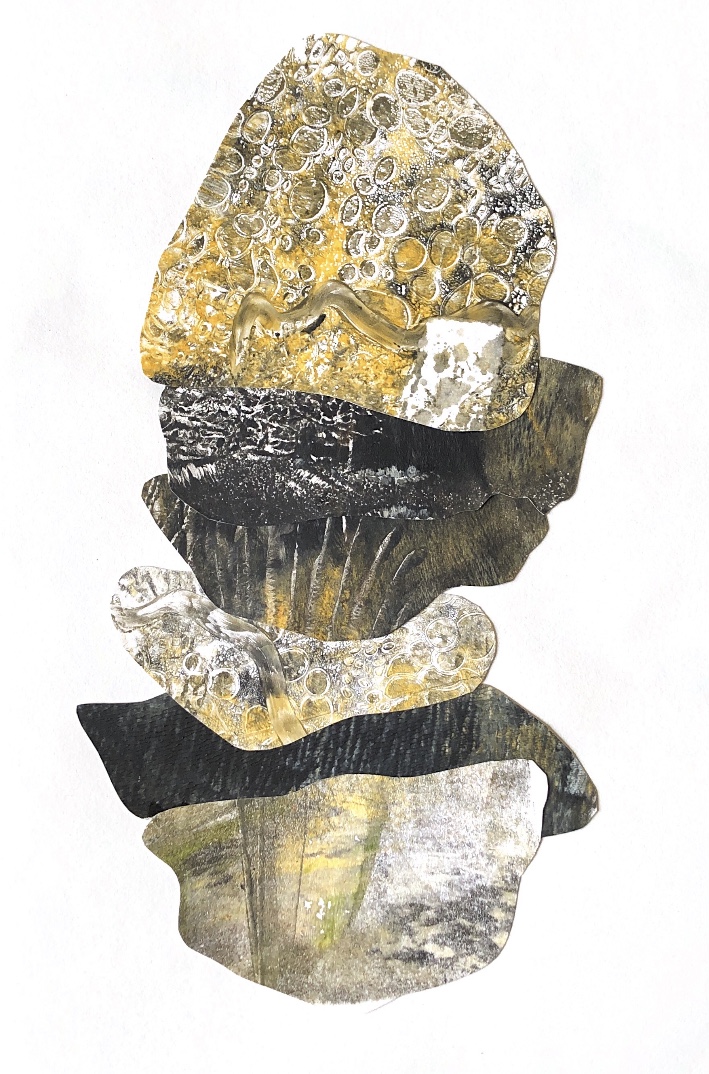
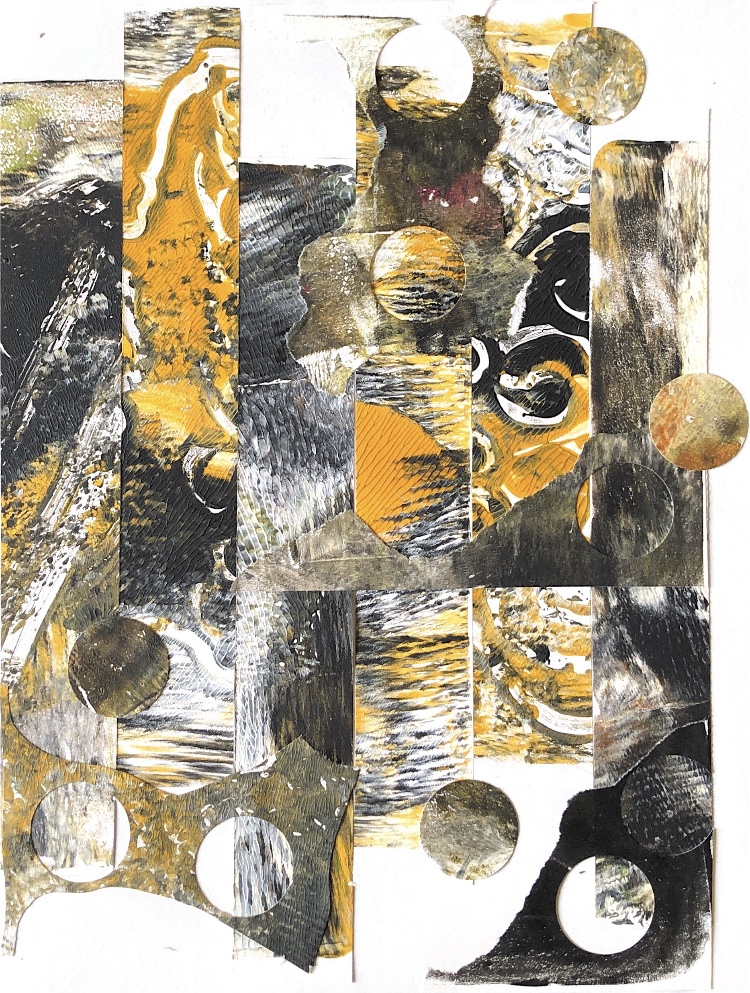
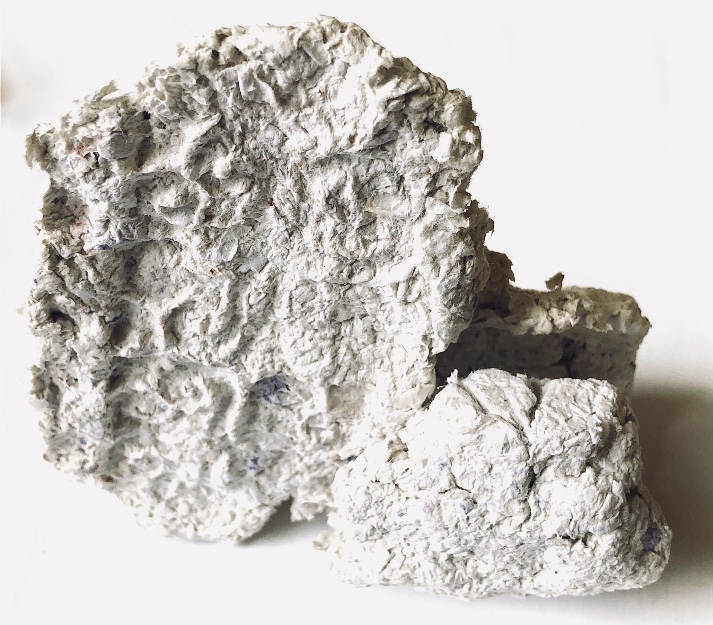
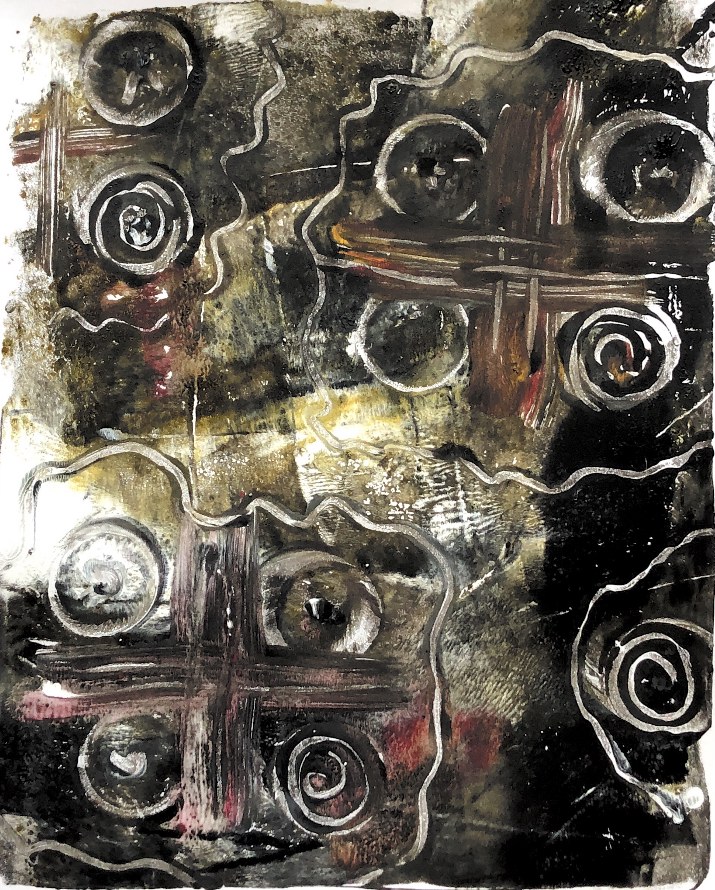
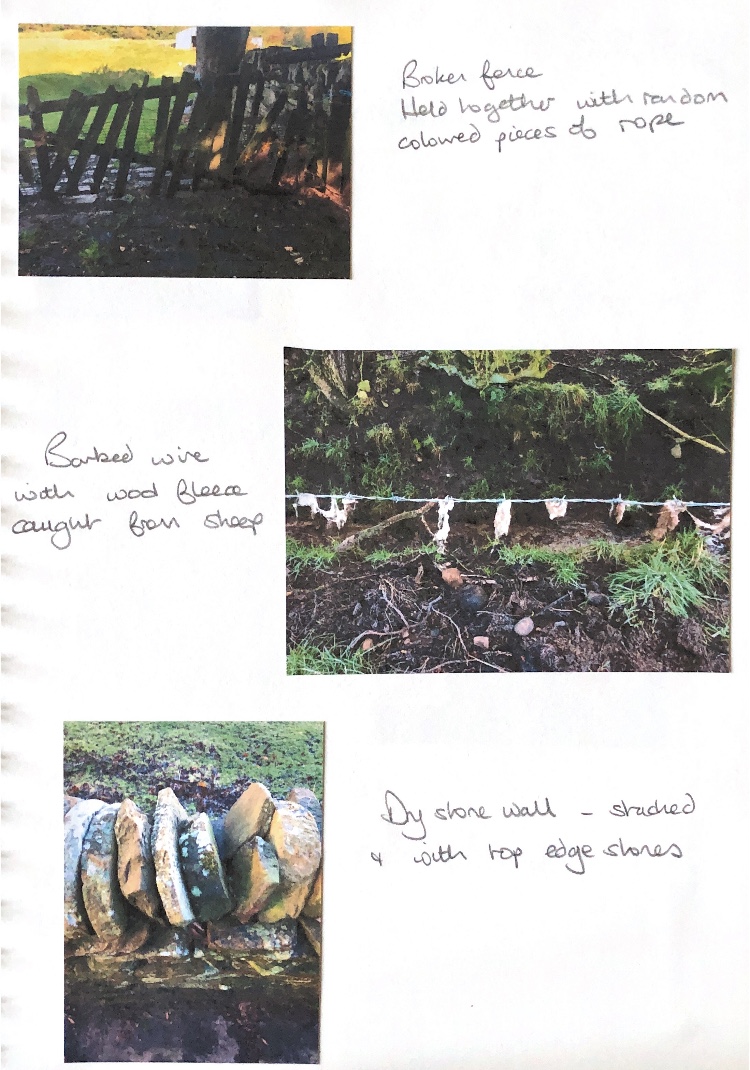
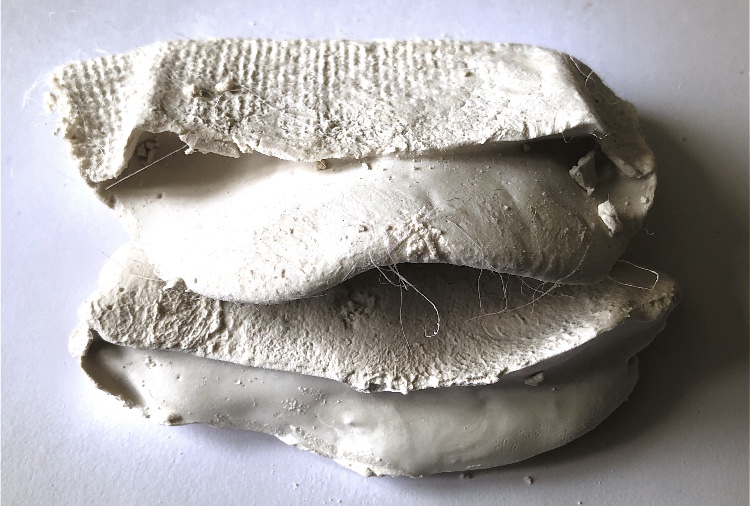
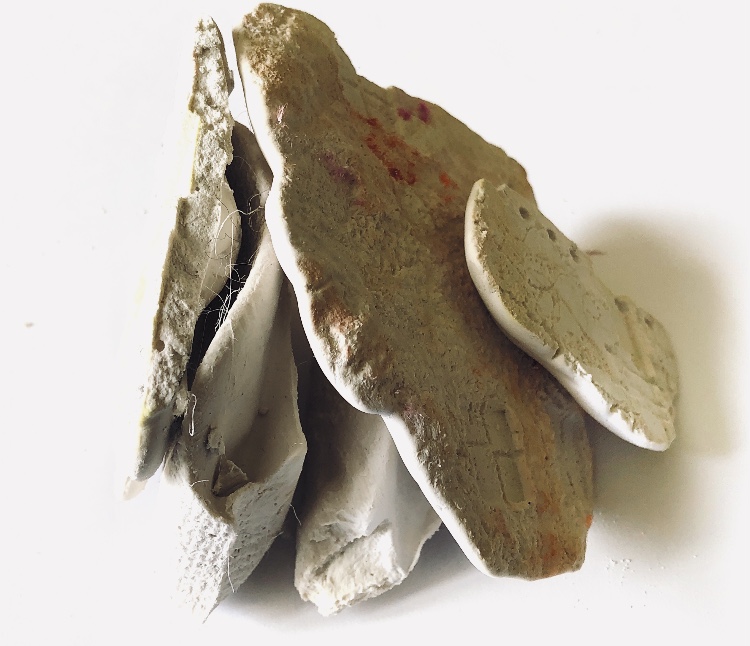
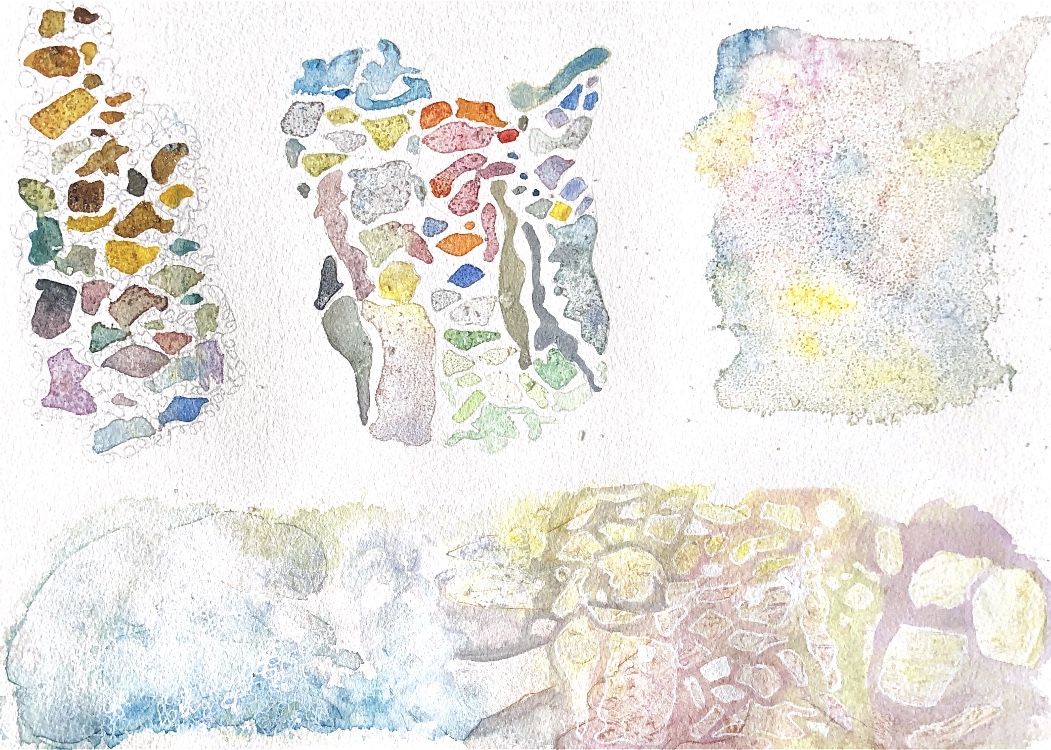
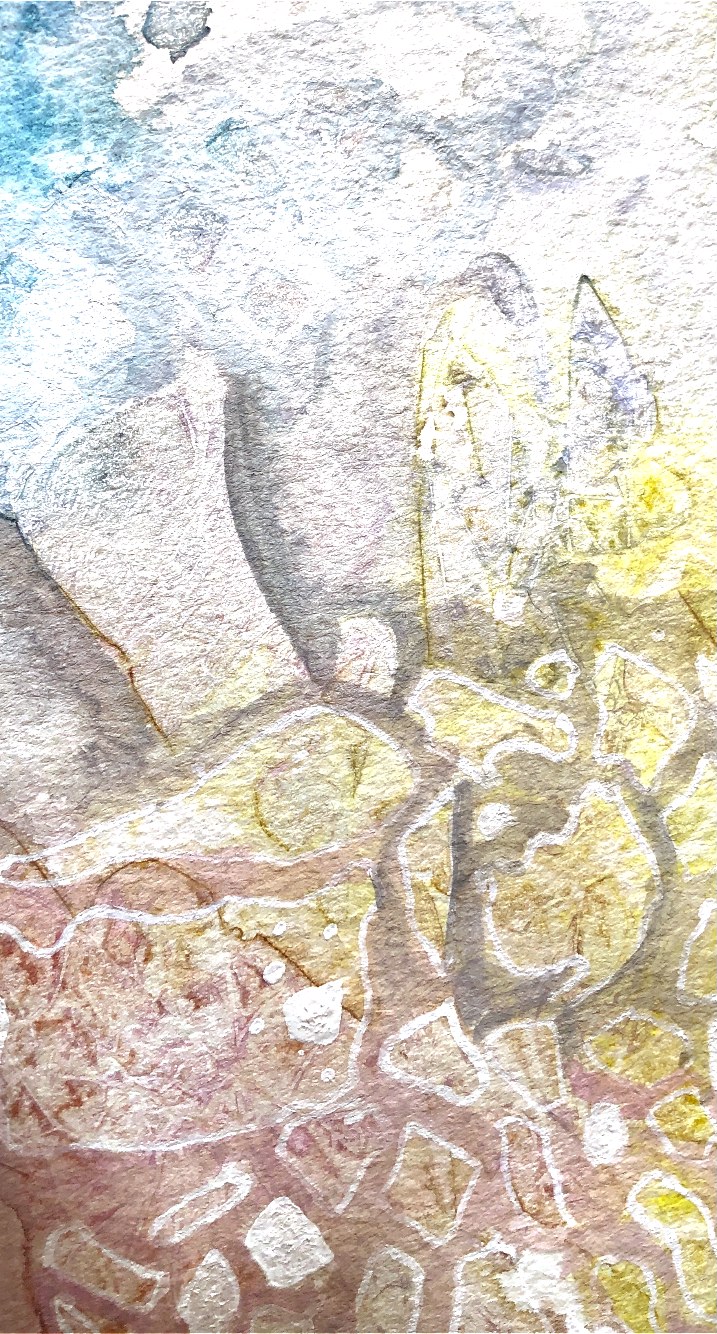
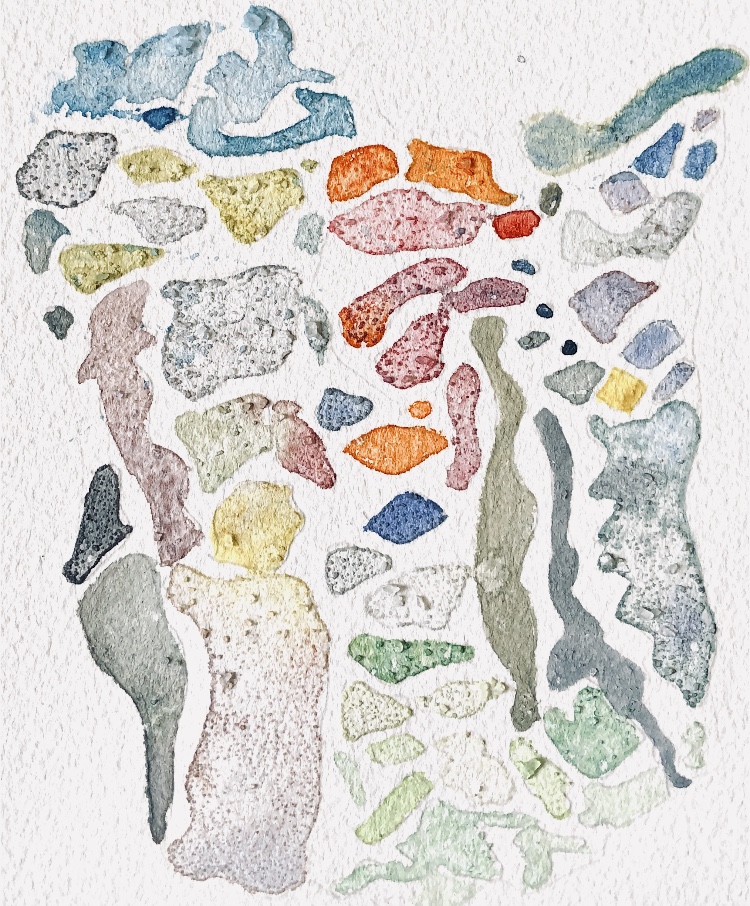
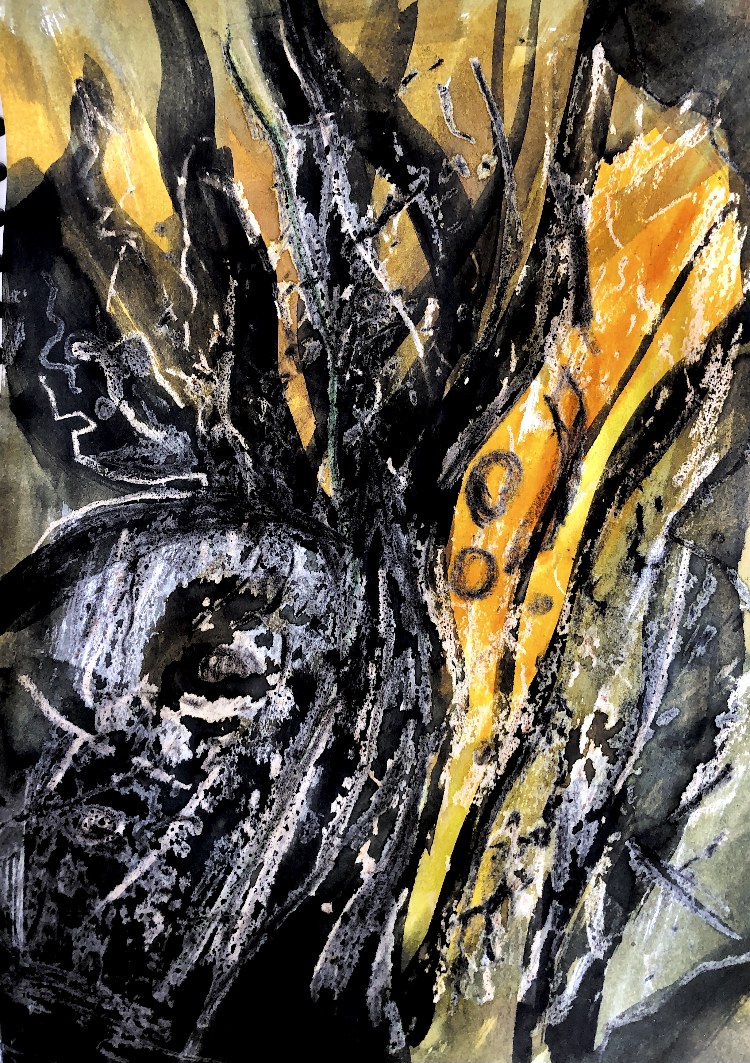
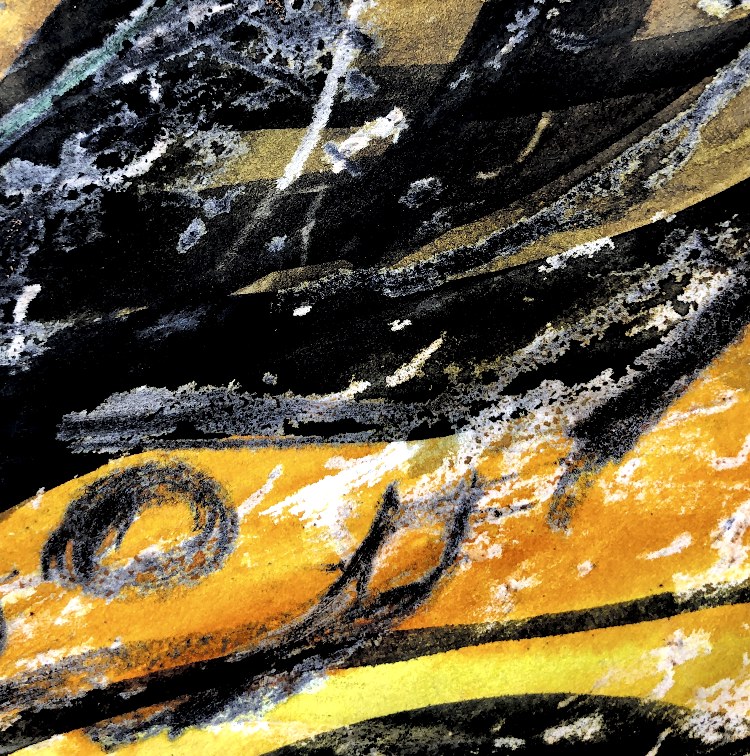
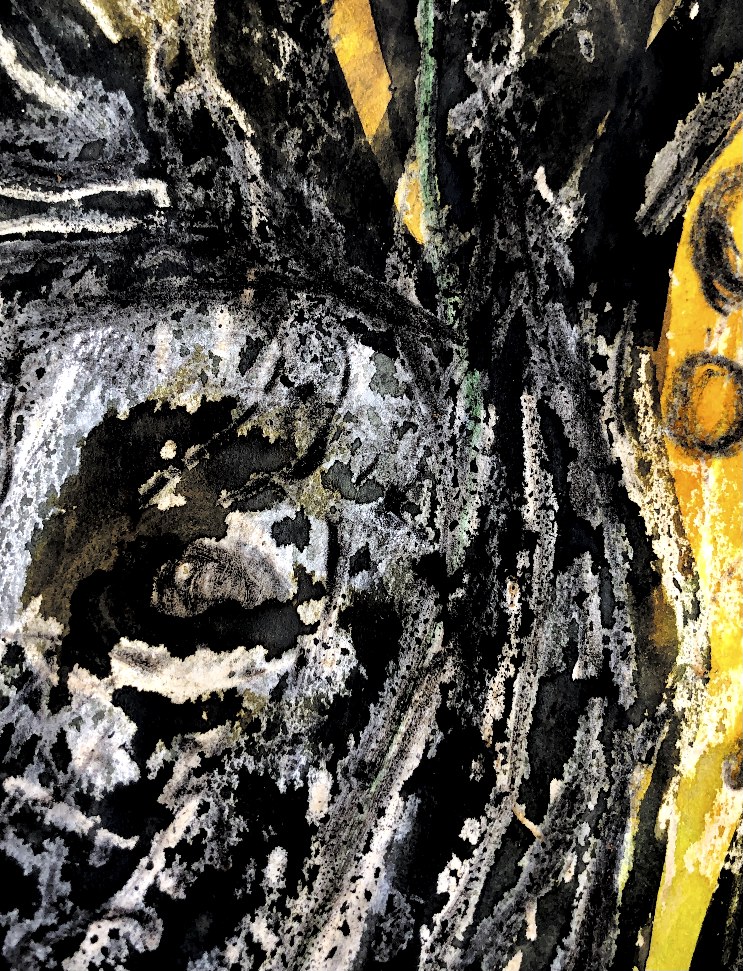
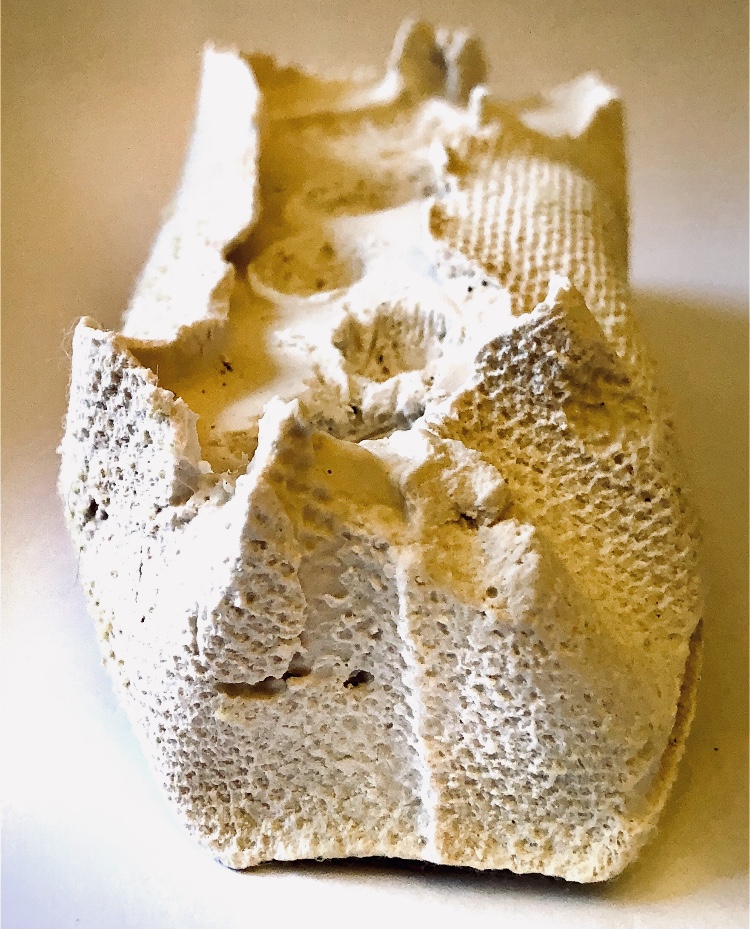
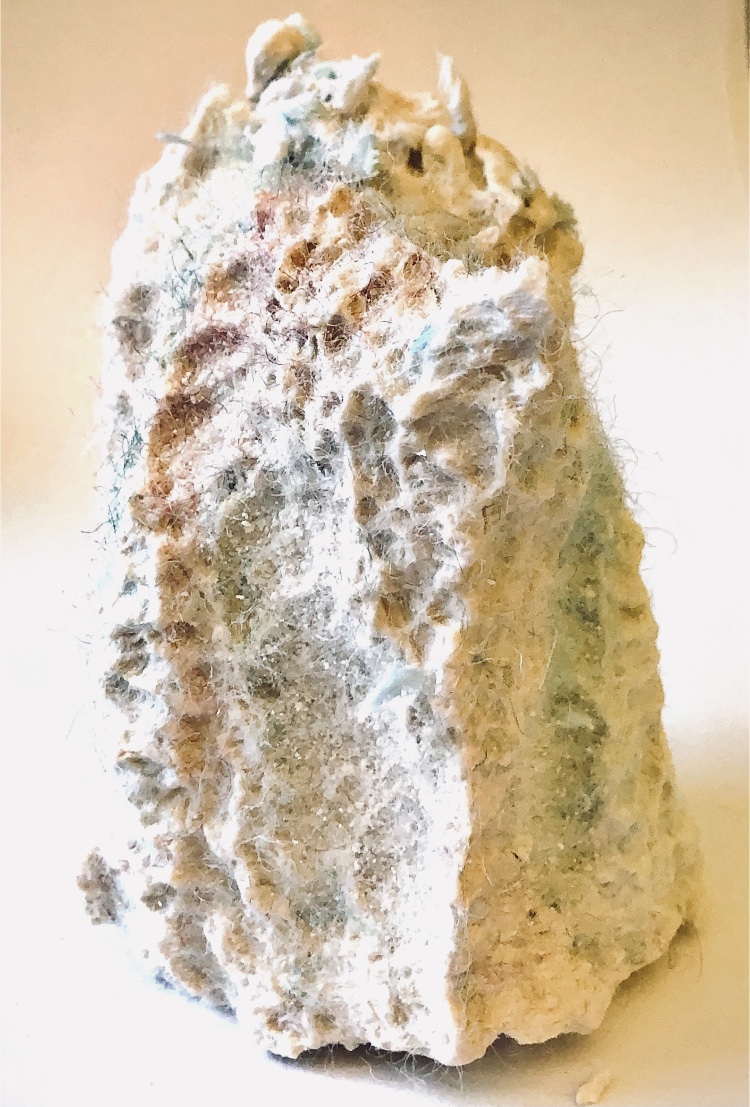
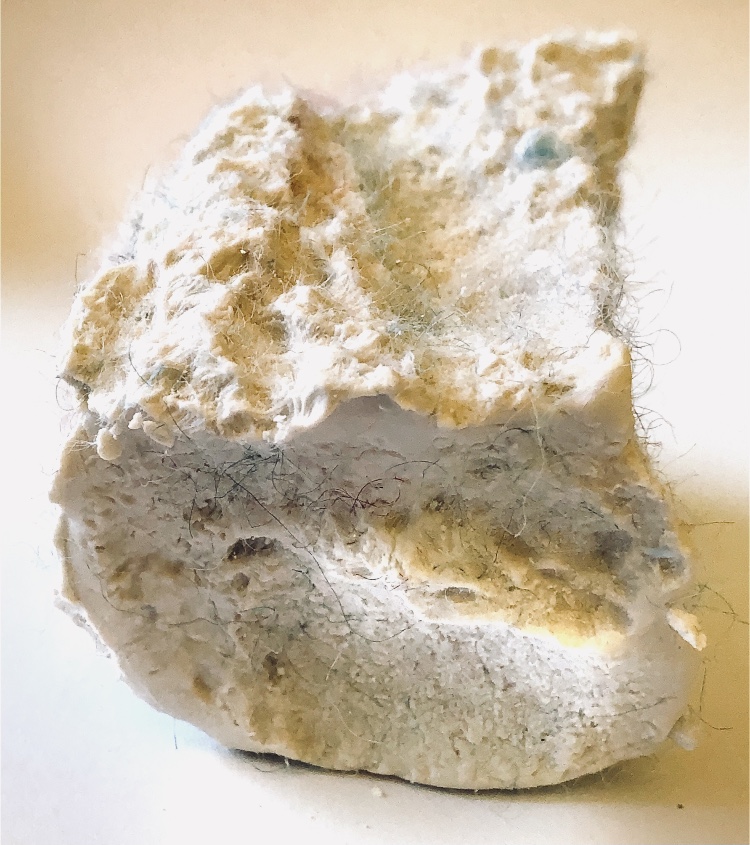
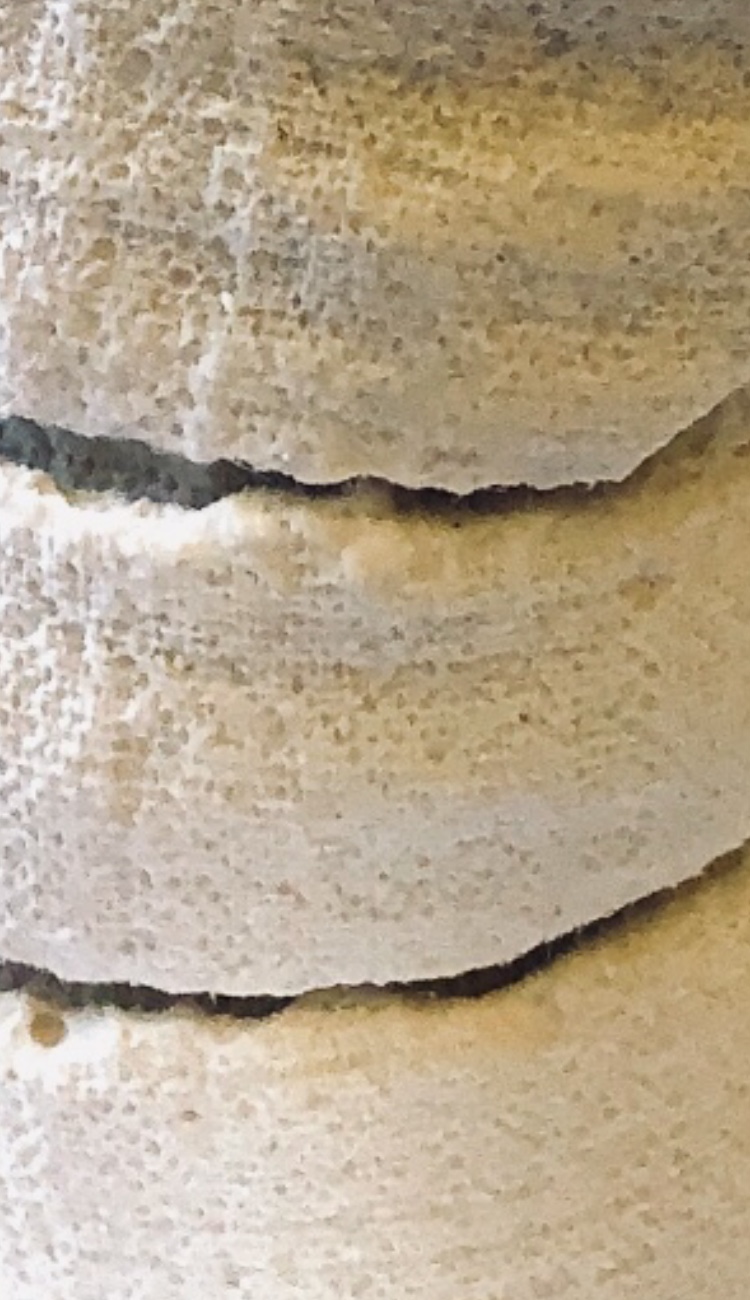
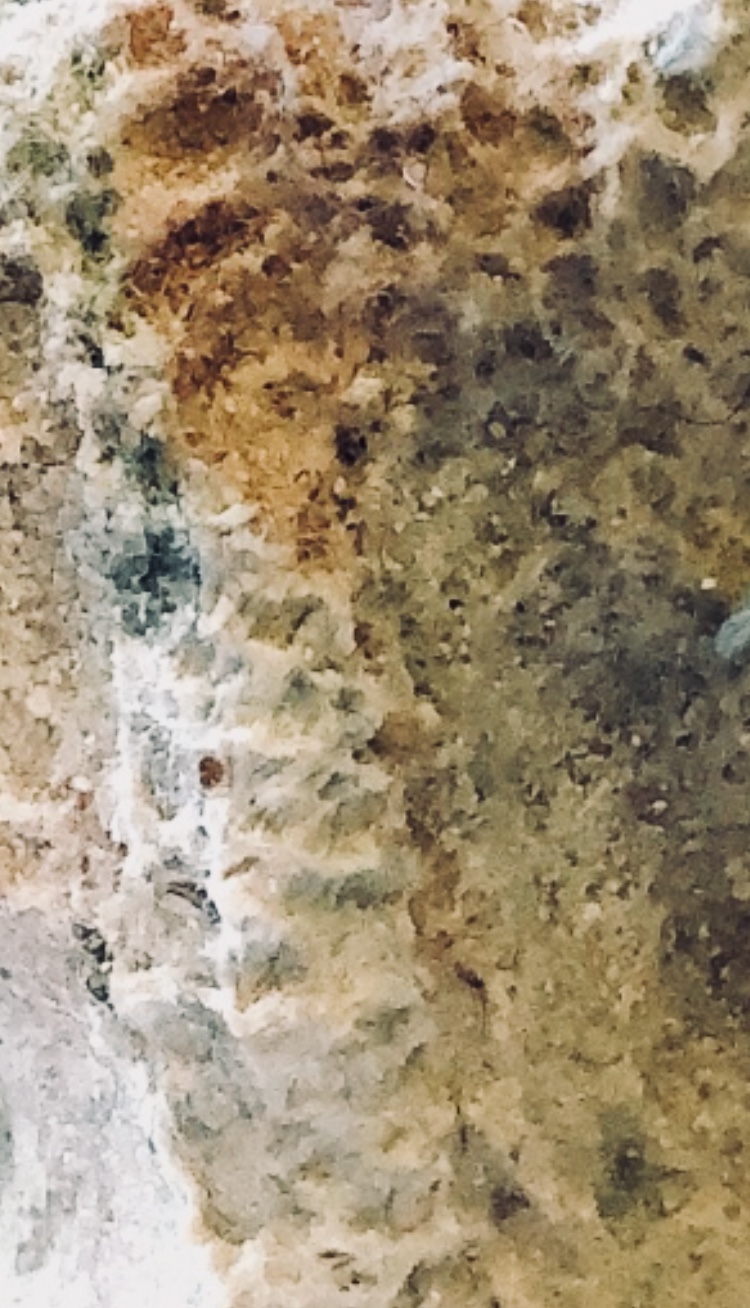
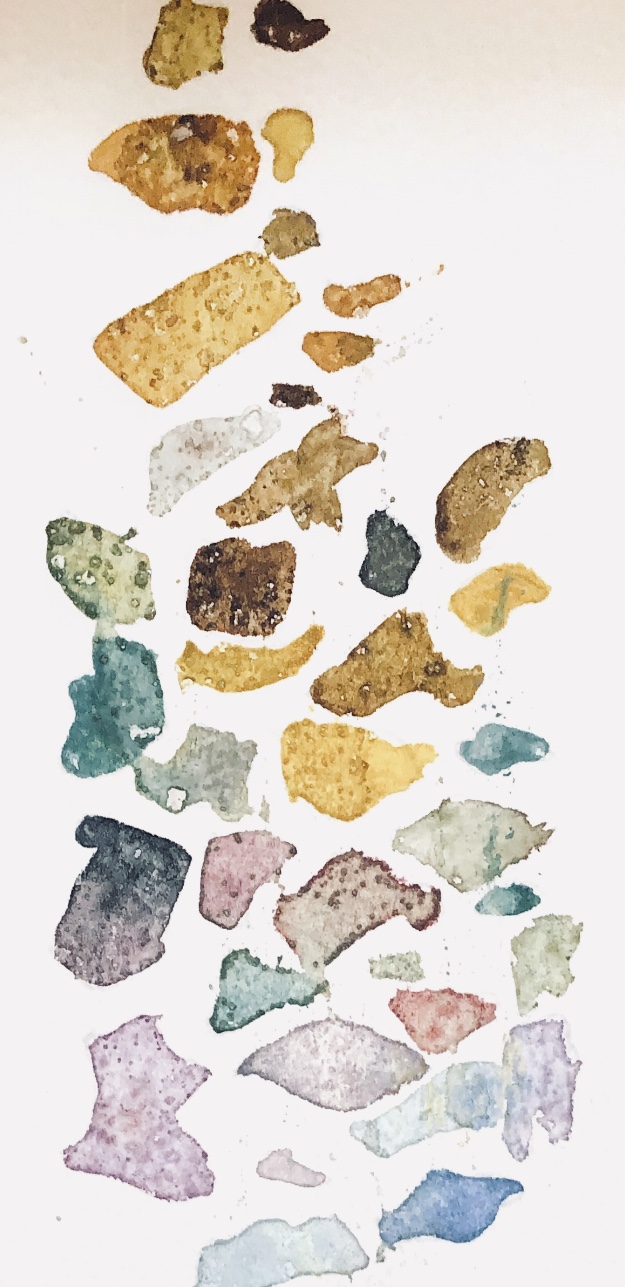
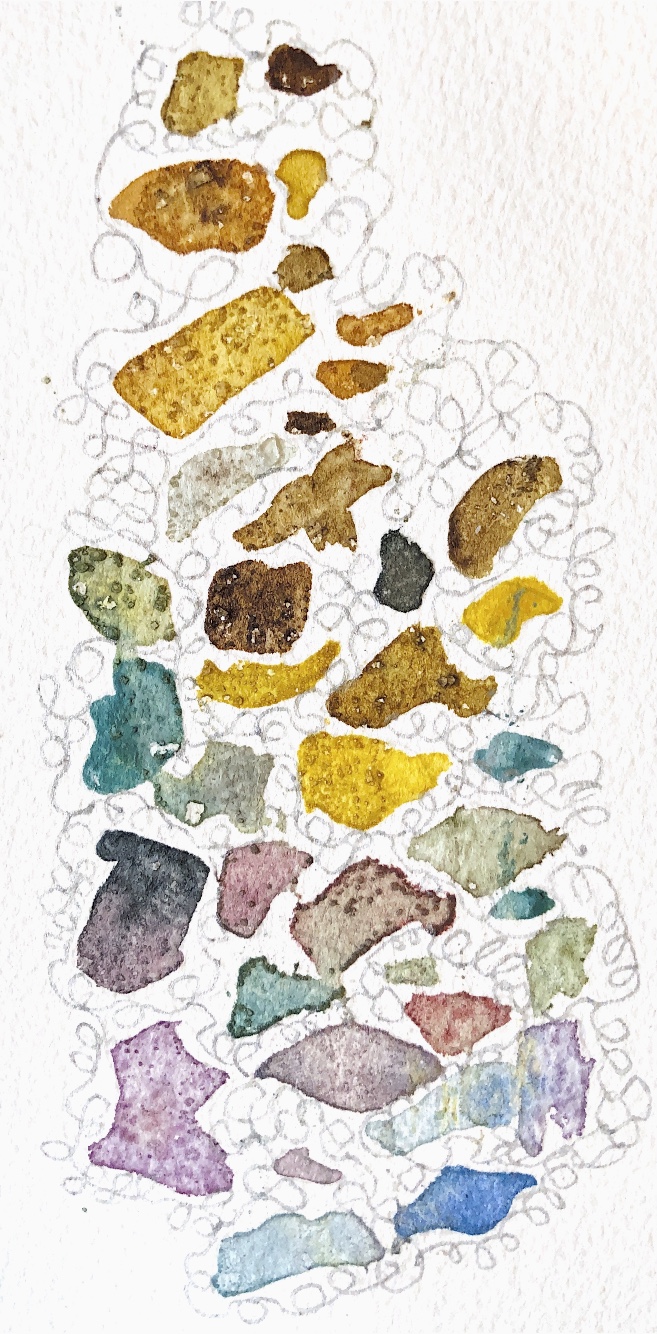
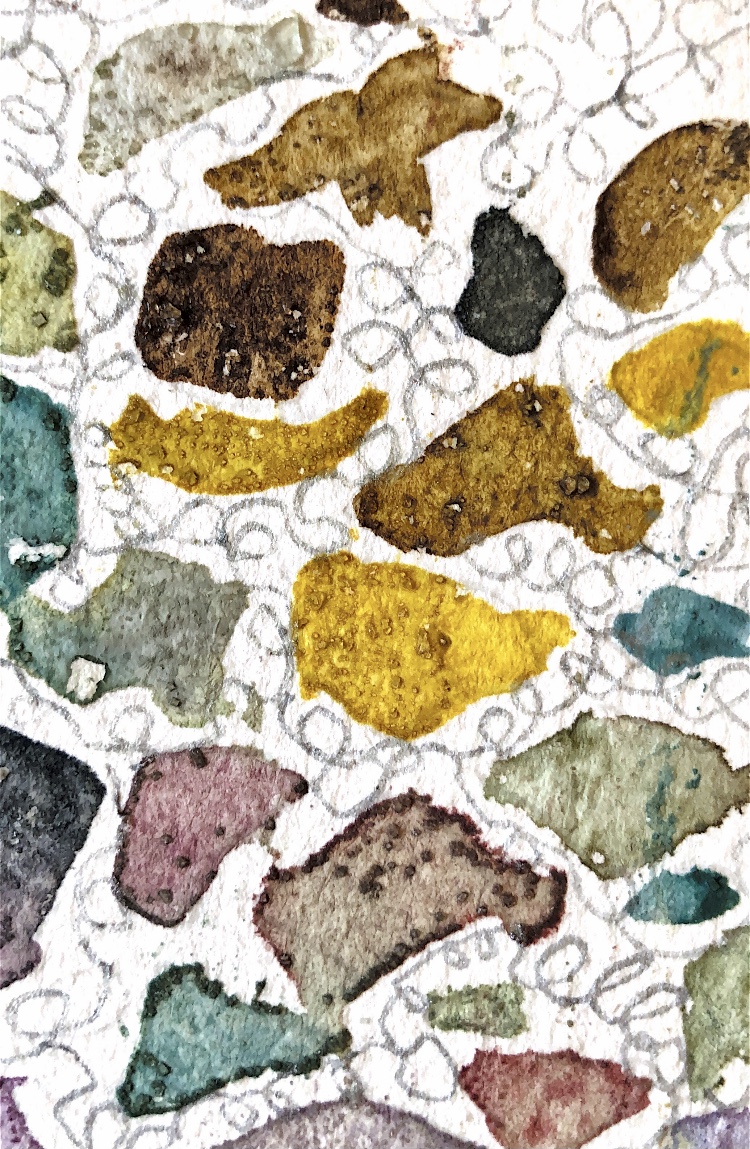
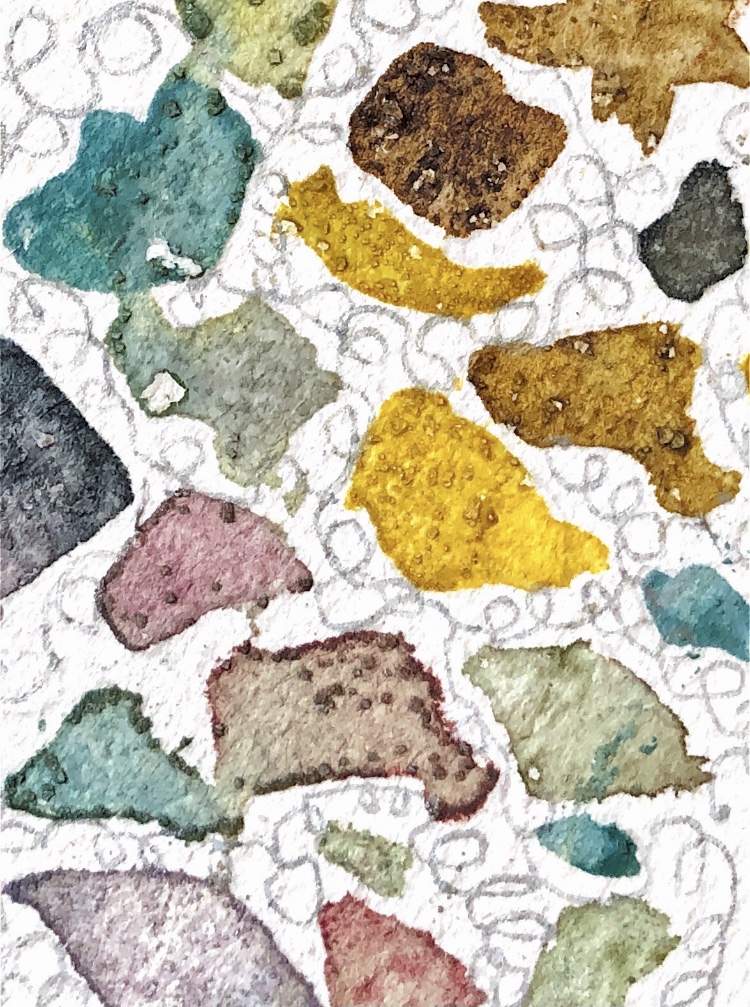
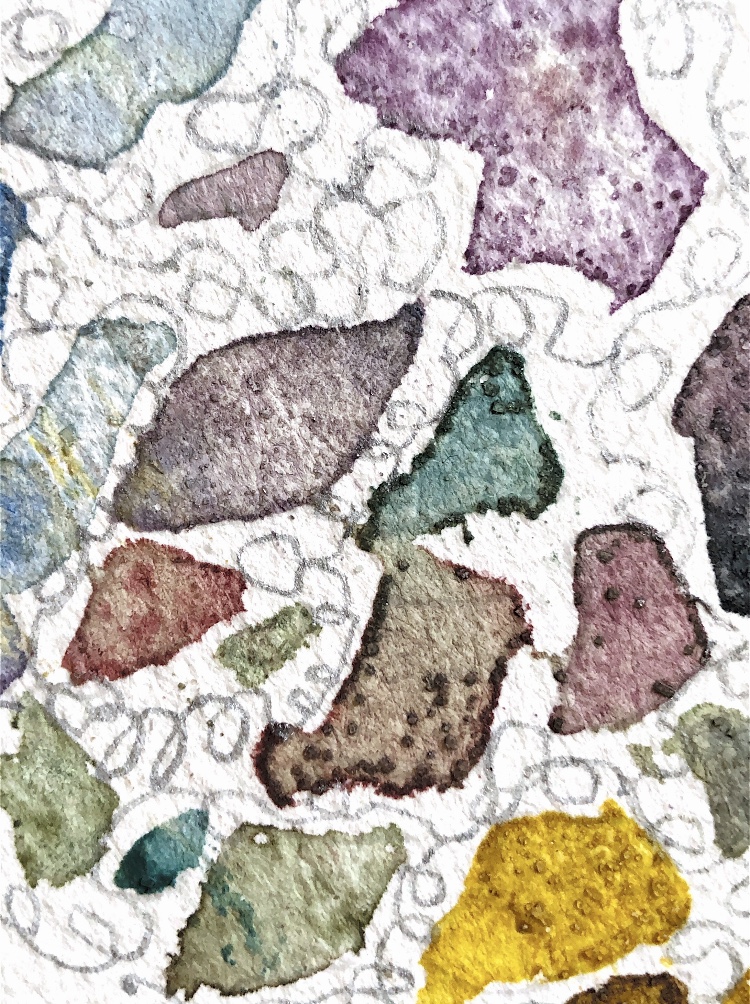
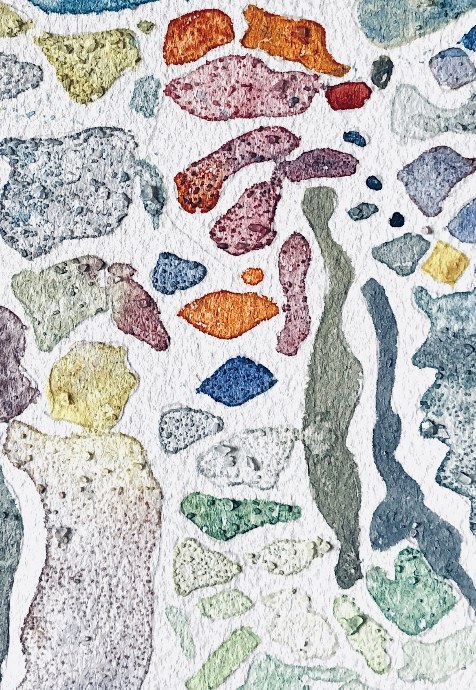
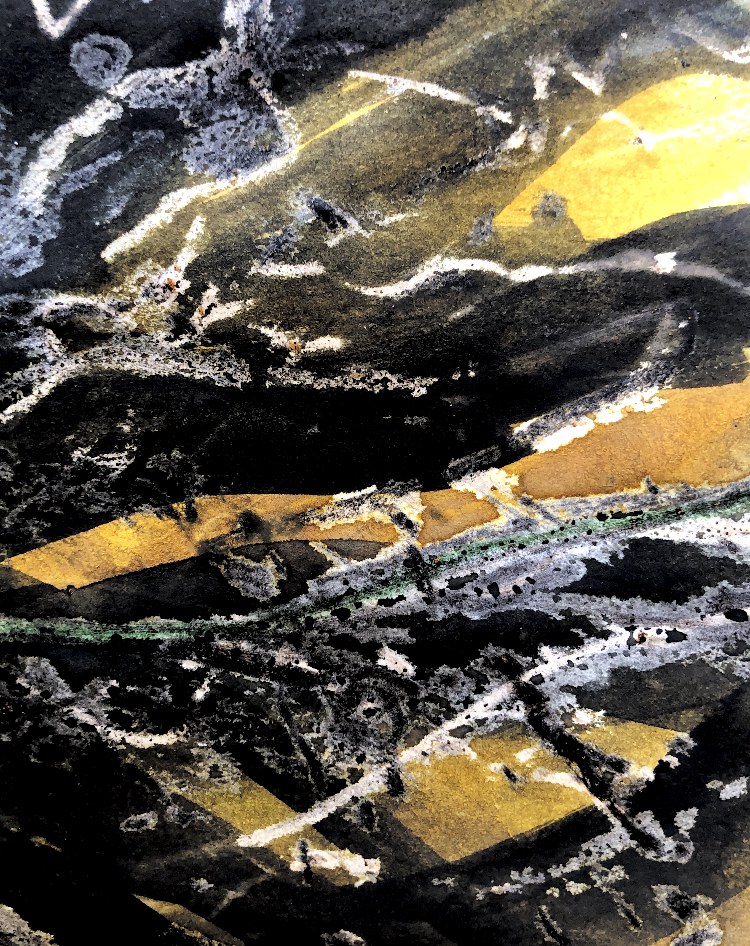
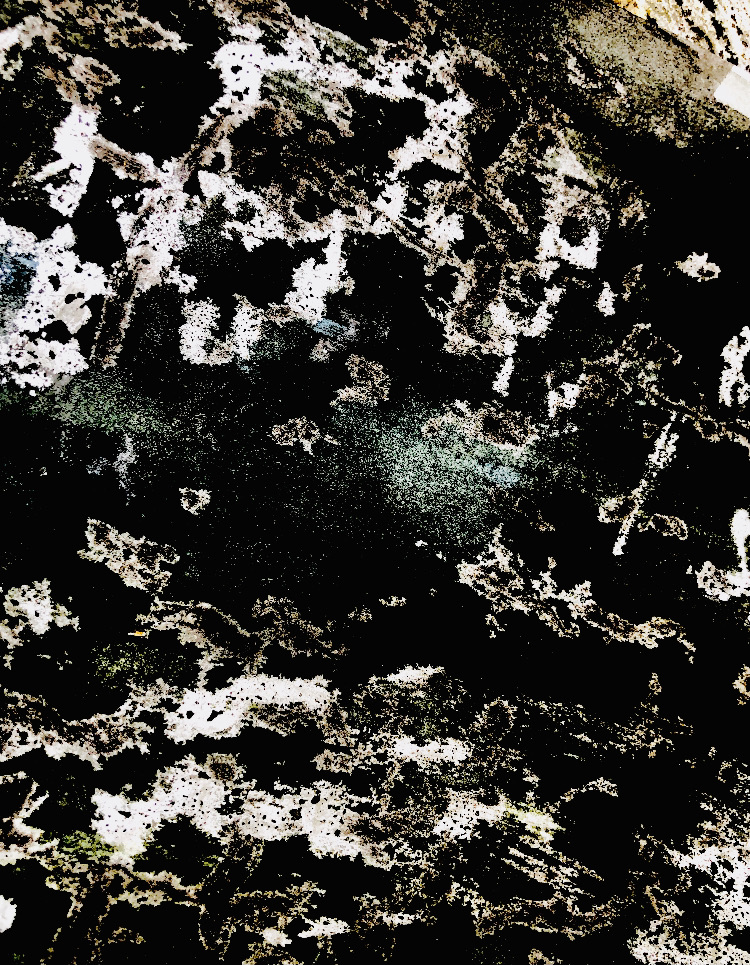
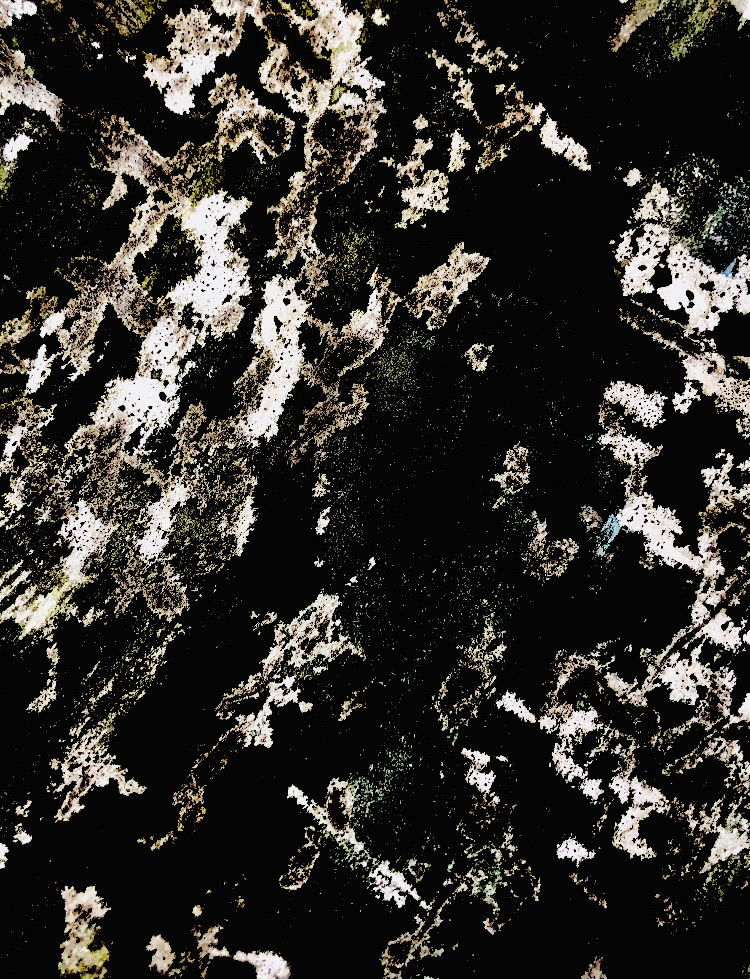
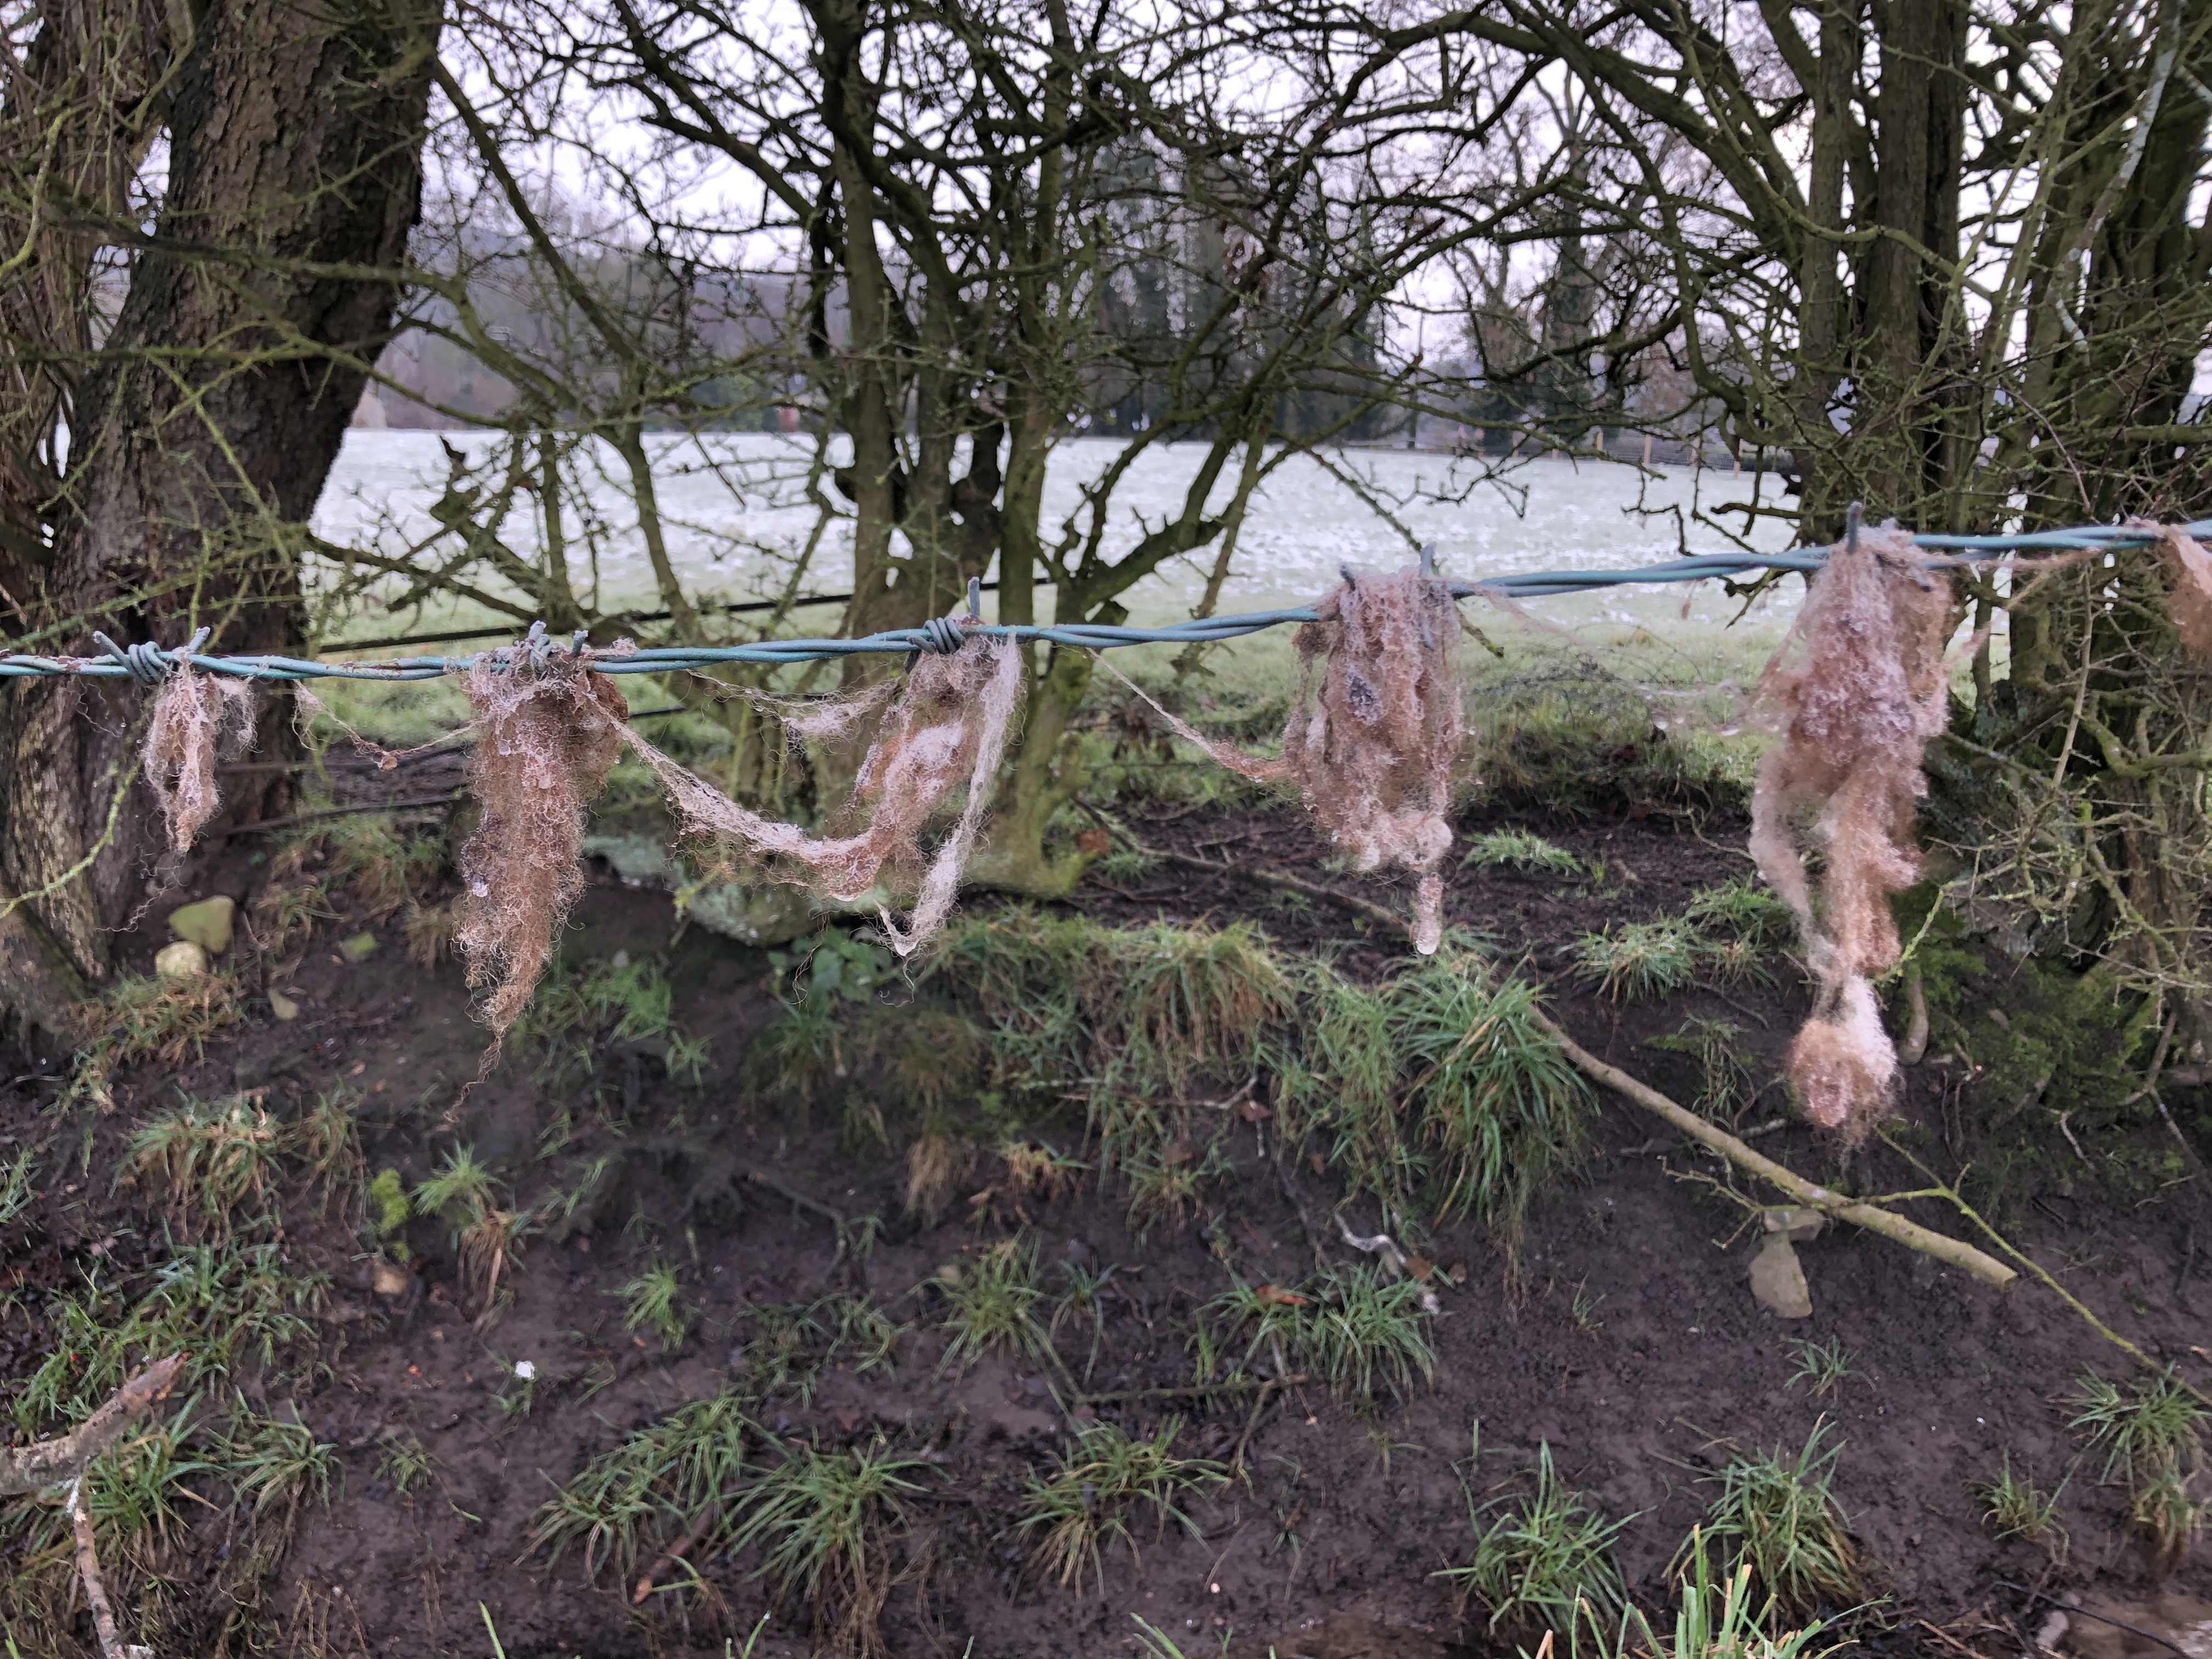
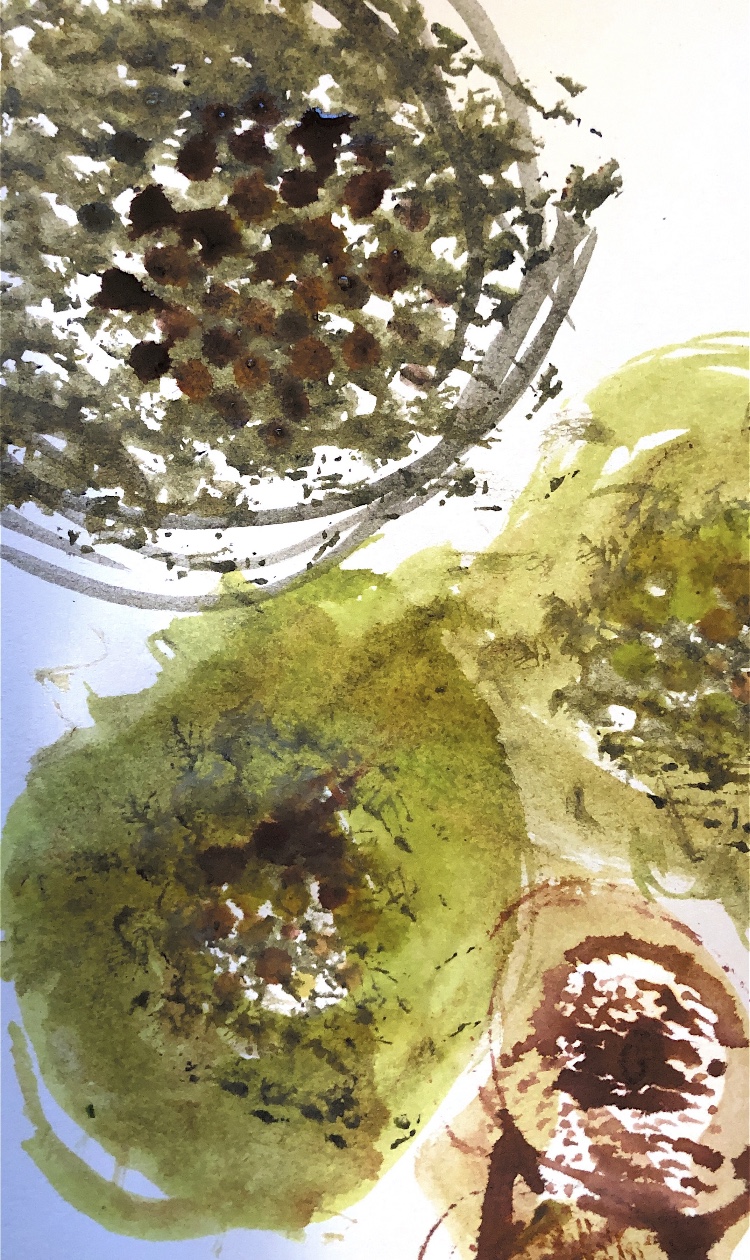
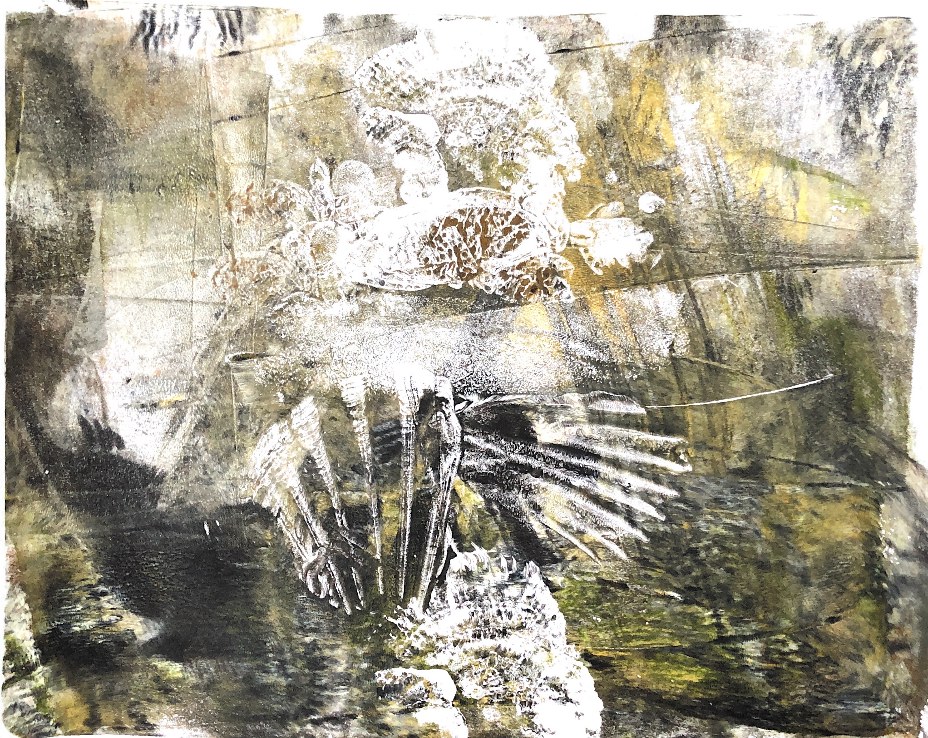
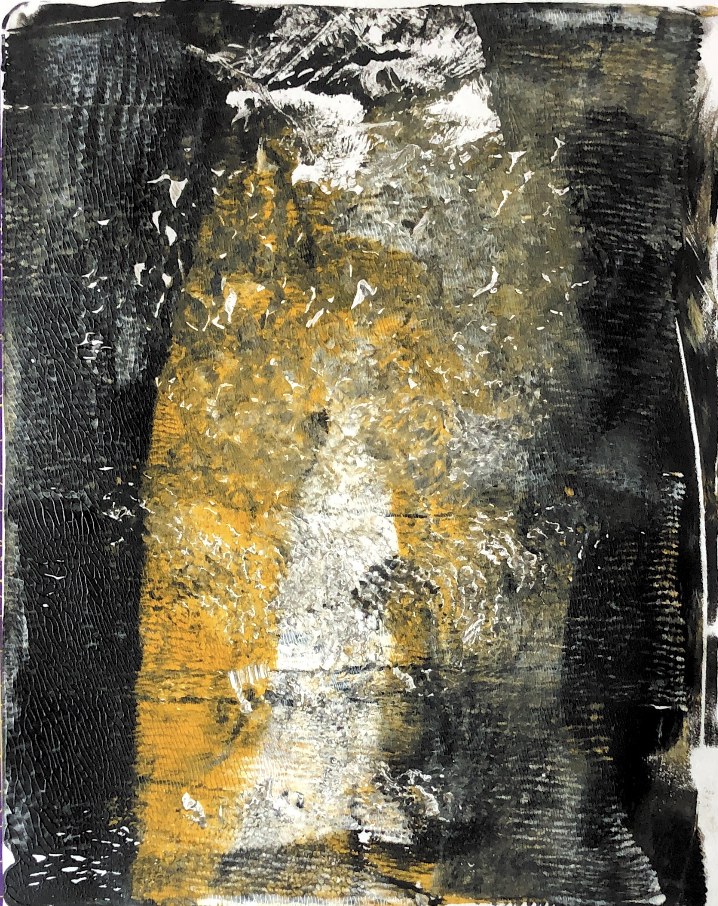
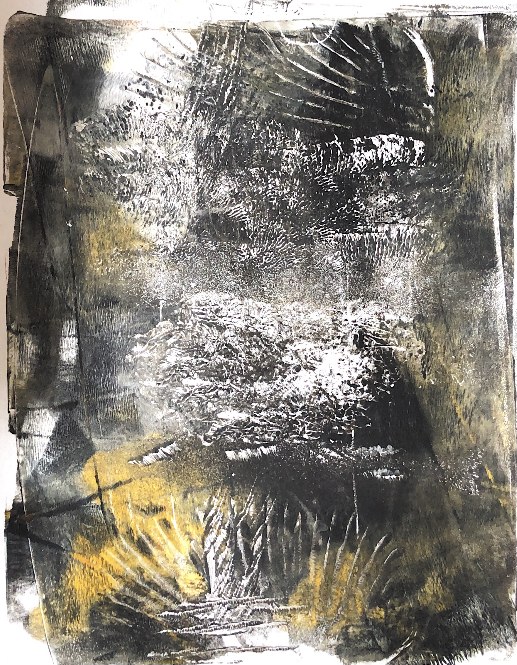
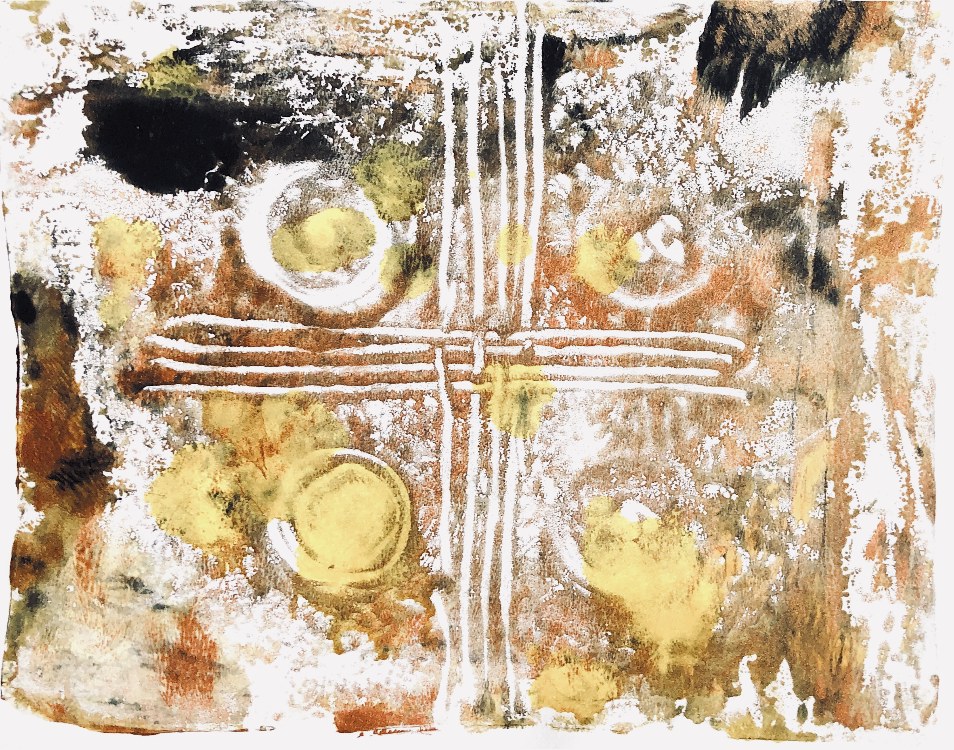
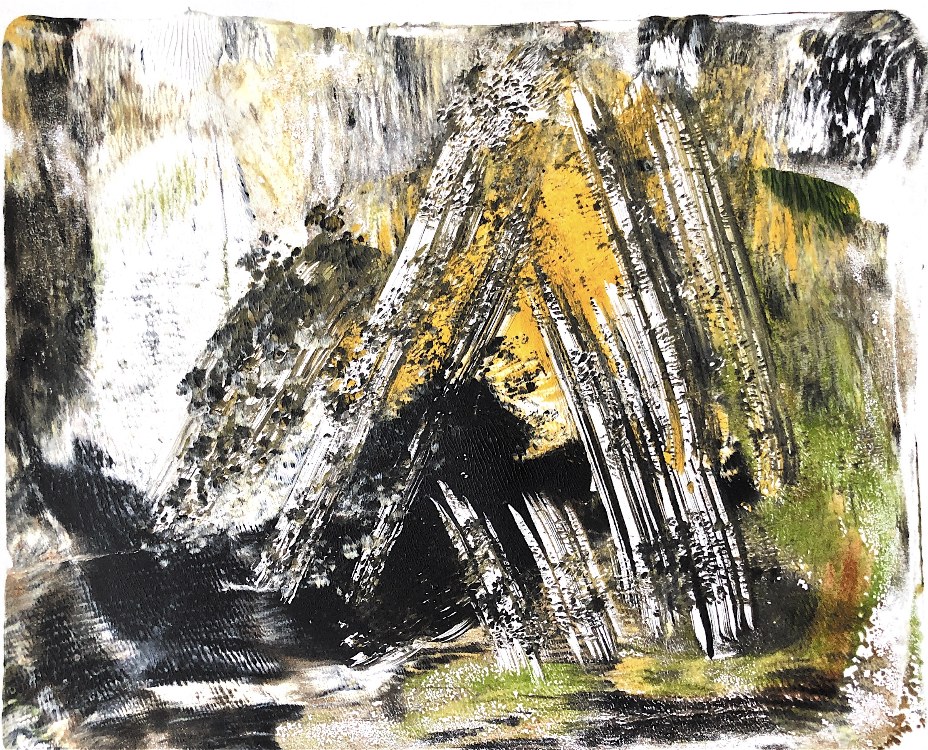
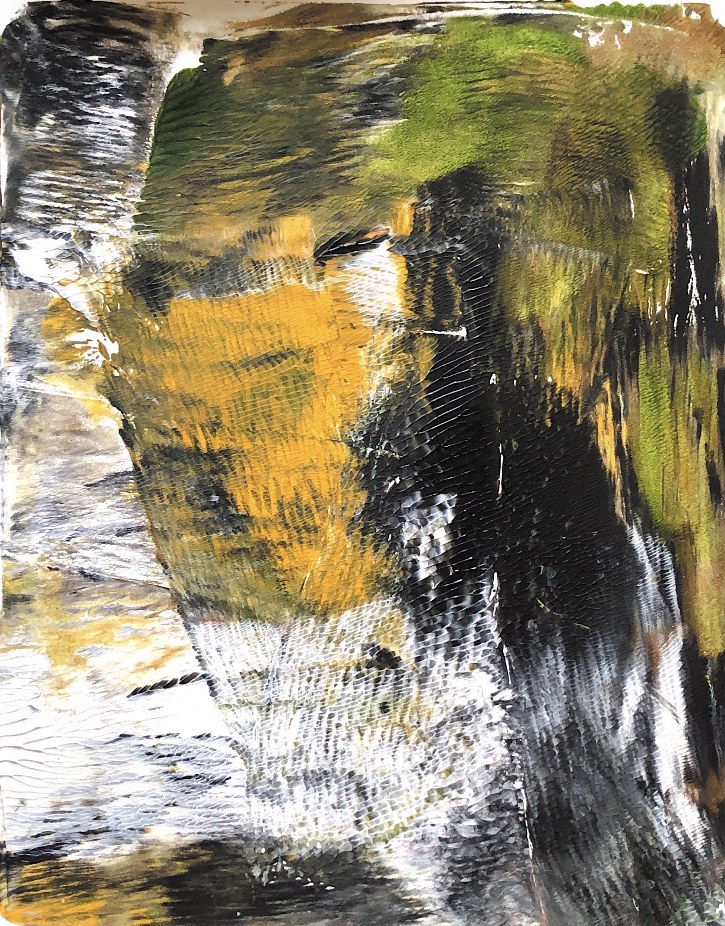
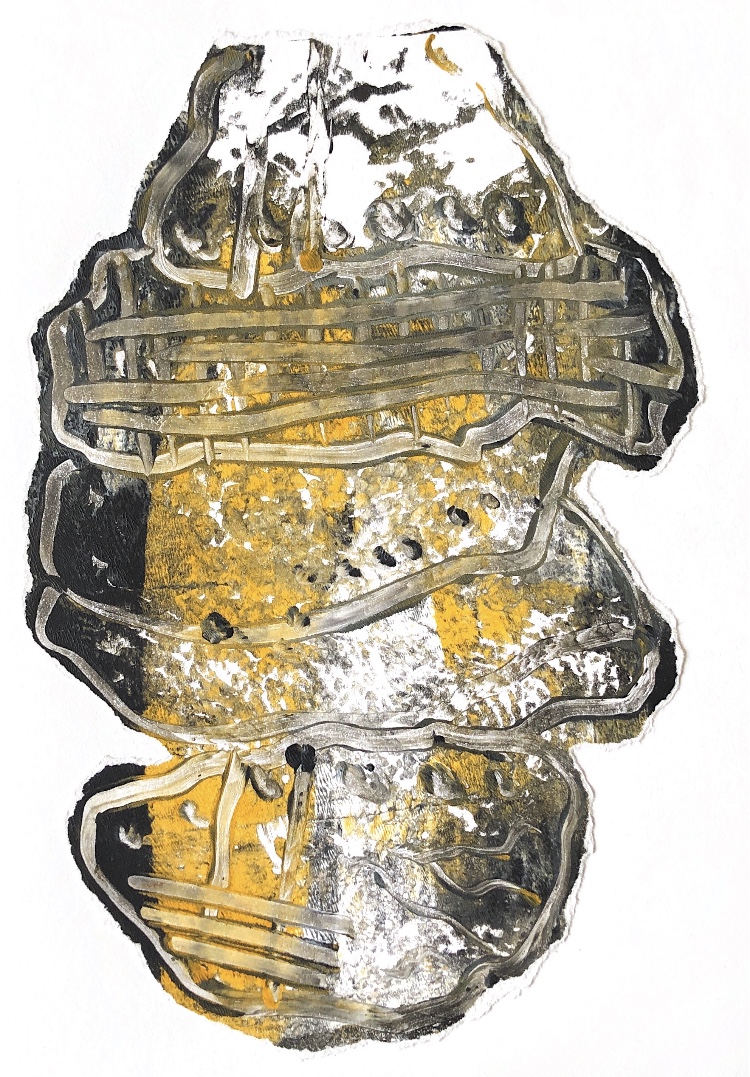
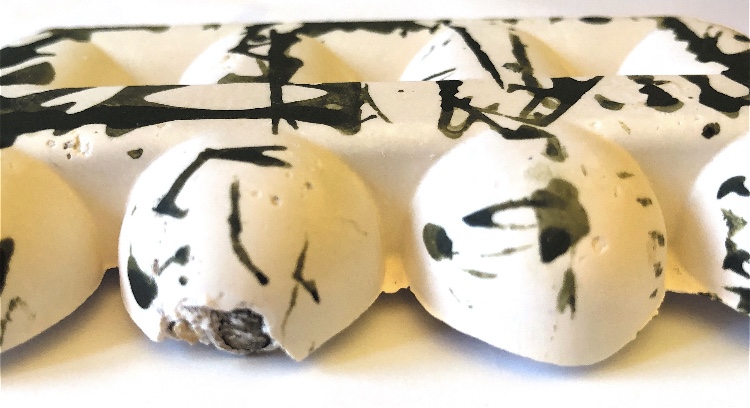
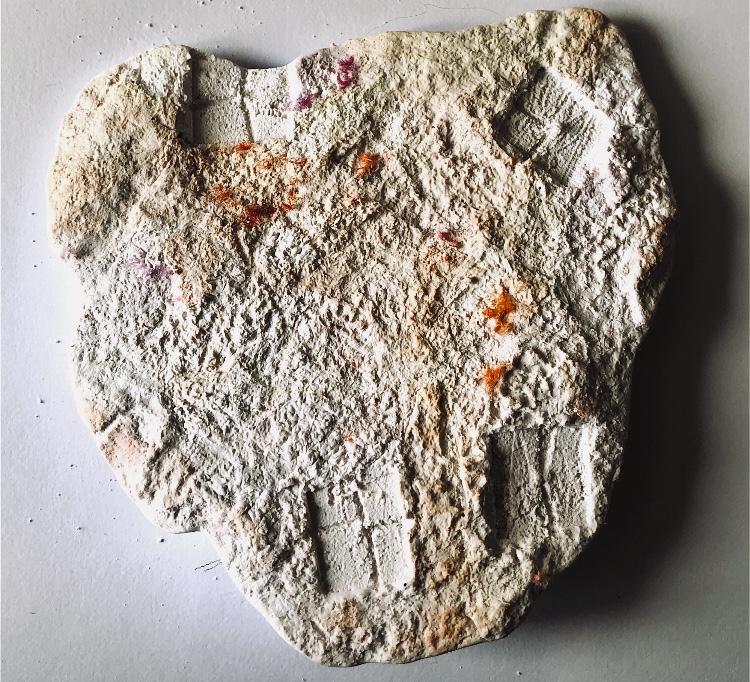
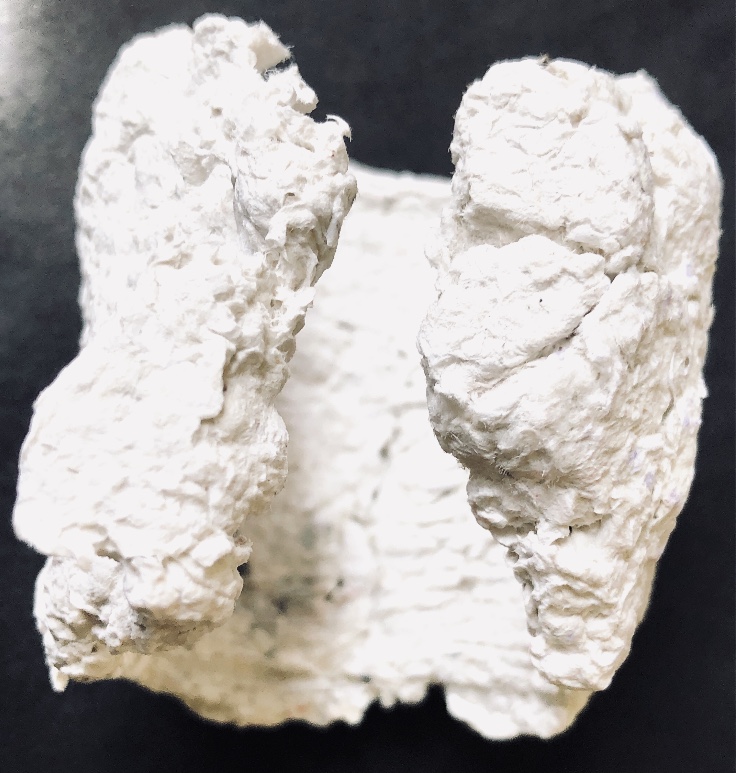
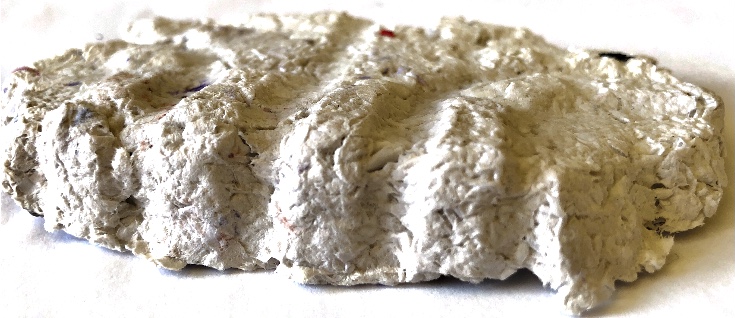
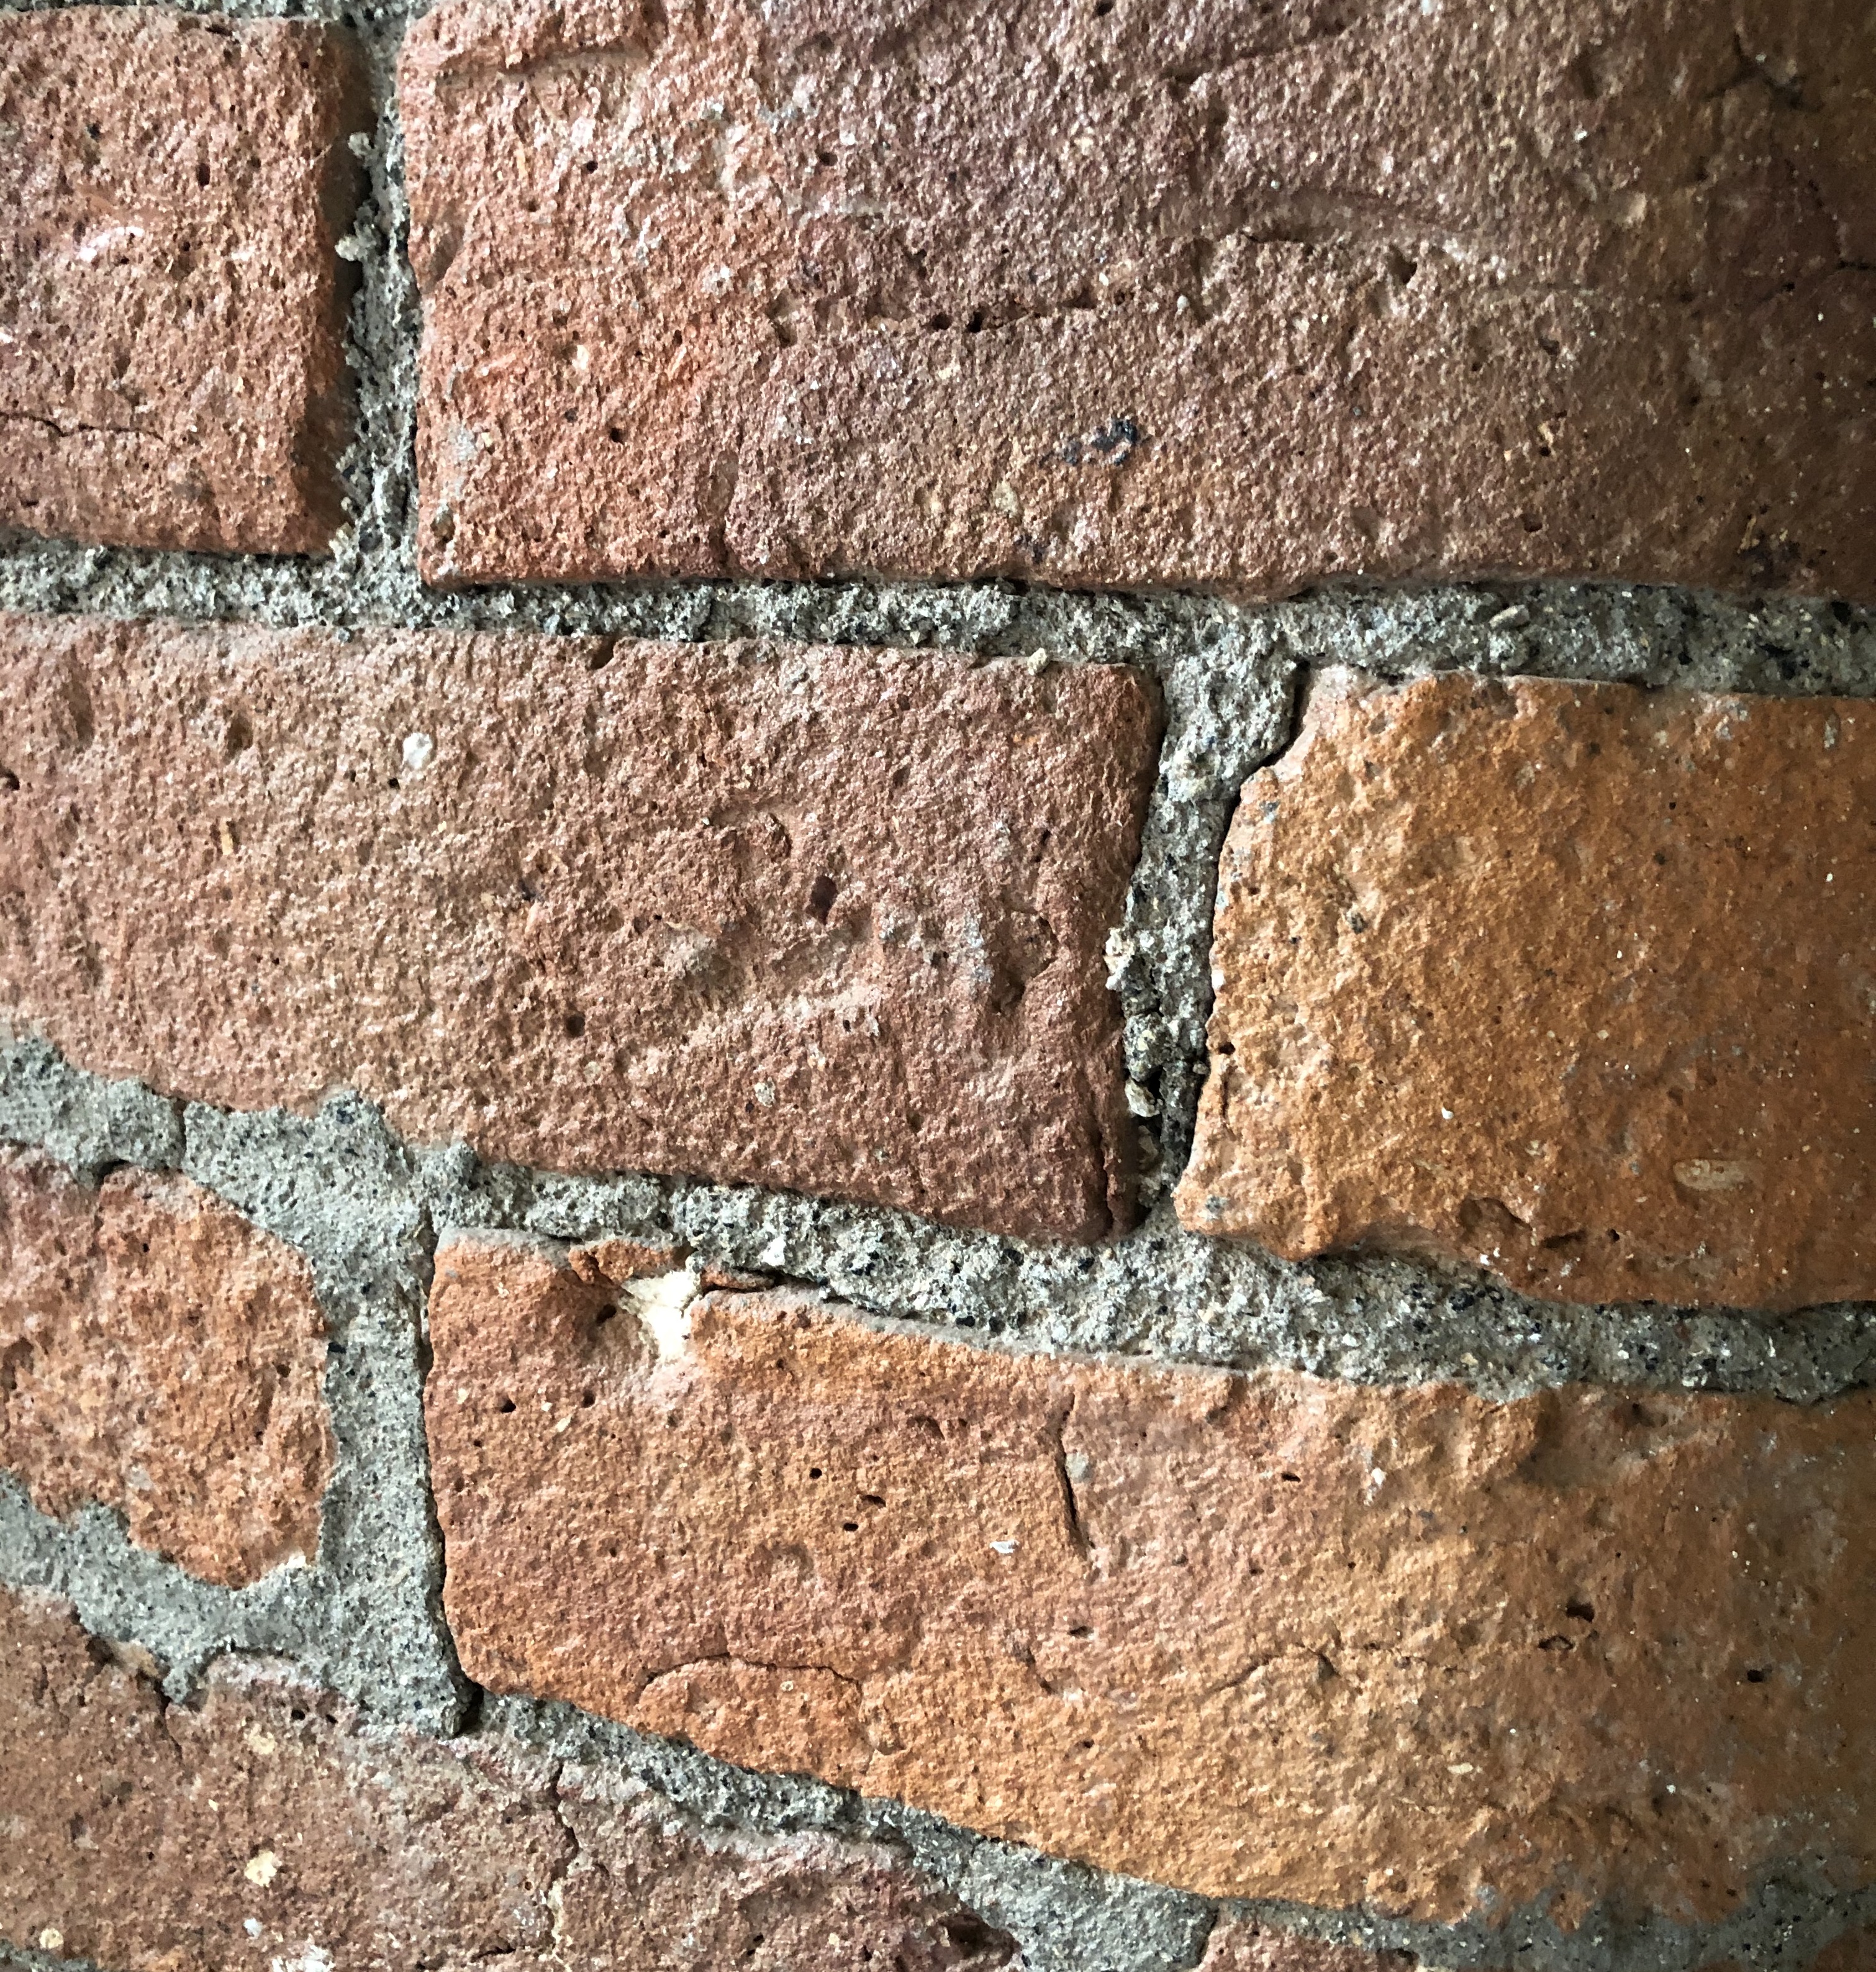
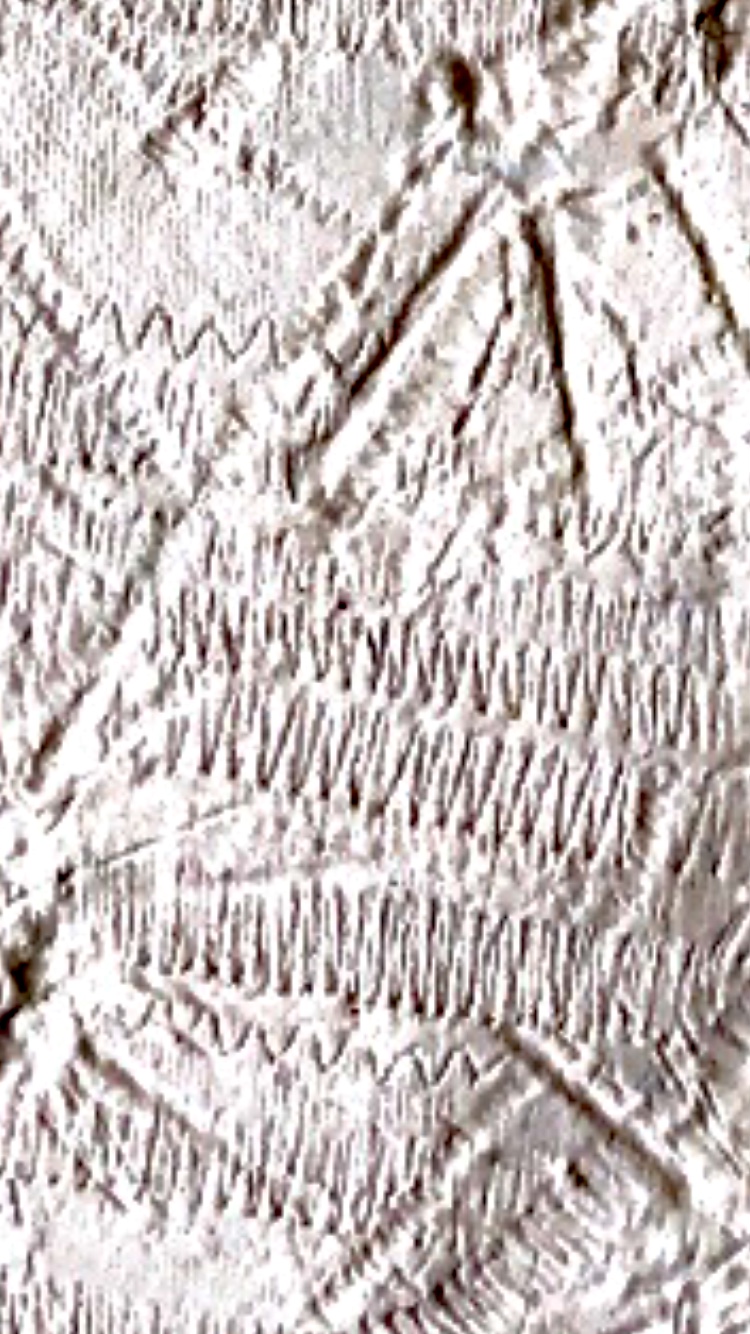
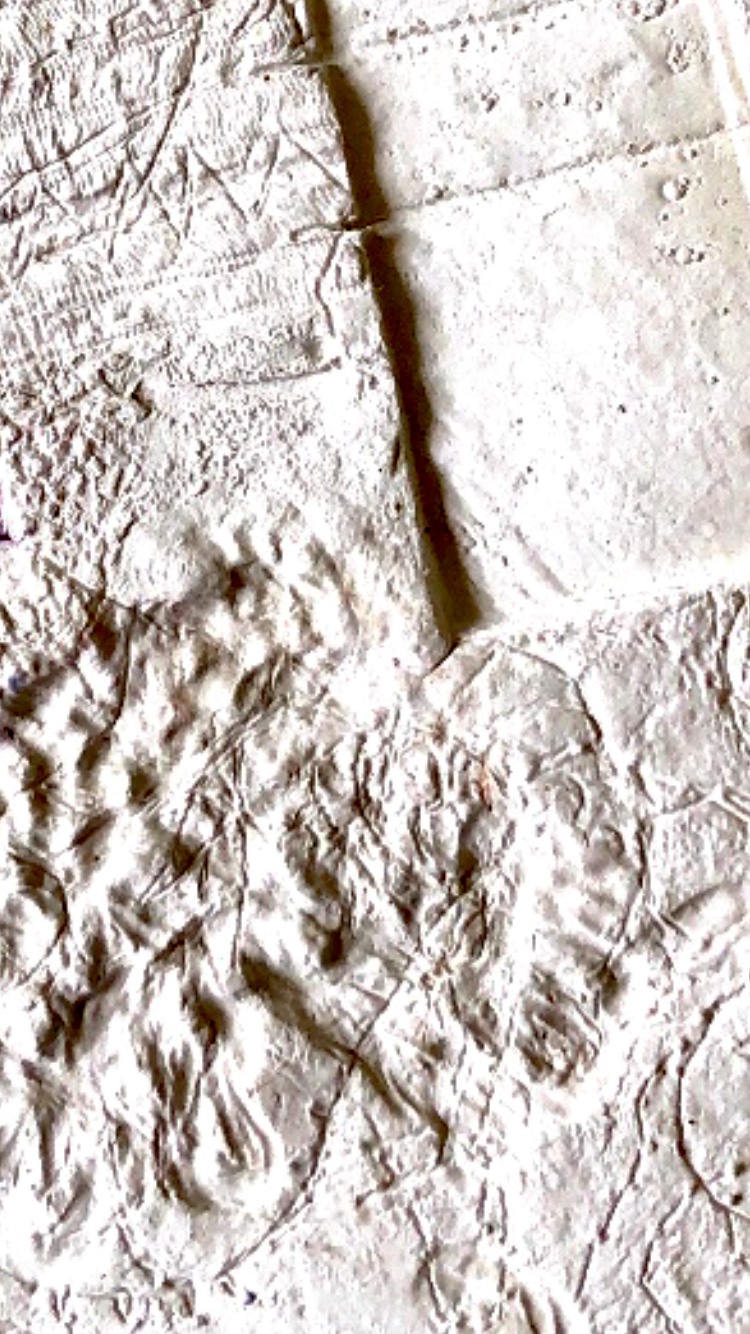
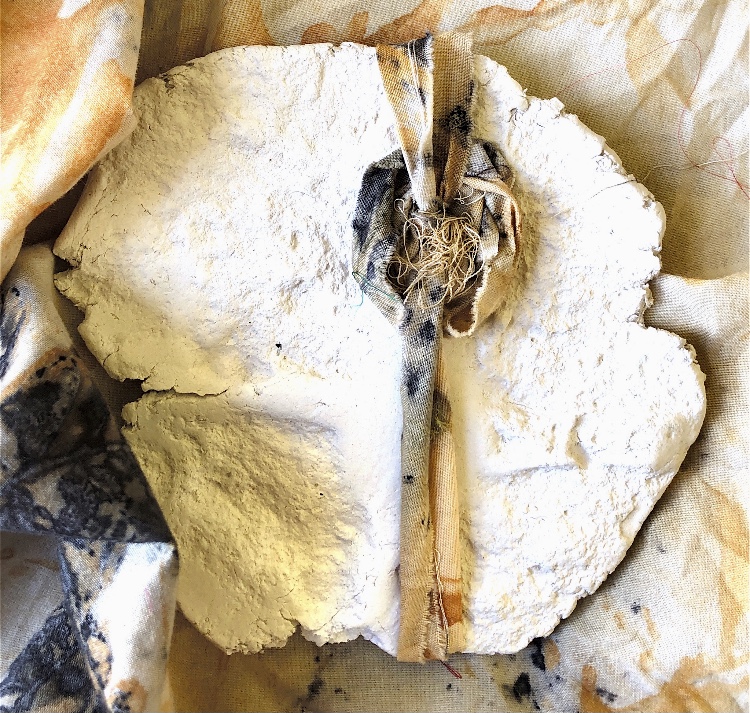
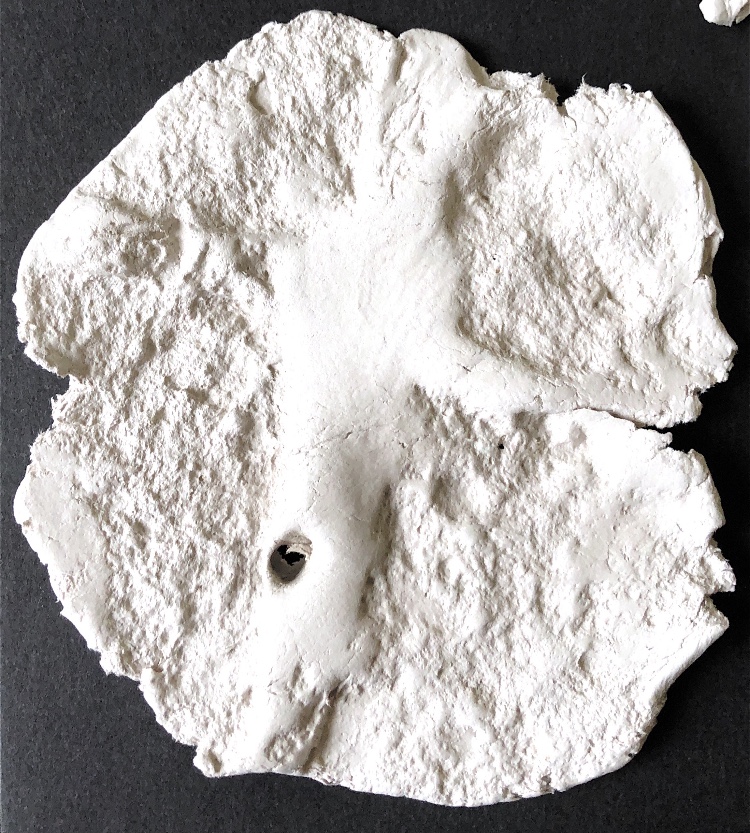
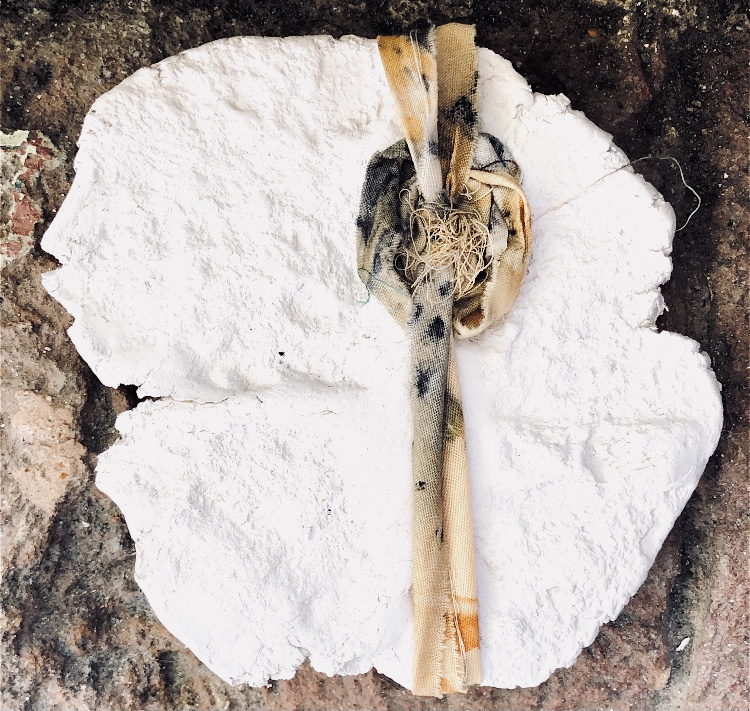
Fig 3. Inspired by a walk in the countryside and also keeping in mind the idea of assemblage I created plaster of Paris samples with textured surfaces. The material was poured onto fabrics to create stone like shapes and textures and these were assembled into layers reminiscent of dry stone walls. Tiny fibres from the fabrics, like the wool caught in barbed wire, remain in the samples. The shapes and patterns were really inspirational for monoprinting and collage, using the natural colours of the stone walls in the picture.

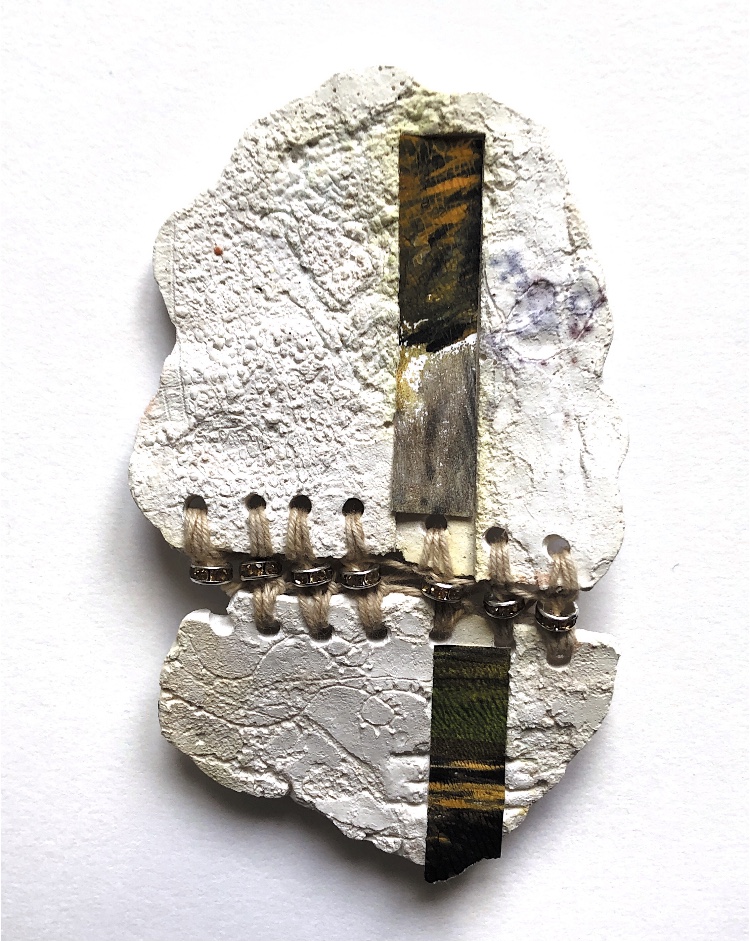
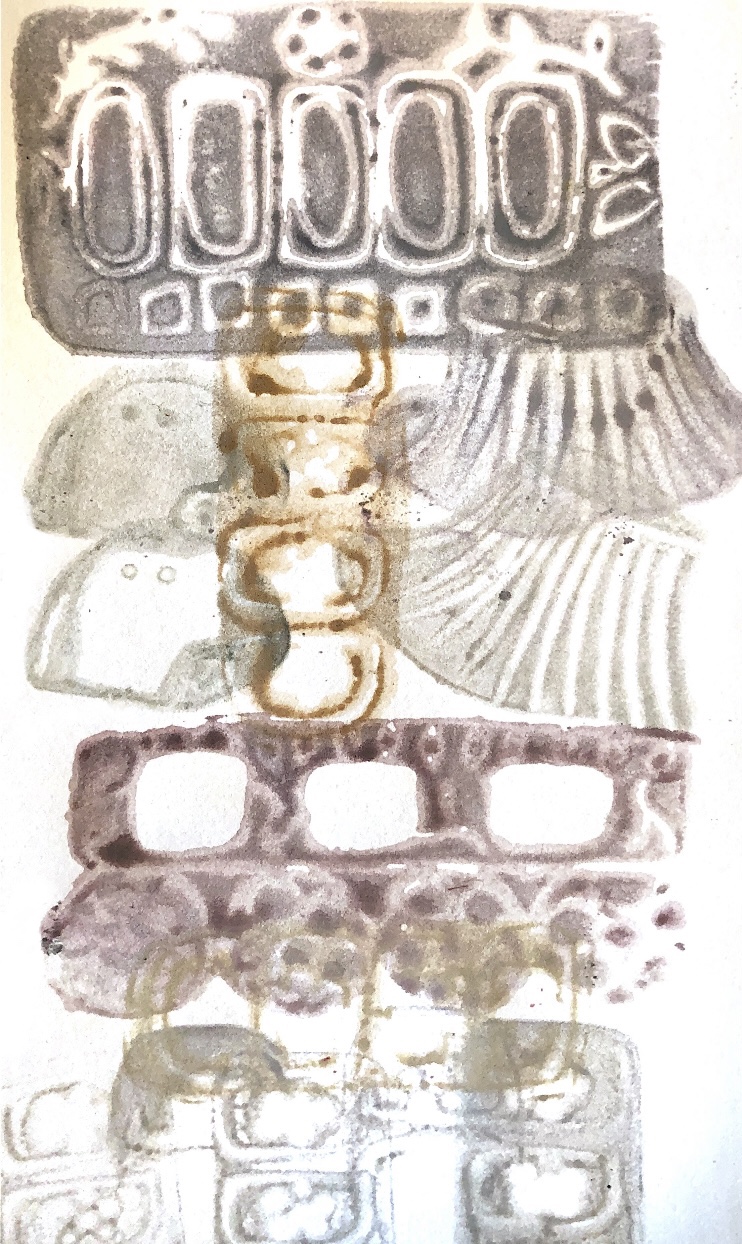
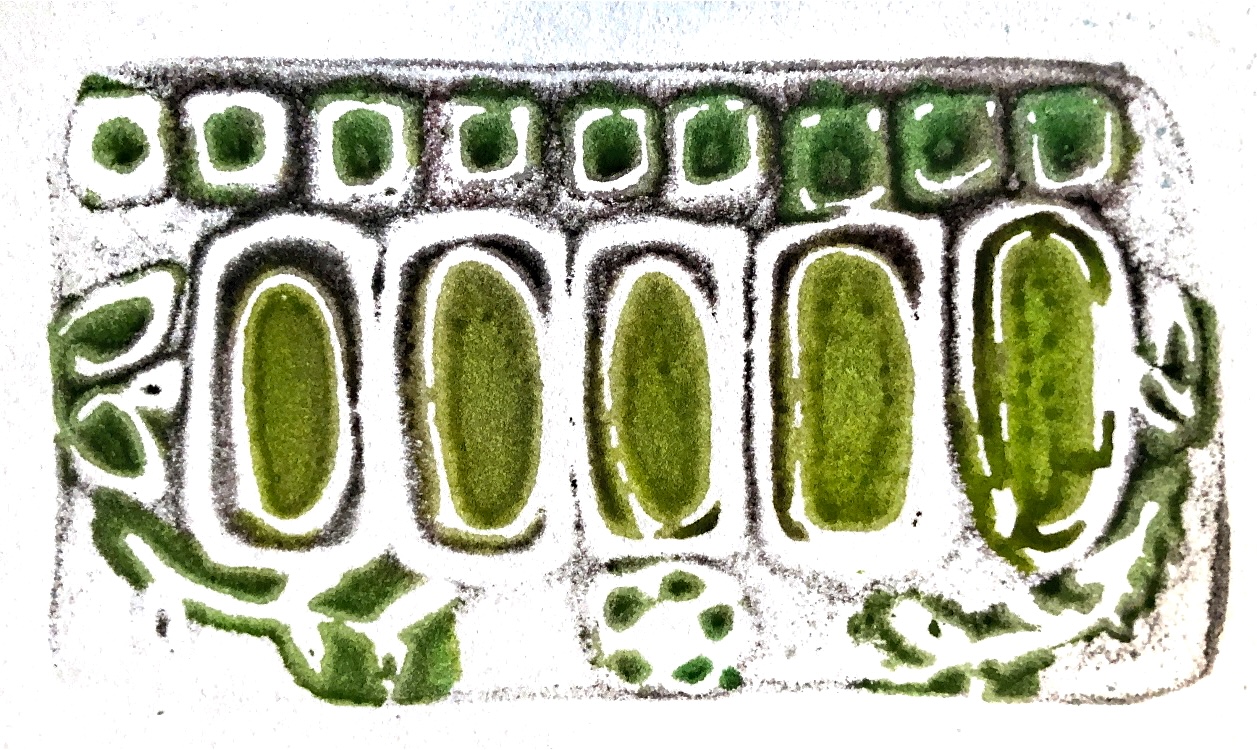
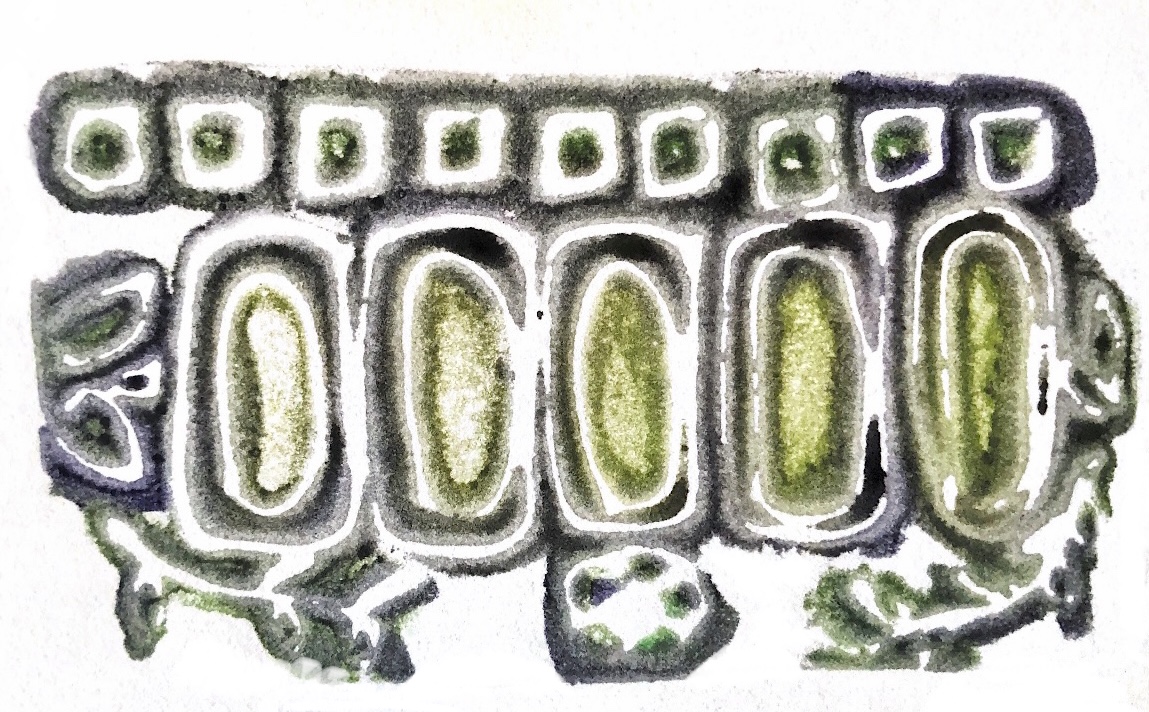
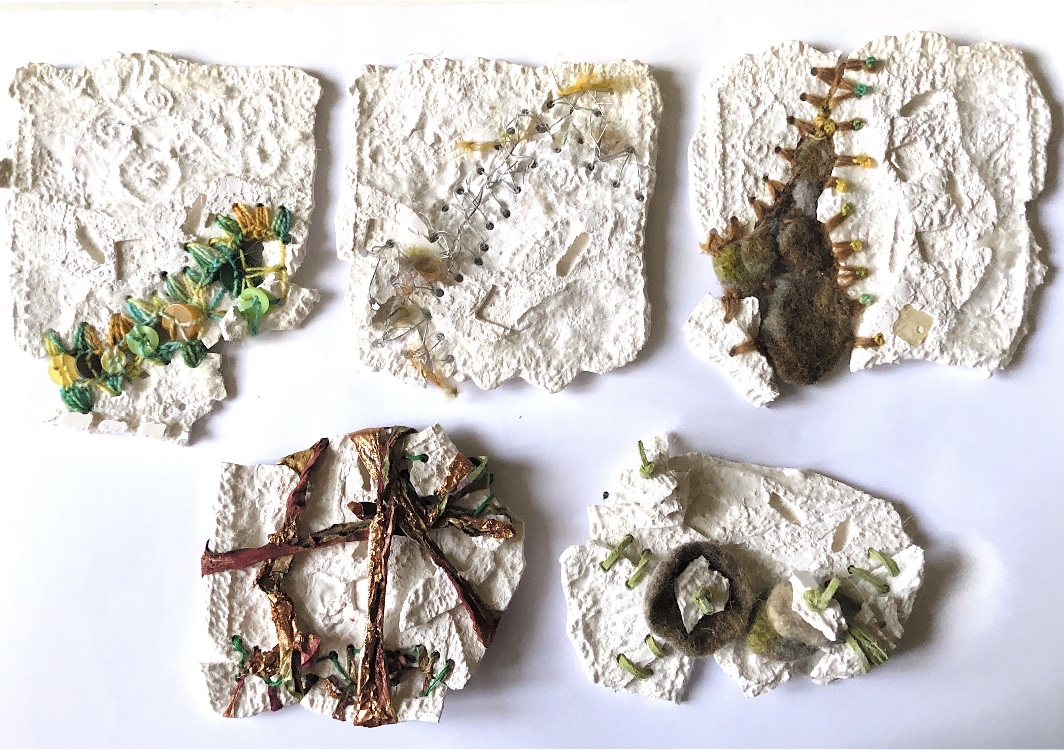
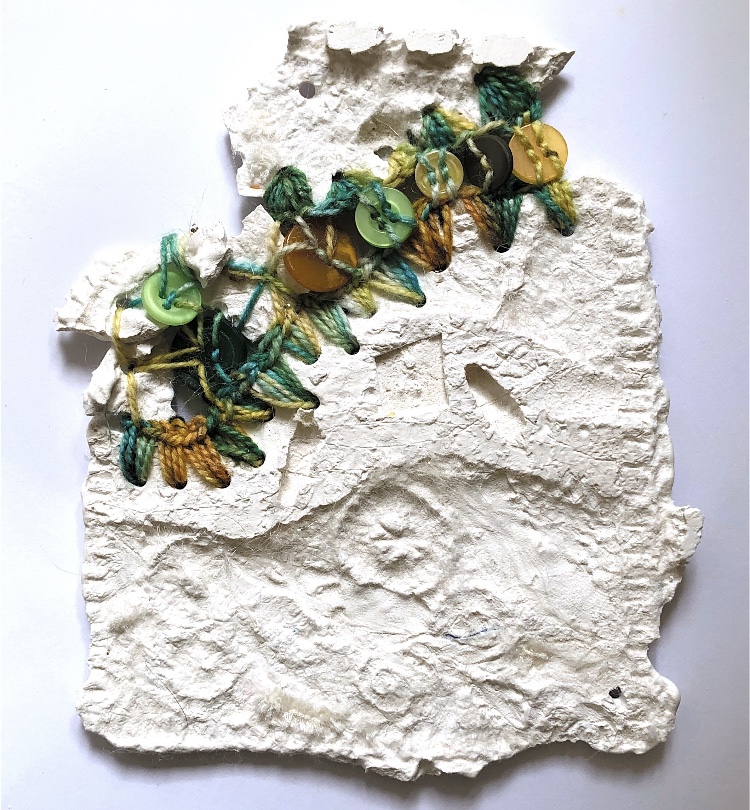
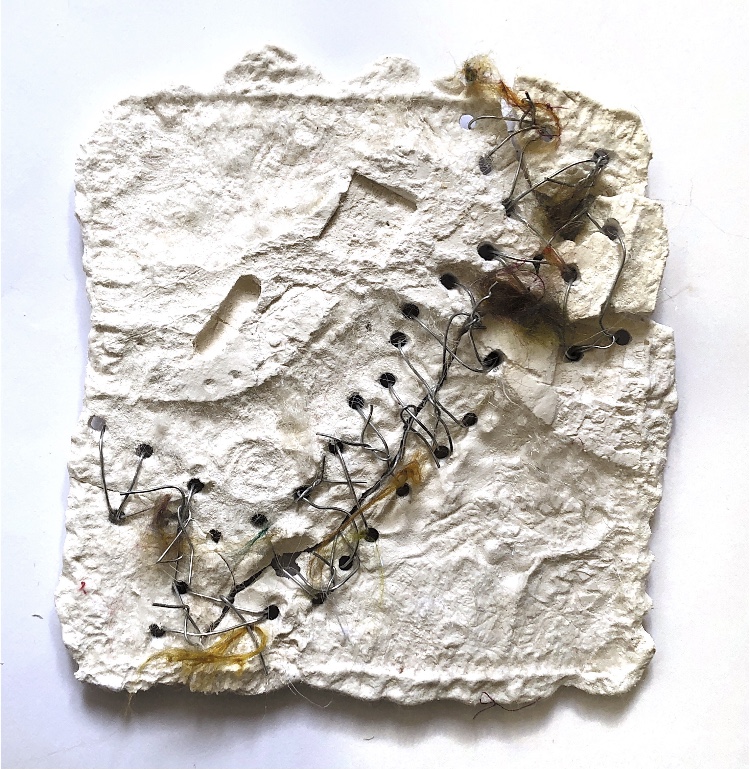
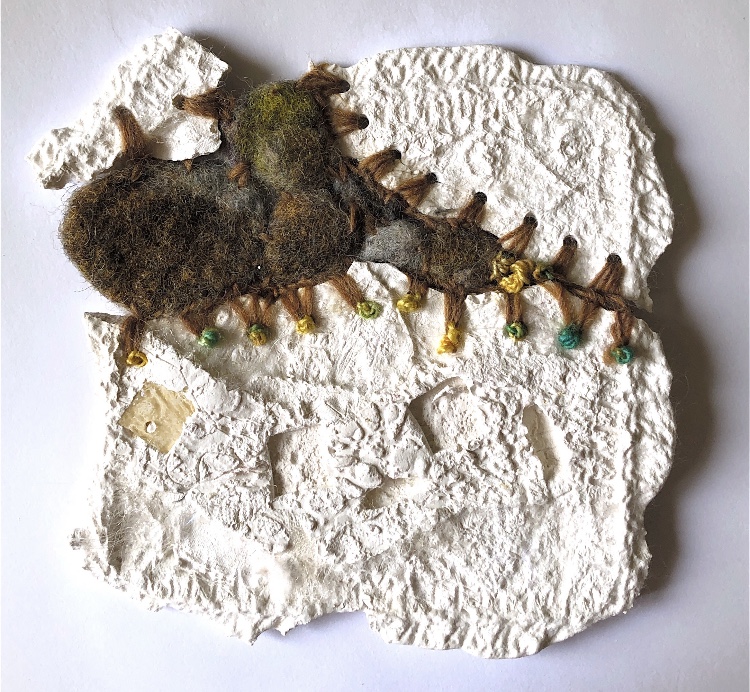
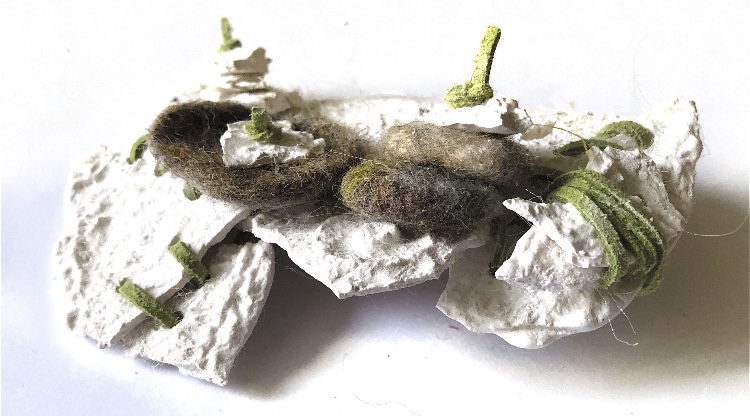
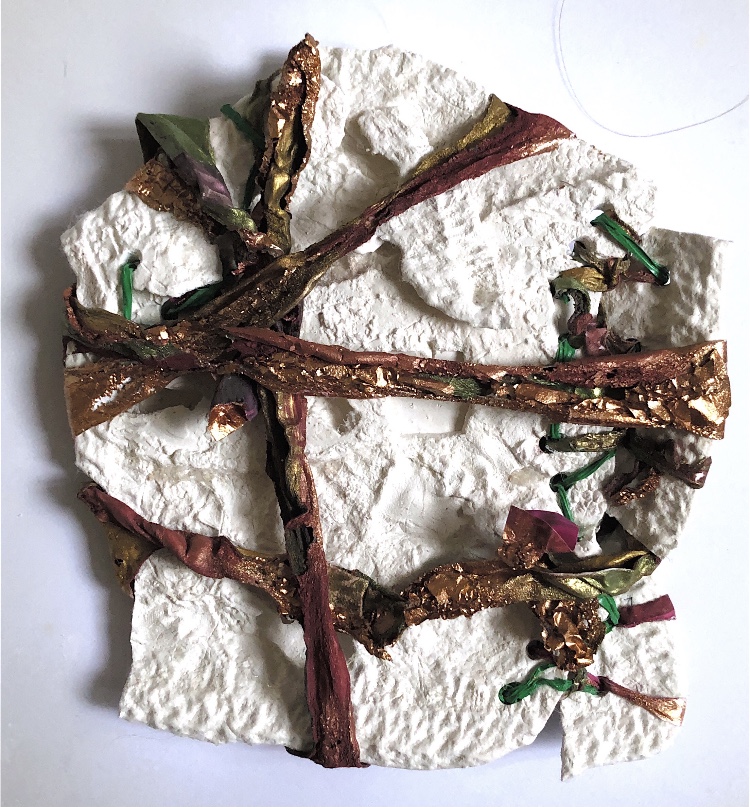
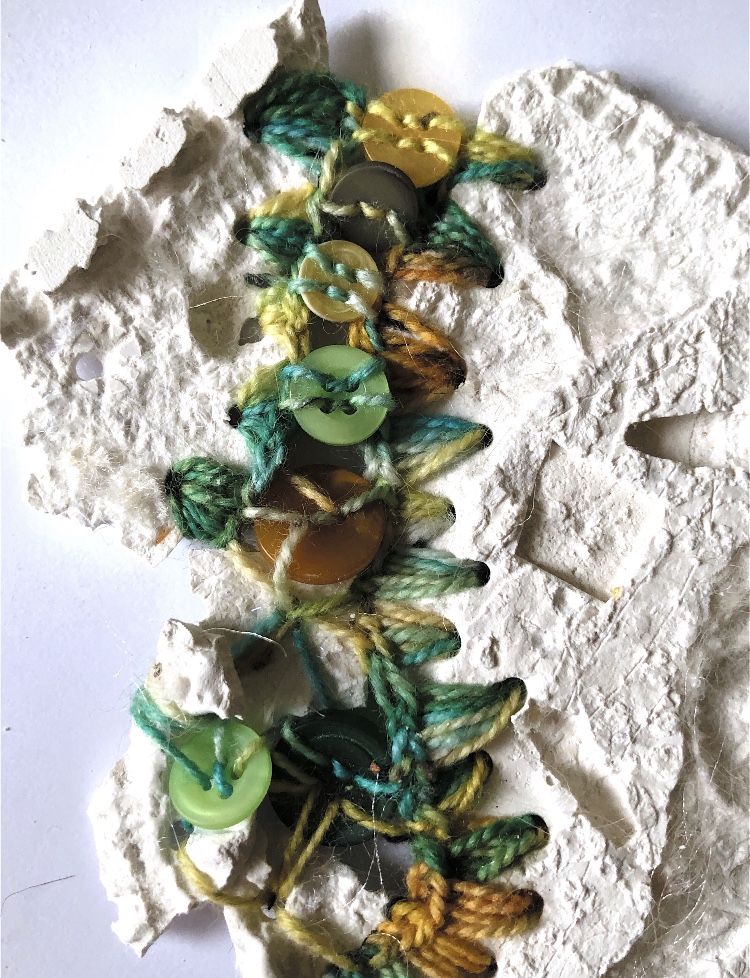
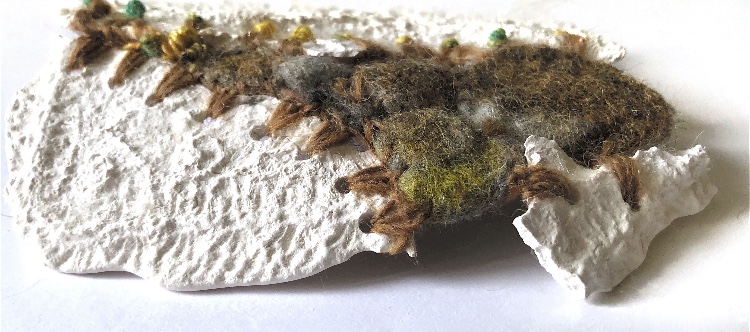
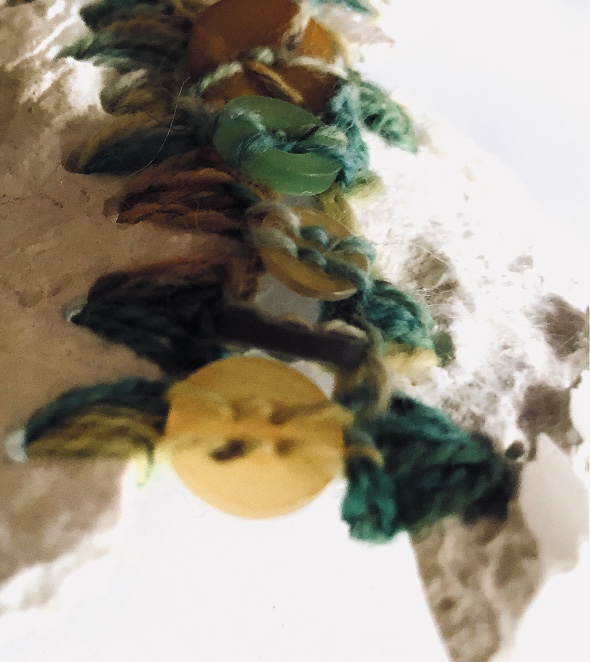
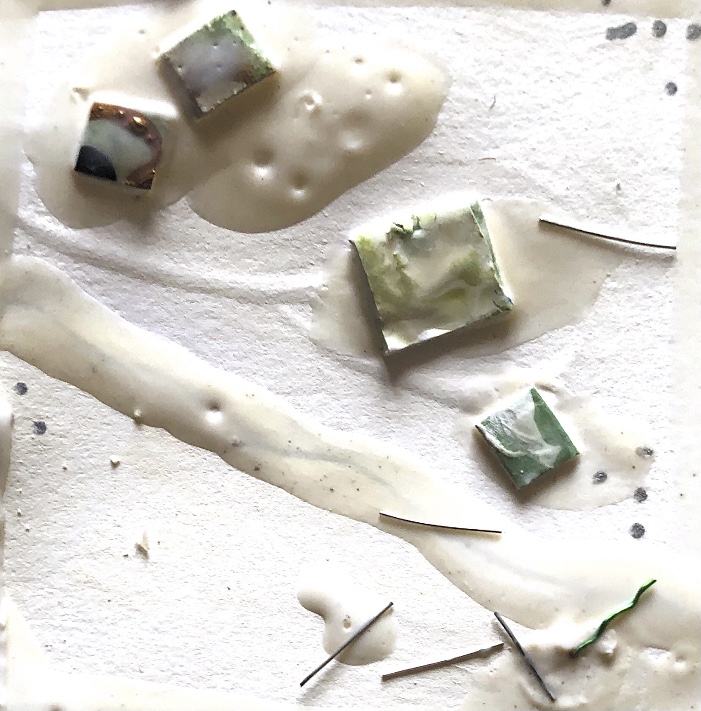
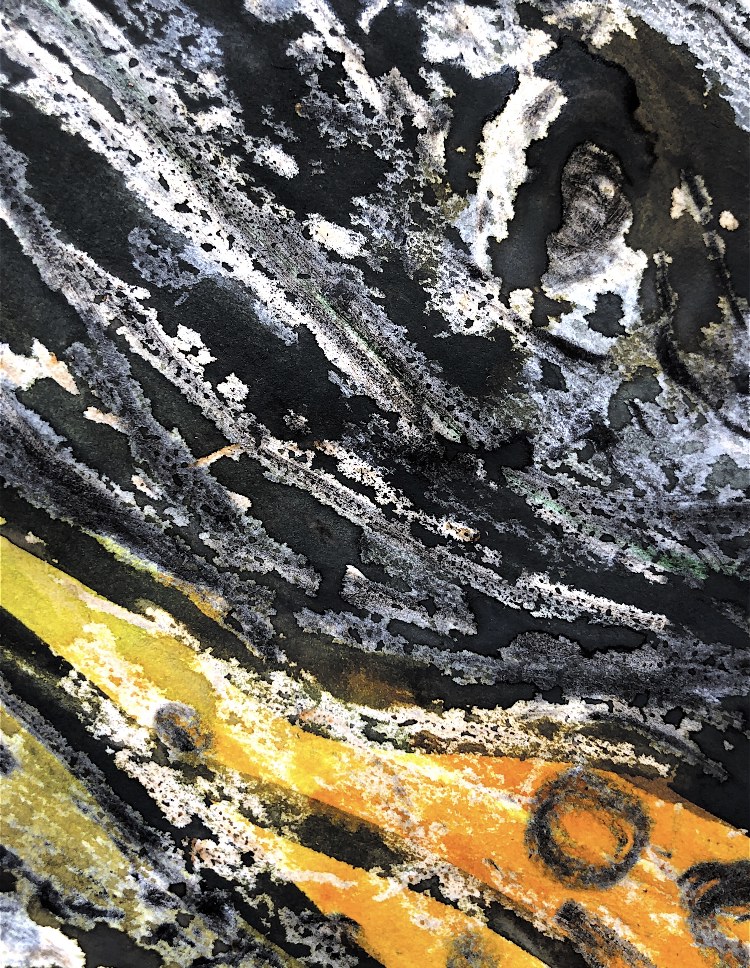
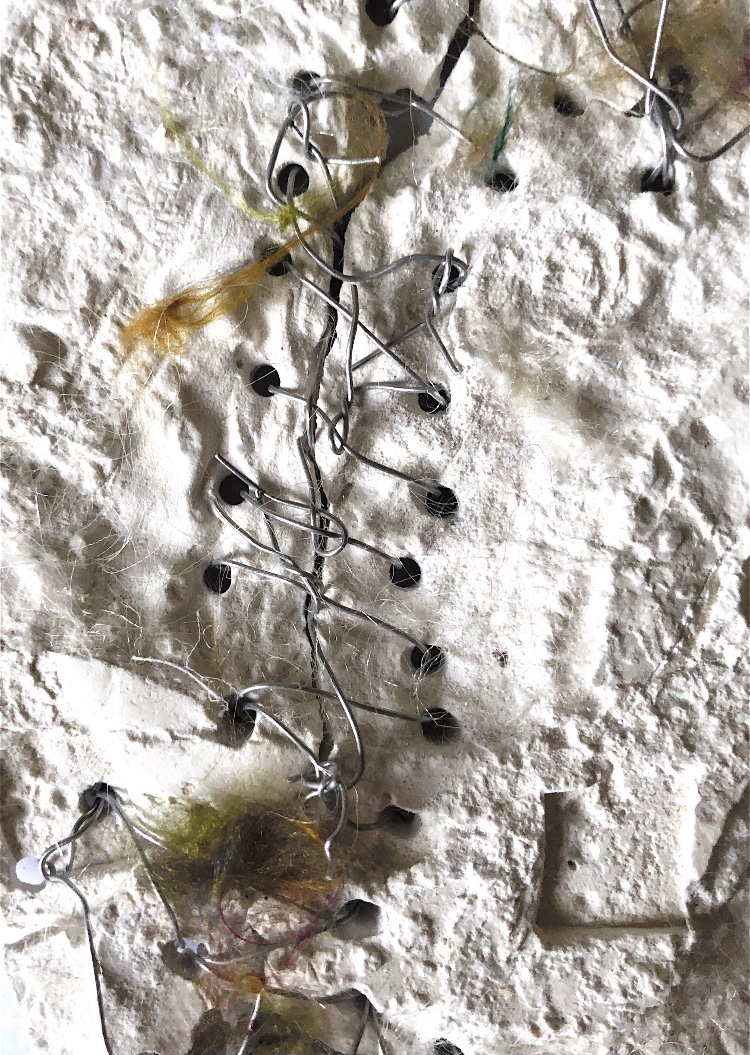
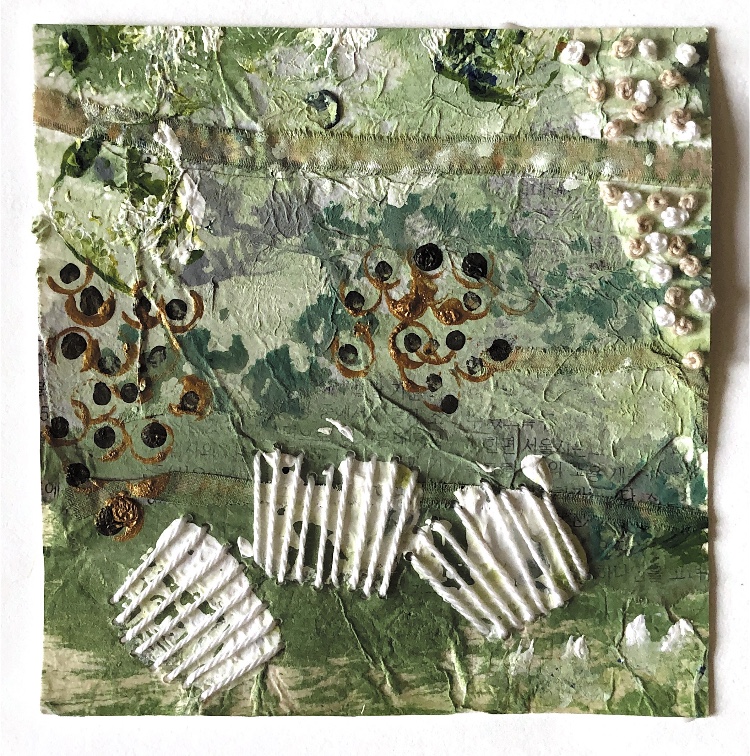
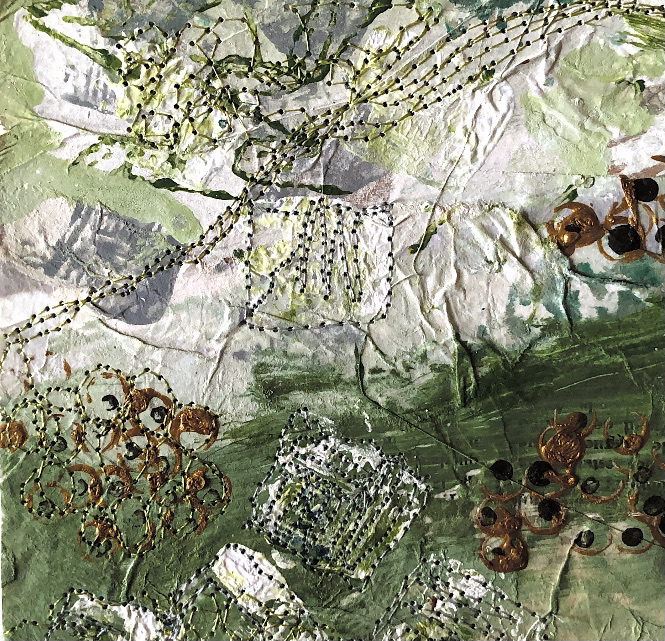
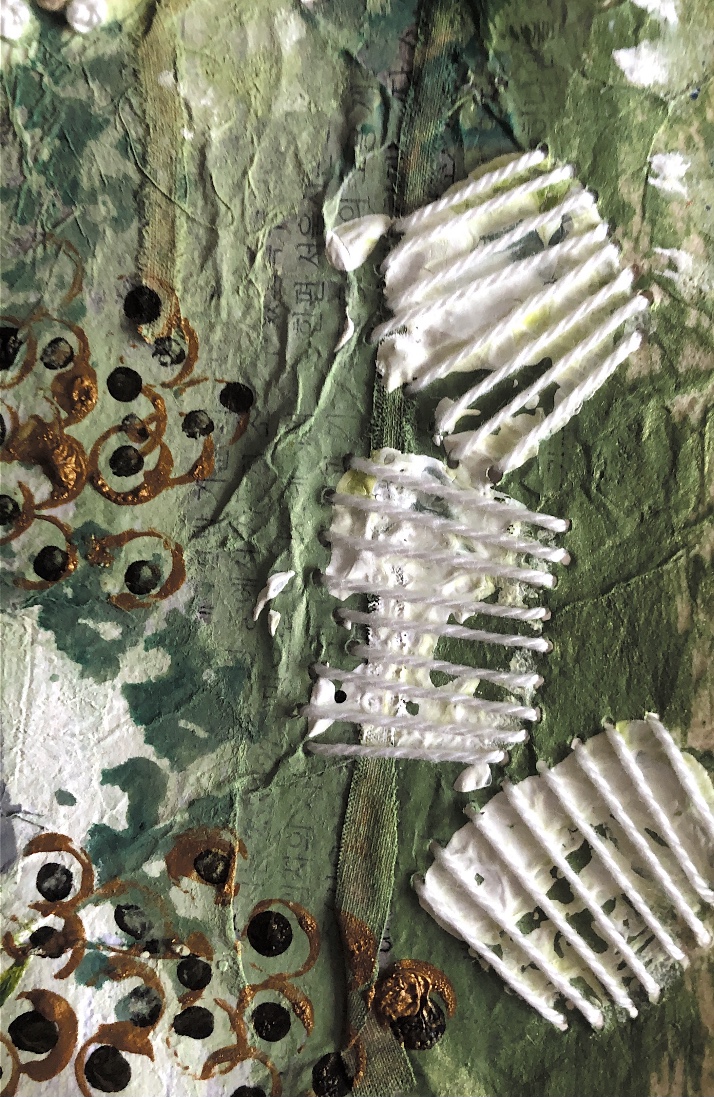
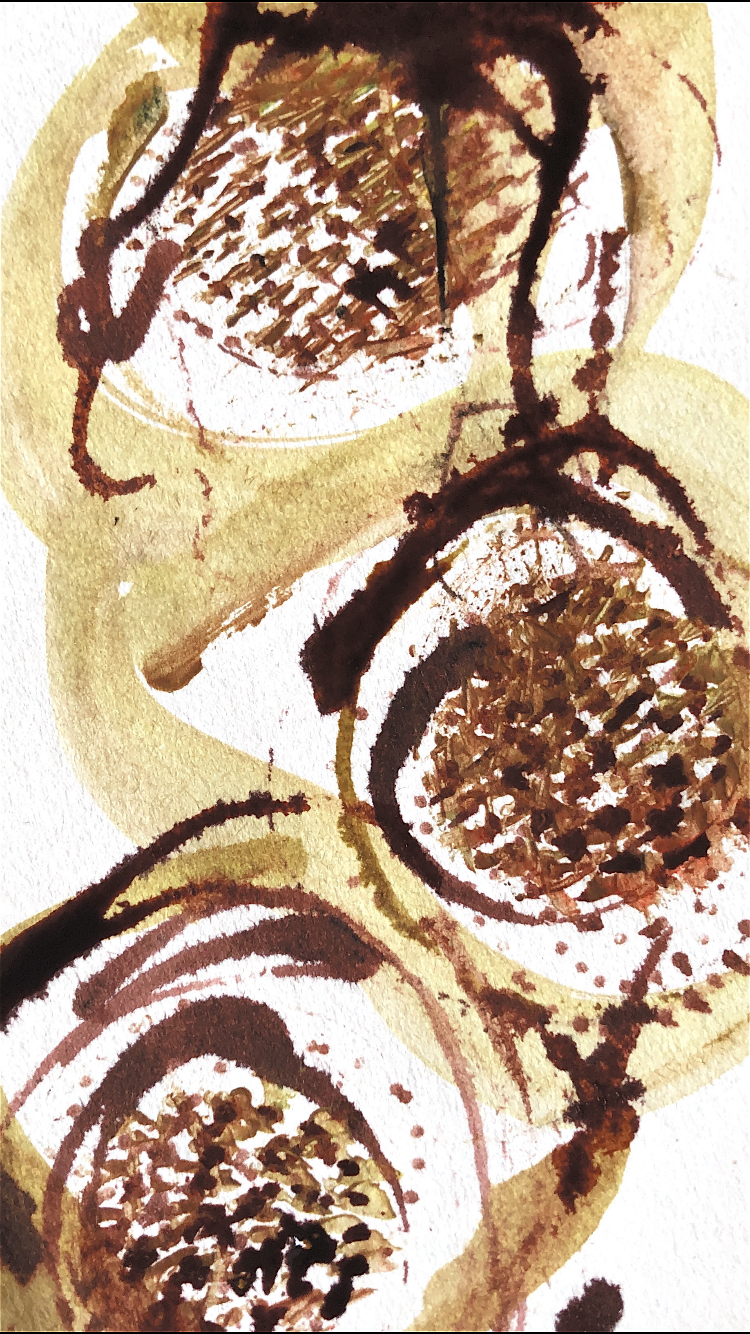
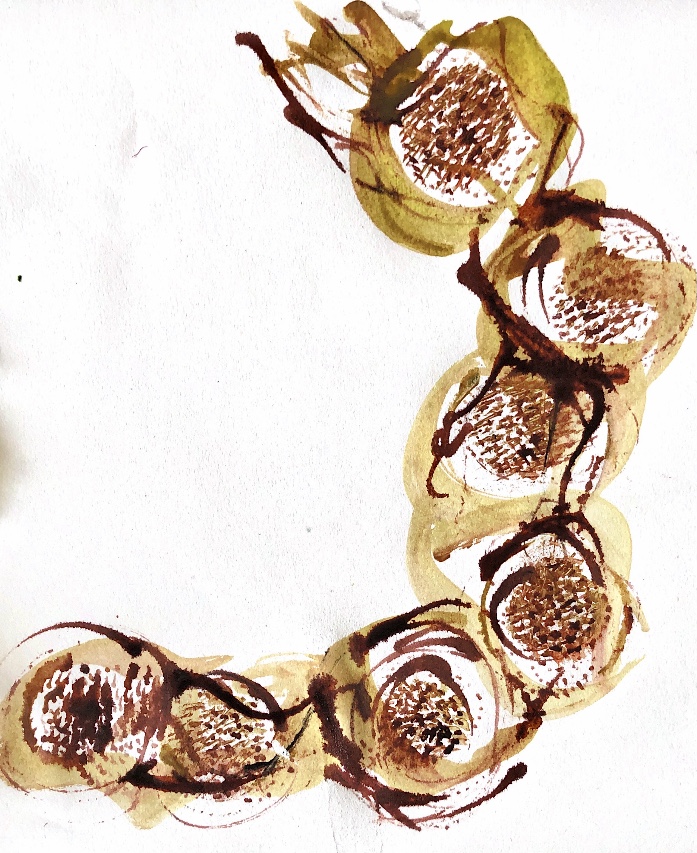
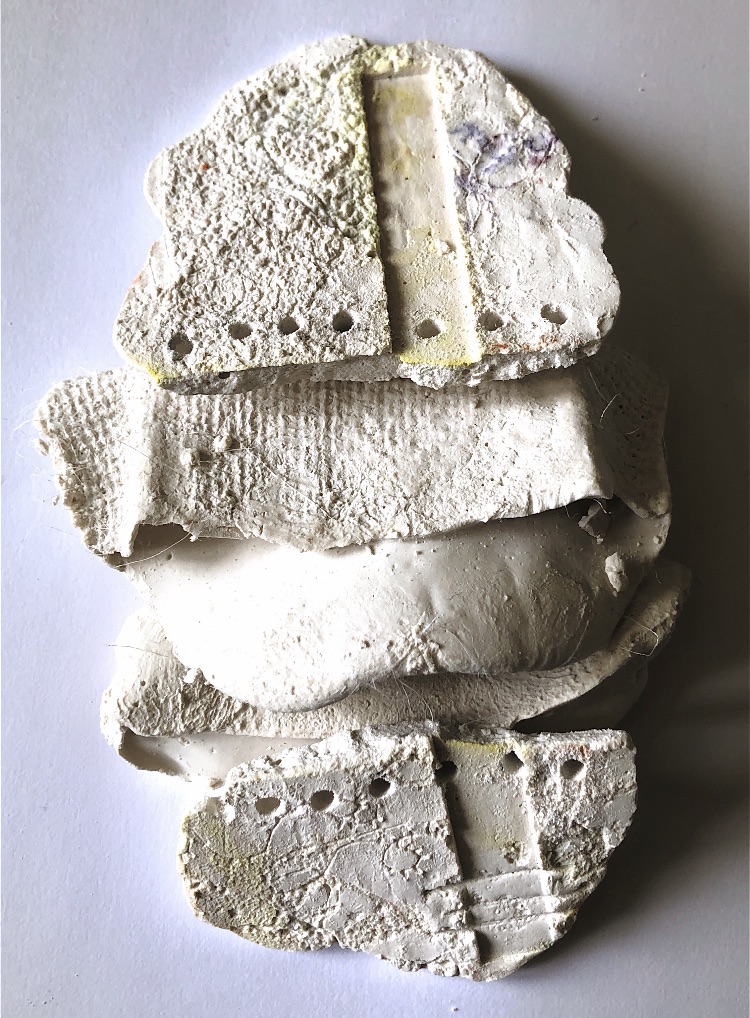
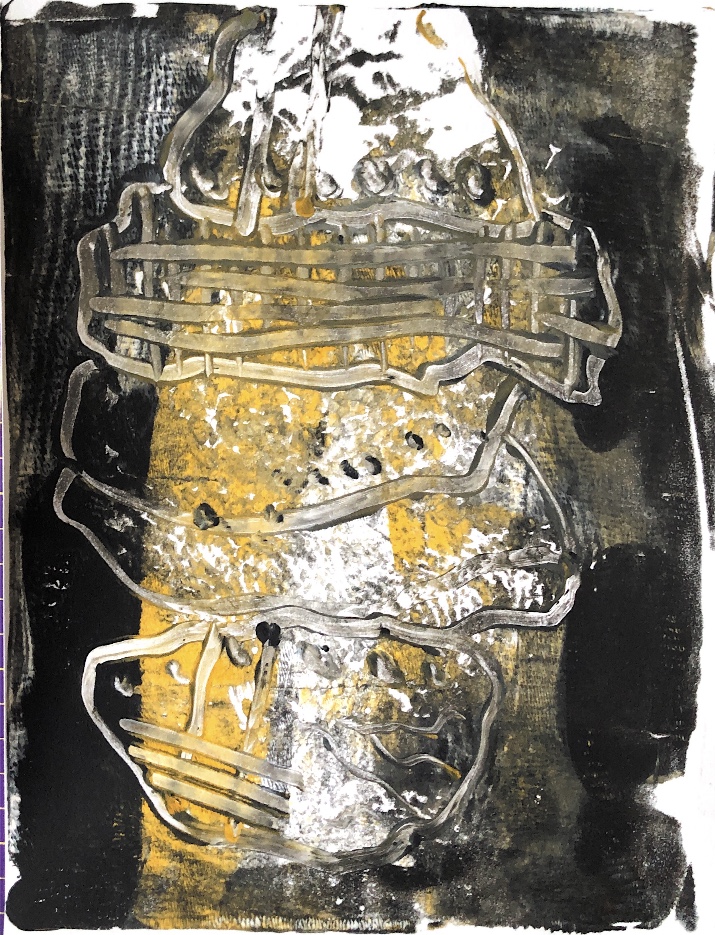
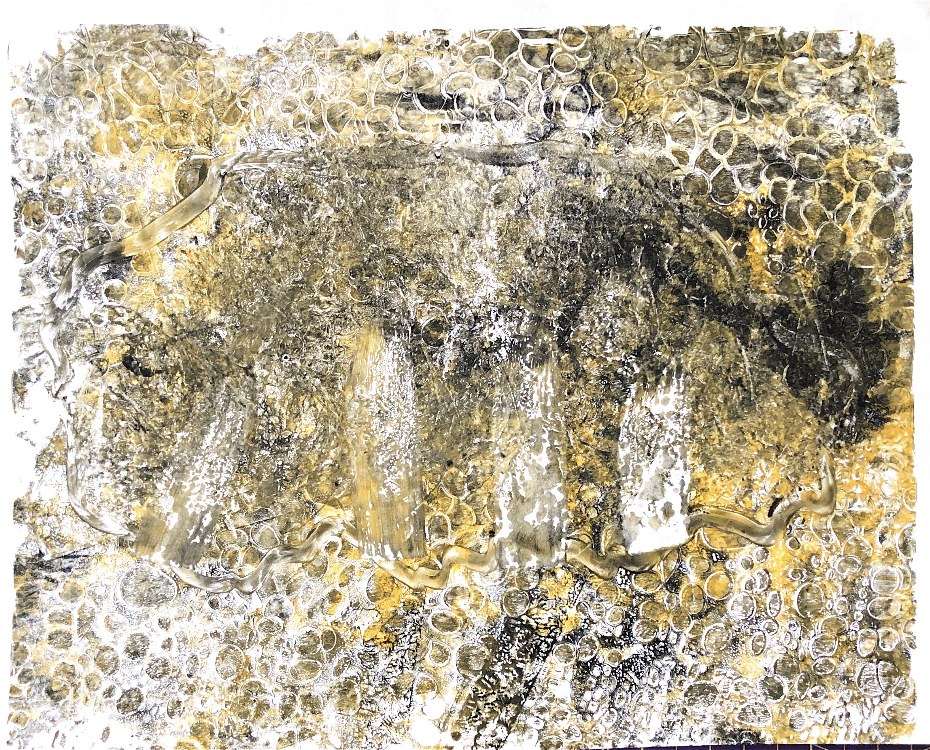
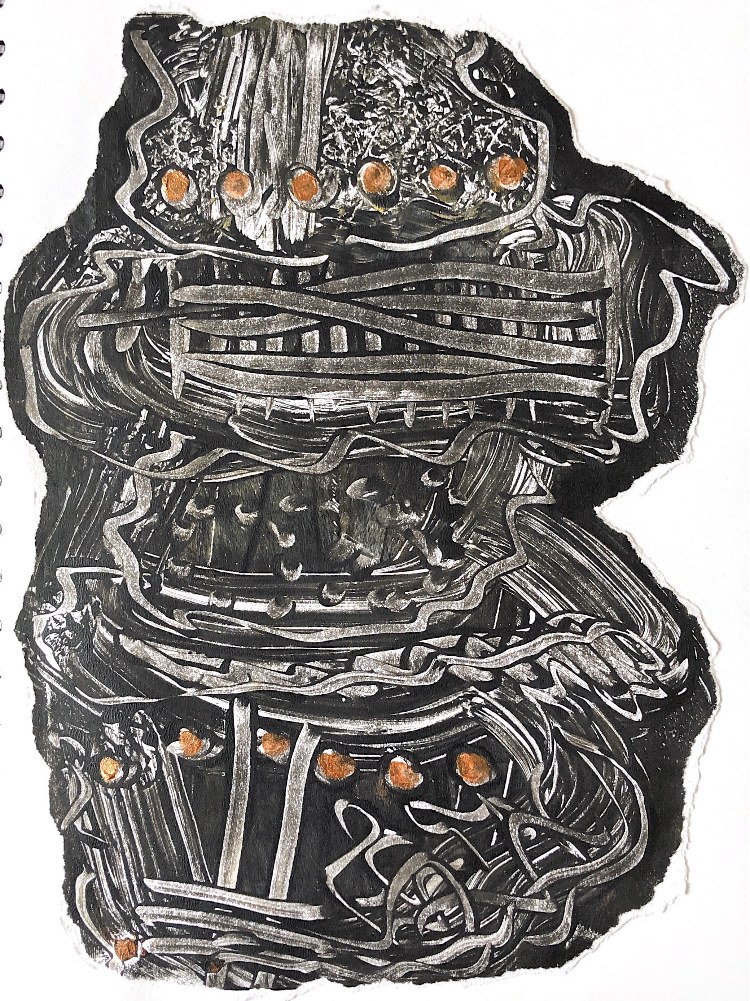
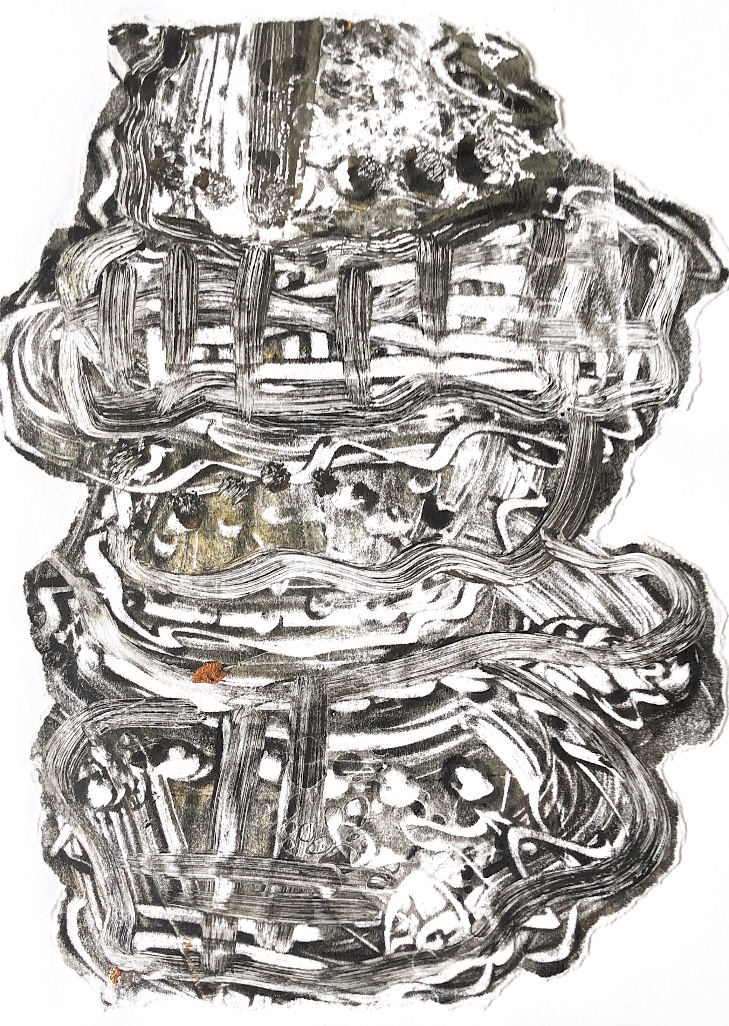
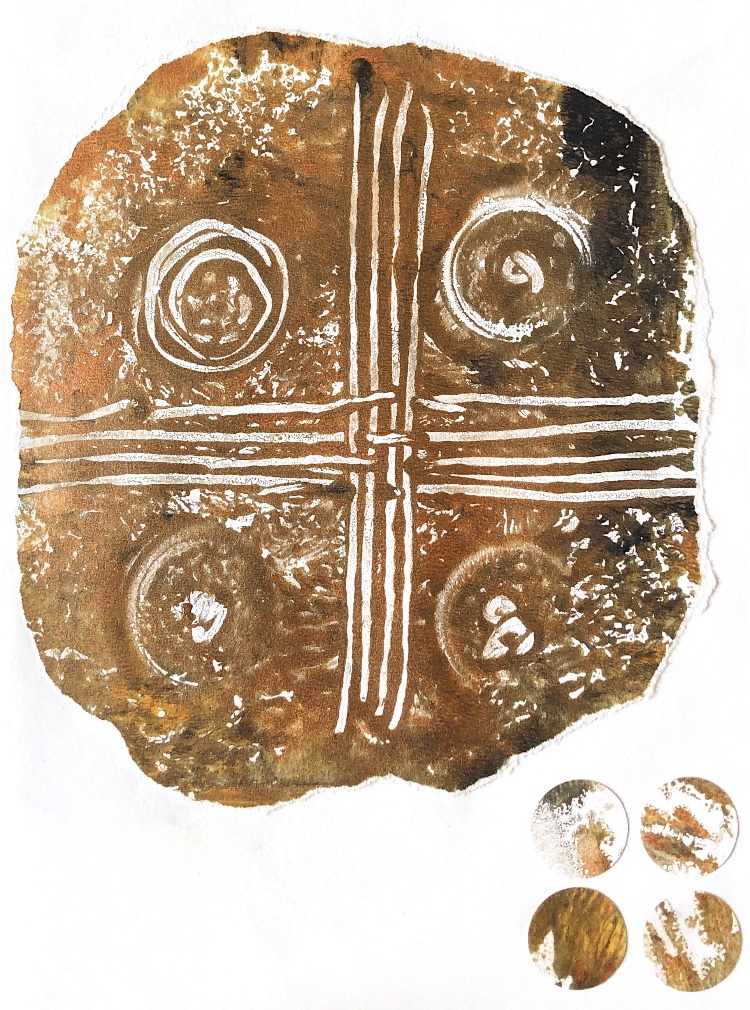
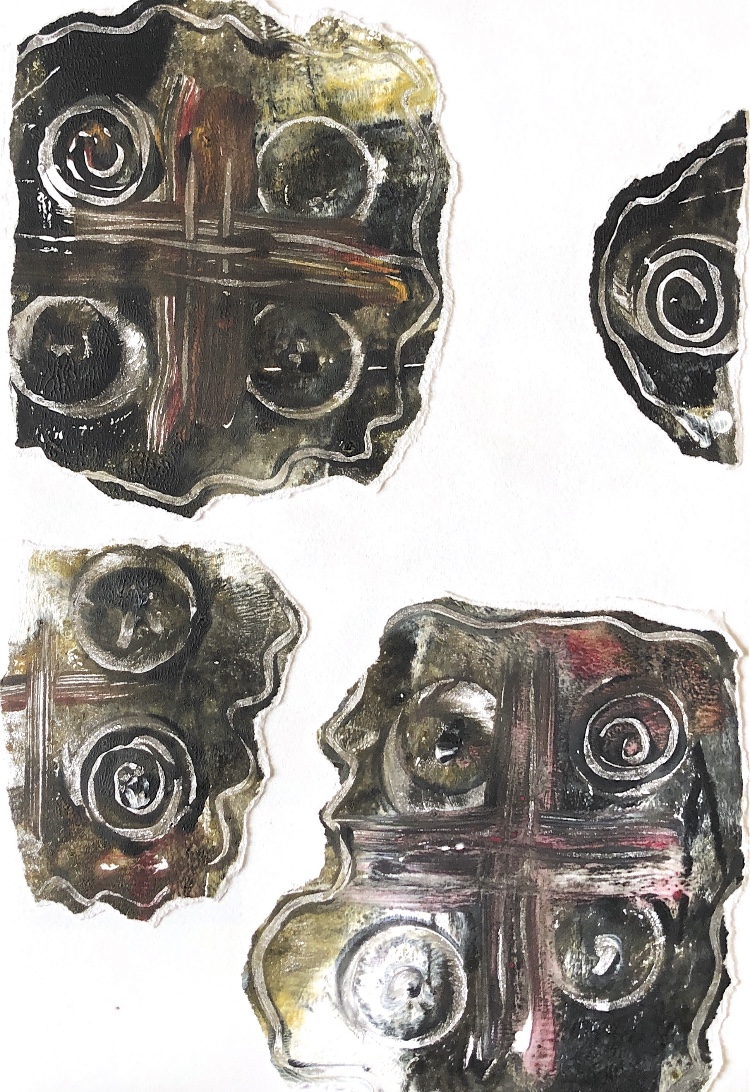
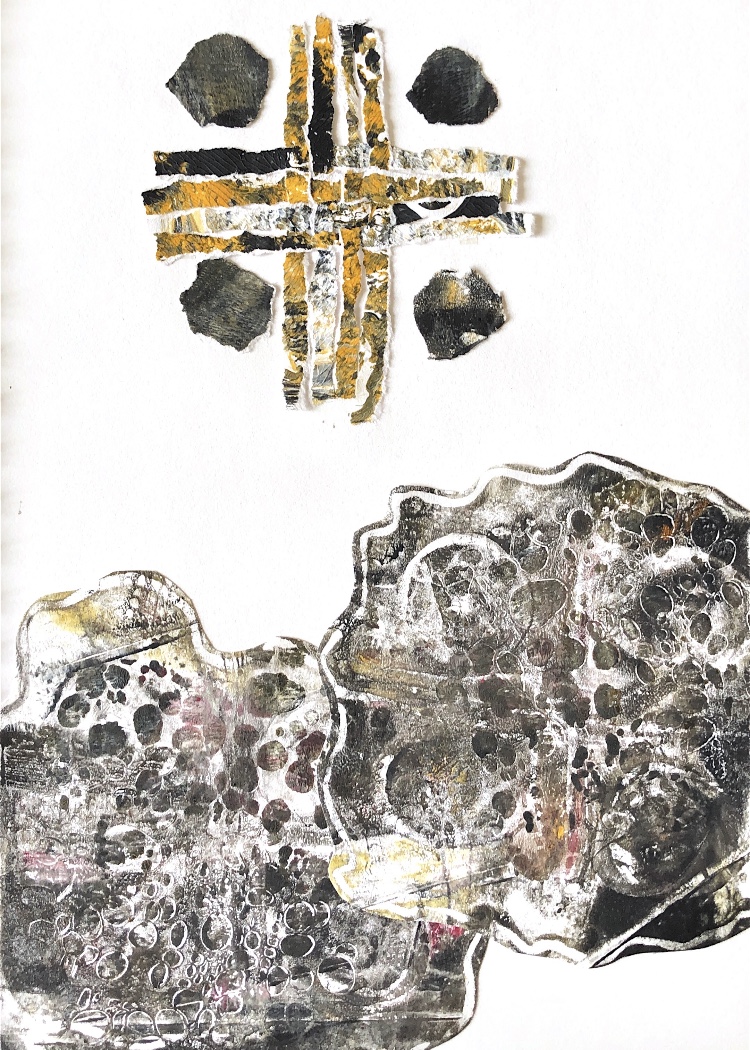
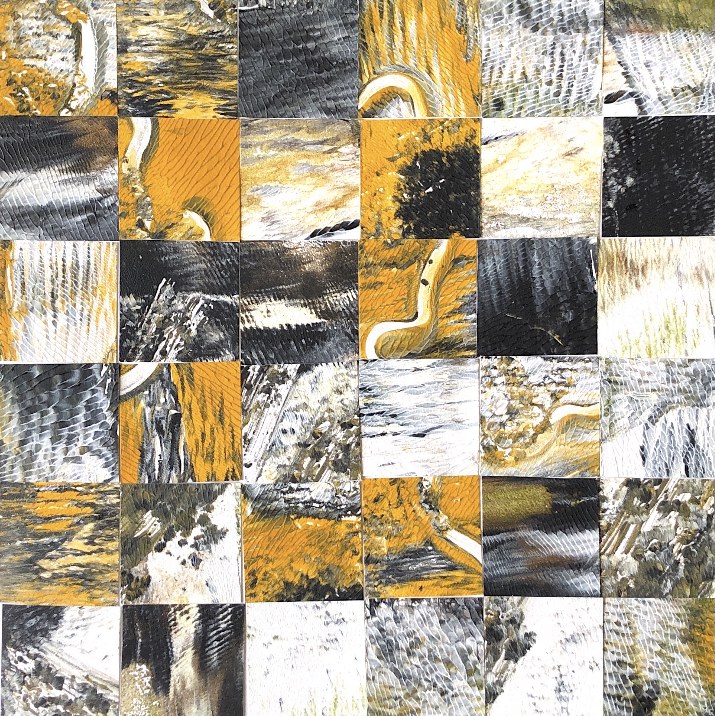
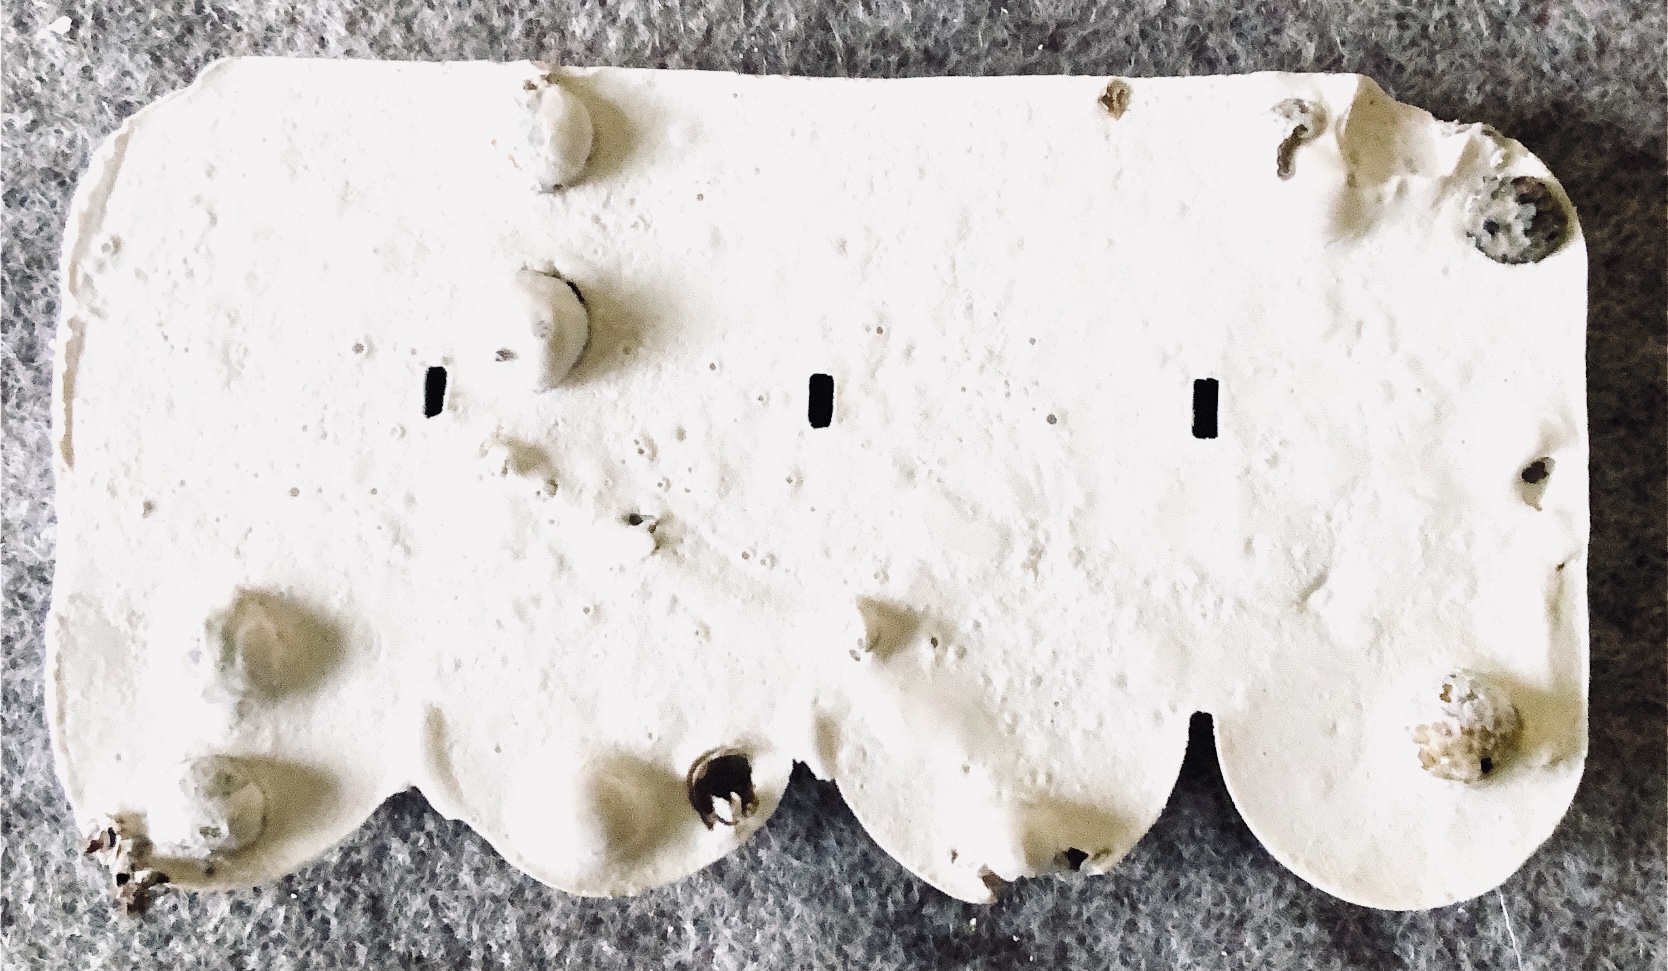
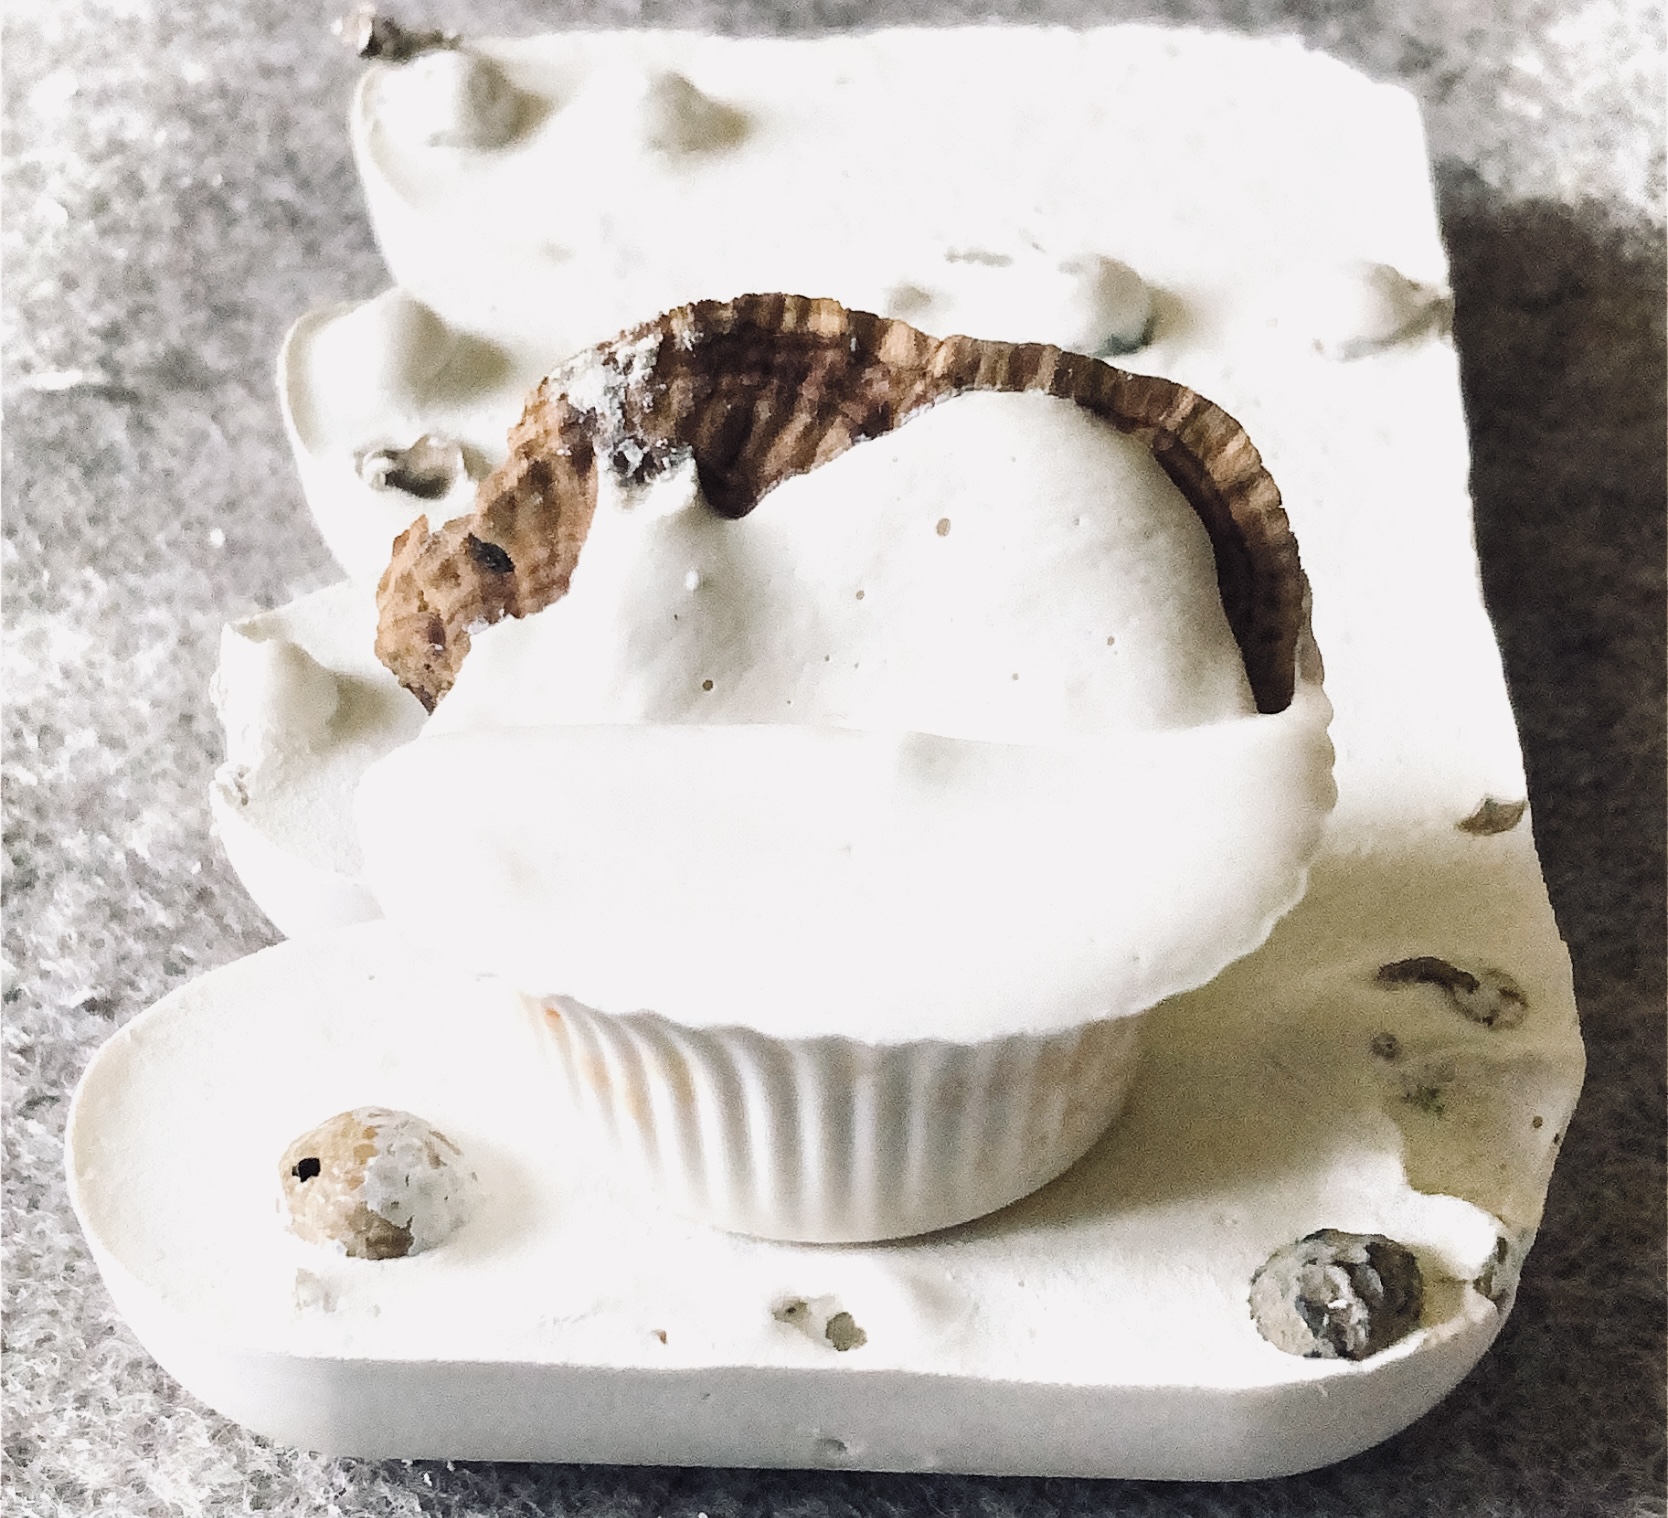
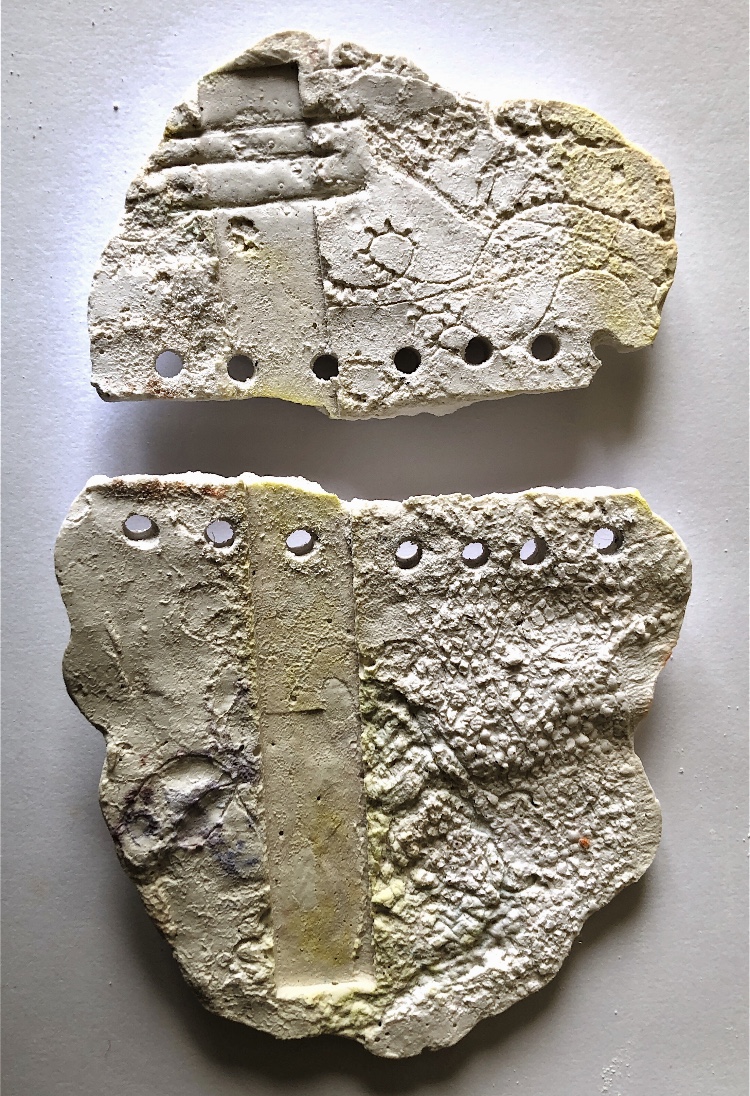
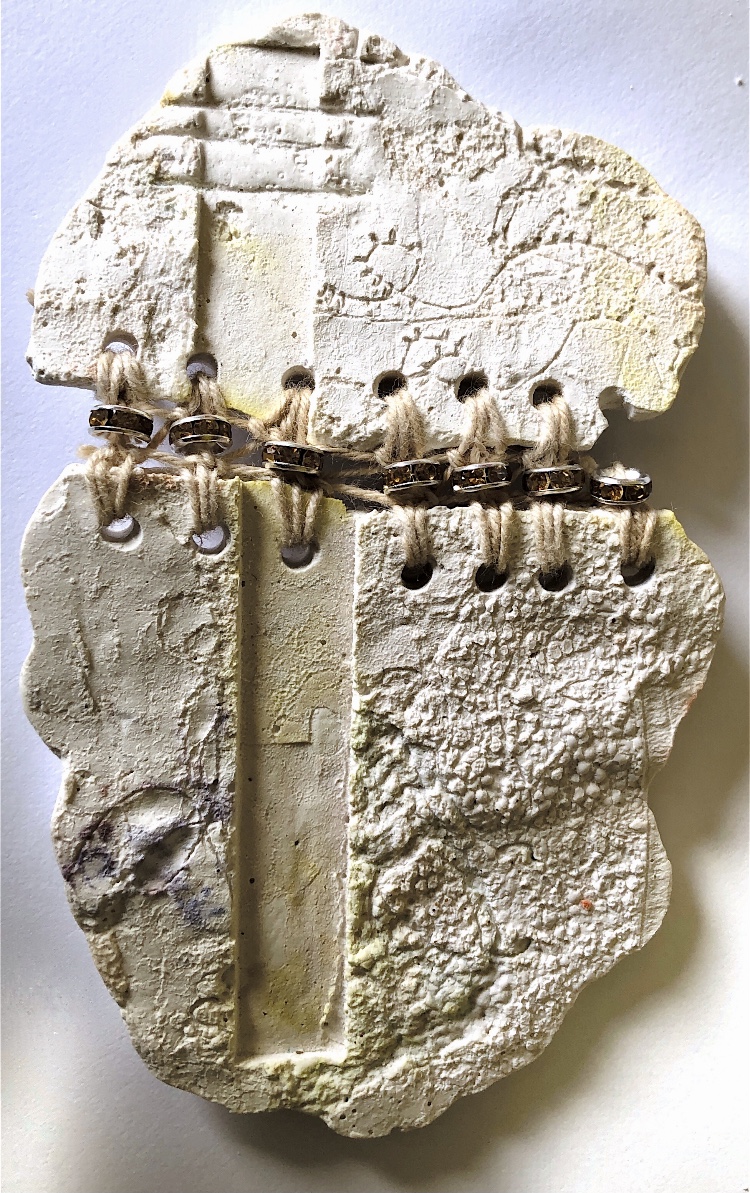
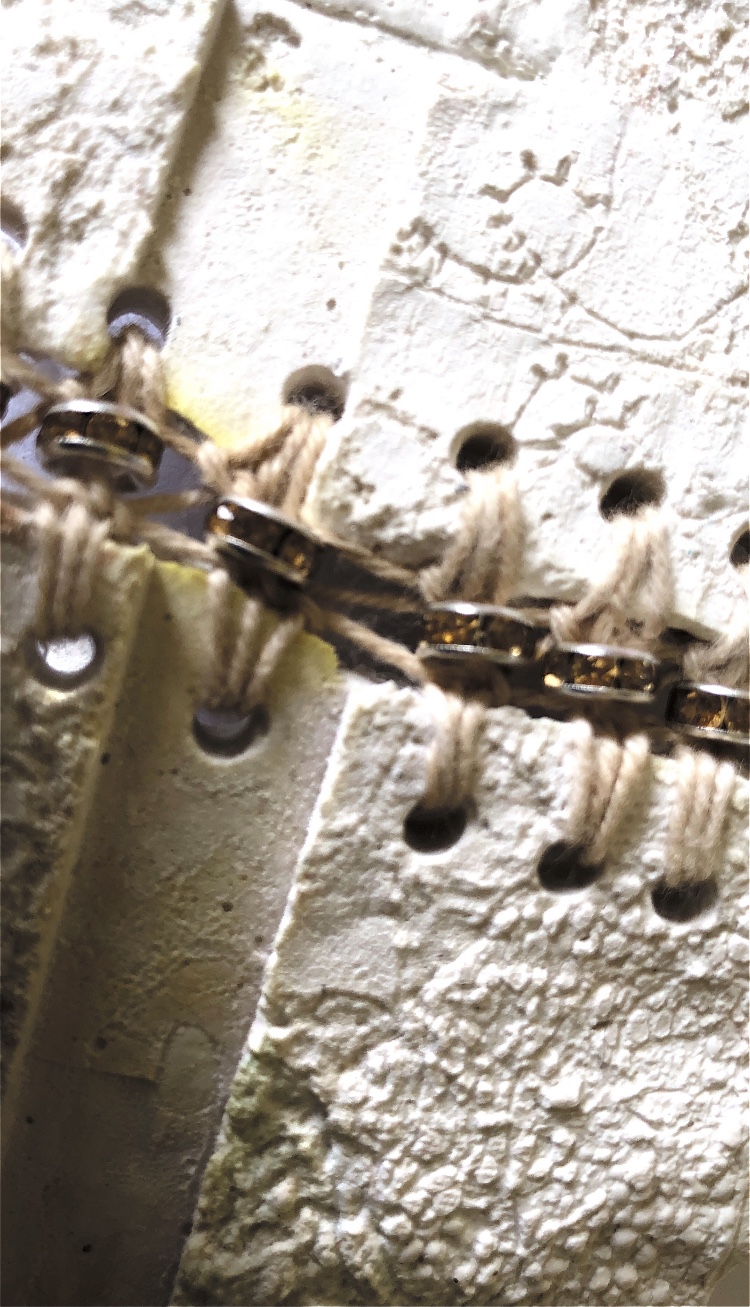
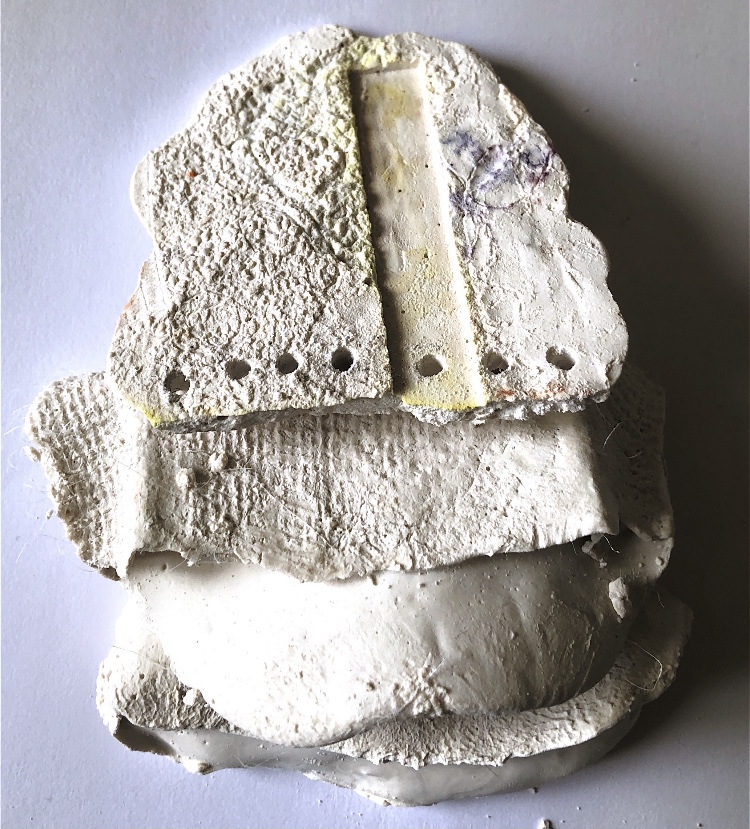
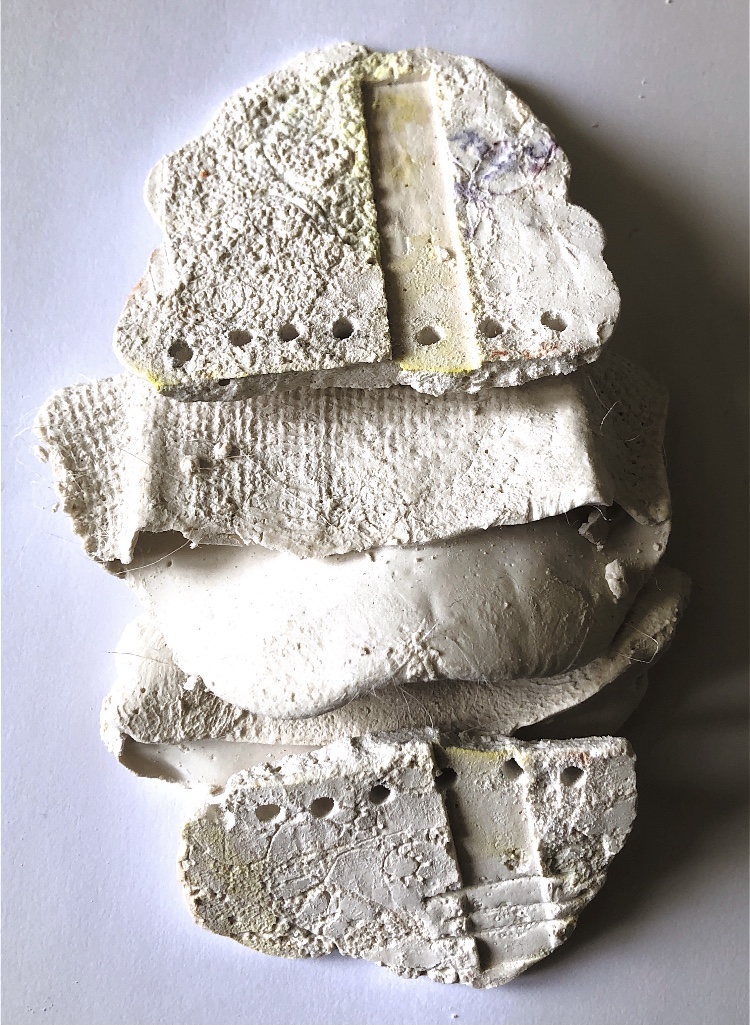
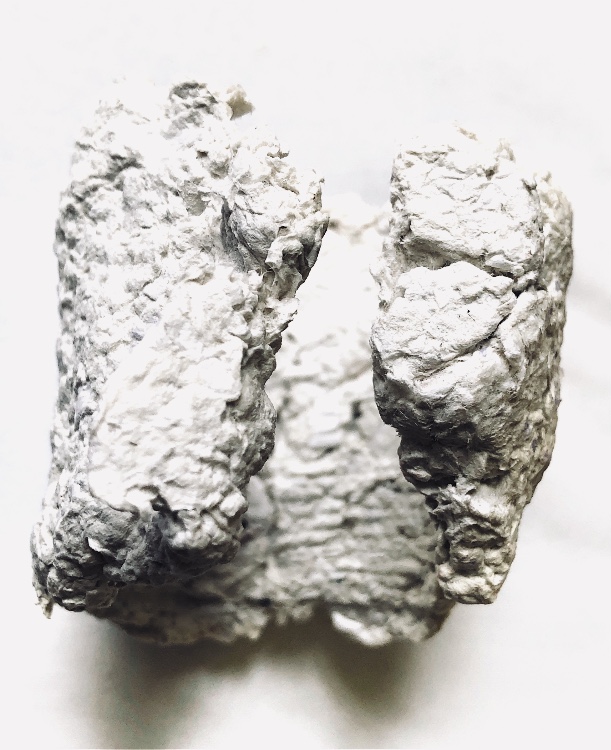
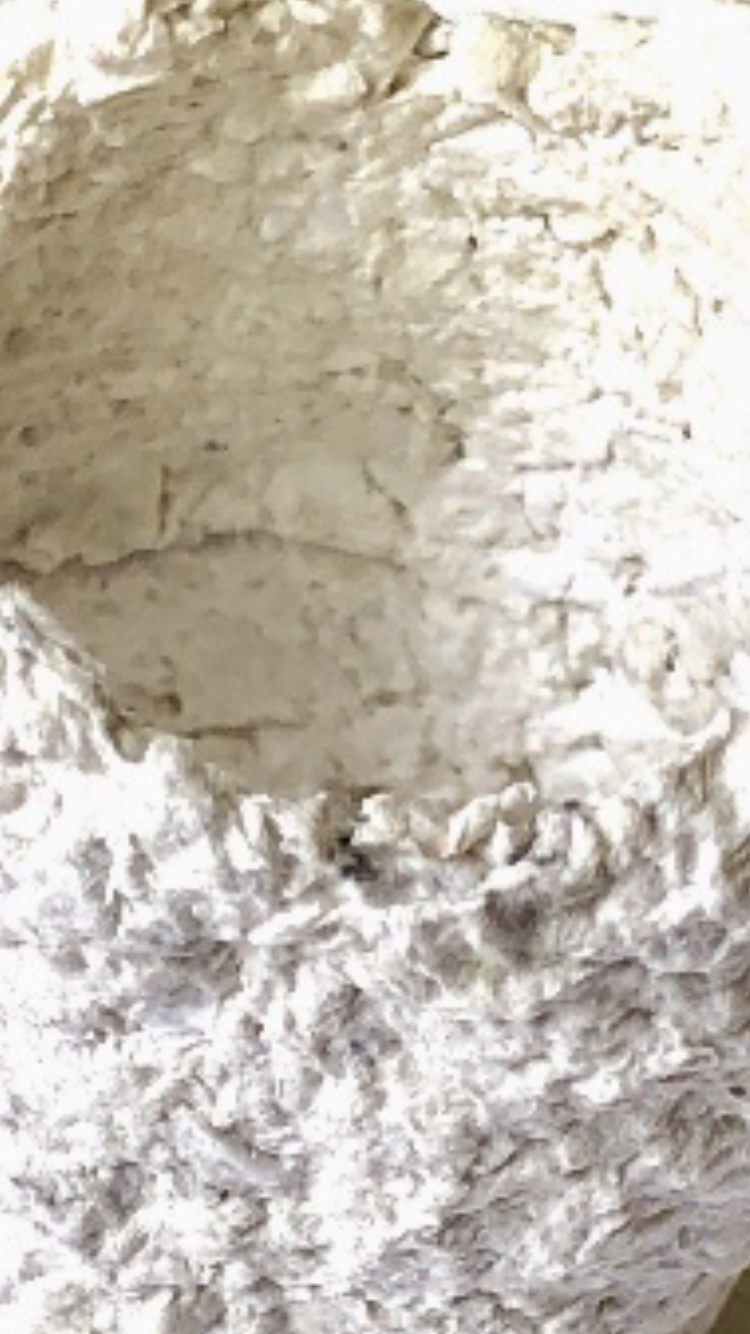
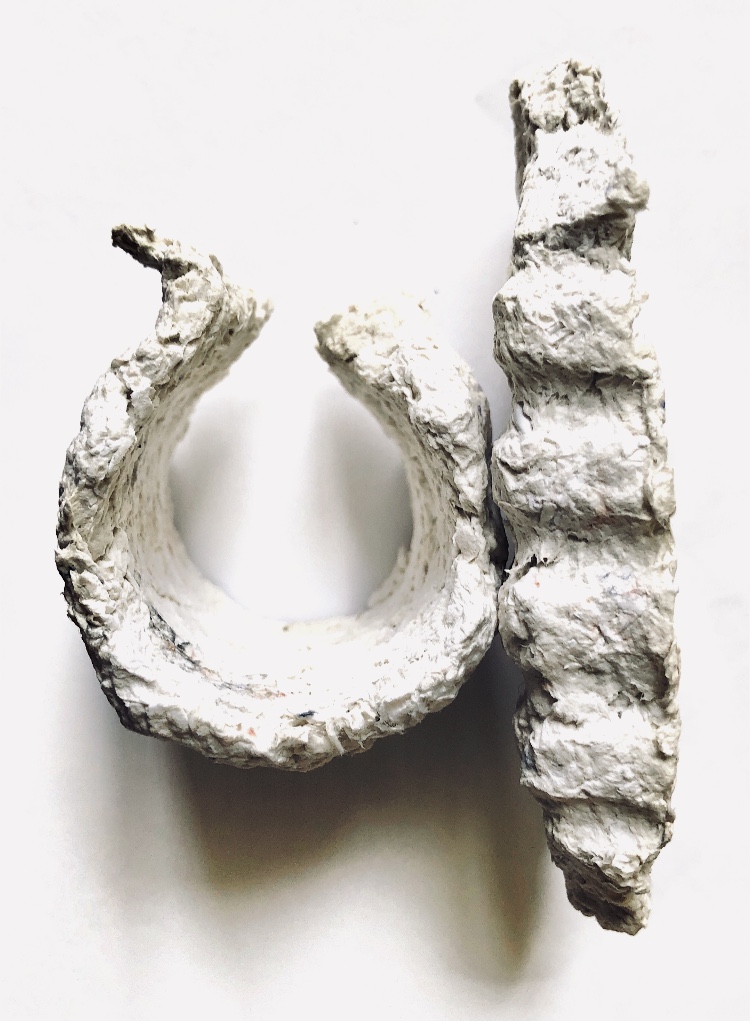
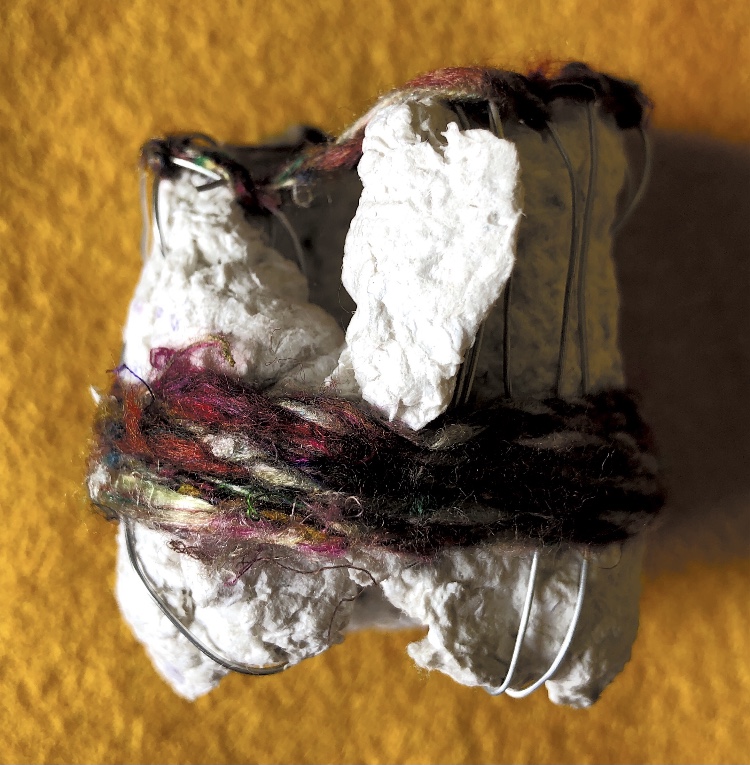
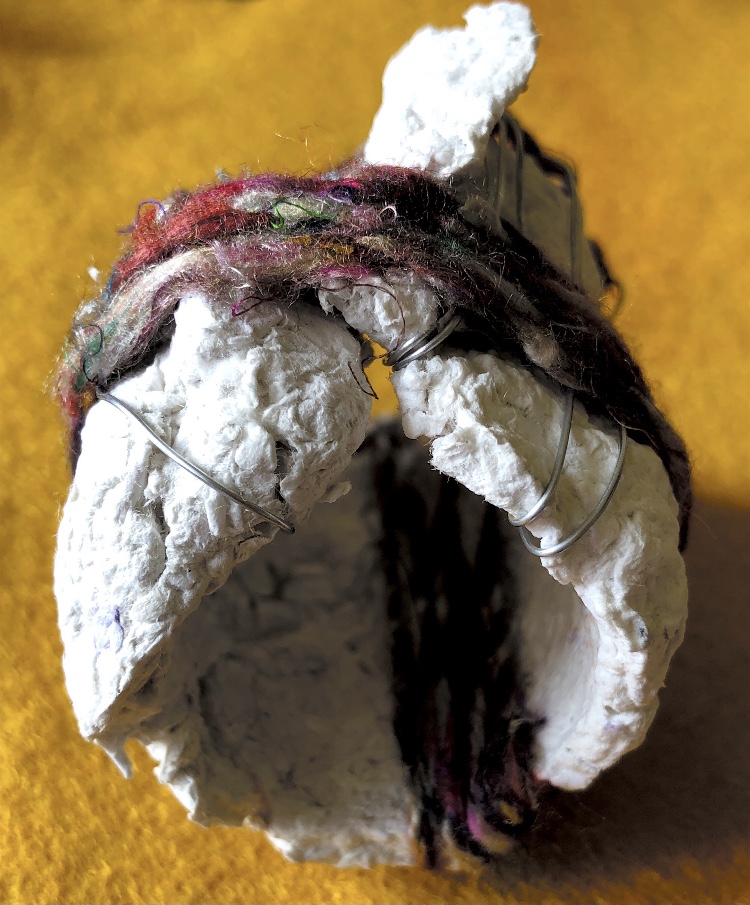
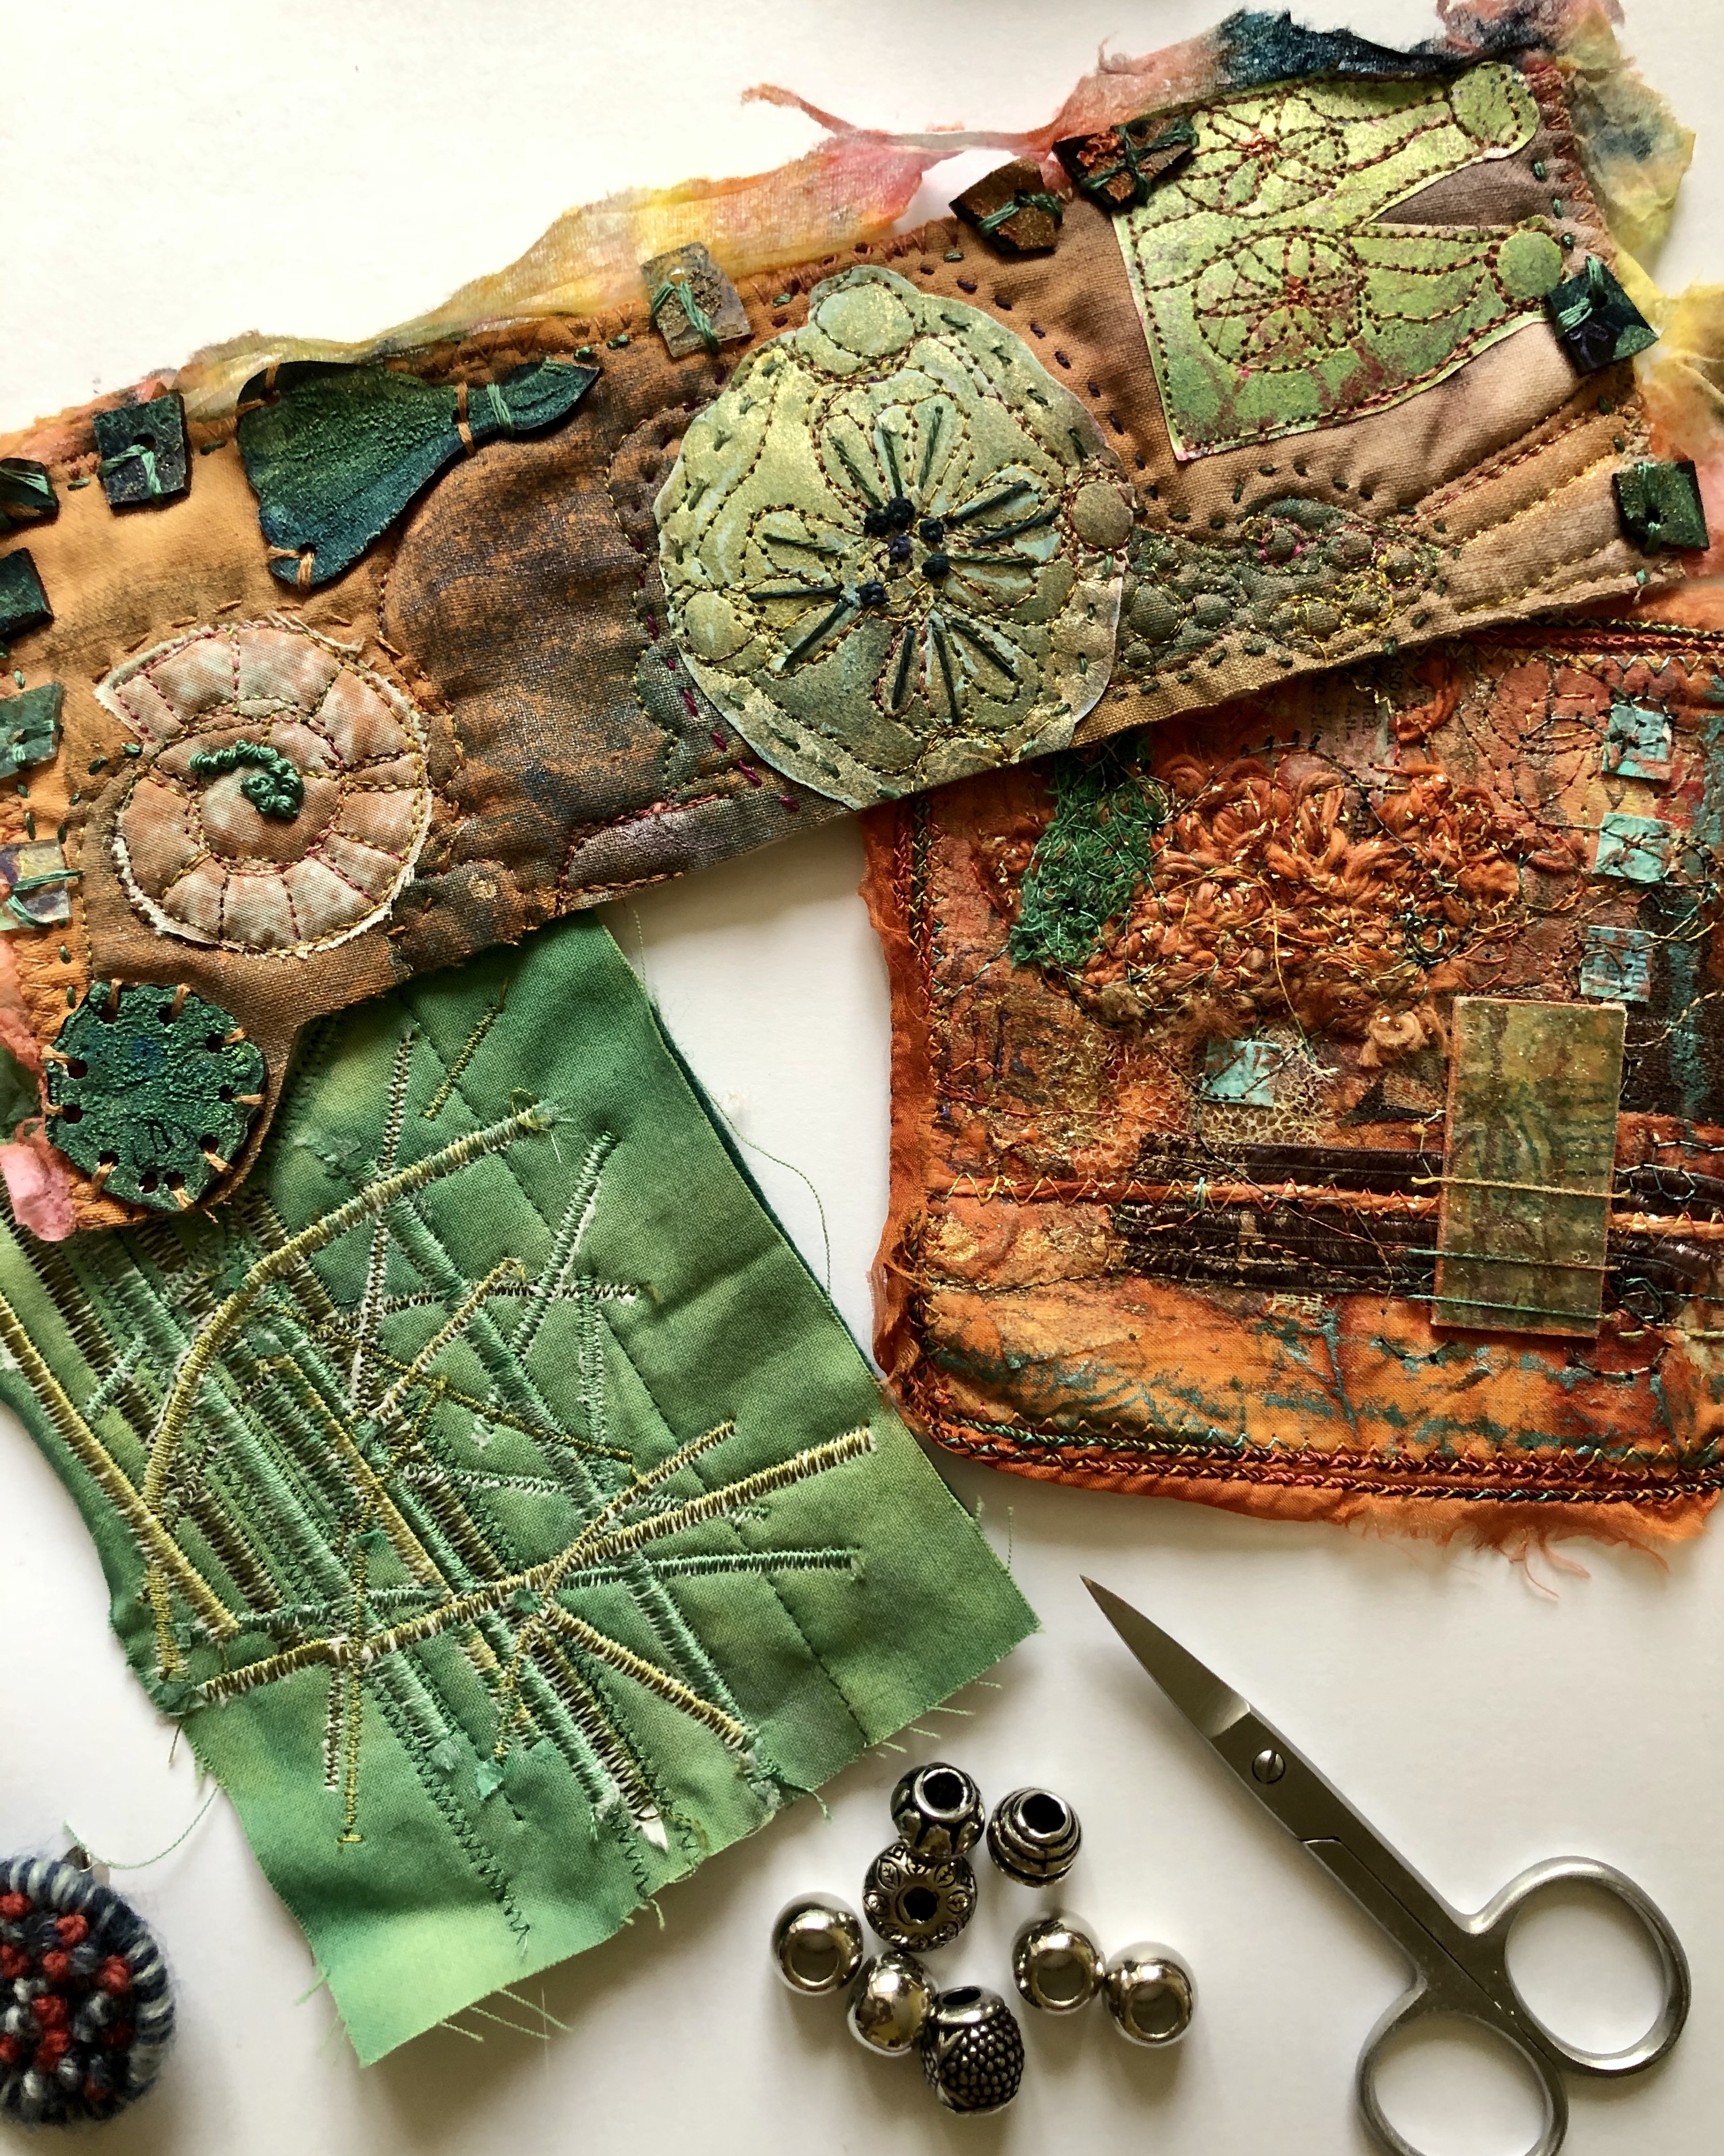
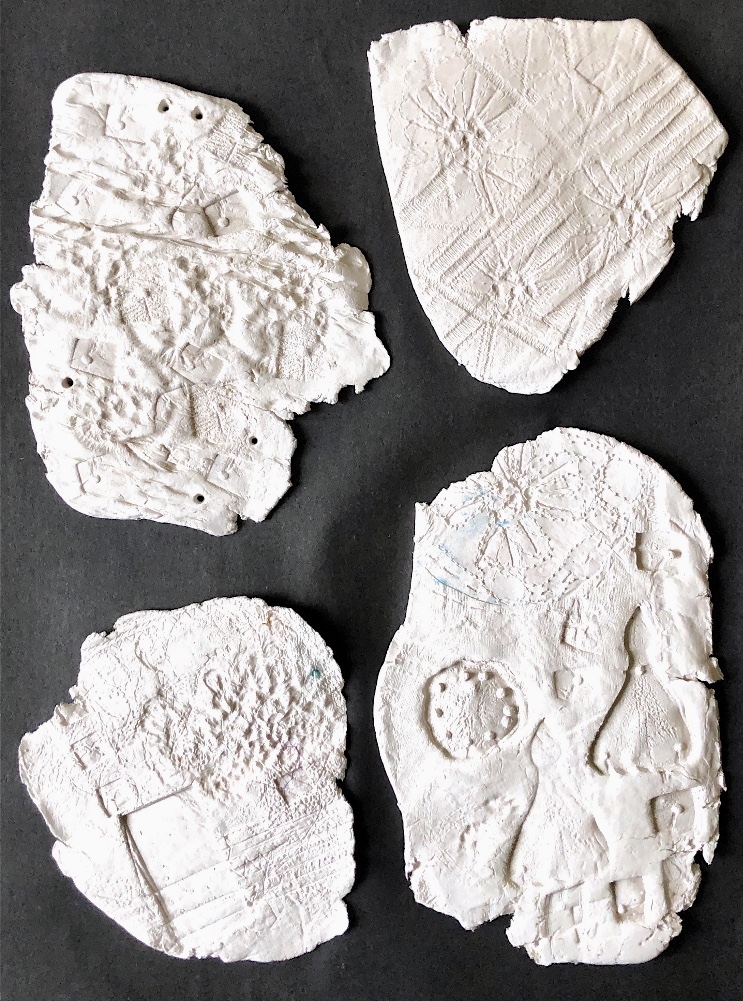
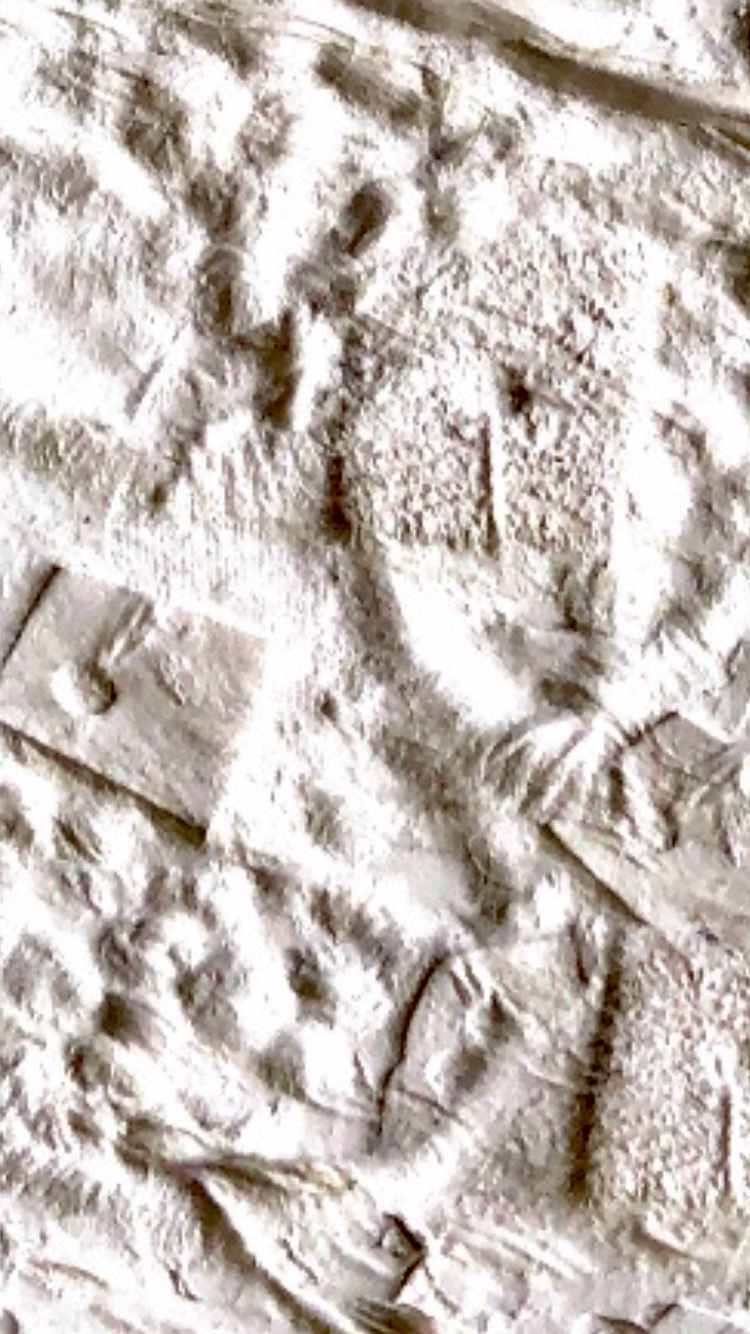
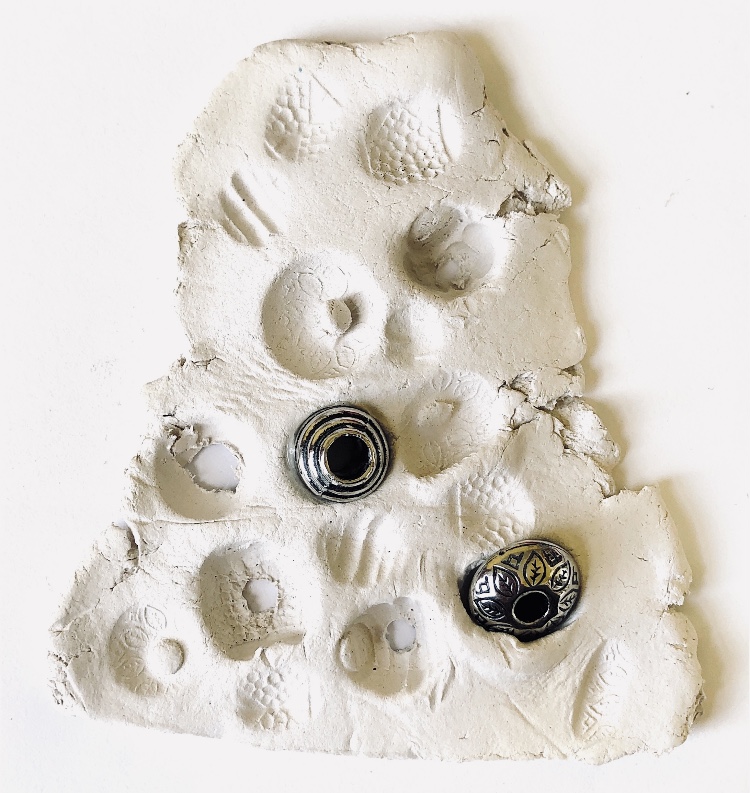
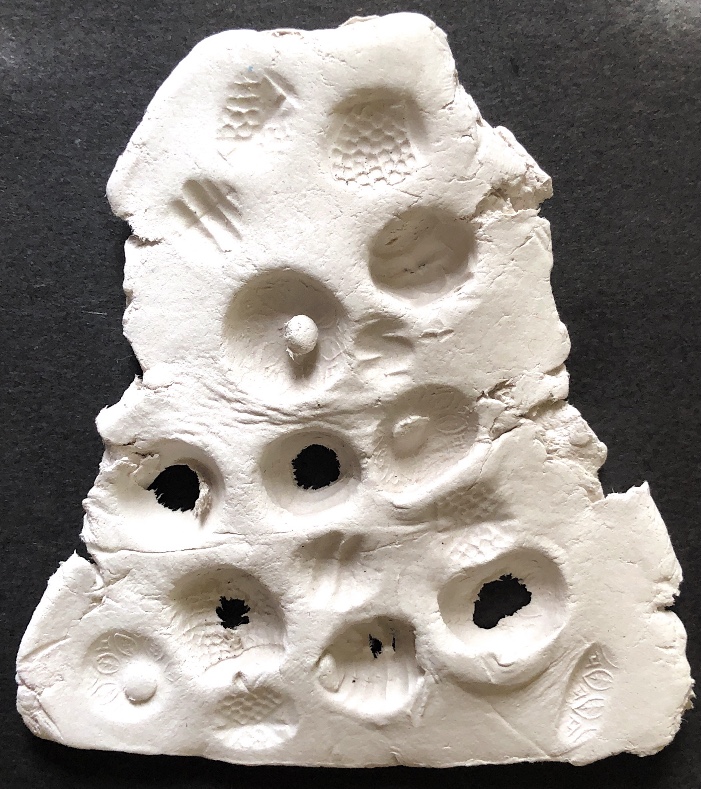
Fig 4. These are a set of developed samples, following my initial sampling, produced by molding from a surface. I wanted to use some of the joining methods from previous exercises. Using thread, wire, felted pebbles, buttons, leather, plastic bags, tyvek strips and wool, I rejoined broken plaster samples which had holes drilled in them. These pieces of plaster had been cast on textile pieces and have lots of pattern in them. I left the plaster in its natural colour so that it contrasts strongly with the joining methods. These samples have some flexibility at the joining points and this makes for 3d pieces with contrasting viewpoints.

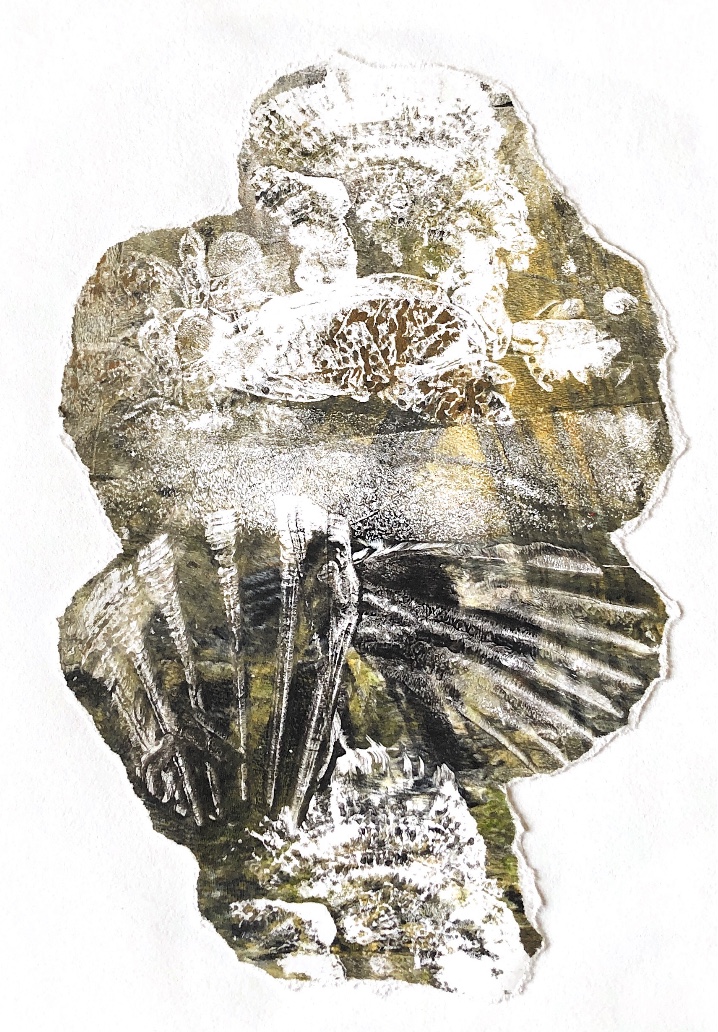
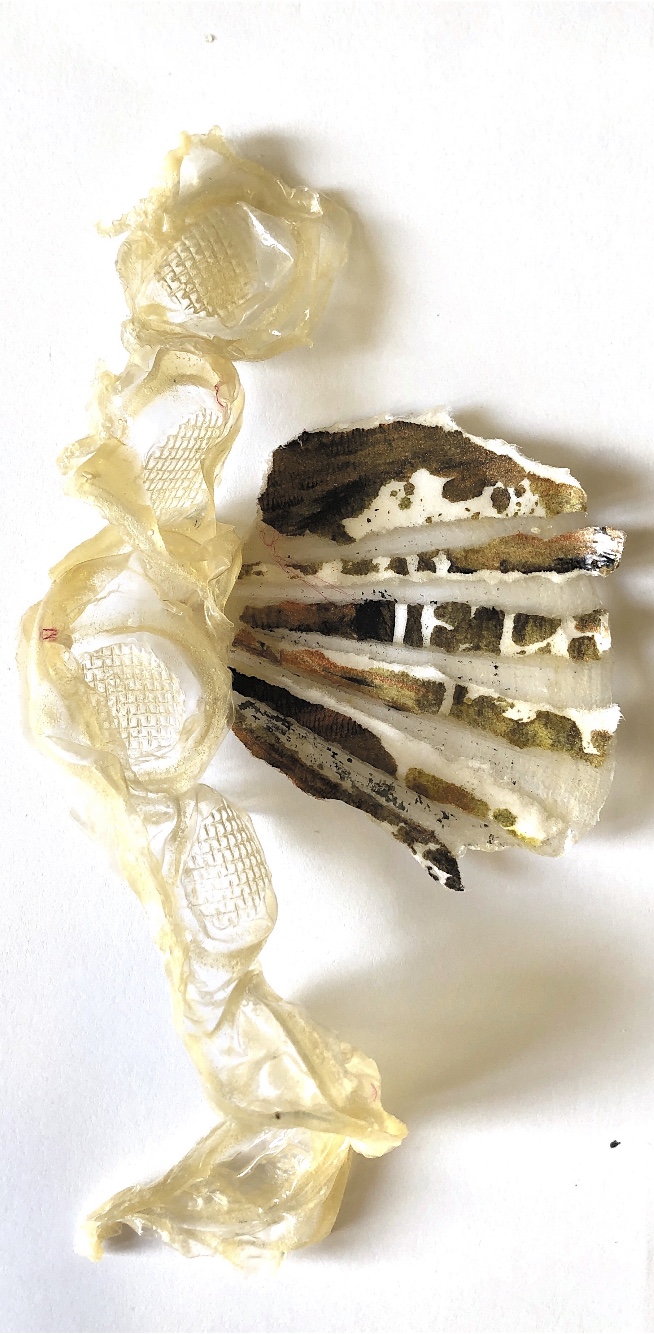
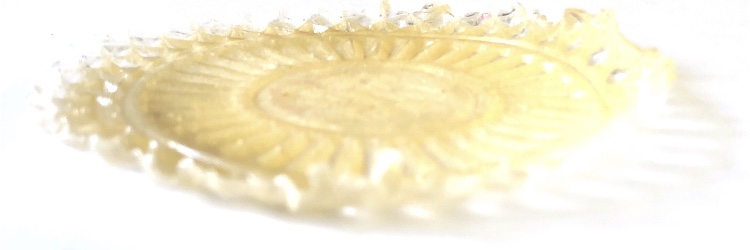
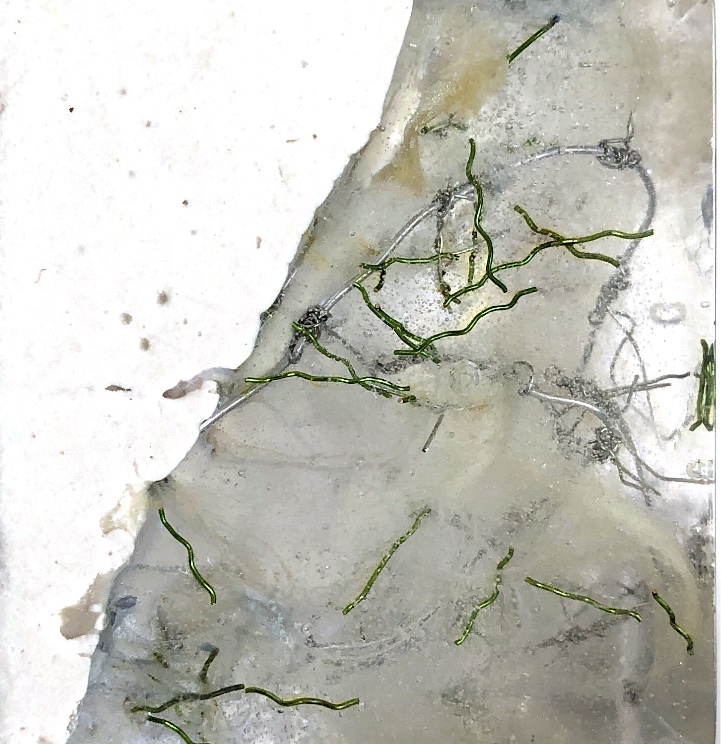
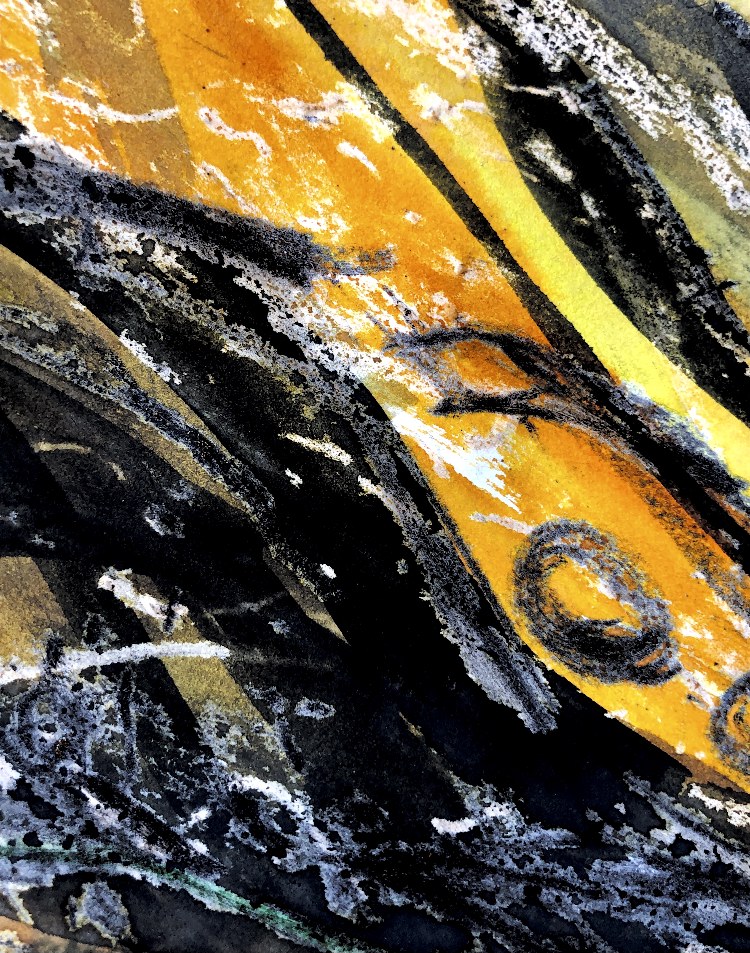
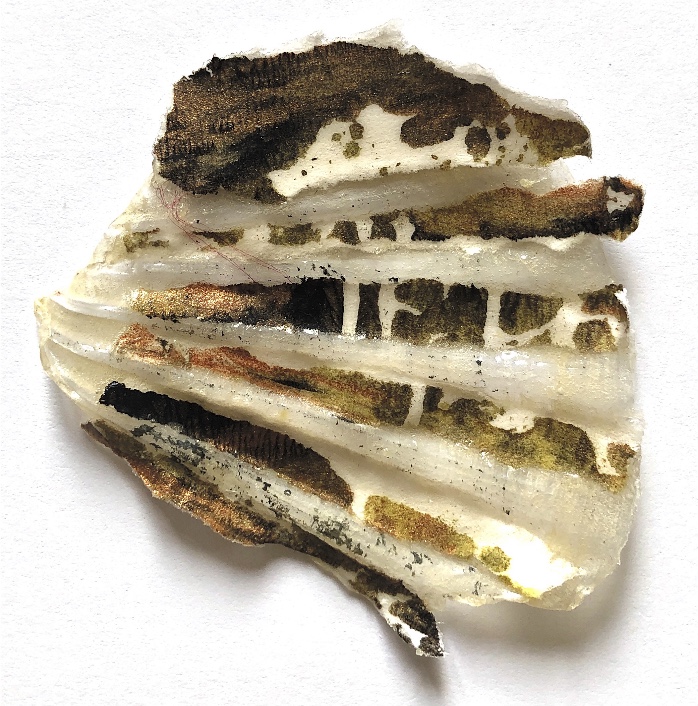
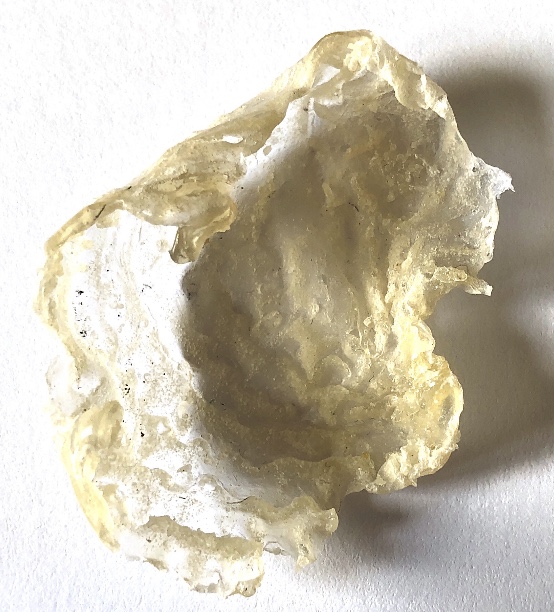
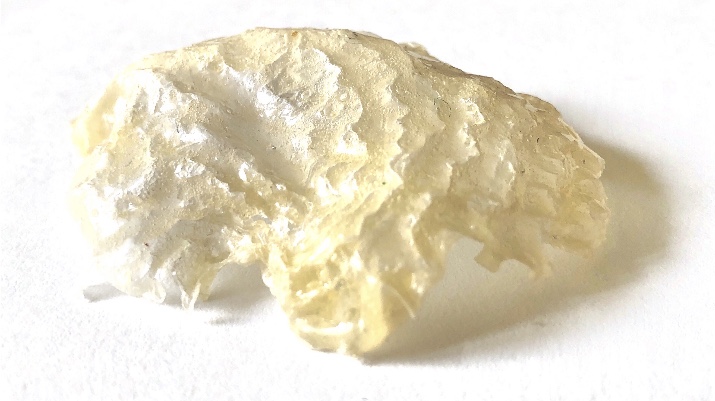
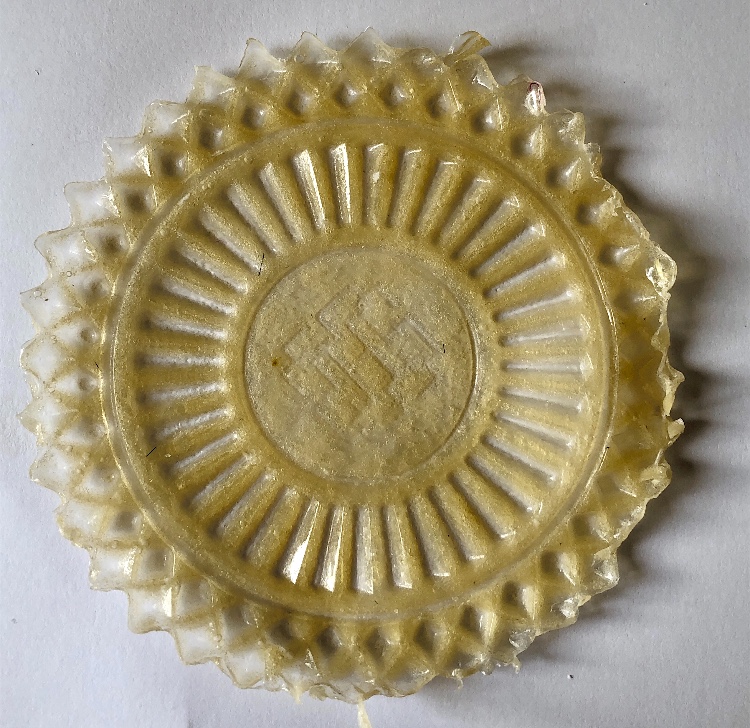
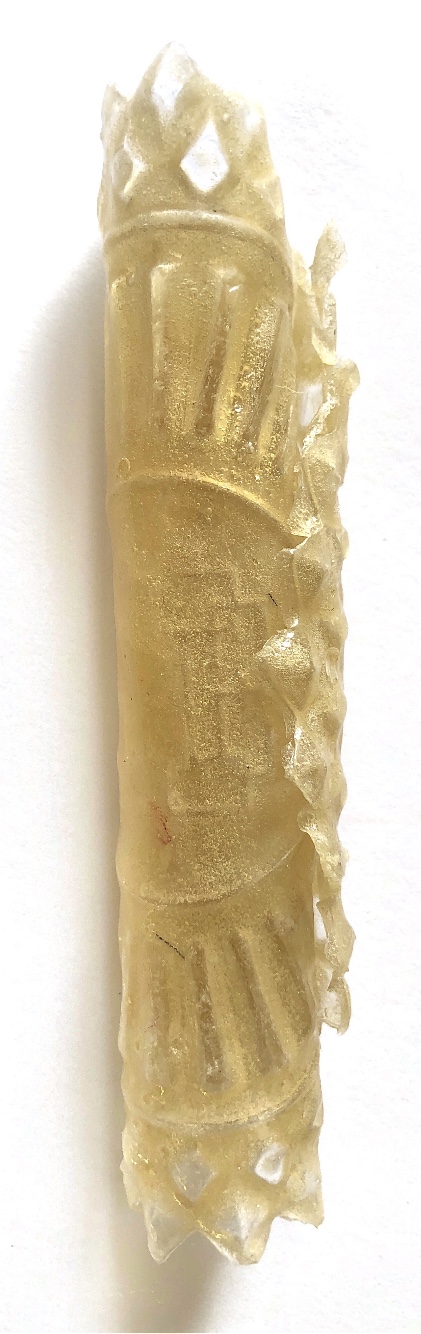
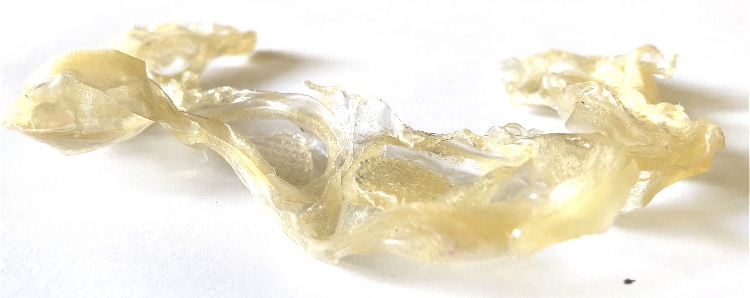
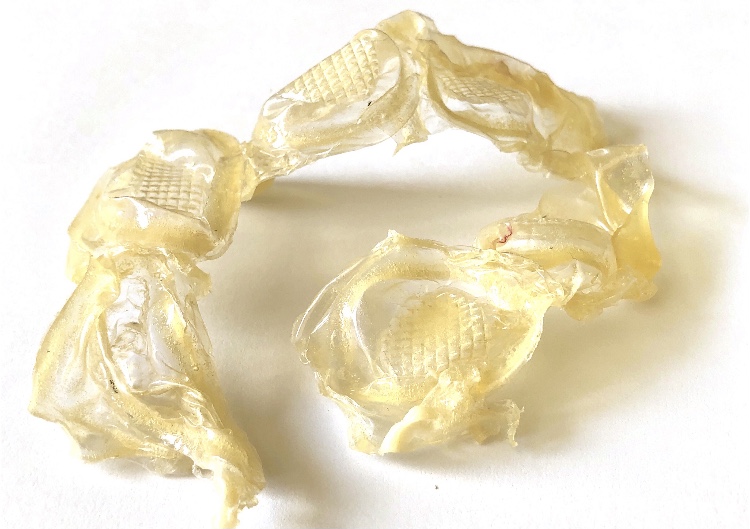
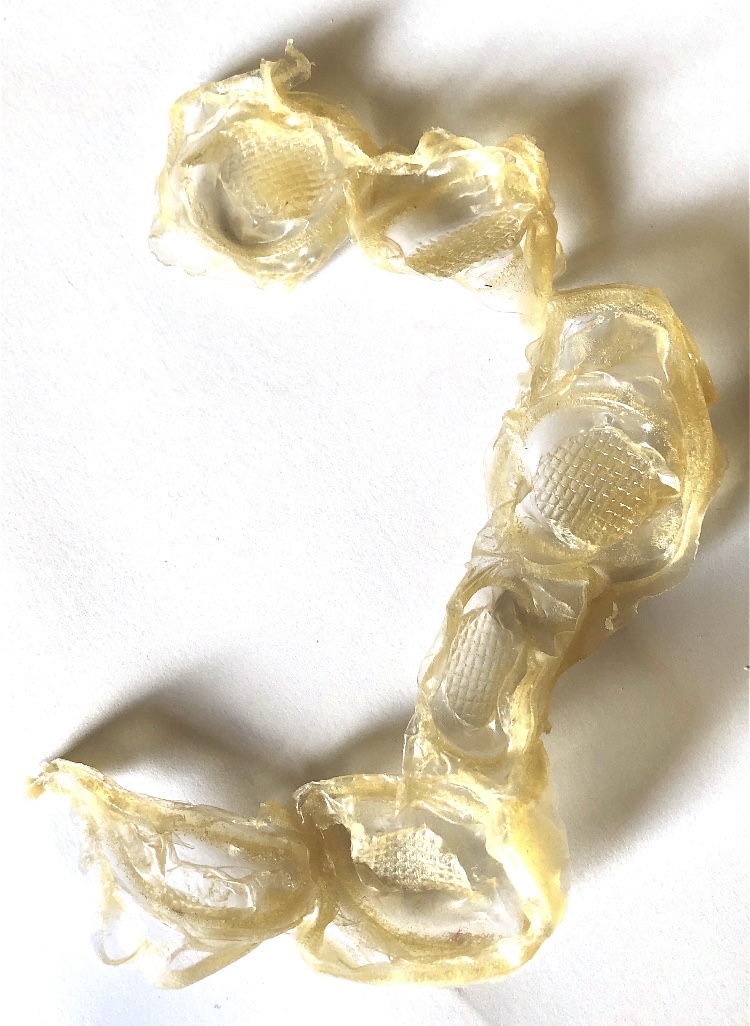
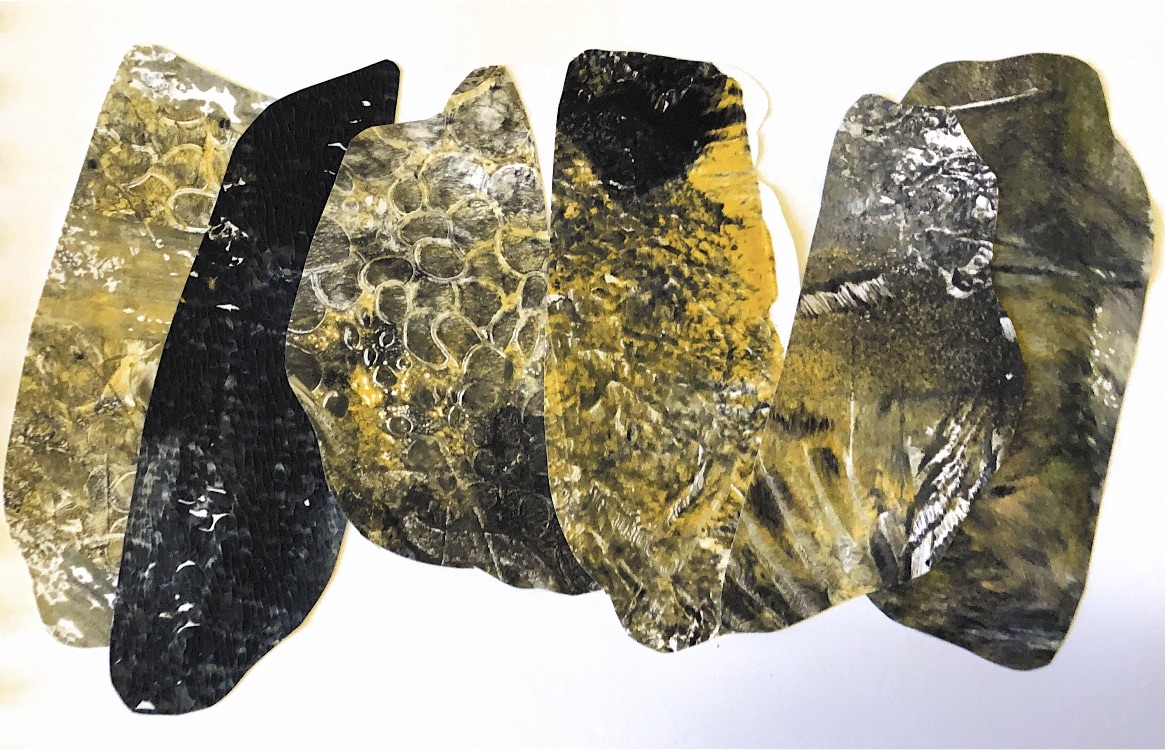
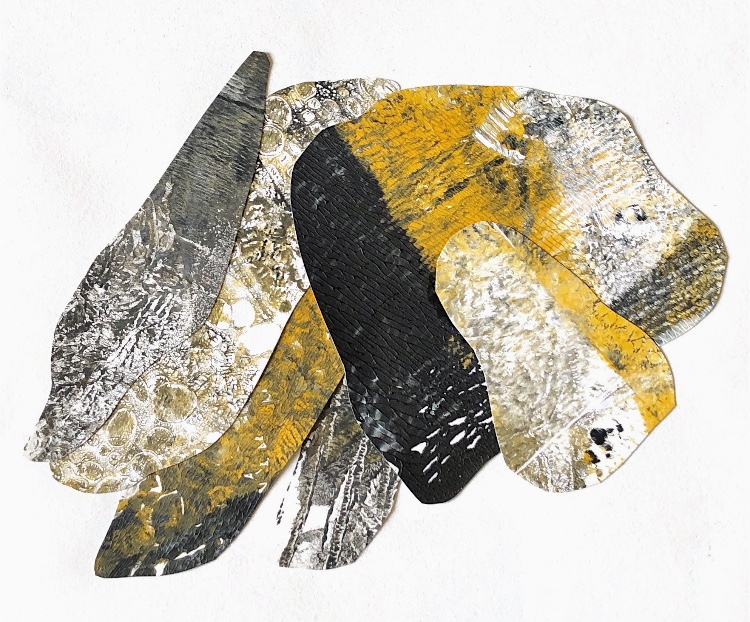
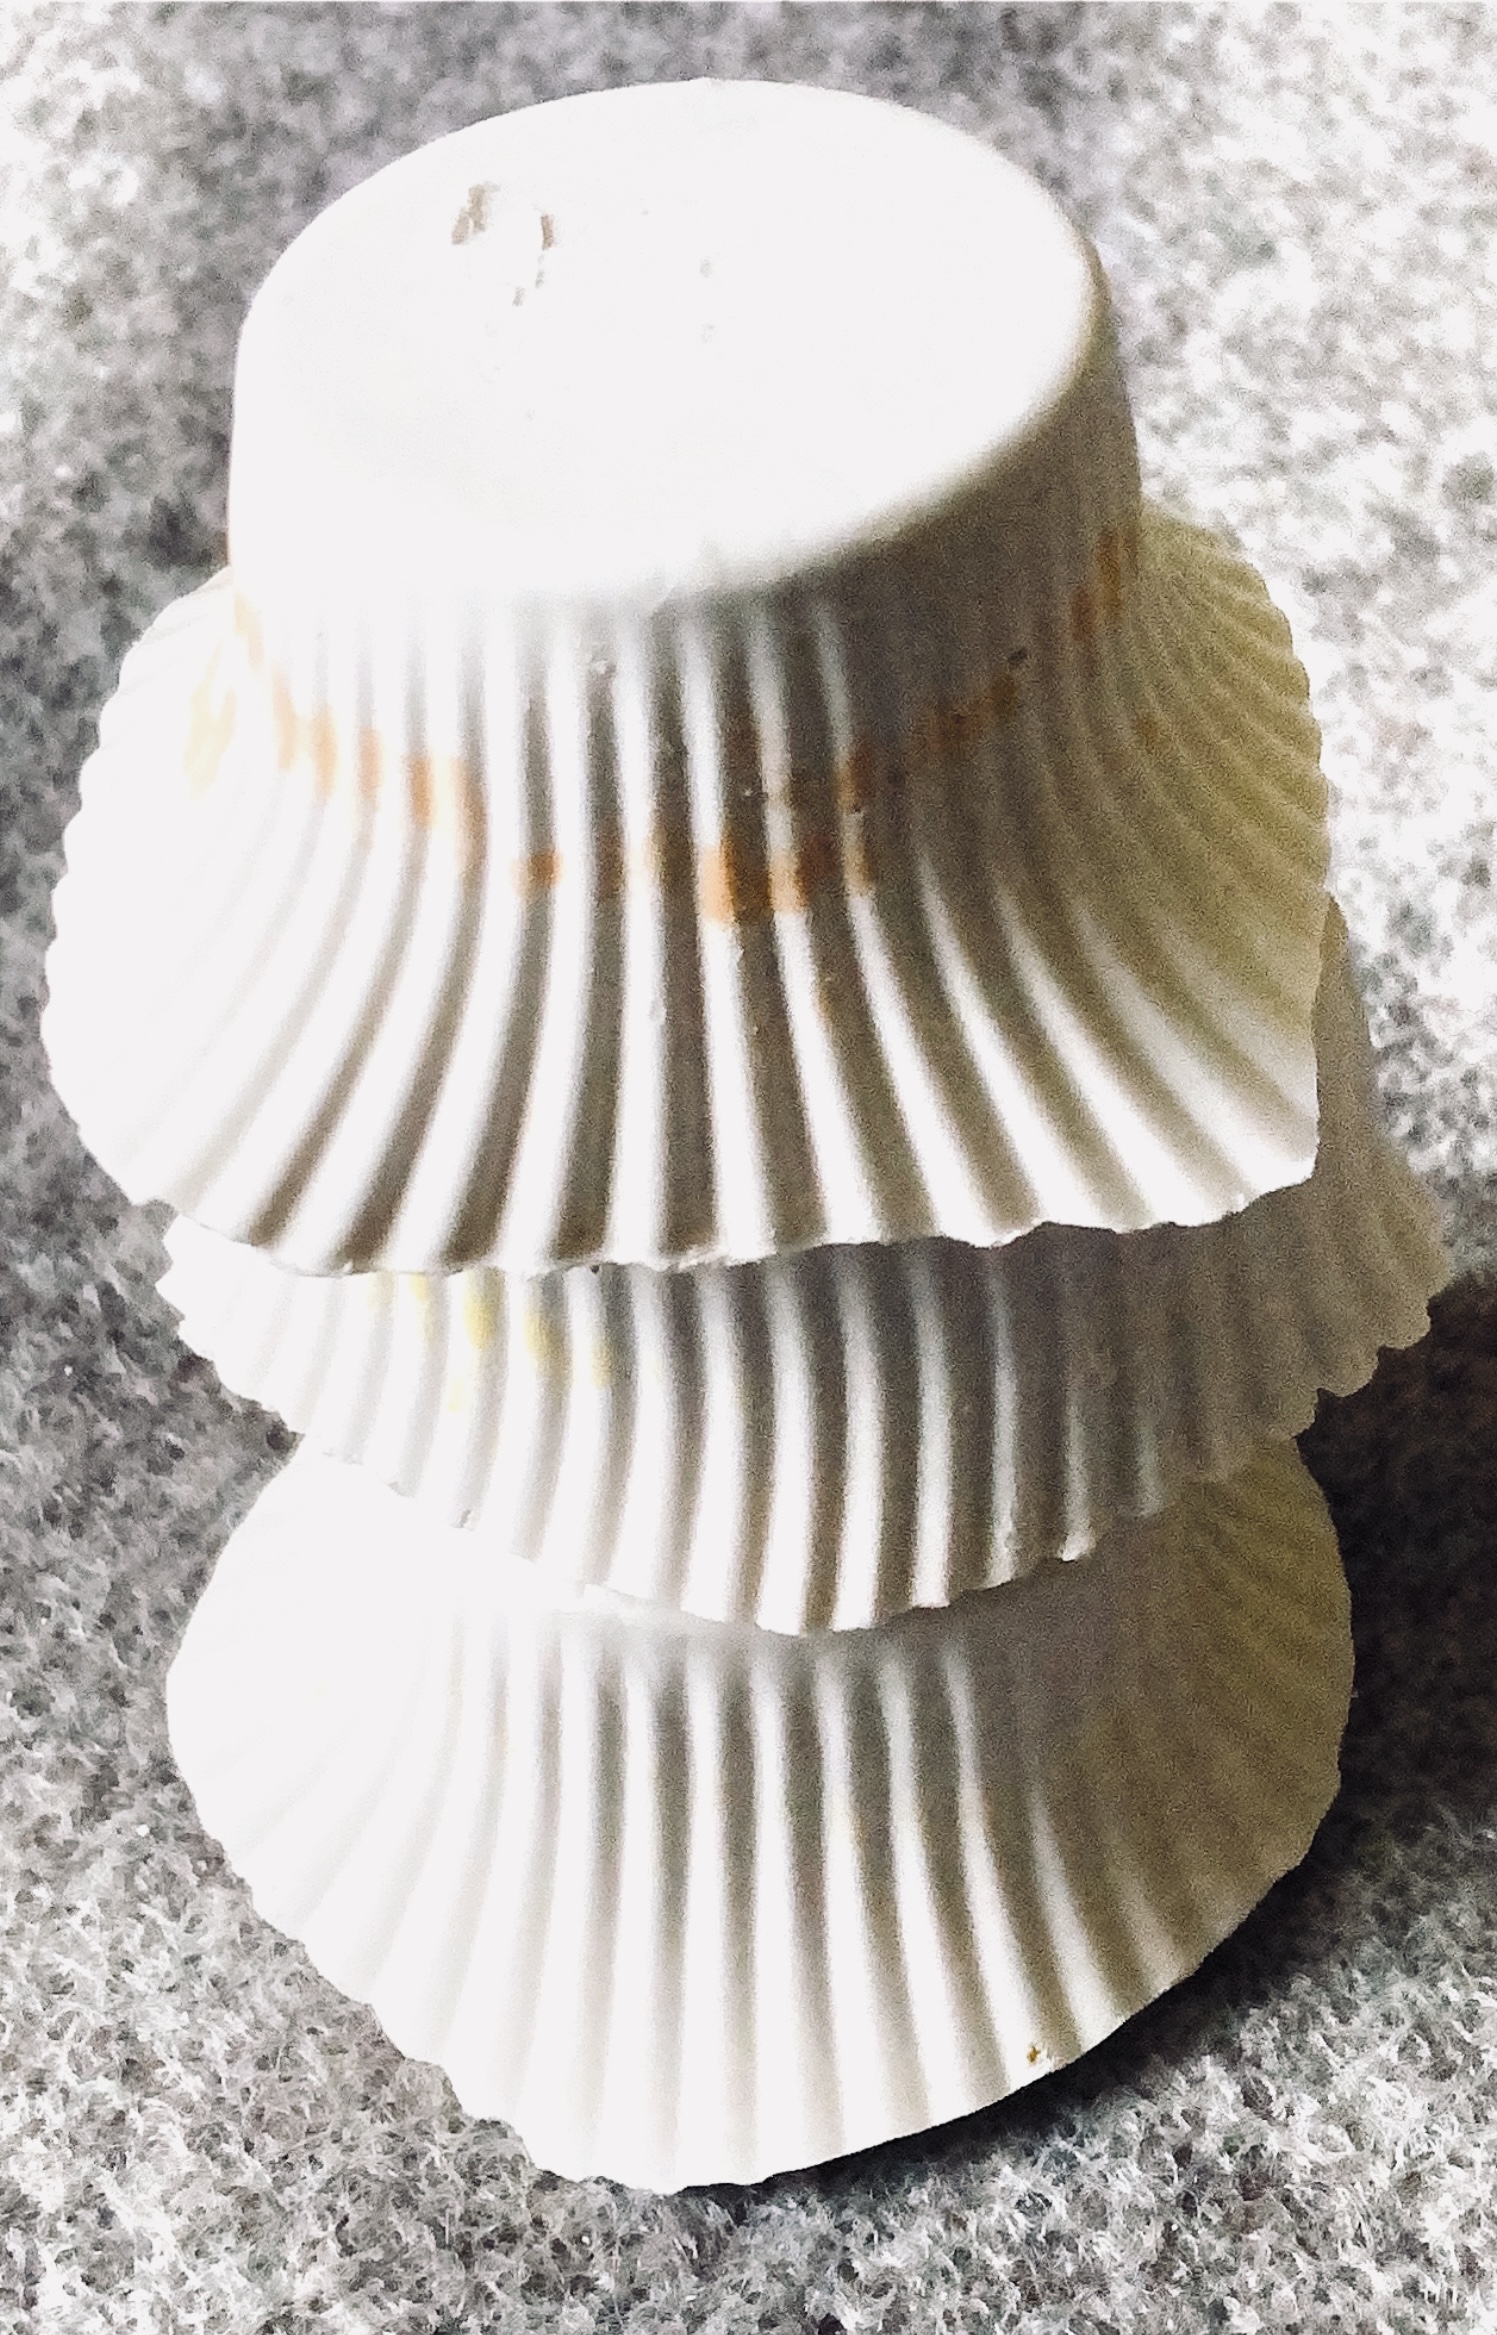
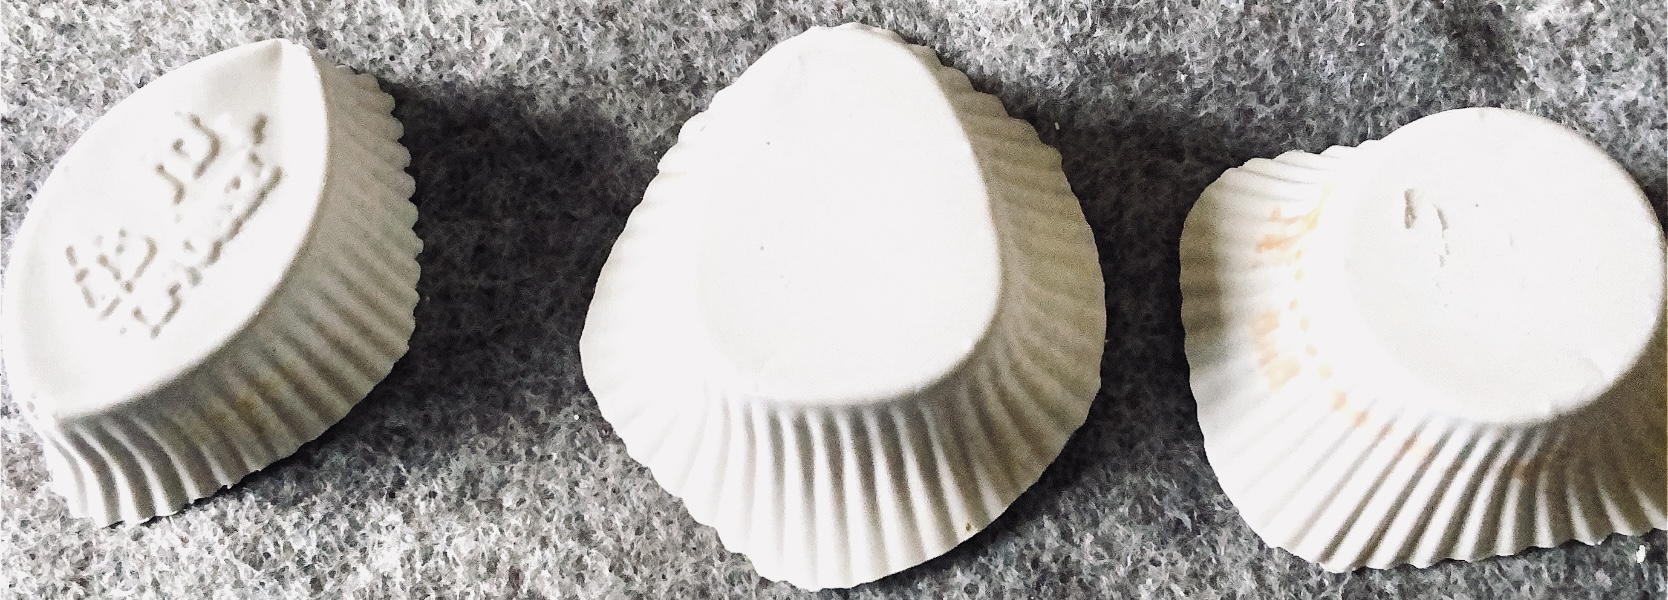
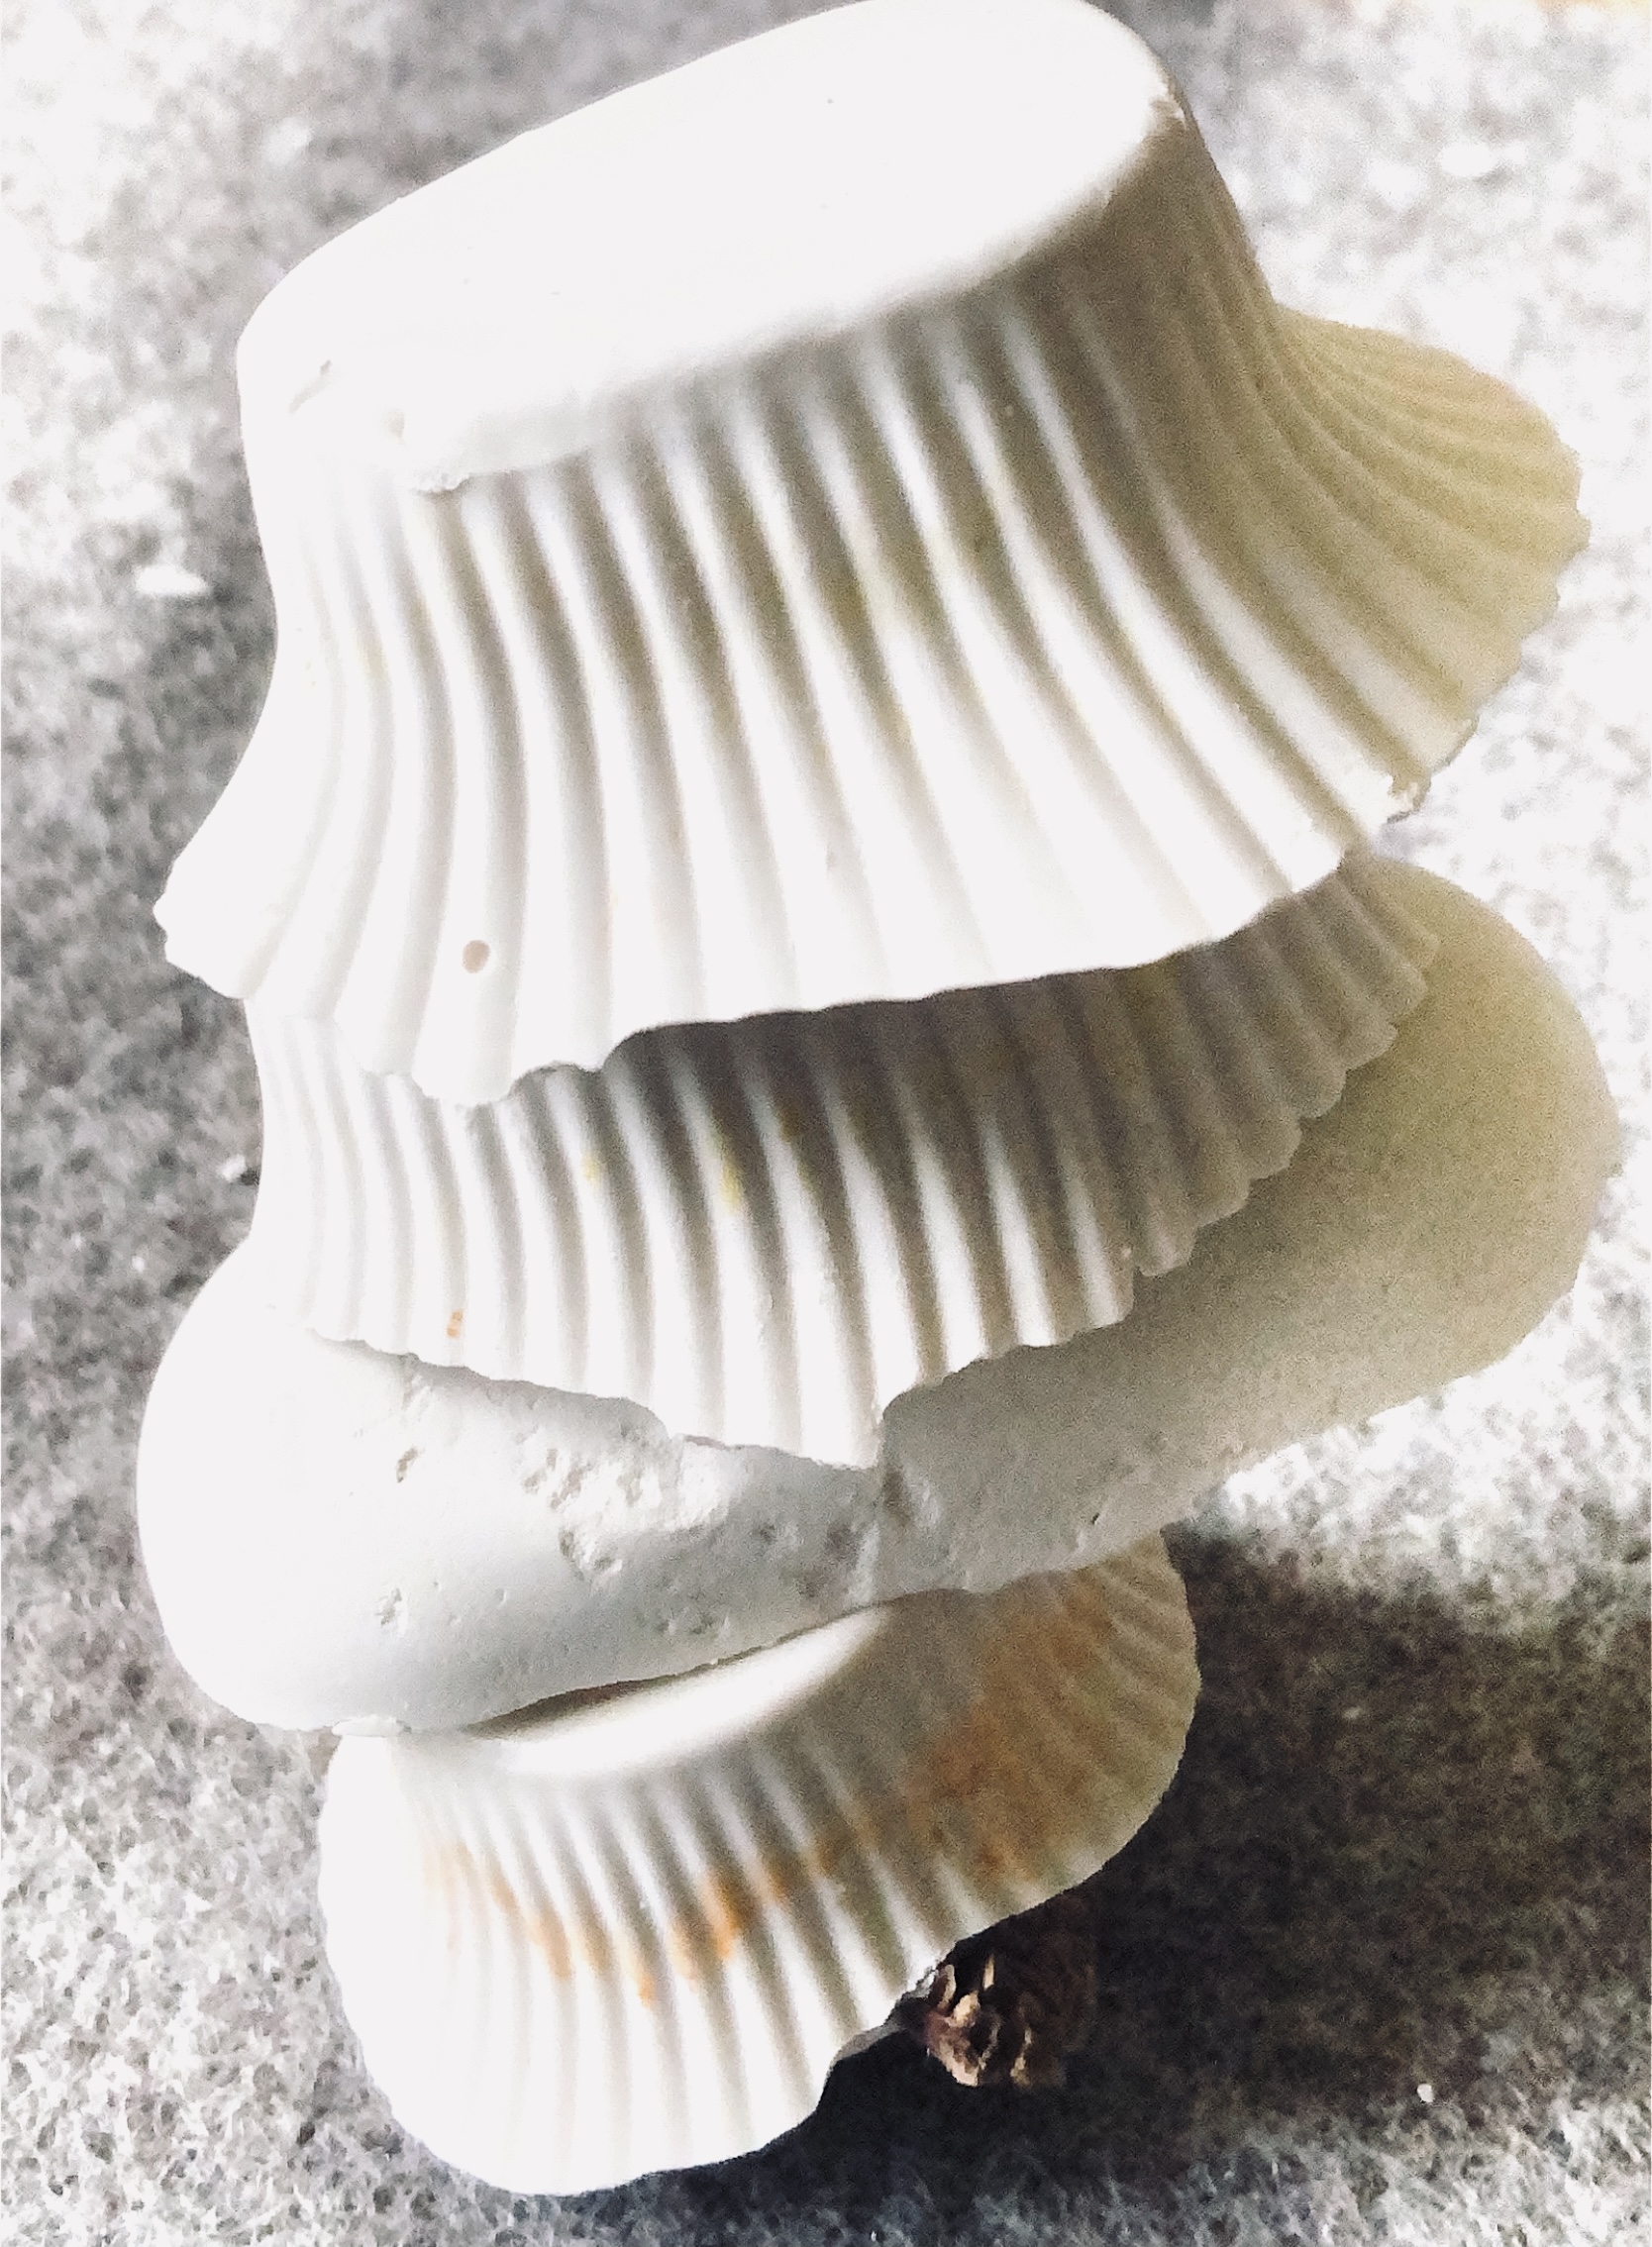
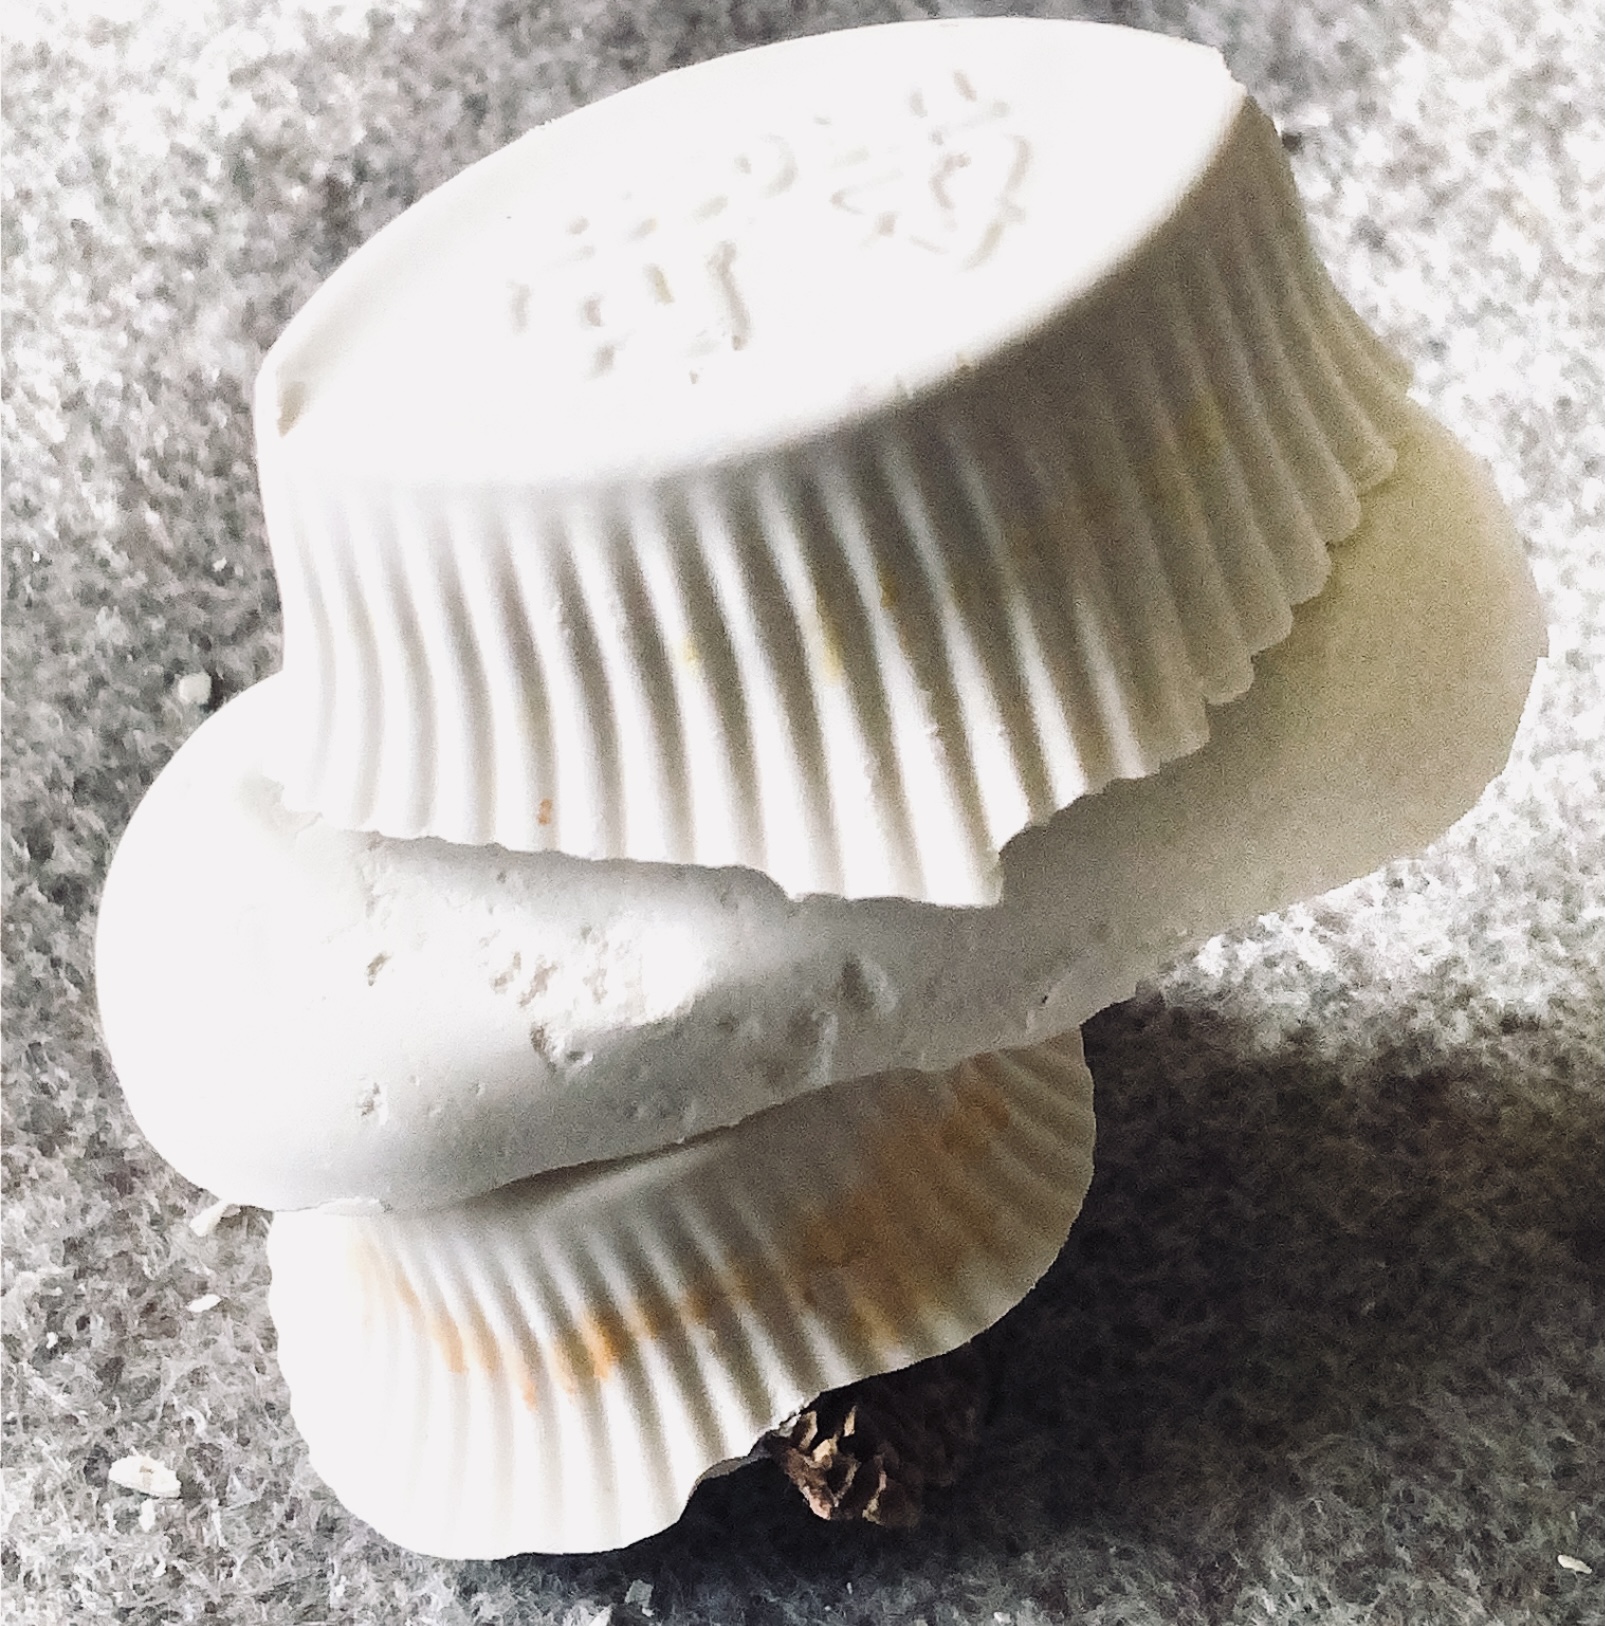
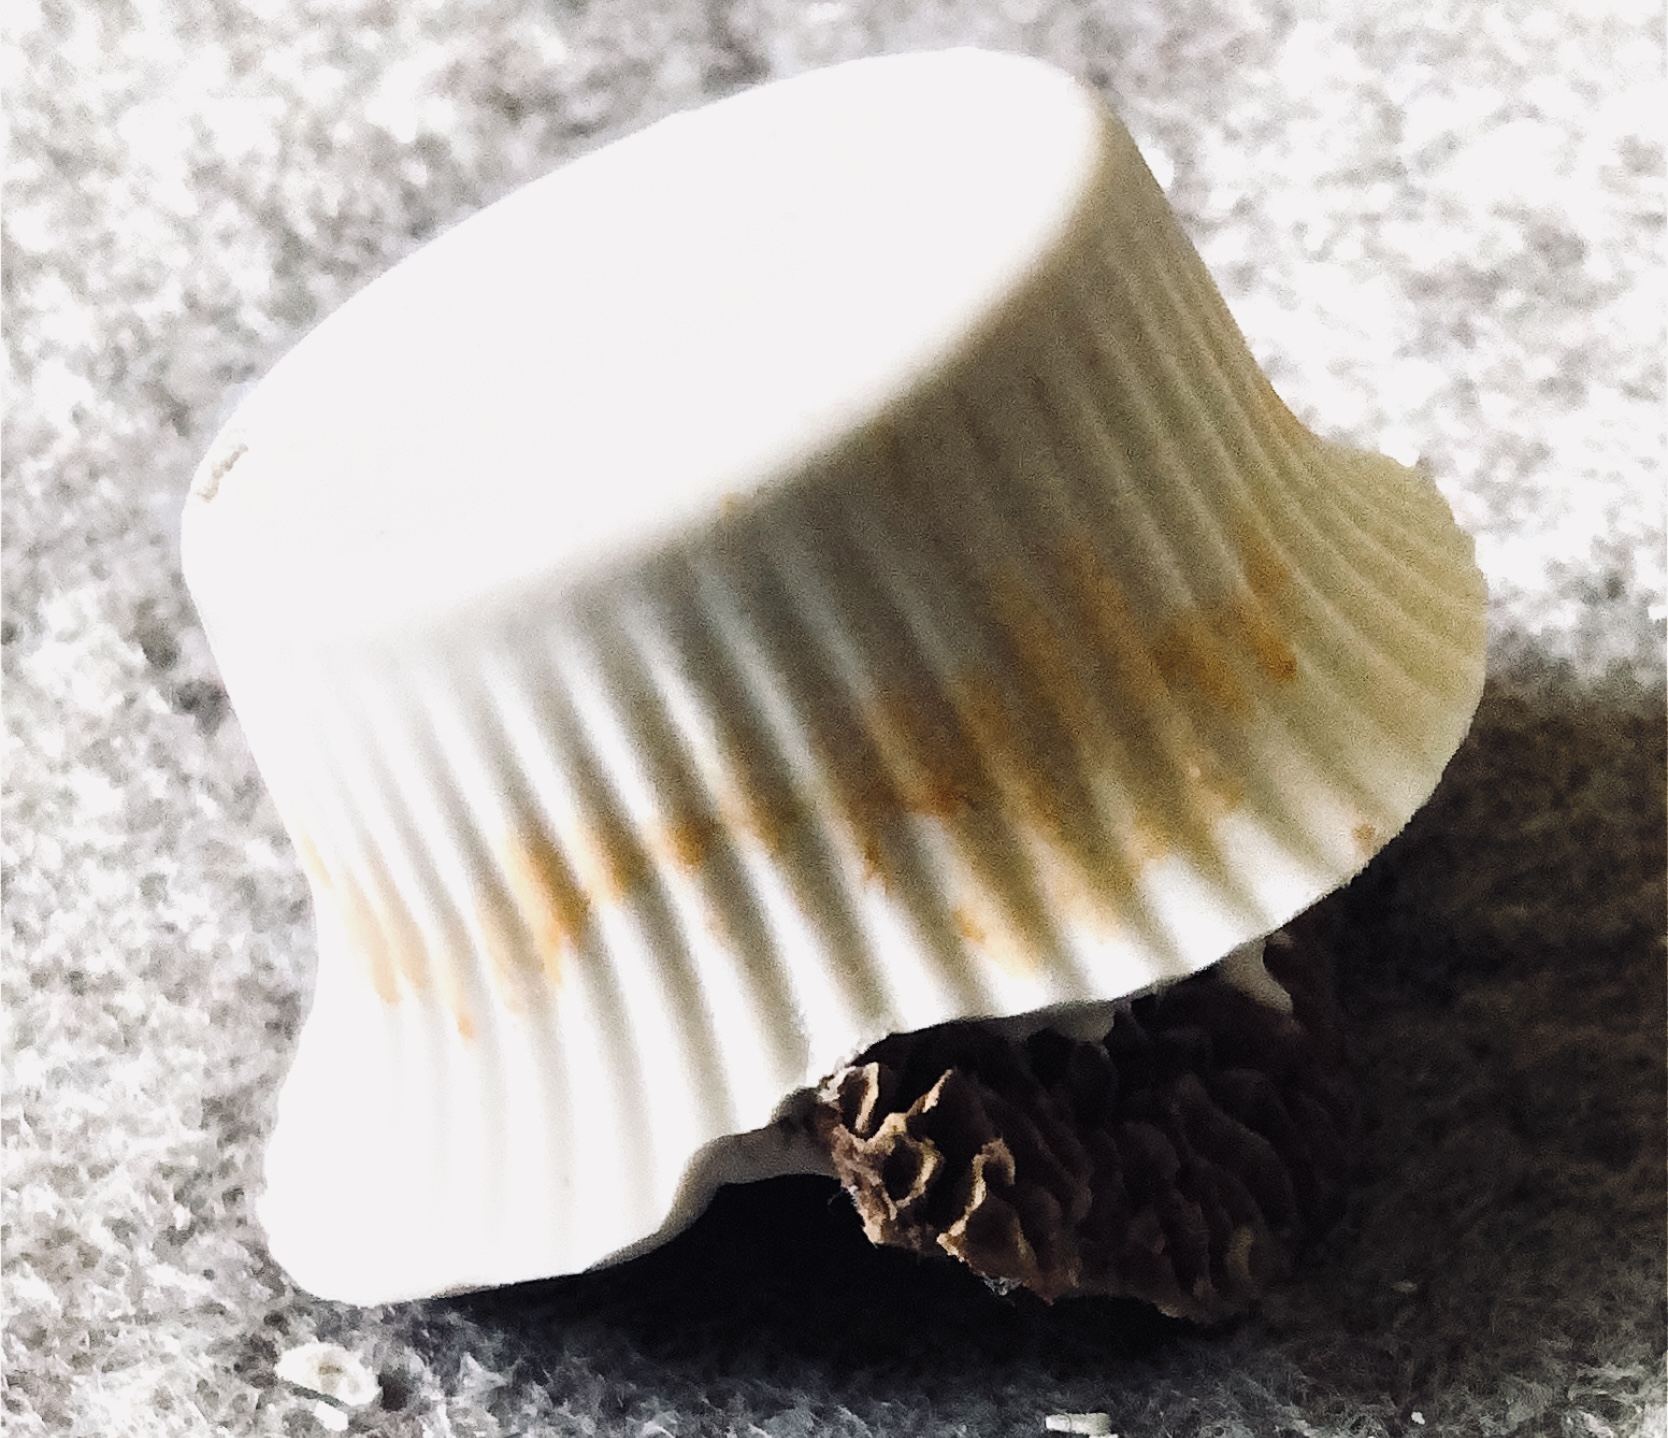
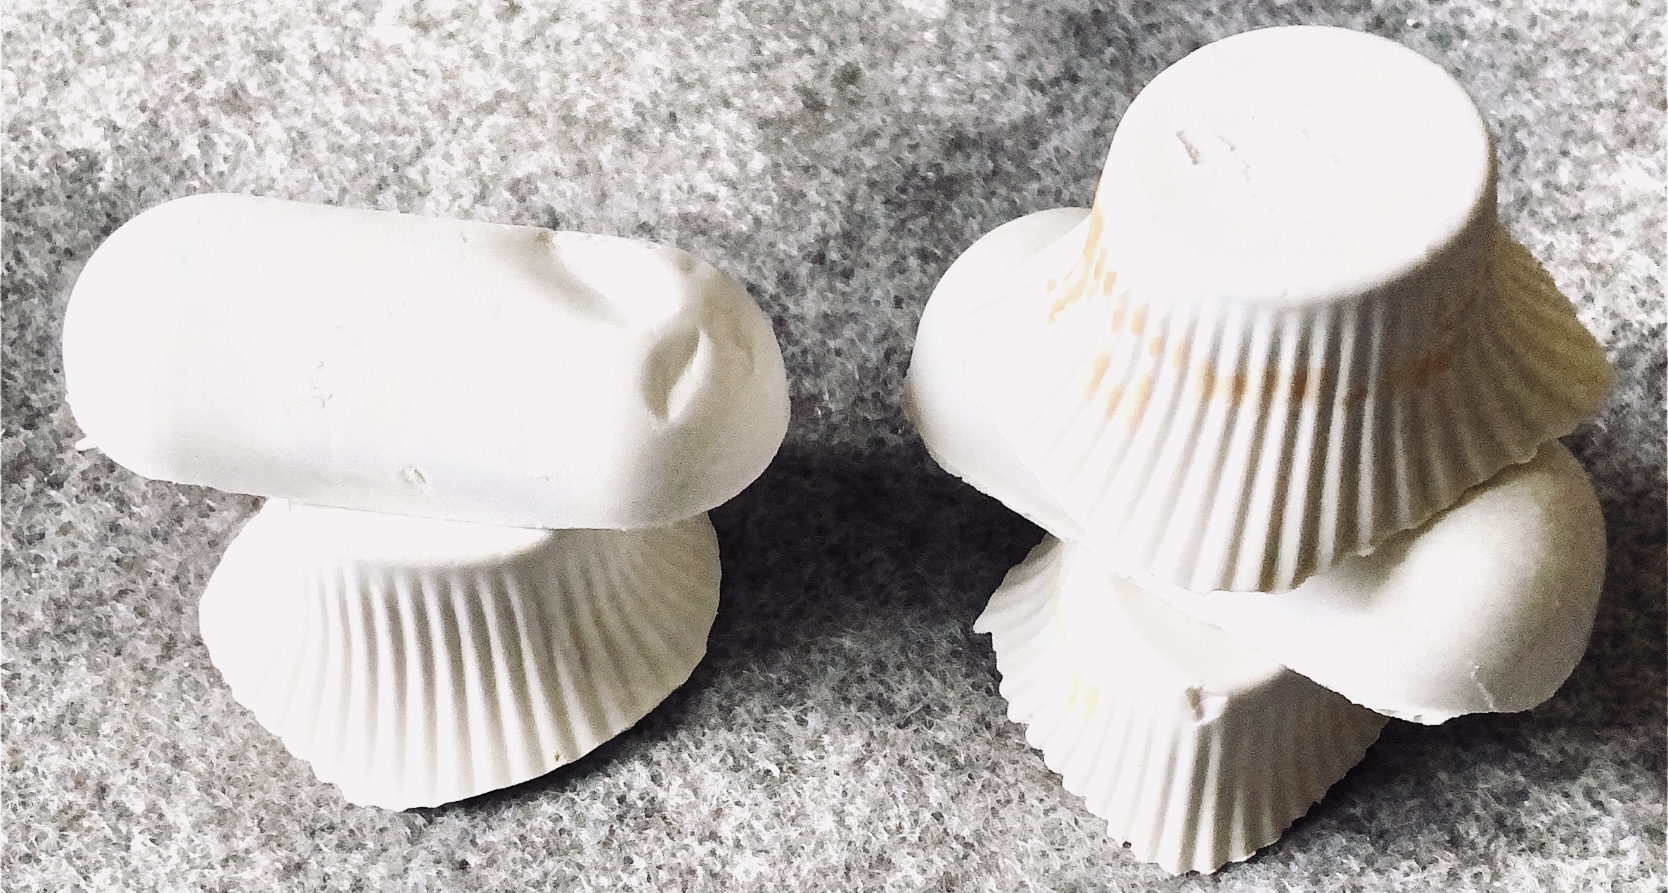
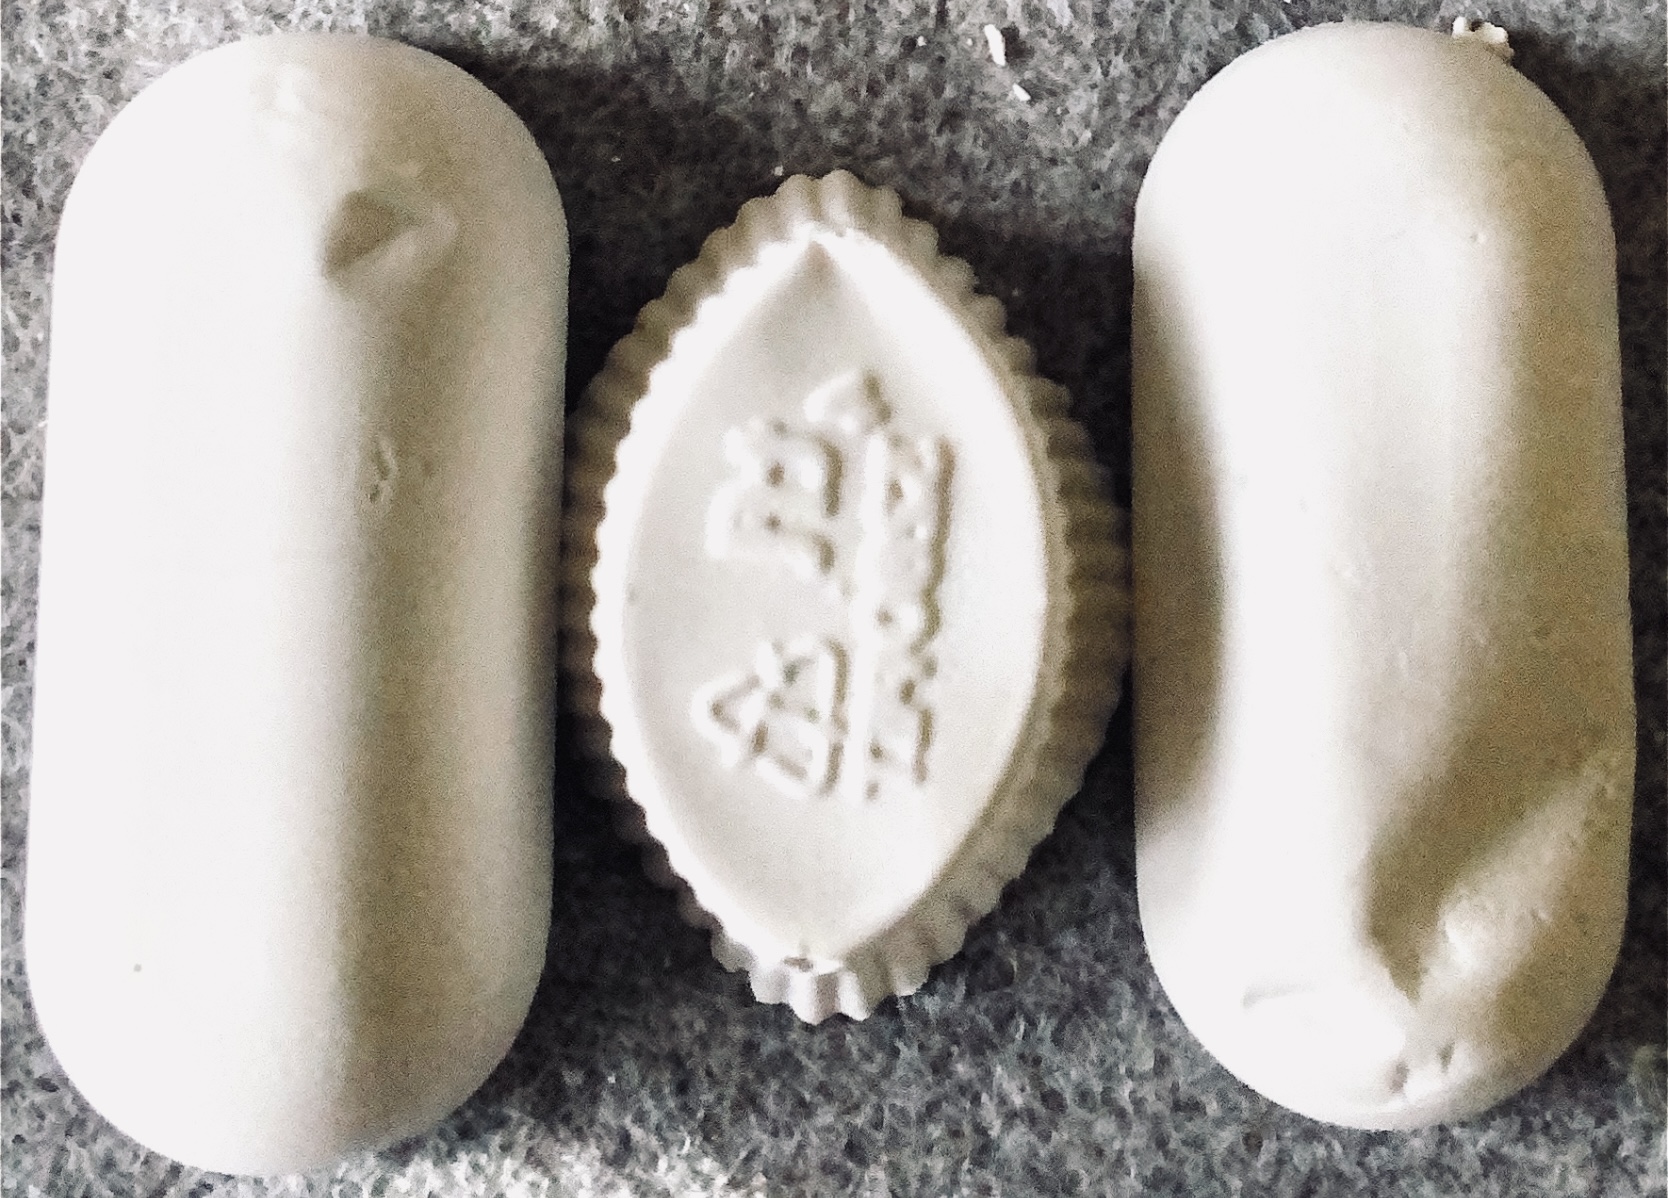
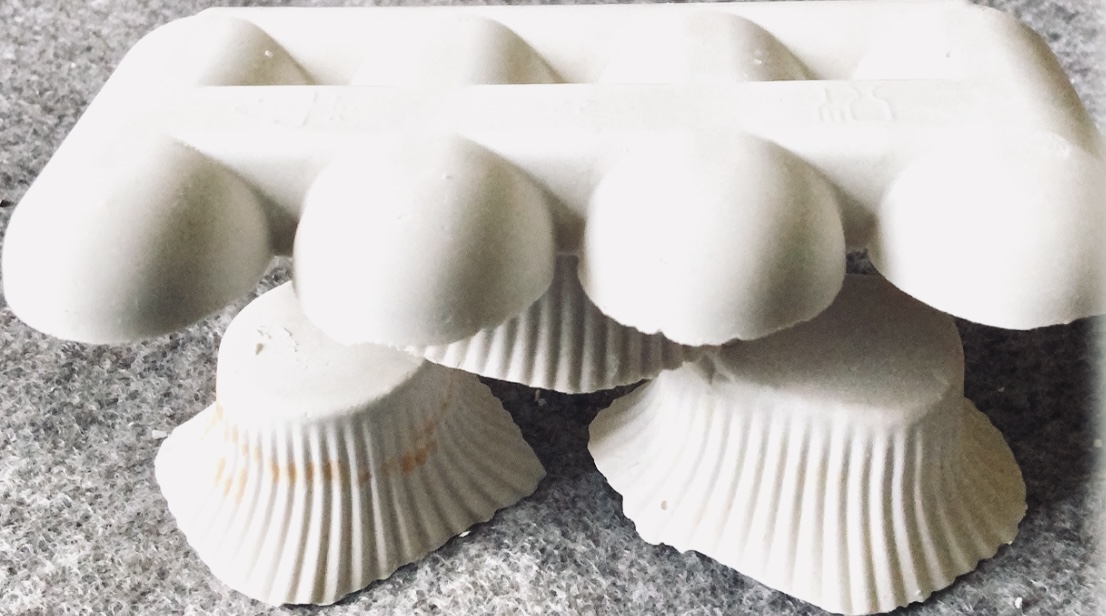
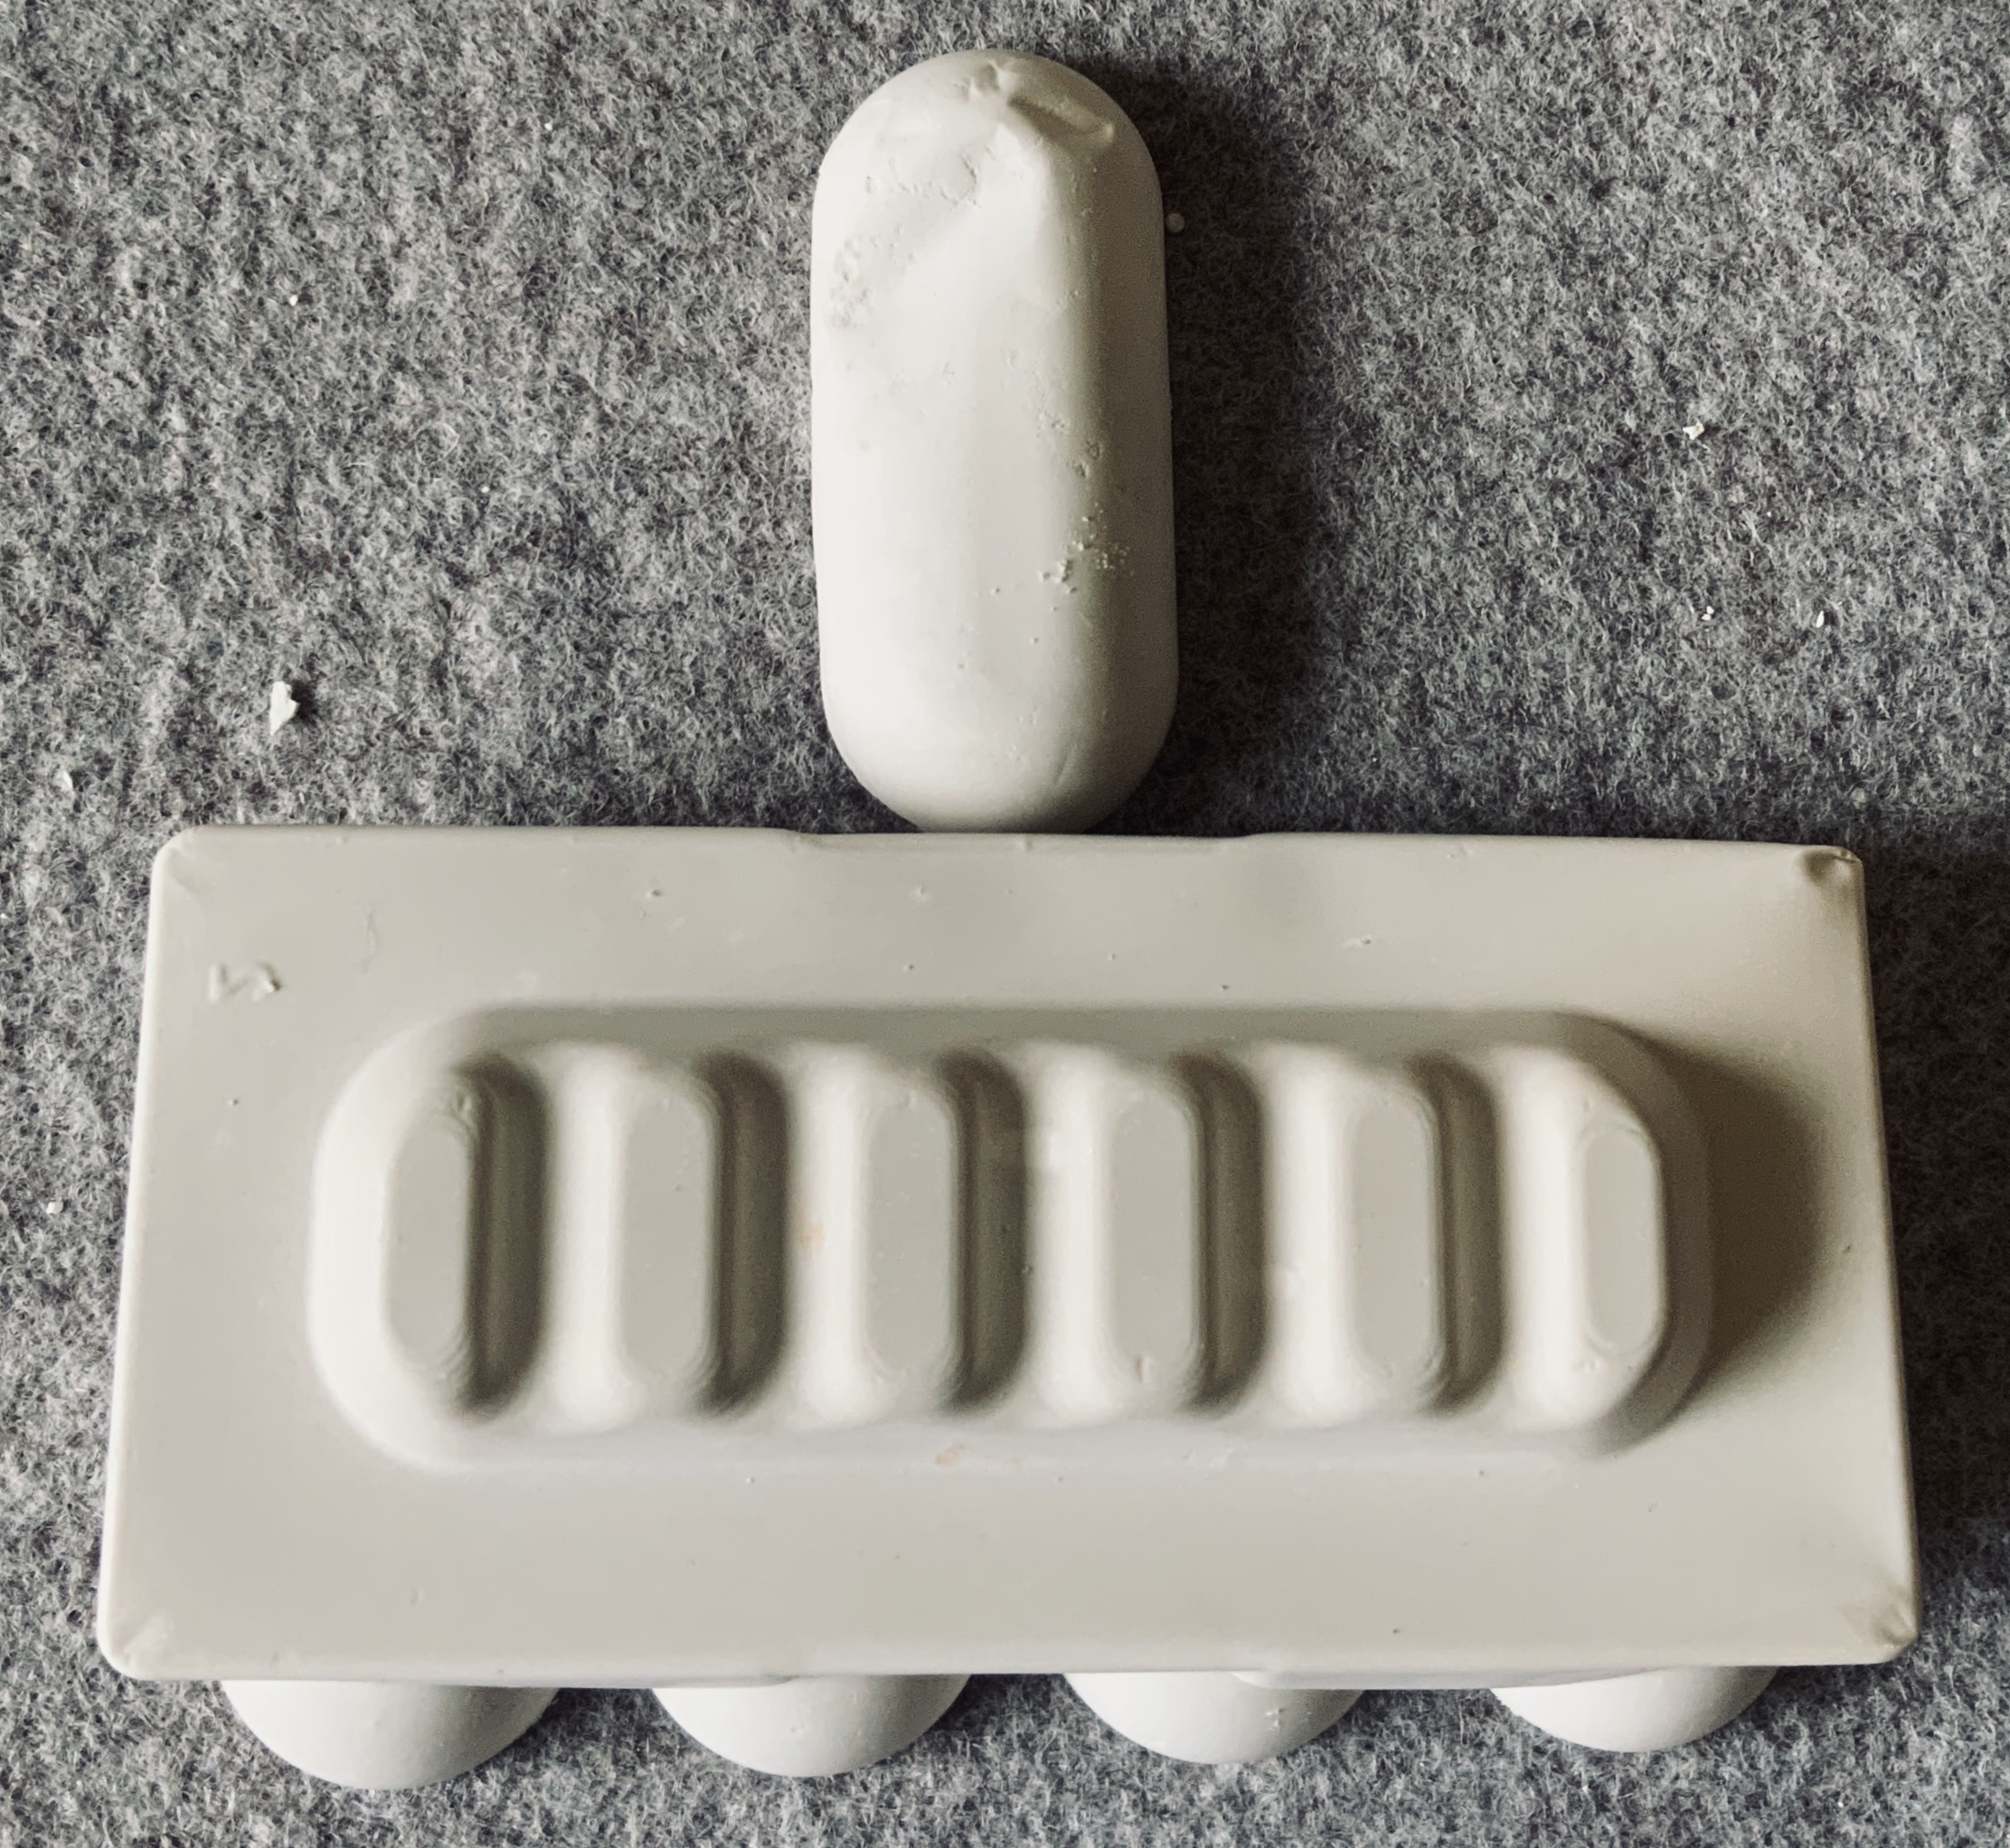
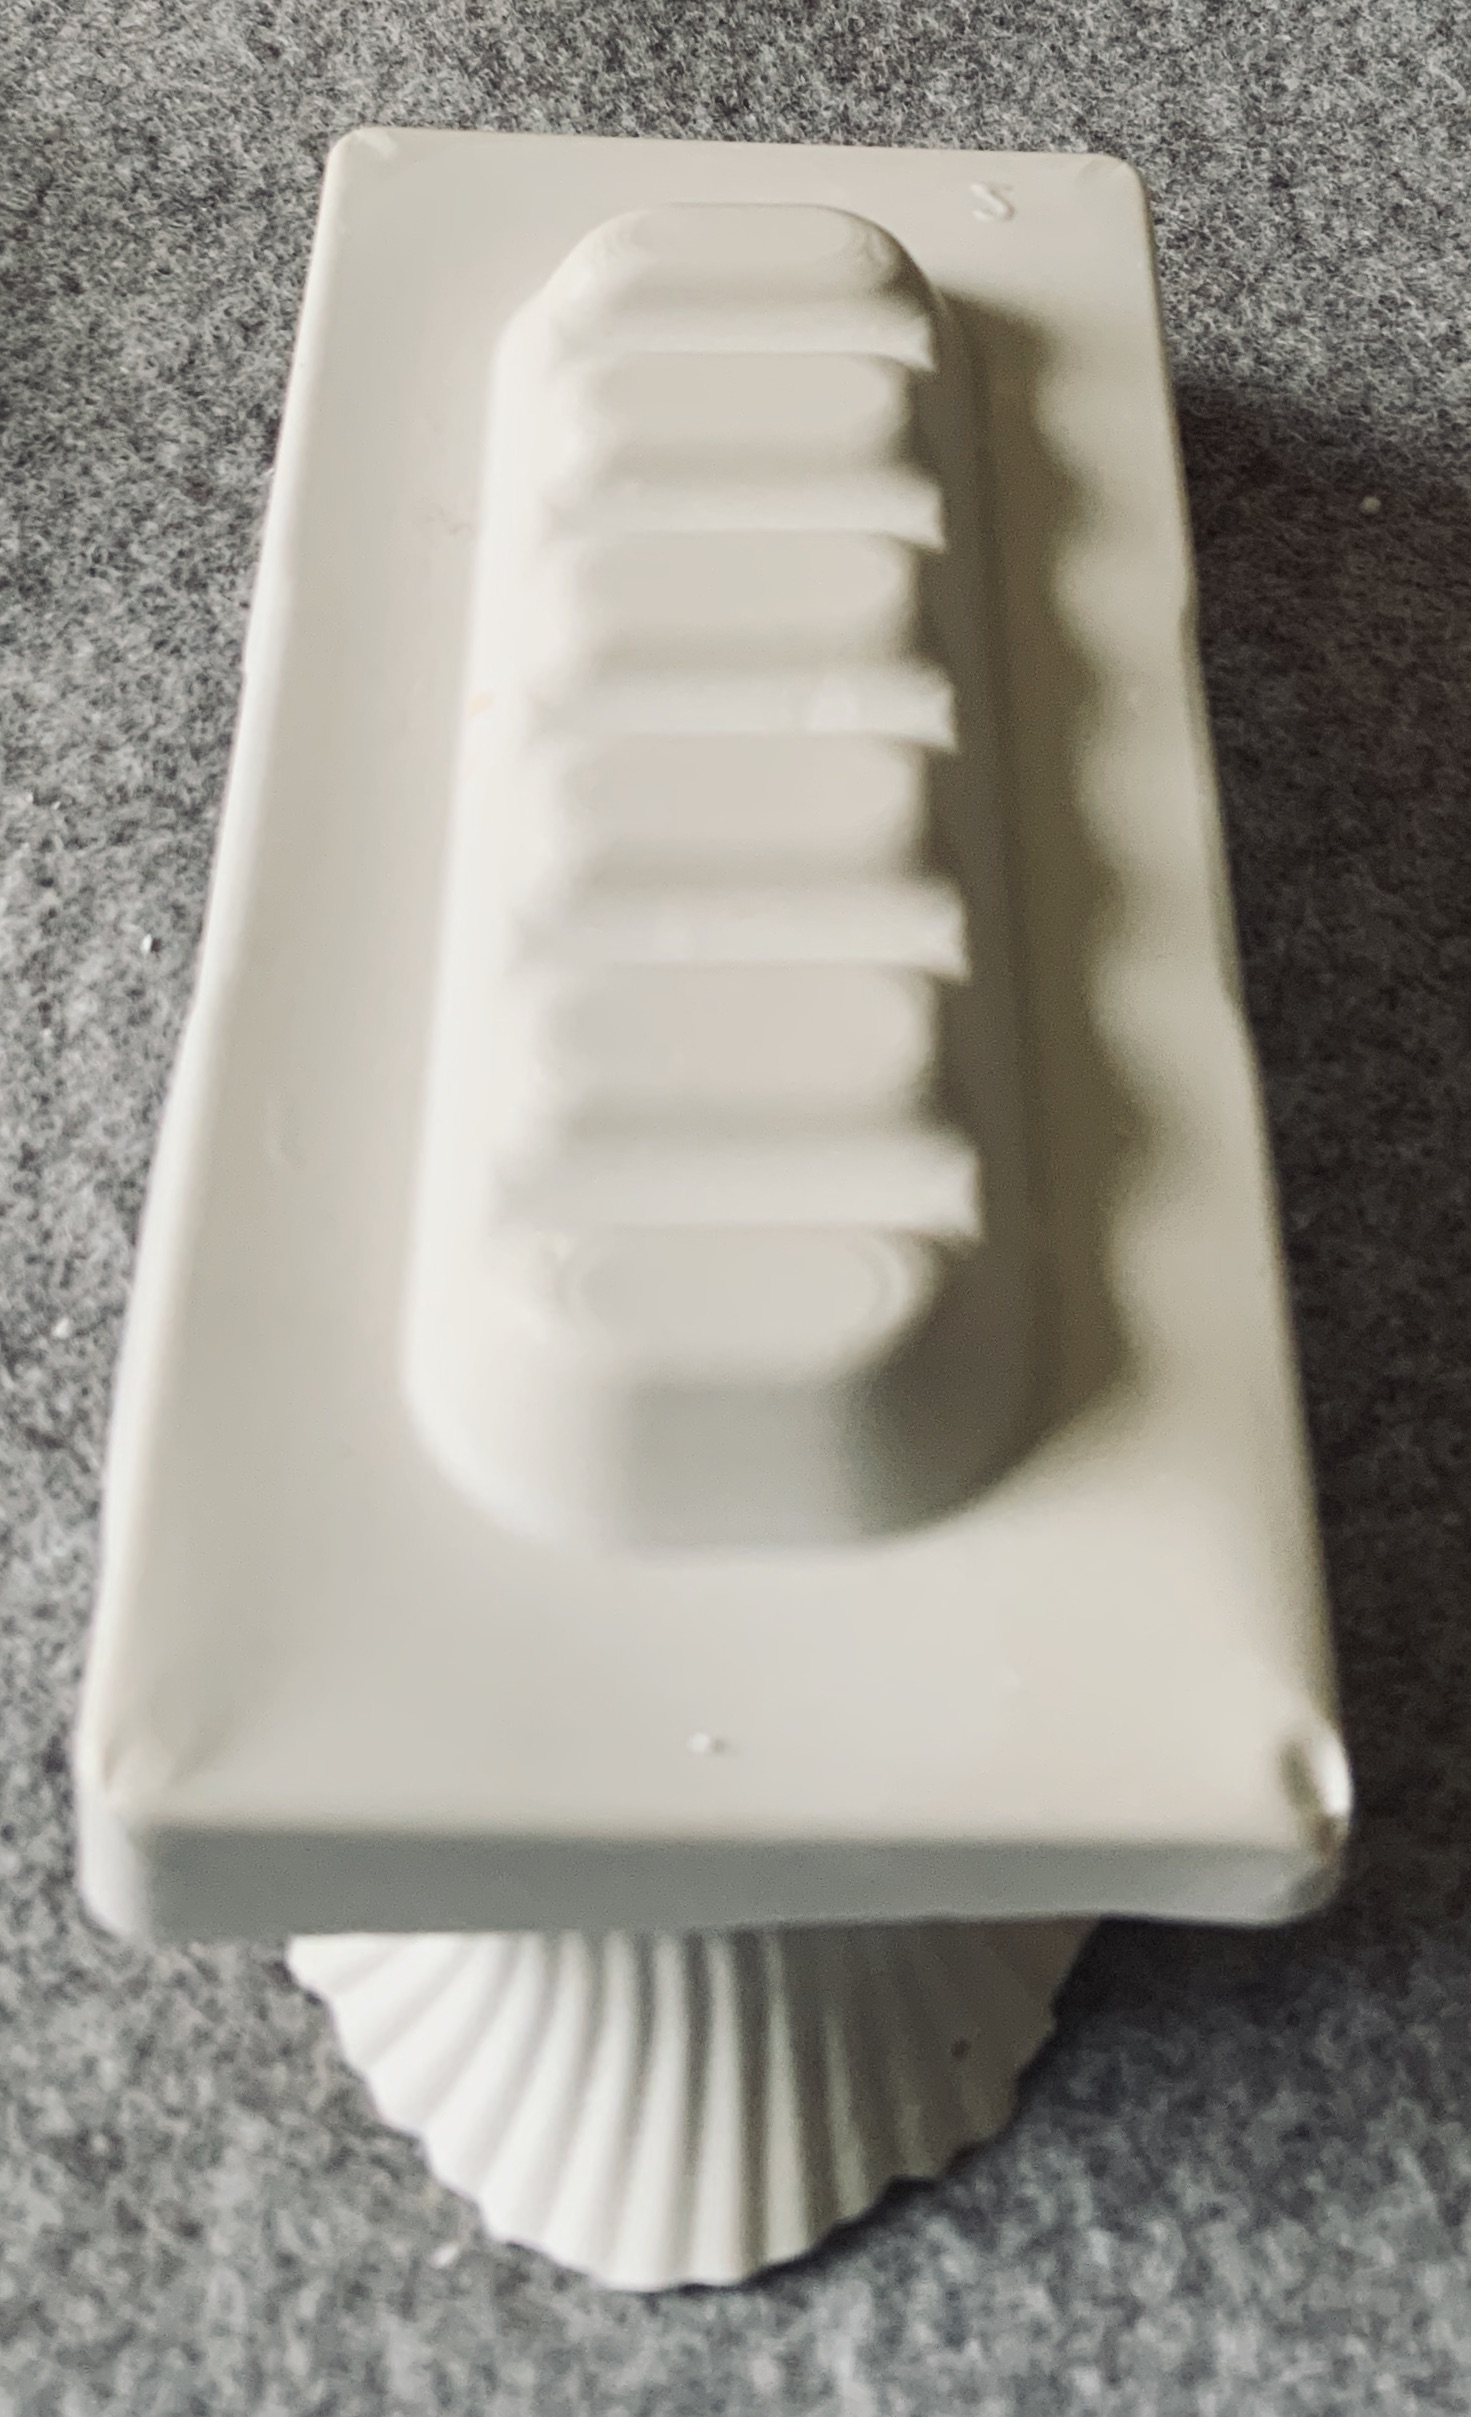
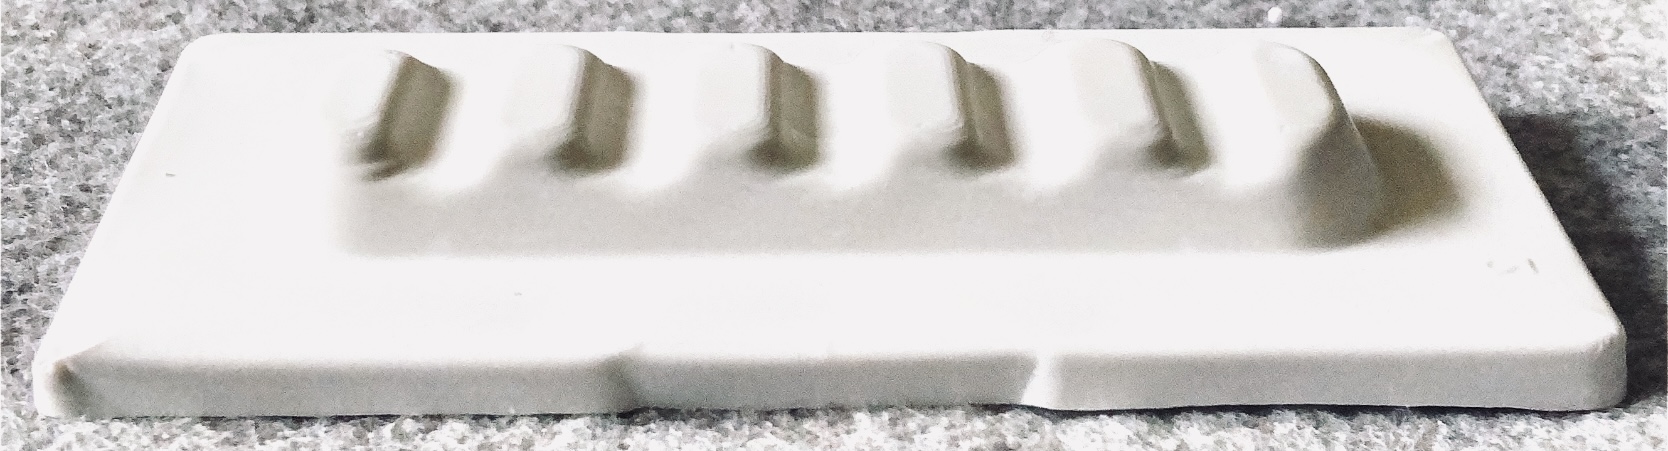
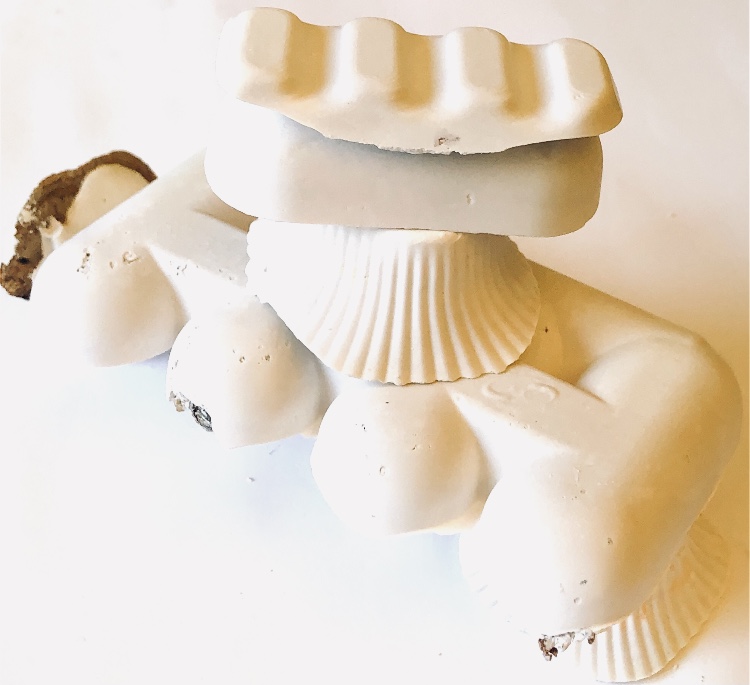
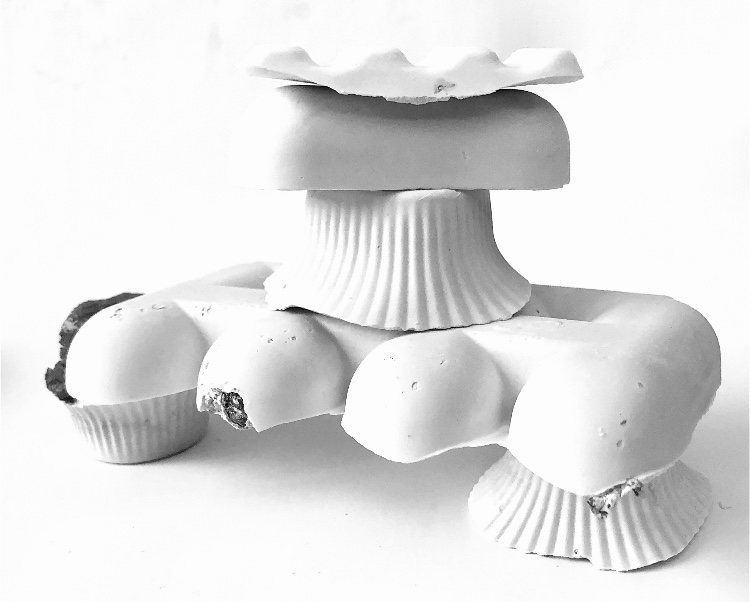
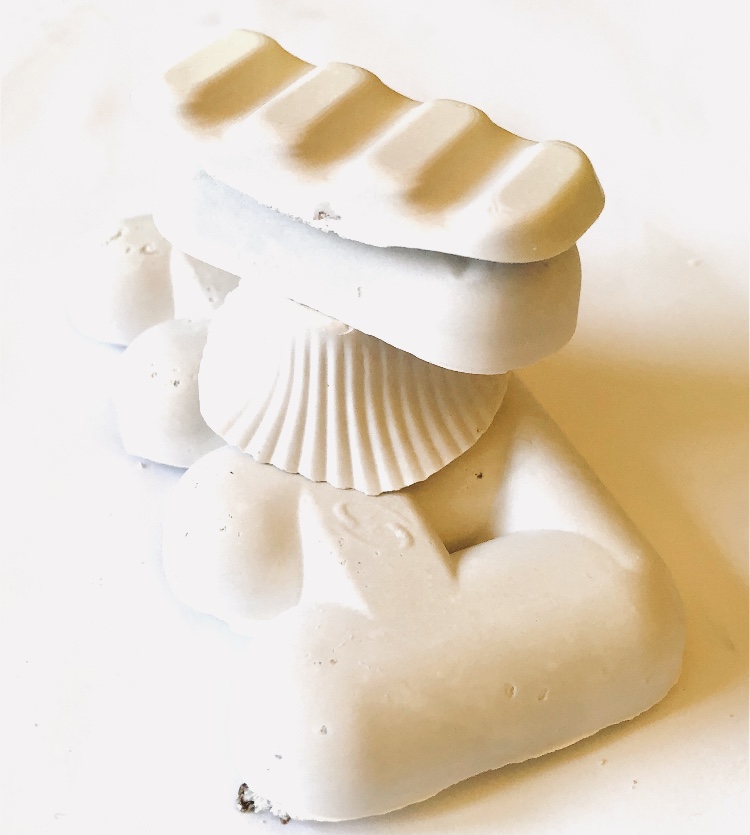
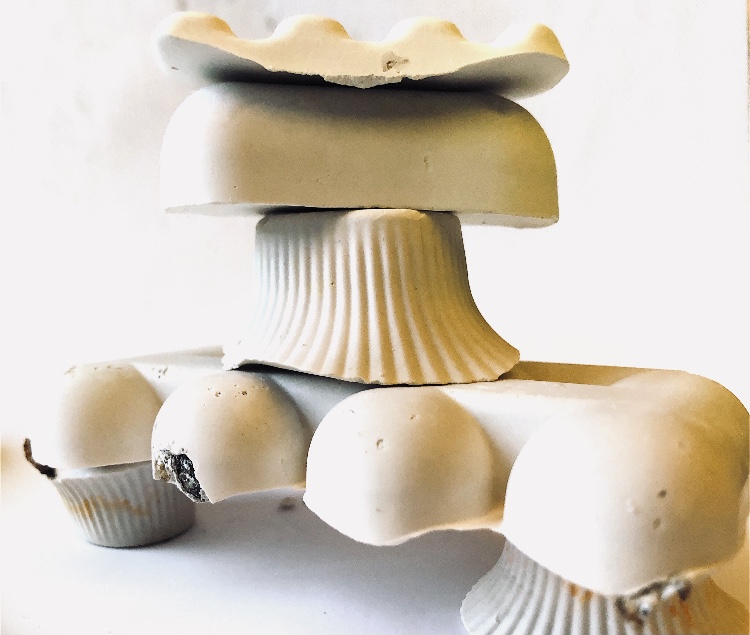
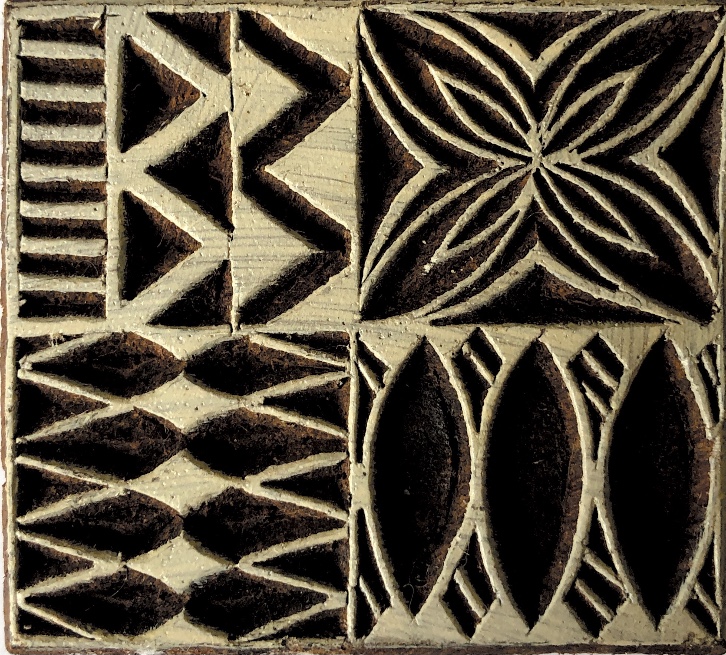
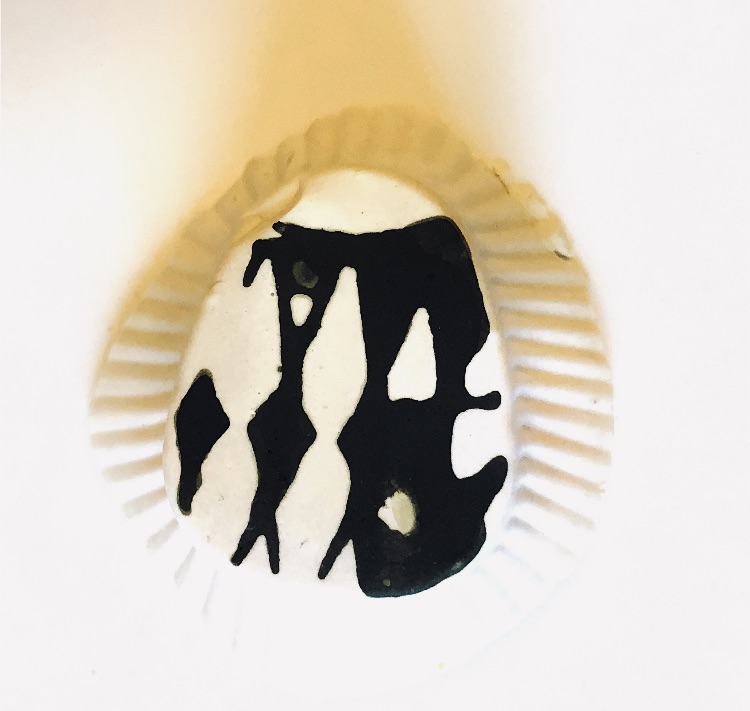
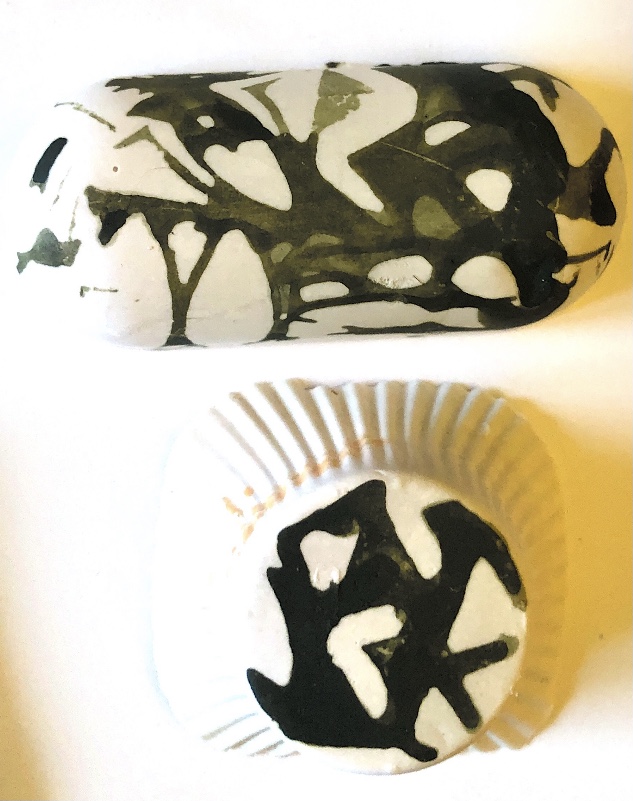
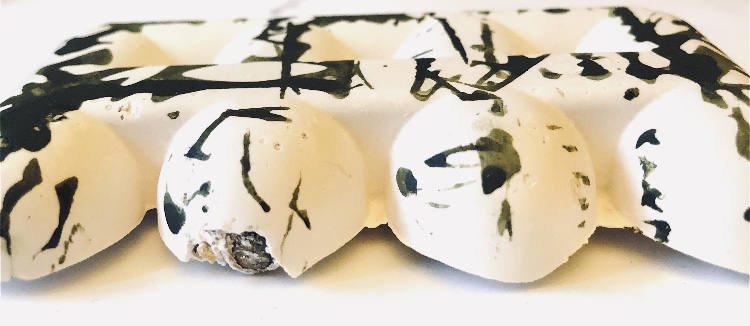
Fig 5. I didn’t really know how to use latex but after talking to my tutor I was inspired to have a go. Casting from sweet packets and shells provided the texture and I added in paper from previous monoprinting on one piece. I also used the lid of a candle jar which produced a very intricate geometric sample, but I prefer the natural look of the first few casts. The piece cast from sweet packets has the look of seaweed and works nicely alongside the shell samples. I think these pieces are fragile, diaphanous and ethereal, like seashore finds – worn by the sea and wind and ever changing. I find the use of paper strips intriguing and I am hoping to return to the combination of latex and paper for future inspiration.

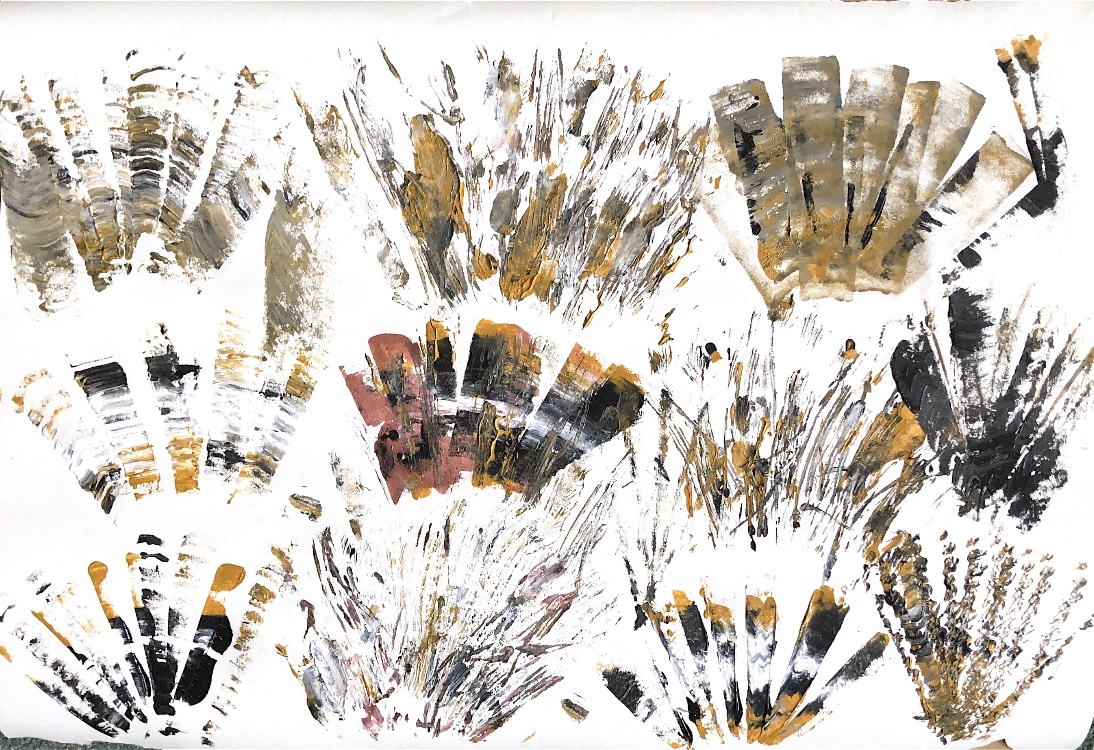
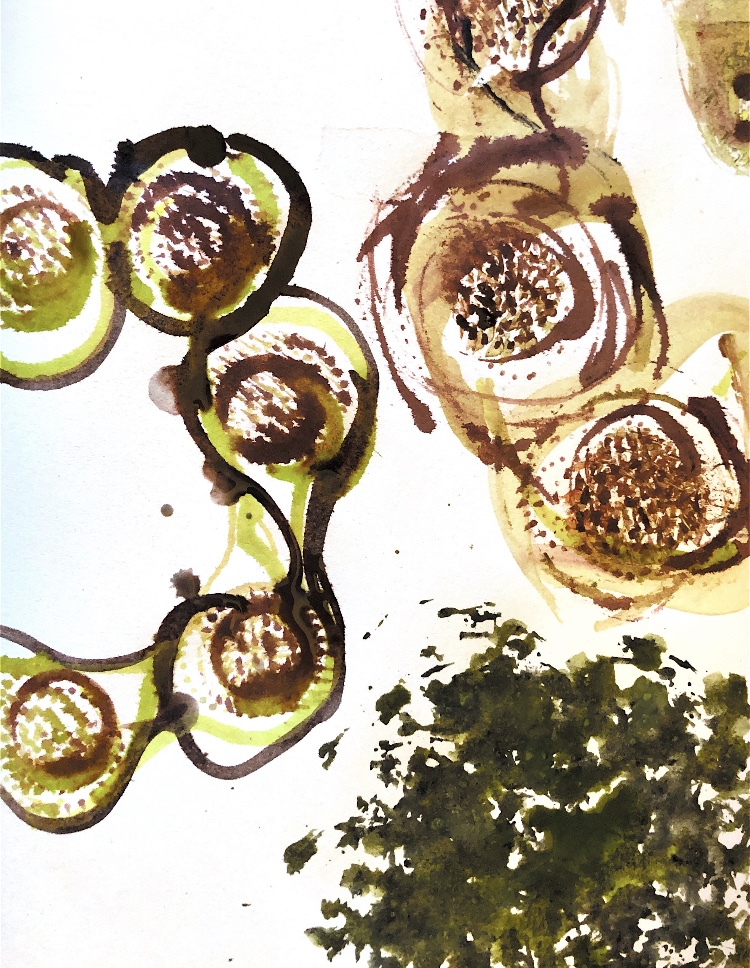
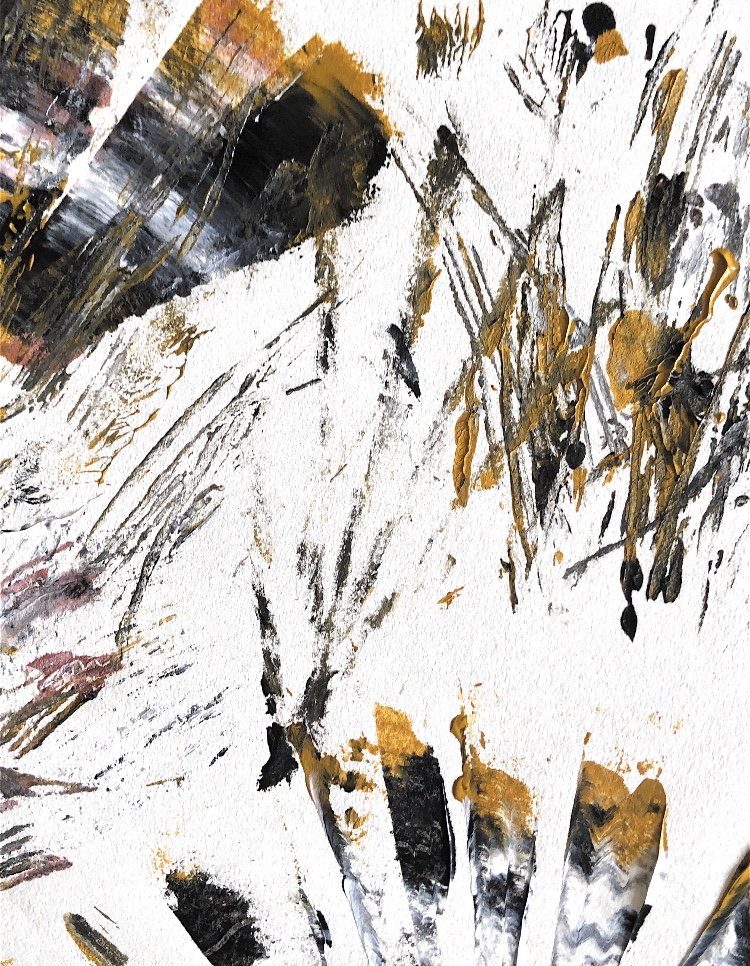
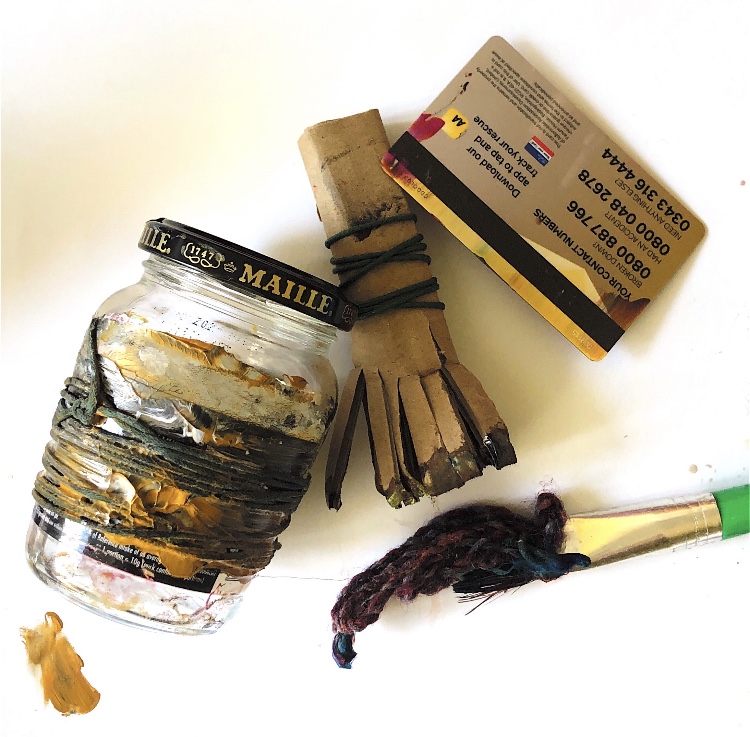
My large paintings using homemade implements captured the seashore theme.

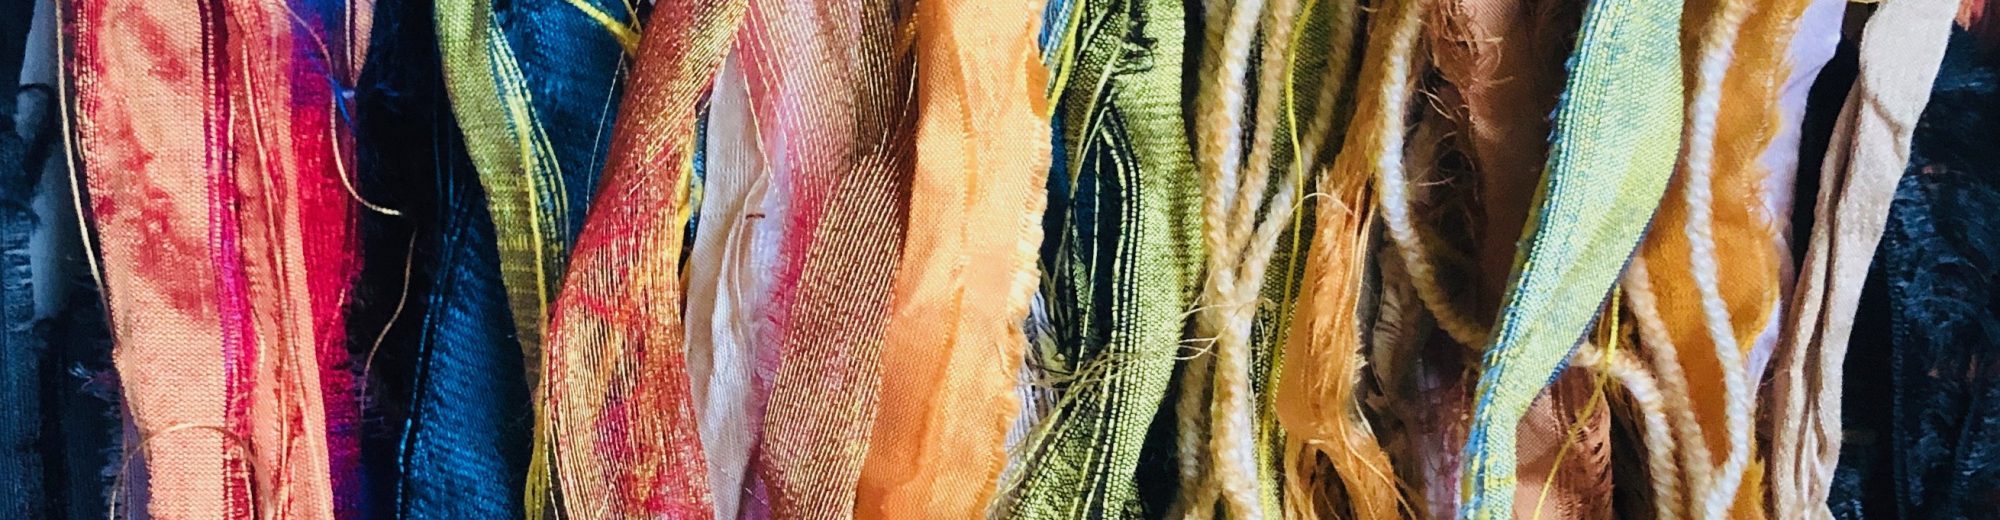
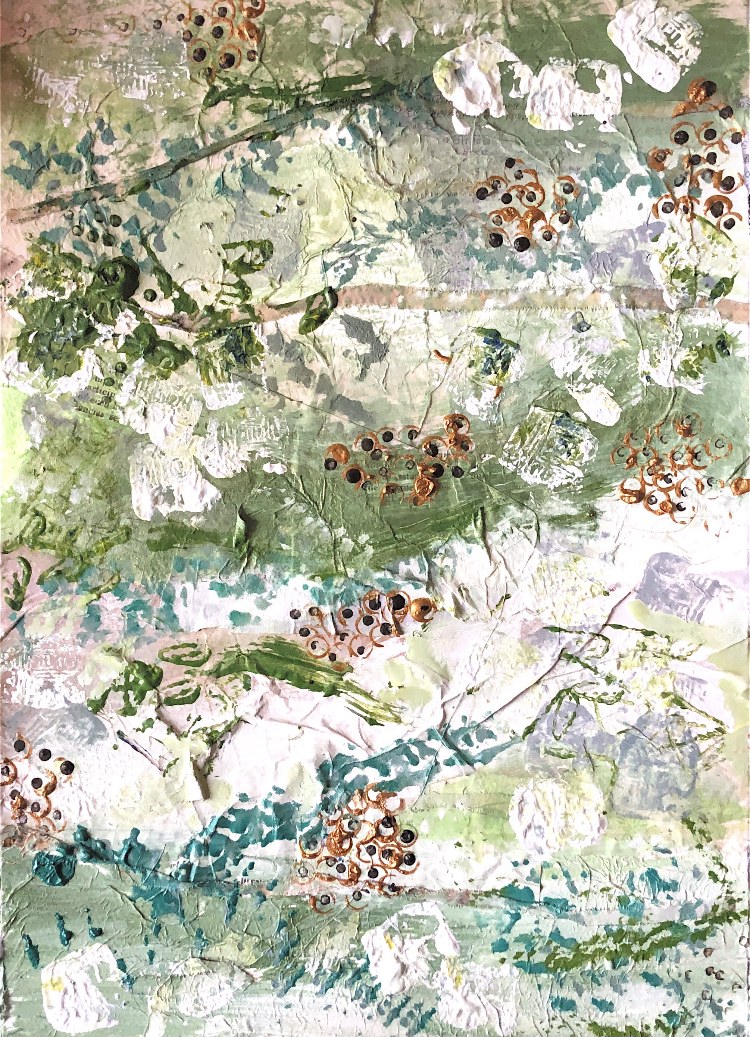
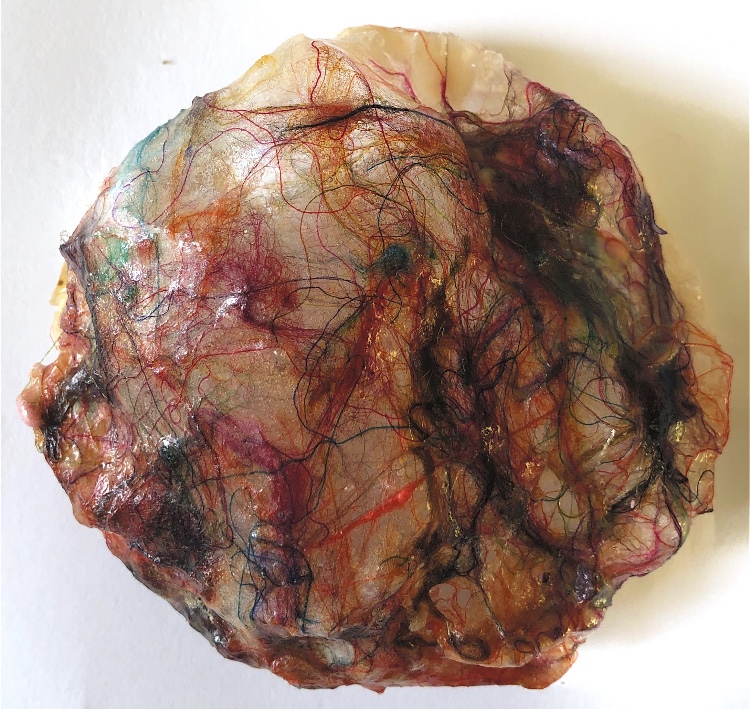
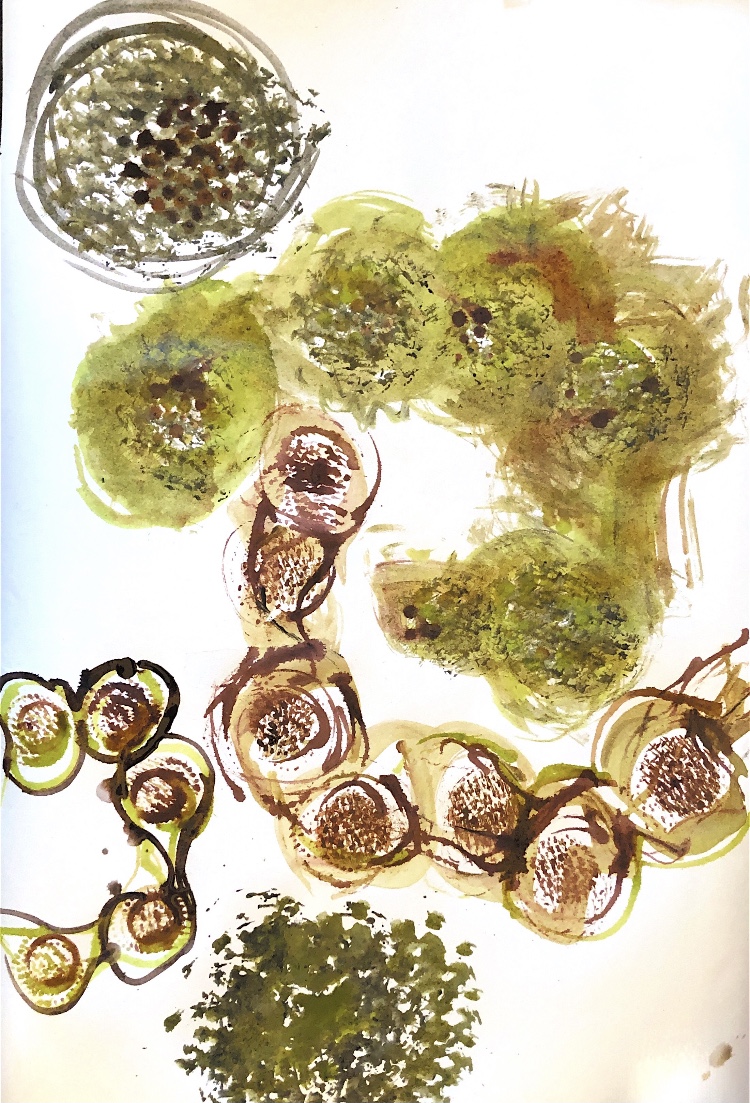
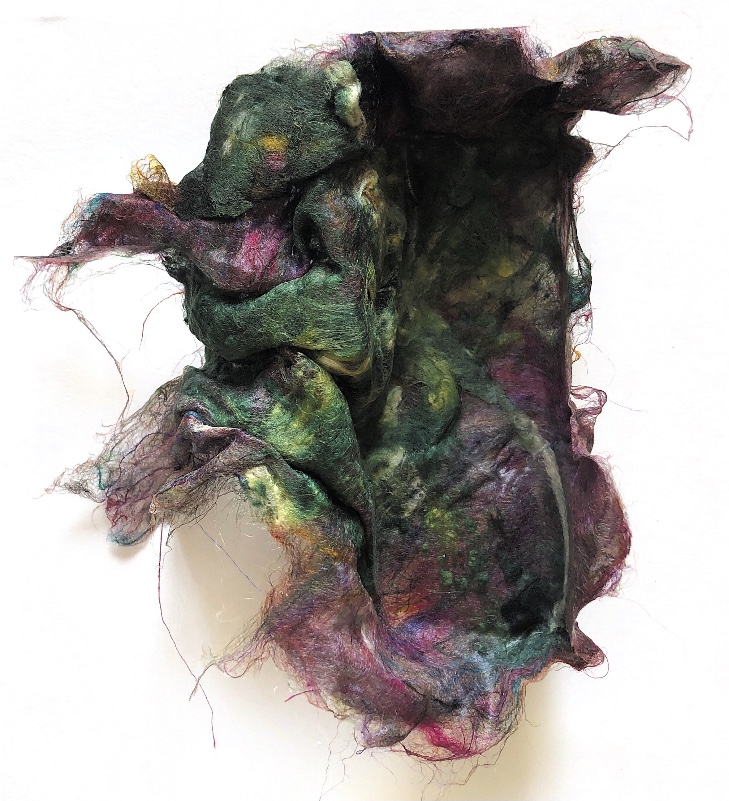
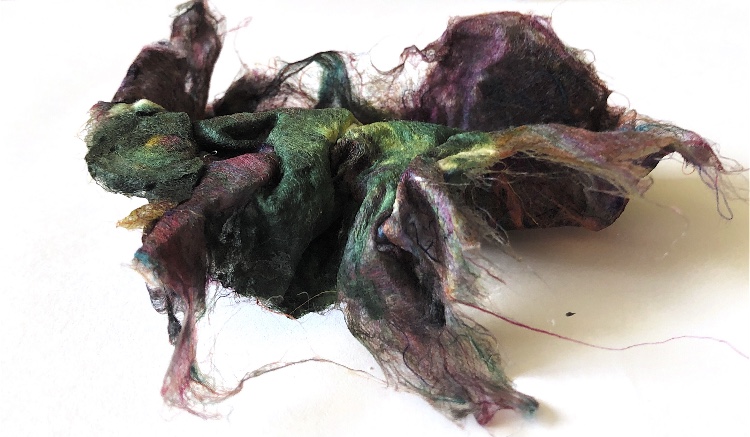
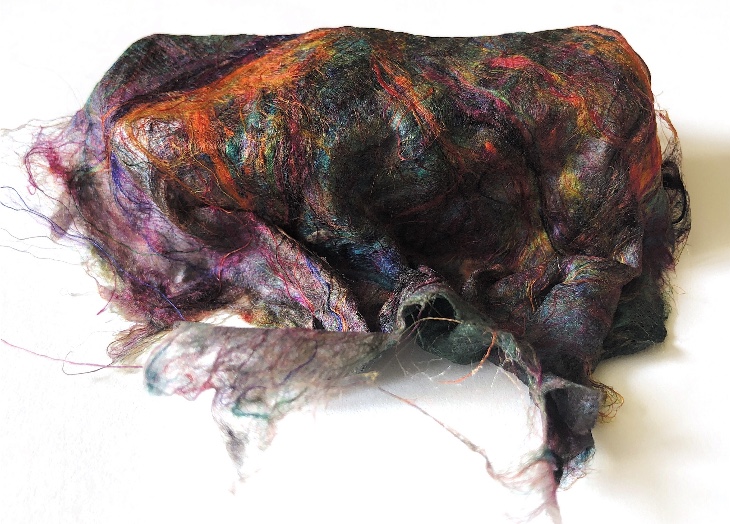
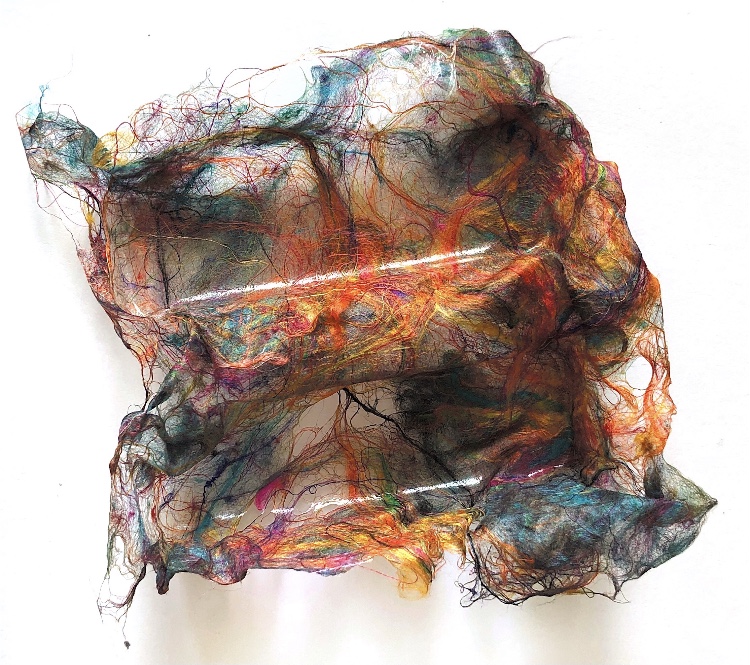
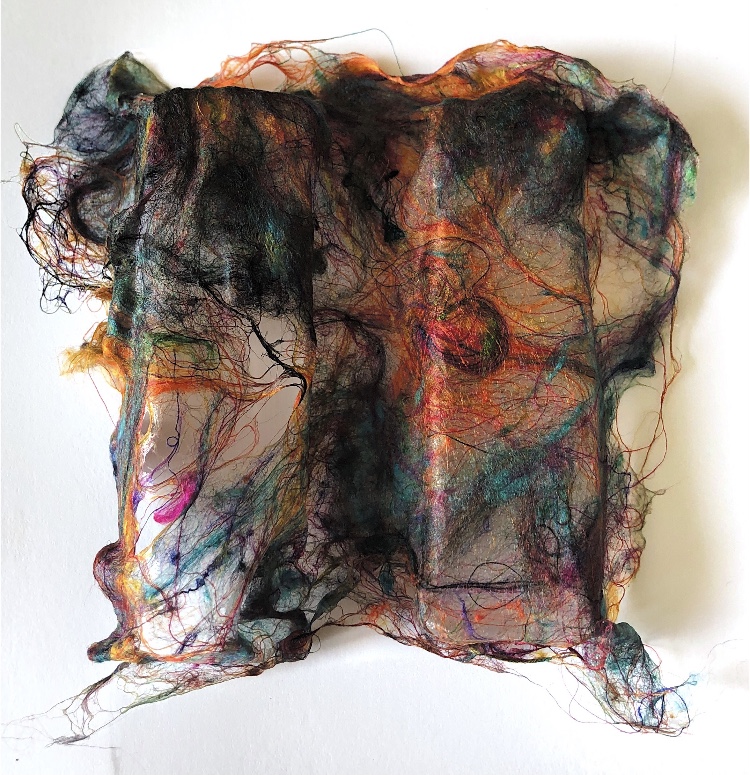
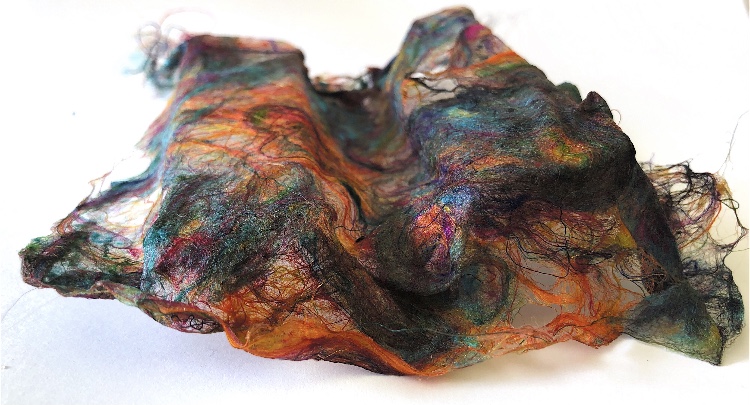
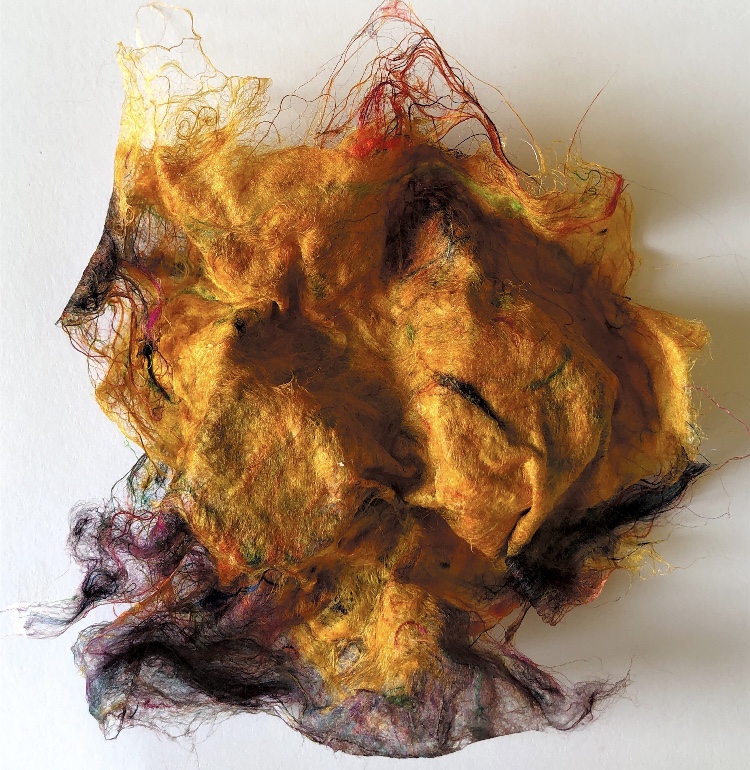
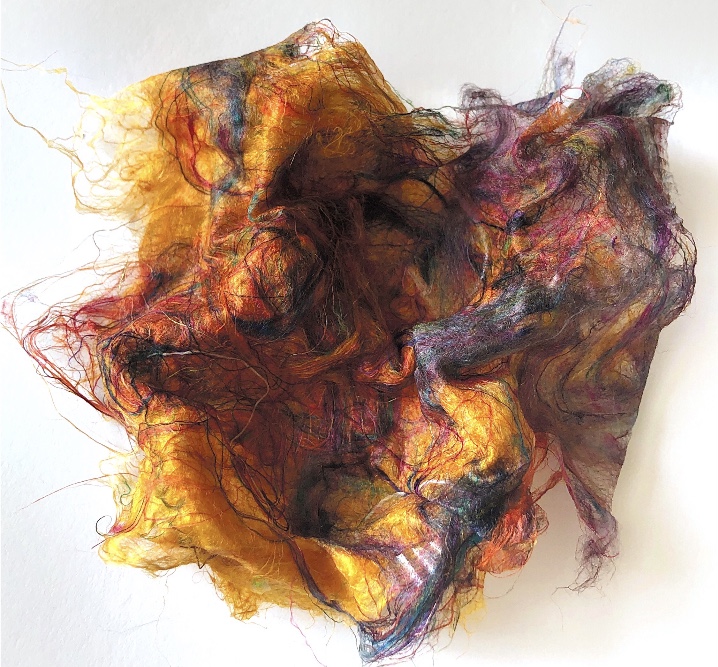
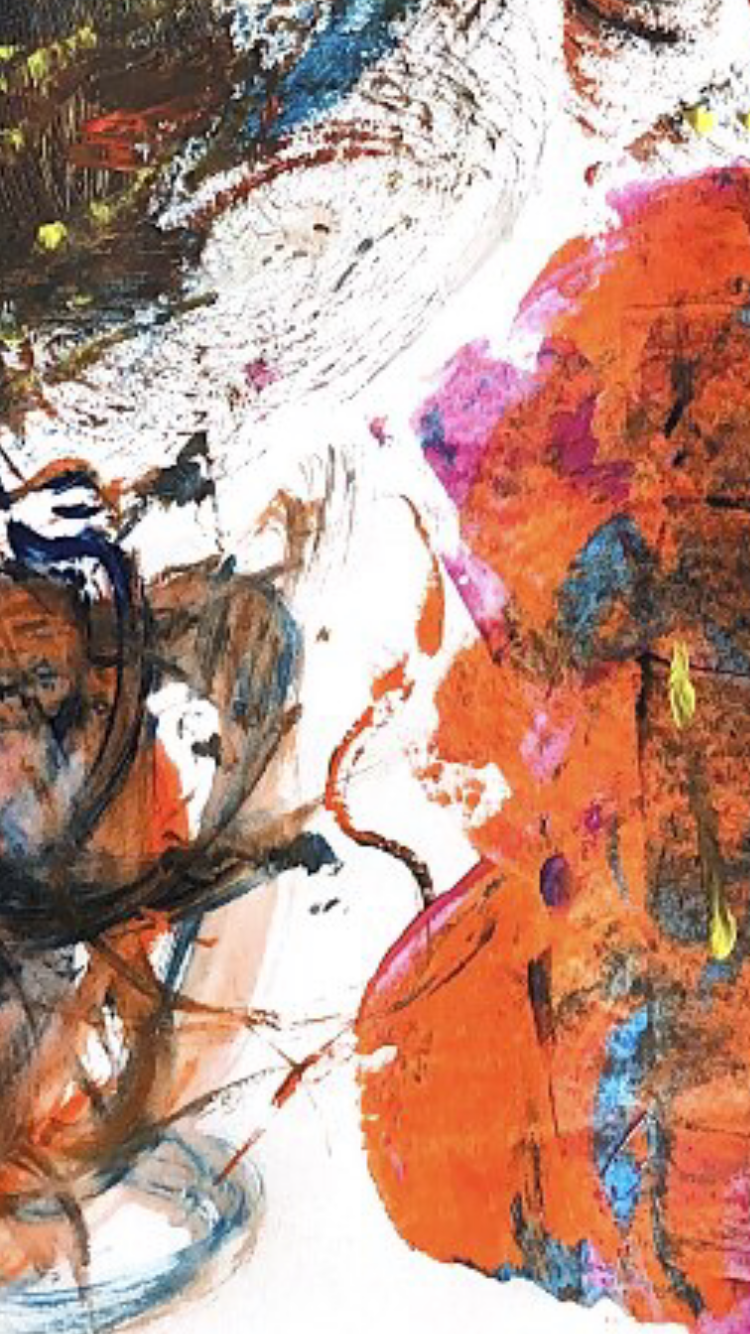
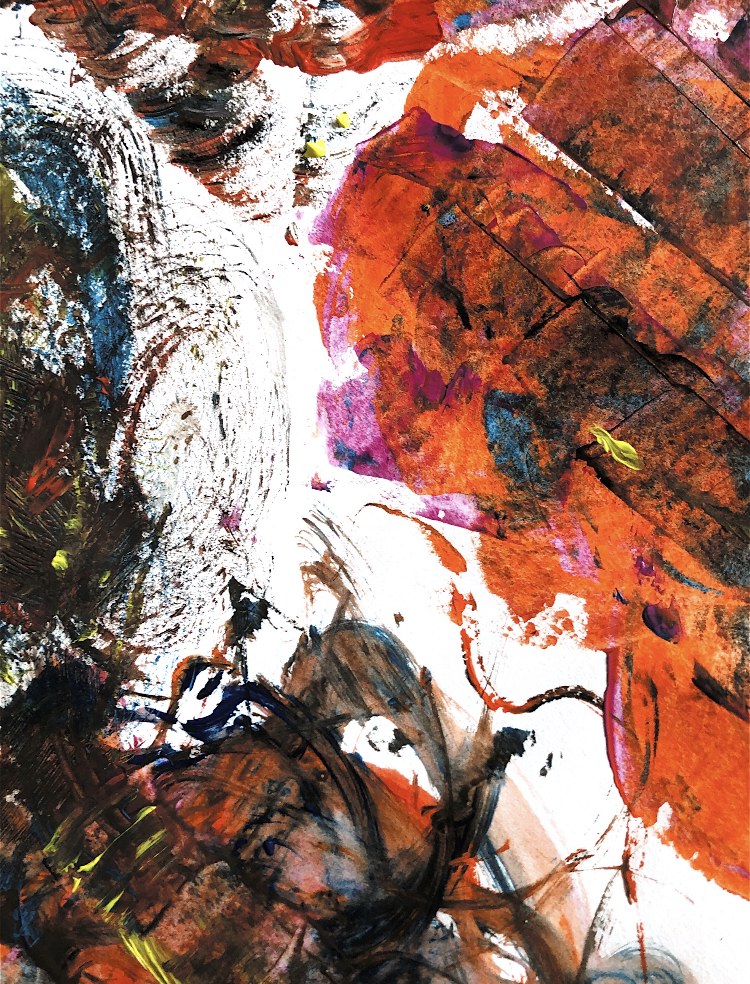
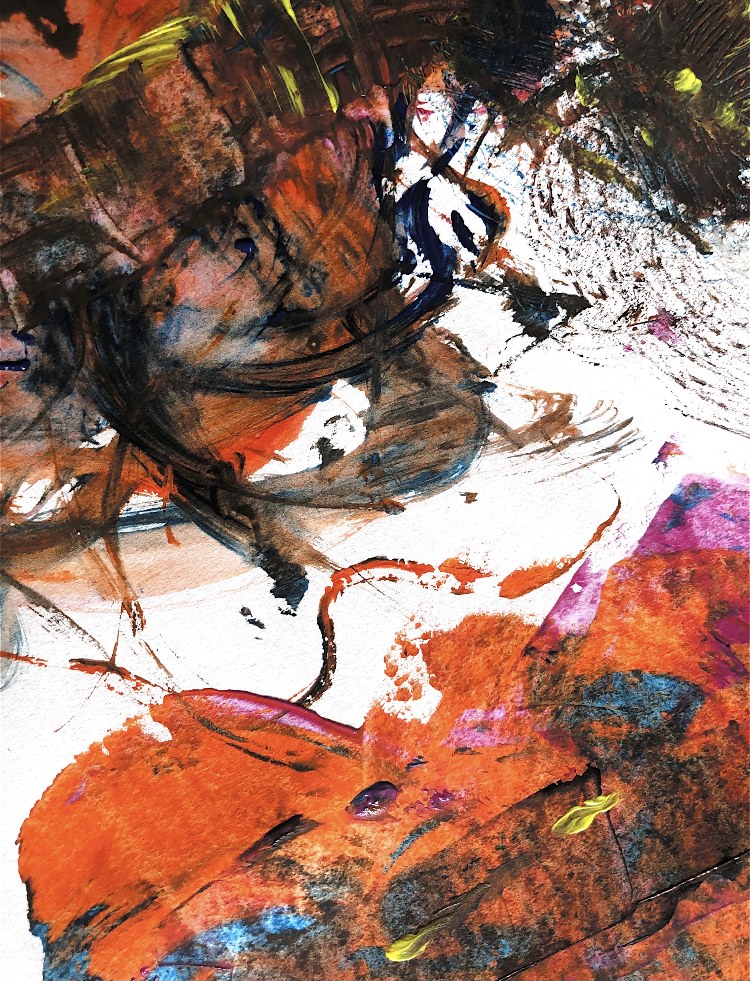
Fig 6. Using silk fibres in bright colours, I cast into plastic containers, using watered down PVA to mold to the surfaces and shapes. Although I don’t think these samples added anything to my discovery, I have included them as I was enjoying using paint and ink freely to respond to these samples and along with a lot of my sketchbook work in this part I feel I am loosening up. These paintings are A2 size in response to feedback from my tutor about trying to draw on a larger scale, and I think they represent a braver style and outcome in my ‘drawing’.

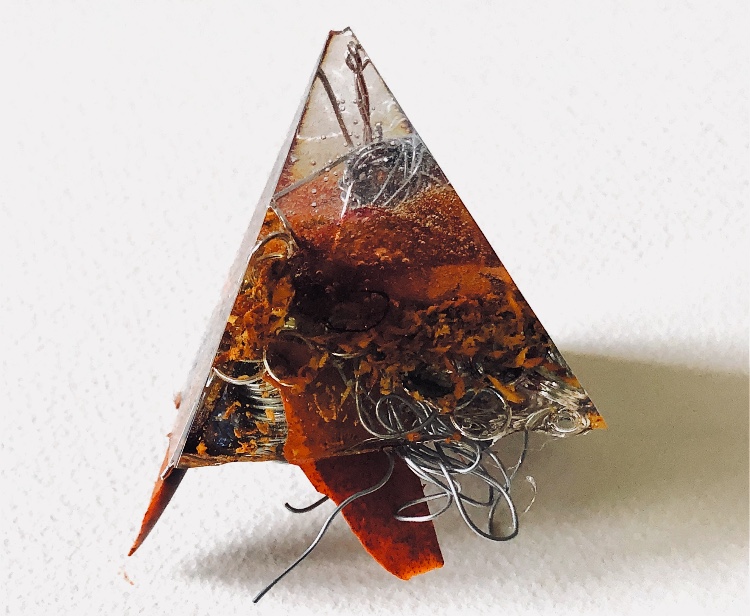
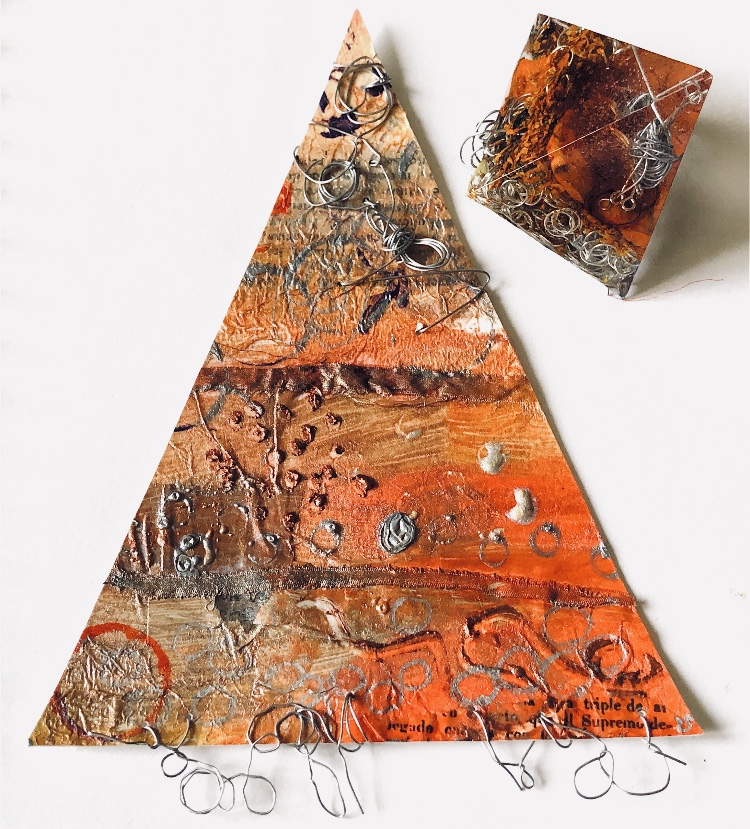
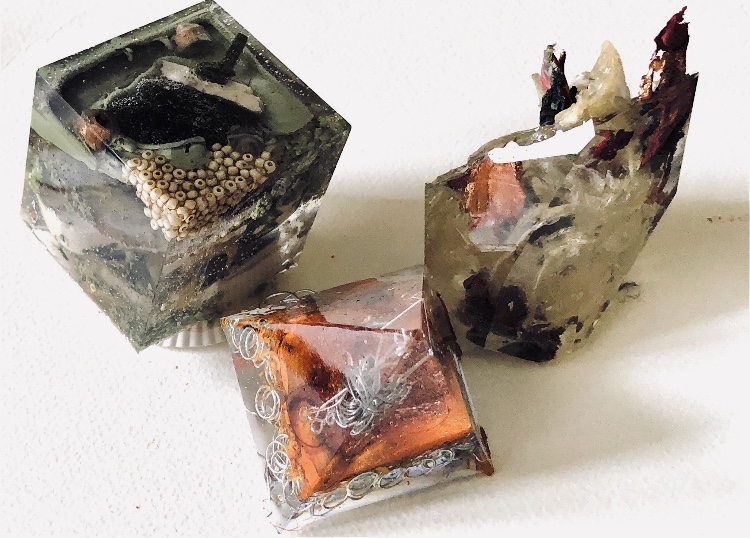
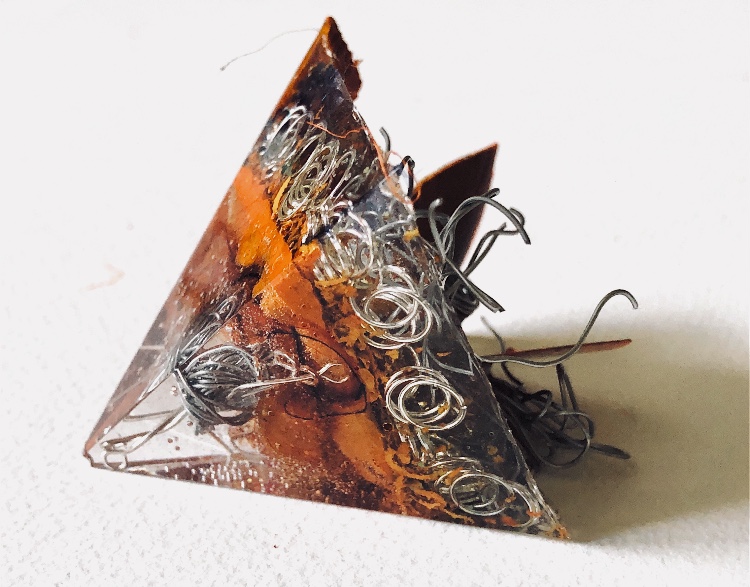
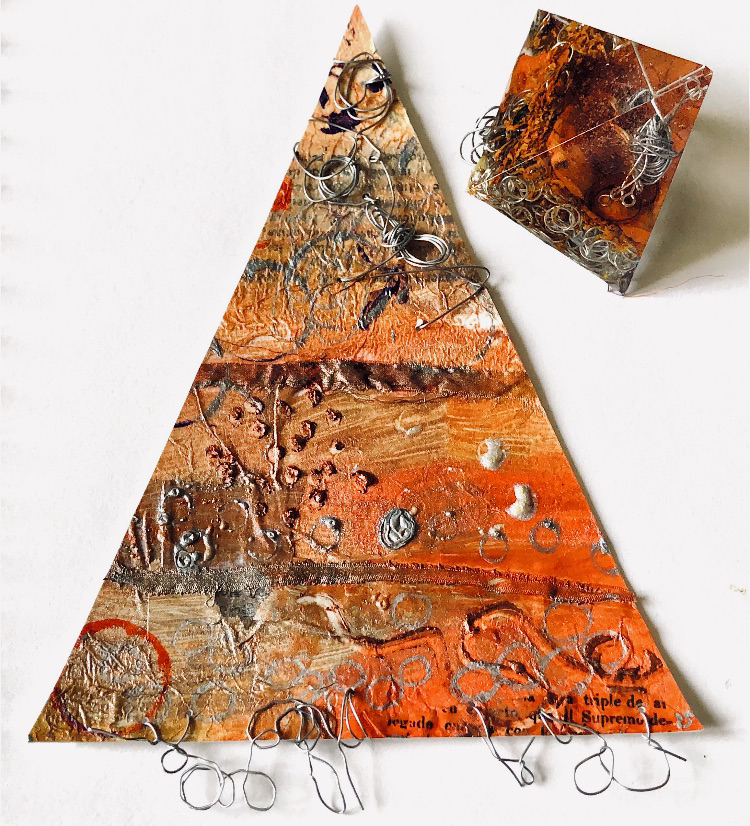
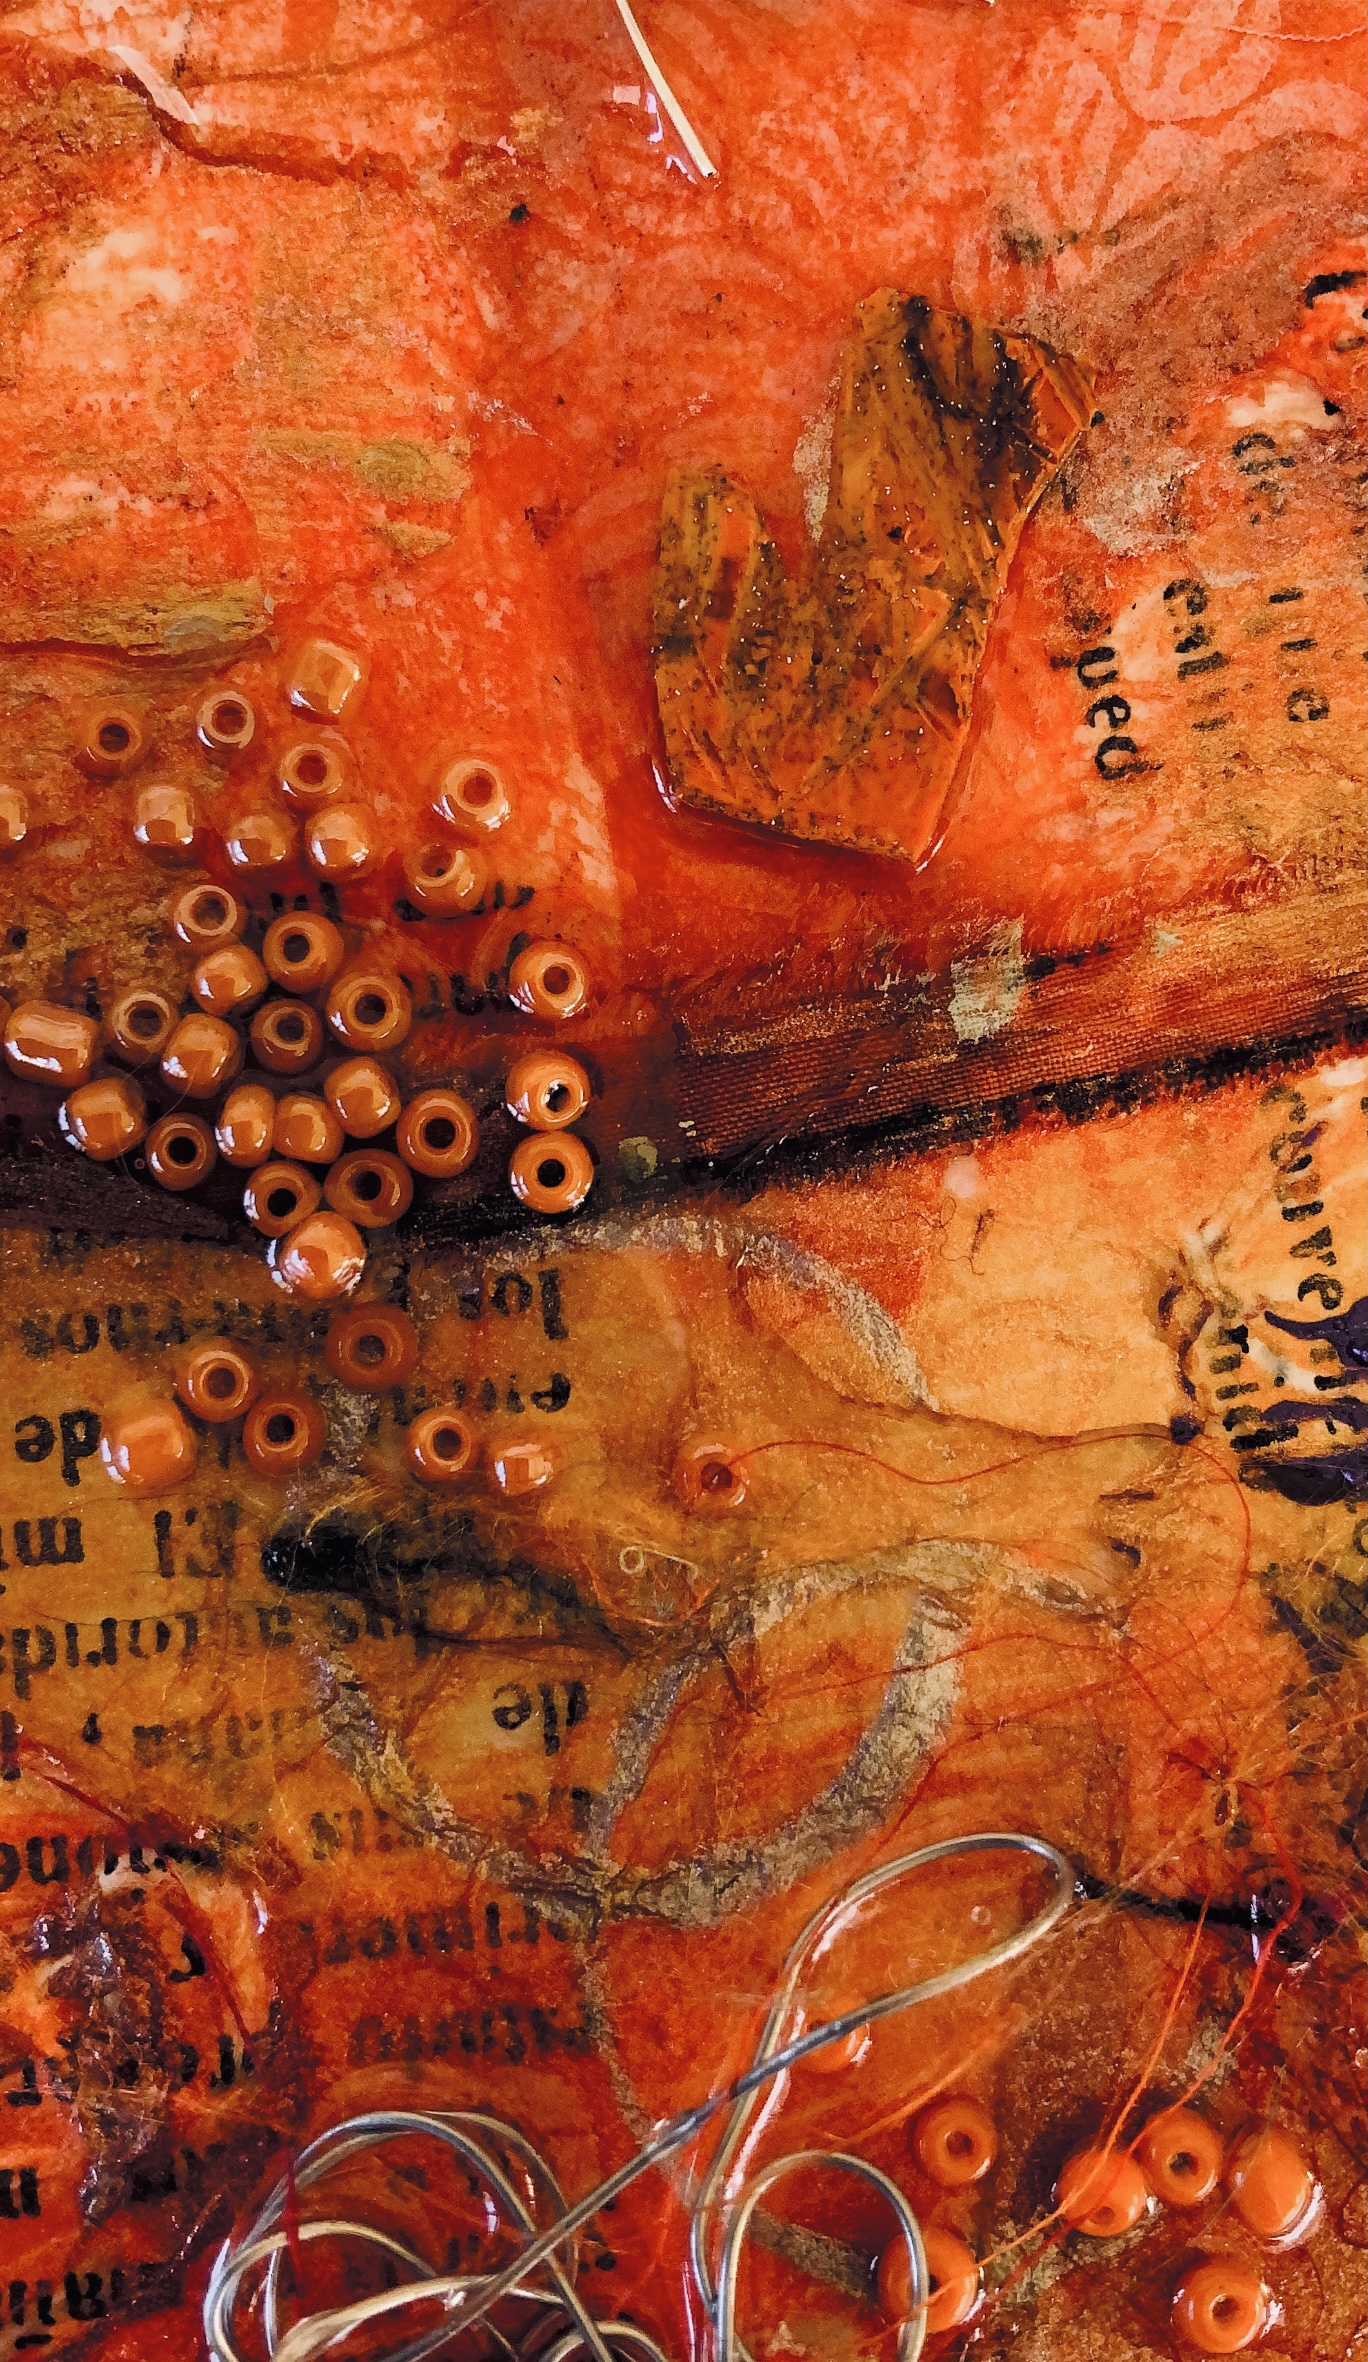
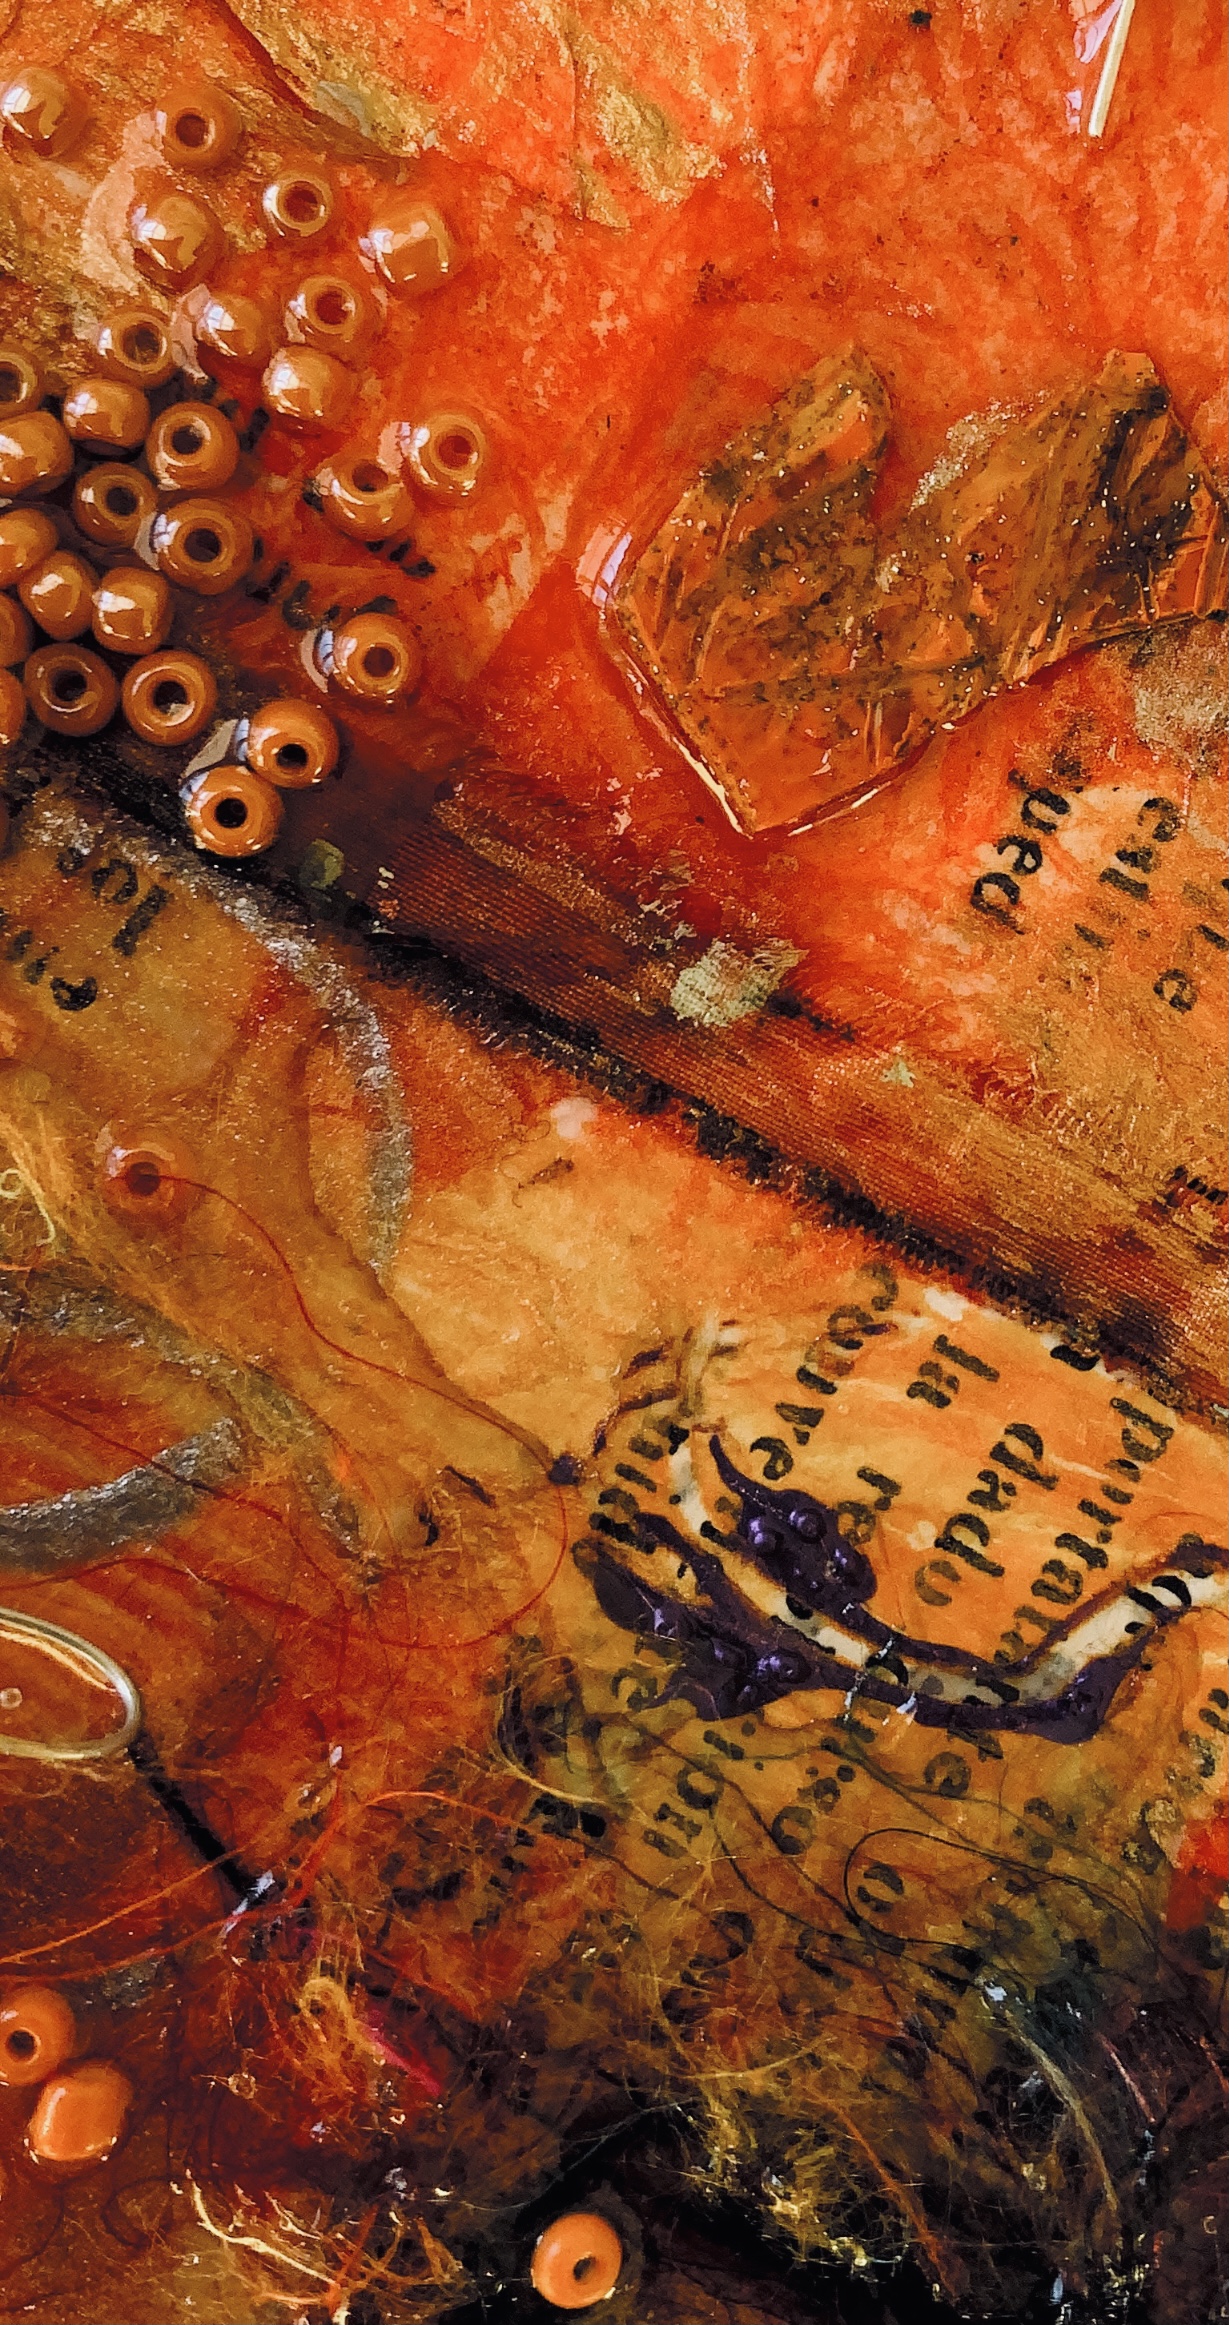
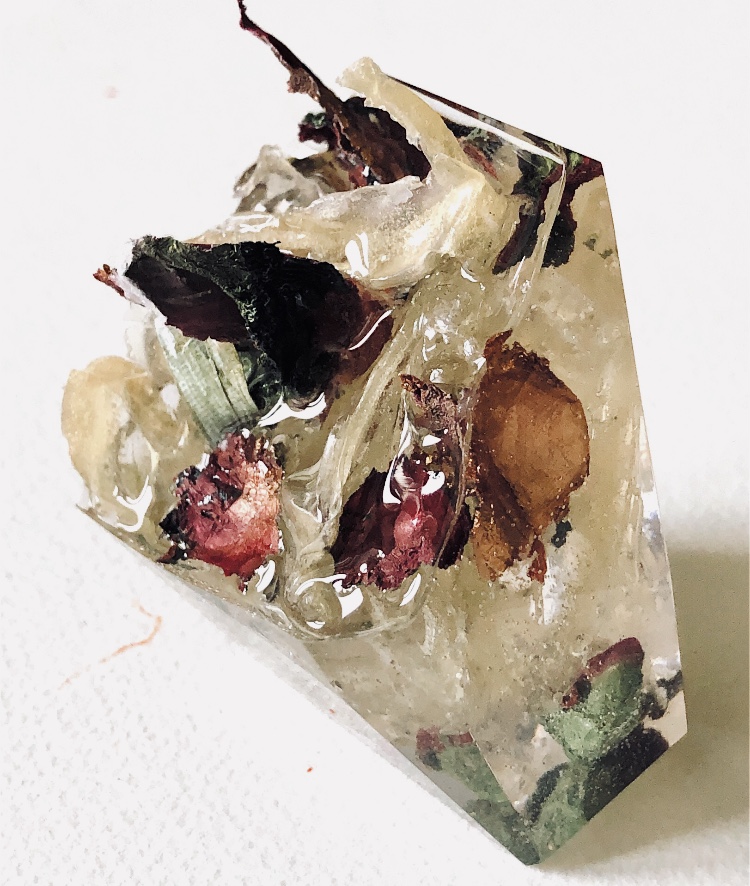
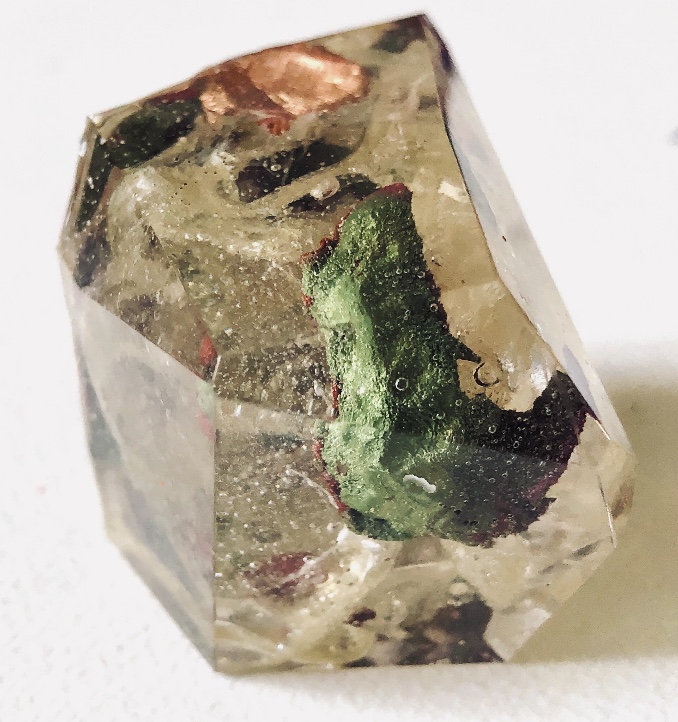
Fig 7. Making a series of resin samples was very satisfying. I was inspired once more by barbed wire, landscapes and nature to create three different samples.

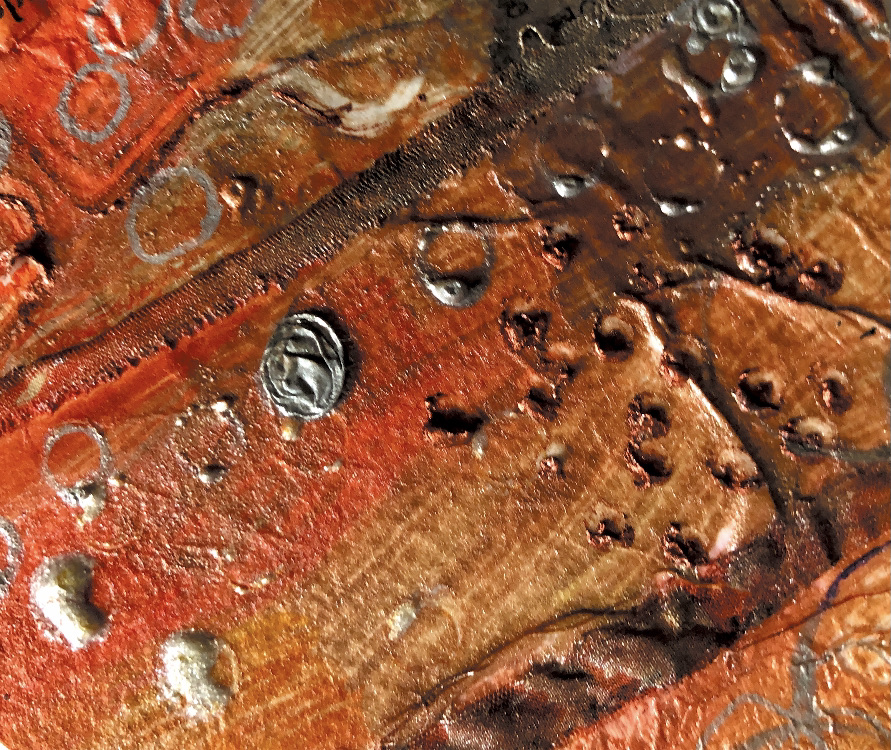
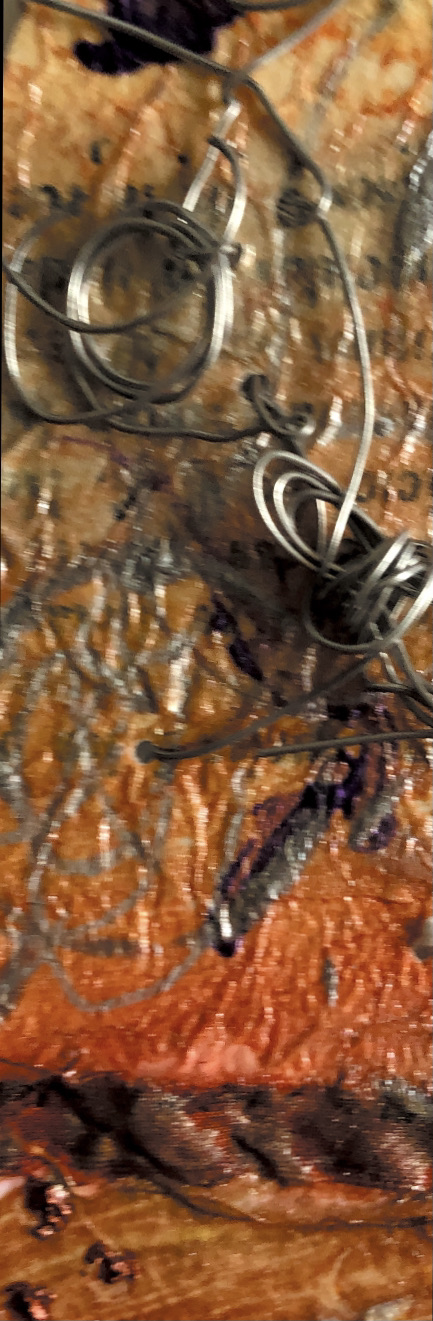
For this pyramid shape I experimented with melted crayon, wire and silk fibres, creating a piece which offers a different ‘landscape’ on each facet. The base has wire and crayon sticking out which enables the piece to stand at an angle and creates a textured tactile surface contrasting with the four very smooth surfaces of the pyramid. The transparency of the material entices and allows the viewer to look closely inside to see the intricate patterns made by crayon shavings, jewellery rings, fibres and wire.

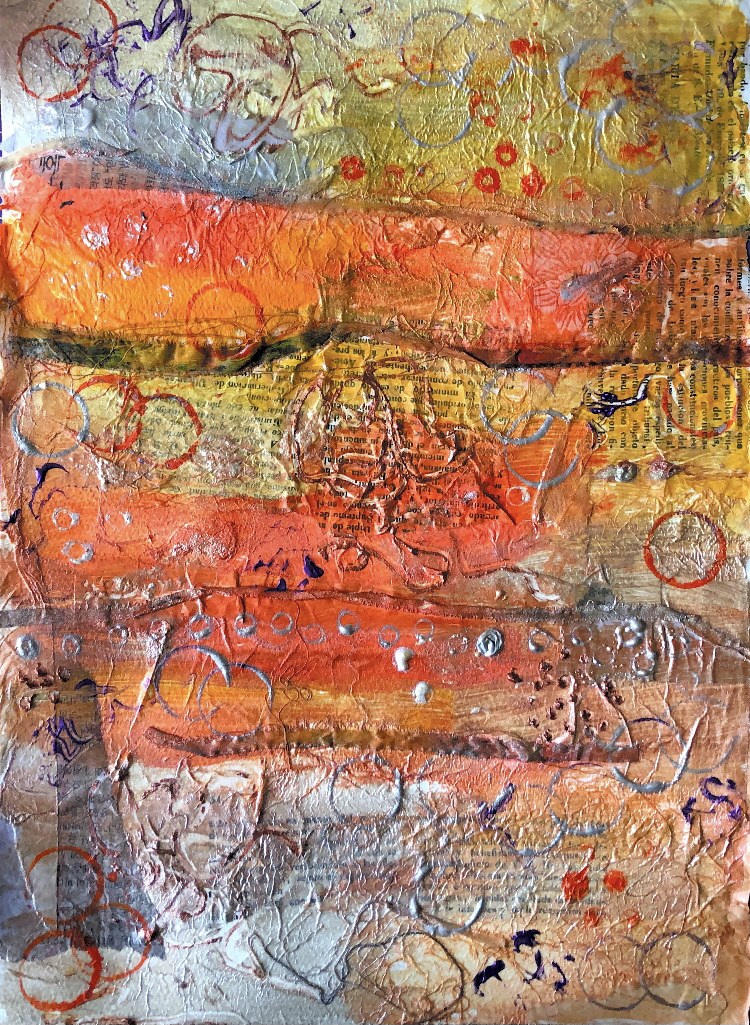
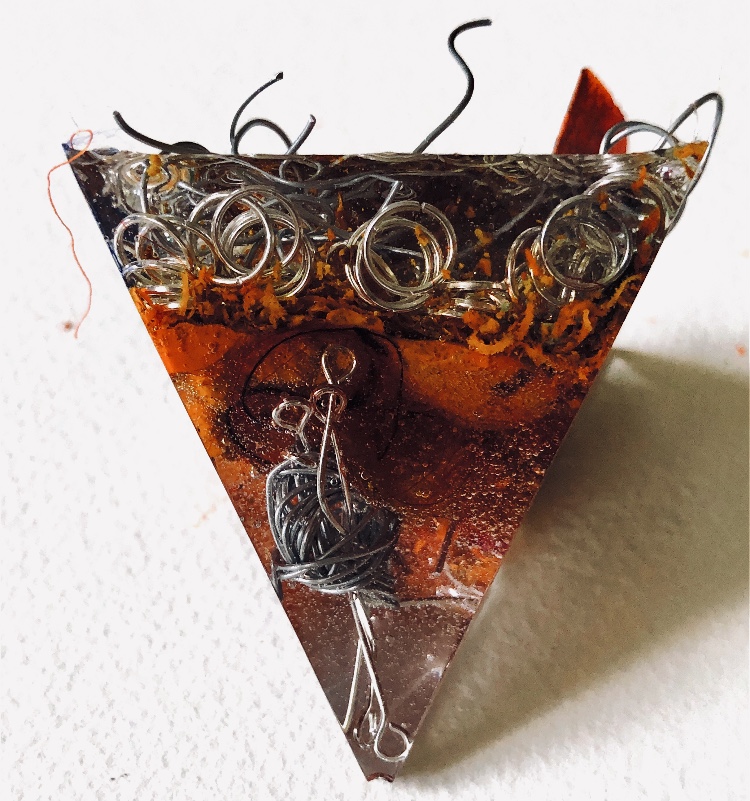
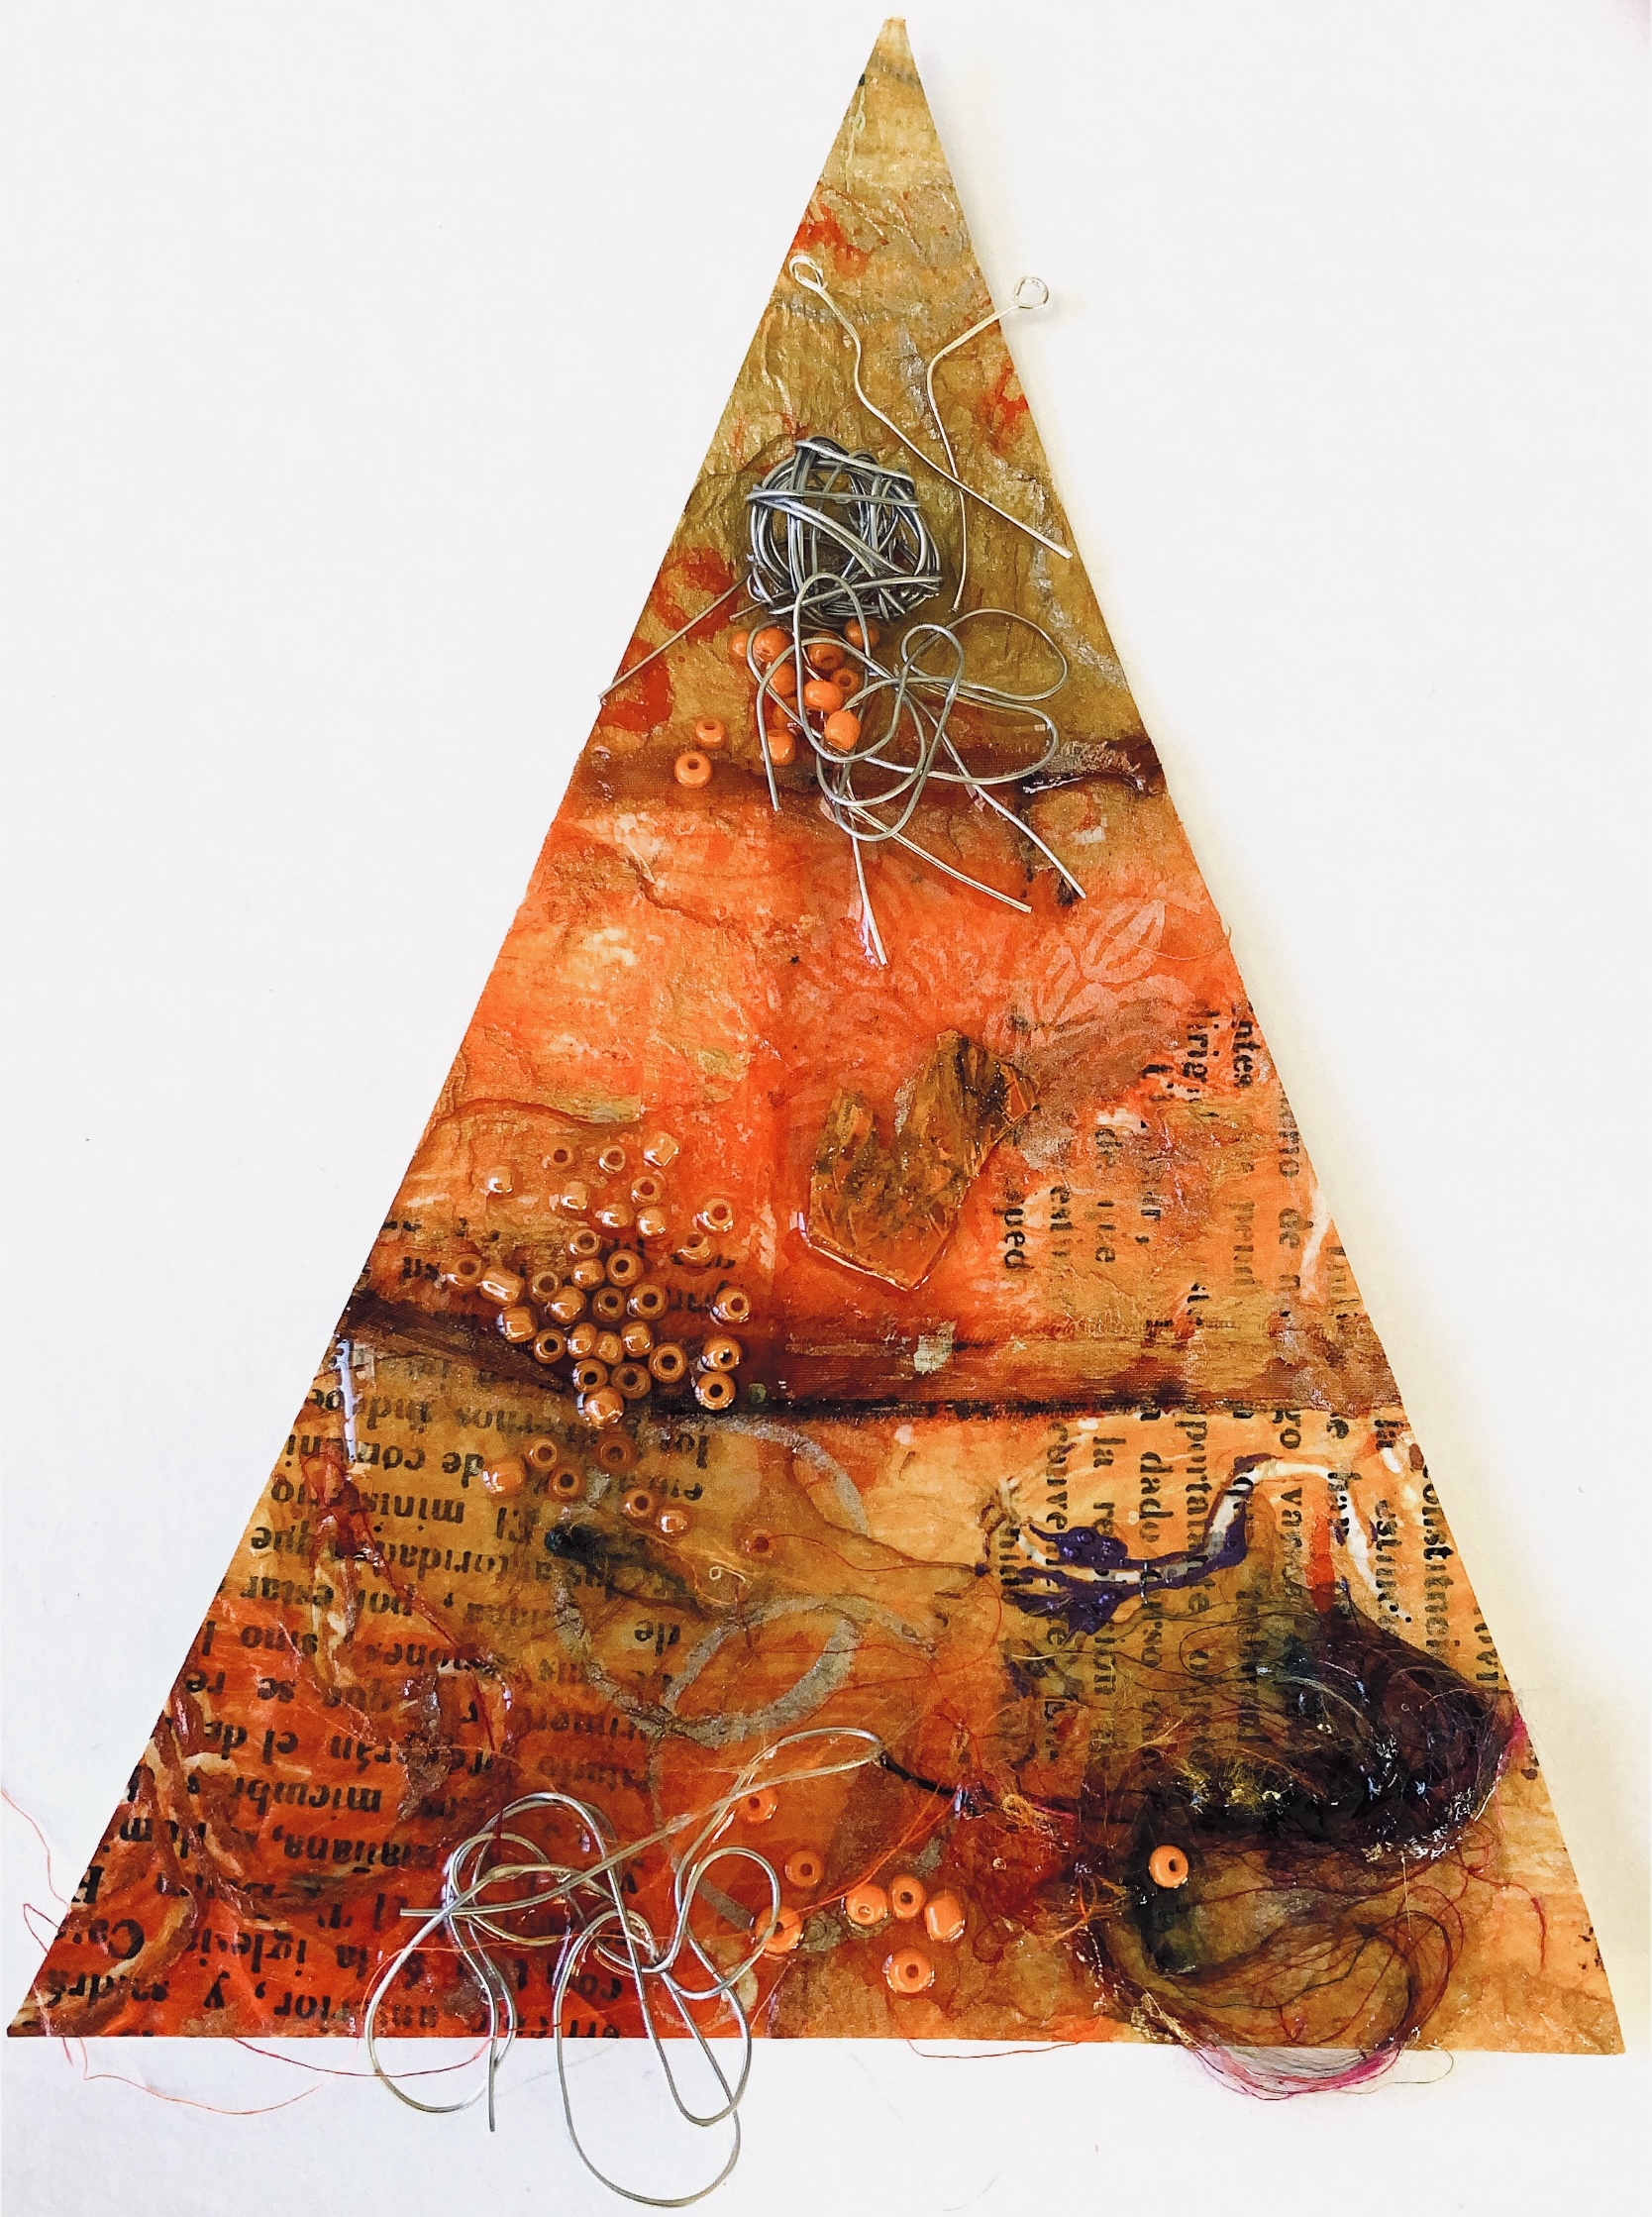
Using collaged papers which I allowed to dry and then painted with inks and acrylic, I have created a textured material in response to this sample, which was then cut into a triangle and embellished further with wire, beads and more poured resin.

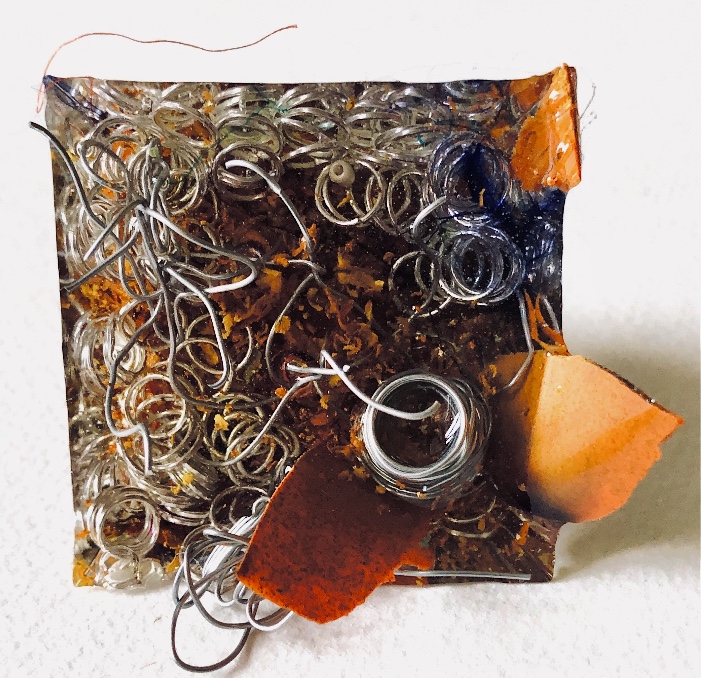
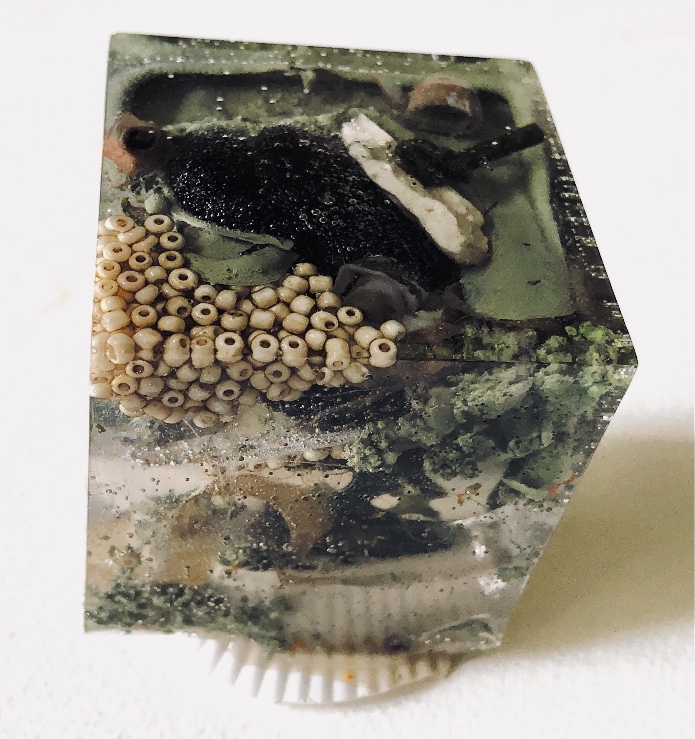
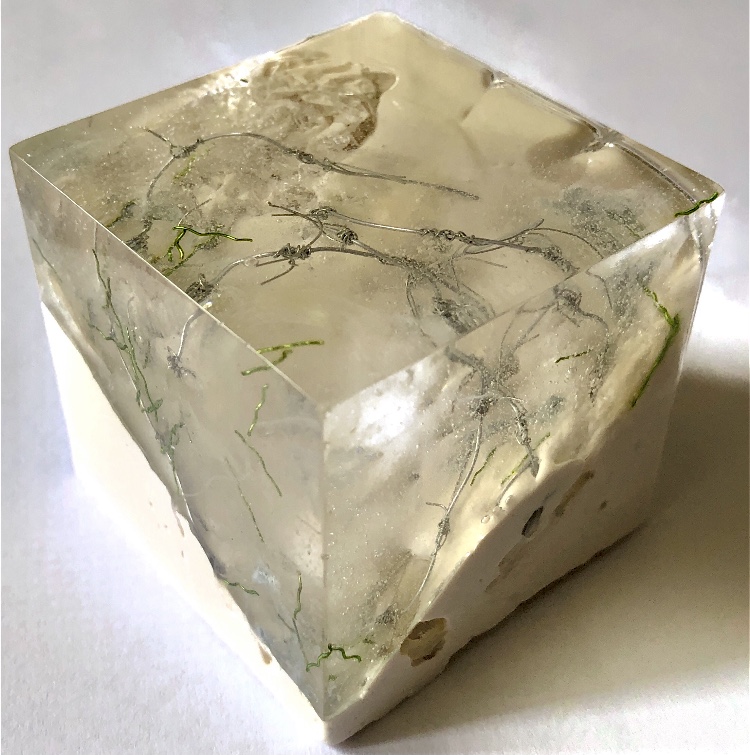
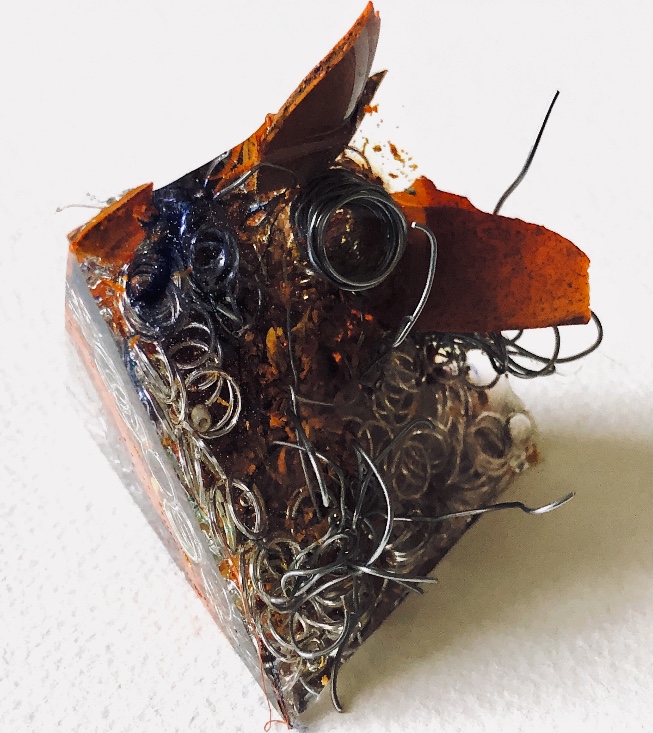
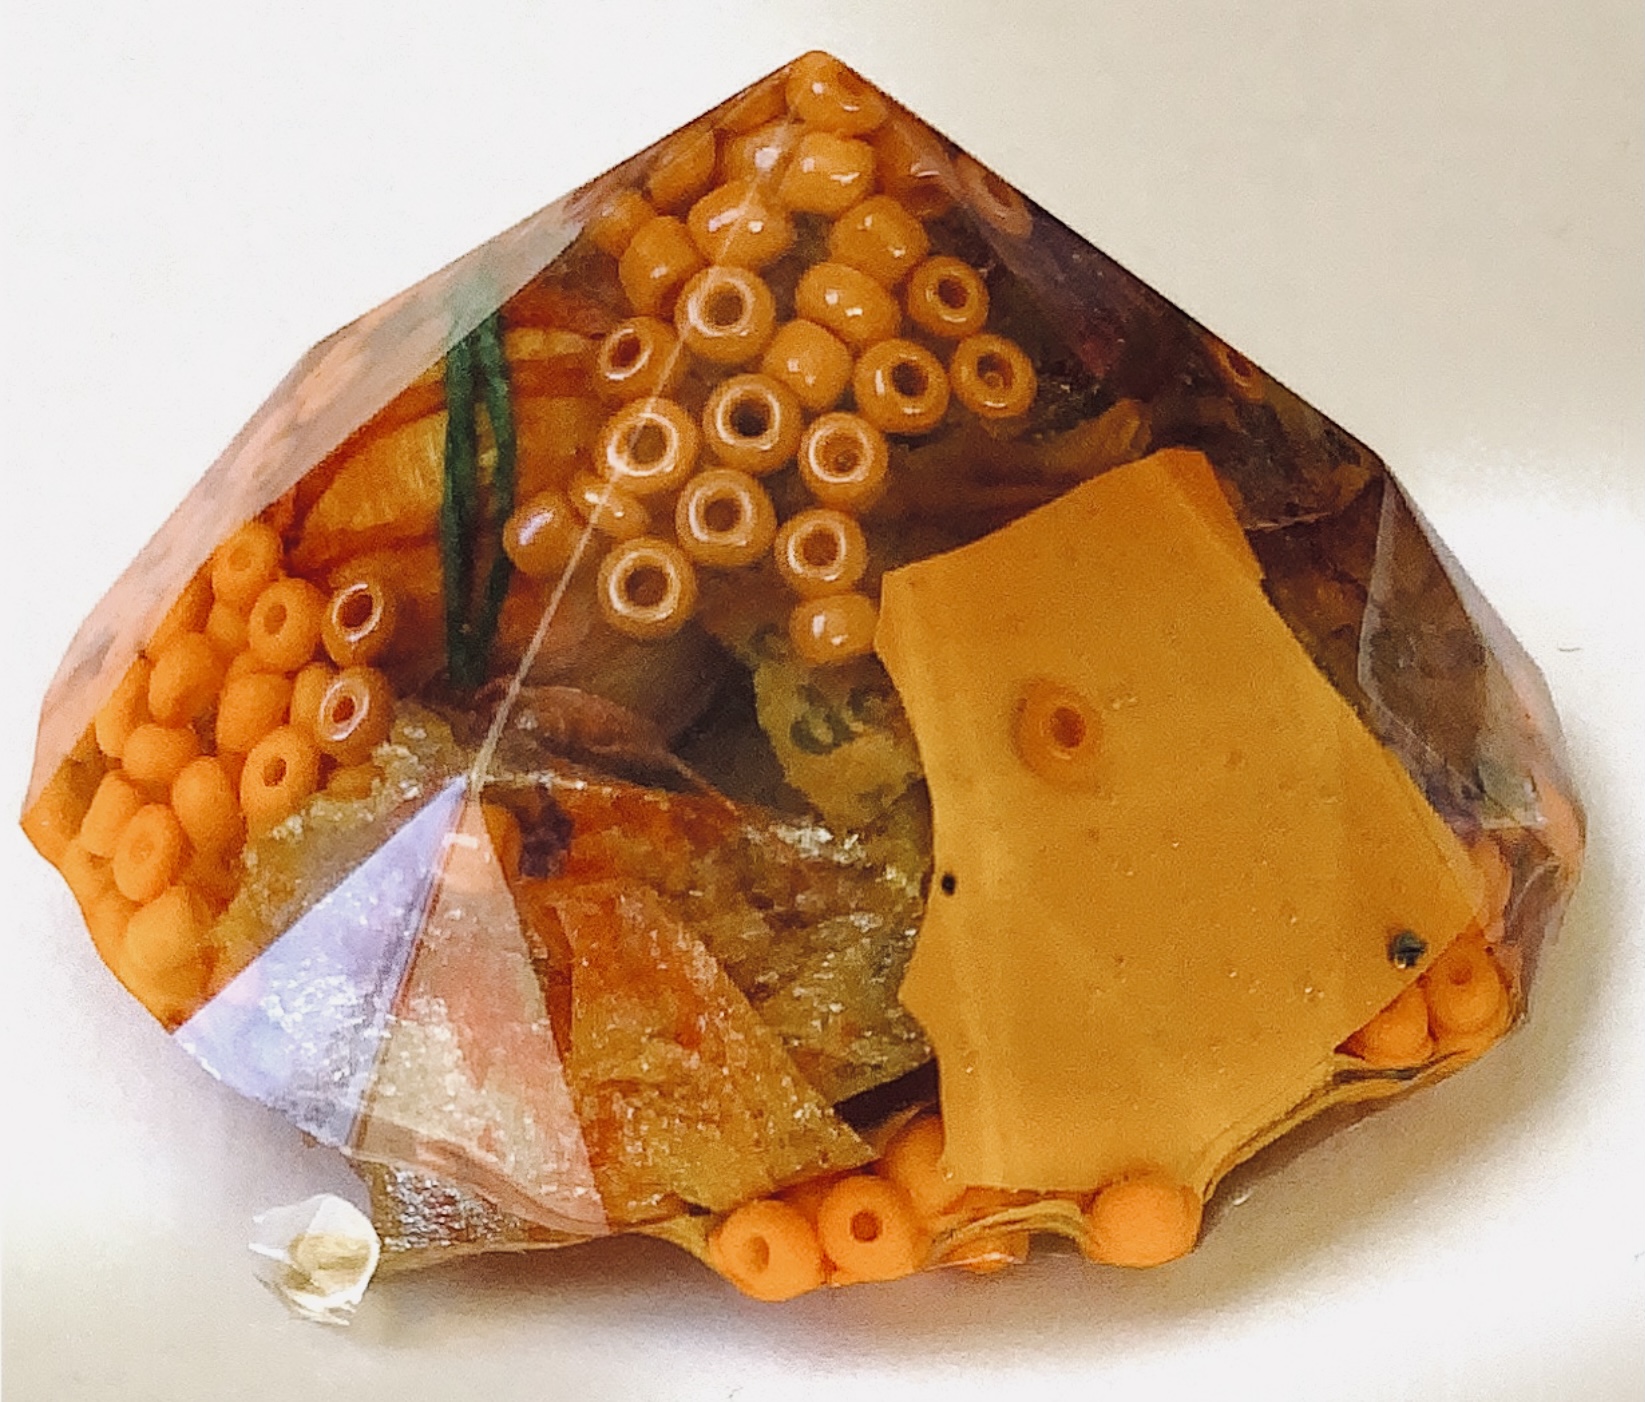
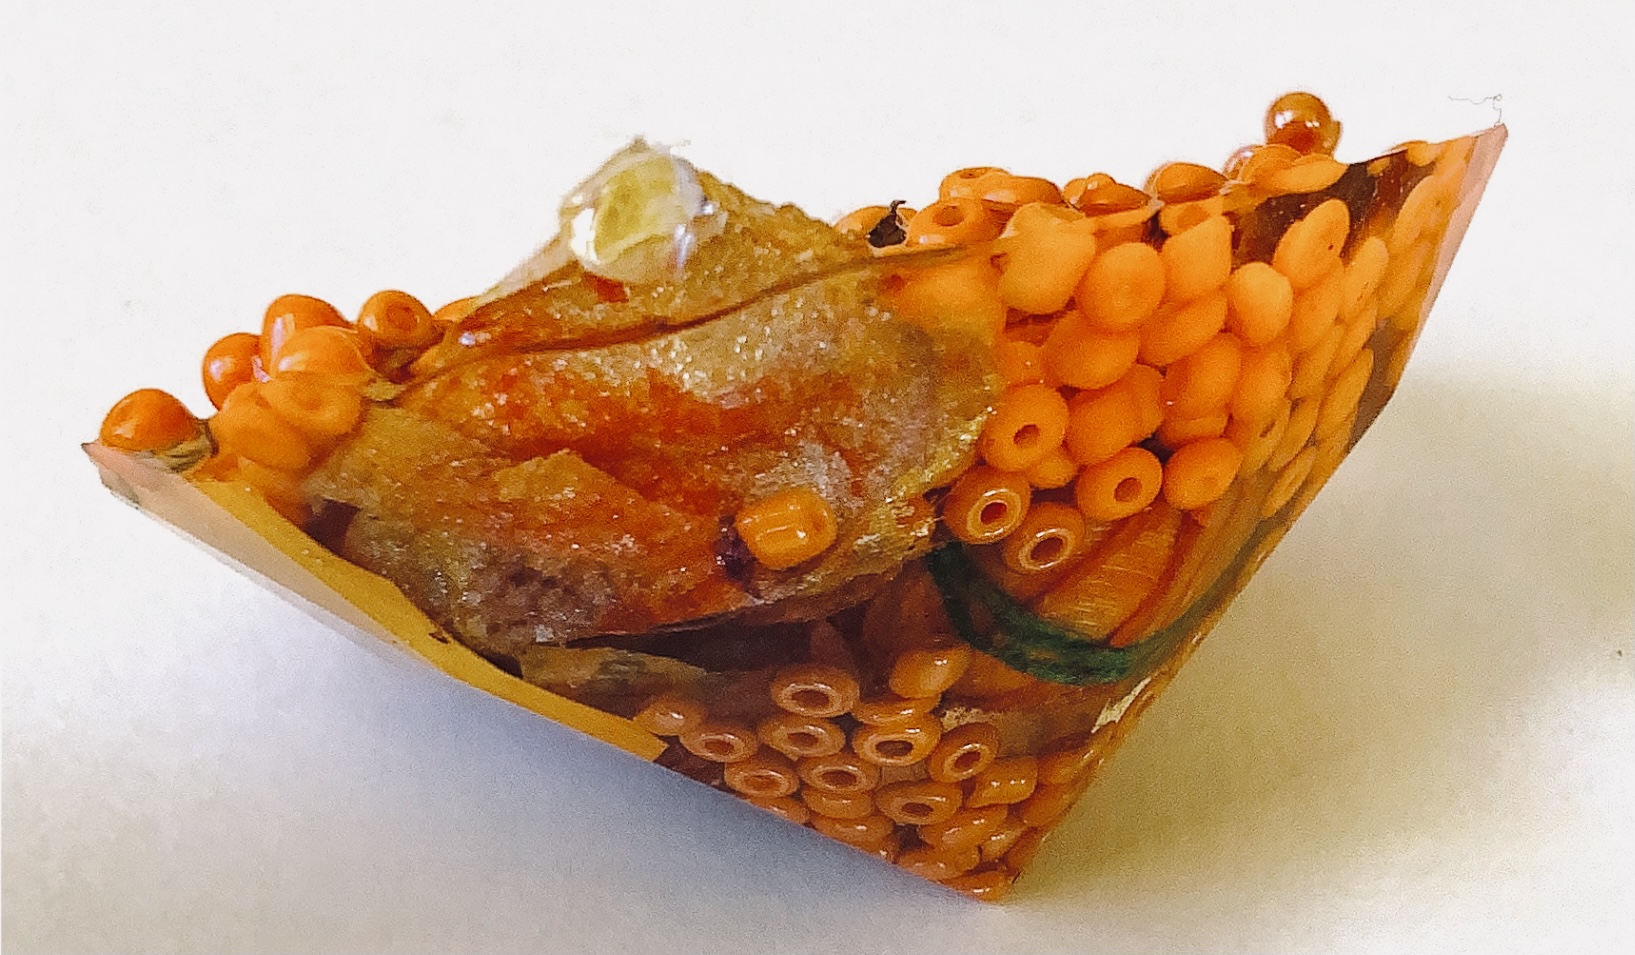
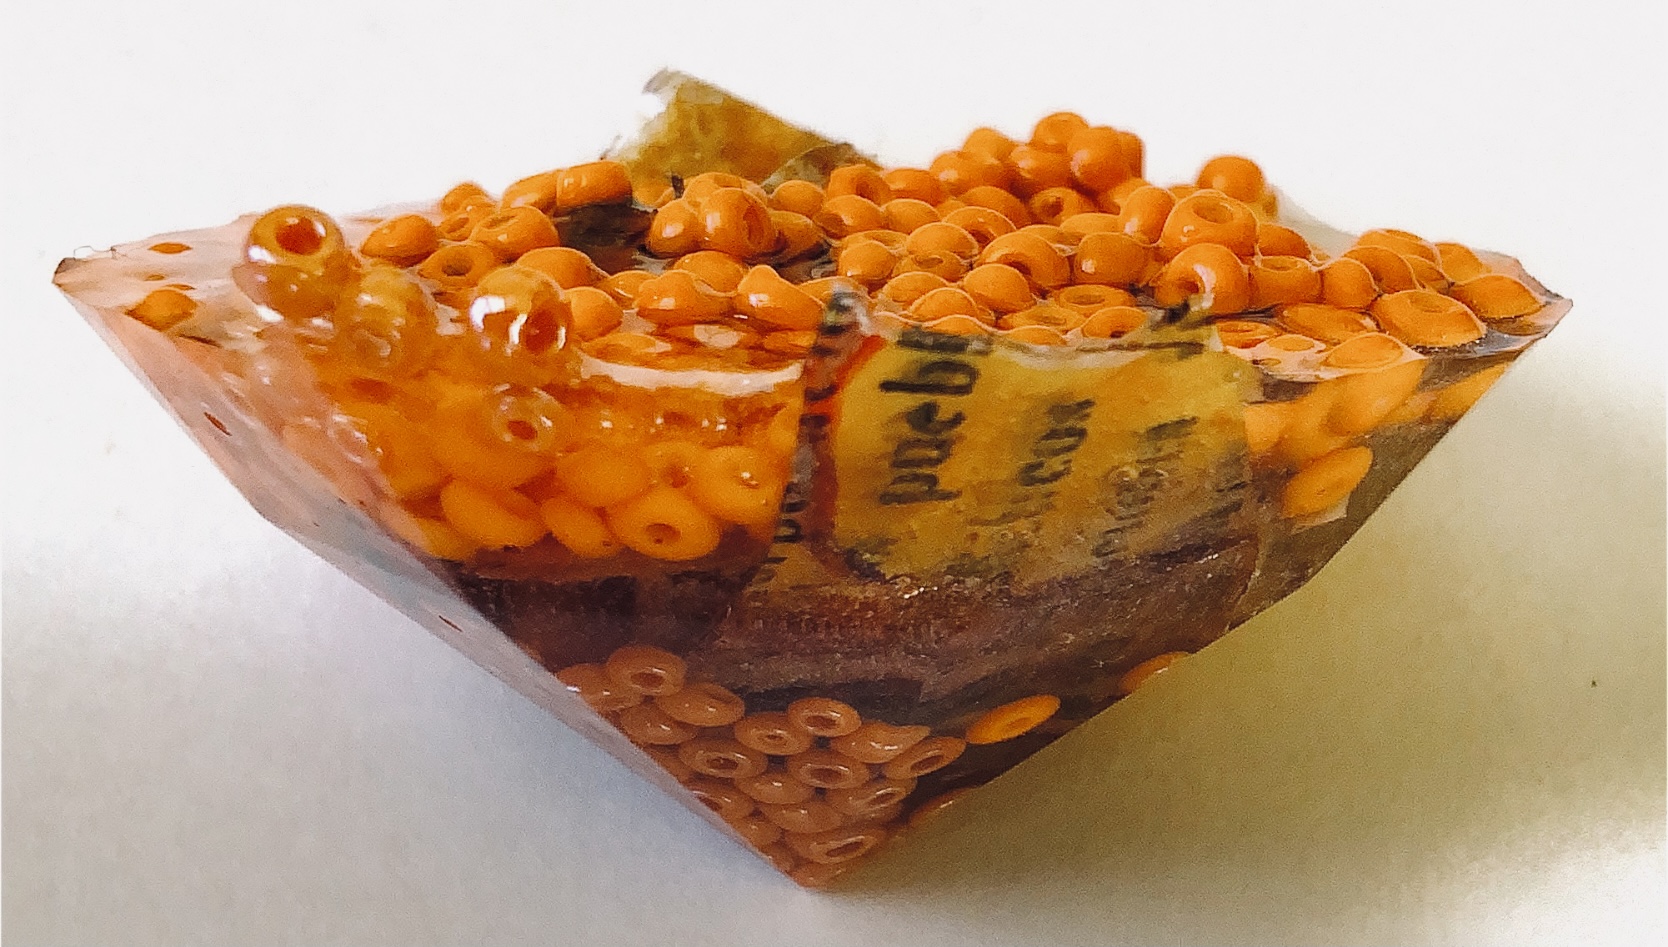
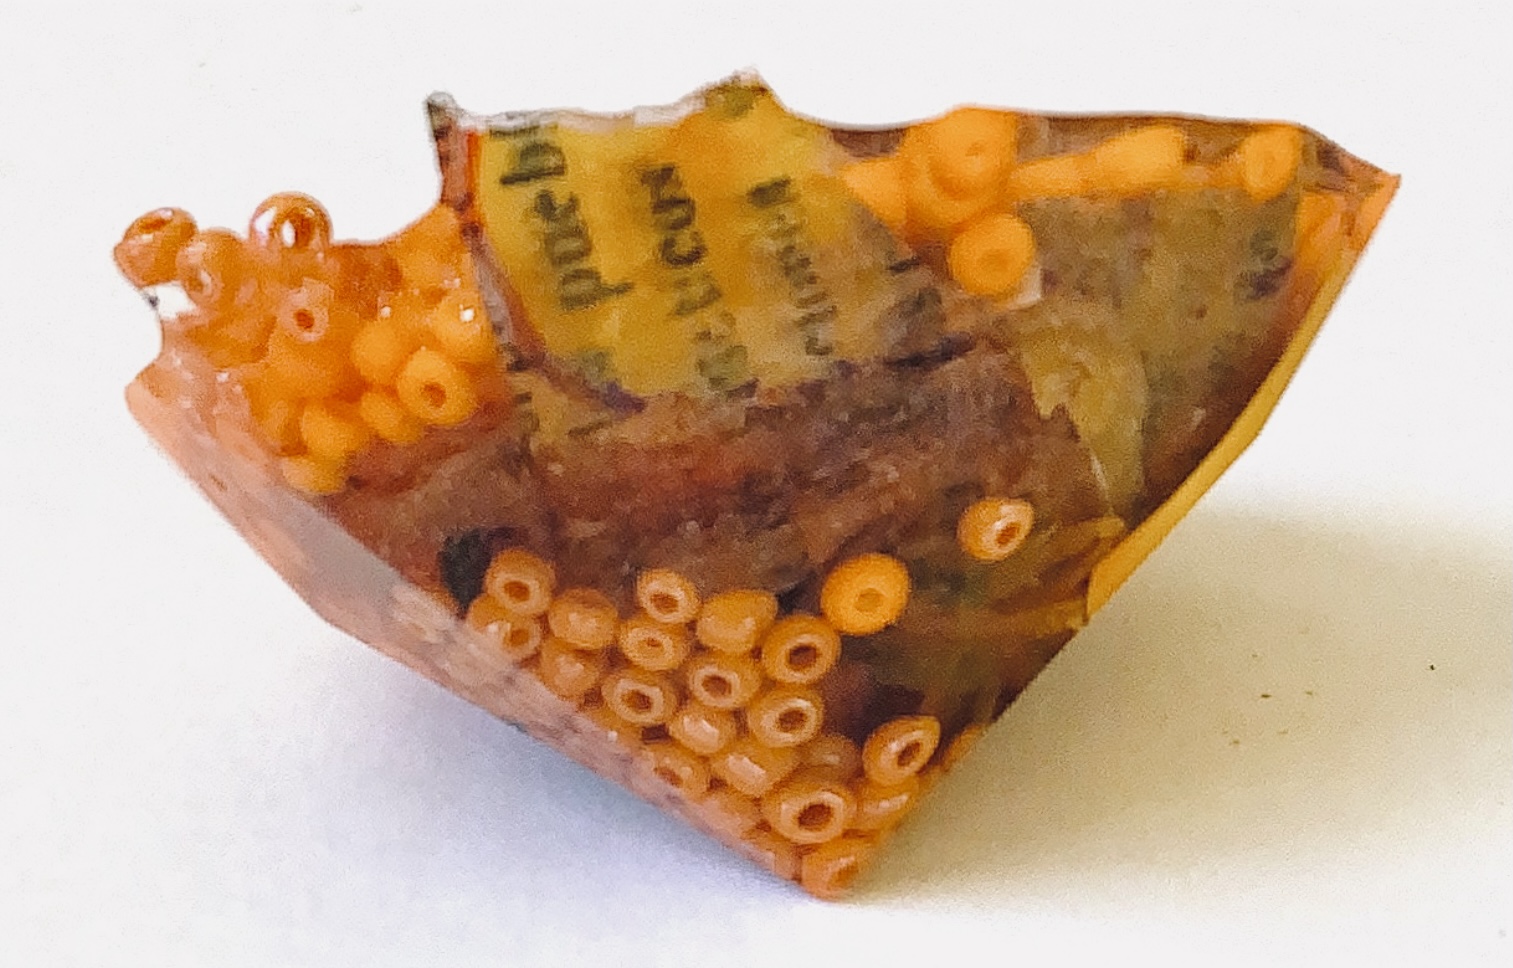
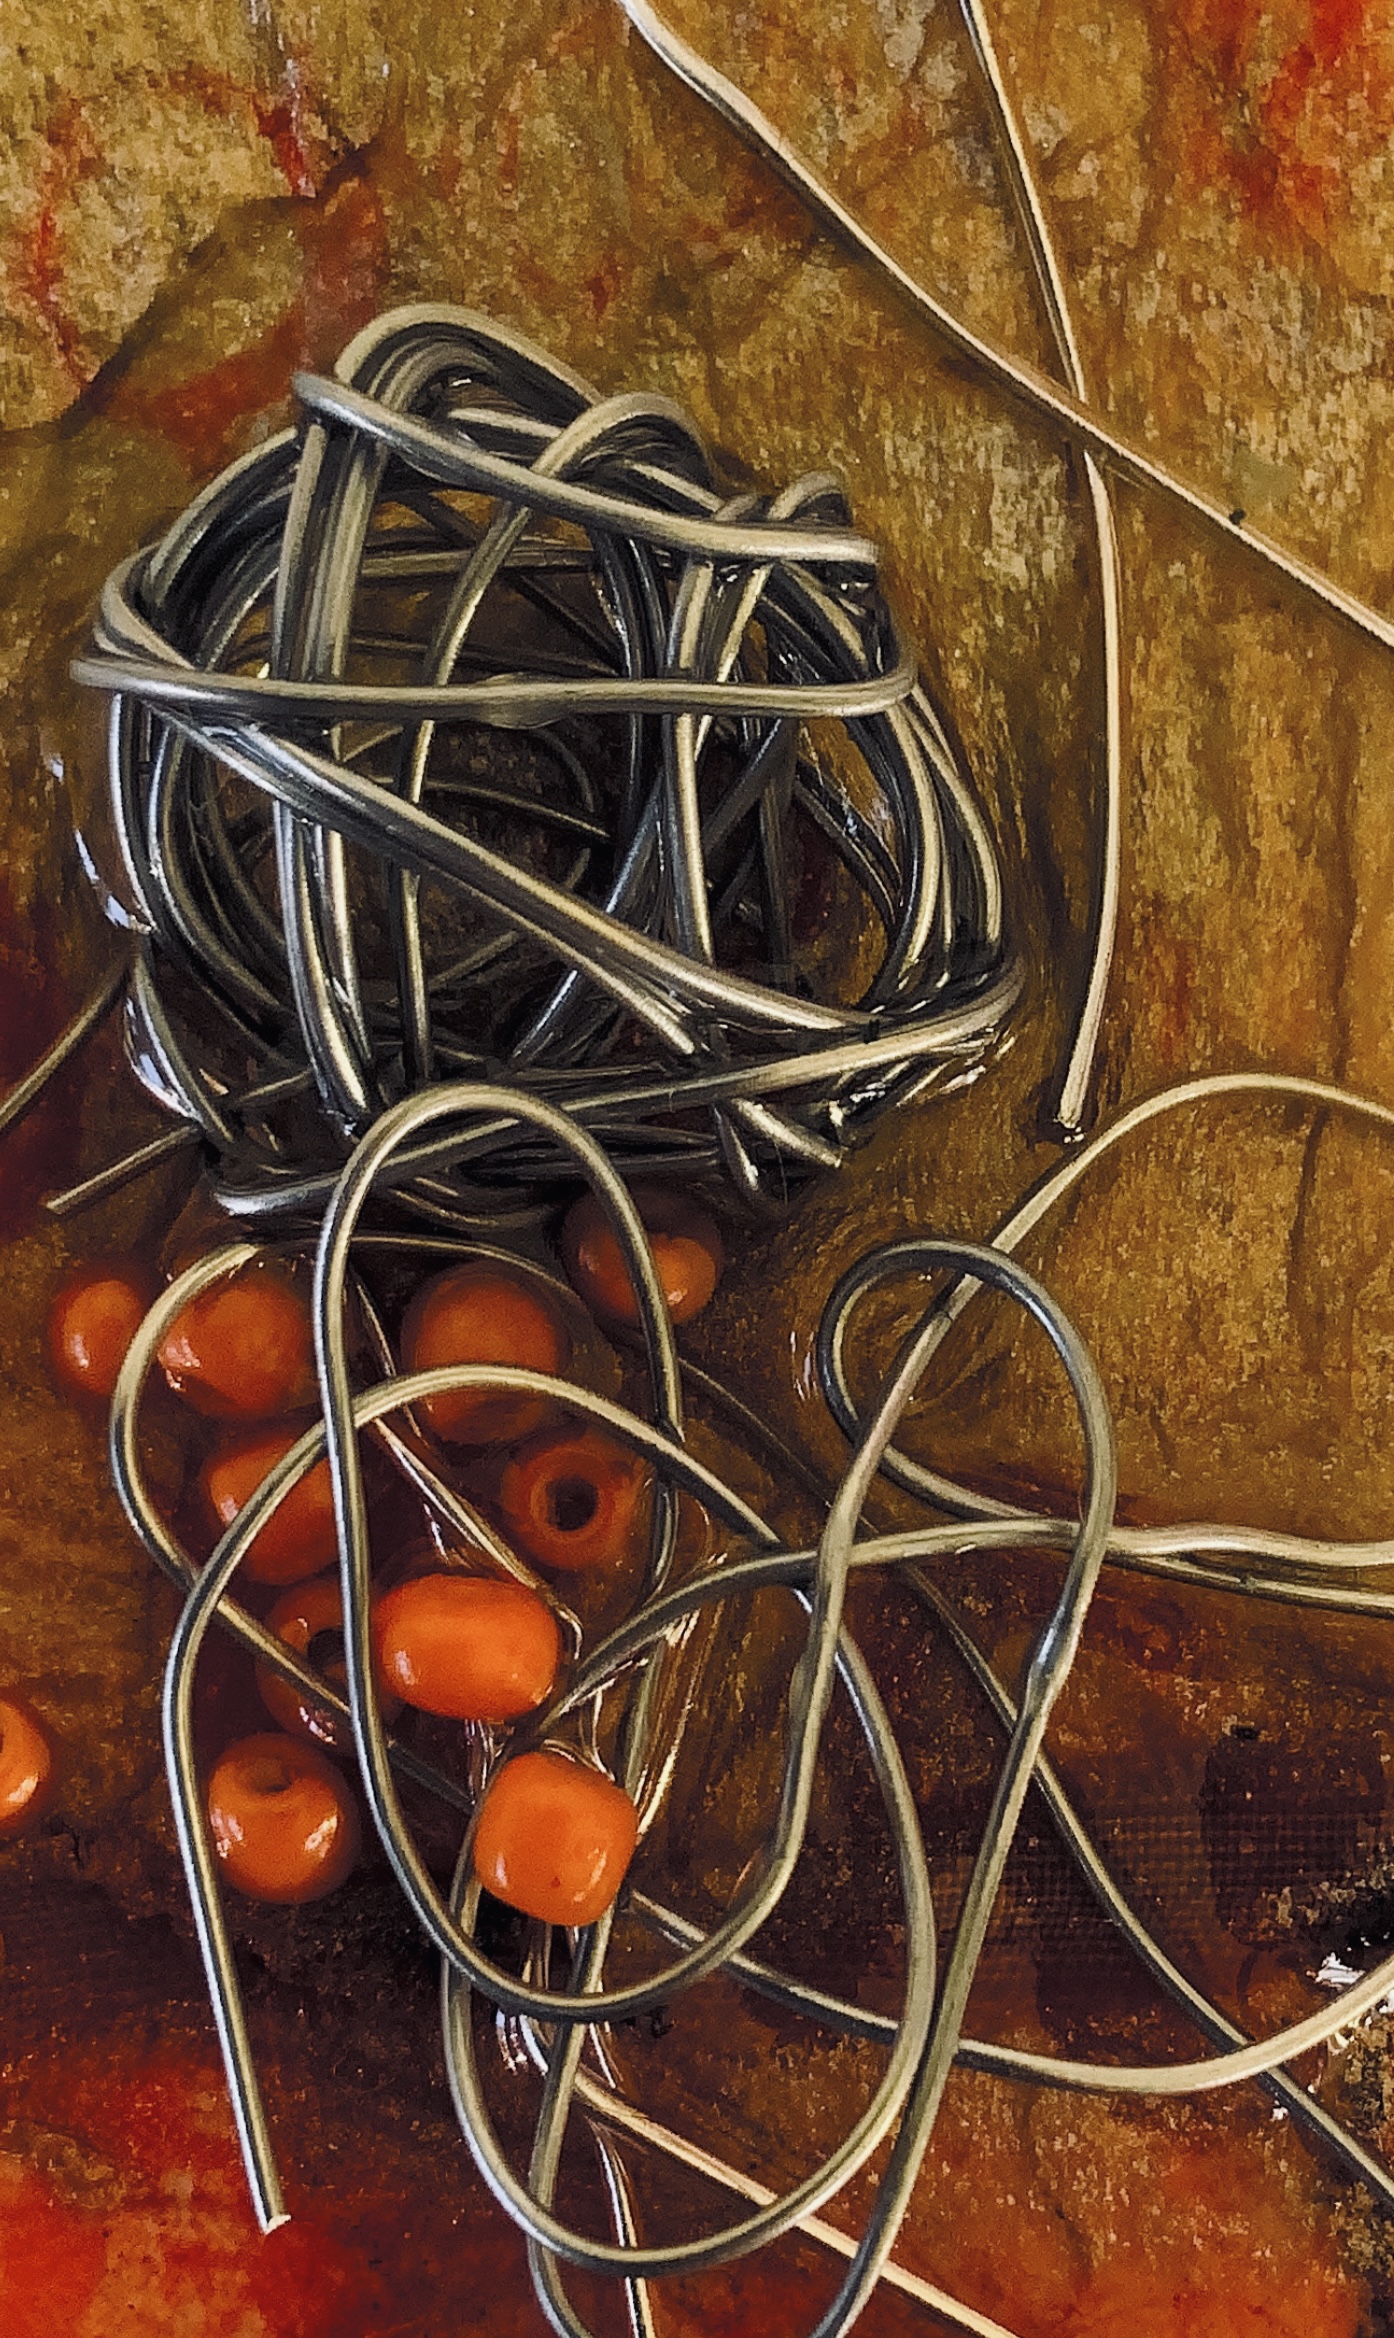
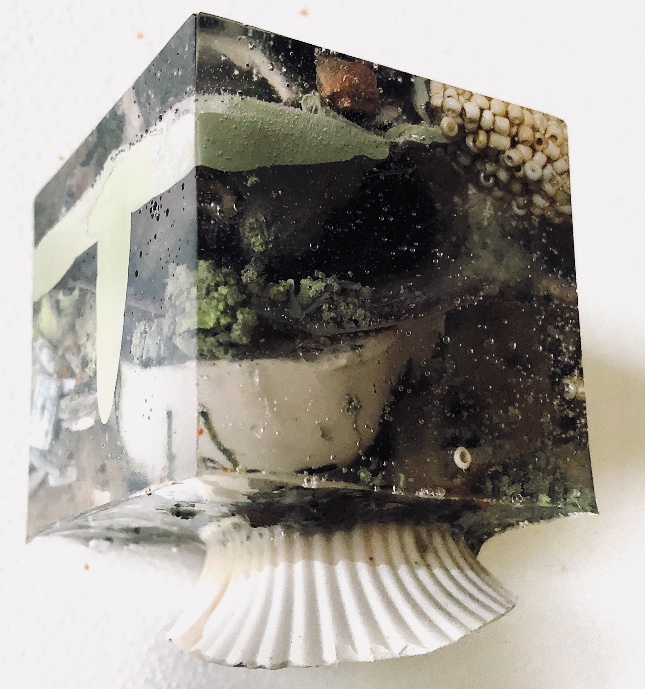
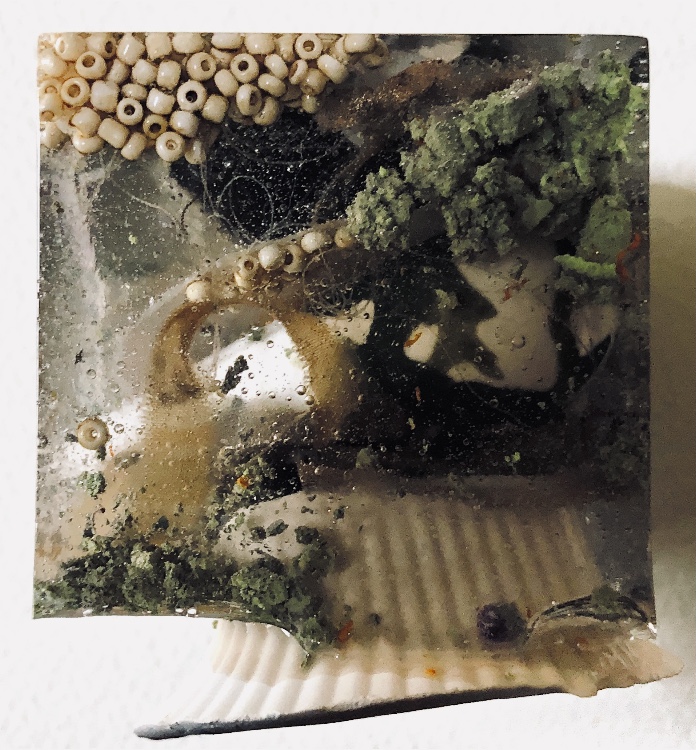
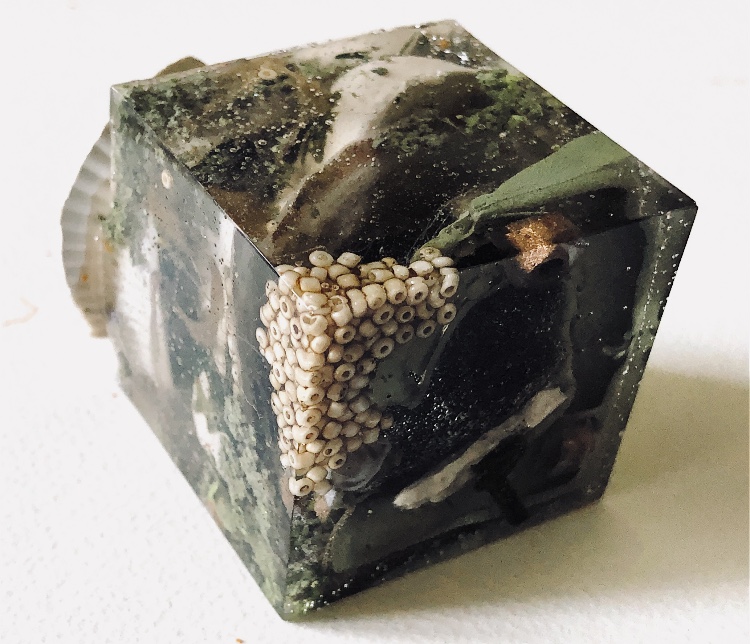
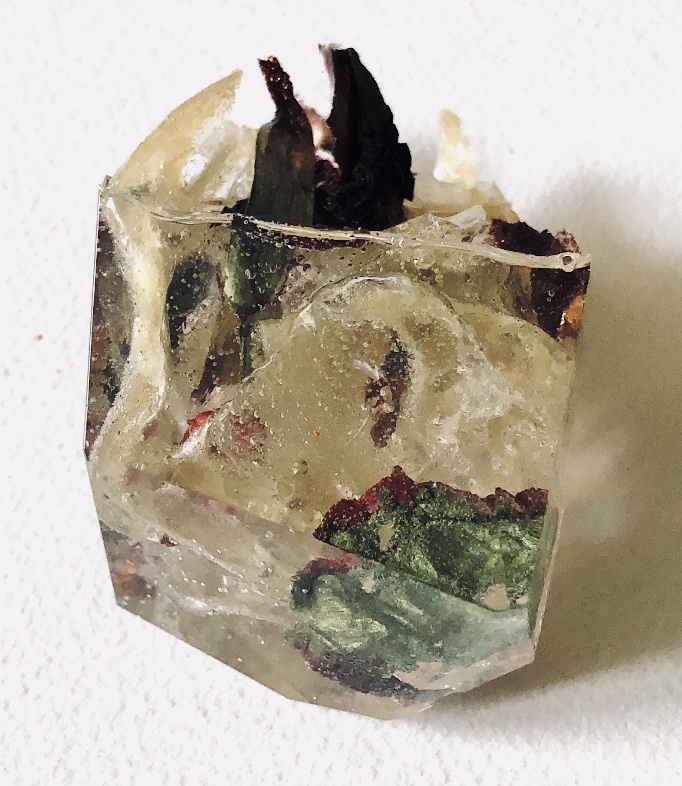
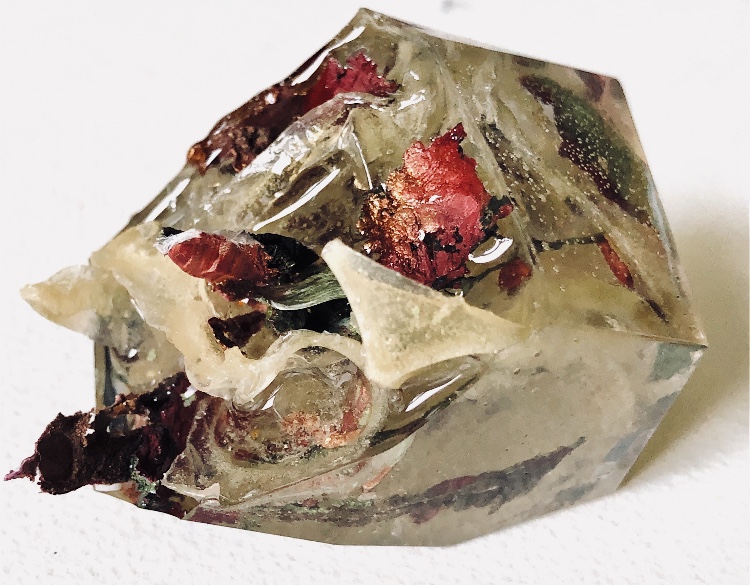
Fig 8. This square sample again uses wax crayon for colour, together with beads, plaster of Paris pieces, felted pebbles, cord, torn painted paper and paper strips to create an intricate organic piece. It is as if a square has been cut from nature – either from a submerged forest or underwater in a rock pool. It is a slice of time captured in space. The use of a semi submerged plaster shape allows the sample to stand at an angle, helping the viewer to see from all viewpoints the beautiful shapes and patterns inside.

The weight of the resin pieces makes them satisfying to pick up and look closely. The smooth surfaces are so different to what is contained within.

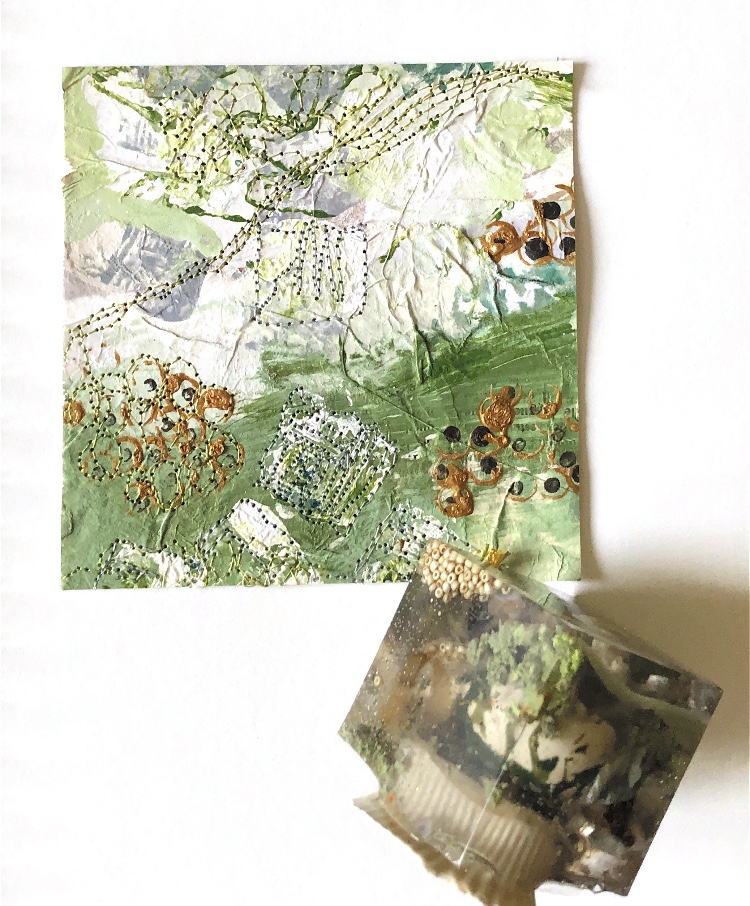
Again I have used collage and paint to further explore this piece, together with some stitching.

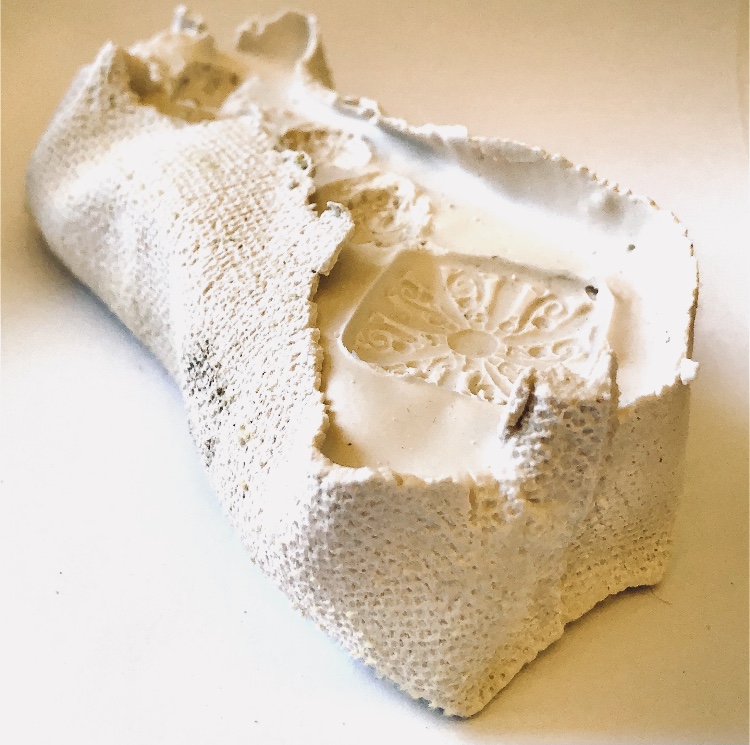
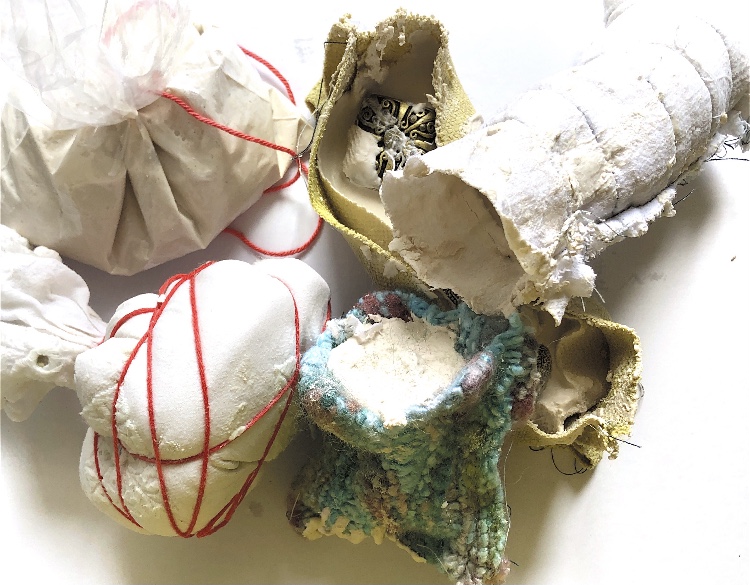
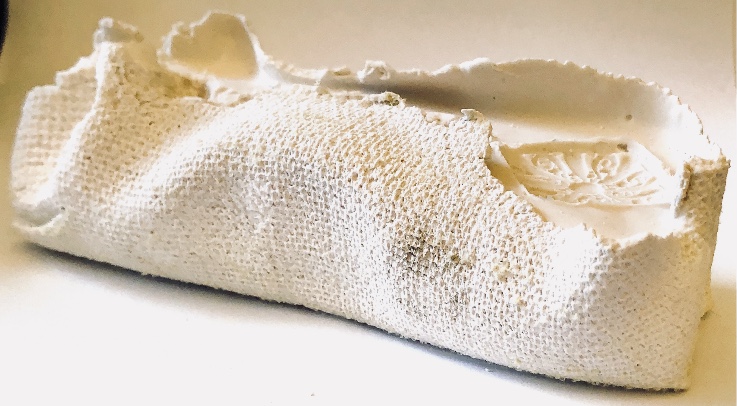
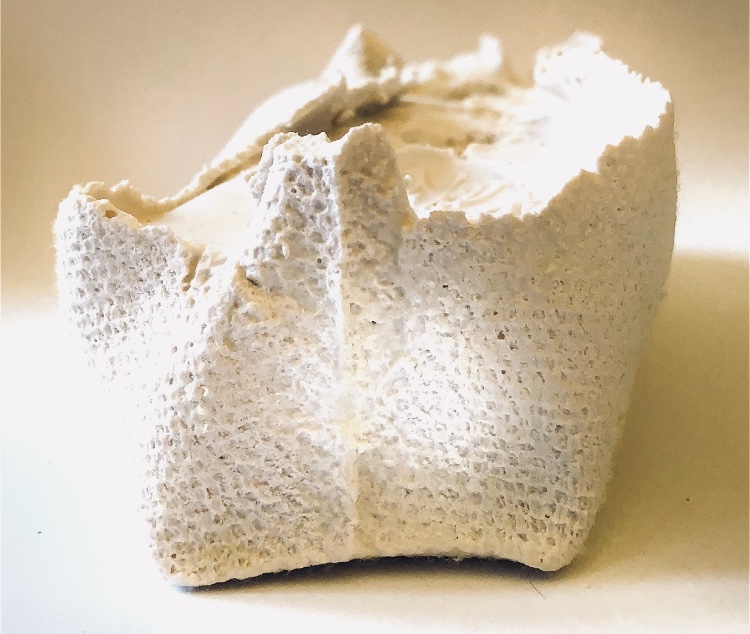
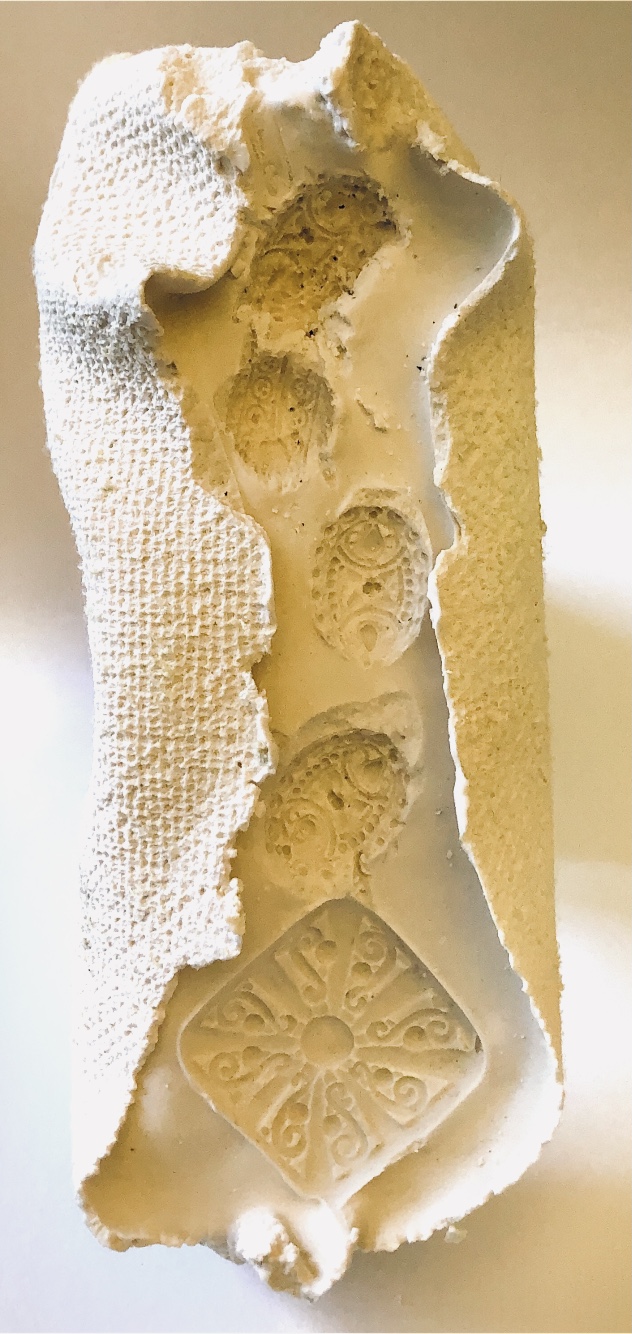
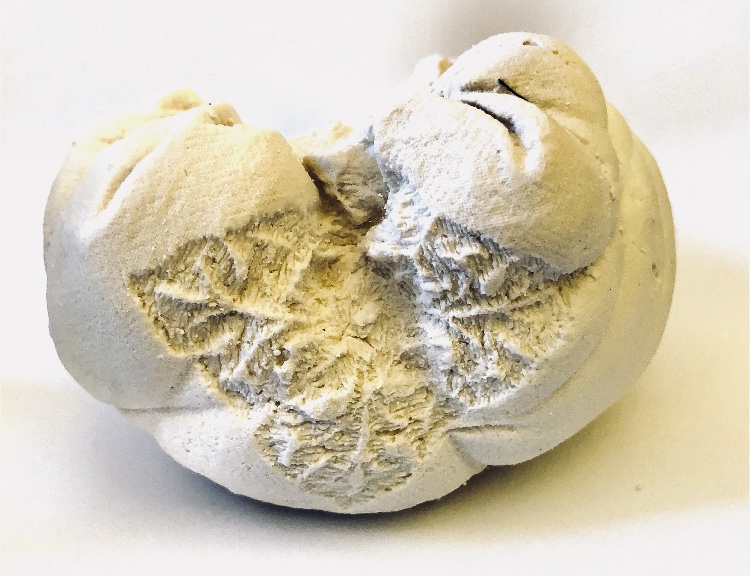
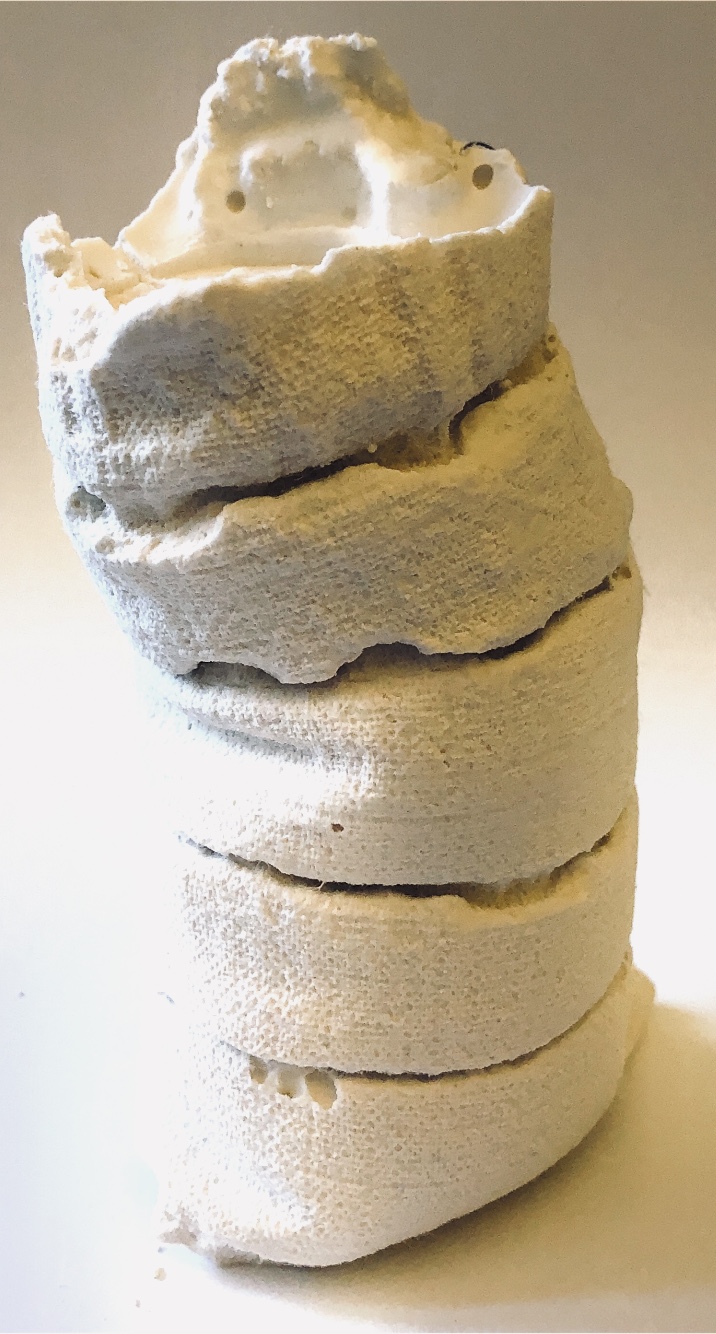
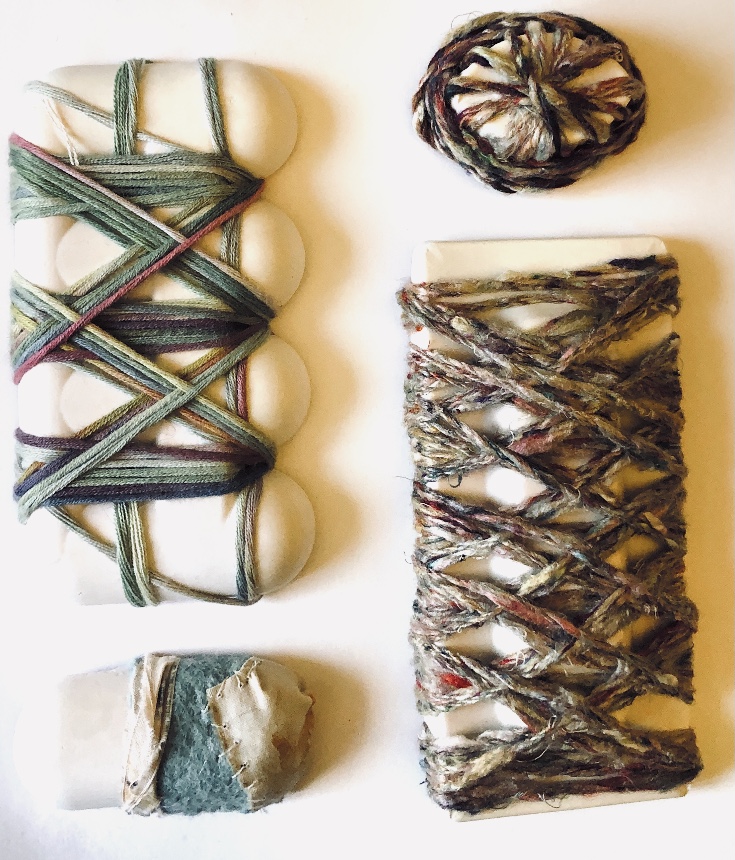
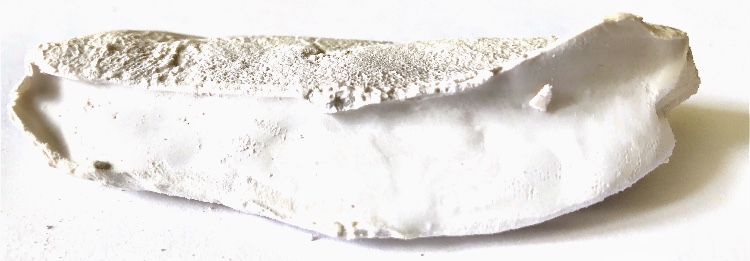
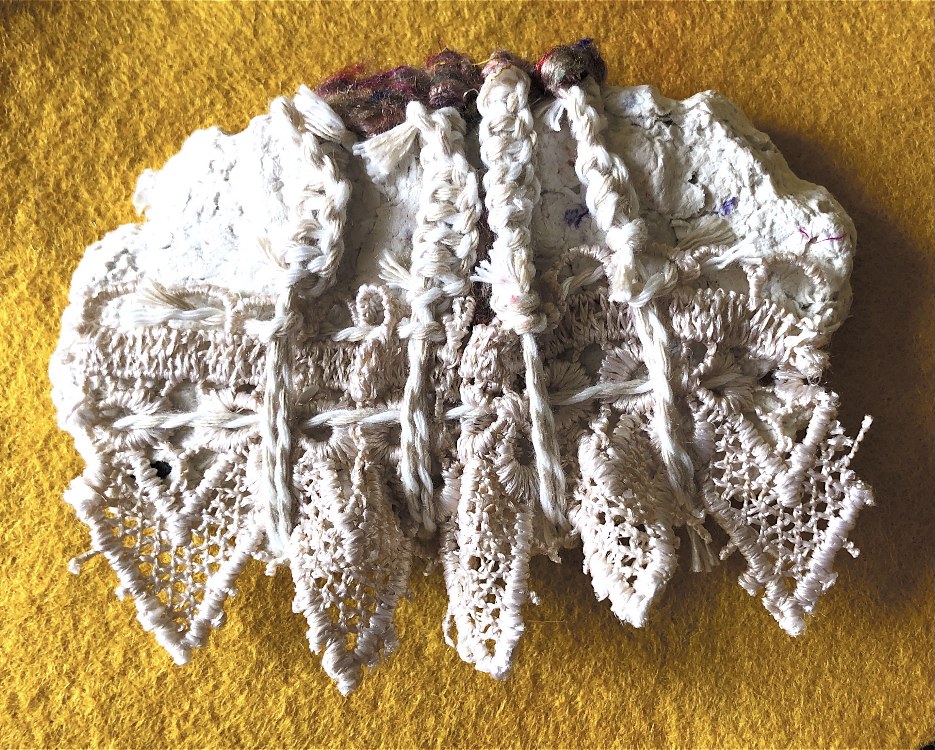
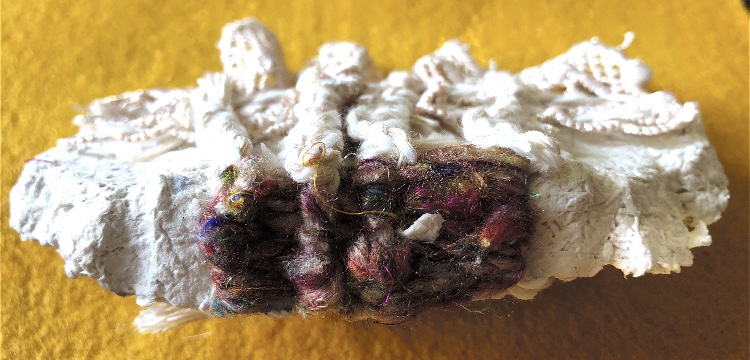
Fig 9. For Project 2 I used plaster again. I made small bags from different fabrics to cast the plaster in and manipulated these with pleats, and stitch. I have chosen these because the detail picked up by the plaster is so fine that every warp and weft yarn, pleat, seam and stitch can be seen on the resulting samples. The first sample stood on a flat surface to dry and this means the bottom is fairly flat and the sample stands up nicely, leaning to one side like a sack full of grain. The second sample is open at the top with decorative beads cast into the surface. I love the intricacy of the surface of these casts, demonstrating the versatility of this material.

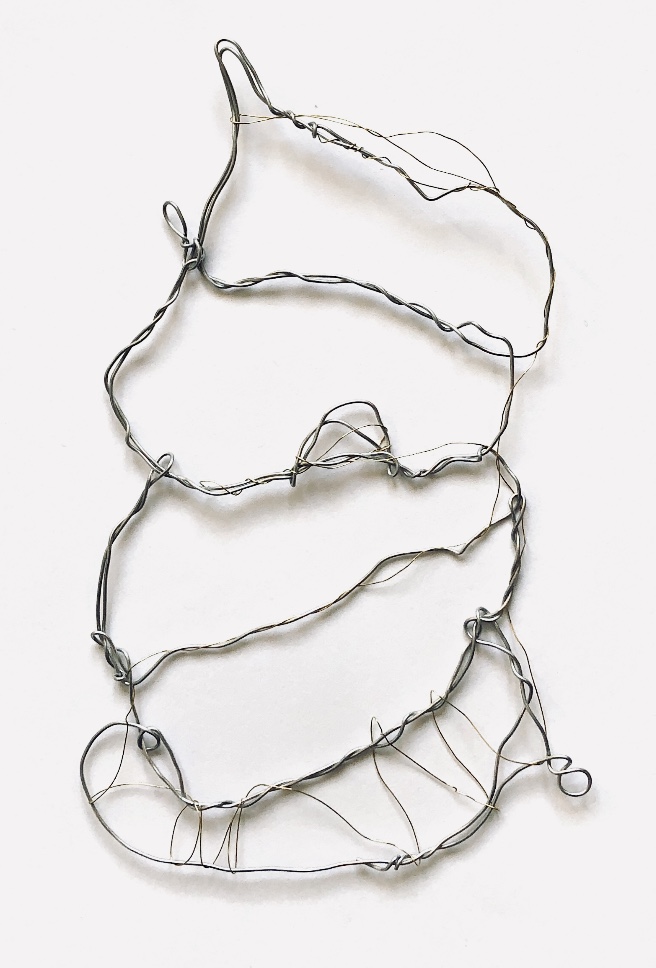
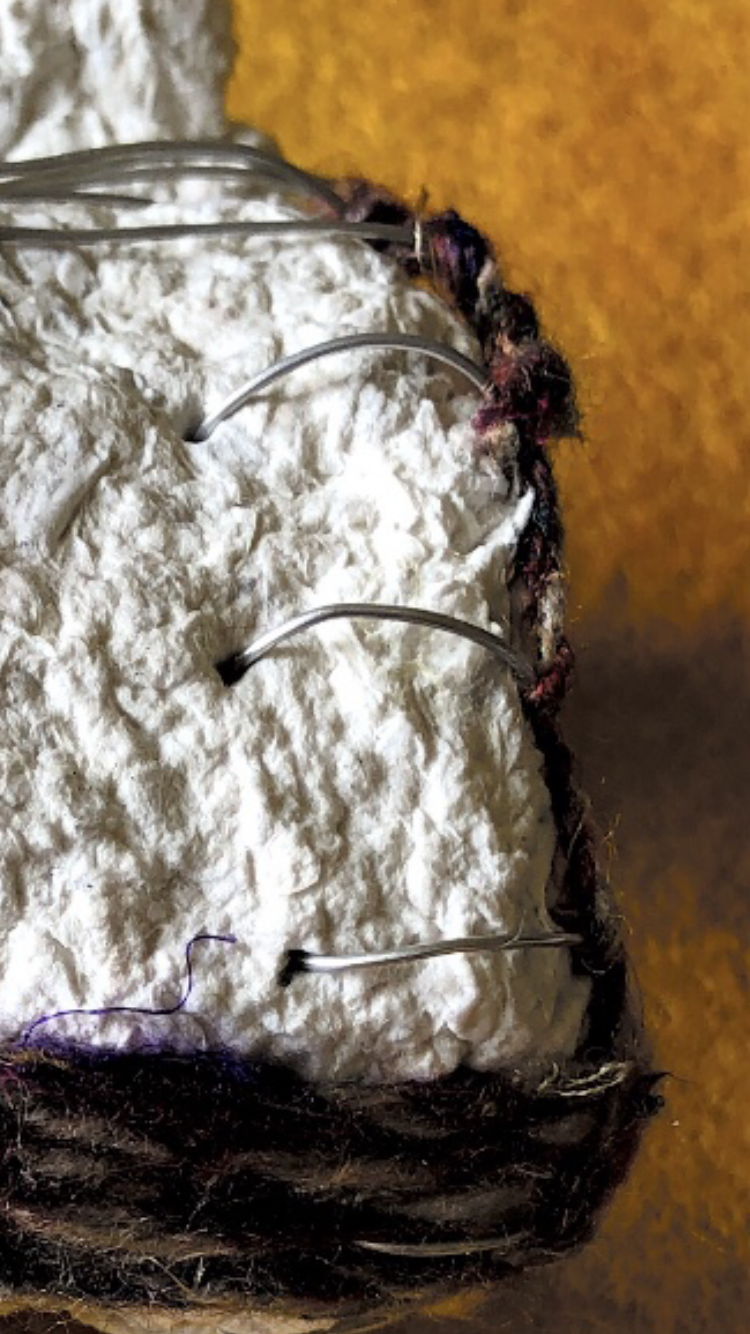
I ‘drew’ one sample with wire and then stitched it to a patchwork of fabric. I think I prefer it before it was stitched down as it has got a bit lost in the material.

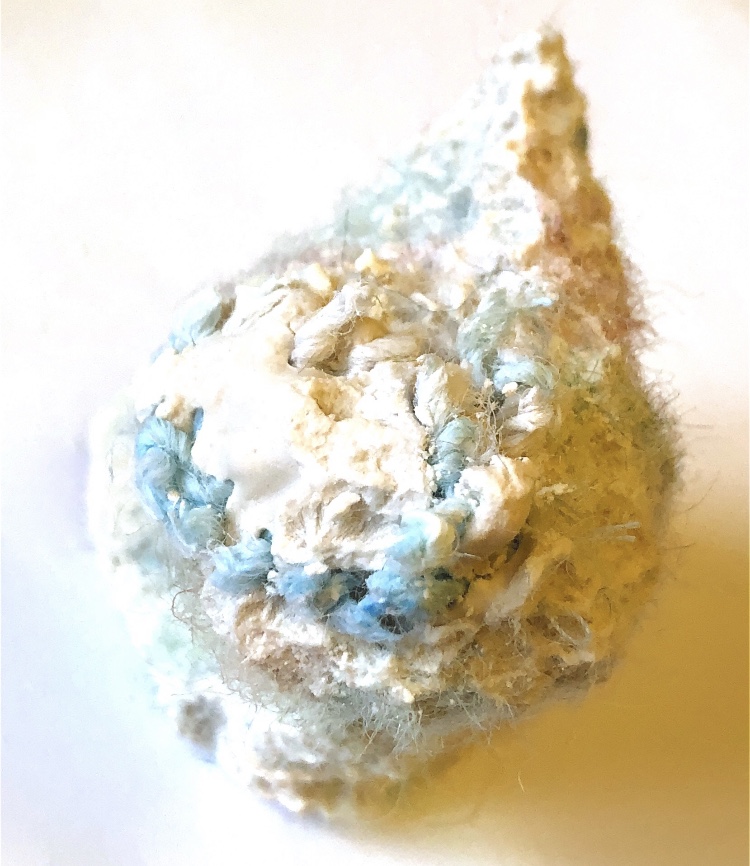
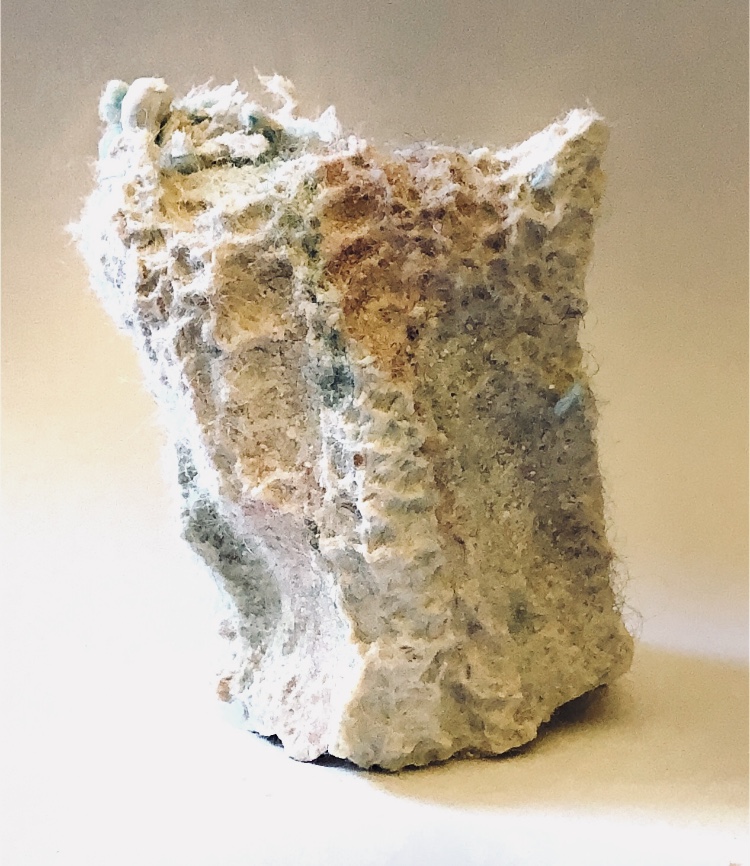
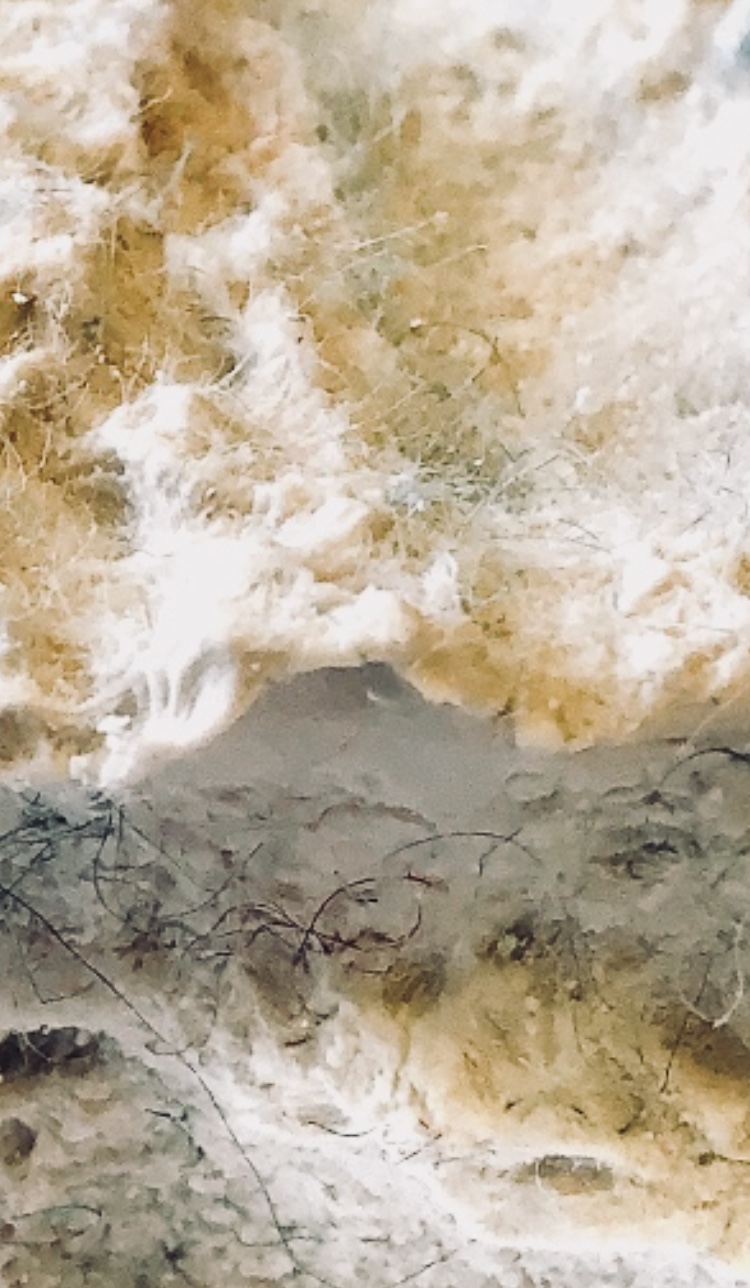
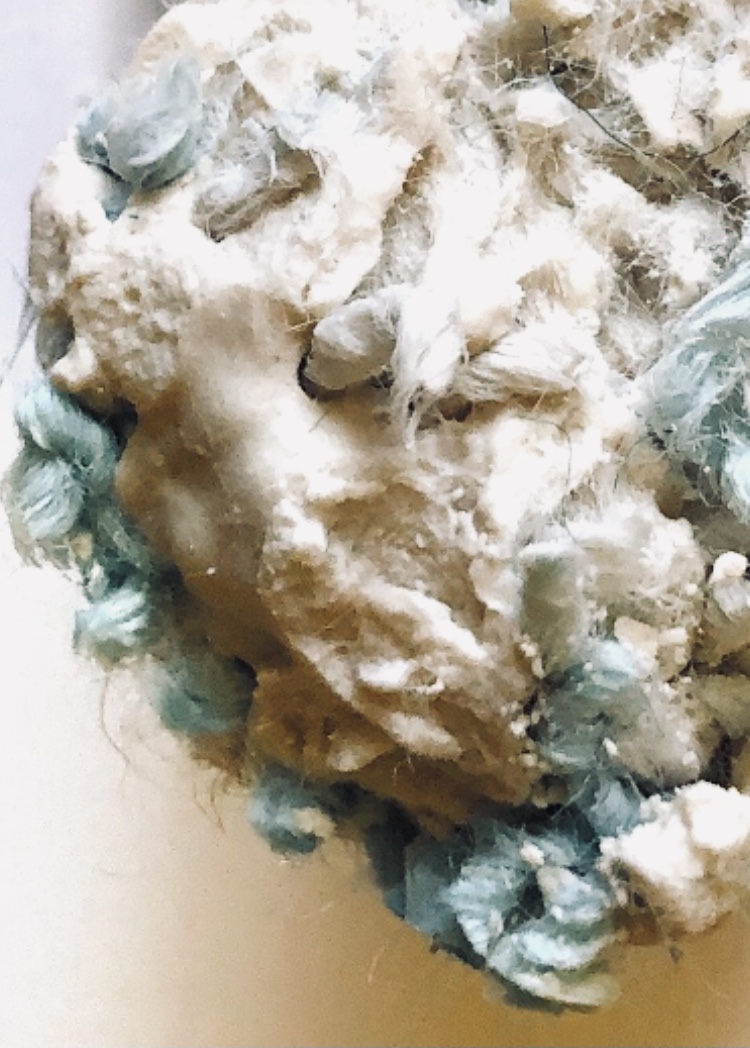
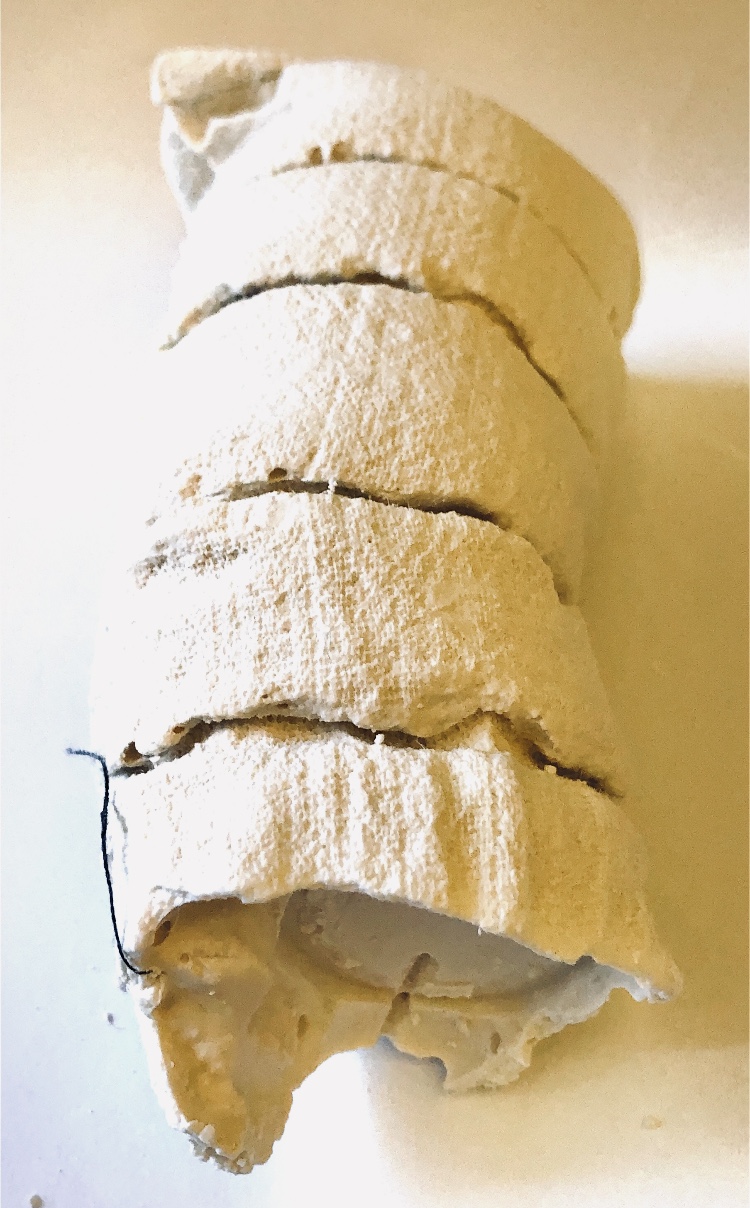
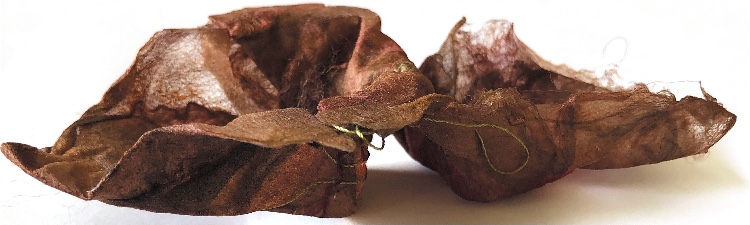
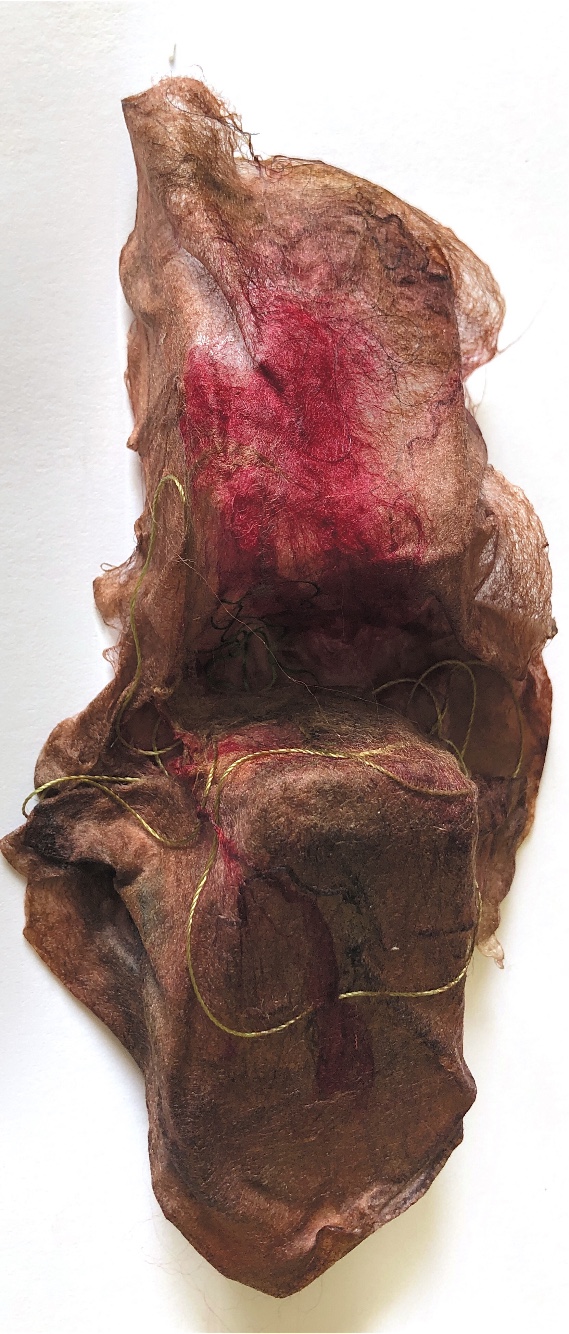
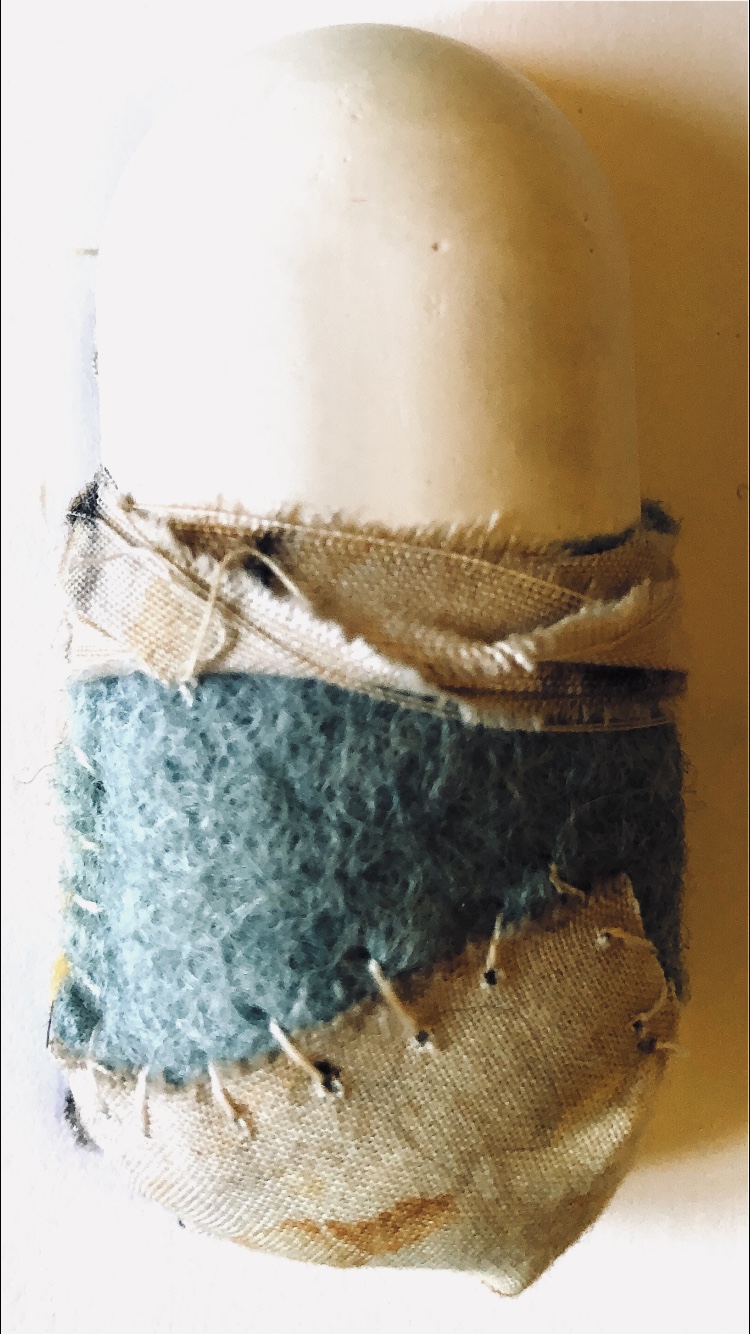
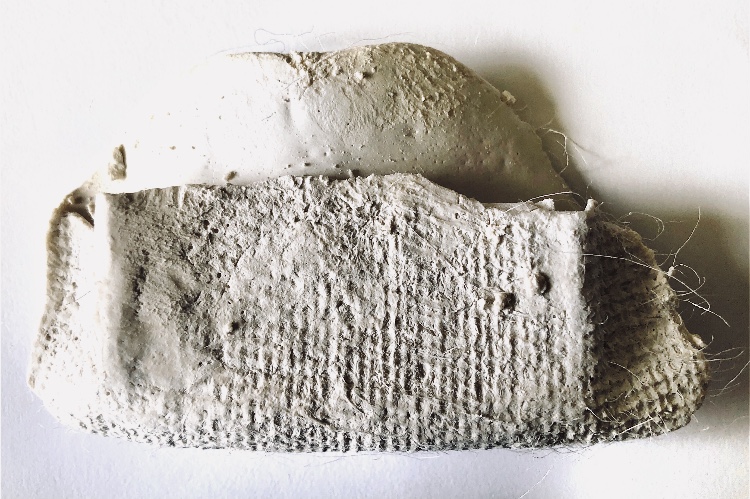
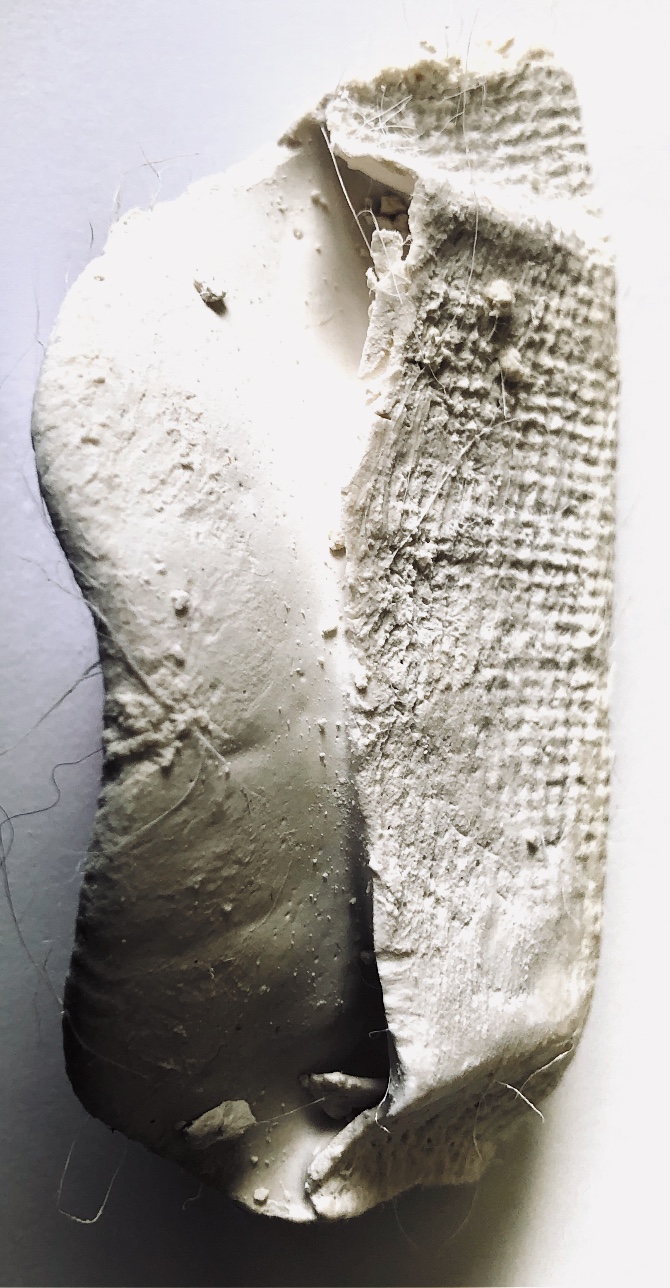
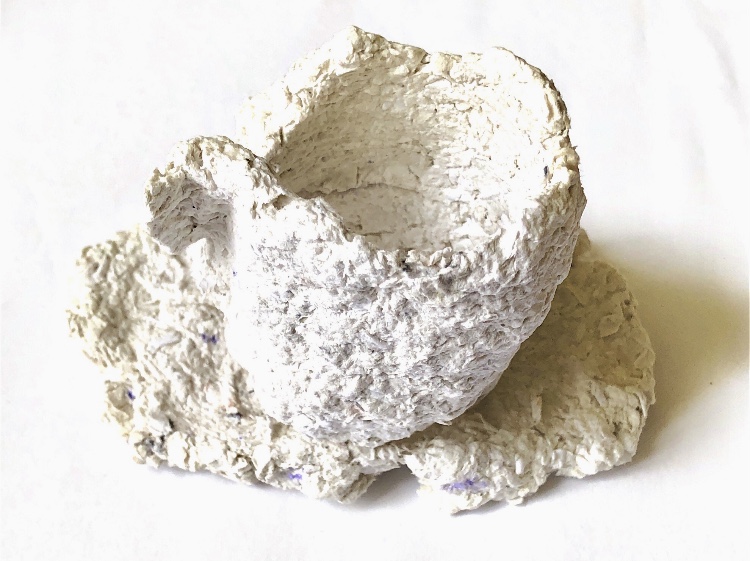
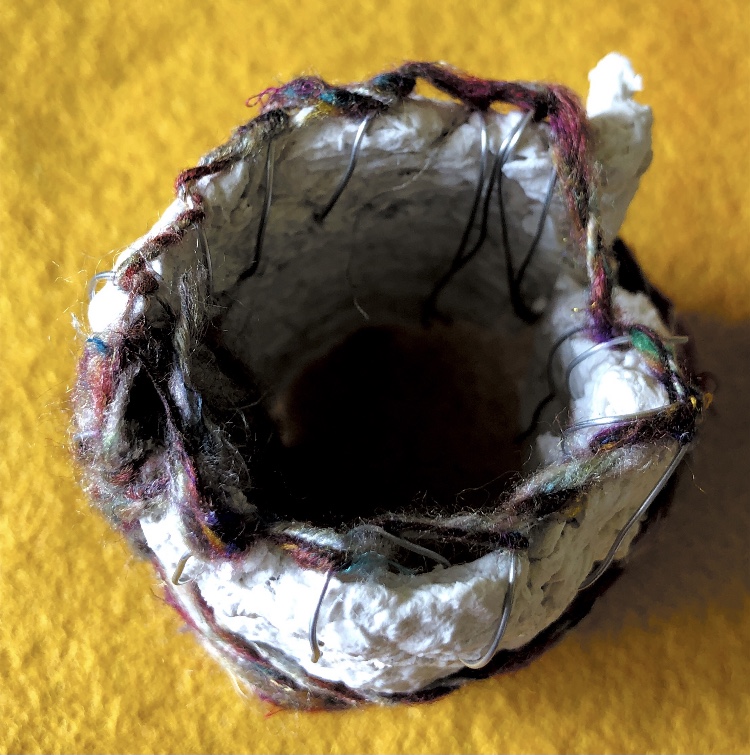
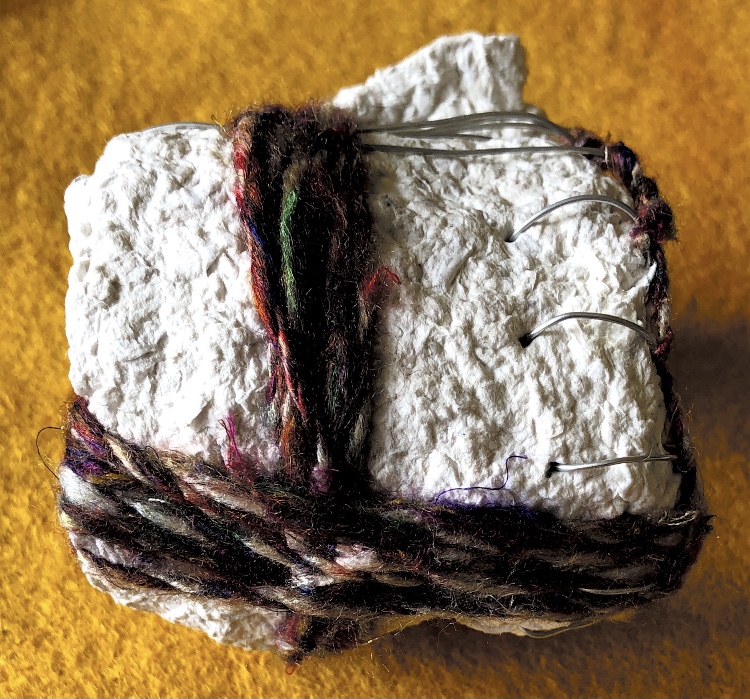
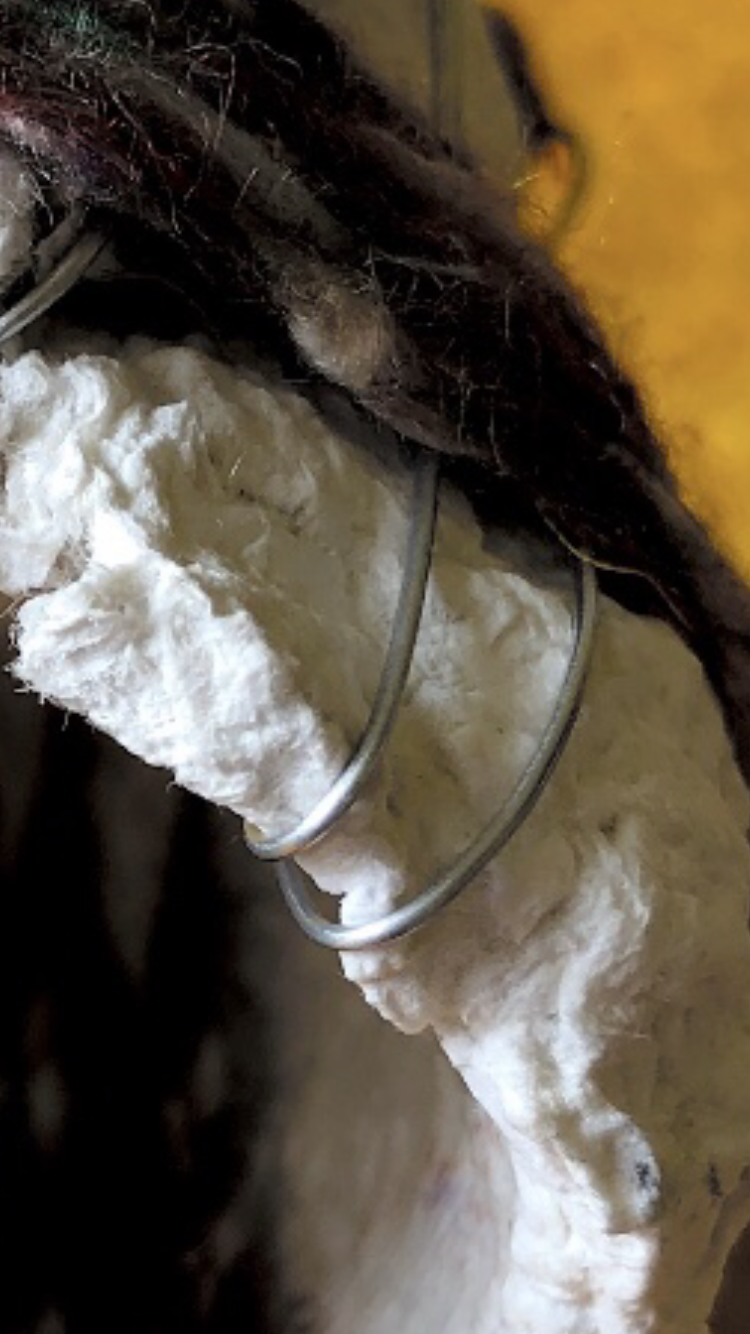
Fig 10. Using the work of textile artist Rebecca Fairley as an inspiration I have cast a sample from a knitted and felted scarf, sewn up the sides and bottom to make a small vessel. Rebecca casts concrete into knitted fabric and uses the stretch of the knitted material to create the resulting shape. Once I had stopped the plaster leaking from the bottom of the vessel, the sample found its own shape, and when removed from the knitting retained quite a lot of coloured fibres. This was a happy accident that I did not predict, and it adds another dimension to the sample. There is so much detail from the knitted stitches in this piece which is full of texture from the plaster and the wool fibres. I am pleased I used plaster rather than concrete for this as I wanted fine detail.

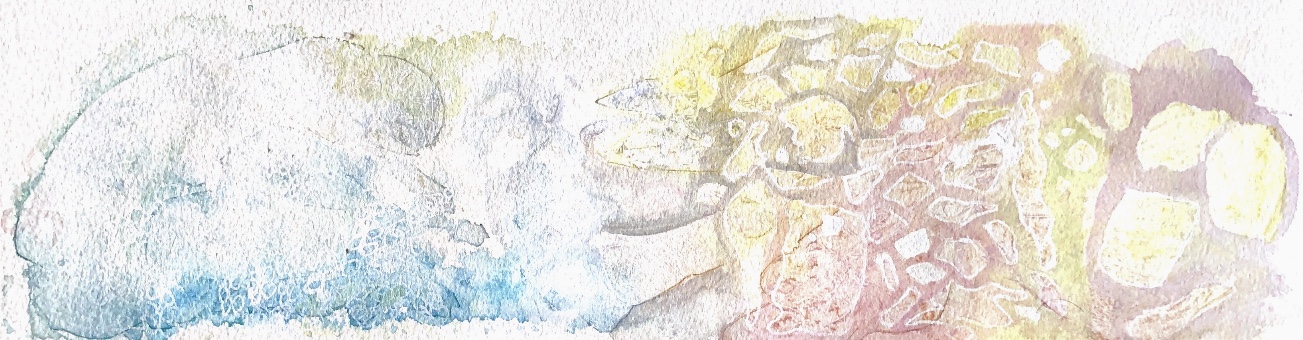
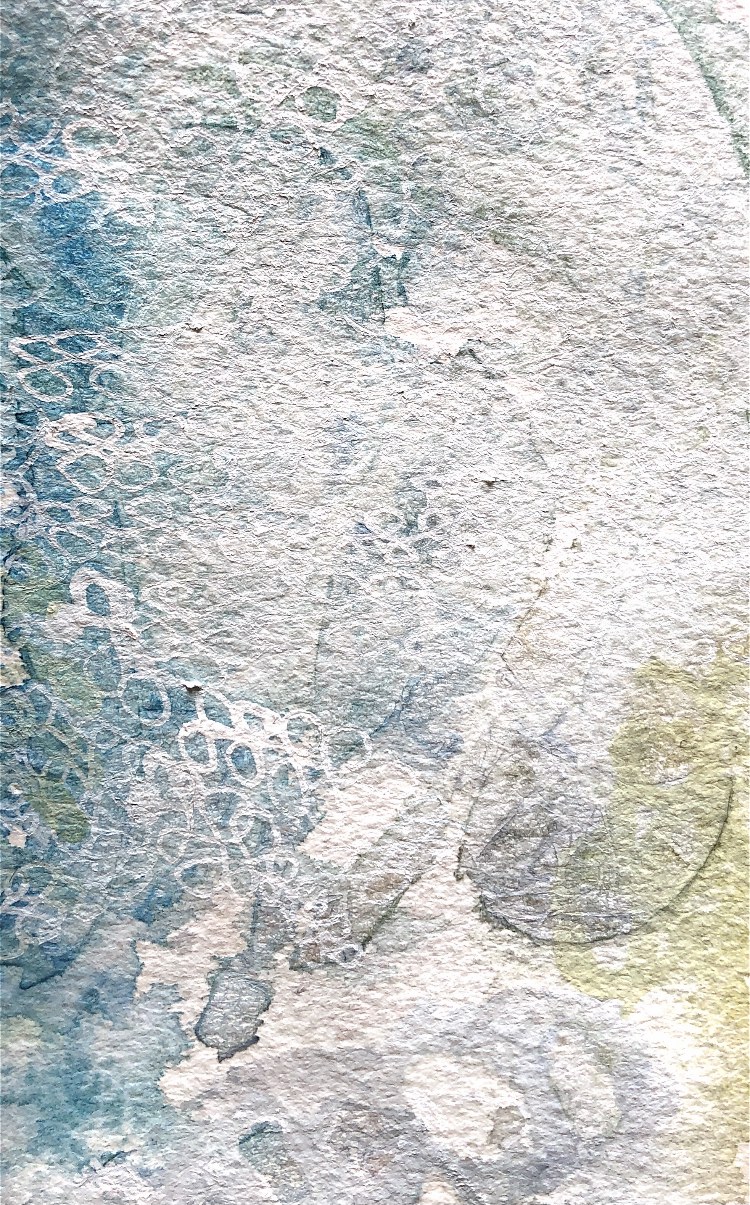
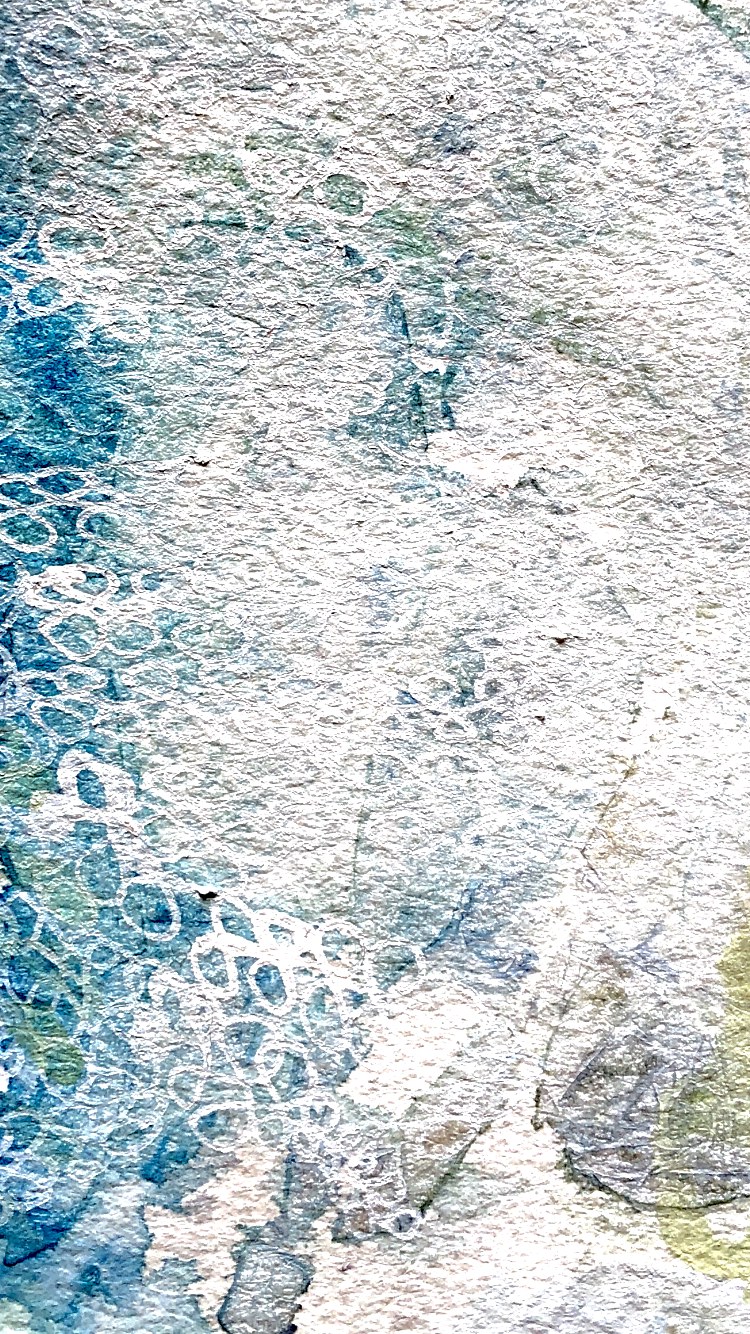
Using watercolours to capture this sample worked well – I used salt and cling film to add texture, and watercolours created the soft, washed out look of the sample.

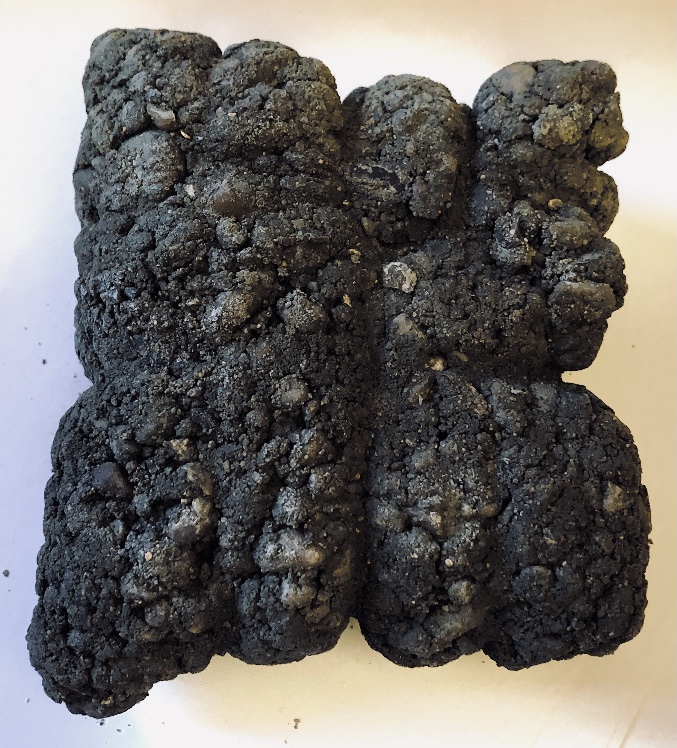
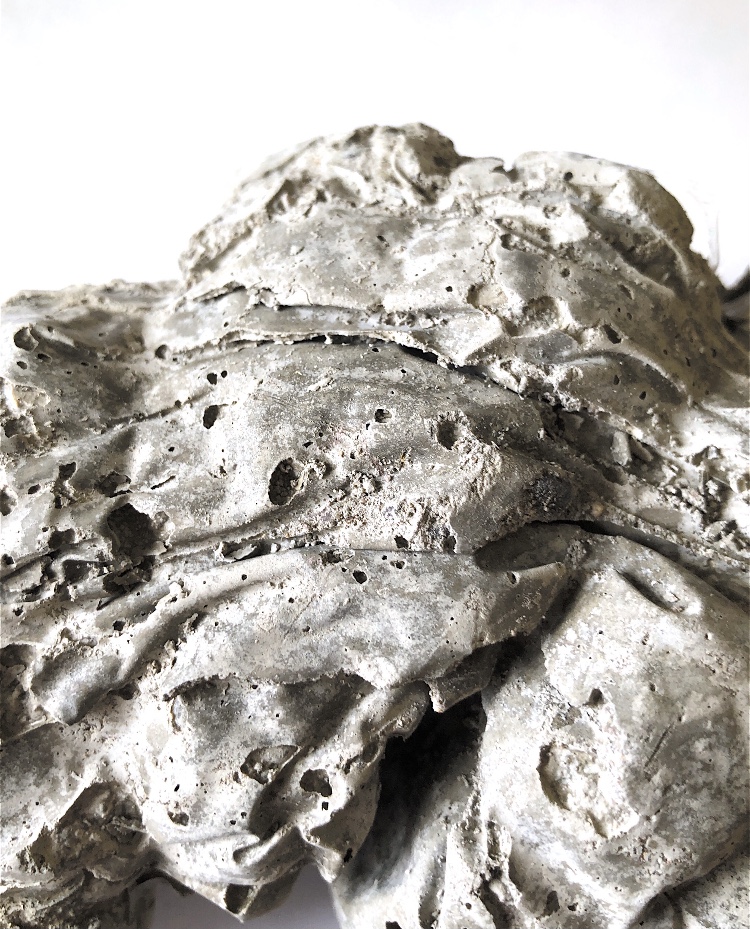
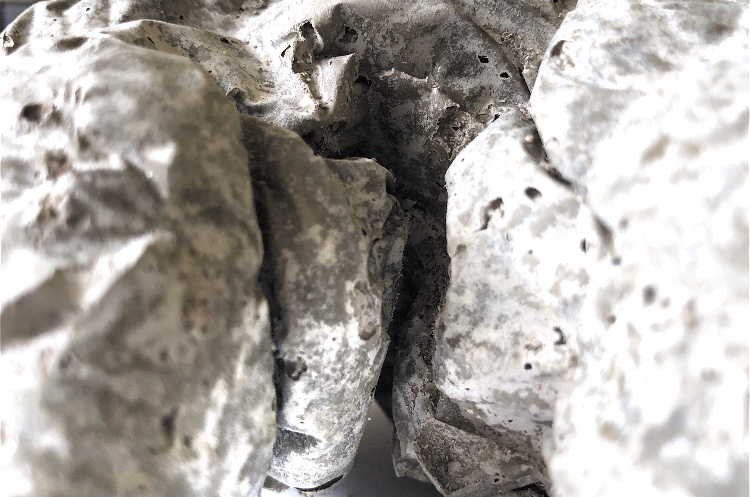
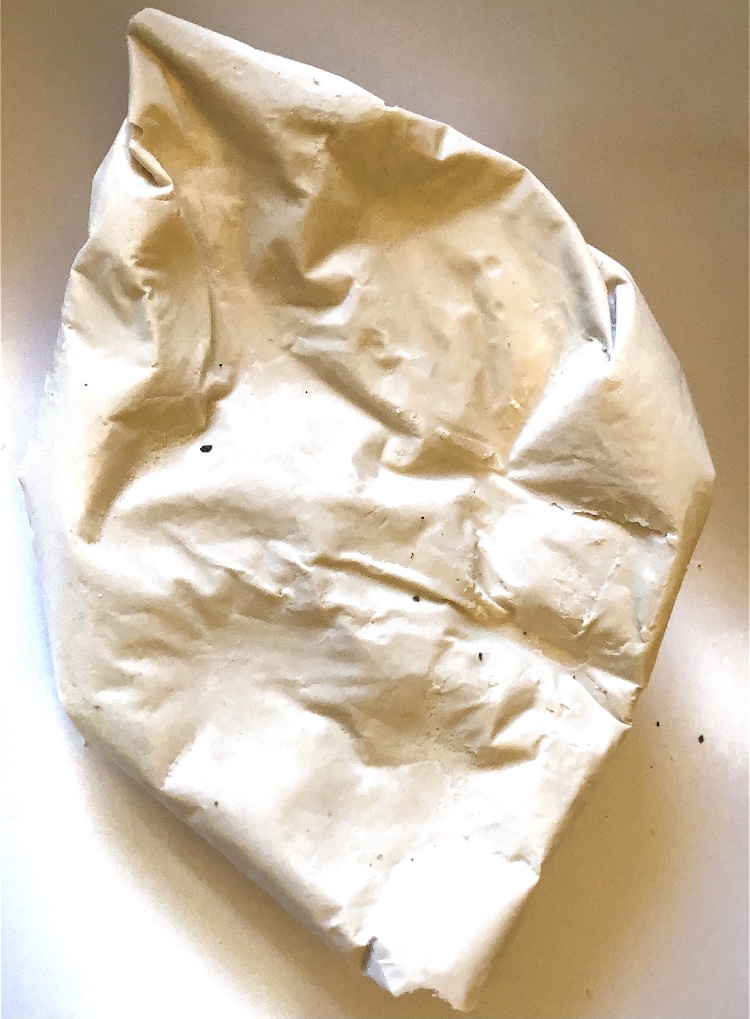
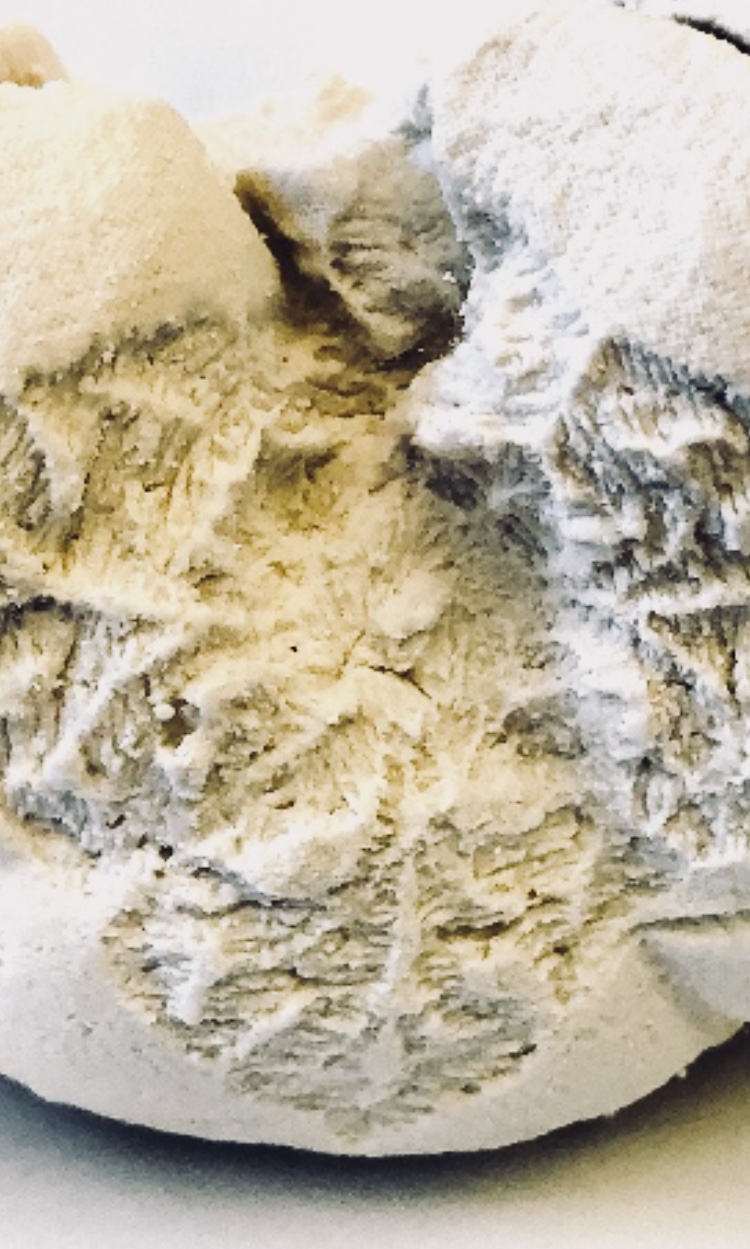
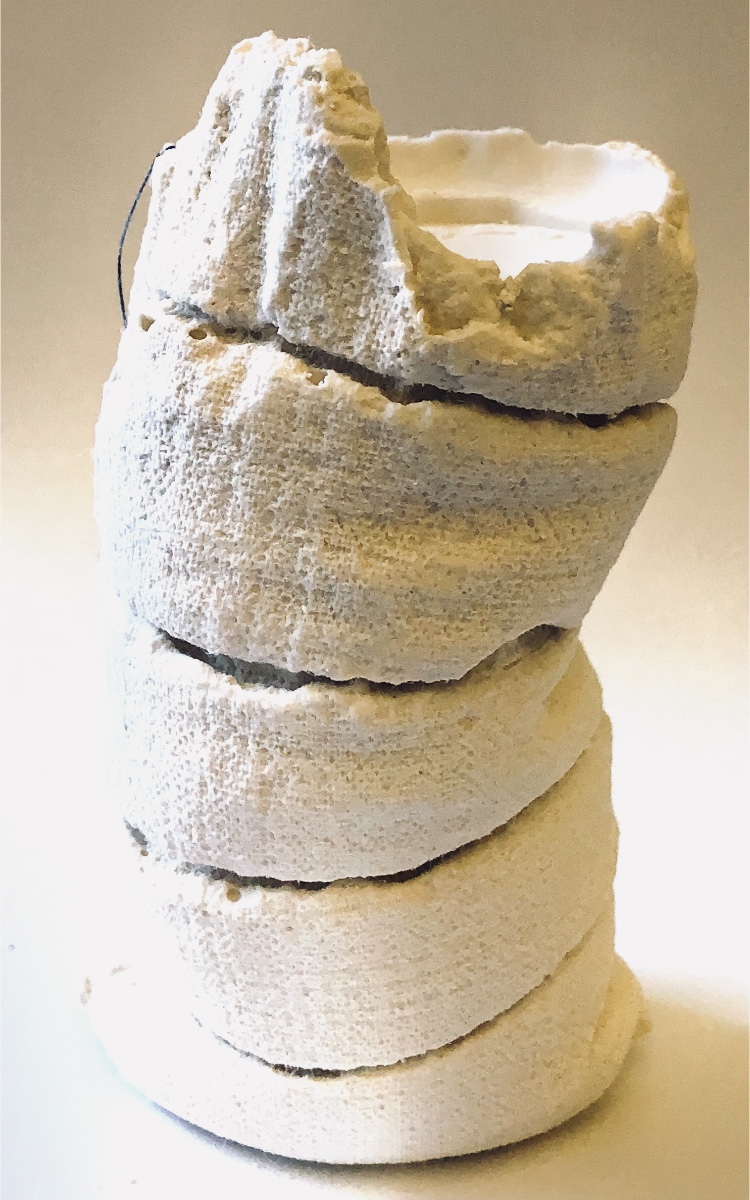
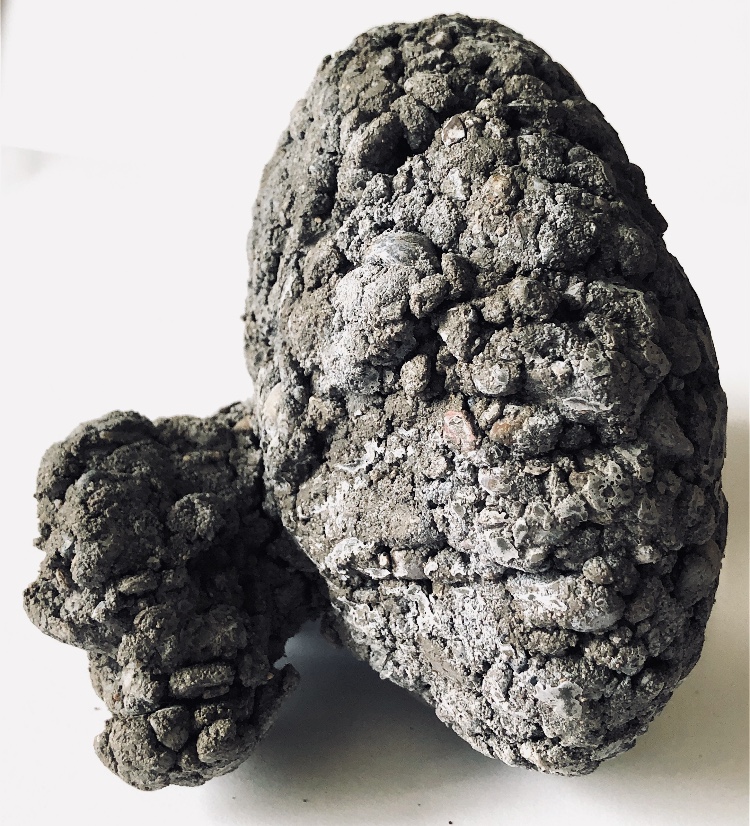
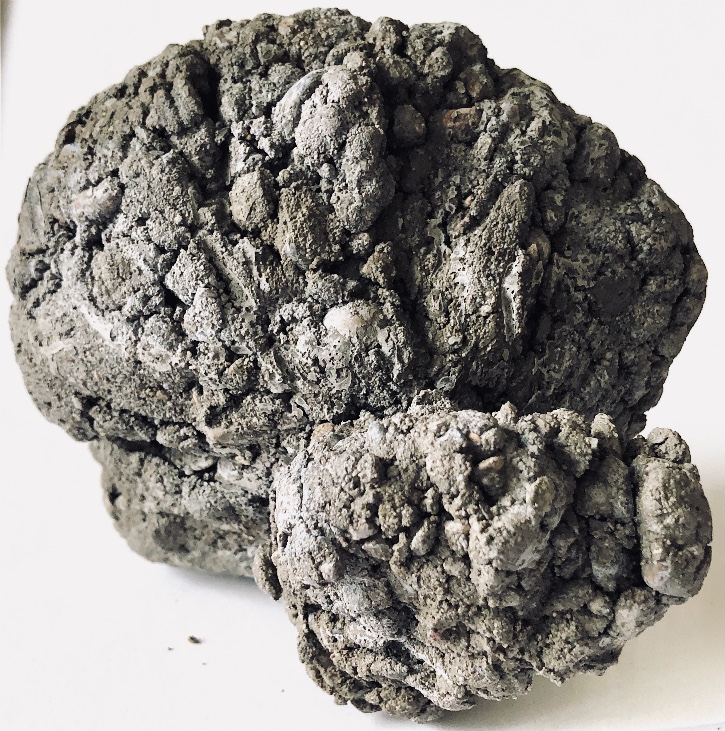
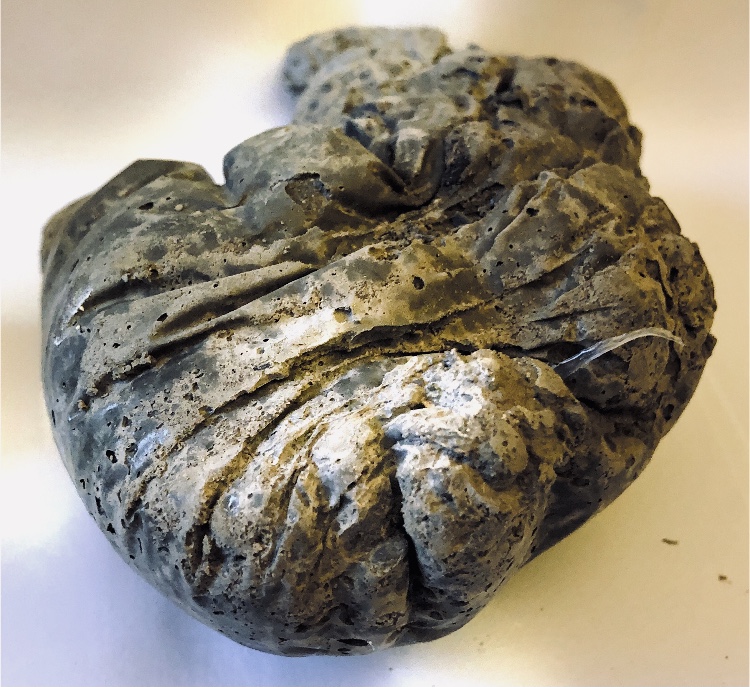
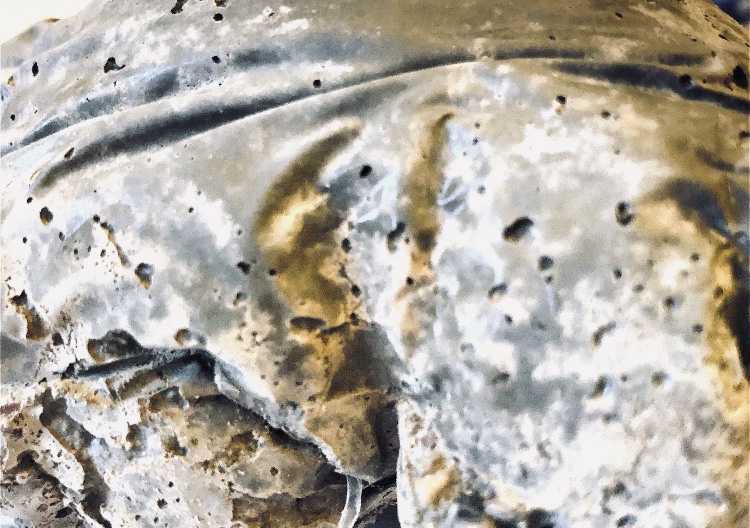
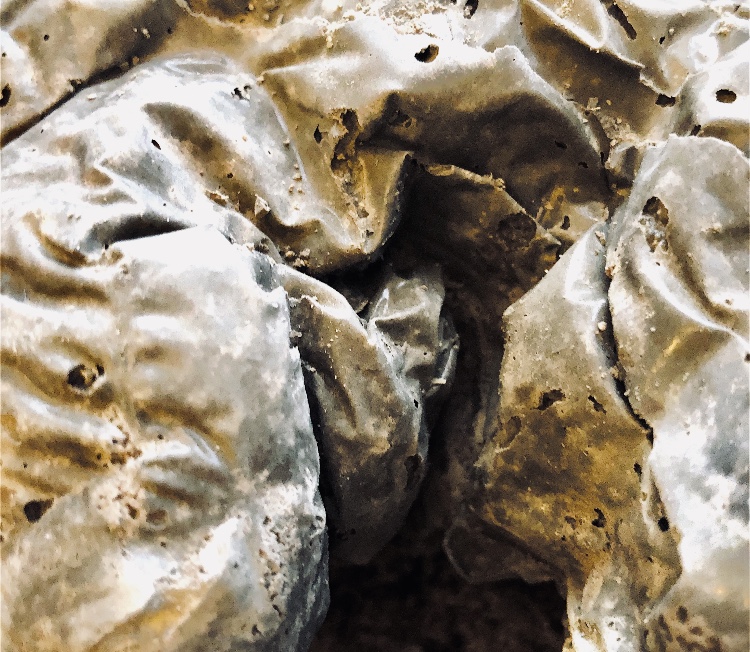
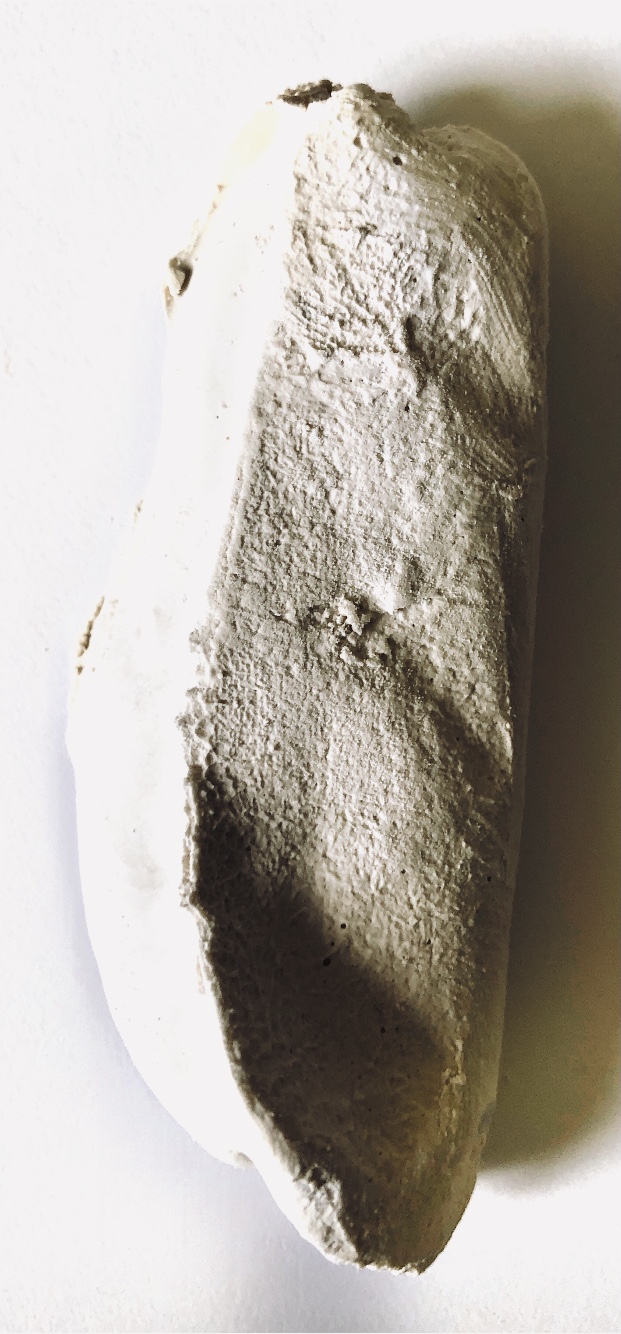
Fig 11. Concrete was a whole new world for me. The mix I purchased was quite rough with a lot of stones so I thought it would not pick up fine textures. The first sample I made was quite a dry mix and although it was made in a plastic bag it retains a lot of lumps and bumps. The bag was tied with string and this made deep crevasses in the sample as well as influencing the final shape.

Crayon rubbings and inks captured the surface of this sample.

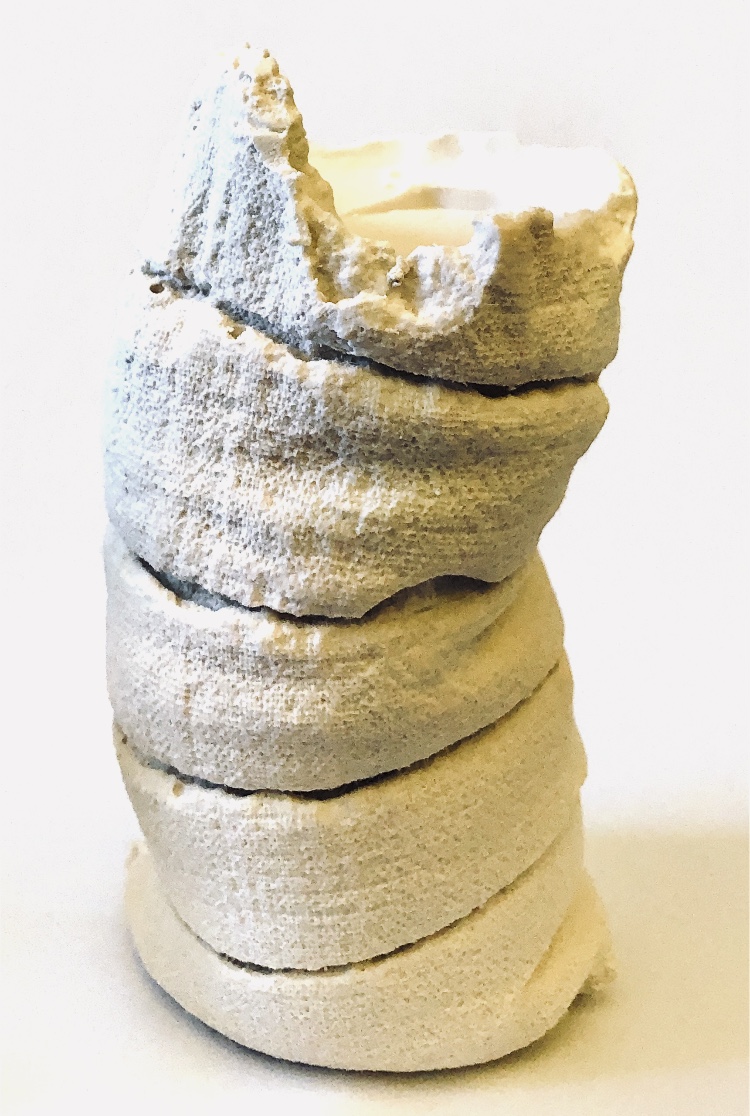
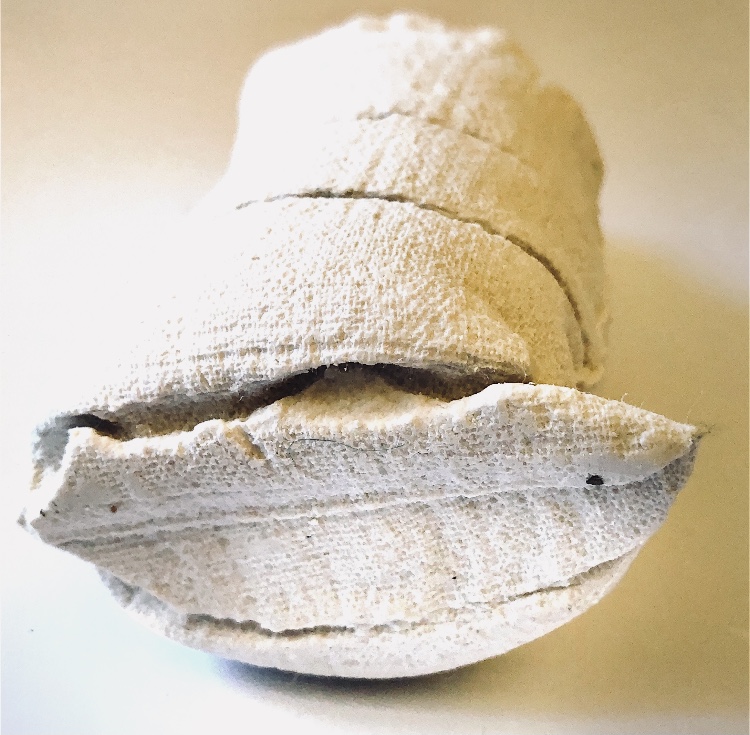
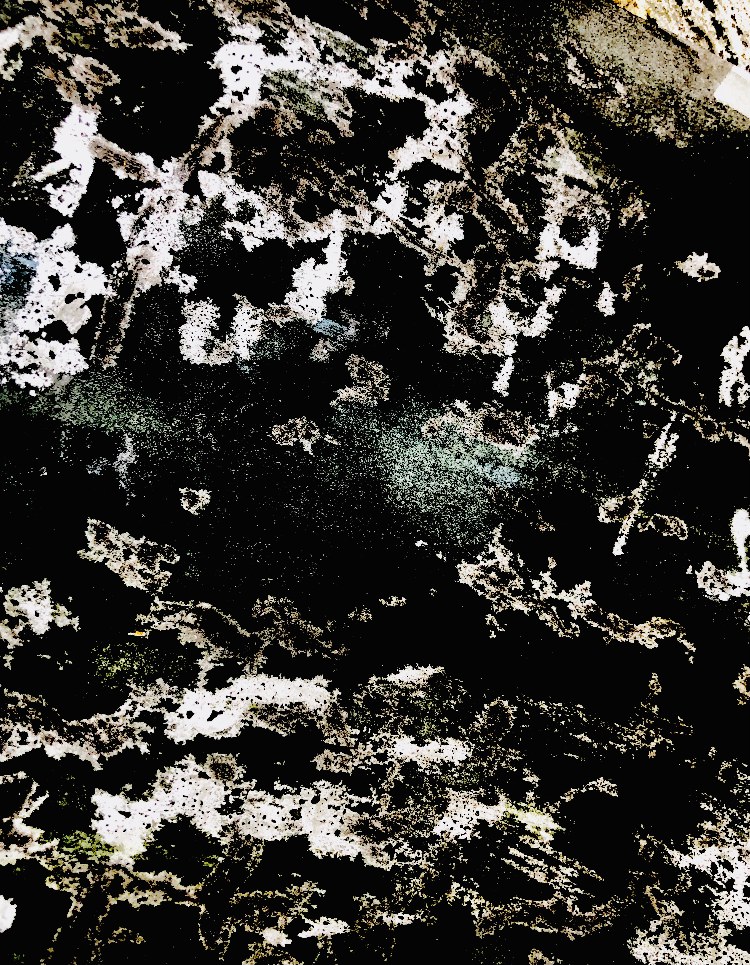
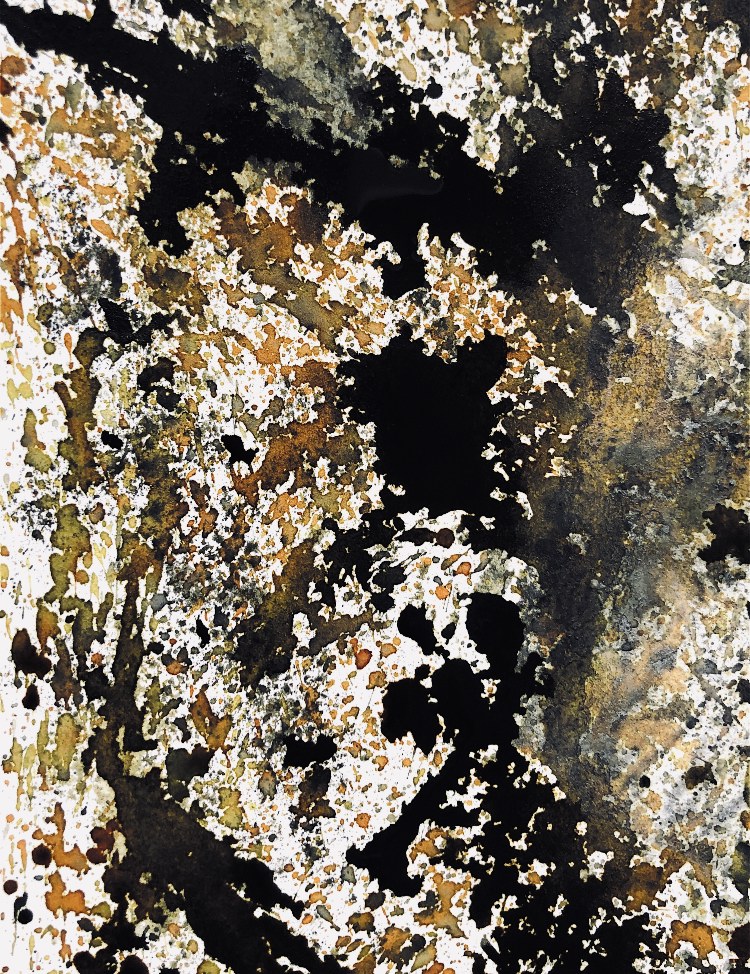
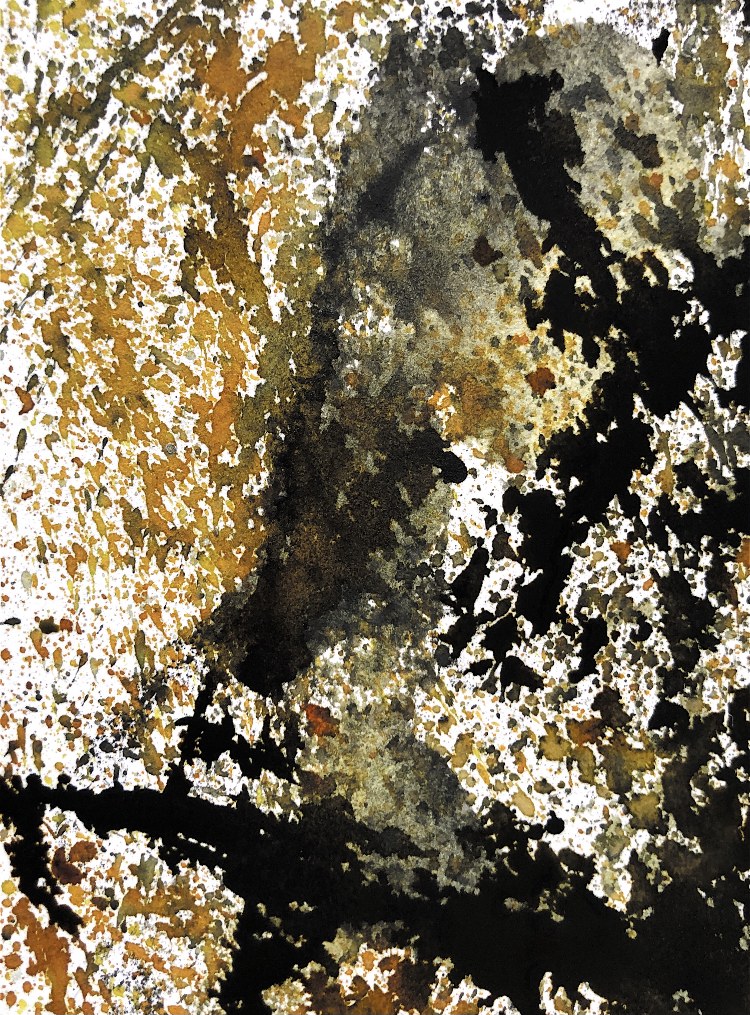
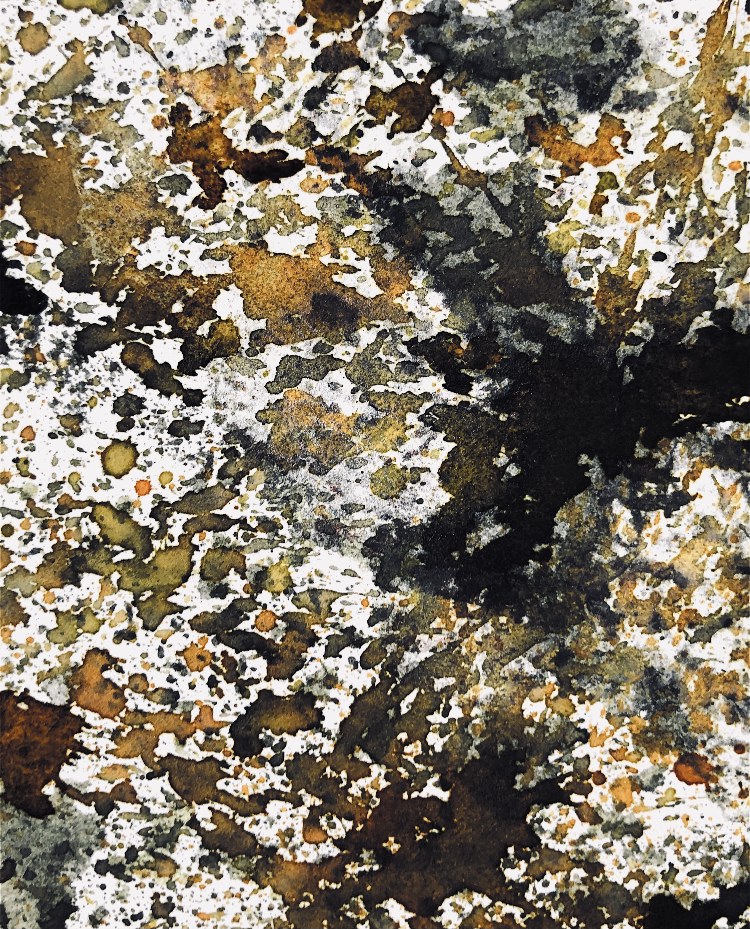
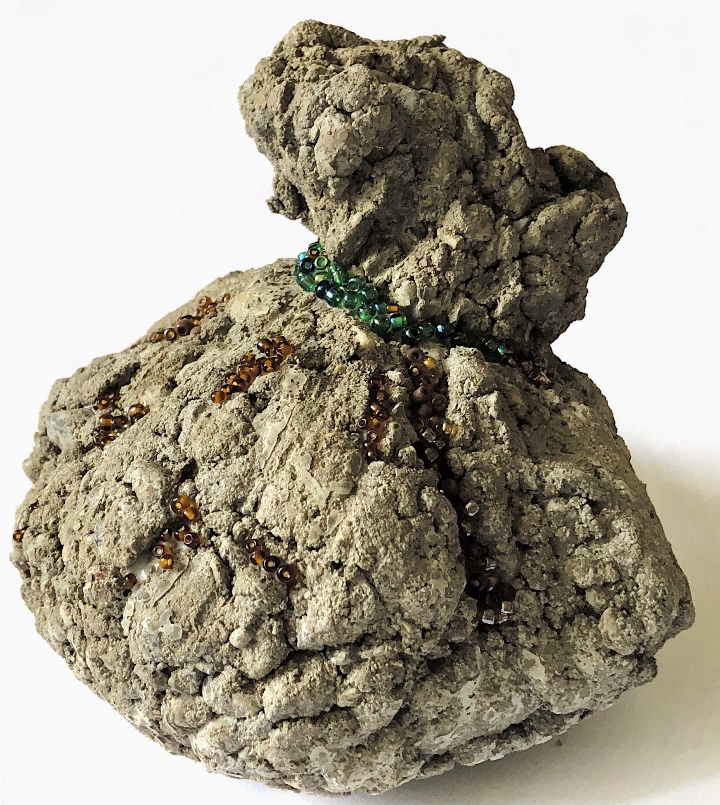
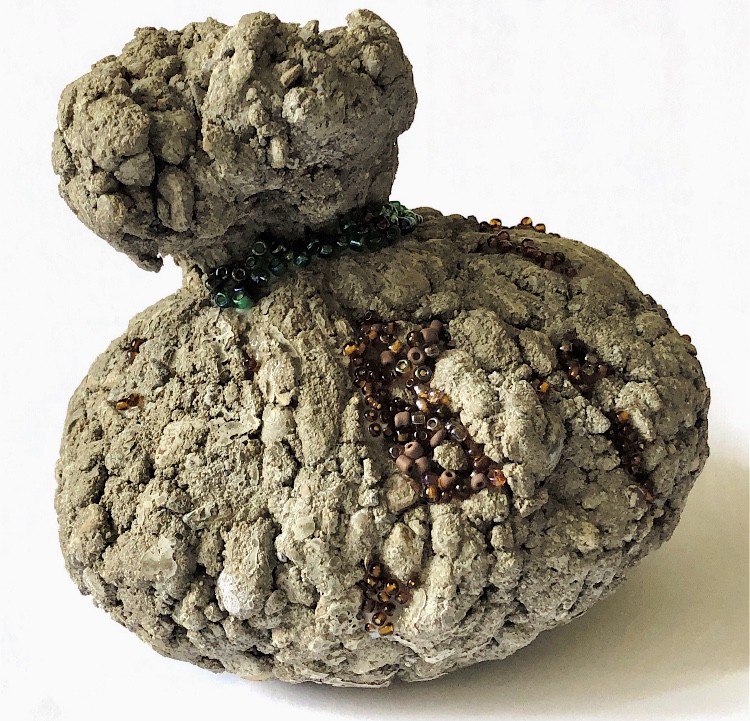
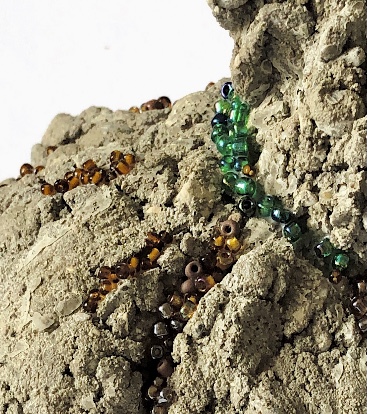
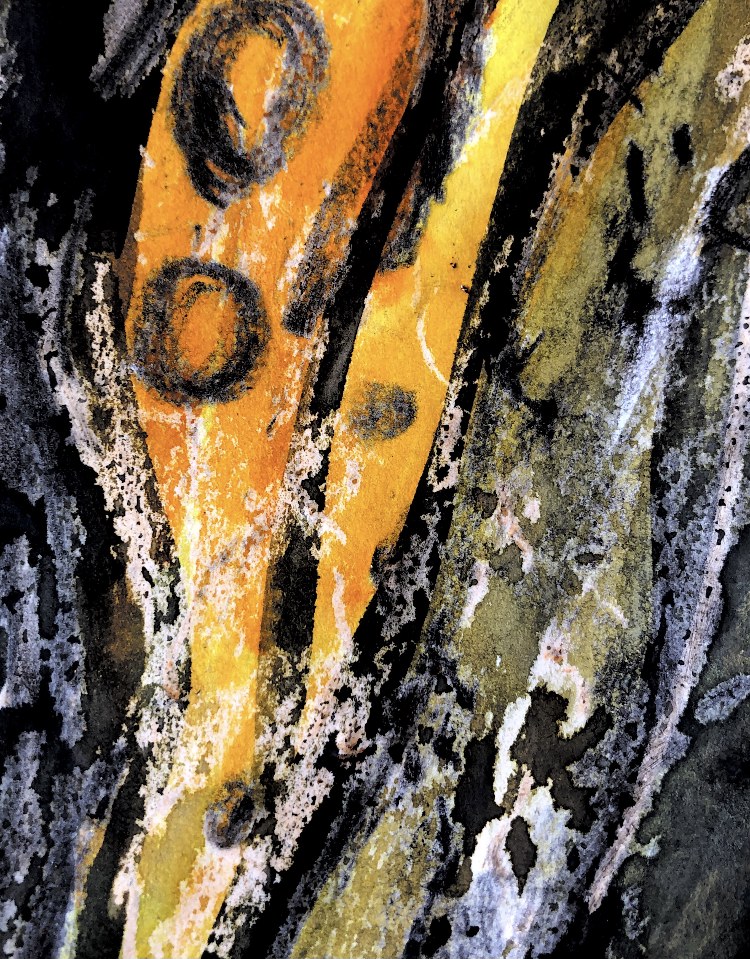
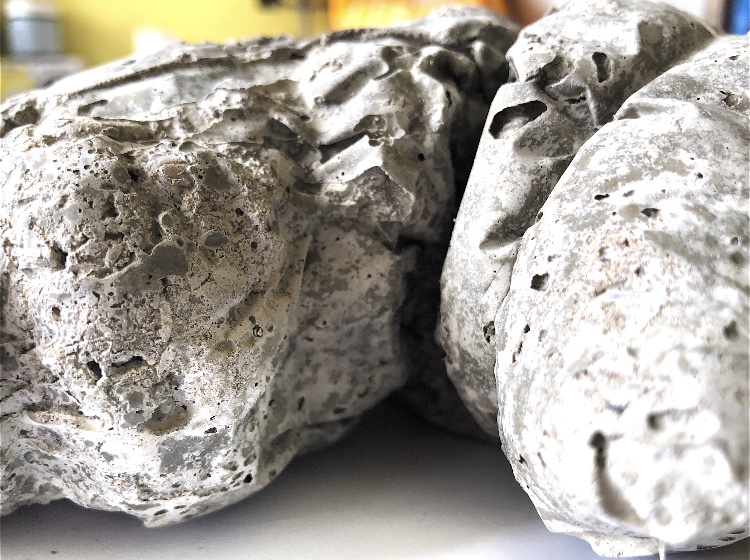
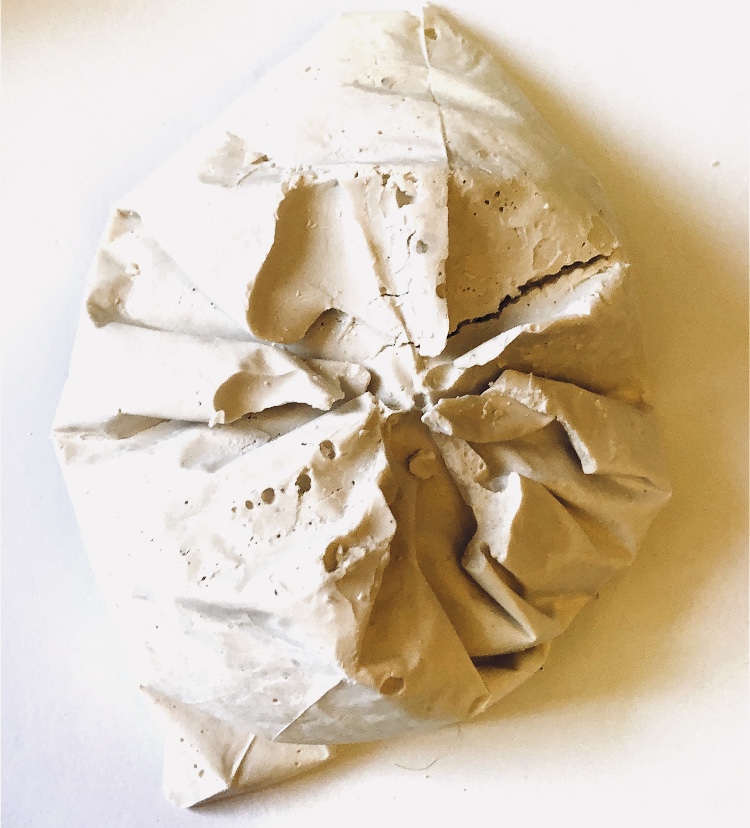
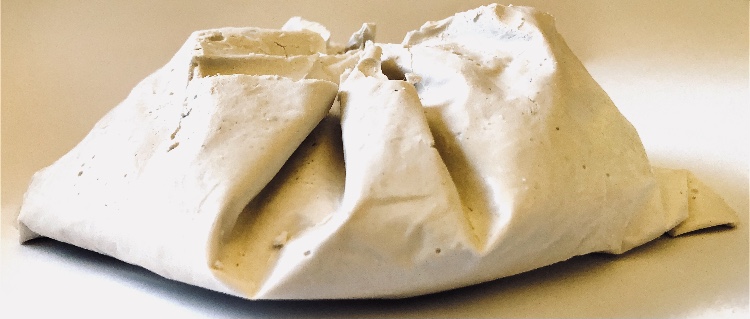
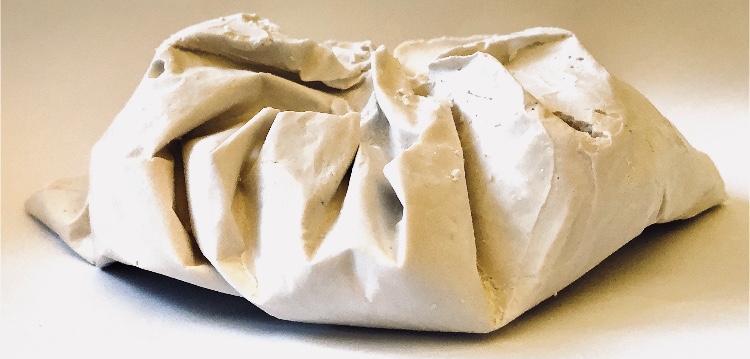
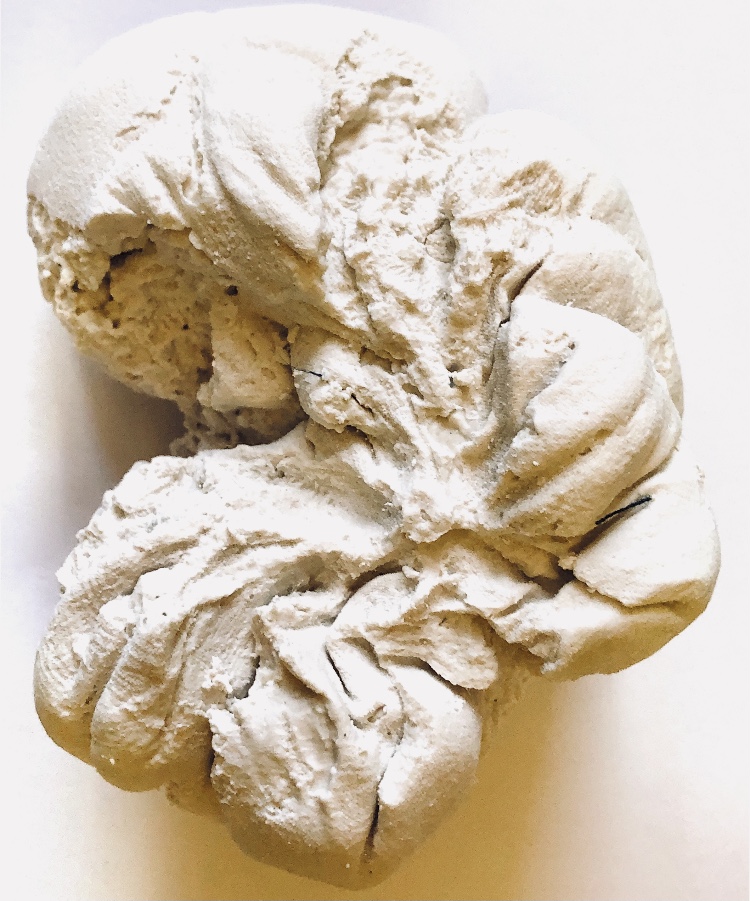
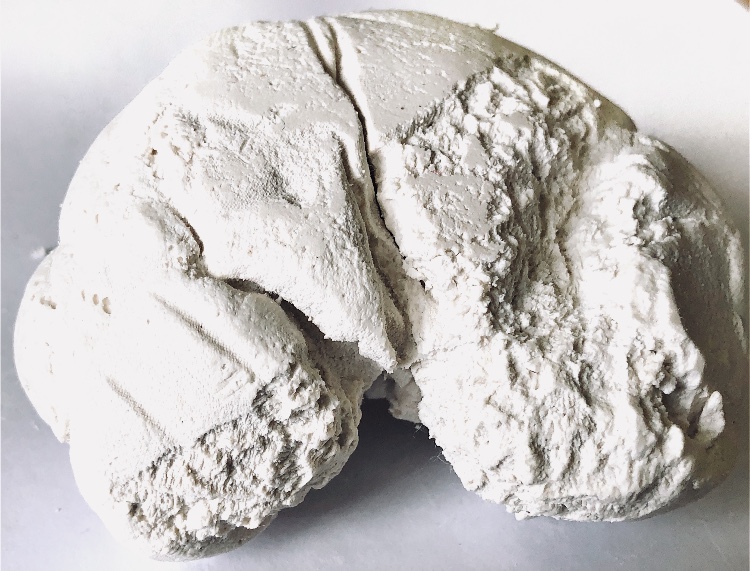
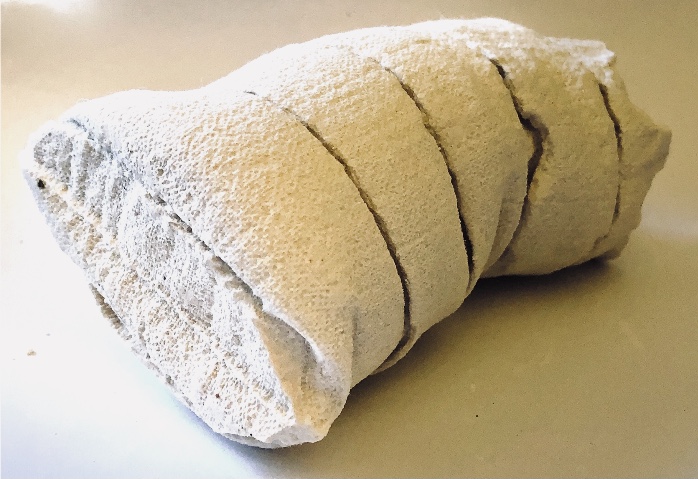
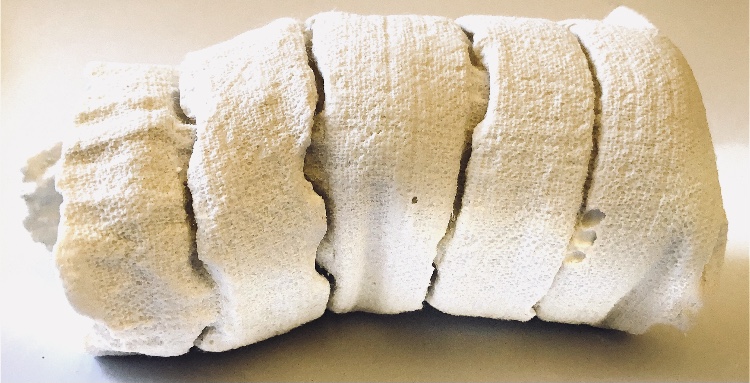
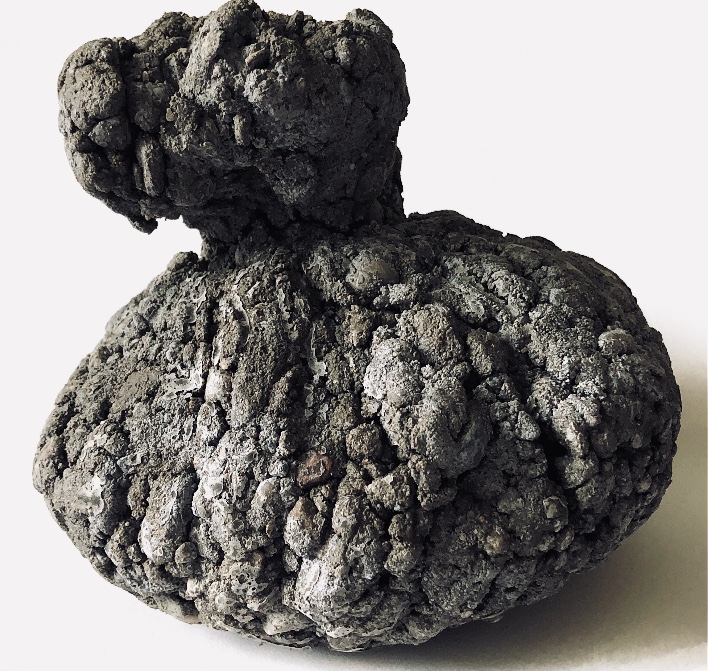
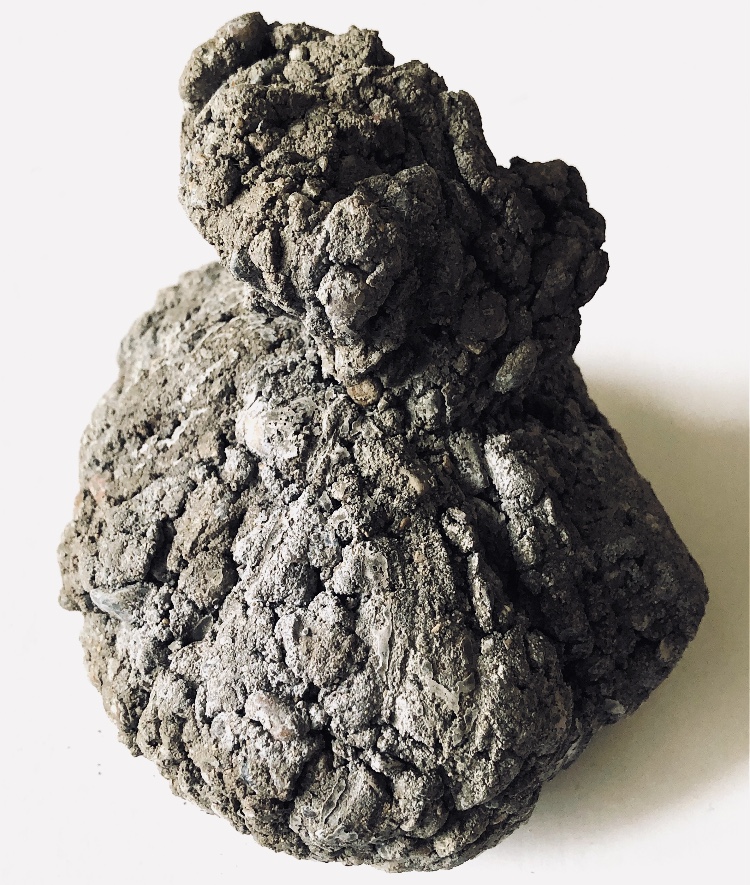
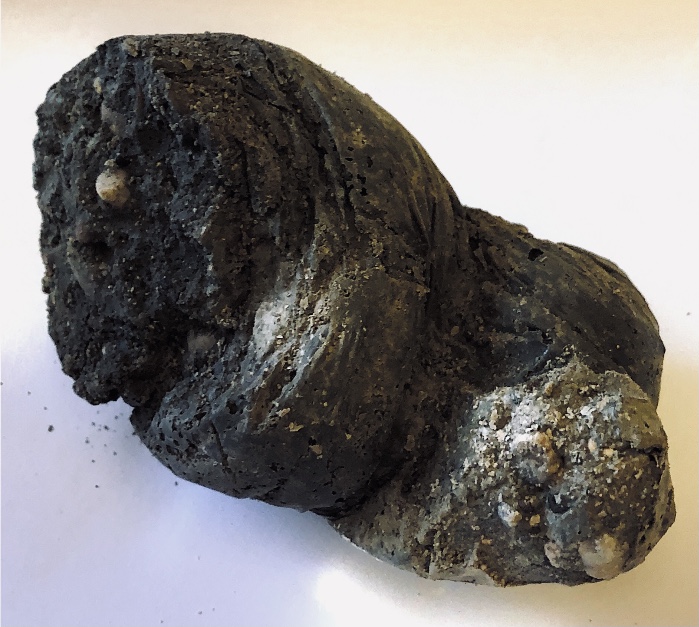
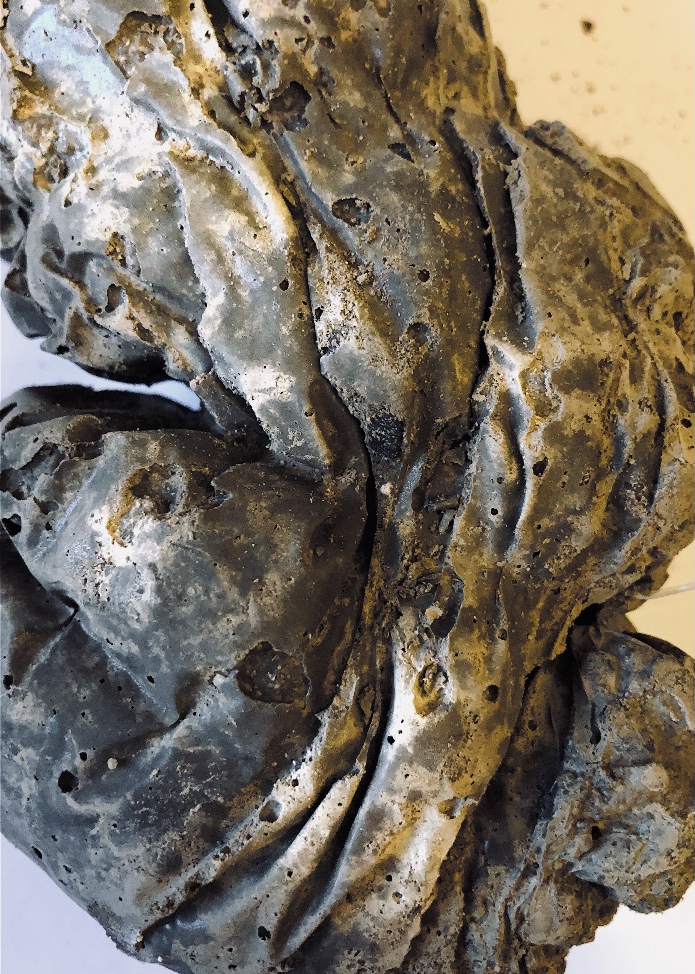
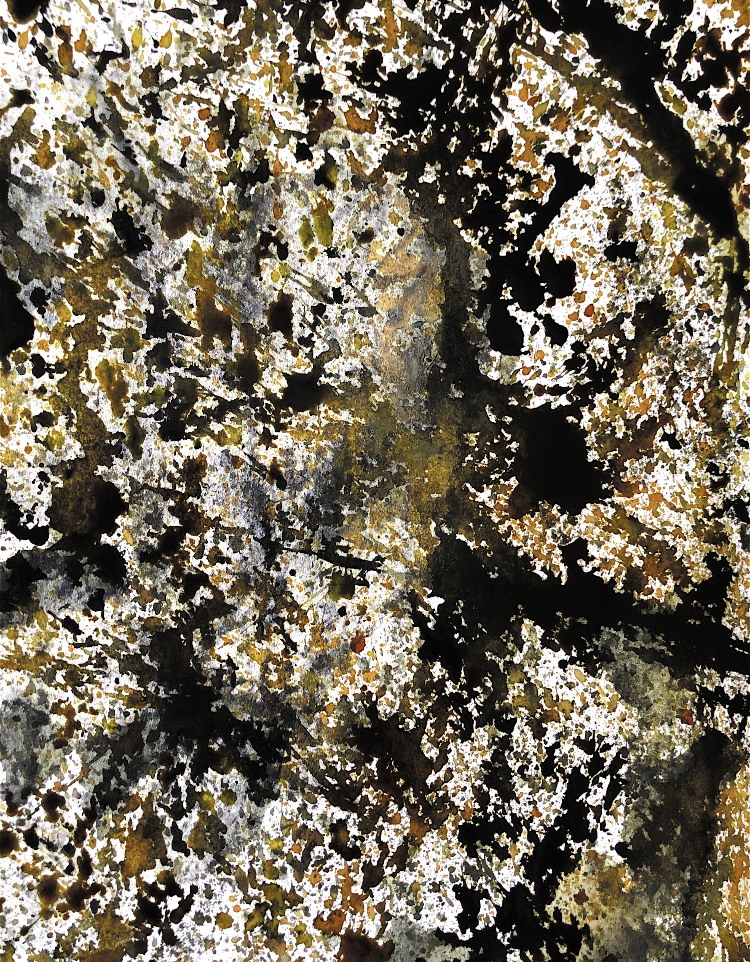
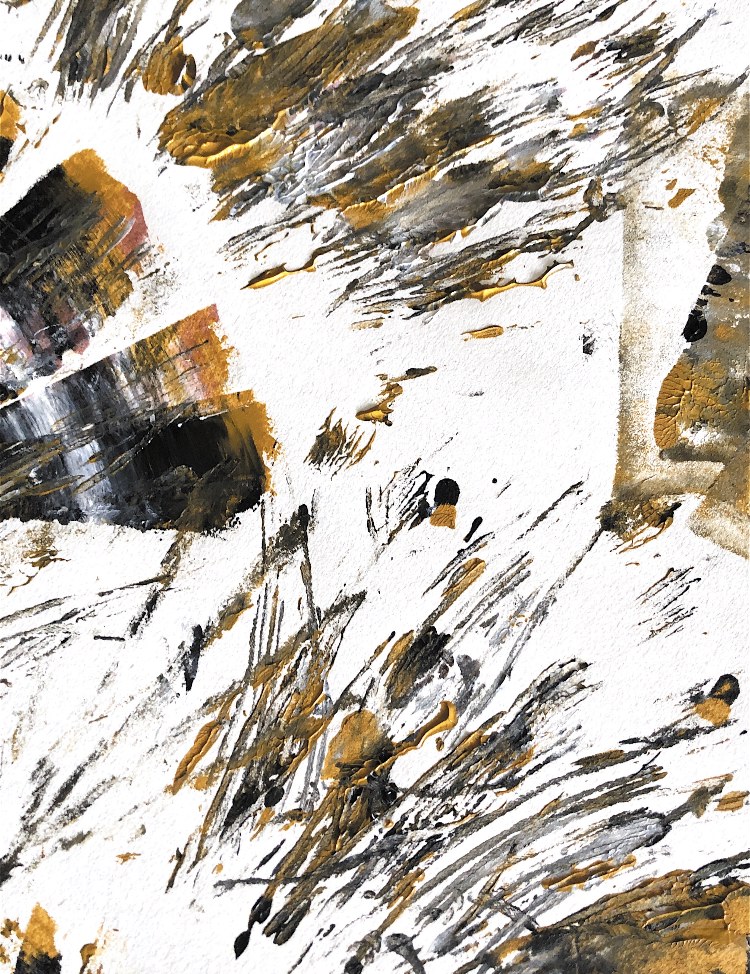
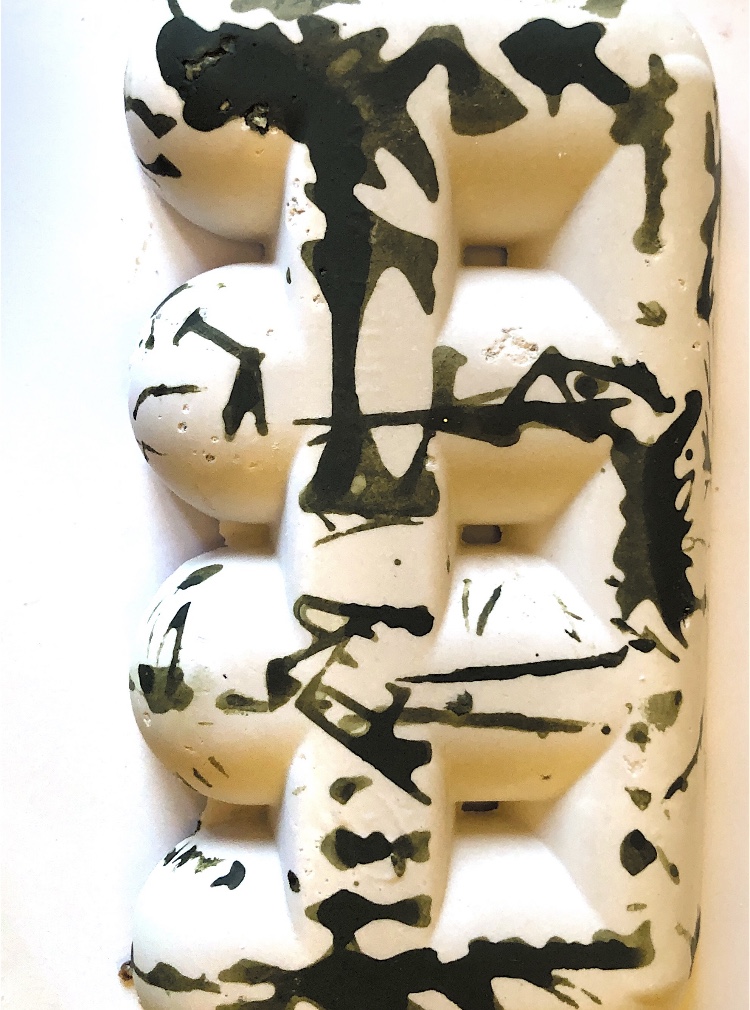
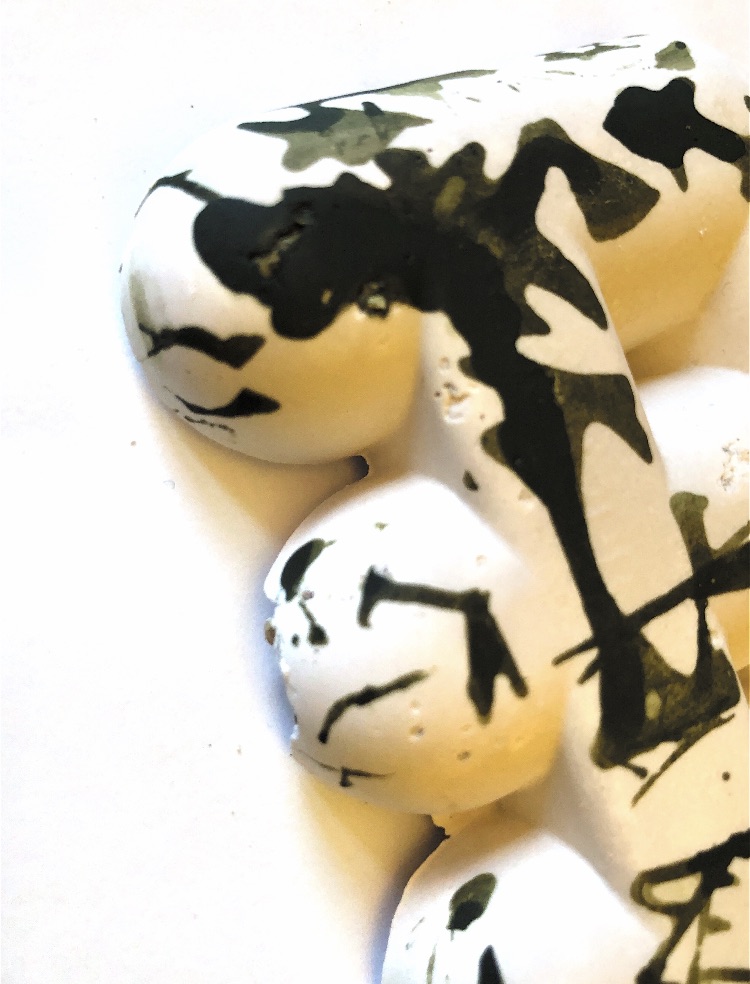
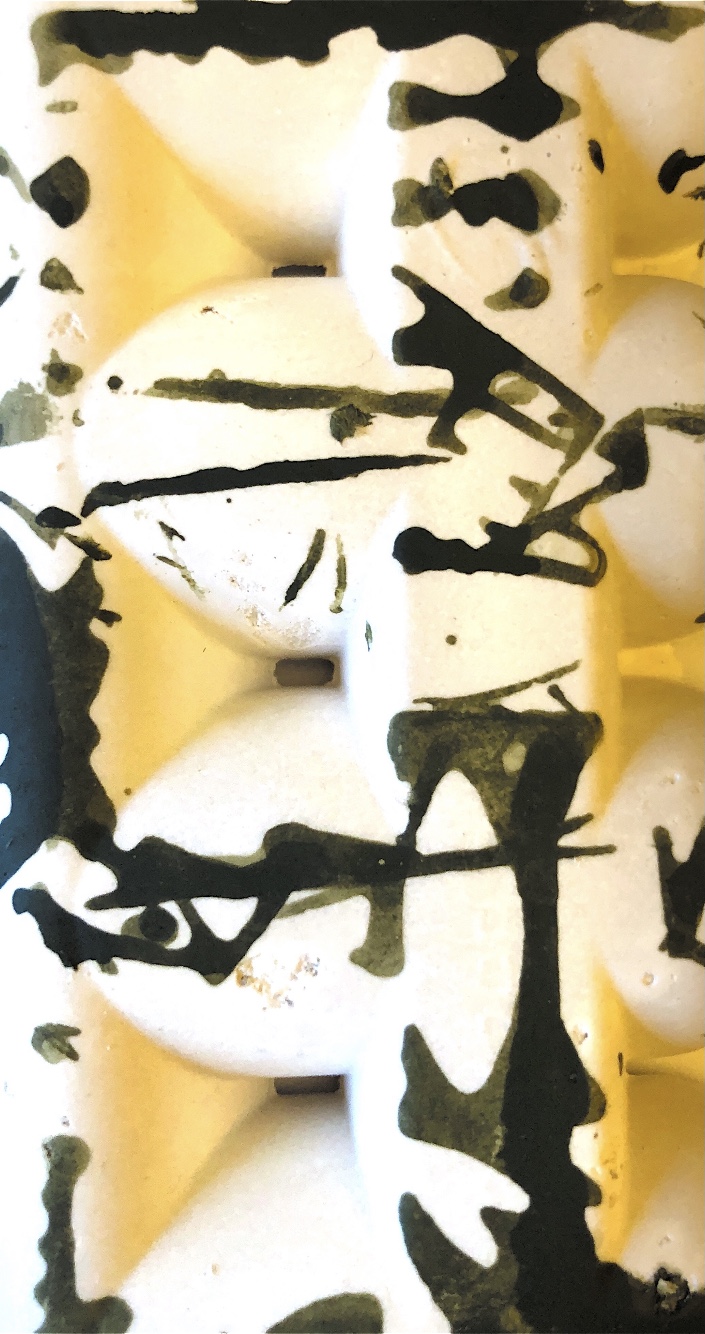
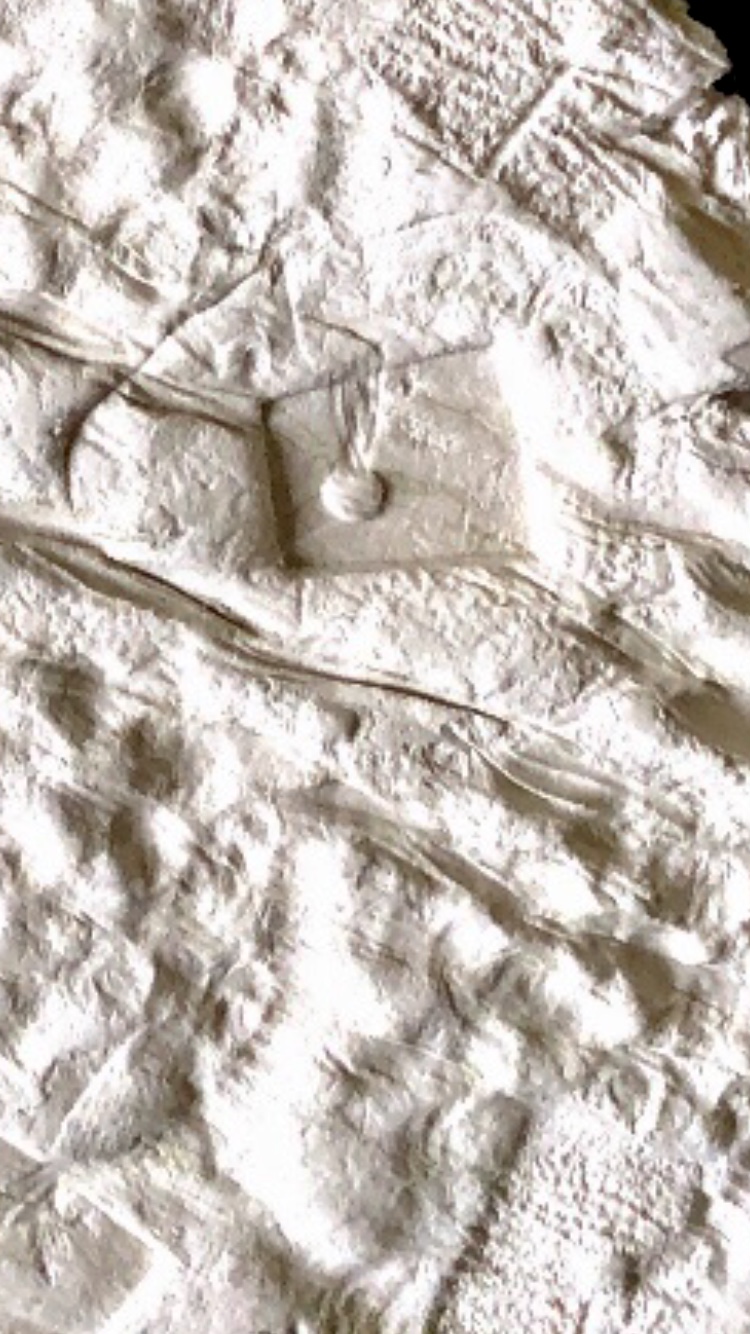
Fig 12. This sample was also cast in a plastic bag with a dryish mix. The bag was tightly wound around the neck and then bound to create tucks folds and gathers. The resulting bag-like form is a really lovely shape and is reminiscent of an ancient purse or money bag. Splatter painting worked really well to explore the textured surface of this sample.

I was intrigued by the idea of an old purse and decided to add beads to the fissures as if small remnants of ancient decoration remained.

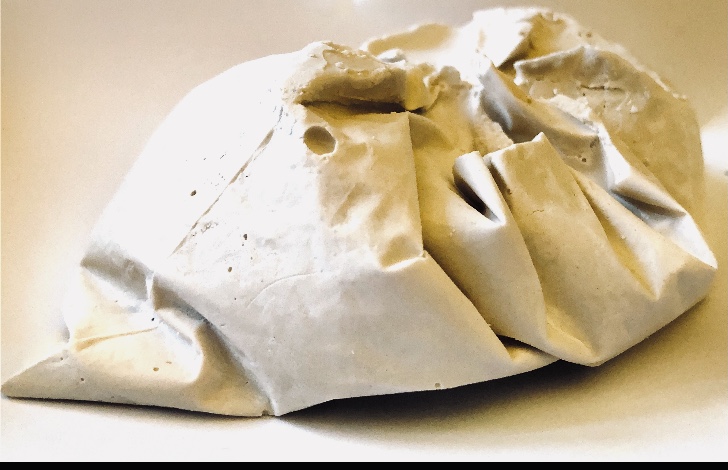
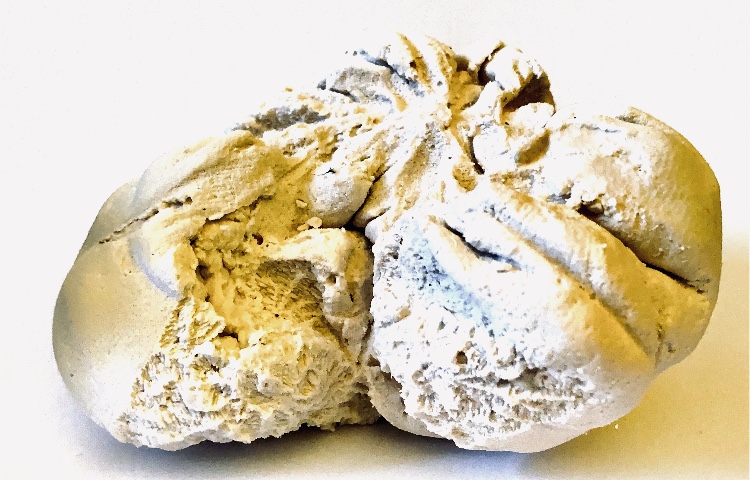
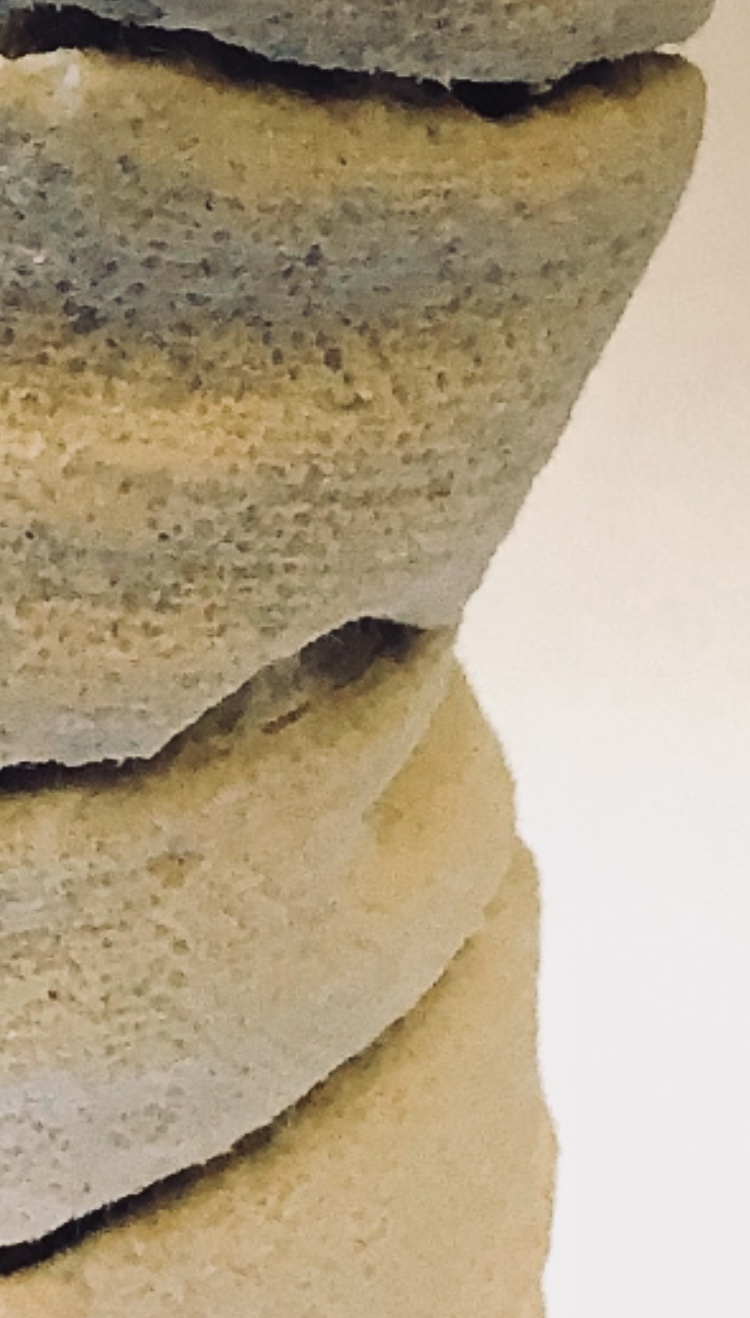
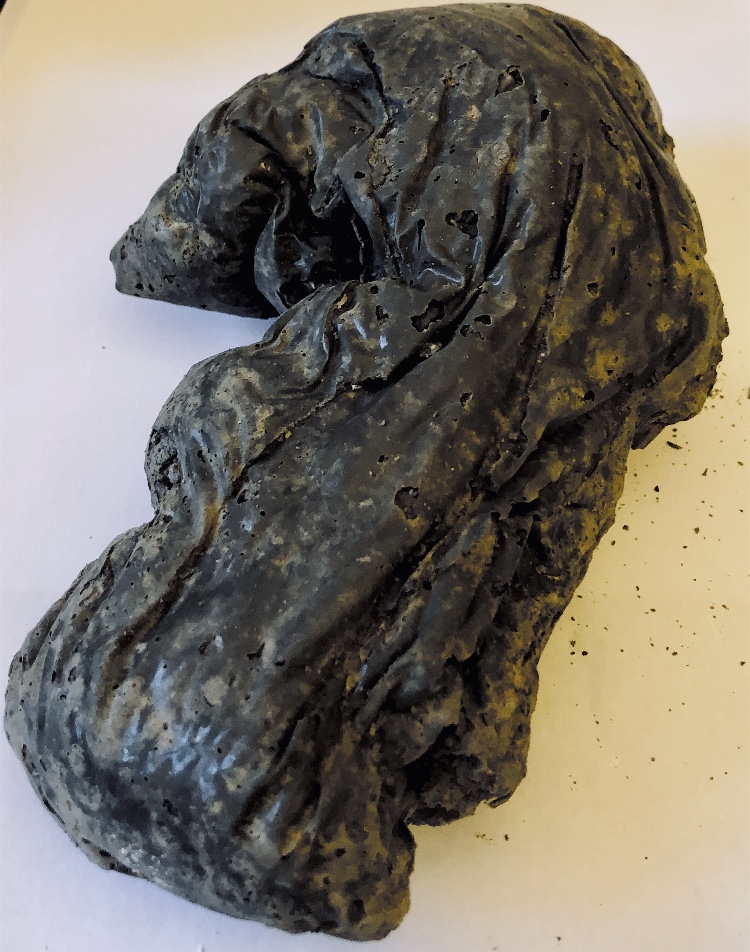
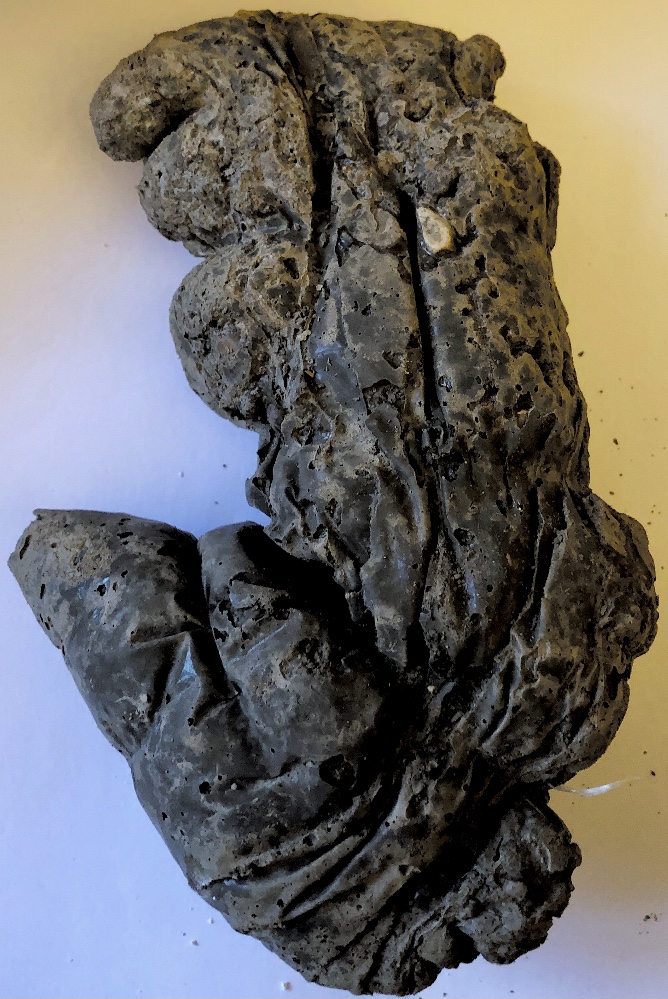
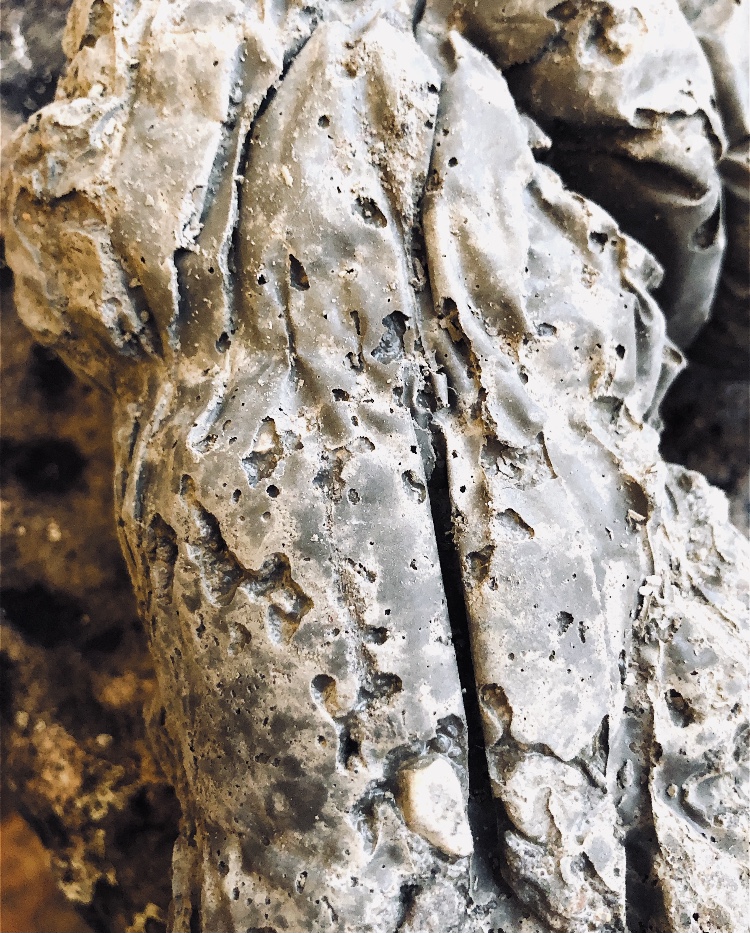
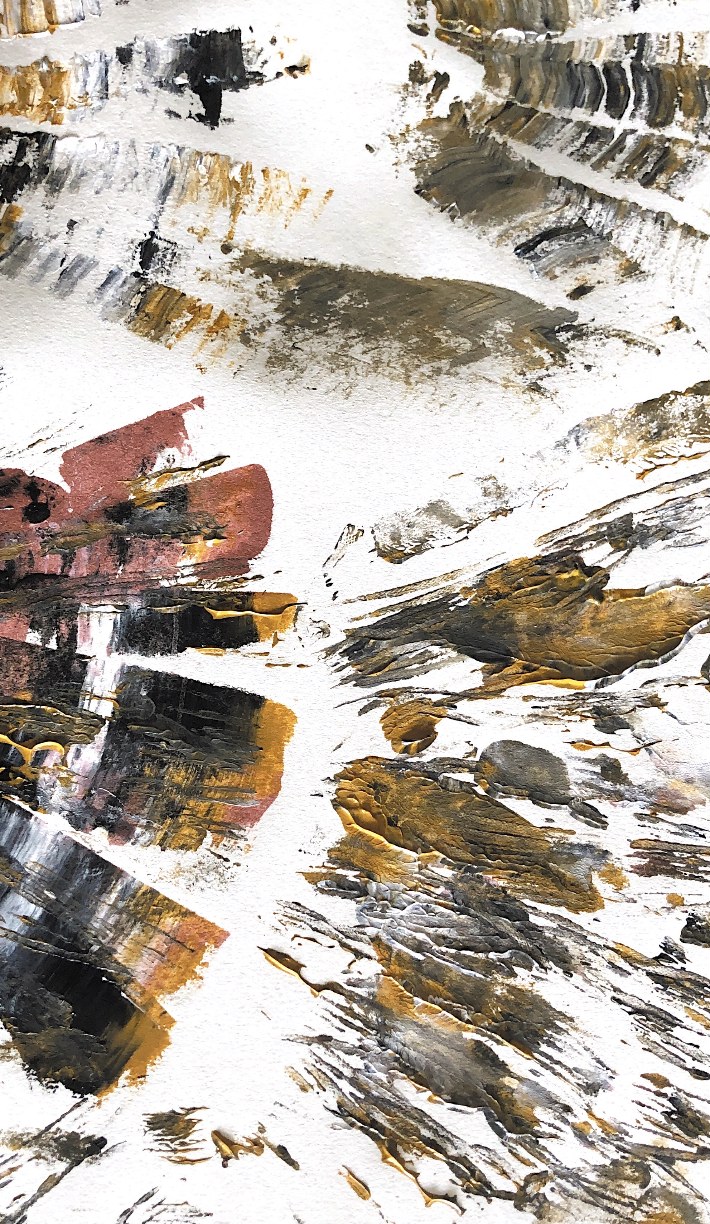
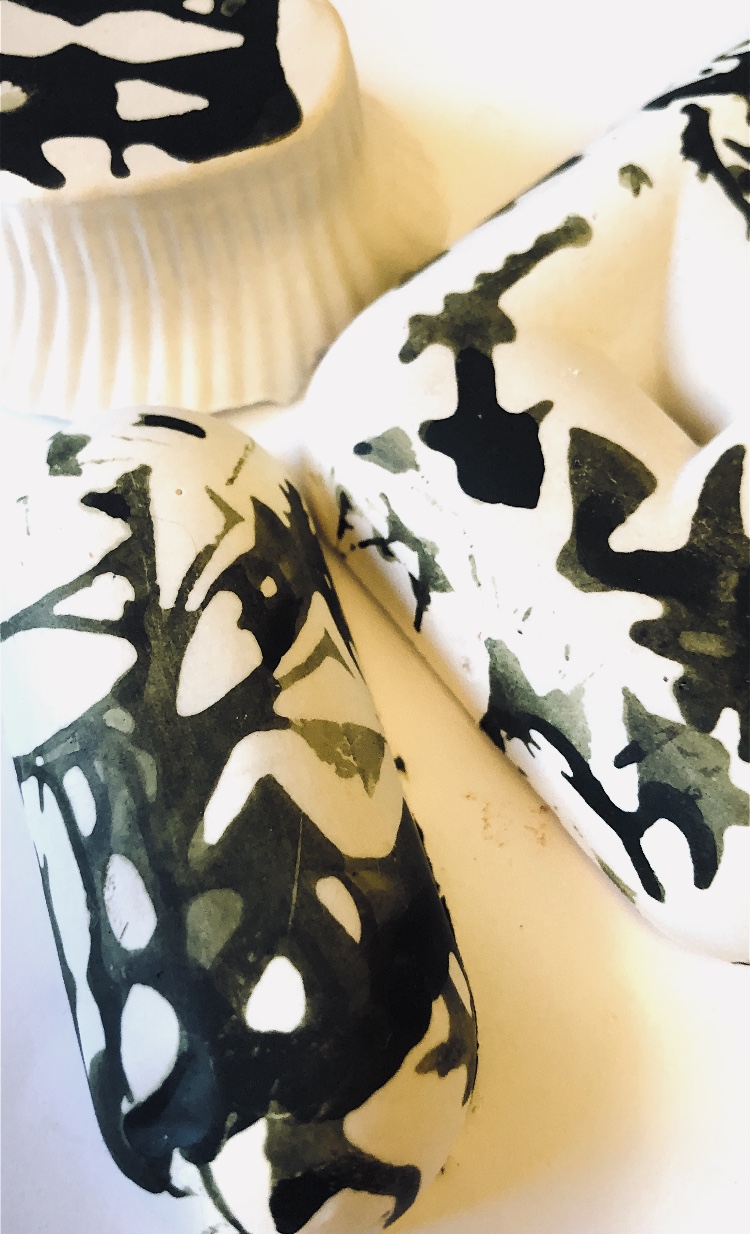
Fig 13. For this sample I added a bit more water to the concrete mix and ended up with a much smoother sample. I cast in a plastic bag and twisted and bent it to make an organic looking sample. This method made a sample with so much movement in beautiful twists and turns in its surface, and fantastic colours where these catch the light. In certain lights the colours look metallic, and I loved painting these patterns with crayon and inks. Crayon rubbings created lots of texture.

As the concrete dried (which took longer than I anticipated) it lightened in colour, and appeared more stone like. The smaller air bubbles became more apparent and the sample looked really different. I think I prefer the darker version as this colouring complements such a heavy, strong piece.

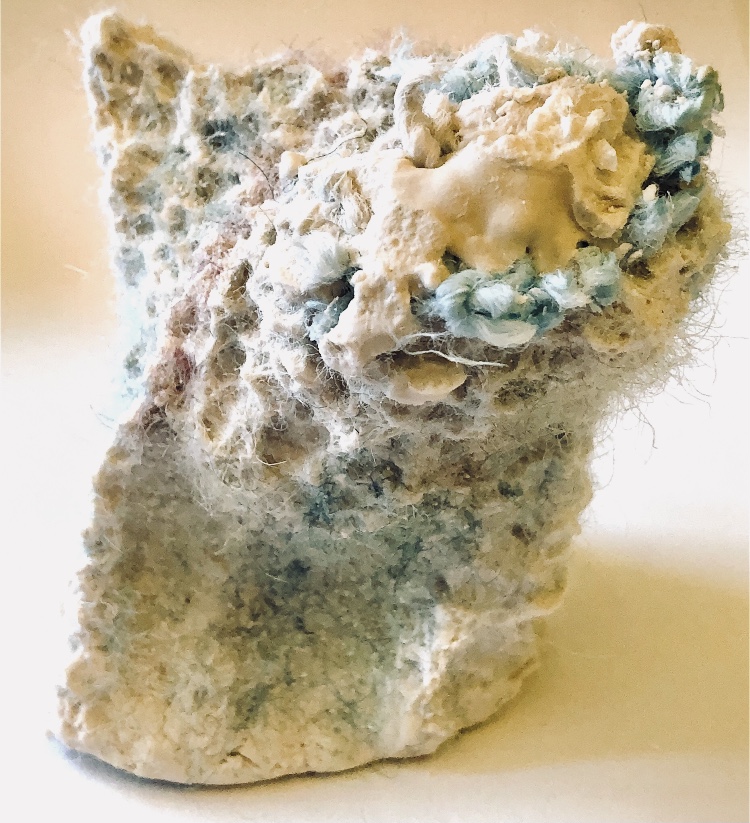
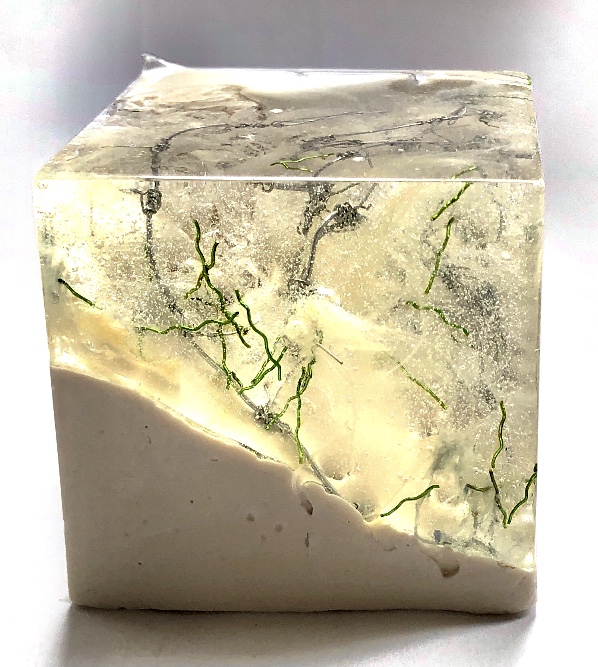
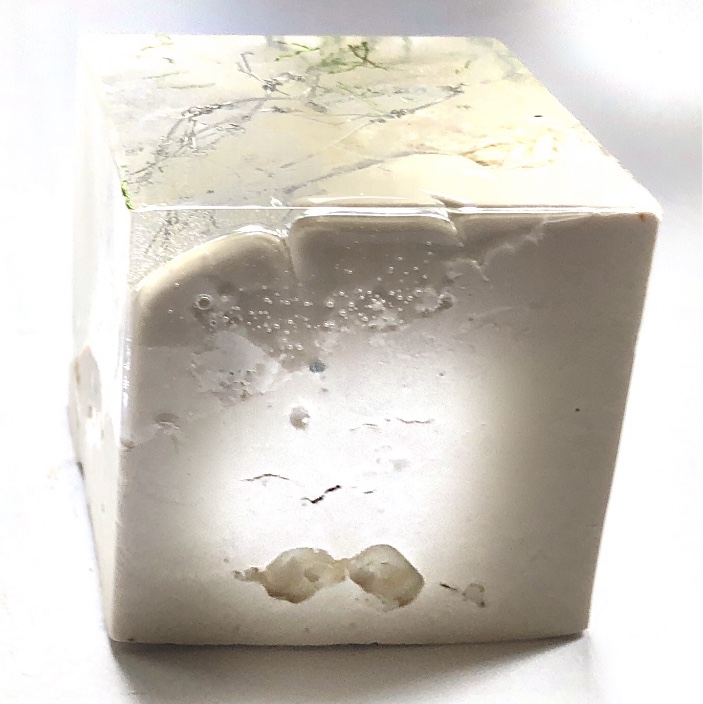
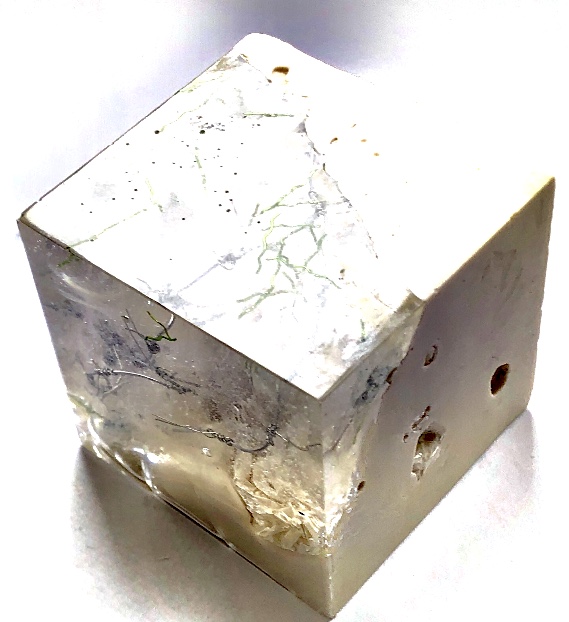
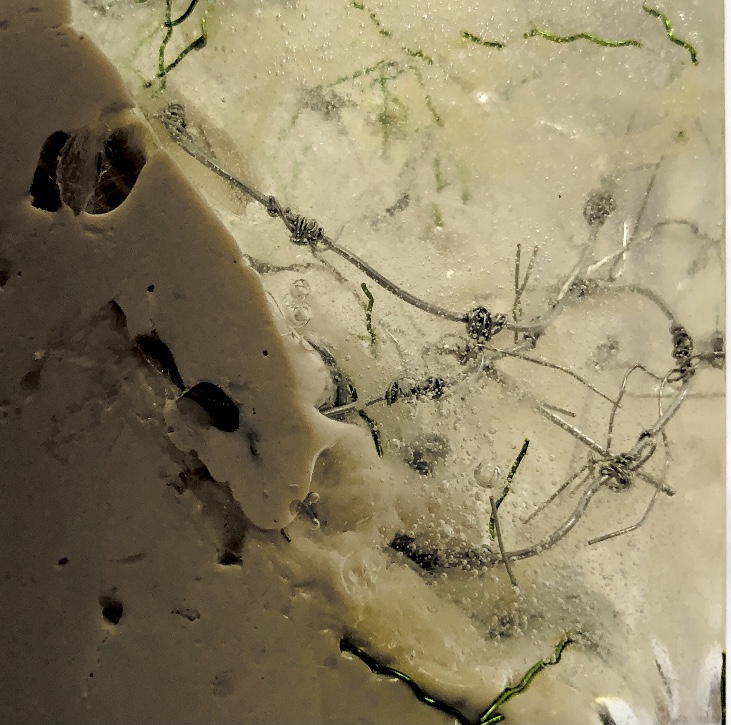
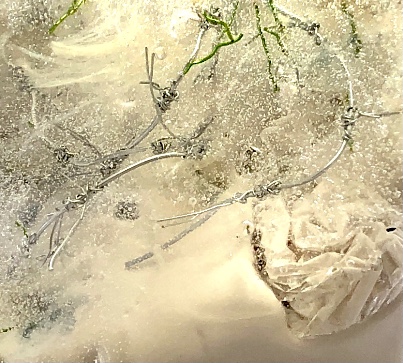
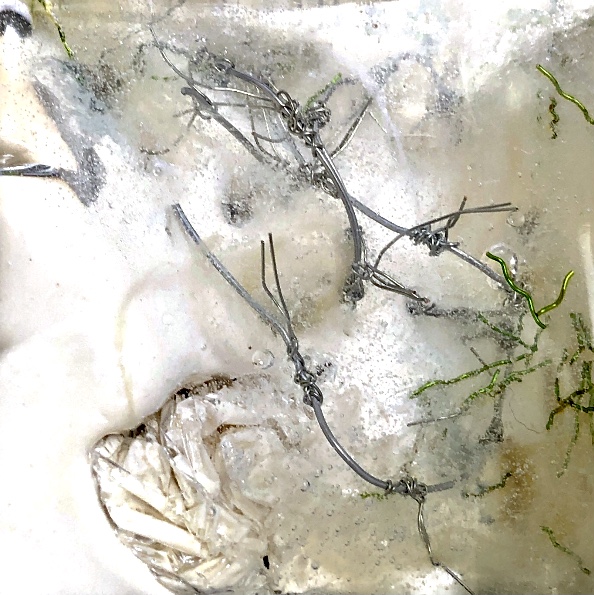
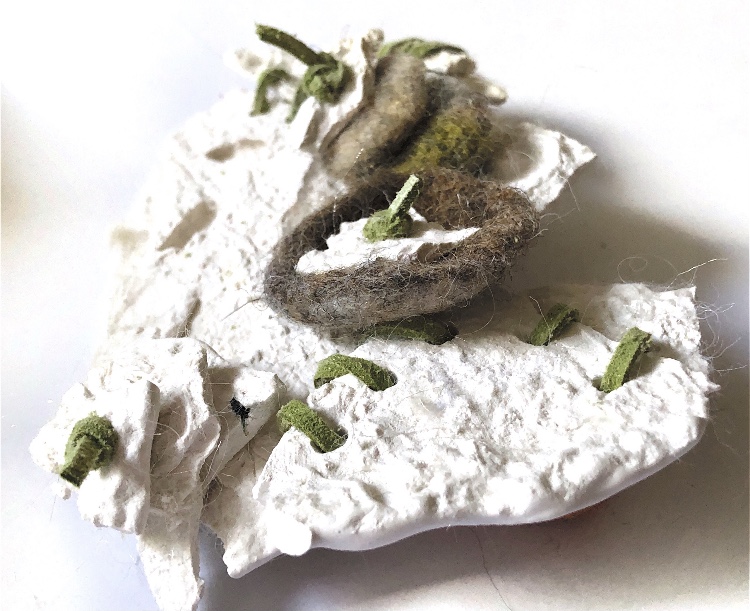
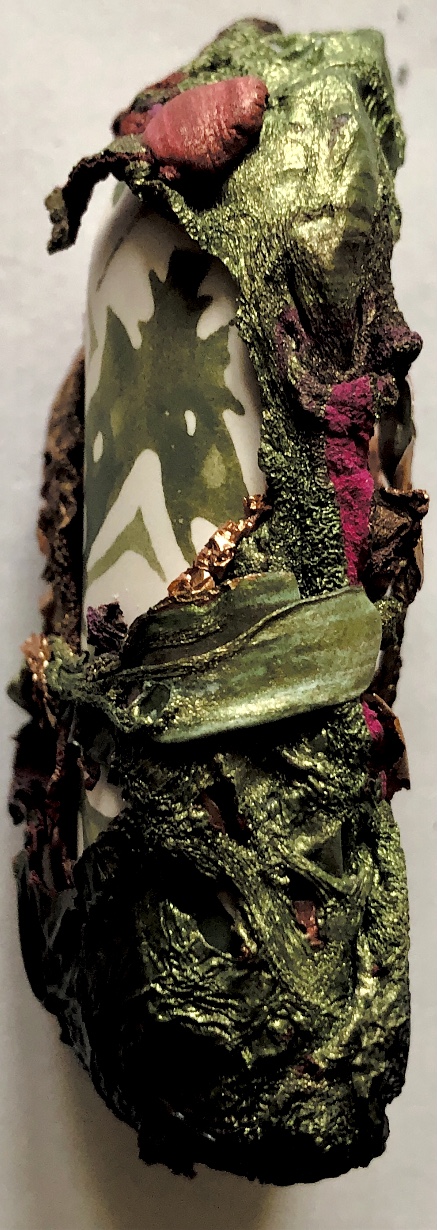
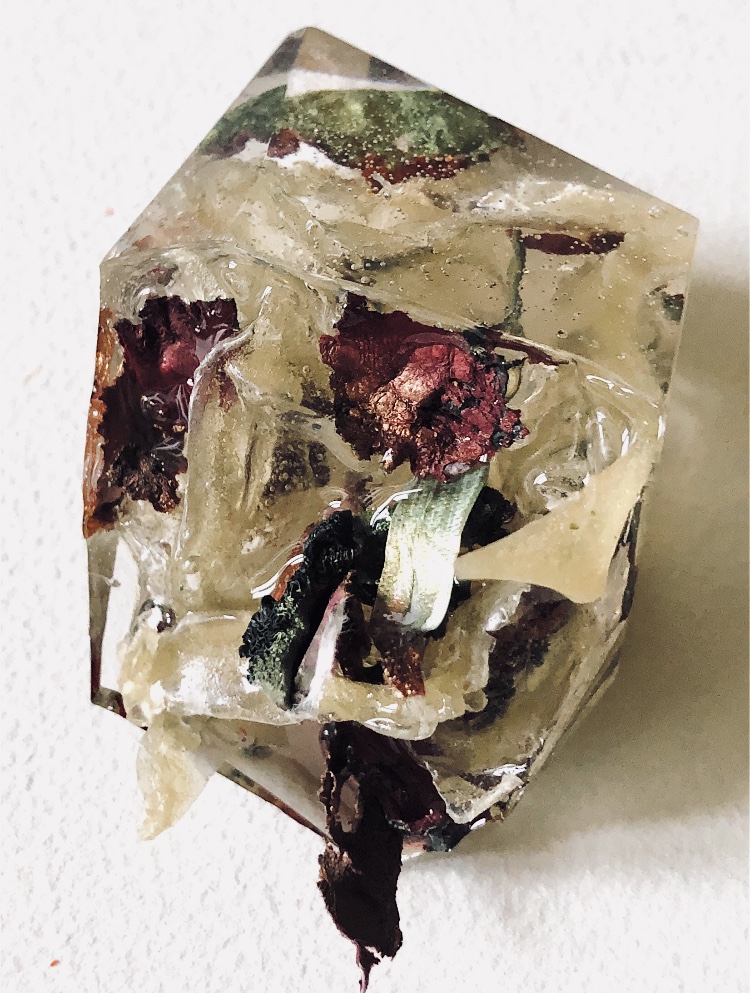
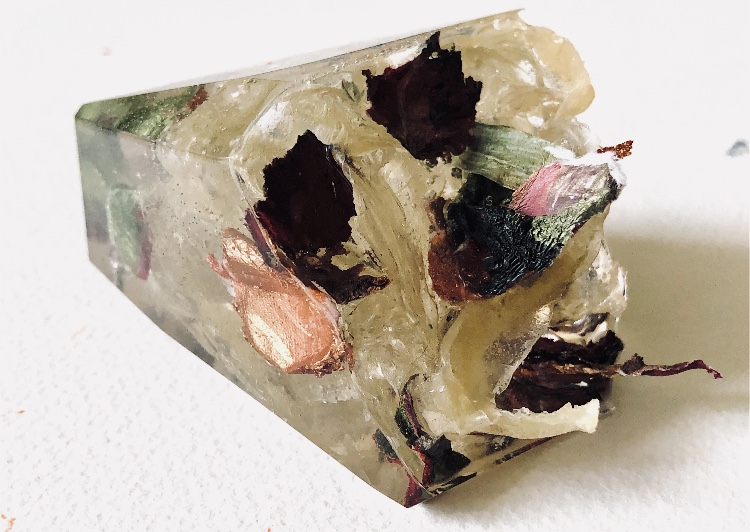
Fig 14. While sorting through my samples I decided to make one more piece combining resin, latex and plaster. I was inspired partly by the work of Ben Young who makes sculptures with glass, metal and concrete. I researched his work at the start of this module. His pieces quite often combine a geometric shape – usually translucent glass representing the sea, with something organic – the concrete representing a geological feature such as mountains. The glass is usually blue and the colour of the concrete is left natural.

For my sample I added in snippets of green wire, barbed wire that I made, fine wool and cotton fibres and some scrunched up cling film together with a piece of a latex sample. I tipped the mold to allow the resin to set at an angle before adding the plaster.

One thing that struck me when I first held this piece was the difference in temperature between the resin and the plaster. The plaster is much colder. The plaster also creates a sort of surface for the resin to sit on, like the bottom of the sea. The latex has got lost a bit in the poured plaster so this is something I need to consider next time.

This sample beautifully reflects light.

I was a bit unsure about drawing this sample but had a go using gouache, gesso and latex with added bits of wire, beads and paper.

So these are the samples that I feel have taken me on new journeys and have lots of inspiration for future projects.

Textiles 1 Mixed Media for Textiles Part 3 Molding and casting Project 2 Casting the internal shape of a vessel

Plaster

Using plaster enabled me to use a range of surfaces which are fine and intricate as the plaster picks these up when cast. I made some small bags from different fabrics to hold some of the casts, adding pleats and gathers to manipulate some of them.

Fig 1. For this sample I used a plastic food bag, gathered tightly at the top and laid on a pile of buttons to dry. Although the indent of the buttons can be seen, the bag stopped any fine detail showing. The folds however are intriguing, creating shadows in the hidden places. This sample is very smooth due to the shiny plastic it was cast in.

Fig 2. I made a small container from some woven furnishing fabric. As the top wasn’t sealed I had to hold it in place until it had dried sufficiently not to leak – bit messy! I also embedded decorative beads on the open surface. The texture of the fabric and the sewn seams have been captured perfectly and contrast with the flat surface embedded with patterned beads. The rough edges of the fabric are uneven, and this is a very tactile sample.

Fig 3. For this sample I made a small container from a piece of knitted and felted material (originally a scarf I had made). Some of the stitches had biggish holes and the plaster did leak a bit from the bottom but this soon stopped. It was quite difficult to remove the plaster from the knitting and it retains a lot of fibres and even a few stitches. I like the fibres as they add a soft quality to the hard plaster and also some colour. The stitches can be clearly seen in the sample which gives lots of interest and pattern to the organic looking shape.

Fig 4. For this sample I cut up an old blouse with an embroidered motif, and pleated and gathered it to make a bag. Once the plaster was poured I tied and manipulated the sample – from the photos one can see that this sample looks very different when seen from different angles. The embroidered motif can be clearly seen but has been distorted by the tying.

Fig 5. I made a different shaped bag from an old pair of linen trousers and added some tucks which were on the inside of the container. This sample stands up nicely like a full sack just slightly bending to one side. The tucks can clearly be seen and they help delineate the bend in the piece. The seams from the bag are clear, and a piece of cotton from the stitching became embedded in the plaster and remains in the sample.

Sketchbook work

Watercolour paintings with pen detail, using salt and cling film to add texture.

I really enjoy working with plaster as it can pick up the tiniest detail and can be poured into a variety of shapes. It feels good to hold and takes colour well.

Textiles 1 mixed media for textiles Part 3 Molding and casting Project 2 Casting the internal space of a vessel

Concrete

The concrete I got for this exercise was very coarse and was obviously not going to pick up subtle shapes, so I went for plastic bags tied in different ways and quite large samples.

Fig 1. This piece I tied around the top of the bag to make a purse or money bag shape, gathered around the top. The creases and folds produced by tying the bag are visible and the neck of the piece where the string was wrapped around and around, is clearly defined. There is a lot of texture reminiscent of ancient embellishment. I laid the sample on a flat surface to dry and this adds to the feeling of a bag full of money or heavy jewellery.

Fig 2. The next few pieces were also cast in plastic bags which were twisted and bent as well as tied with string. I decided not to try to make other impressions but to rely on the impressions of the twisted bags and the string. Some of the mix was a bit wetter in some samples and a smooth shiny surface has resulted with clear lines and twists creating organic patterns. Samples made with the drier mix are rougher to touch and to look at but still clearly show the tying lines.

Crayon and ink drawing

Having done a quick sketch with crayon and ink for a couple of samples I decided to have another go. This drawing is done with different coloured crayons with an ink wash over the top. To get some texture I laid a homemade textured glue stencil under the paper and did a crayon rubbing before inking.

Close up photos of the samples show the air bubbles and twisted patterns more clearly.

These drawings were inspired by the texture of the concrete and were made by splattering ink from a brush onto the paper And everything else within a 1 metre radius)!

The colour of the samples is getting lighter as it dries out which is more attractive.

The texture of the folds, bubbles and rough and smooth surfaces are what I have found most inspiring in these samples.

Think I’m getting braver with my drawing!

Textiles 1 Mixed media for textiles Part 3 Molding and casting Project 1 Molding from a surface Resin

Epoxy resin

This is not a cheap material but I remember as a child having a ‘Plasticraft’ set to make items from a clear resin to which you could add small objects to be held within the cast. I wanted to have another go!

I wanted to incorporate objects and ideas from my previous sampling (plaster, felt pebble and plaster stacks, plaster shapes, latex shapes, silk fibres).

It was a long wait (24 hours) before I could remove the samples from the mold and hold them in my hands to view from all angles. They are satisfyingly smooth and heavy, but I deliberately left one side with protruding objects for a contrast. There are bubbles in the resin but I rather like the idea that the objects have been submerged and captured in a moment in time with bubbles rising from this action. It feels natural.

Fig 1. Pyramid mold. For this sample I was inspired by the pictures and samples of barbed wire with fibres caught on the barbs. I used wire and jewellery findings together with silk fibres and wax crayon melted and shaved to give colour. Every facet gives a different view. The orange colour works well as a contrast to the wire.

Collaged papers painted as a response. Triangle cut out and wire added.

I experimented further by pouring resin onto one of my triangles to add more materials. It is difficult to see in the photos but this made a shiny raised coating which emphasised the colours and trapped materials beautifully.

With the leftover resin I poured another shape.

Fig 2. The square mold I filled with beads, plaster of paris shapes, green wax crayon (melted and shaved) fine strips of fabric and felt/plaster stacks tied with cord. I added in a plaster shape as a stand so that the cube stands at an angle off of the surface. This has a feel of the forest – underfoot. It it like a view underground of moss, pebbles. rocks and buried treasure, or maybe a rockpool – especially as the bubbles can be clearly seen in this sample.

Collage papers painted. Squares cut out – hand and machine stitched.

Fig 3. For this asymmetric mold I added pieces of heat treated and painted Tyvek and molded latex from a previous sample. There is a strong contrast between the translucent ethereal pieces of latex and the strong jewel like Tyvek pieces which catch the eye. There is movement in this sample where the latex bends and twists like a jellyfish or seaweed.

What an amazing material – making 3d objects that encourage the viewer to look at what is encased in a different way. It enables lots of materials to be put together in a microcosm. The materials are suspended in time and space. Light travels through the pieces and is also reflected by the facets and materials inside.,

There is also something special about how these samples feel to touch and hold. They are weighty, smooth, textured, angled, rounded, cool, sharp, and hard.

Lots of inspiration here for further sampling and stitched textile ideas. I also want to combine resin with other materials such as plaster and fabric, and to explore latex further.

Textiles 1 Mixed media for textiles Part 3 Molding and casting Project 1 Molding from a surface More sampling

Latex

Cast from shells, a glass lid, a foam sample and a sweet container. Paper was added to one sample and silk fibres to another.

This piece reminds me of seaweed.

In response to encouragement from my tutor, I tried mark making on a larger scale than I am used to. The paper is A2 size and I used acrylic paint and inks with a range of homemade implements.

Latex is such a flexible material and despite my initial reluctance I have enjoyed using it. I like the organic look of some of the pieces and they worked well as inspiration for mark making. I particularly like the piece with paper embedded as it adds colour and strength as well as pattern and strengthened lines. My samples are mostly quite fine and fragile but I prefer this to a thick layer.

Silk fibres

Silk fibres wetted with acrylic medium/watered down PVA glue were laid over plastic forms and left to dry.

The dried samples keep their shape well and are soft enough to stitch into and manipulate further. The colours are bright but the samples retain an ethereal quality especially around the edges.

Using an A2 piece of paper, homemade implements and acrylic paints I tried to capture the movement and colour in this sample.

This has been a good exercise in taking risks both with materials and drawing. I have pushed myself to get out of my comfort zone and have made lots of inspiring pieces.

Textiles 1 Mixed media for textiles Part 3 Molding and casting Project 1 Molding from a surface Sketchbook work

Following feedback from my tutor about expanding my drawing vocabulary and mark making, I decided to use monoprints to document some of my samples. I chose 3 colours to reflect the stonelike colours of my paper mache and plaster samples – black, white and yellow with a tiny bit of copper and green. Using a gelli-plate and various tools such as shells, erasers, pot pourri and corks I made a lot of prints. This was quick and fun with a bold result full of movement.

Fig 1. Prints inspired by plaster assemblage

Fig 2 Prints inspired by wrapped paper mache sample

Fig 3 Prints inspired by various surfaces and shapes from my samples and the joy of mark making!

I tore and cut shapes from the prints and used some to collage with. I find these really inspiring and exciting – lots of ideas for development and stitch.

Fig 4 Torn and cut shapes inspired by plaster assemblage

Fig 5 Collage inspired by ‘dry stone wall’ assemblage

Fig 6 Cut shapes and collage inspired by broken plaster shape with drilled holes

Fig 7 Torn shapes, weaving and collage inspired by wrapped paper mache.

Fig 8 Further collage ideas

I am very pleased with the shapes, patterns and colour palette of these ‘drawings’. There is a lot here that offers ideas for stitch and applique, but also a lot of ideas to take forward in 3D using the molded materials.

Textiles 1 Mixed Media for Textiles Part 3 Molding and Casting Project 1 Molding from a surface

Before moving on with another material I did a little bit of research into assemblage art and sculpture. I looked at the diverse work of artists such as textile artist Jean Draper who makes small forms to be joined together into larger pieces, Louise Nevelson who makes wooden assemblage pieces, and Rob Plattel who works with natural materials such as driftwood and plants. Although each artist works in a very different way, they all use small shapes which are beautiful in their own right, to make larger patterns and forms with maximum impact and a great deal of detail.

Fig 1 Draper, J. (Date unknown) Emerging Detail Free standing or wall piece depicting new growth. Hand-wrapped points made from fabric and hemp, hand-made paper and clay At://www.textileartist.org/jean-draper-interview-hand-stitched-landscapes/ (accessed 30/12/2020)
Fig 2 Nevelson, L. (1959) Case with Five Balusters, from Dawn’s Wedding Feast,
wood, paint, 27 5/8 x 63 5/8 x 9 inches.
Collection Walker Art Center, Minneapolis.
At ://sites.google.com/site/dgvartteacheryr7/focus-artist-louise-nevelson (Accessed 30/12/2020)
Fig 3 Plattel, R. (Date unknown) Zonnekroon (silphium perforatum – a herbaceous perennial plant) At:http://www.naturalart.nl/portfolio/

Stonecast powder (plaster of Paris)

After Christmas I ended up with lots of plastic sweet trays so these became the perfect mold for my experiments with this material. No mold release was necessary and apart from needing to pour quickly once the powder was mixed with water it was very easy to use. Very fine detail is picked up in this process. A little bit of colour was also picked up from the oil residue in the marzipan tray. With one of the samples I embedded a piece of pot pourri and it makes a piece that looks like a snail or shell with a creature peeking out below. I really enjoyed assembling the individual pieces, stacking and arranging them in different ways to make mini sculptures. I was inspired by the work of Louise Nevelson in these samples as in Fig 2 above.

I introduced some more small pieces of pot pourri in one of the larger samples but they mostly got lost apart from the rough hole in the first piece below.

Seen from the reverse side the added bits are visible – I think they floated in the mixture!

Adding wrapping to some of the samples adds colour. I particularly like the small sample with a stitched covering on half of it (below right). It has the look of a talisman, and the smooth stone like shape of the plaster contrasts nicely with the rough texture of the stitched felt and cotton. The work of Jean Draper in Fig 1 above uses lots of thread and wrapping in muted colours which inspired my colour choices here.

More samples arranged in piles again inspired by Louise Nevelson.

With a wooden stamp and a dark green inktense block I added pattern and colour to some of the samples. This was not easy on curved shapes with a wooden block, but this added to the element of surprise and I really like the results.

Next I tried using textiles as molds. The first two samples were made by pouring the mixture into small fabric soap bags. The fabric stuck to the plaster a bit and the resulting samples retain the texture and some of the fibres. There is a marked contrast between the surfaces that were against the textile and the smooth untouched top poured surface. These samples look a lot more natural, the second one I think looks like a seashore find.

This next piece was made by pouring the mixture onto a piece of embroidered and embellished felt. It has picked up some of the coloured fibres, and after a wash the felt is good as new!

For the following piece I poured onto a stitched and collaged small sample. When I tried to remove it, the sample it broke in half (I may have been a tad impatient) but this gave me a chance to join it back together by drilling holes into the sample and stitching with cotton hand dyed thread and small beads. I like the contrast of the textured, stone like, natural sample, with the stitching and the shiny beads.

While out walking I have been looking at dry stone walls – they are everywhere around here. This led me to balance and layer some of the flatter samples. This is definitely an idea to explore further.

I have really enjoyed working with this material – it is quick and versatile, easy to drill holes into and picks up incredibly fine detail. I am starting to be inspired by 3D objects that can be handled, and feel I am becoming more experimental in my work.

Textiles 1 Mixed media for textiles Part 3 Molding and casting Project 1 Molding from a surface

Papier-Mache pulp

For these samples I purchased some lightweight pulp that just needed to be mixed with water. One thing I discovered is that in a cool winter environment this takes forever to dry so I ended up putting it into an oven, which worked well.

I didn’t use anything as a mold release but the pulp released itself nicely once it was partly dry. It was hard to pick up fine lines and indents with this material. Once dry it has a small amount of flexibility and retains a lot of texture.

Using a paint palette as a form meant that the paper picked up some of the colour which added to the visual effect. The smooth domes contrast with the rough texture and edges of the shape. I really like this piece – I could add in specific colours another time, but maybe this would spoil the random effect? On a larger piece the colours could form a pattern.

Using a reel of wire produced a bangle like sample. It holds its shape but has a little bit of flexibility. The lines of the wire are just visible if you look closely on the inside edge. I have also discovered that I can push a needle through this sample which gives scope for stitching and joining as well as wrapping.

Using a wooden stamp to impress a moulded piece of paper mache made a piece that reminds me of broken bits of Roman buildings seen on my travels – the pictures below were taken in Zadar, Croatia, just lying on the grass.

A plastic food container produced deeper ridges which cast shadows on the sample making good contrast in tone. I like the simple arrangement of two of the samples in the photo below, with the straight and curved edges, deep and shallow indents and the viewpoint looking into one piece and at the edge of the other..

I decided to add some stitching and wrapping to these samples and did some research on talismans and amulets as the shapes of the samples reminded me of the small items you would want to hold, wear or keep in your pocket to feel and touch; and to protect you and bring you good luck.

For the first sample I wrapped and wove with hand spun silk (spun by me) and cotton cord; the texture of the yarns contrasting with the smooth domes of the sample. The yarns form a cross which could also be seen as a religious/spiritual symbol. The back of this piece is also interesting.

The next sample I stitched with wire and used the silk to wrap. Once again a cross has been formed. This piece reminds me of a bracelet and I like the way that the rough texture of the paper mache makes it look old and worn.

For the third sample I added lace and some stitching to emphasise the ridges using cotton cord. I added a little bit of colour and texture on one edge with the silk yarn.

I have enjoyed working with the paper mache and like the way it can be stitched into. It doesn’t pick up fine detail but has a crumbly rough surface resembling old stone. I’m wondering if I can use it again in conjunction with other materials. The only thing I am worried about is how stable and strong it is.

Textiles 1 Mixed media for textiles Part 3 Molding and casting Project 1 Molding from a surface

Air drying modelling clay

I thought I would start with a material that I have used before to start with. Air drying modelling clay comes in a range of colours, – I already had some in white. This clay stores well as long as it is well wrapped up, it is easy to use and safe.

I wanted to use some bits of stitching, a surface from my home and odds and ends from my craft room.

For the first group of samples I used the brick walls in my studio to cast my clay, and also played around with beads and scissors. Pressure makes a great difference to the surface texture – heavy pressure caused some of the beads to make holes in the clay. I left the rough edges of clay on the samples. Some edges cracked as they dried but this didn’t matter for these initial samples. A close up photo of the brick cast shows the tiny details captured in the clay.

For the next lot of samples I used some old stitched pieces, discarded in a box. The clay picked up every tiny stitch as can be seen in the close up photos. It also picked up a bit of colour on one piece.

Air drying clay is easy to work with and responds well to a variety of casting surfaces. Here I have added some colour and embellishment to some of the samples to experiment more.