Sorting
I have approached the sorting stage by going through the ten exercises I selected, and choosing the samples that I feel are the most interesting either as they are or that have potential. Some I have drawn, some images have been manipulated in a photography application, and some I have used to inspire prints.
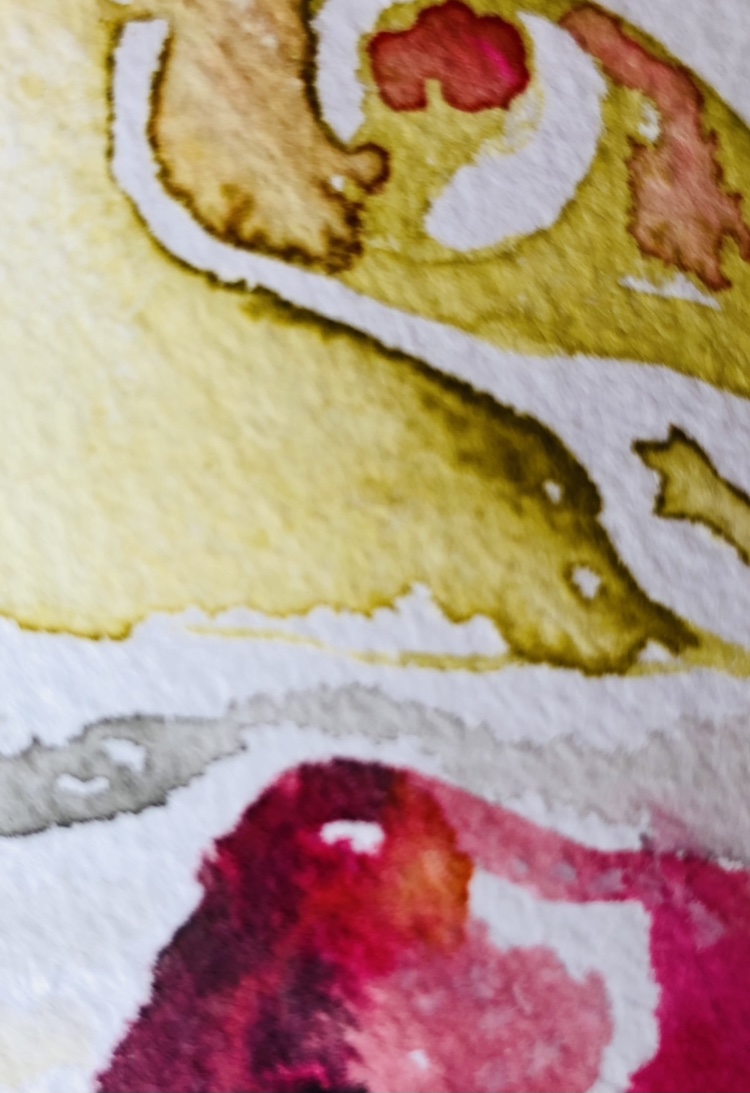
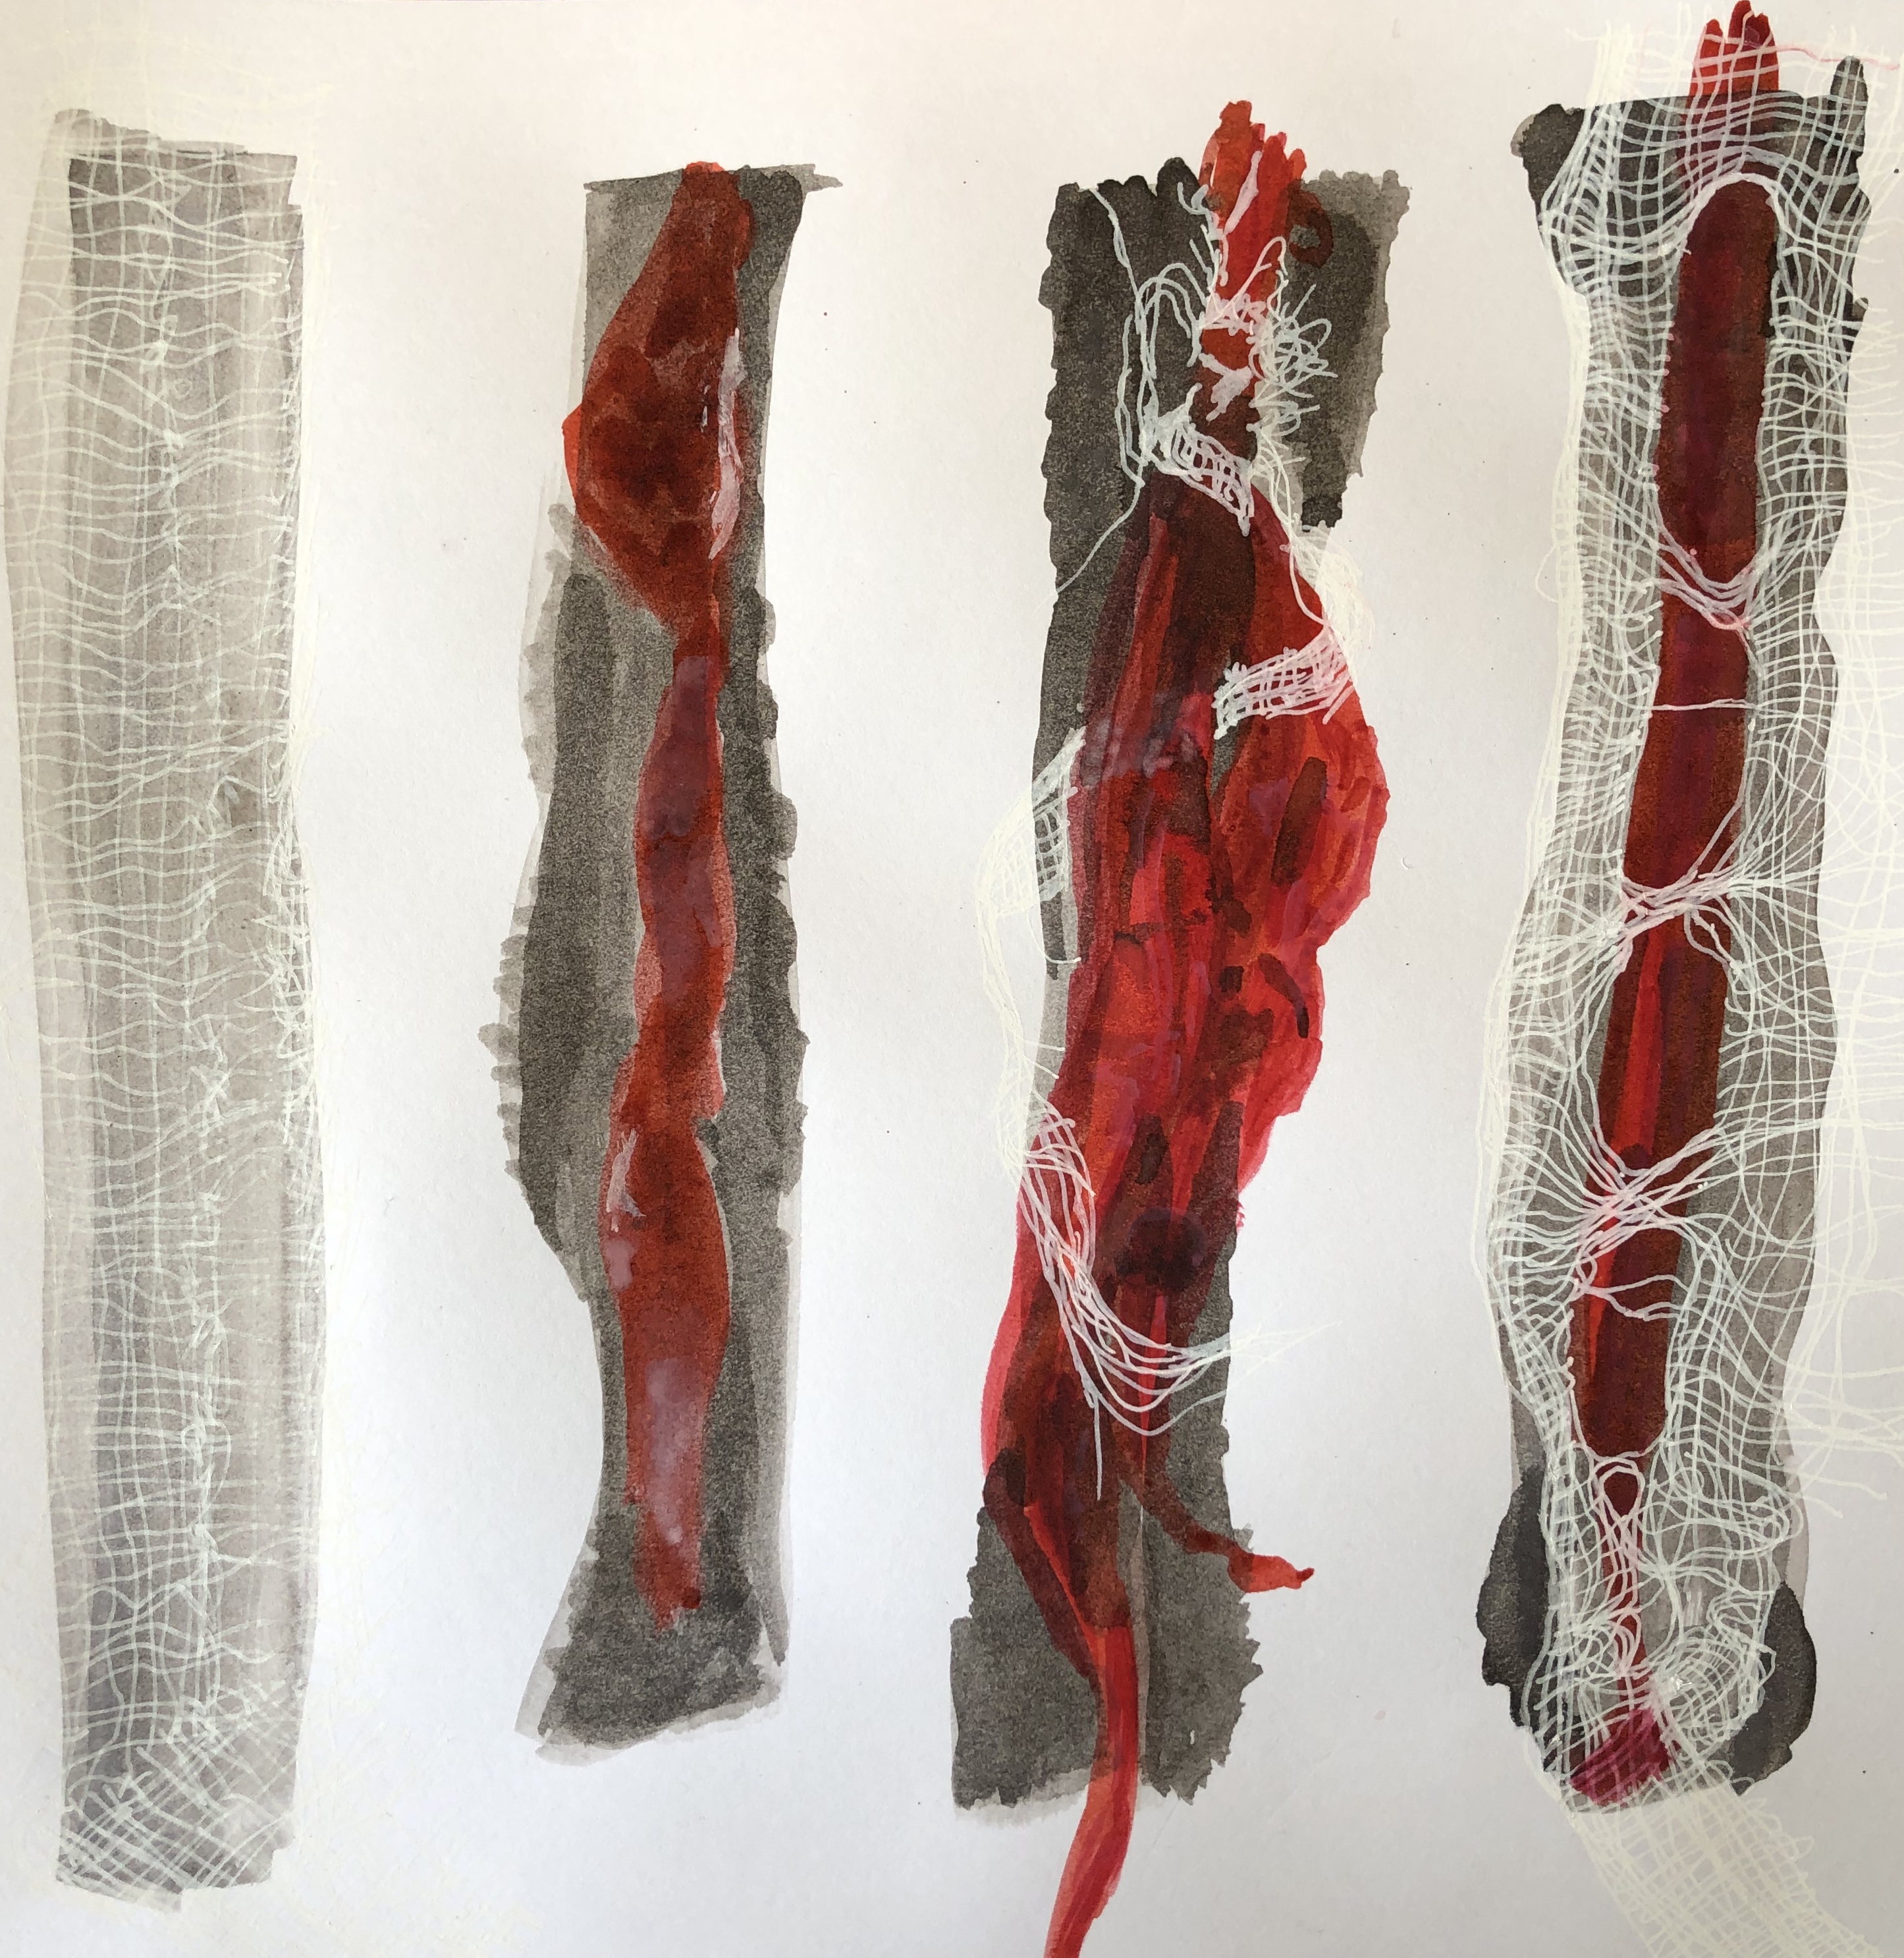
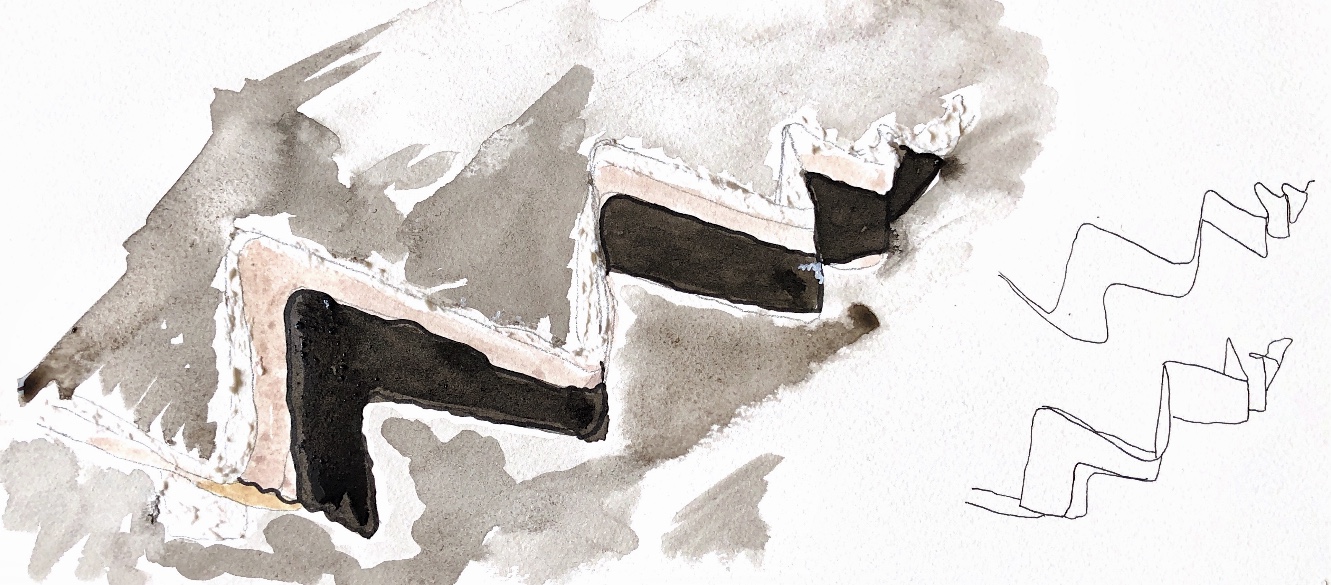
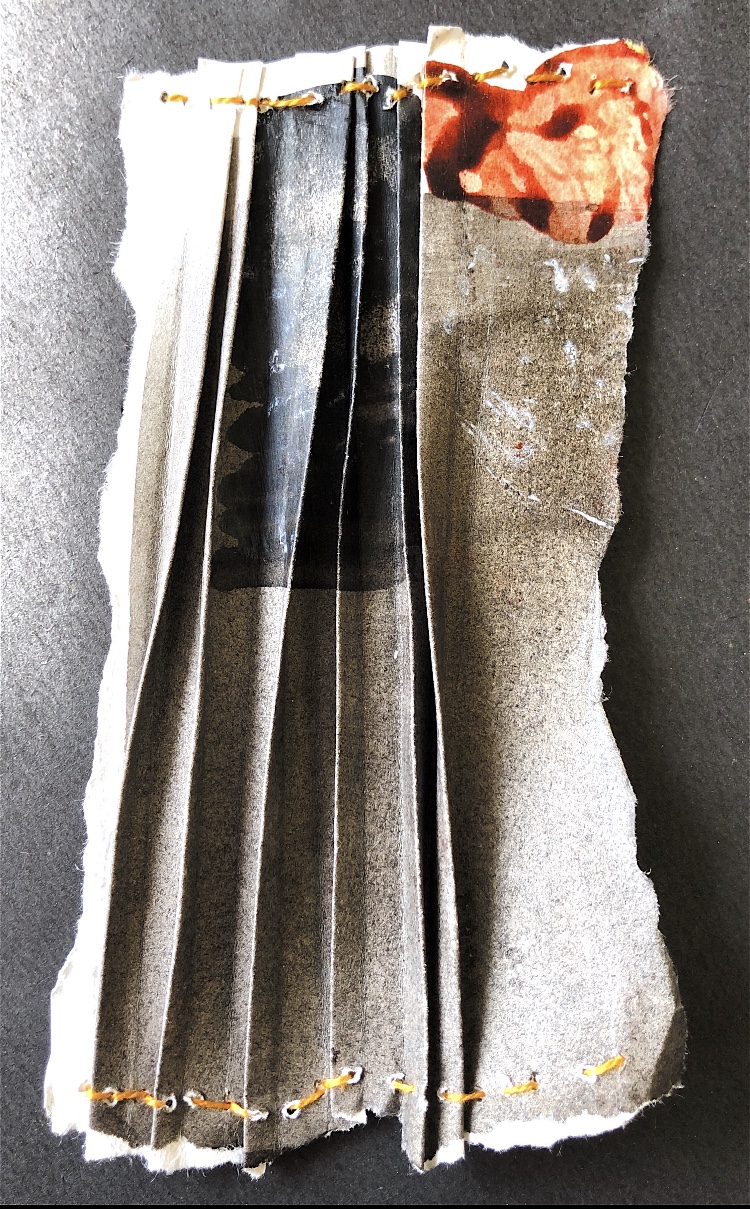
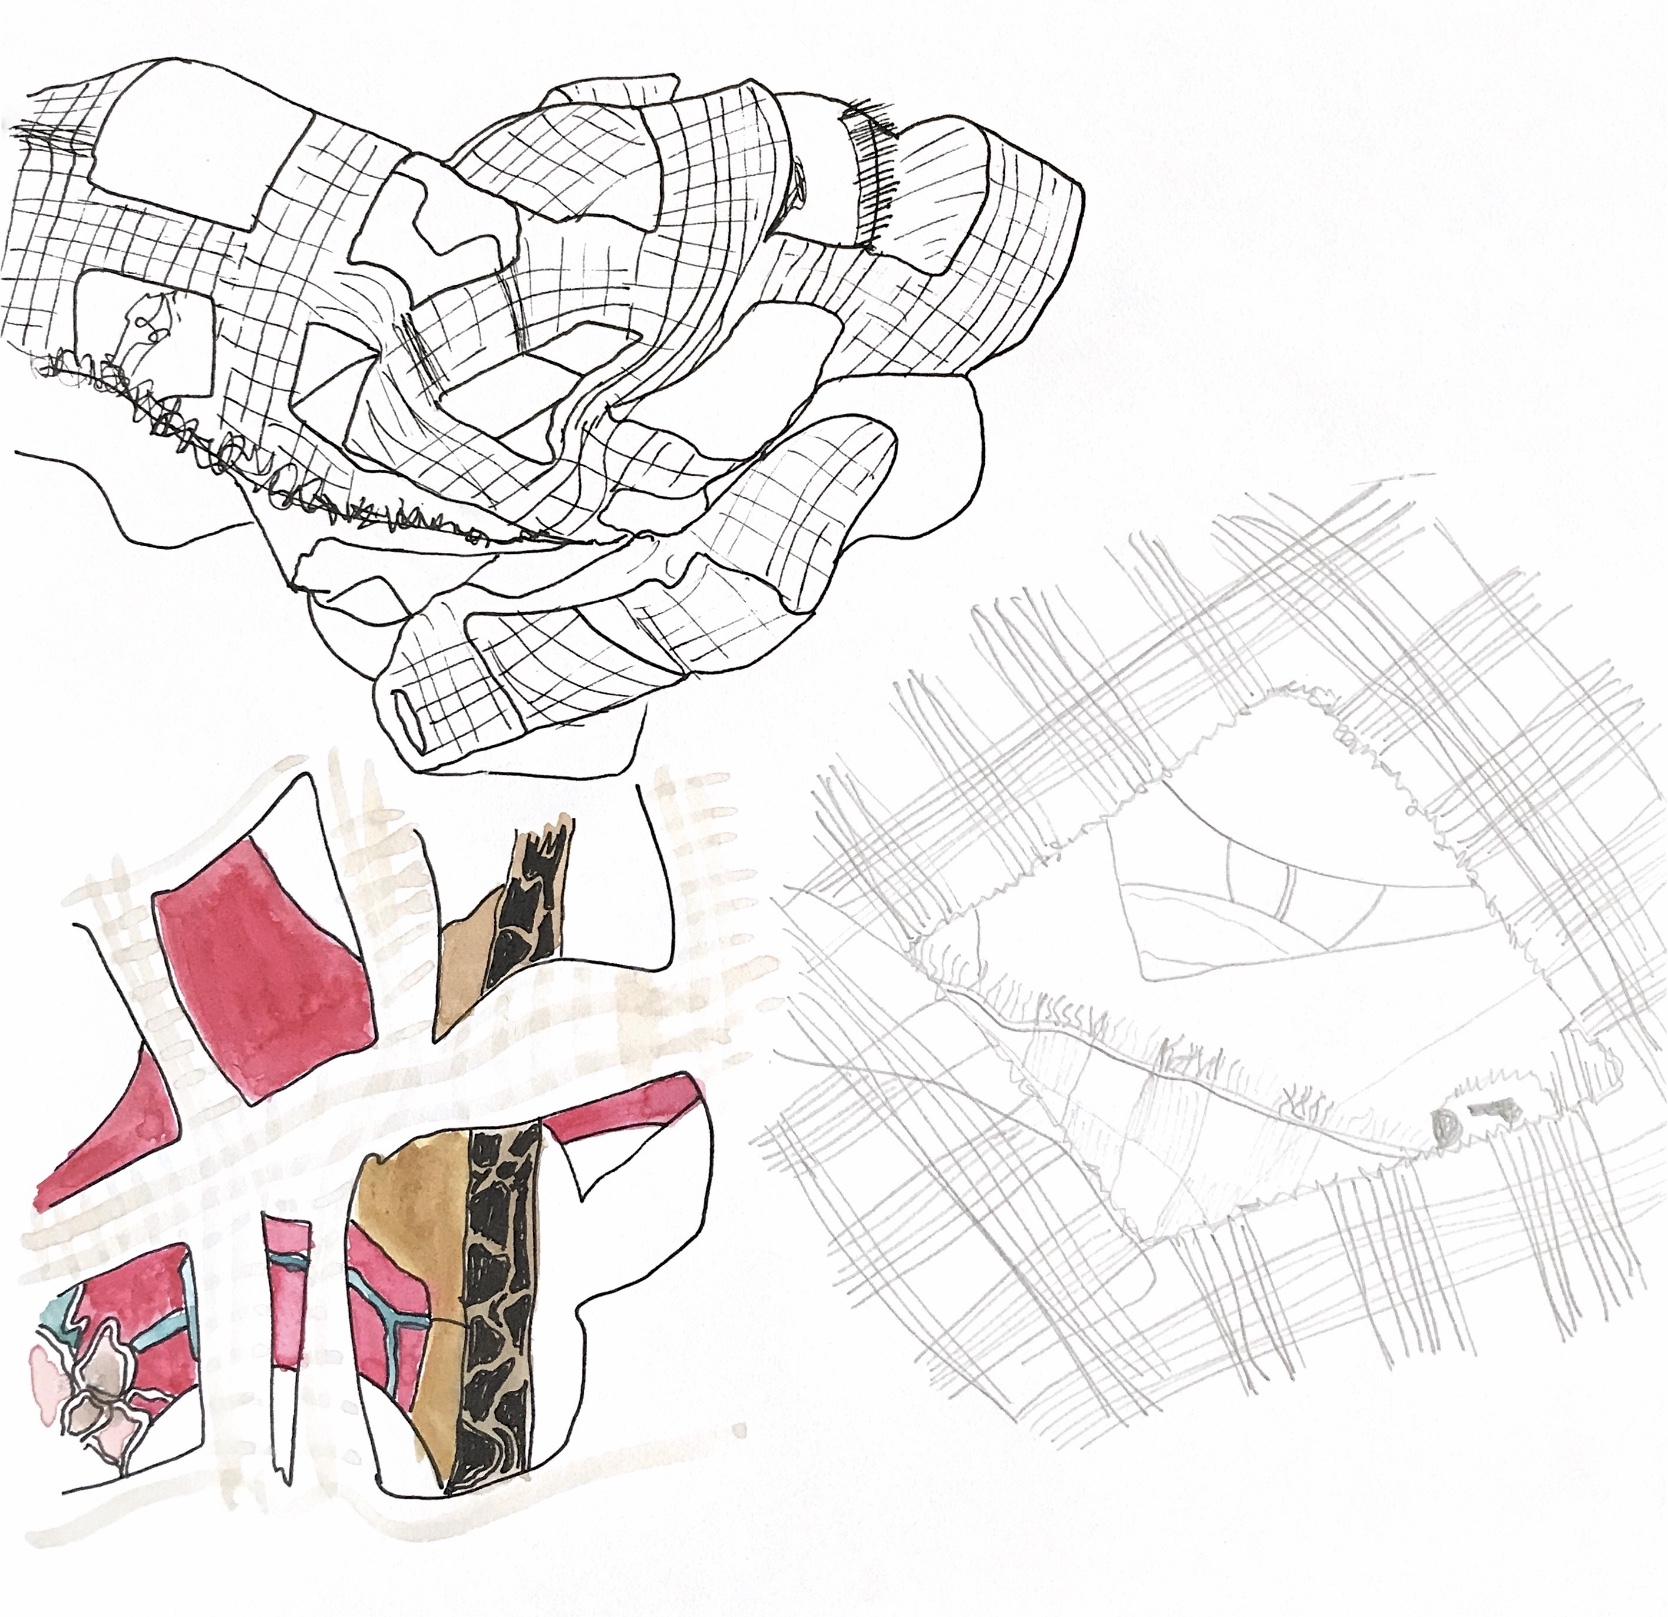
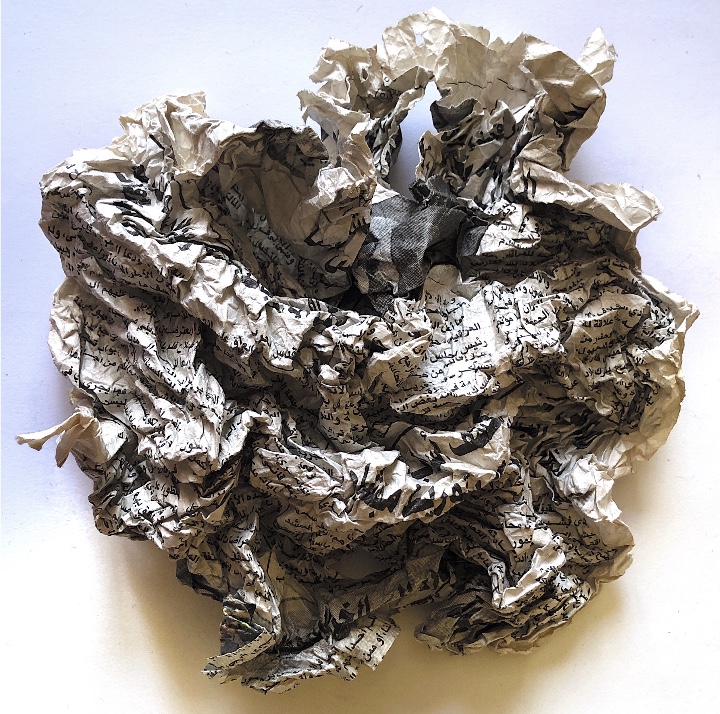
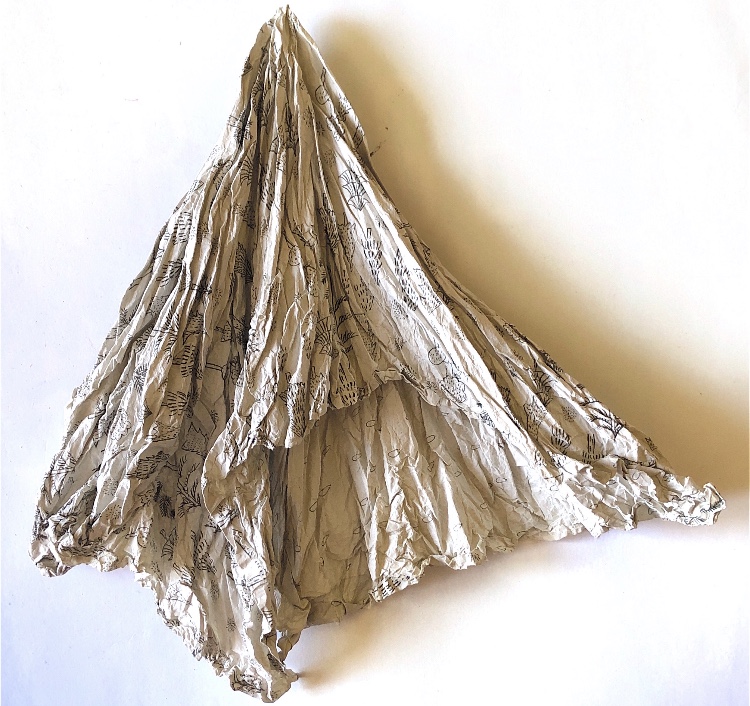
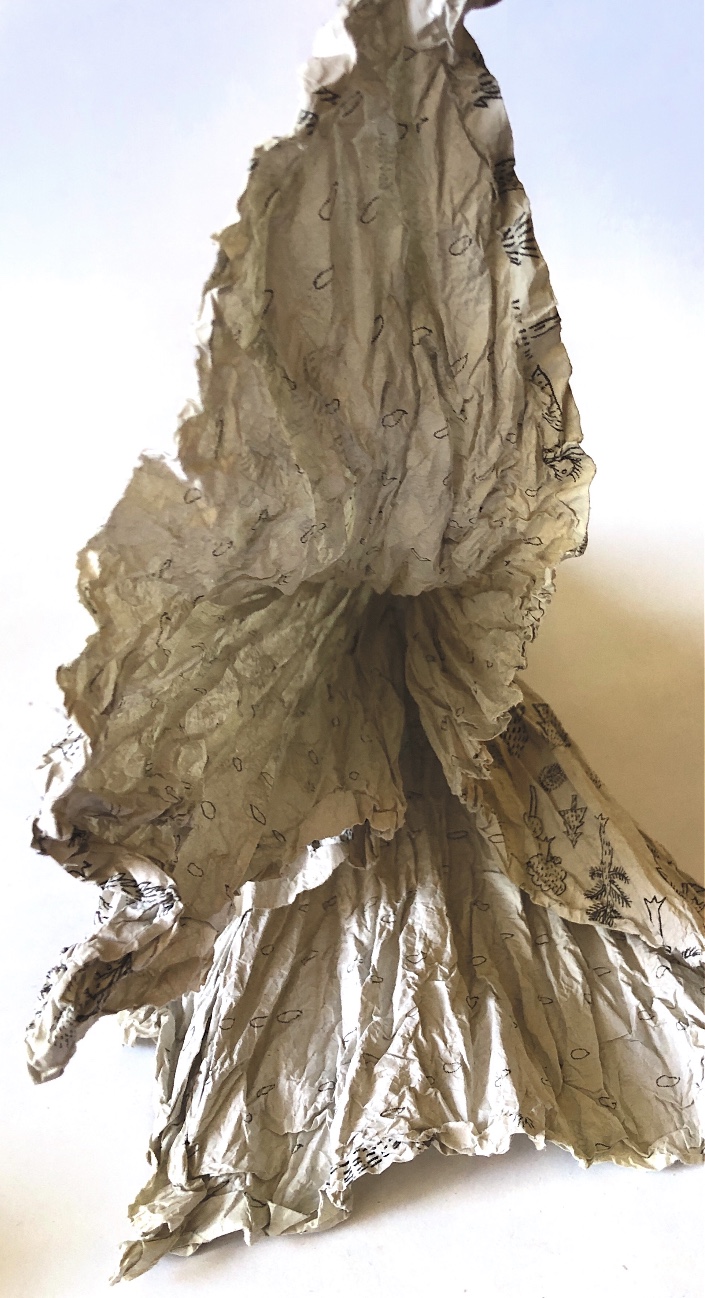
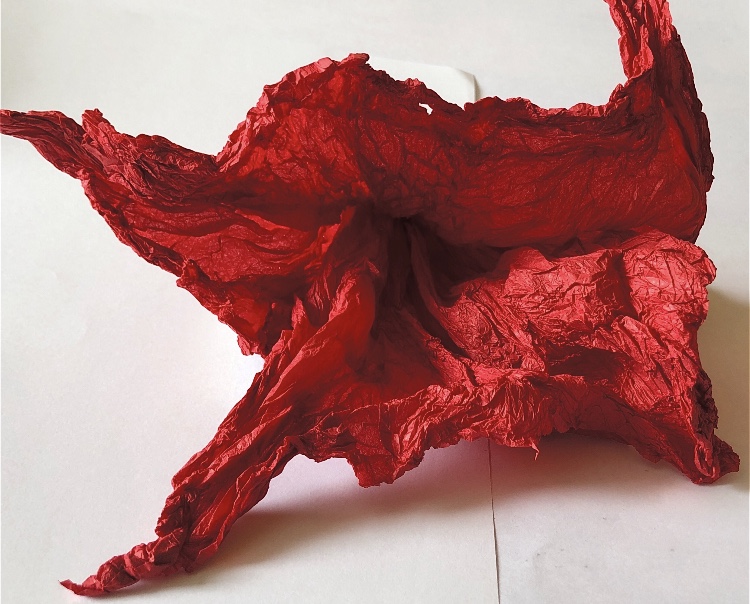
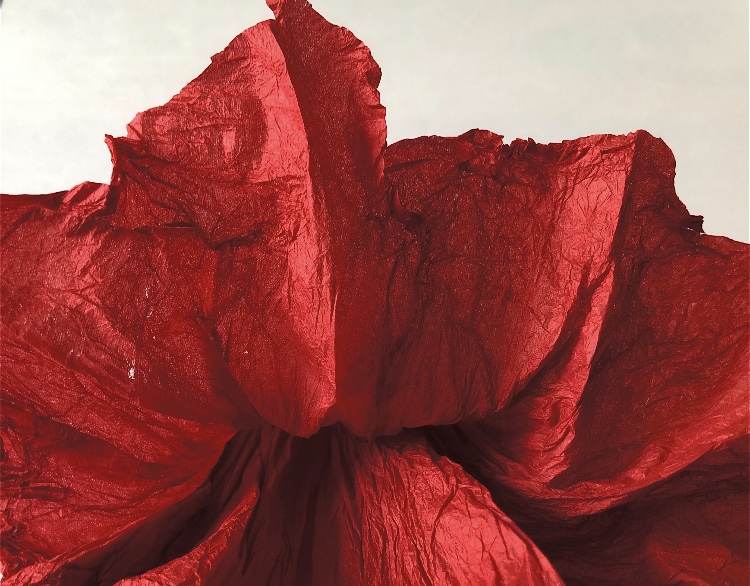
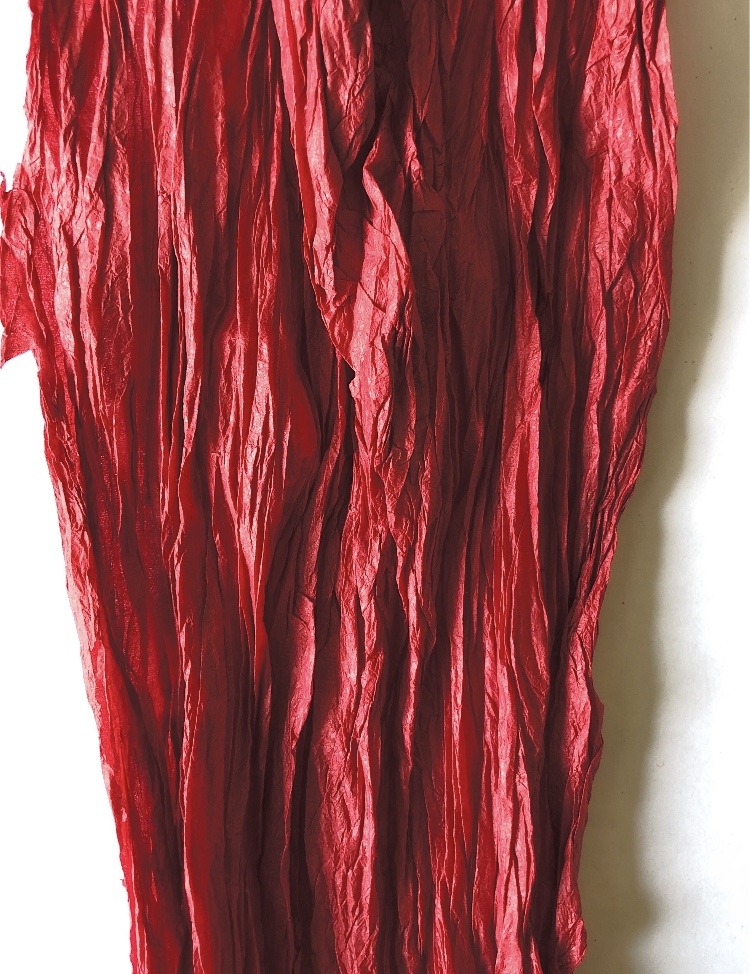
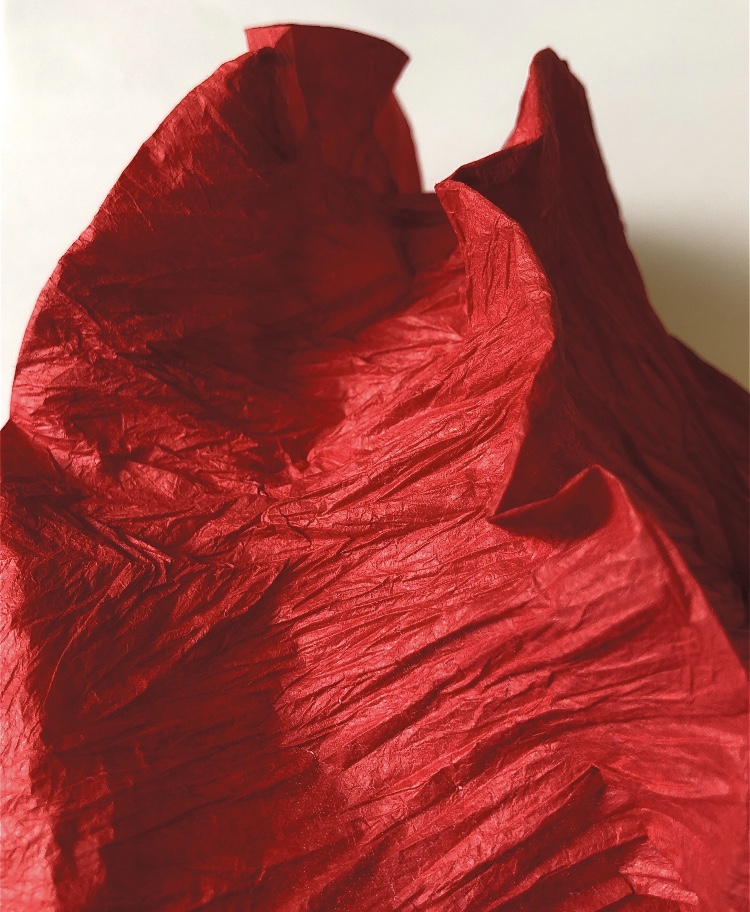
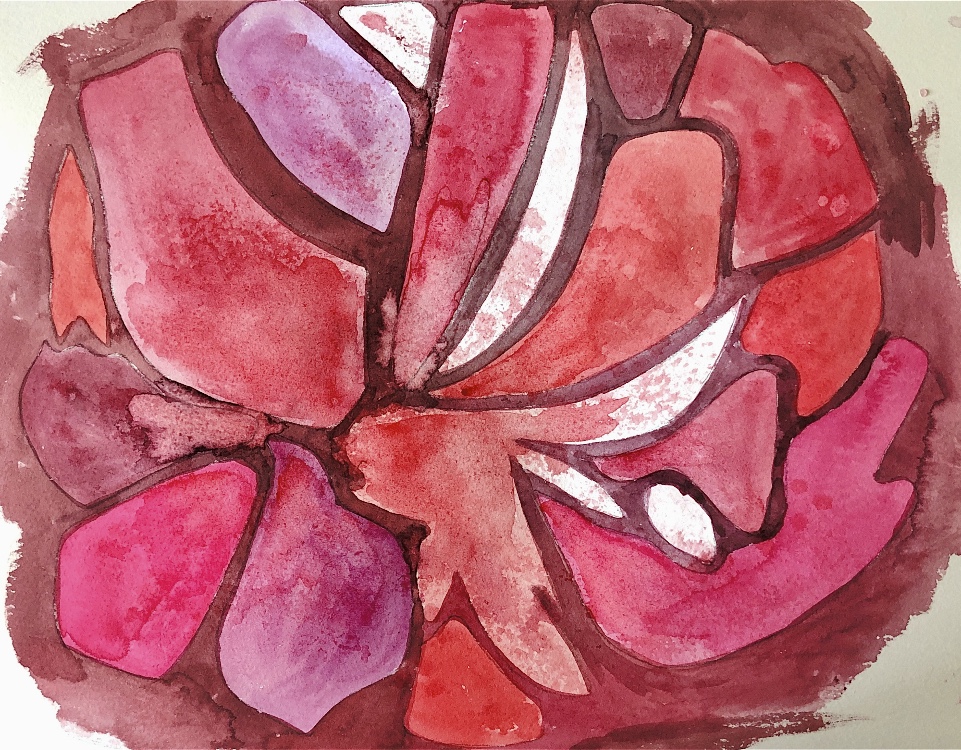
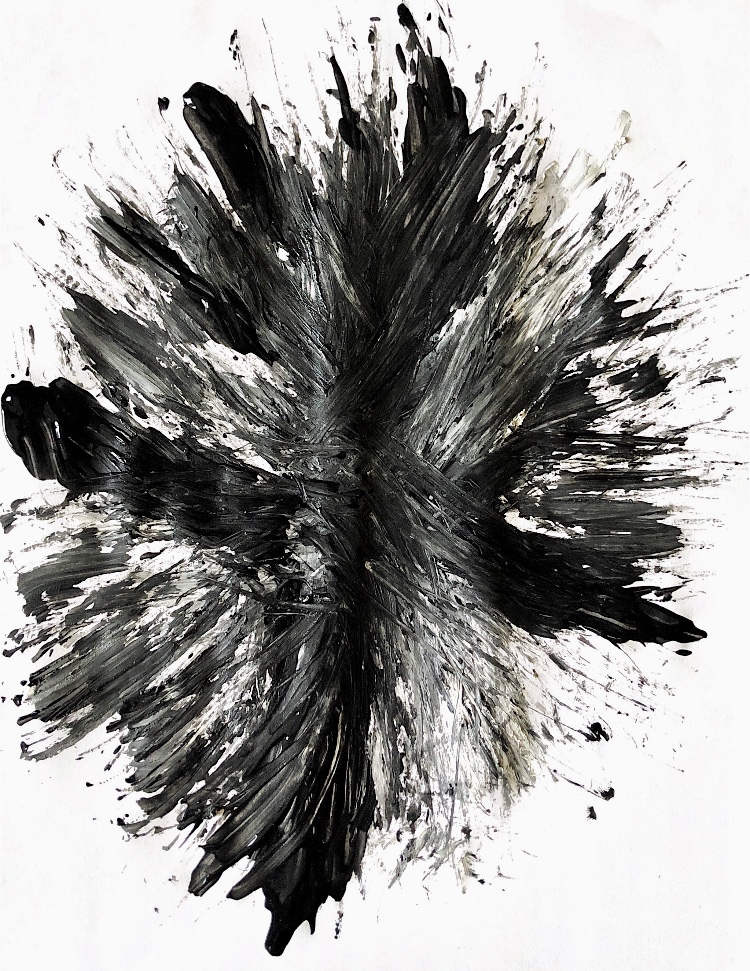
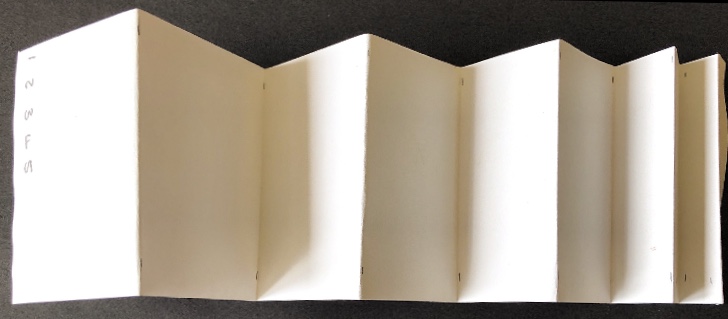
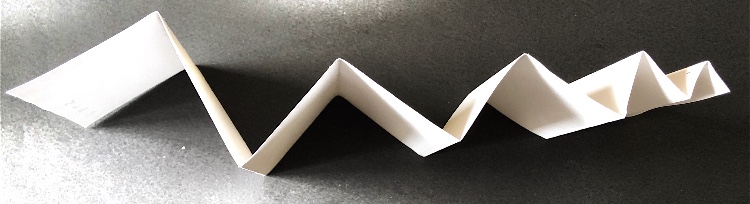
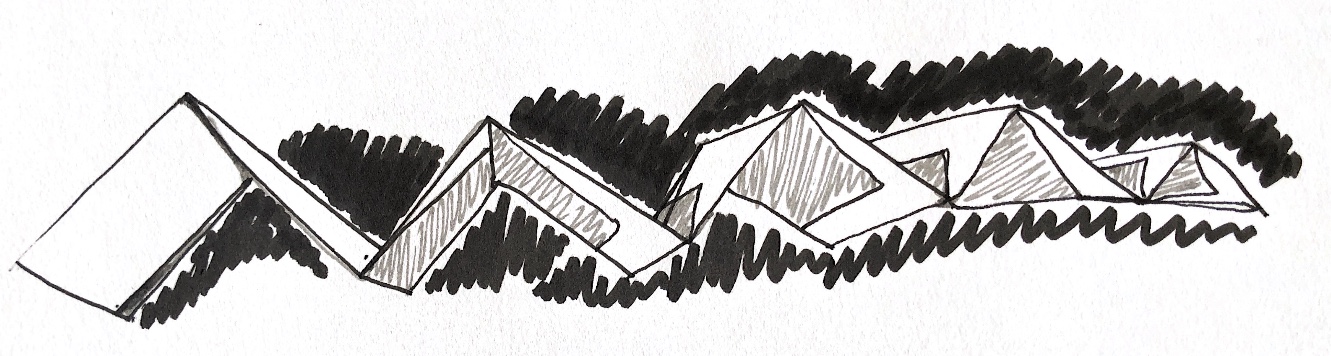
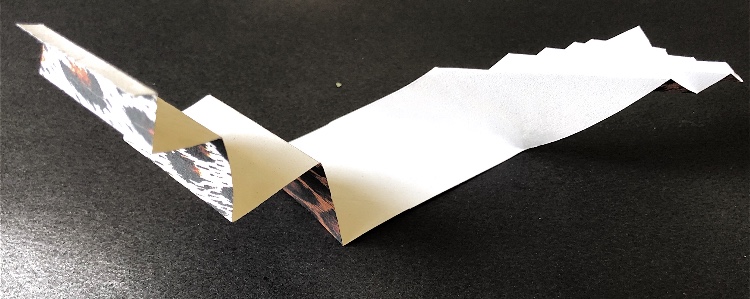
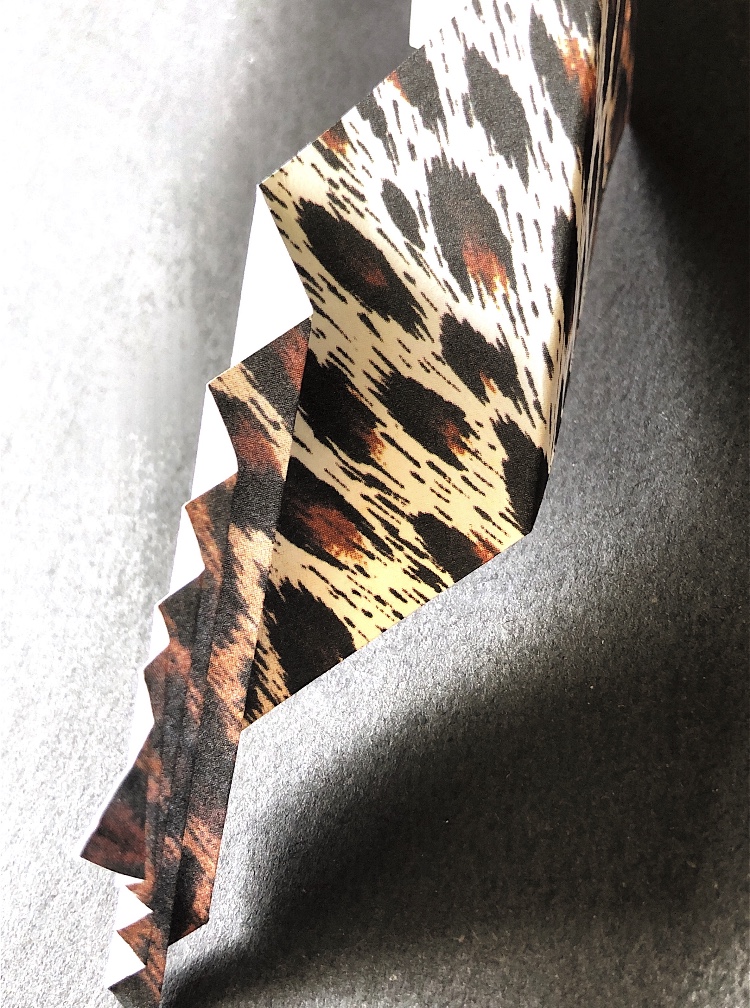
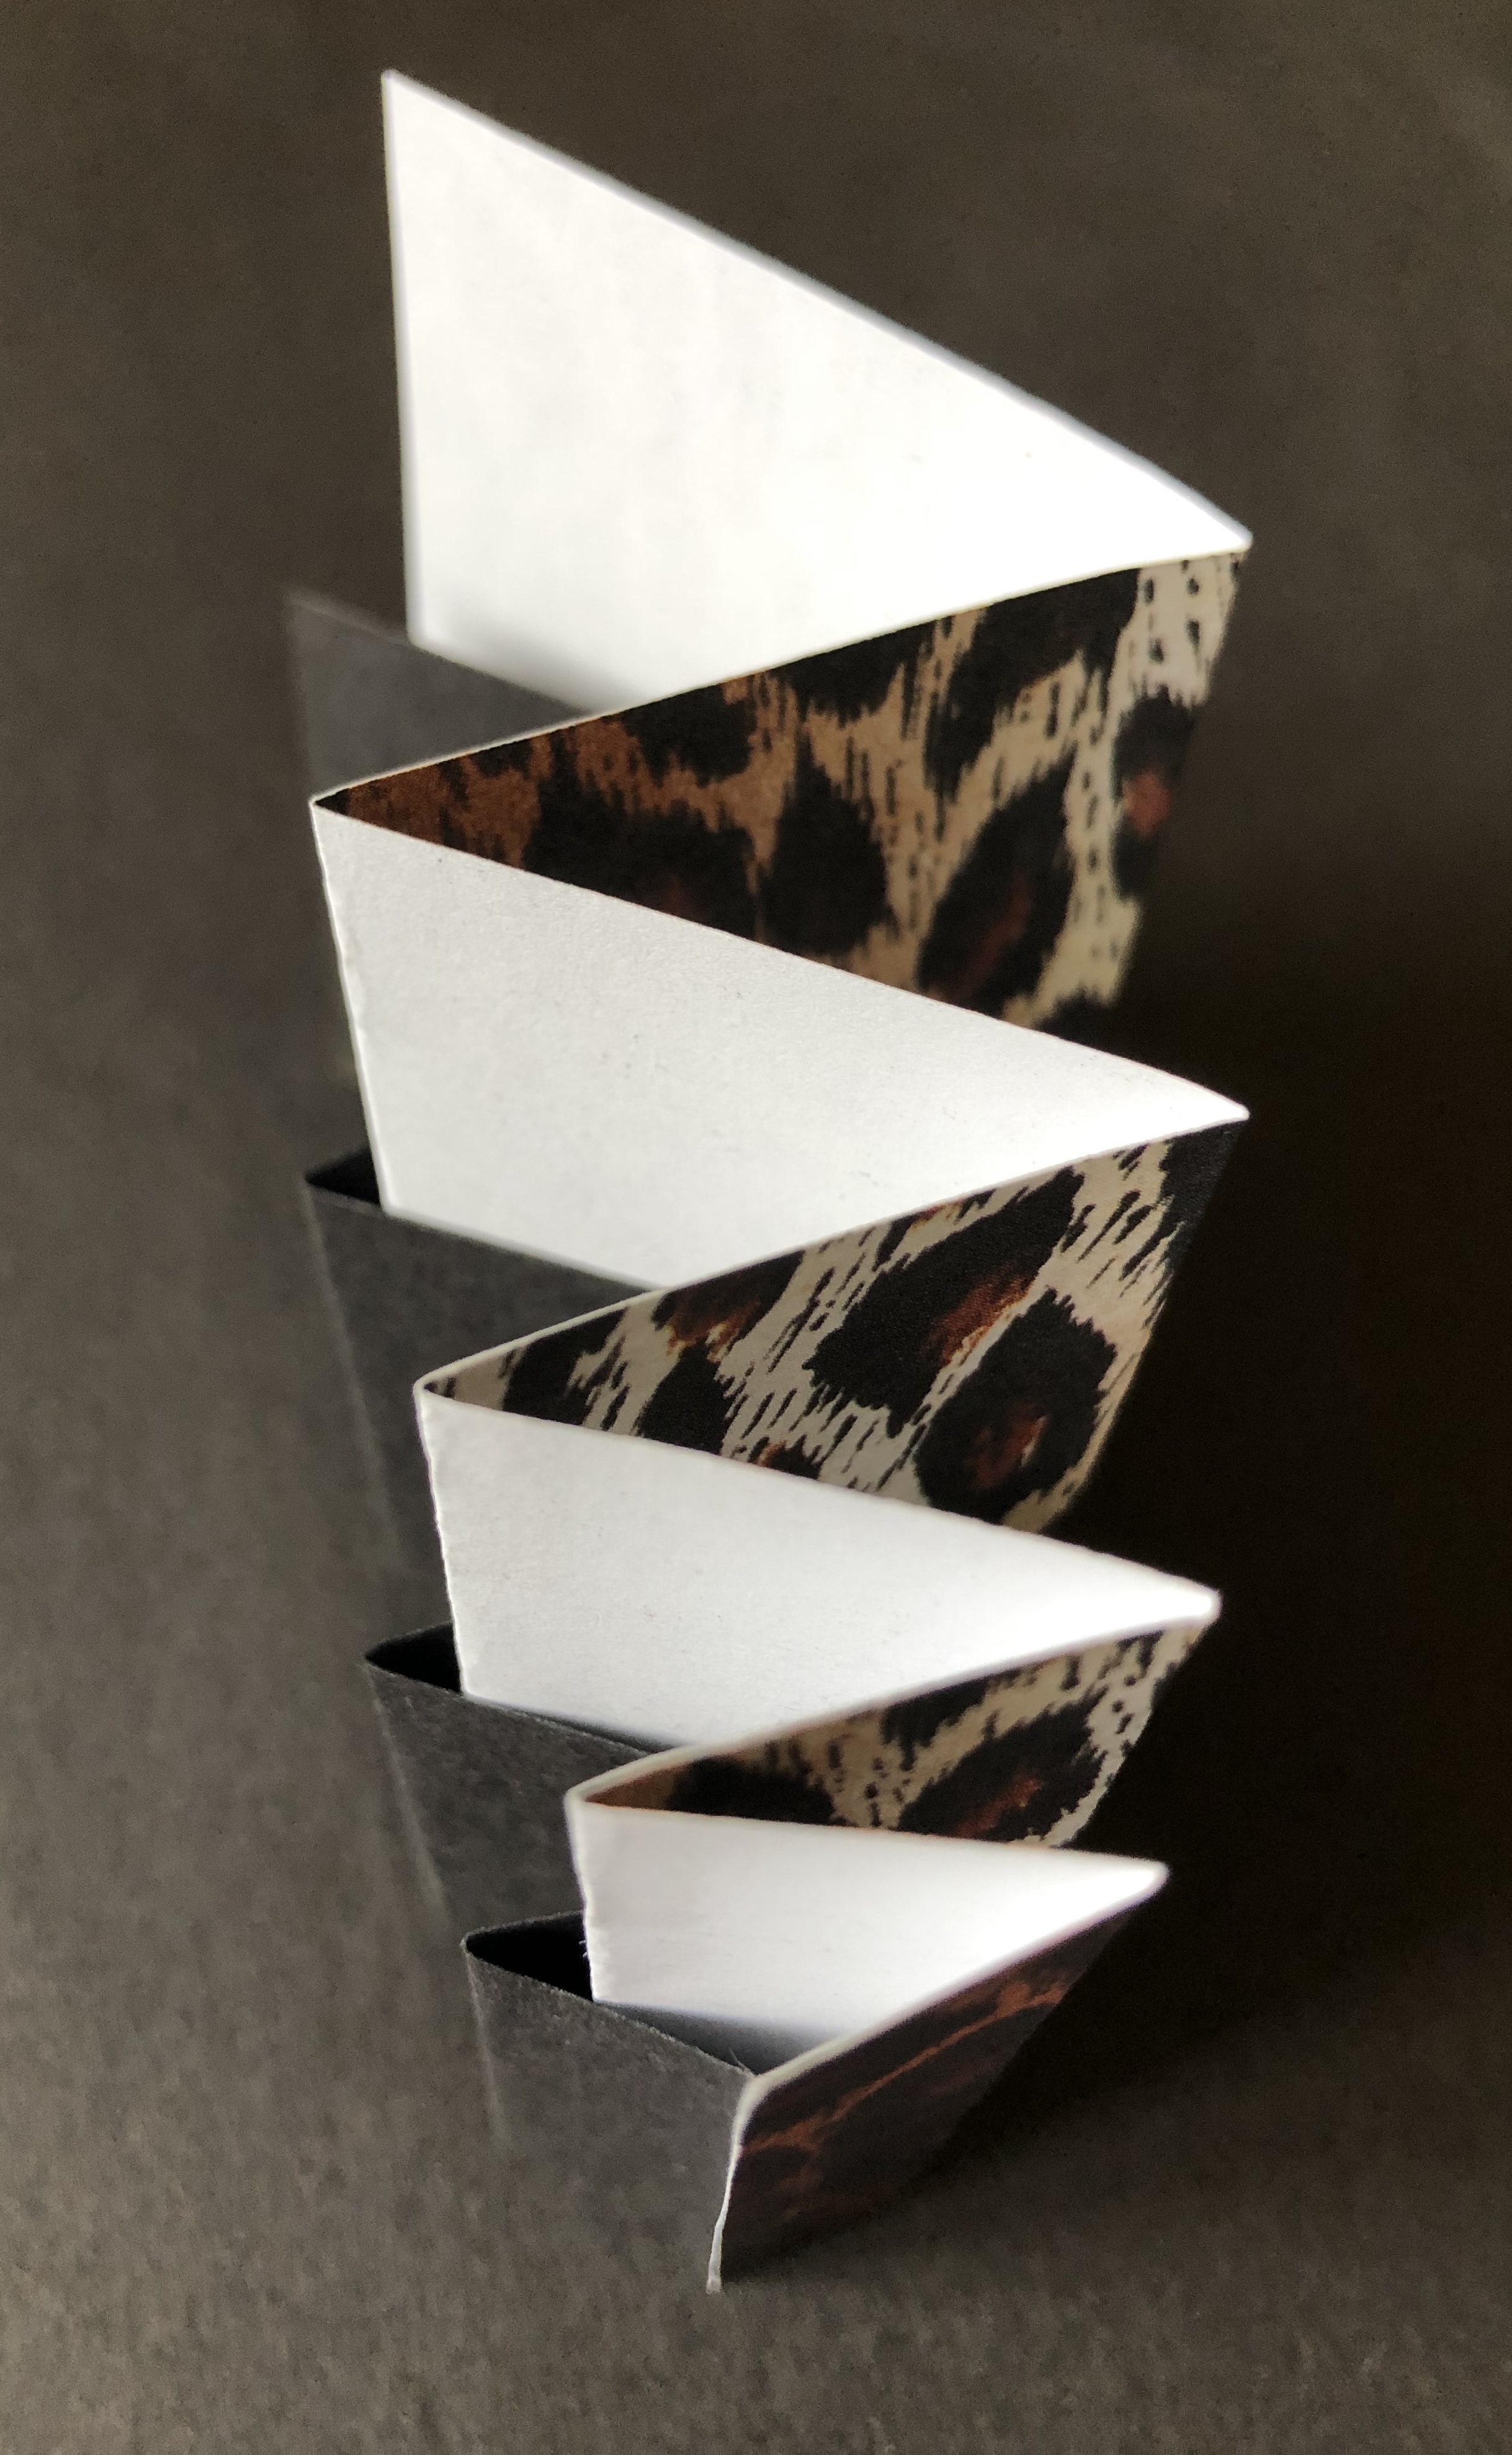
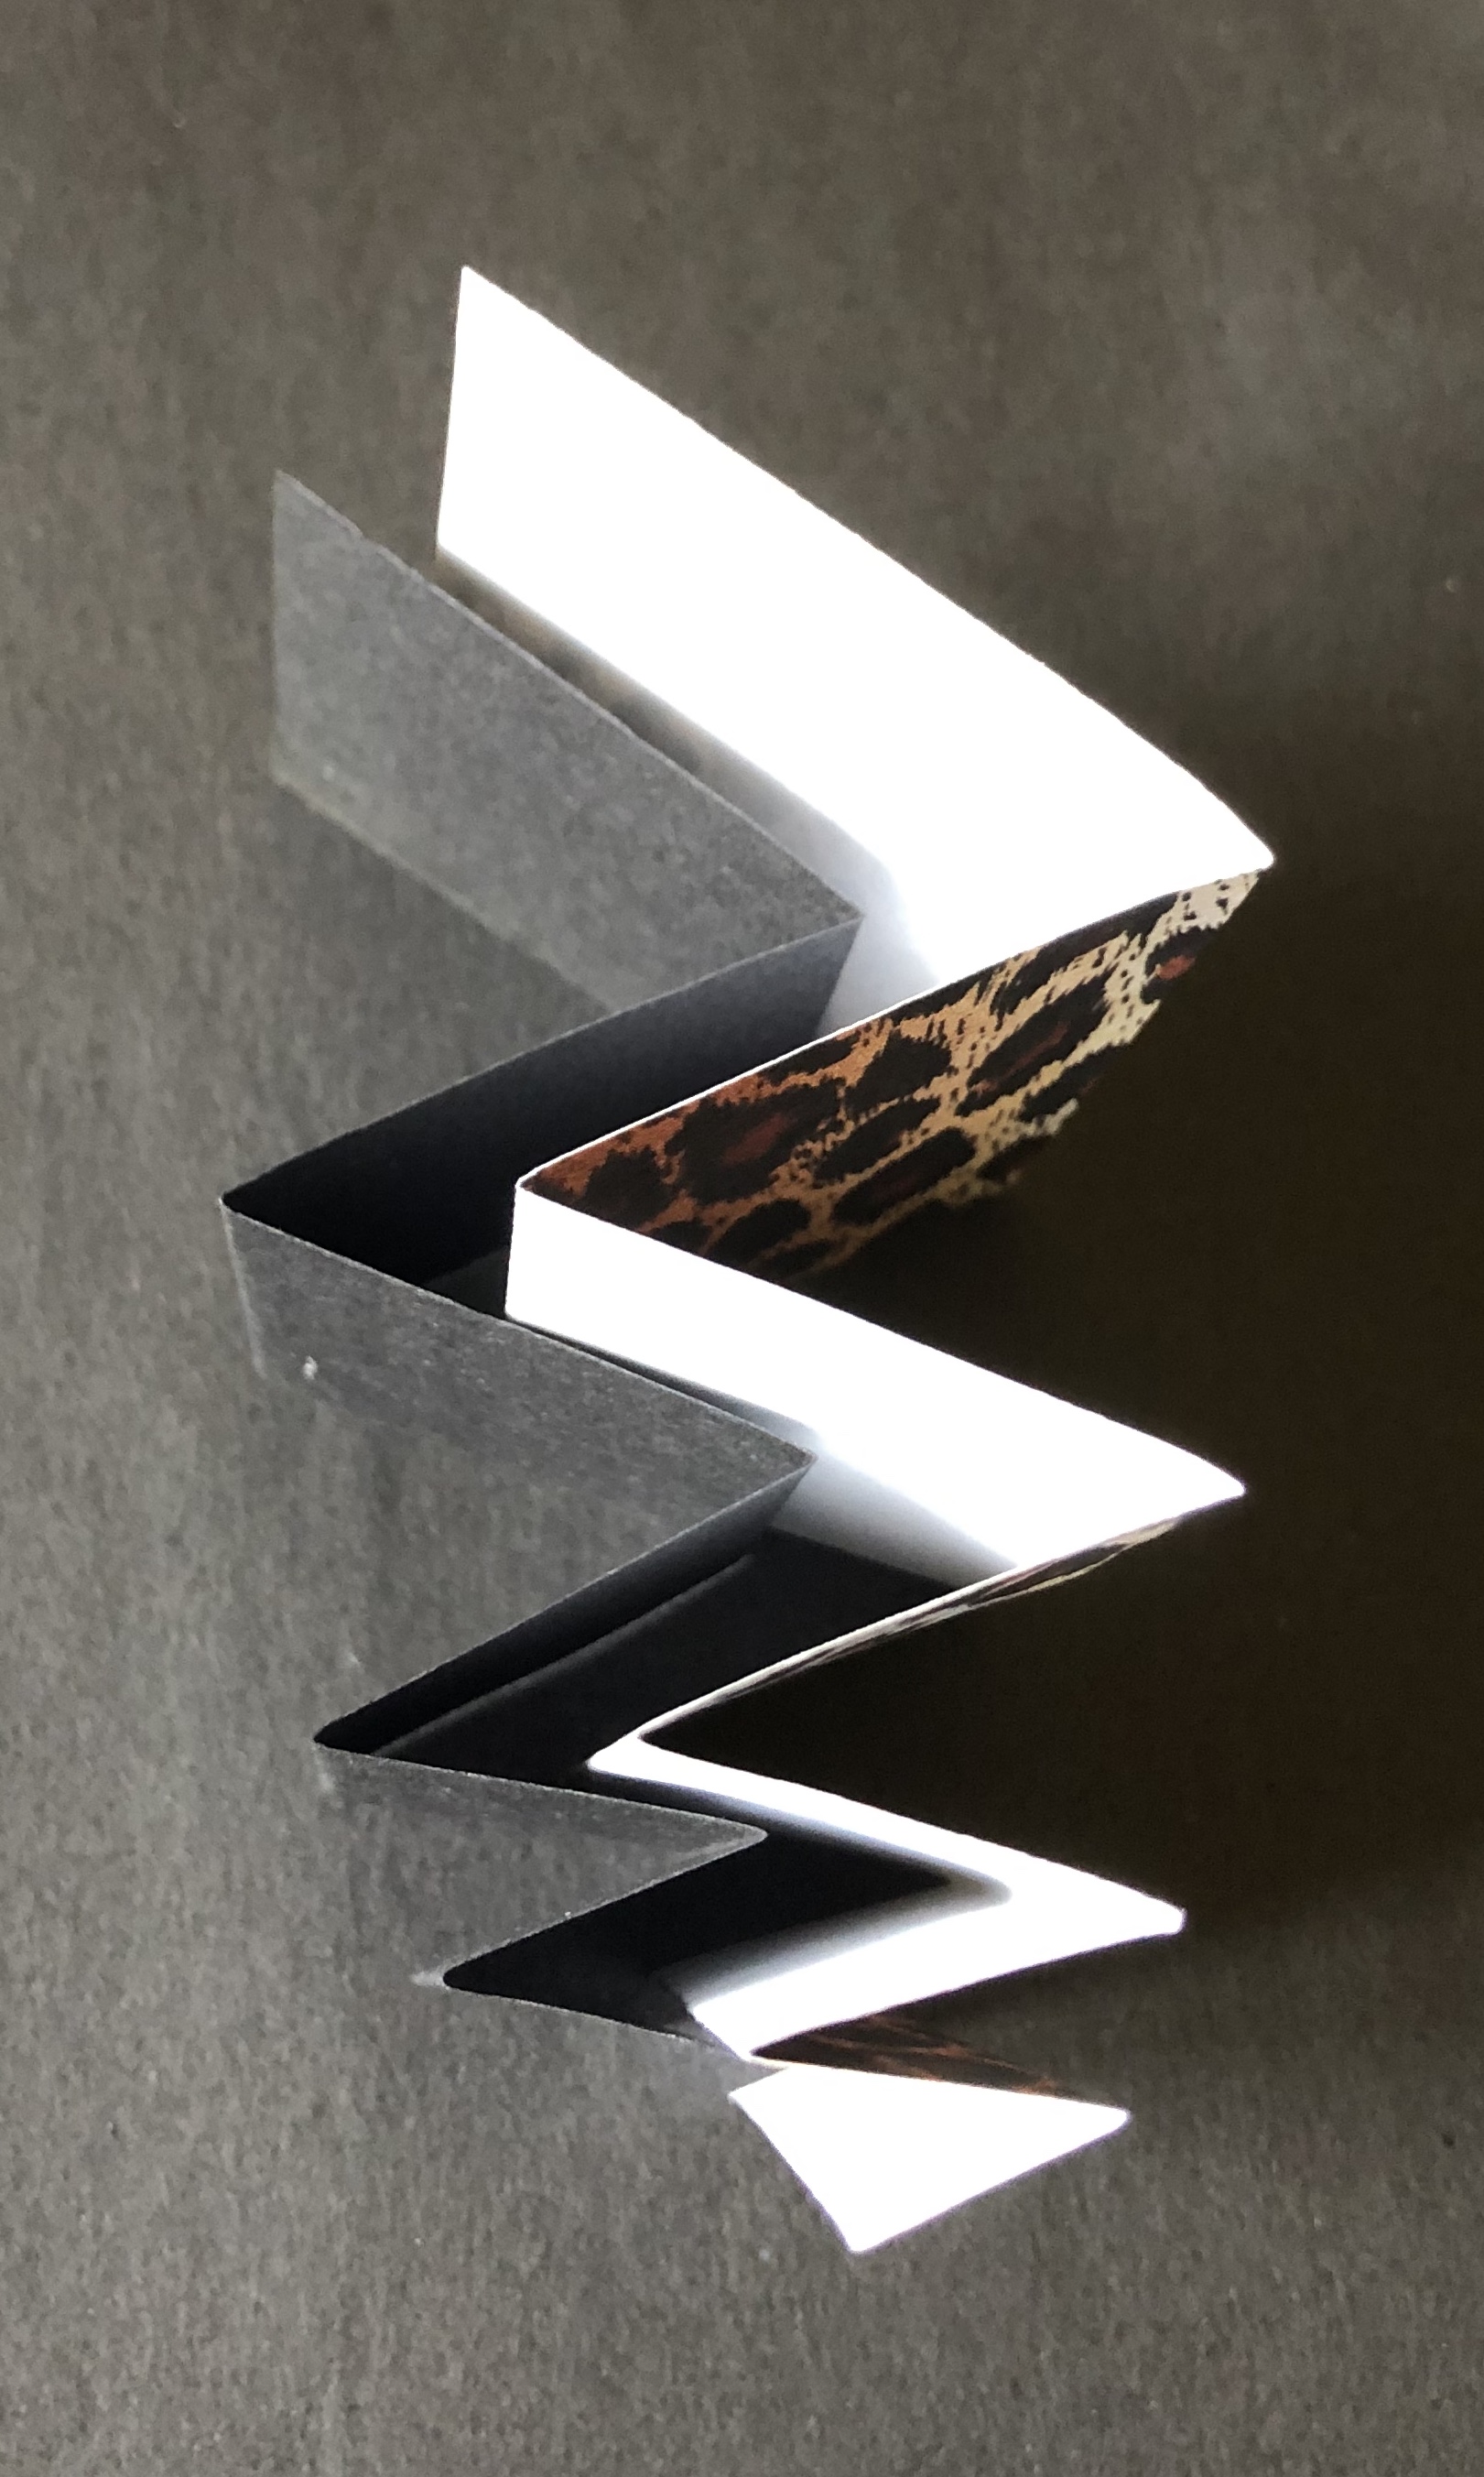
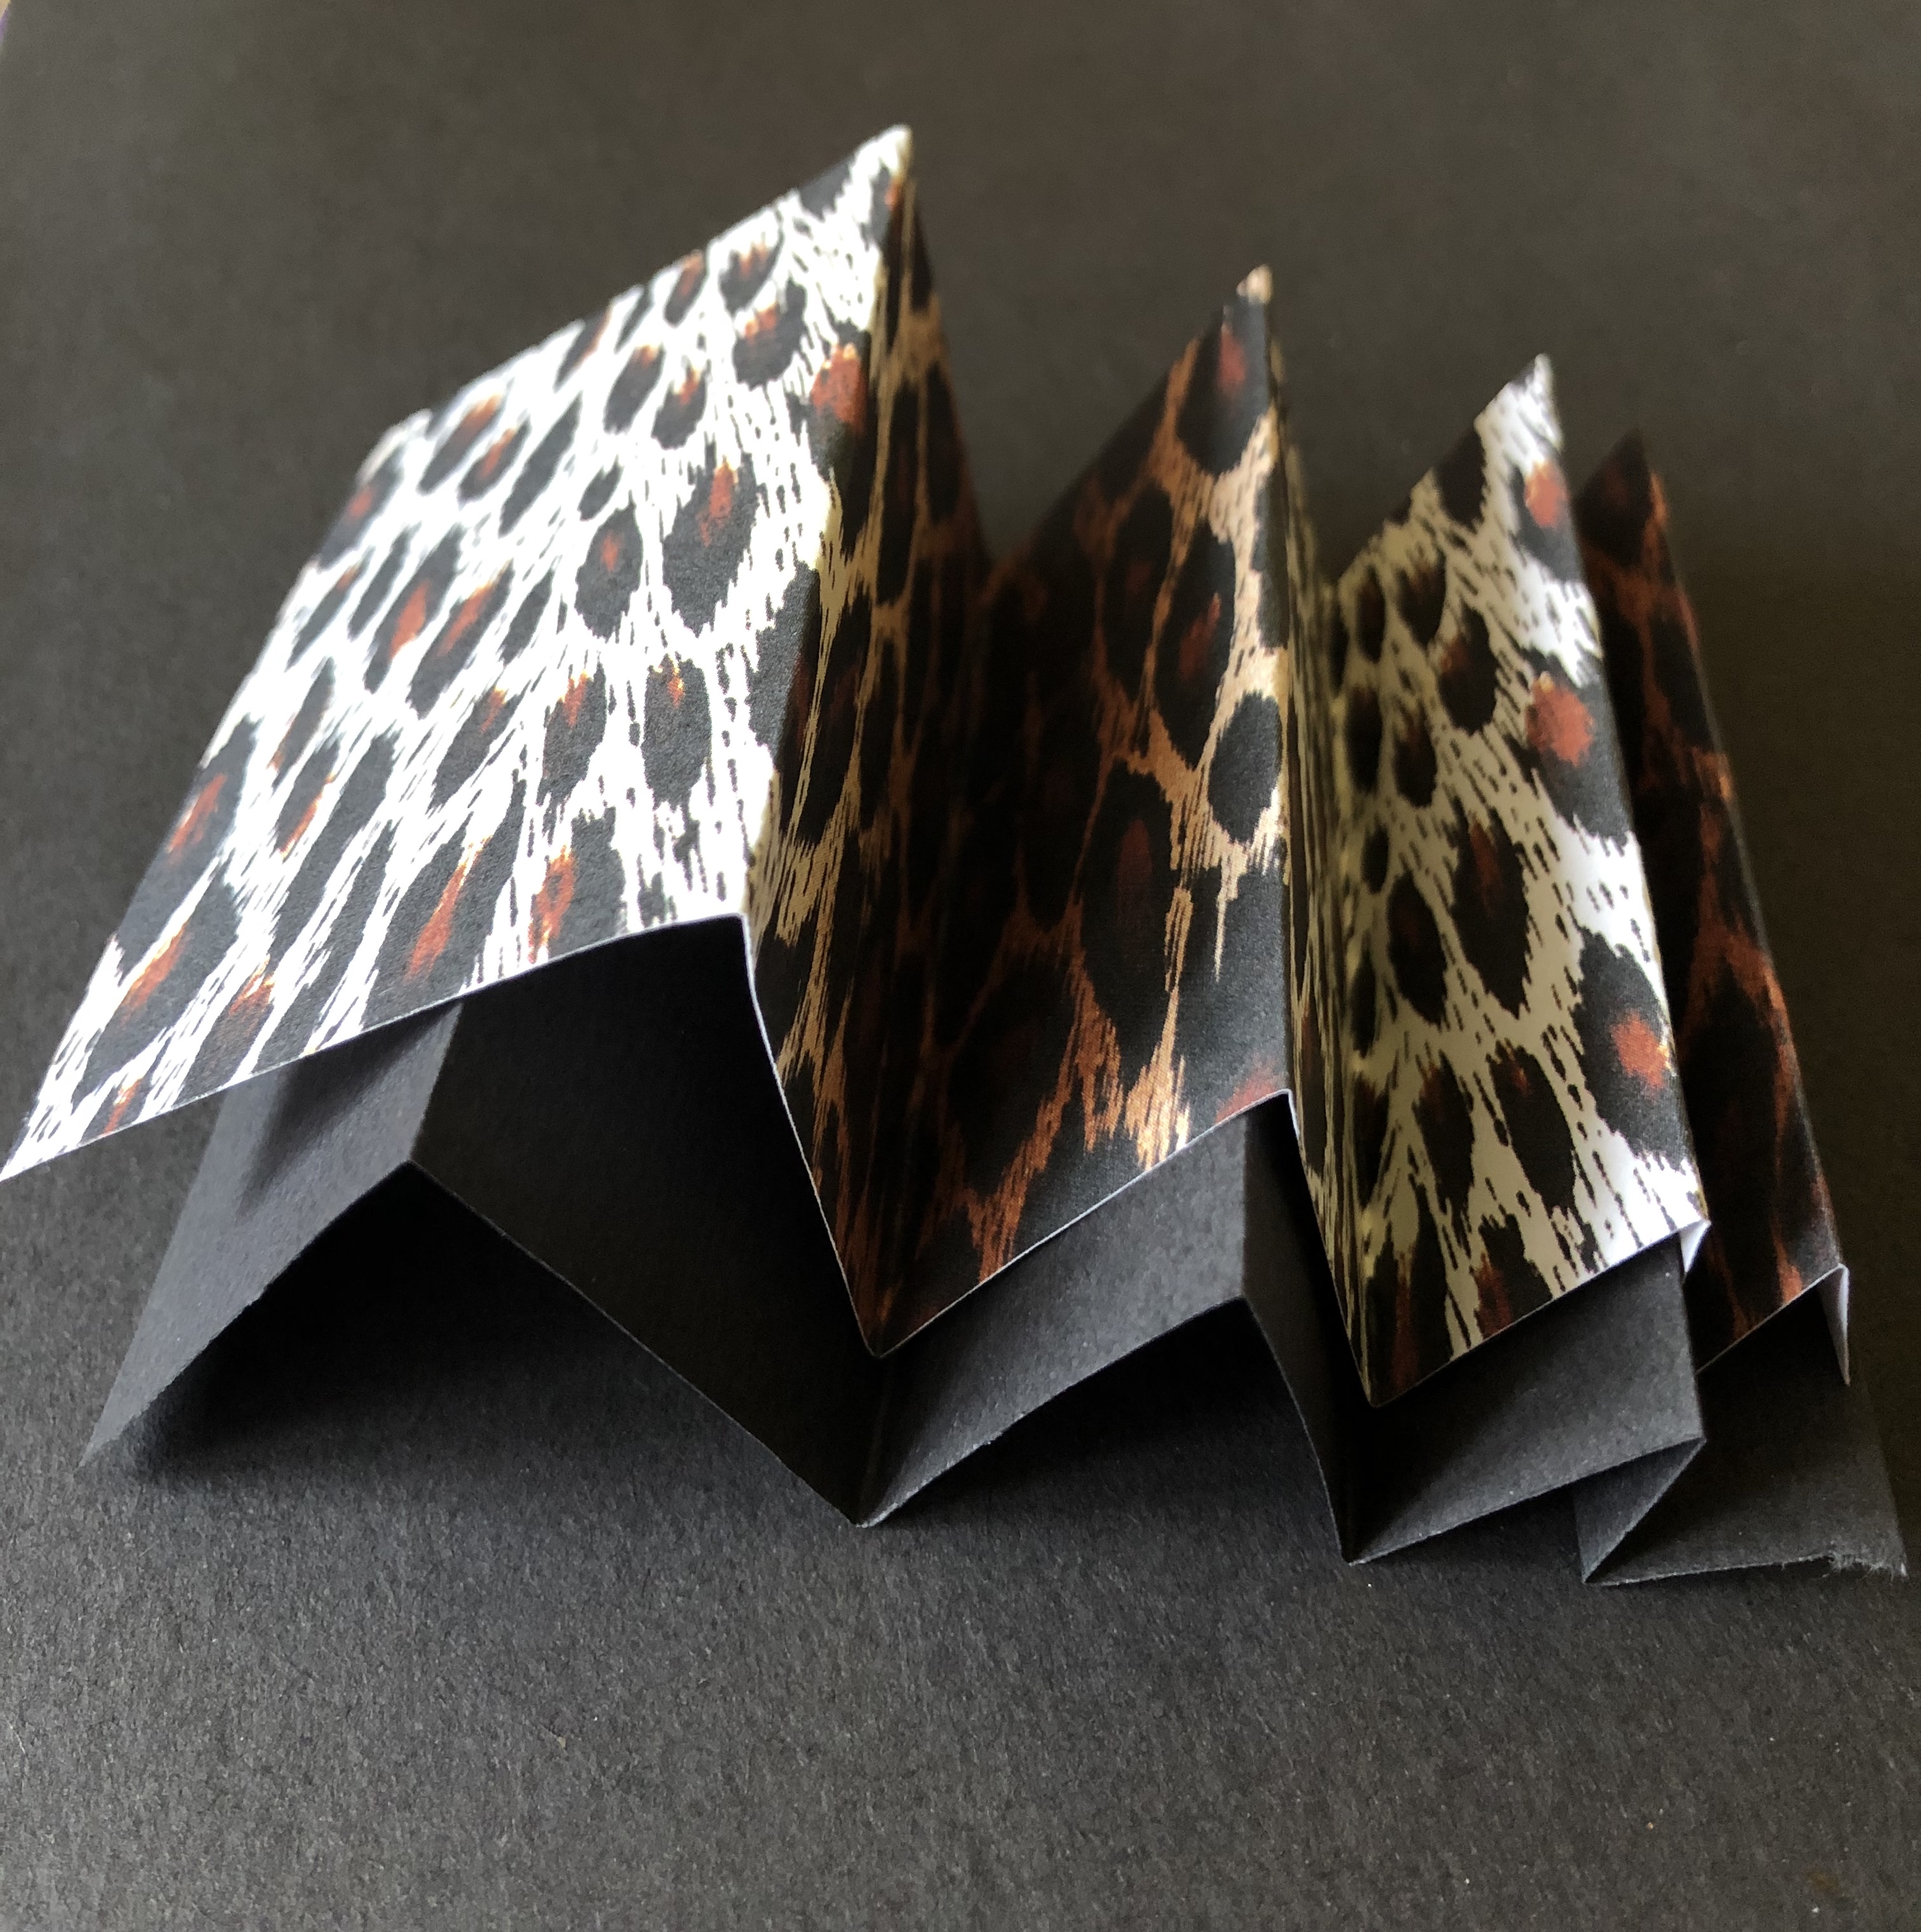
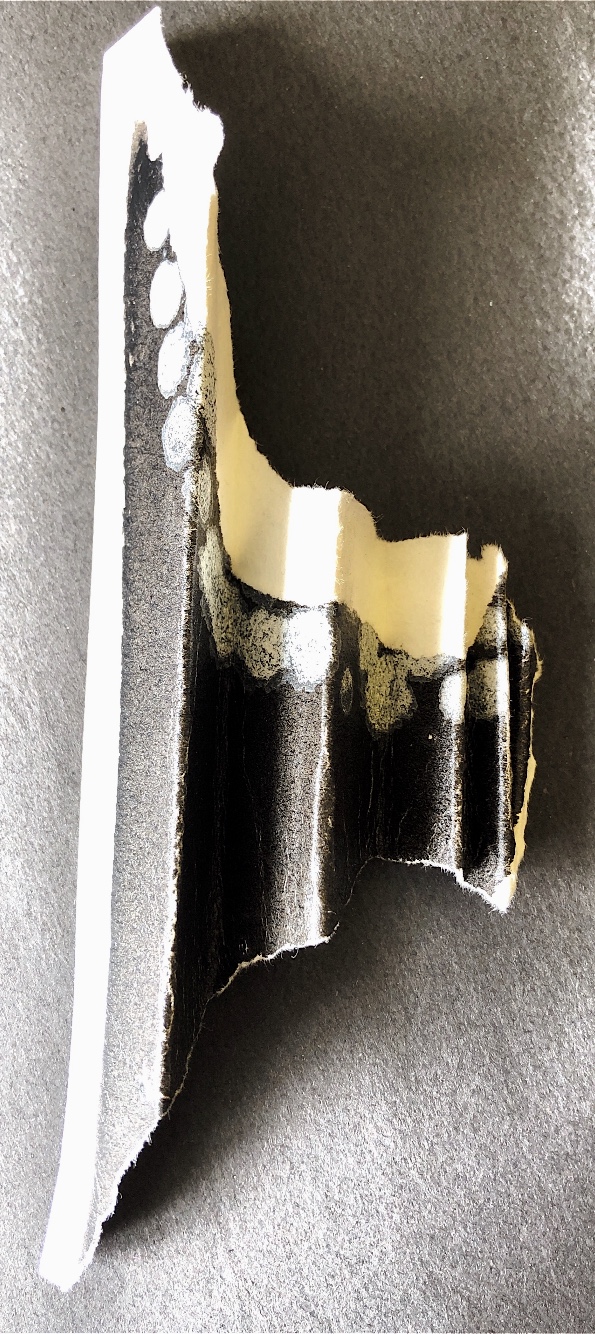
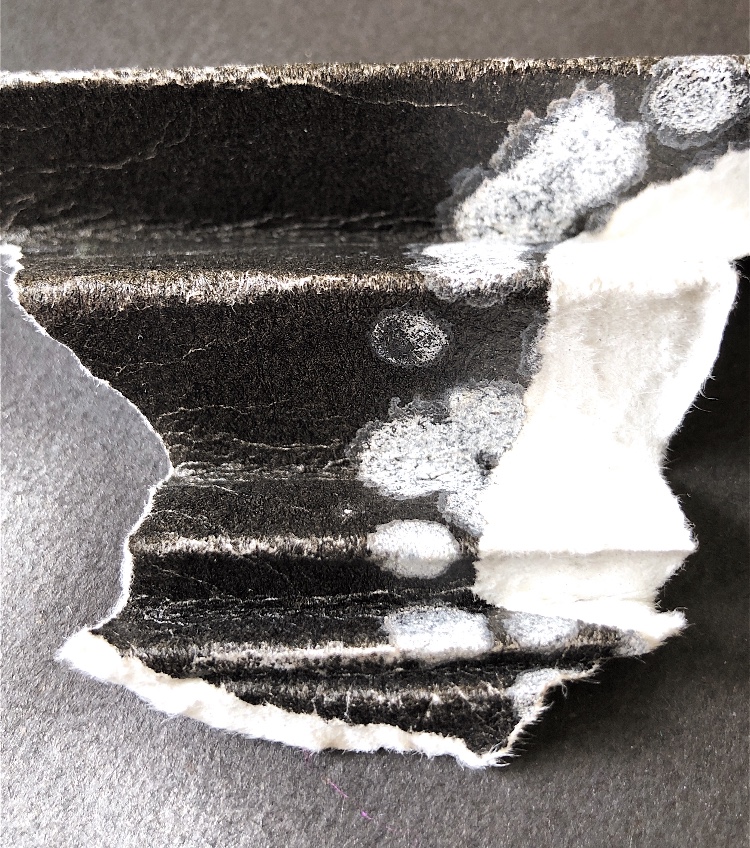
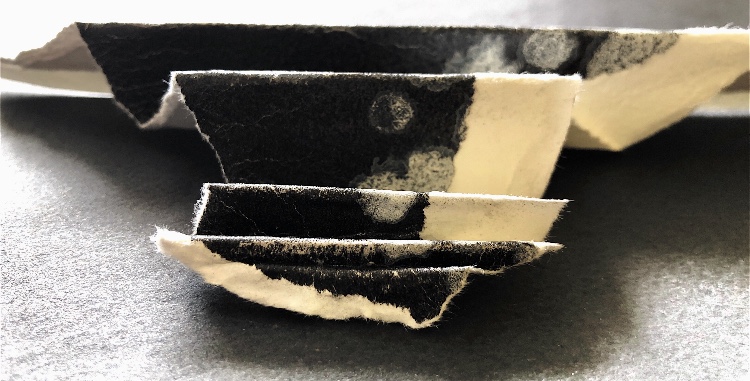
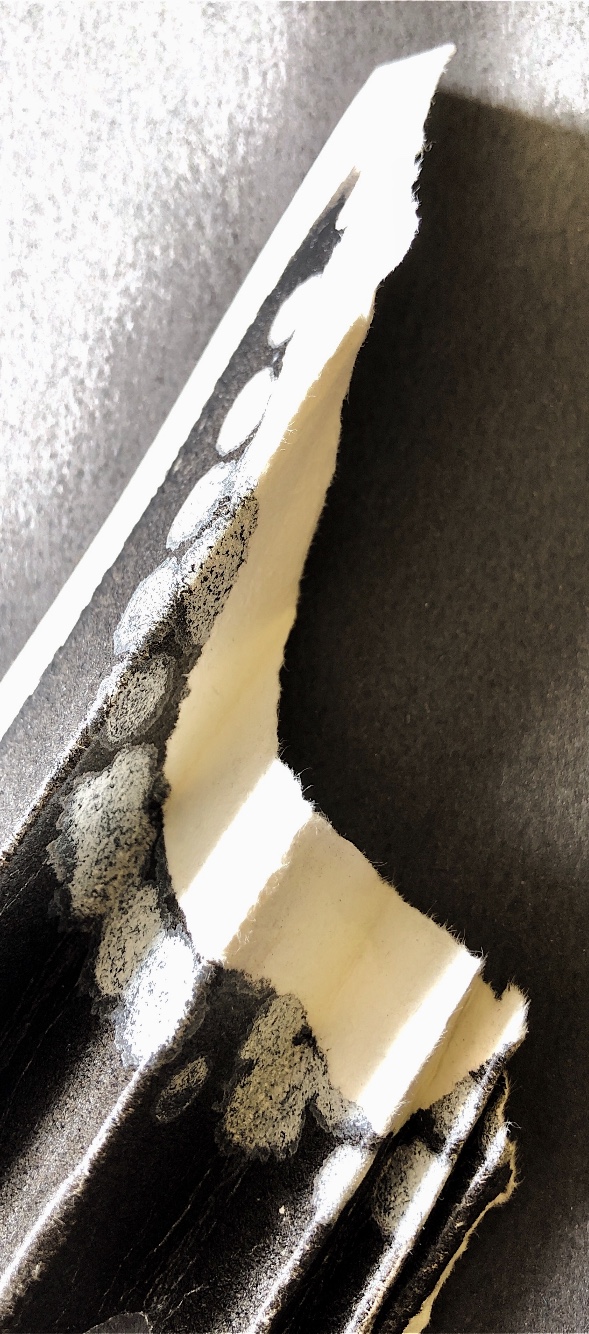
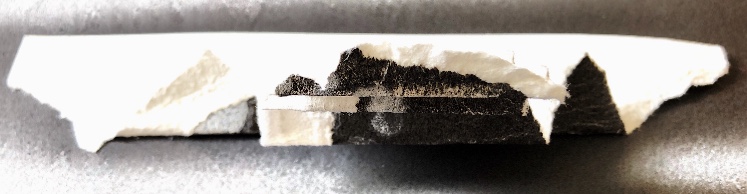
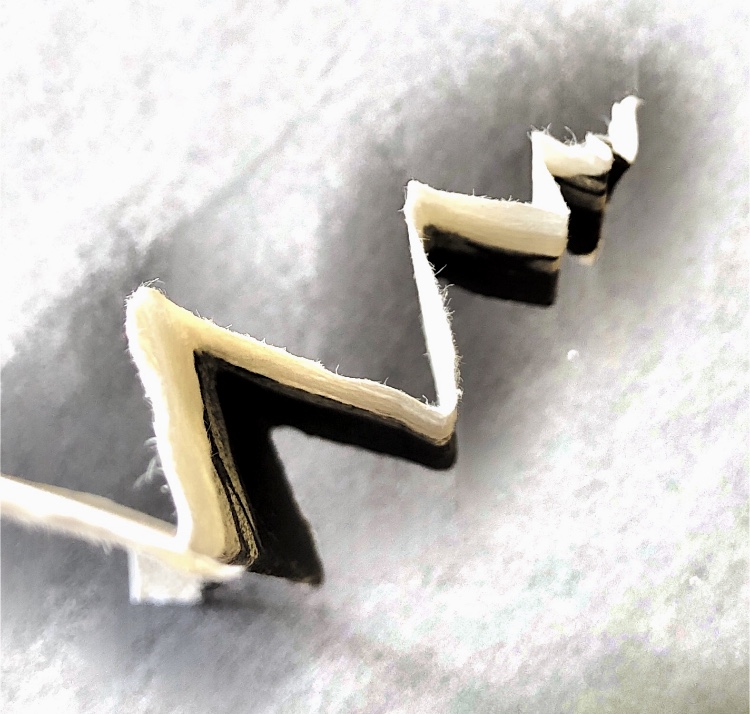
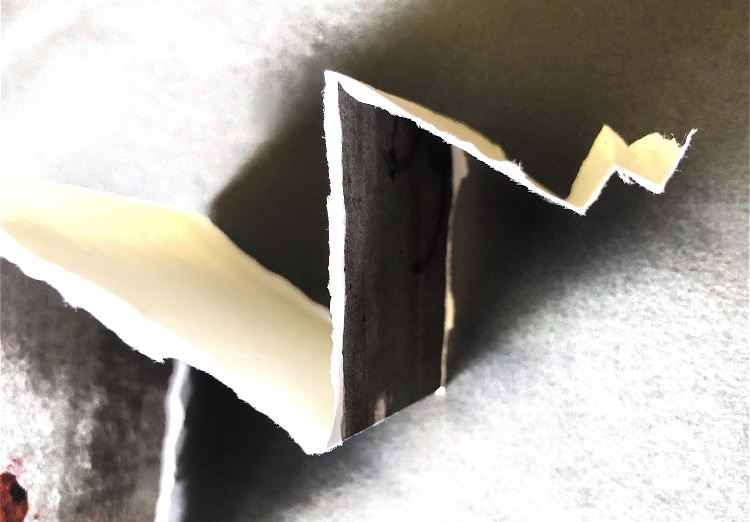
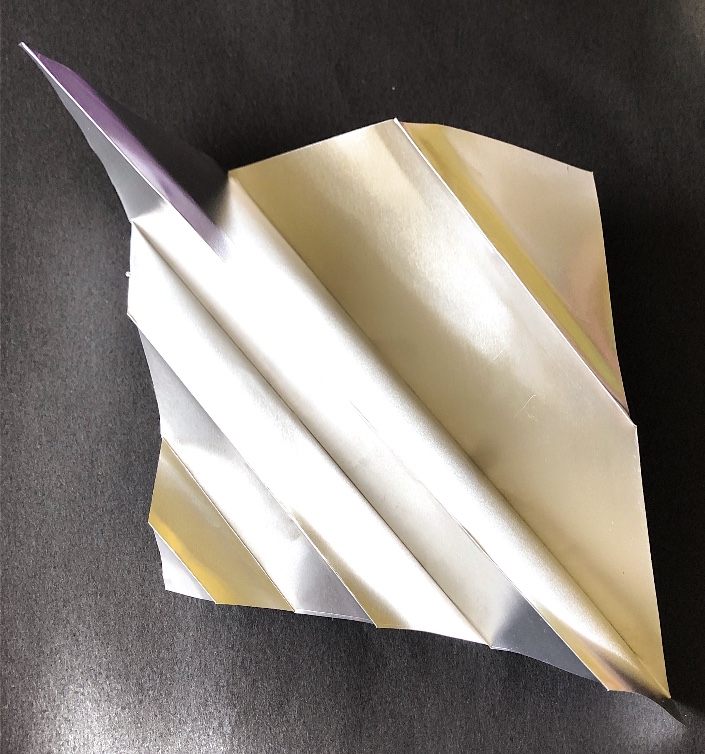
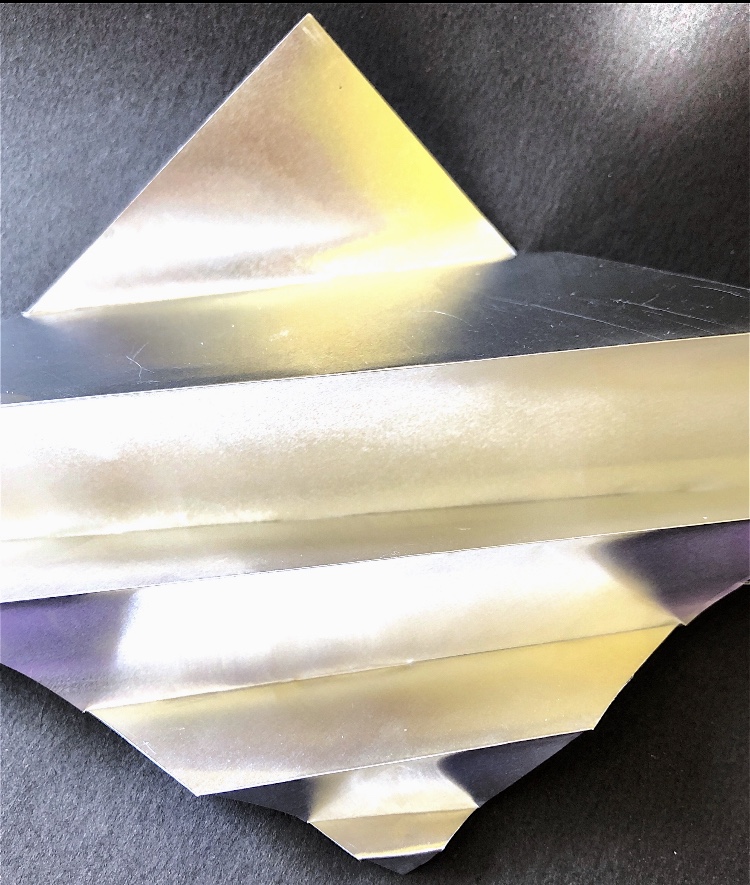
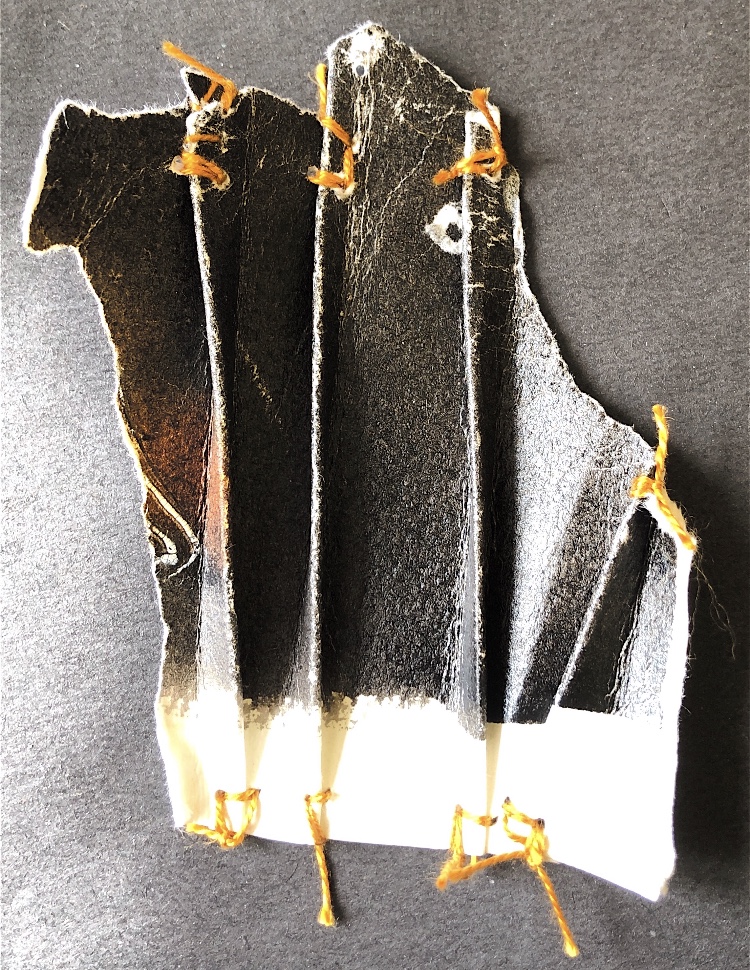
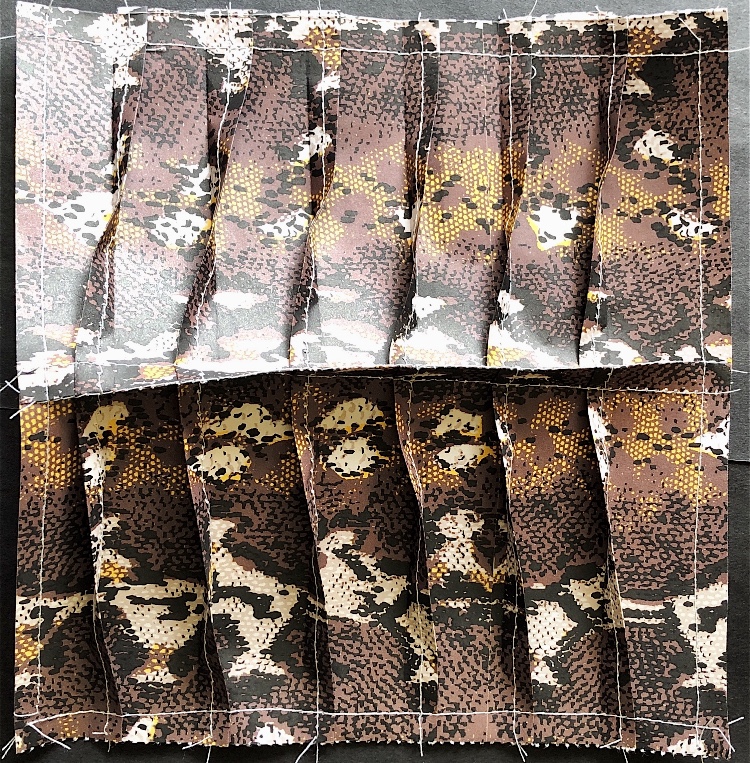
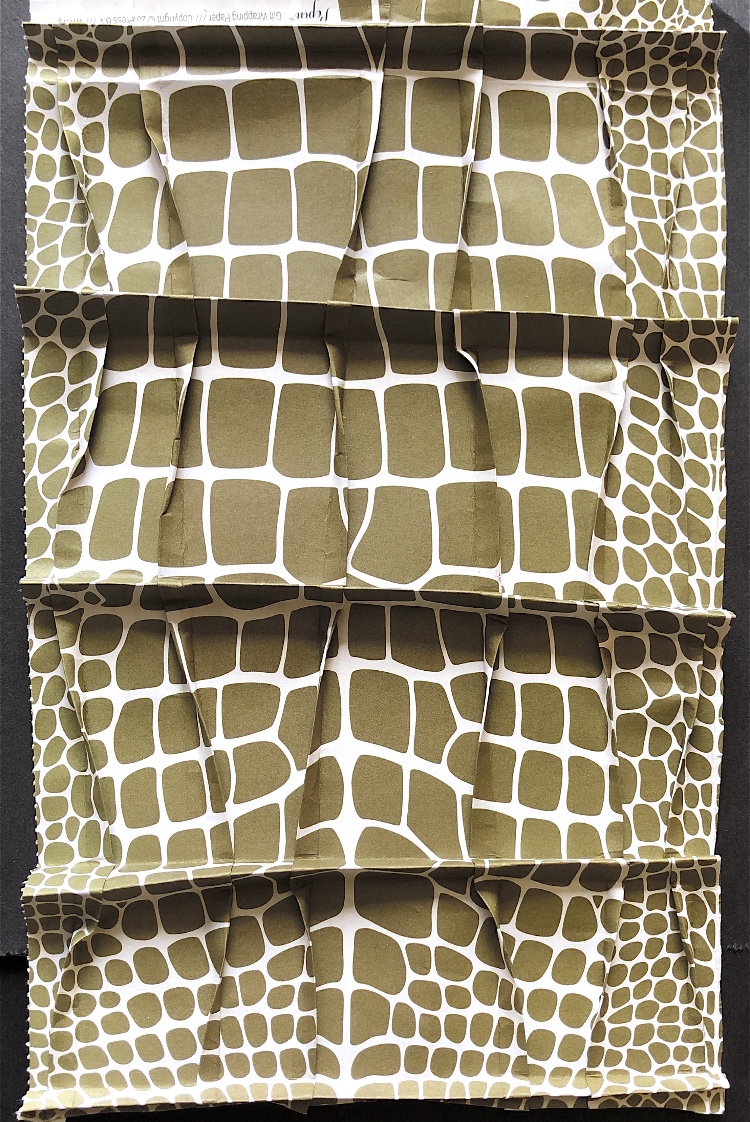
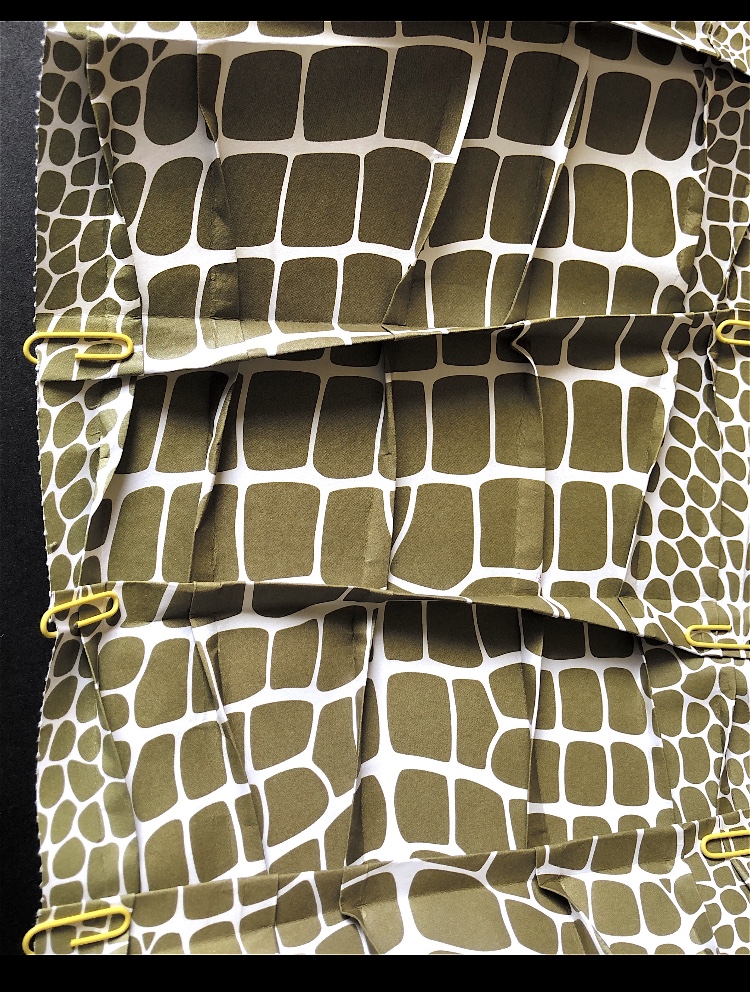
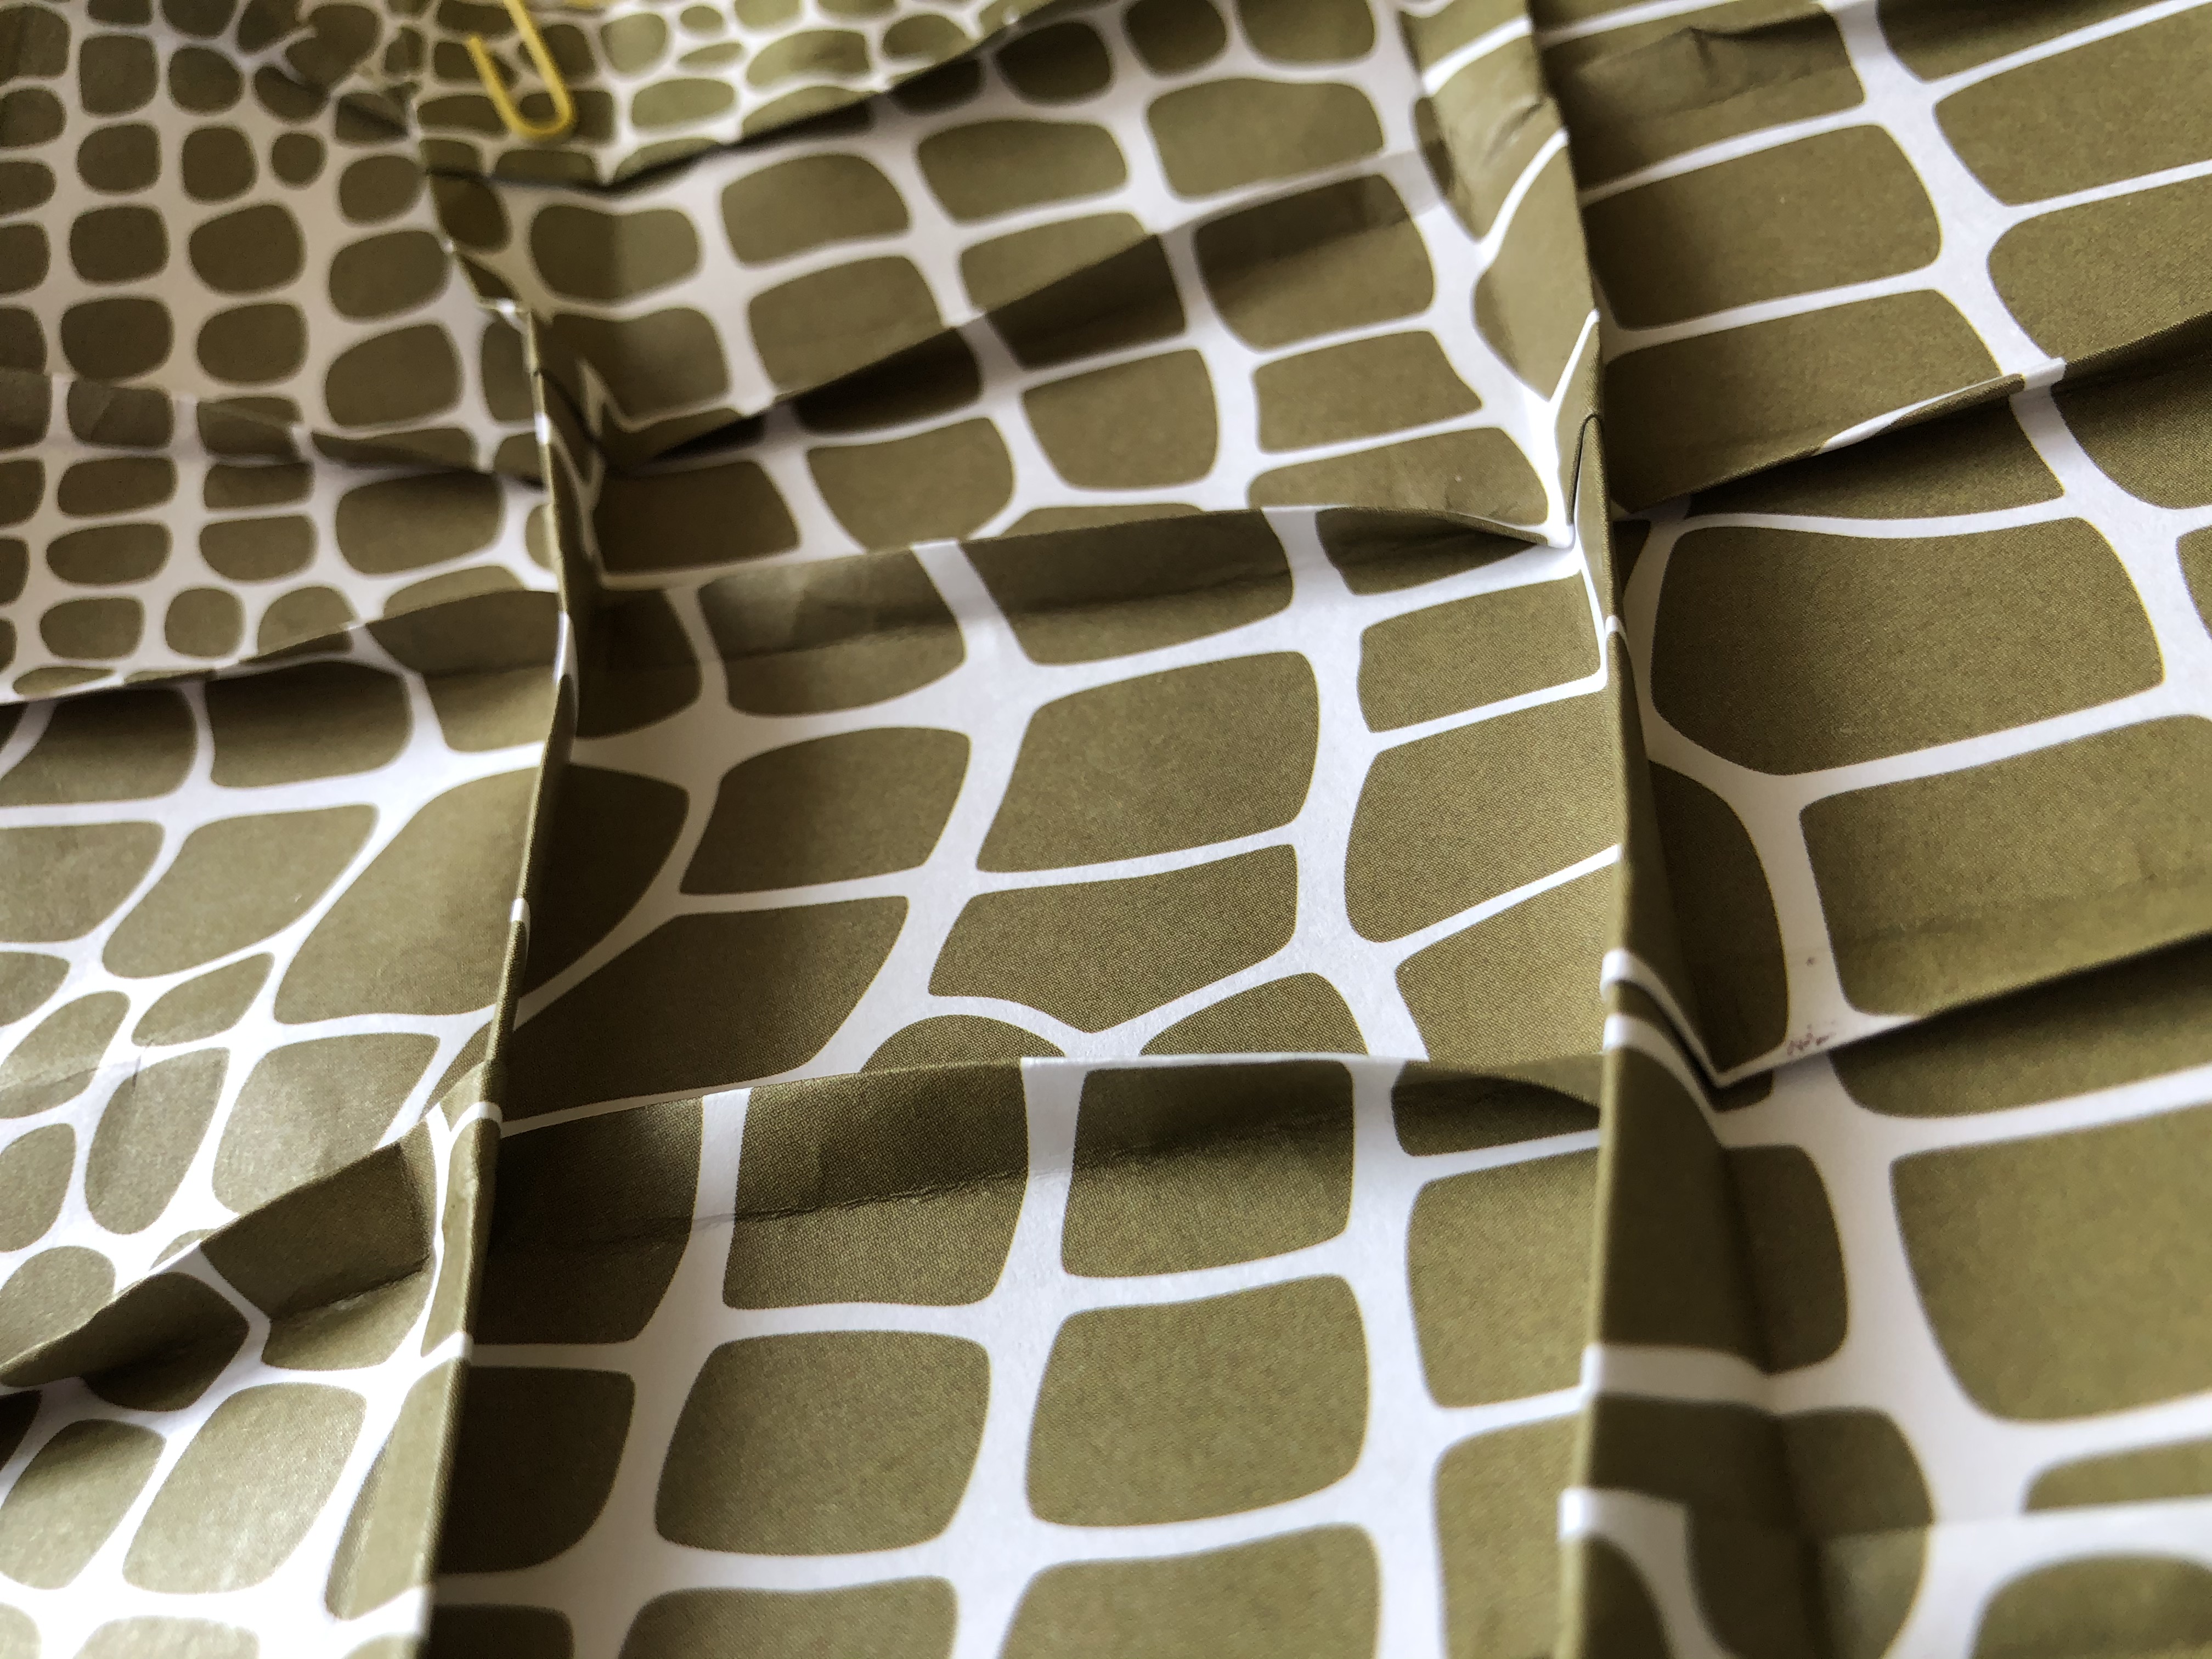
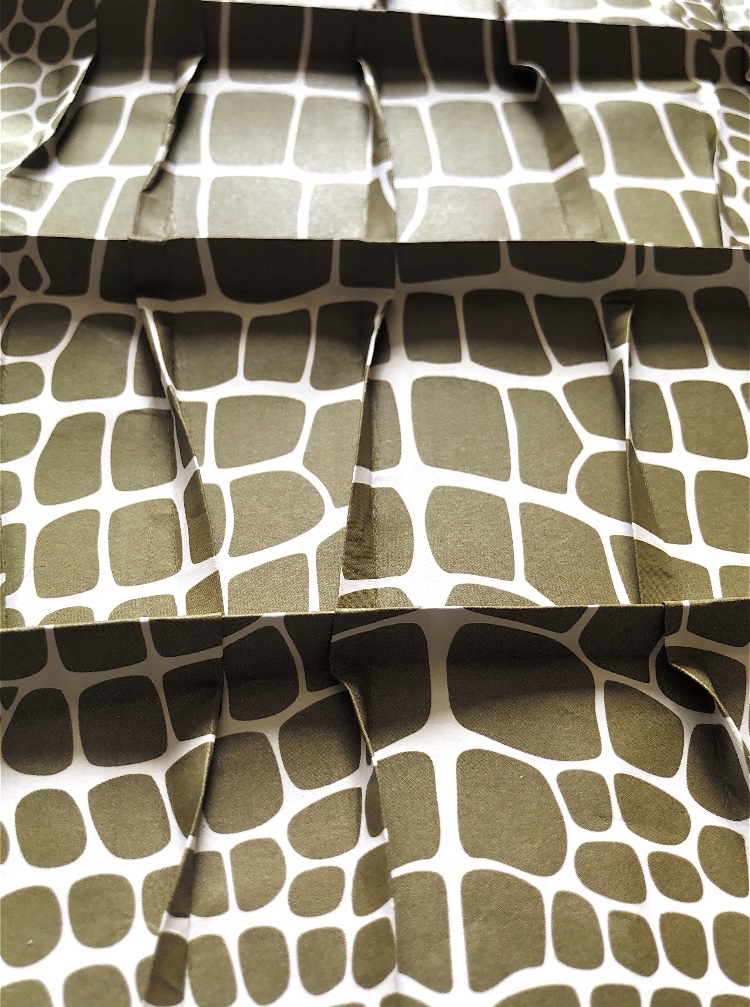
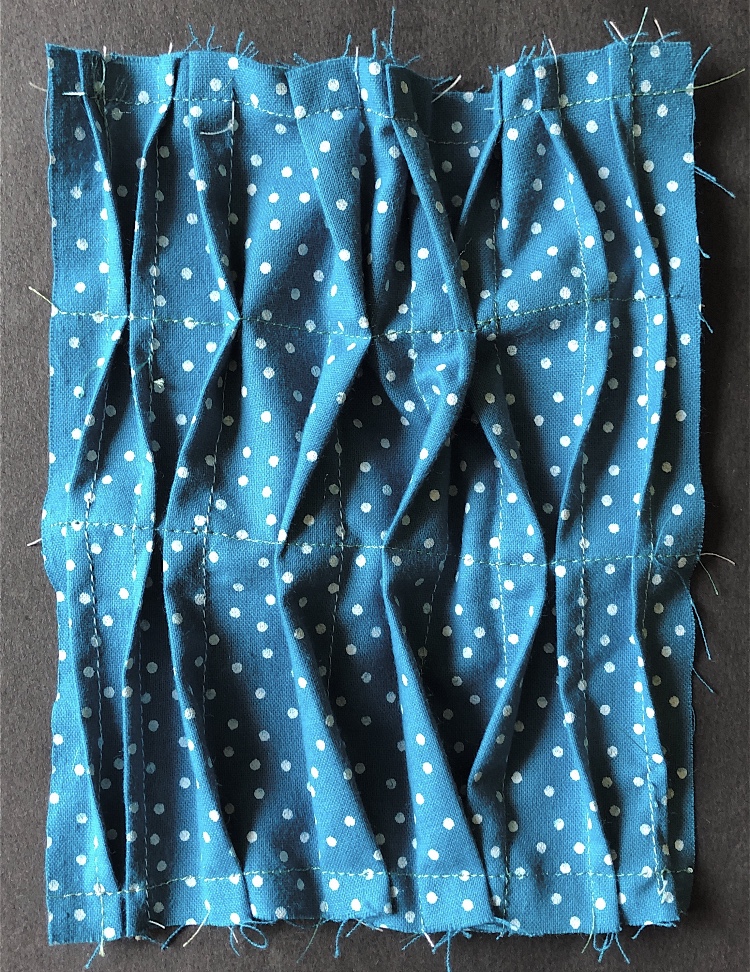
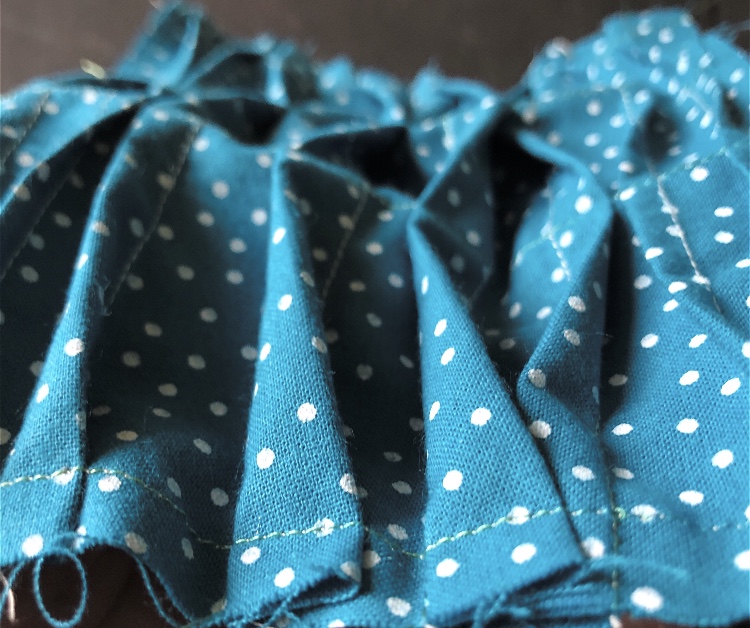
- Project 1 Folding and crumpling. Exercise 4 Incremental and twisted pleats Each of these samples is very simple but due to the paper used, the angle of the photography and the resulting shape, they feel like works of art just as they are. Colour also plays a major part here. The use of watercolour paper painted black, and torn to give a feathery white edge contrasts well with the definite folds. Paper printed on one side but not the other, and then folded, distorts the pattern in an abstract way here, but maybe the folds could be used to create specific patterning if I decide to take this technique further.
The thicker paper was more difficult to fold and twist, but the shapes and shadows created are bold and powerful, again contrasting with the soft white torn edges and the thread used to secure the ends.
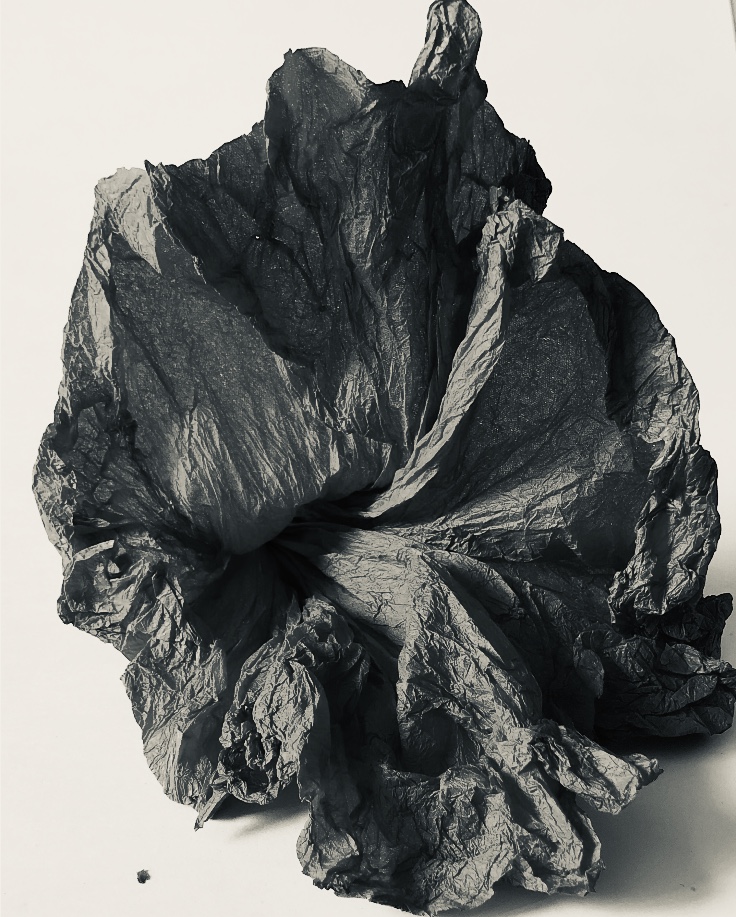
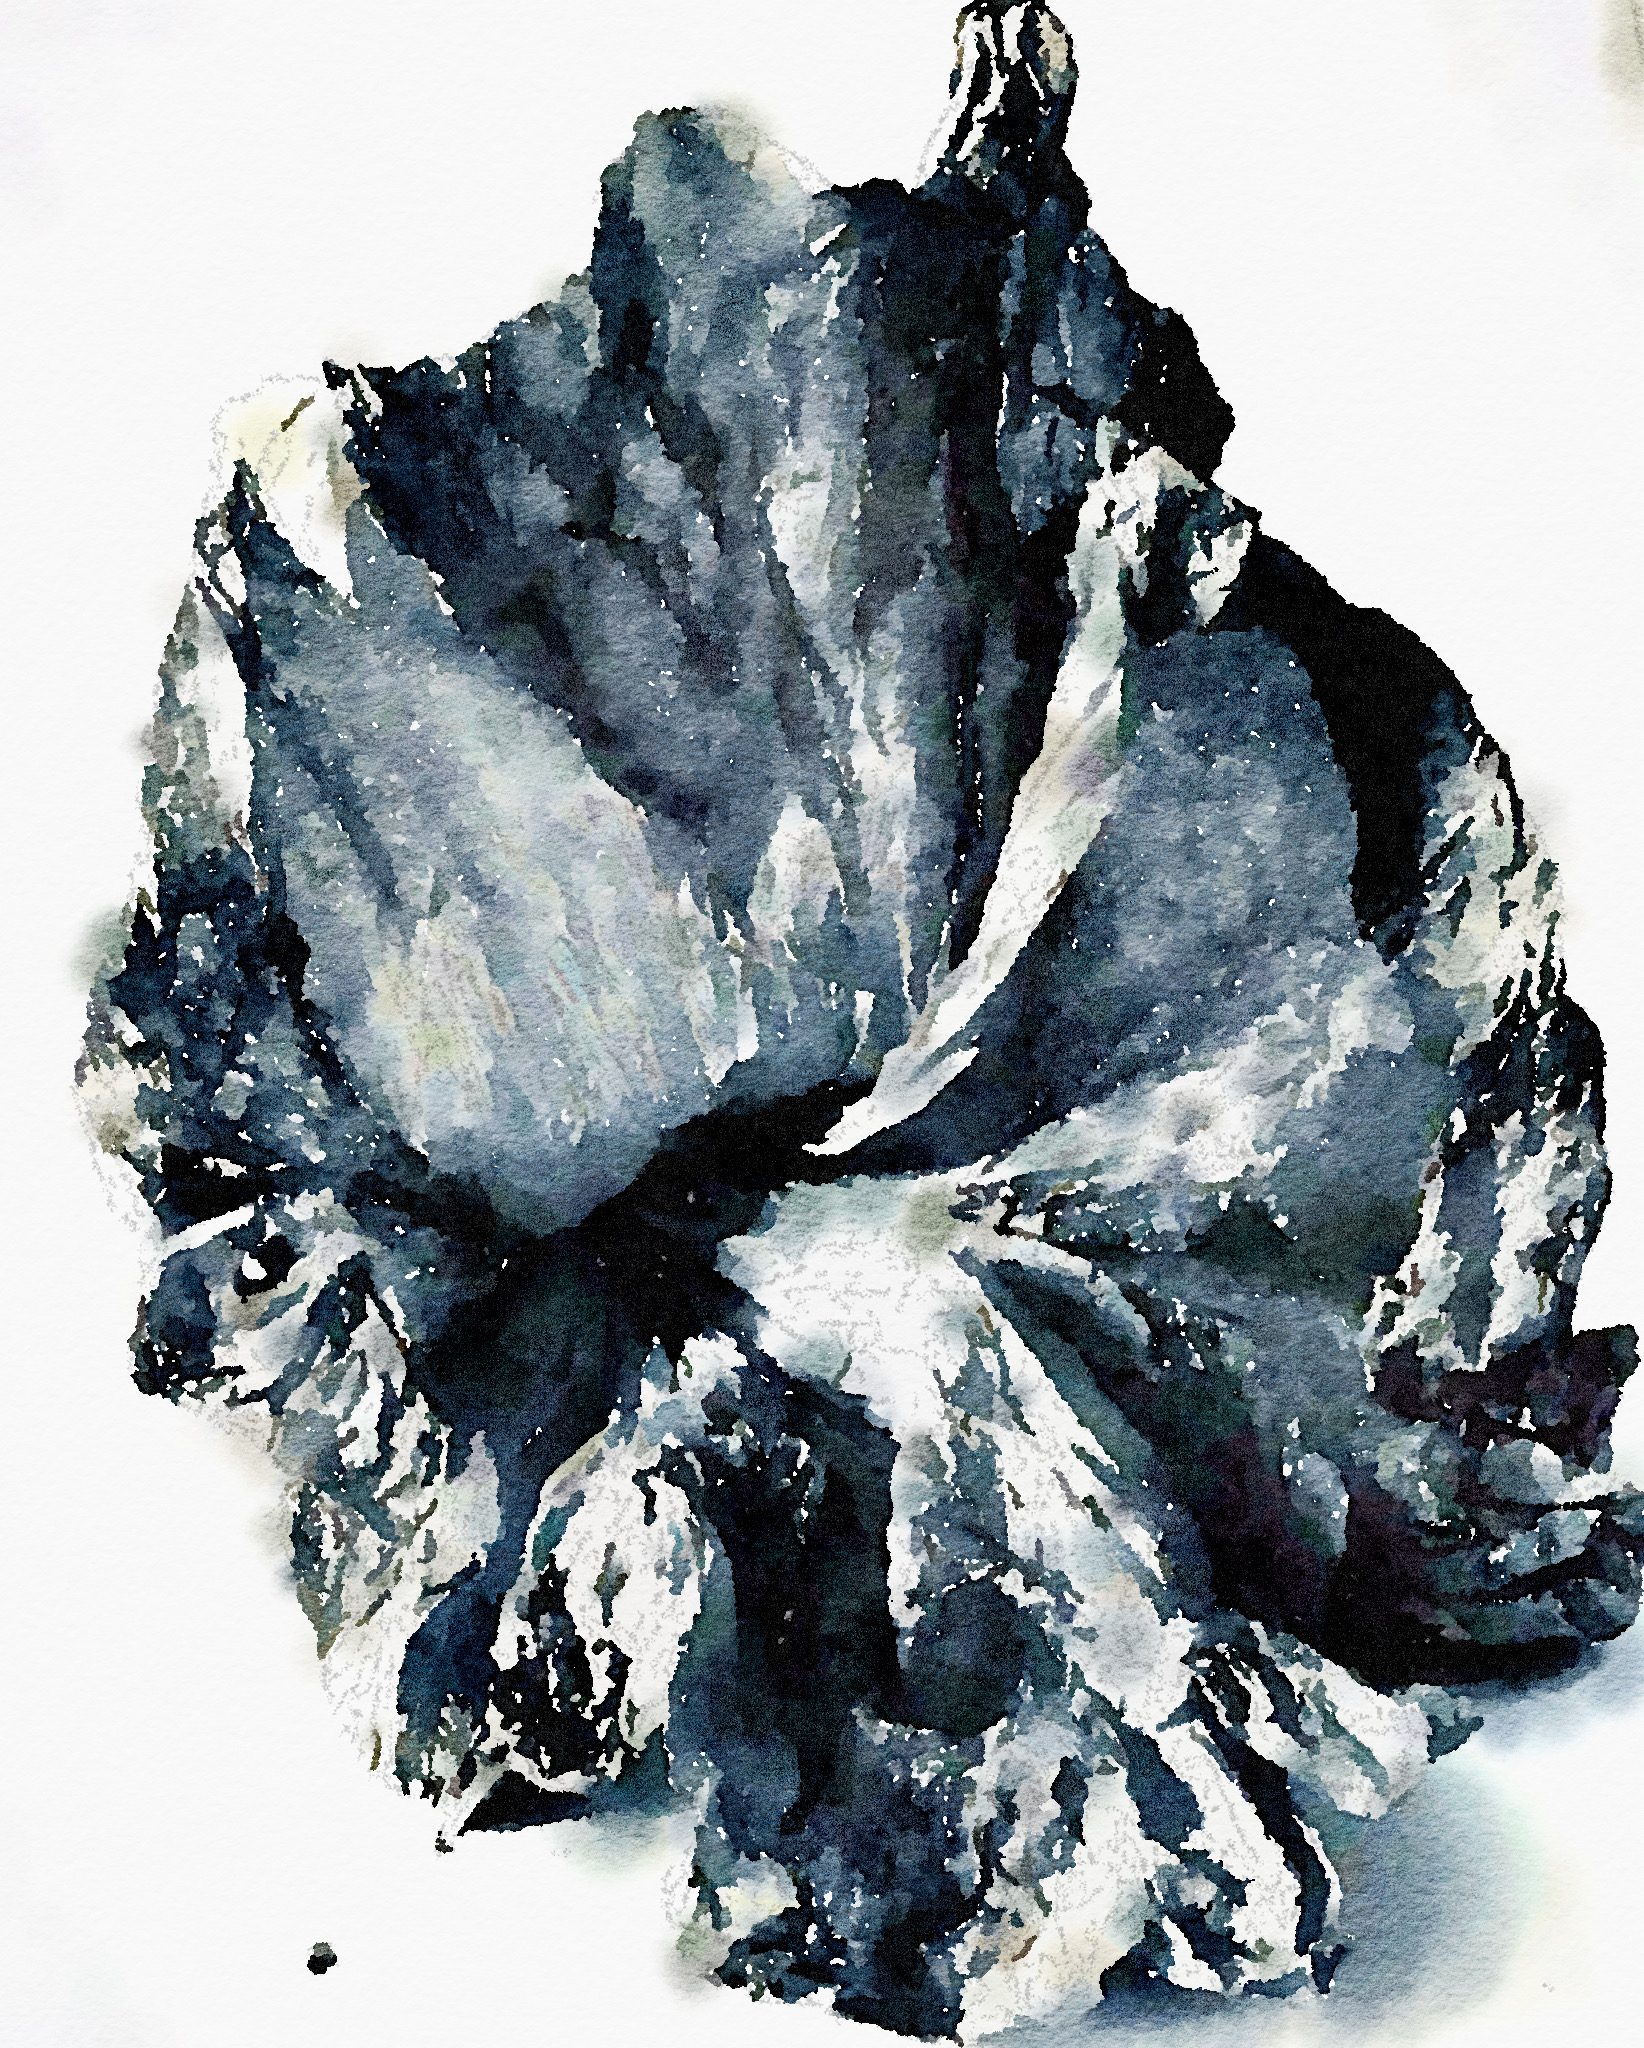
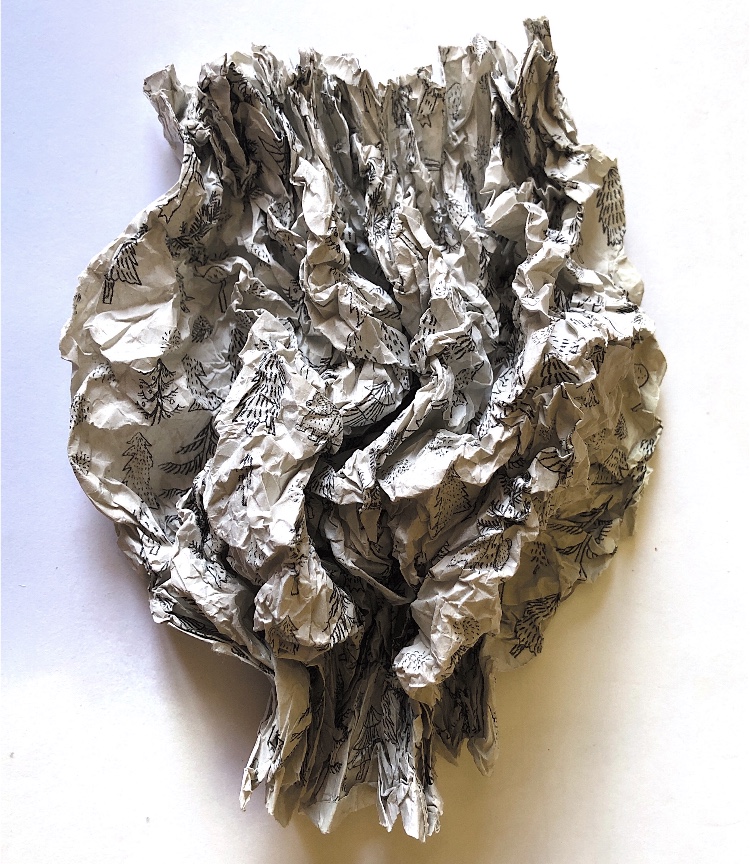
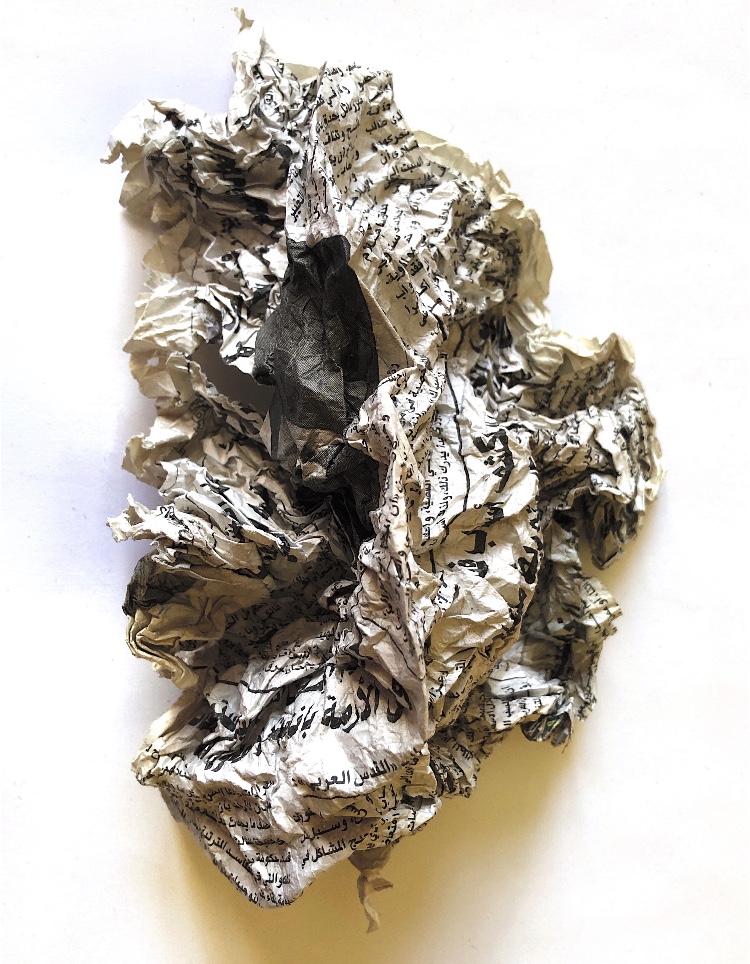
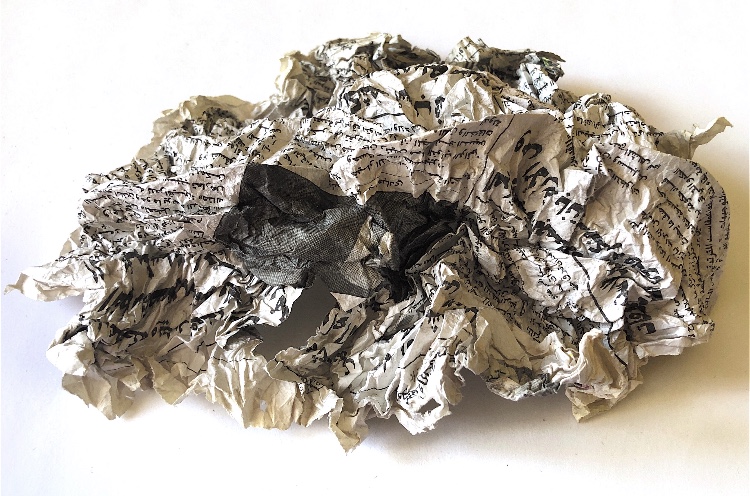
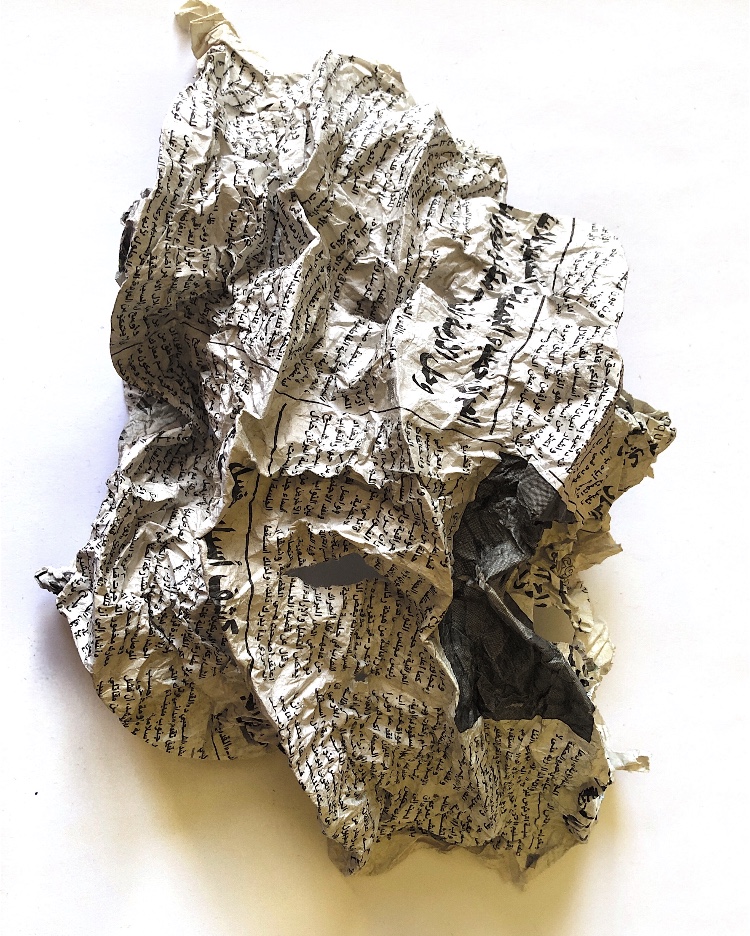
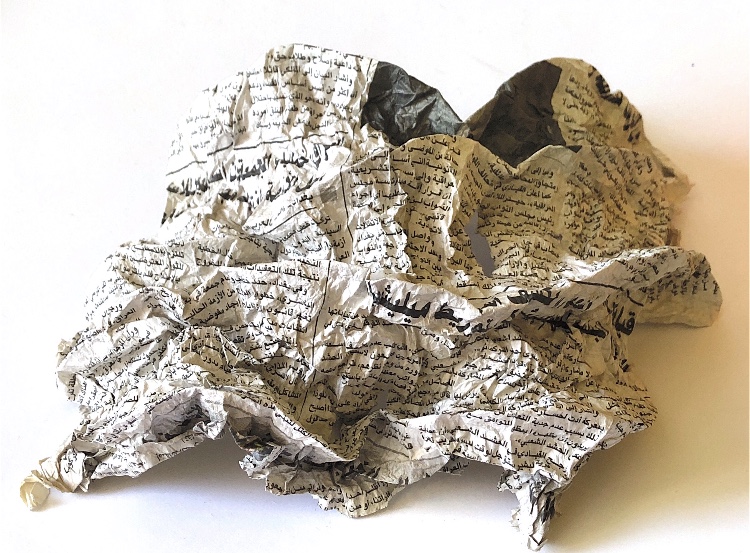
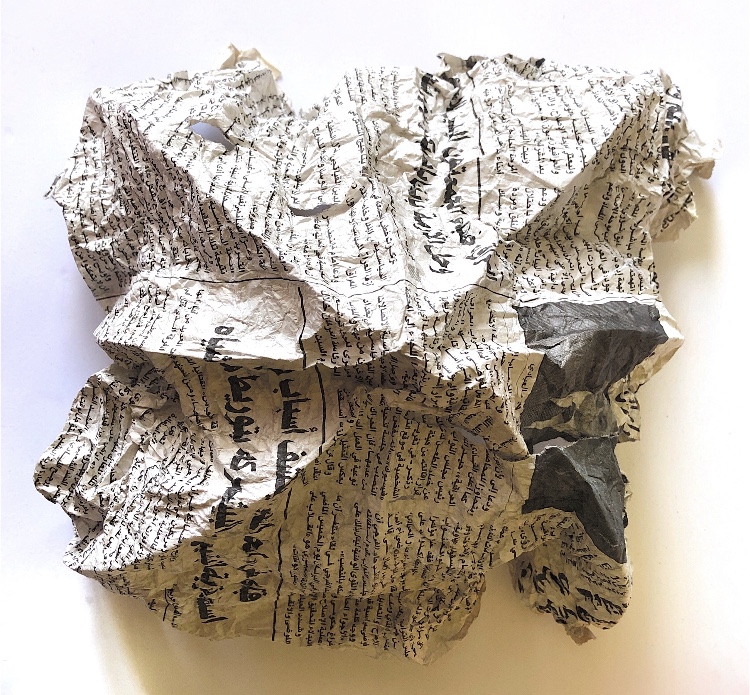
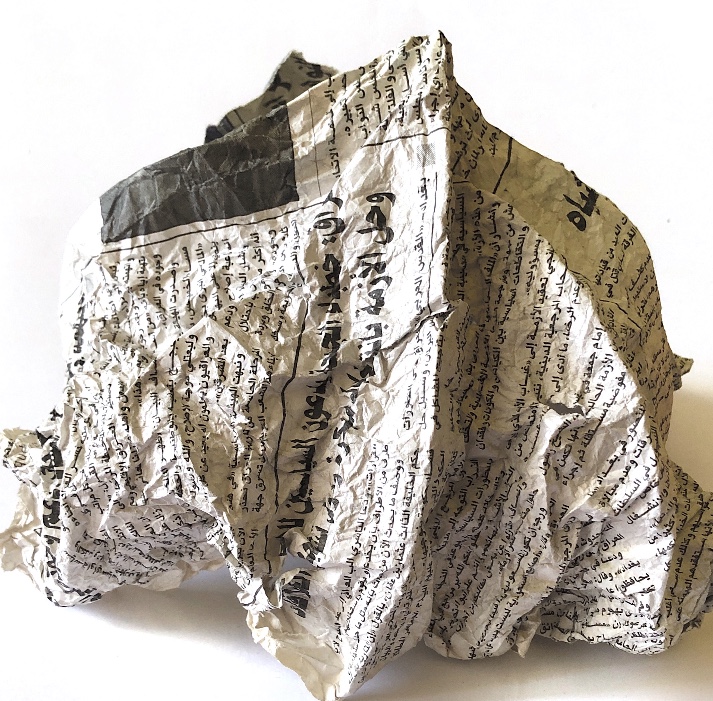
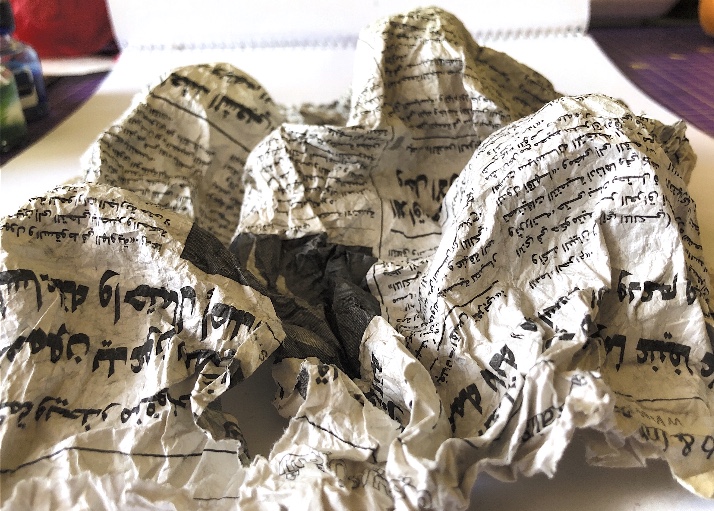
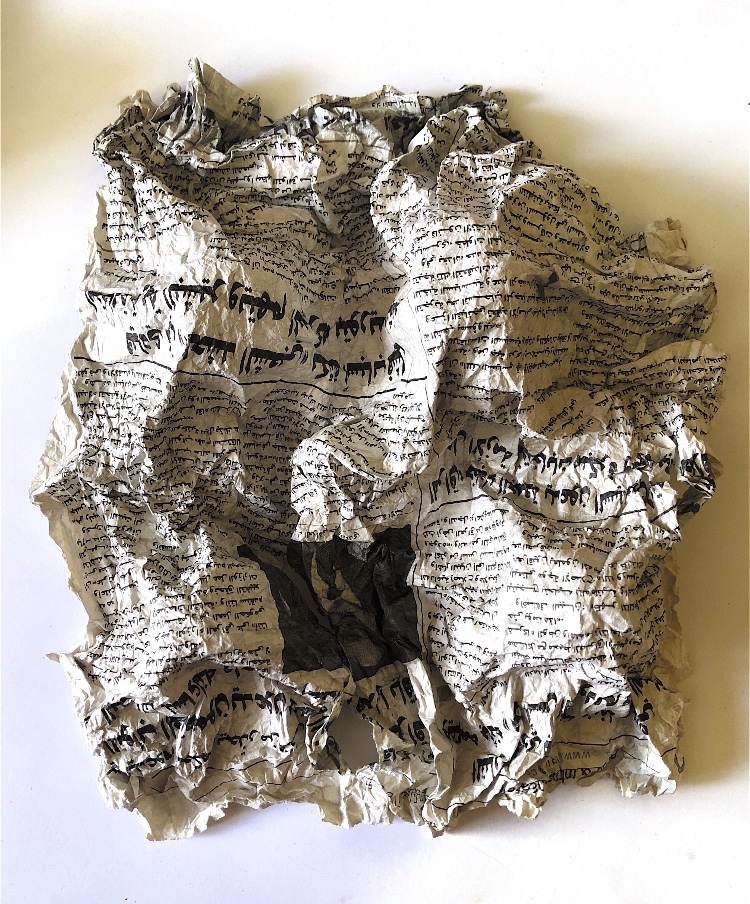
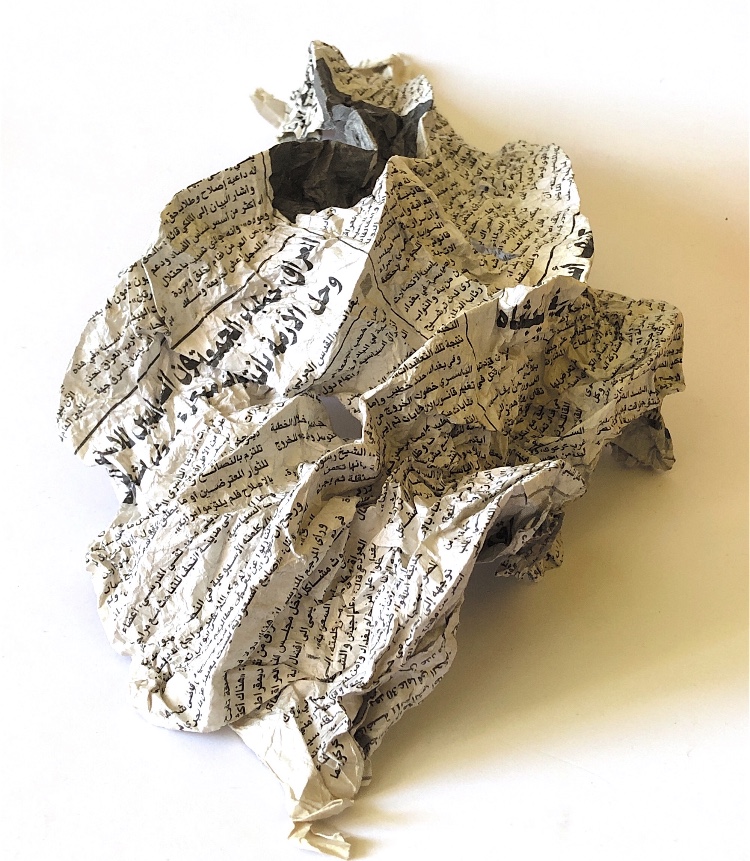
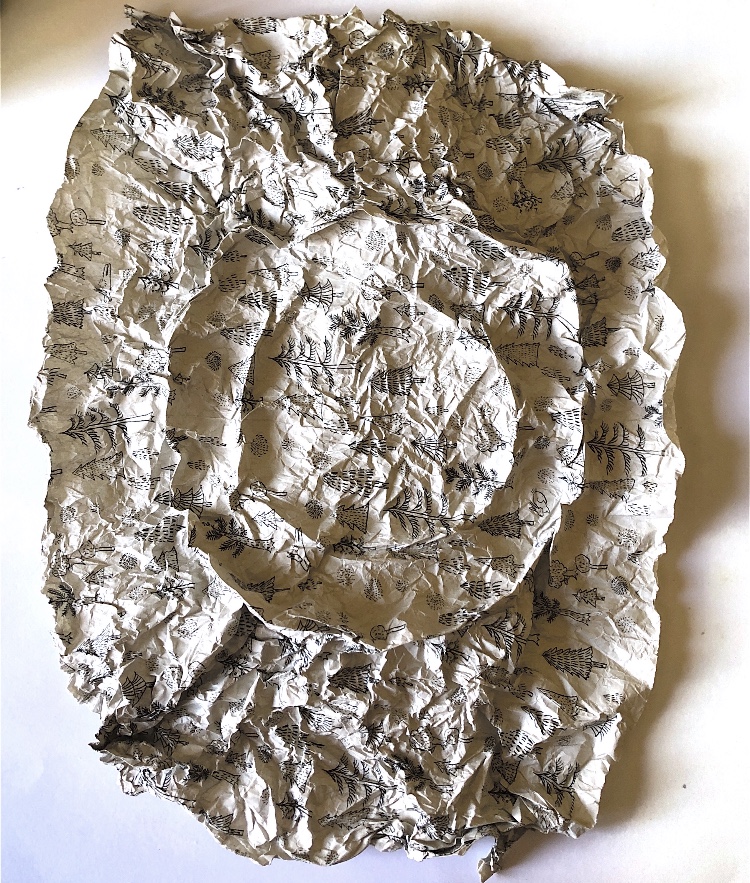
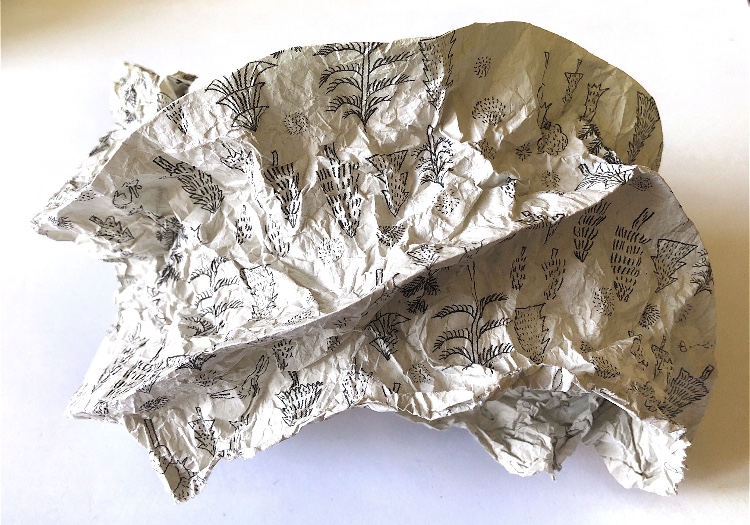
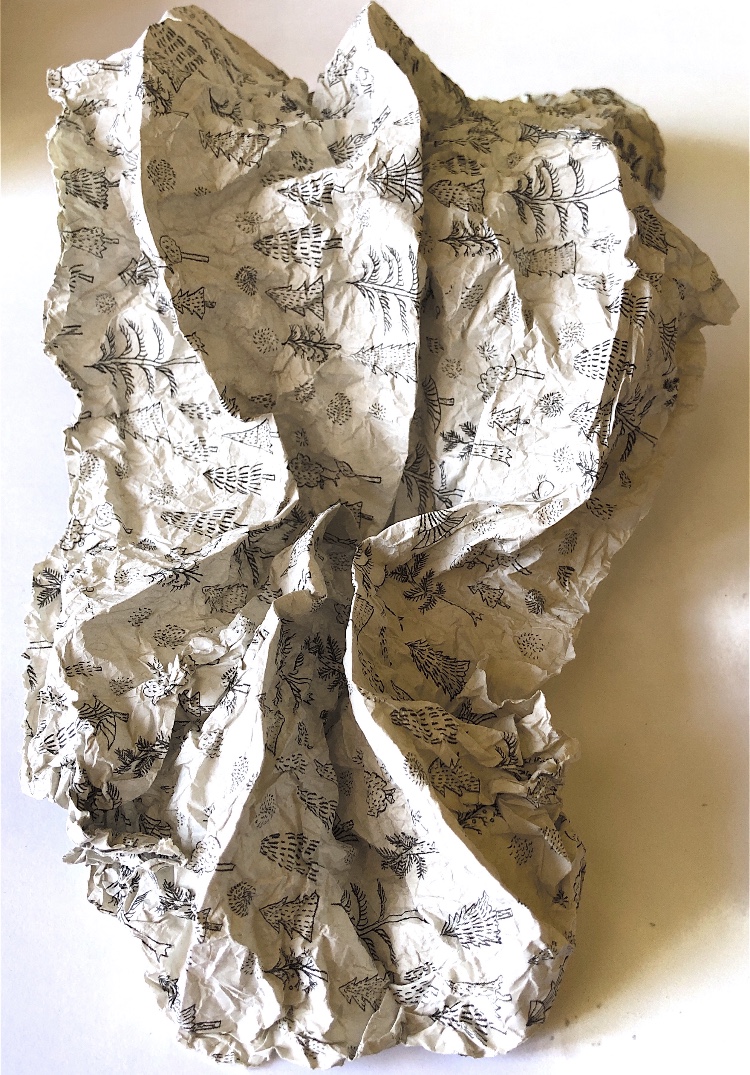
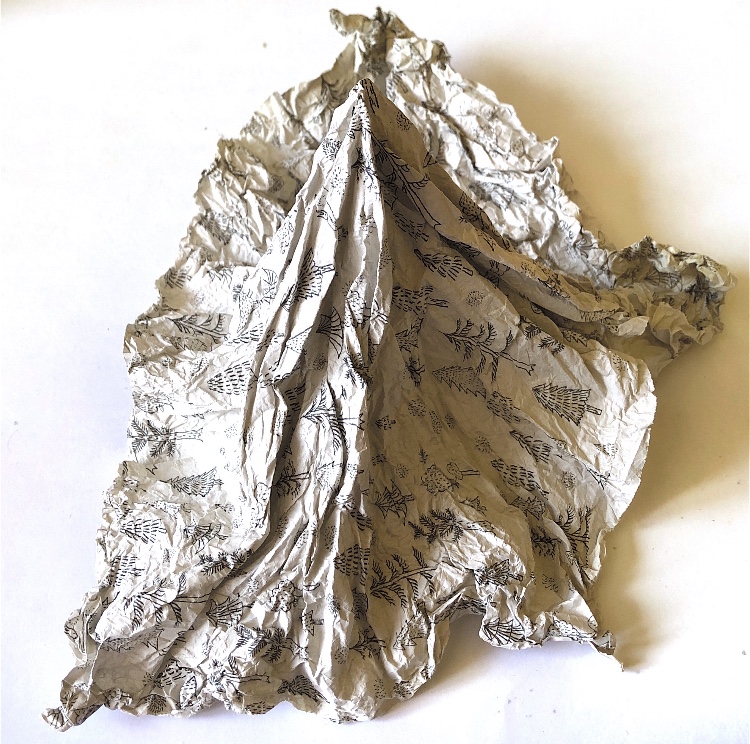
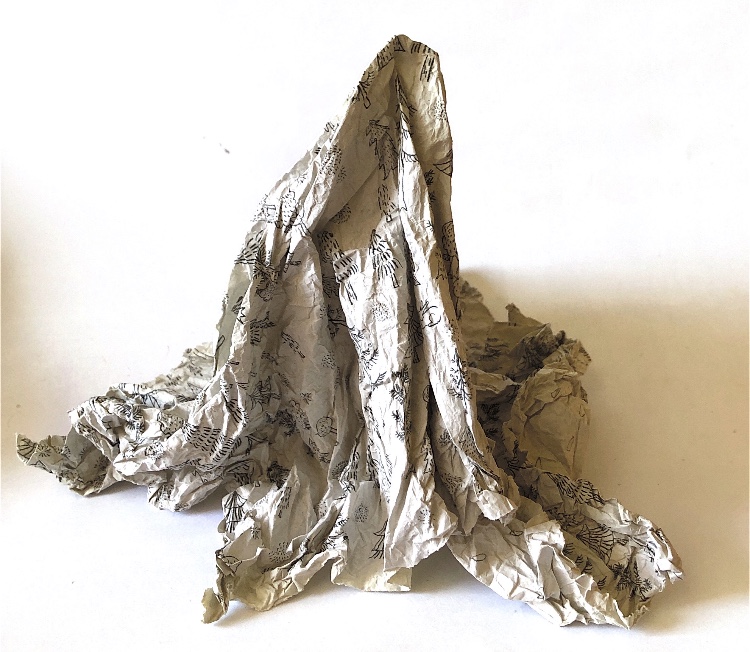
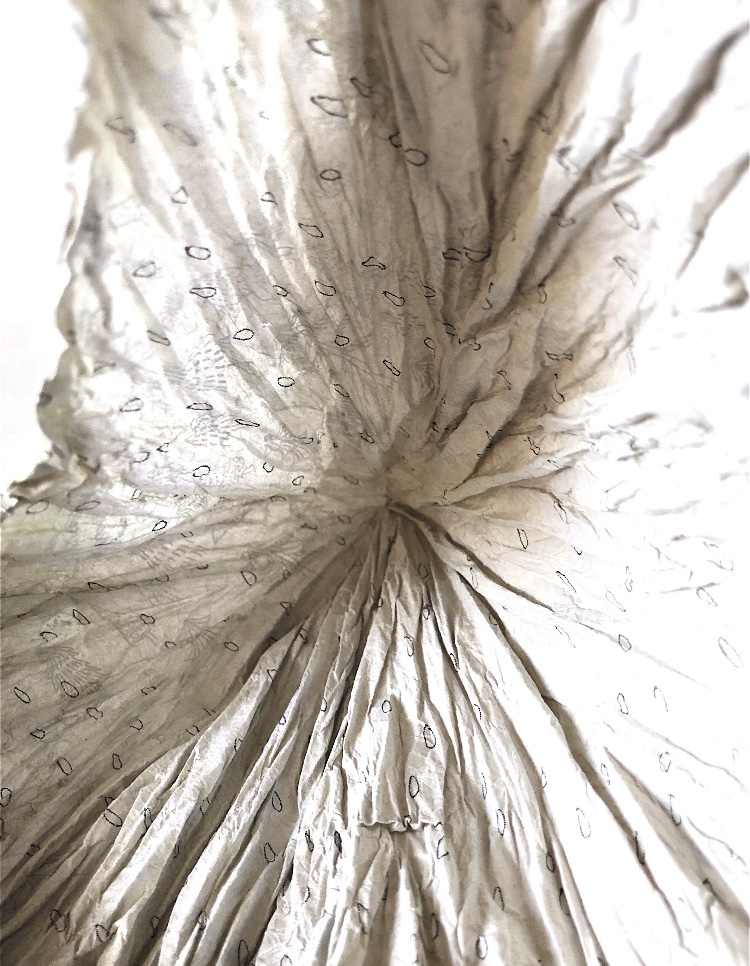
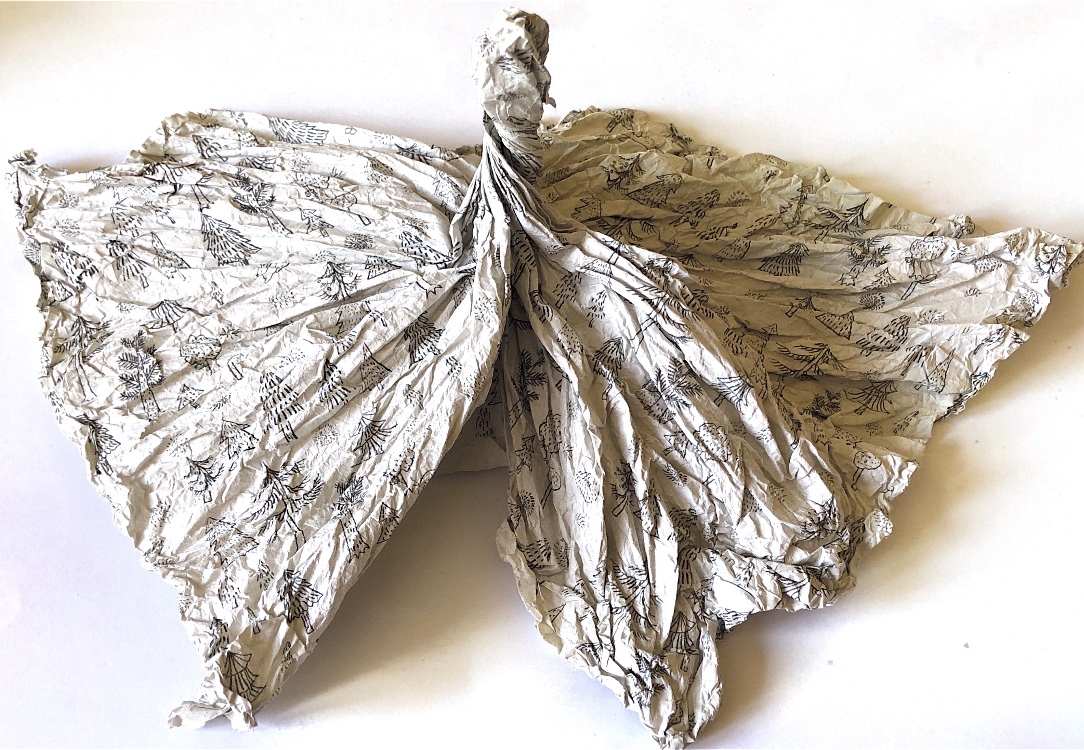
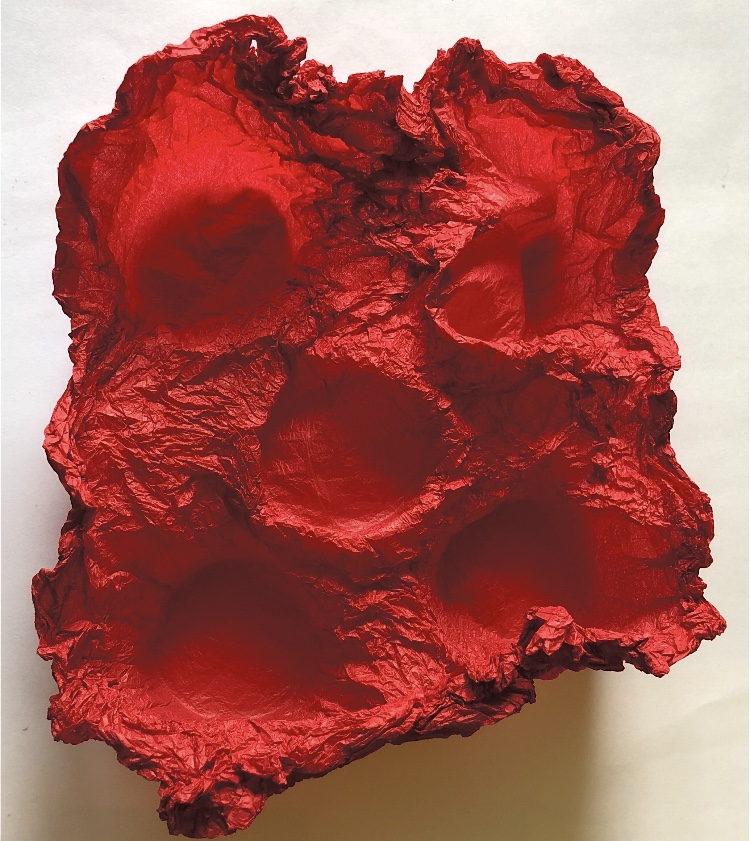
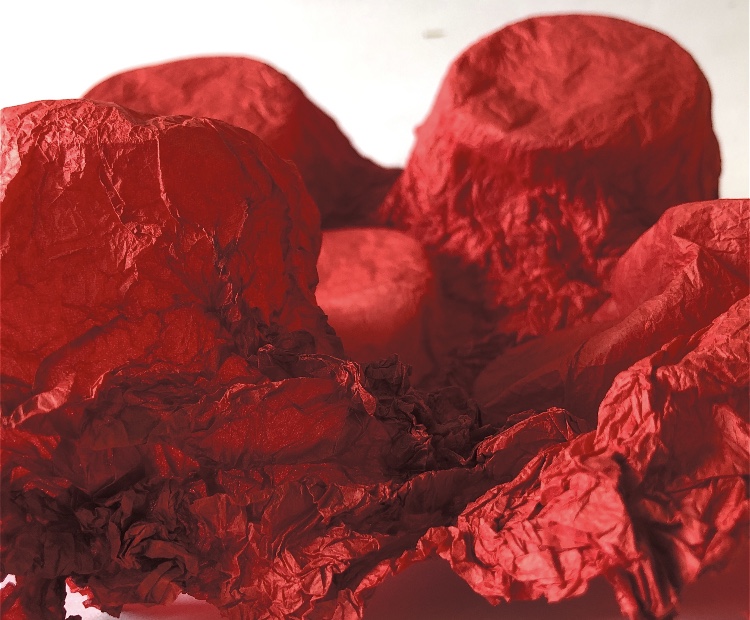
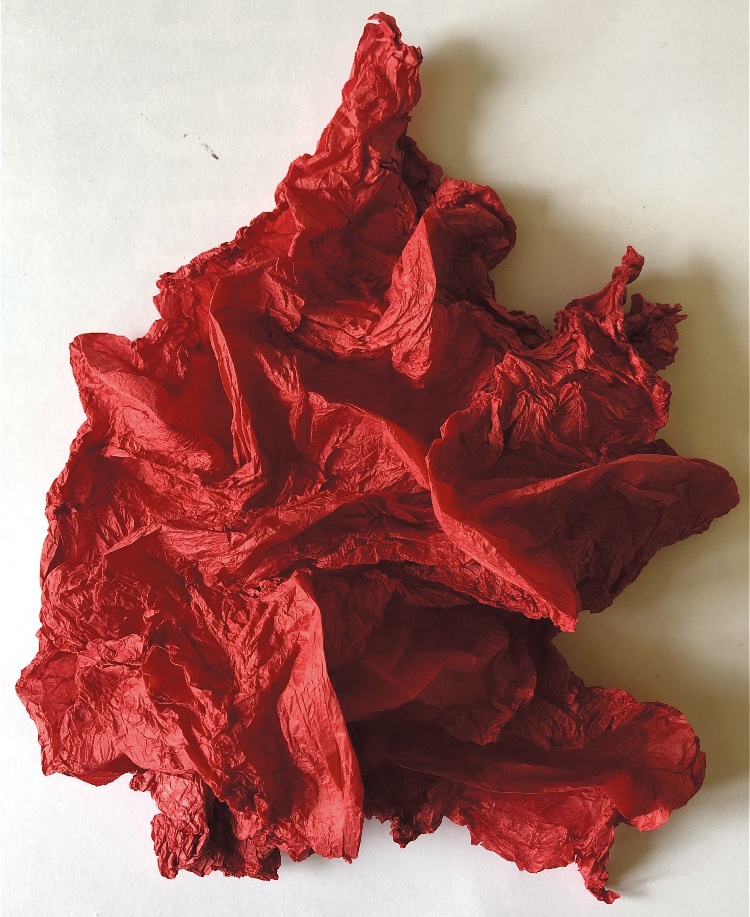
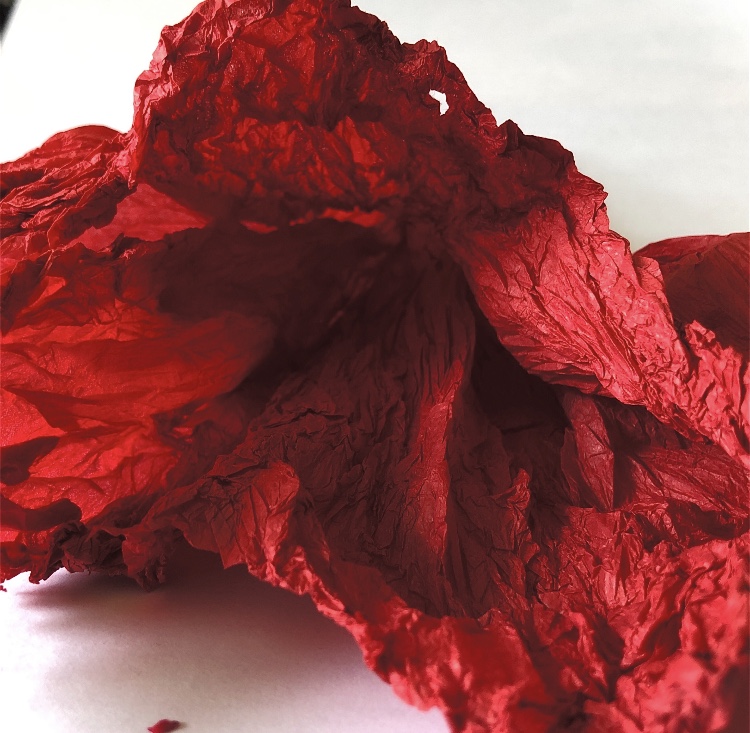
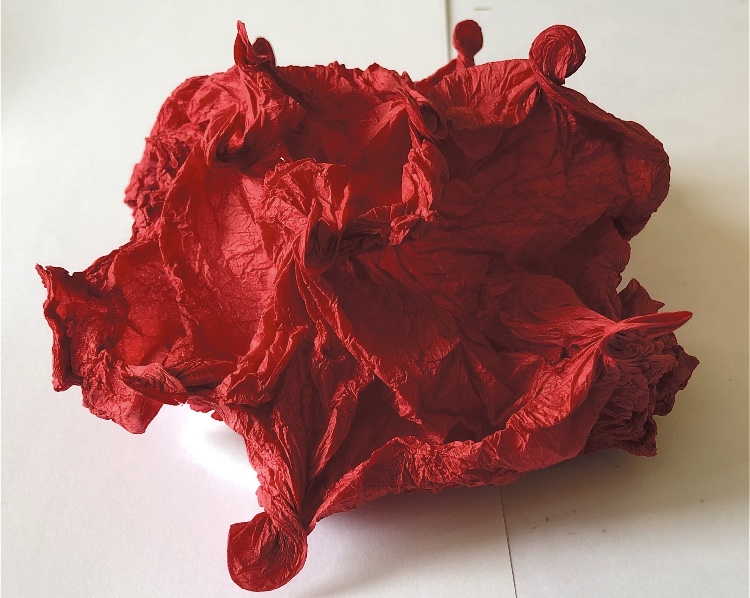
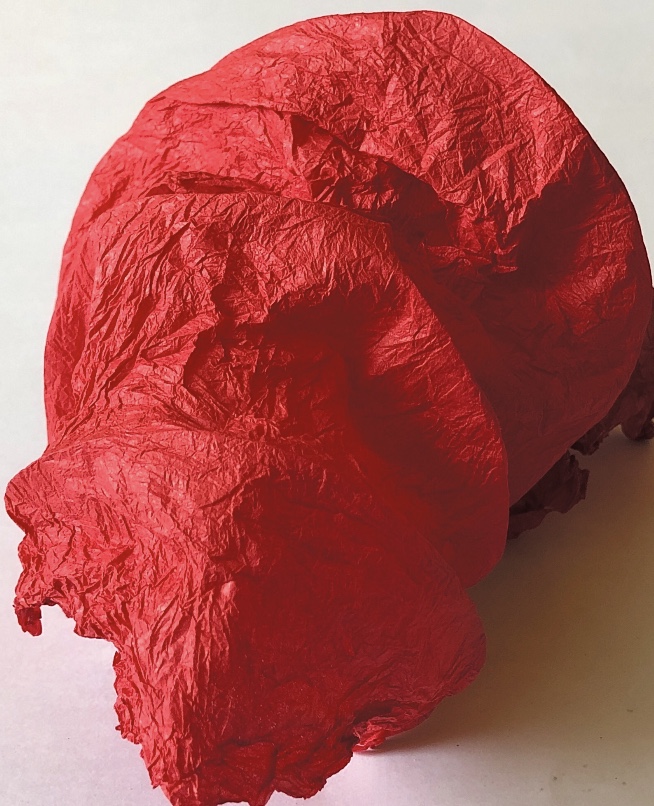
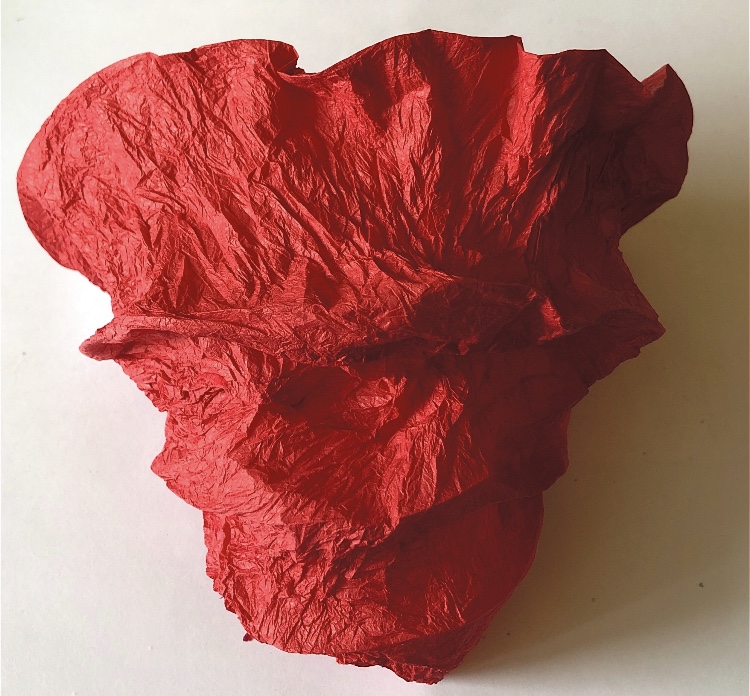
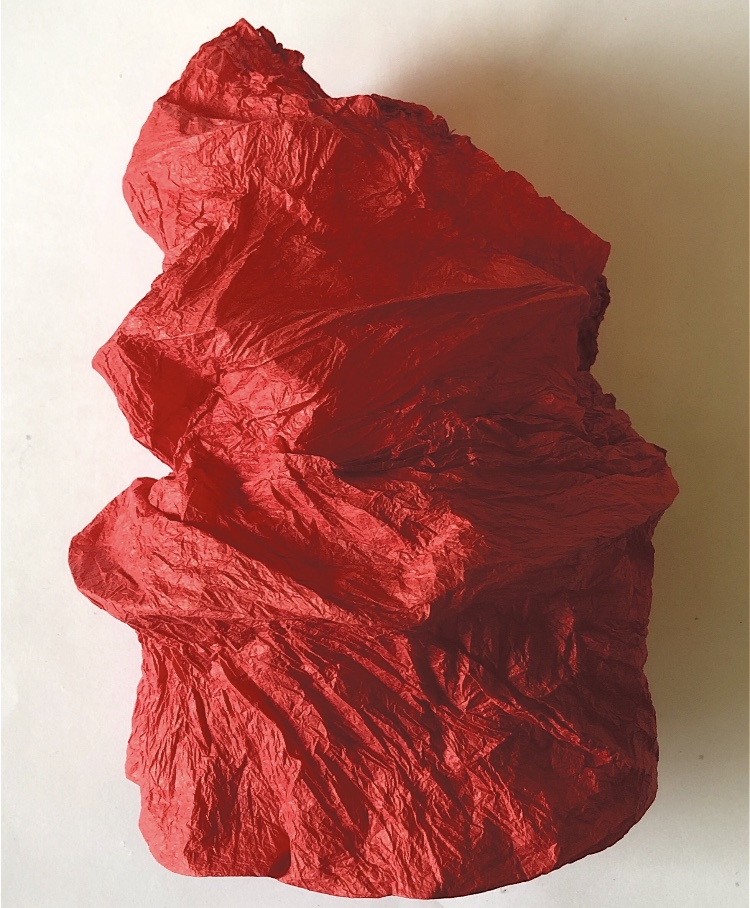
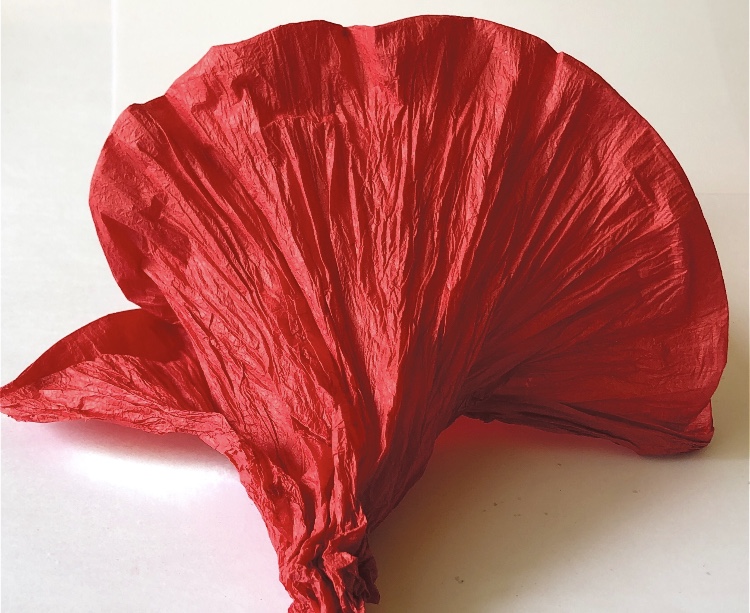
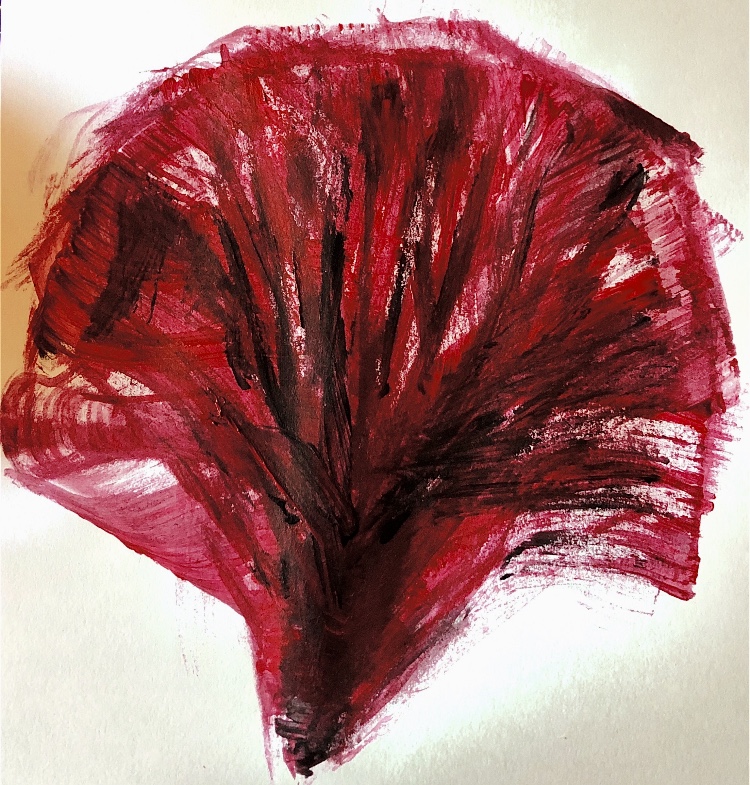
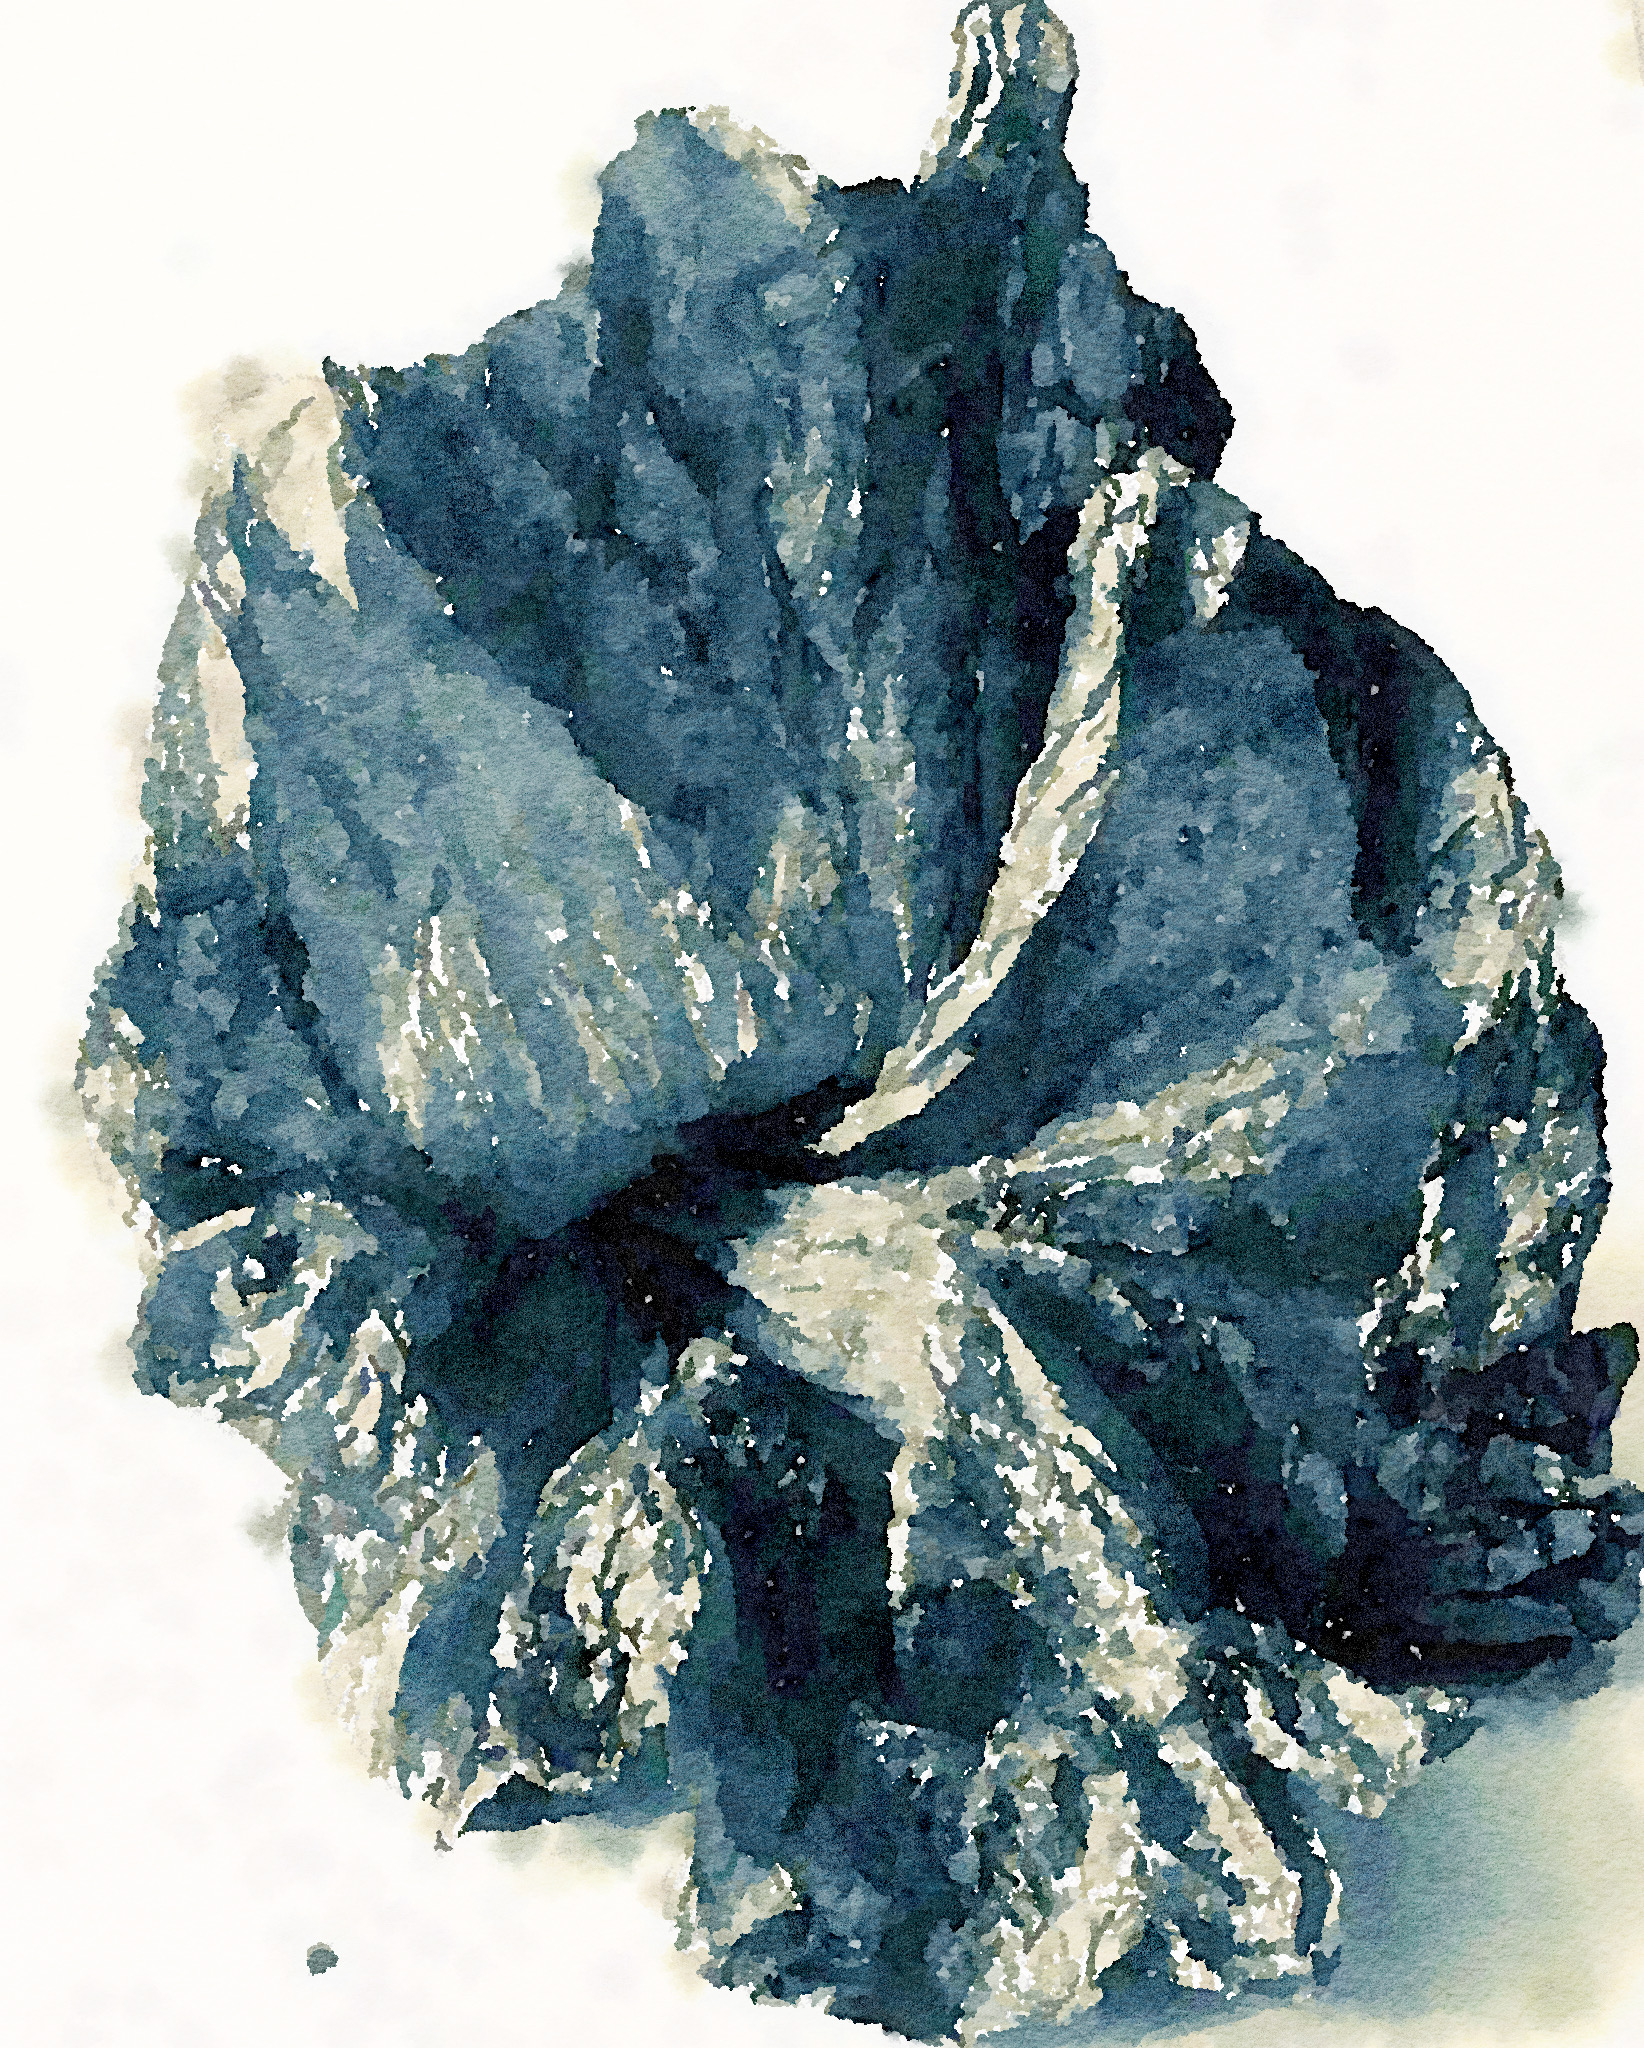
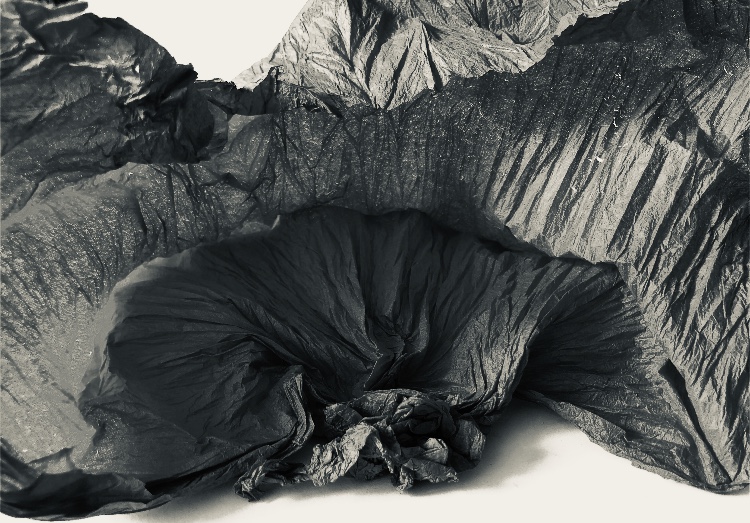
Exercise 5 Basic crumpling technique I enjoyed the crumpling technique, the tactile nature of the samples is pleasing to look at and to hold. The papers I used worked well and could be crumpled many times to give a soft handle which still kept its shape when manipulated into ribs. Changing one of the sample photos into a black and white image and then manipulating it in the ‘Waterlogue’ app made a beautiful picture.
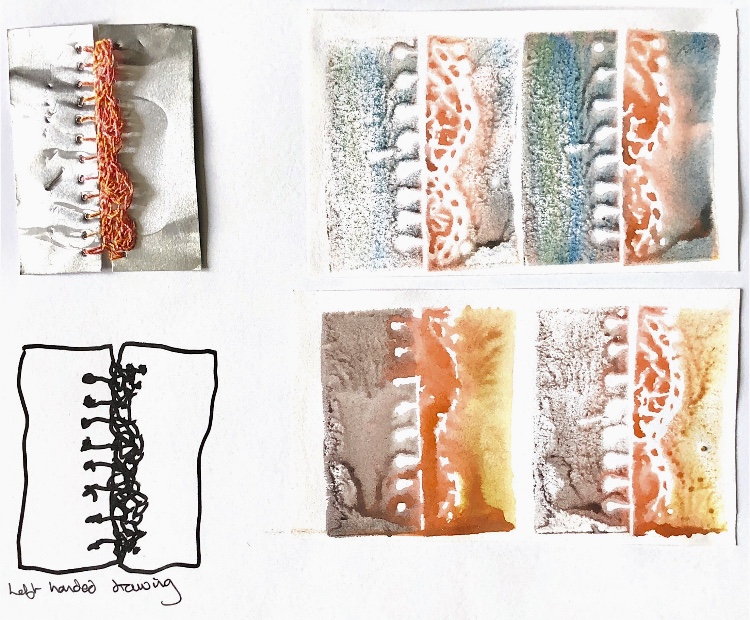
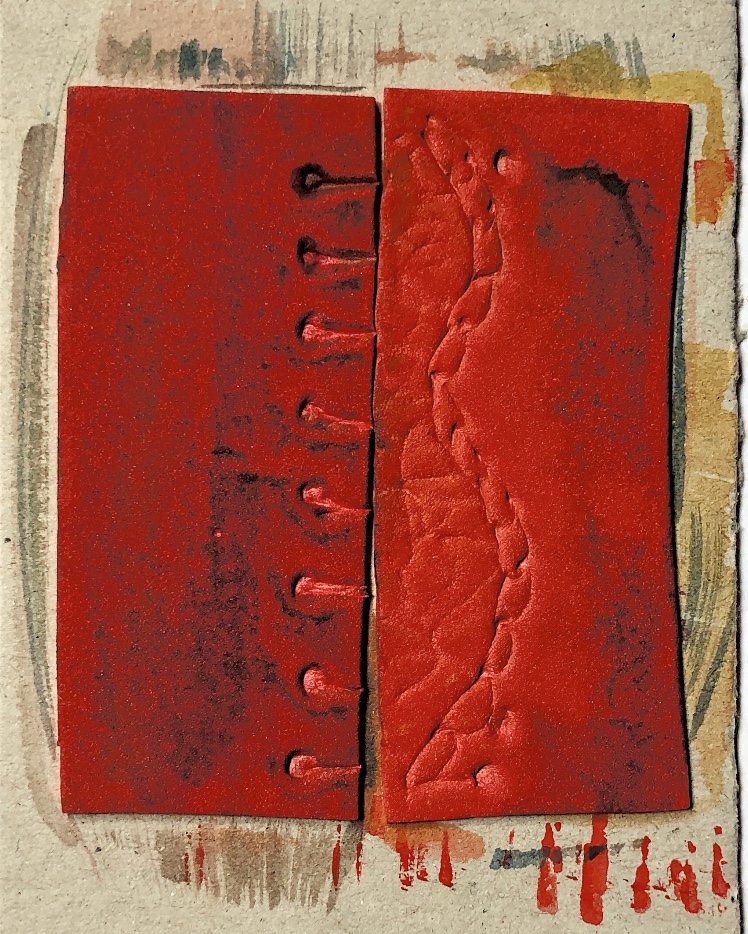
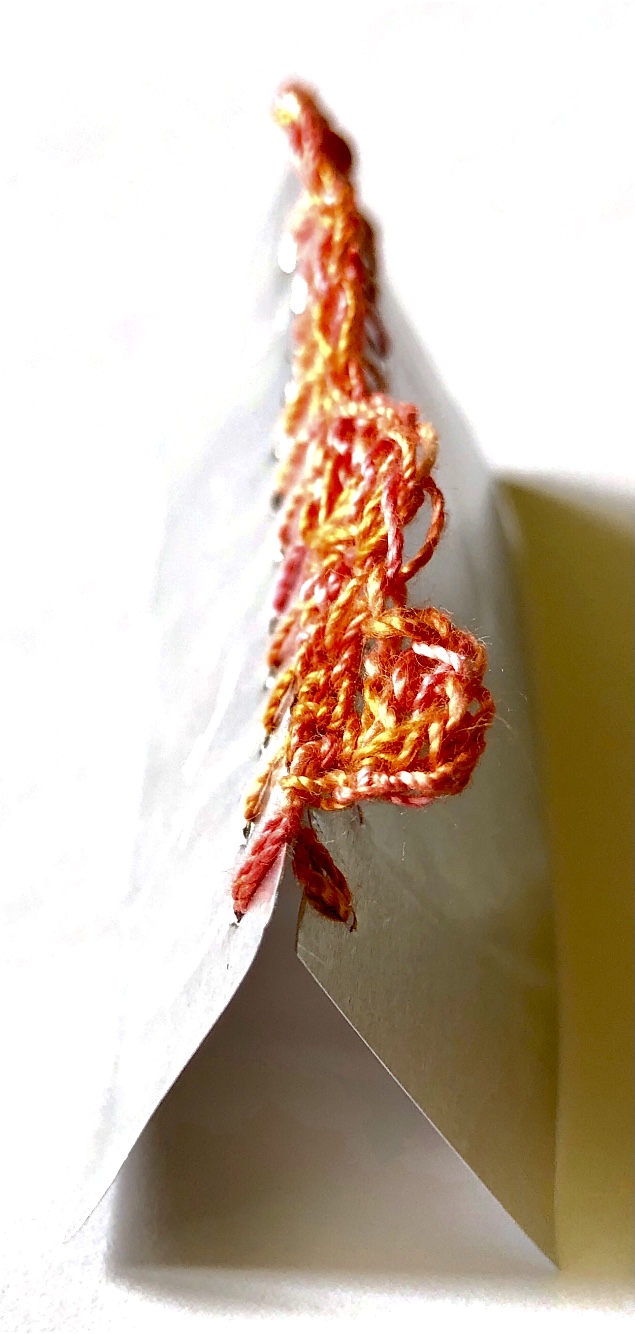
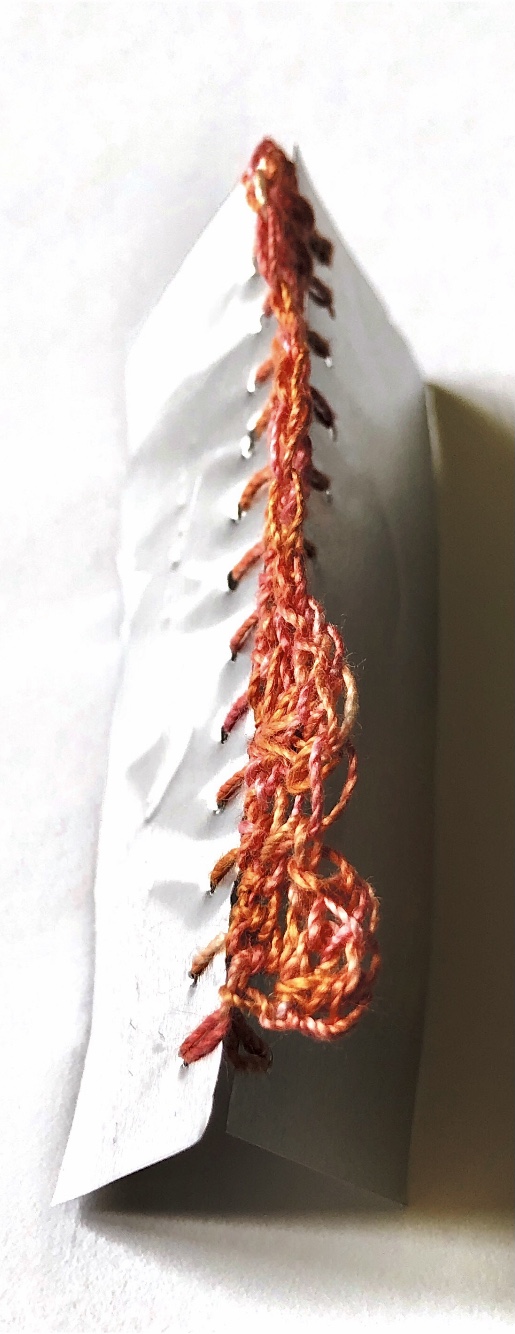
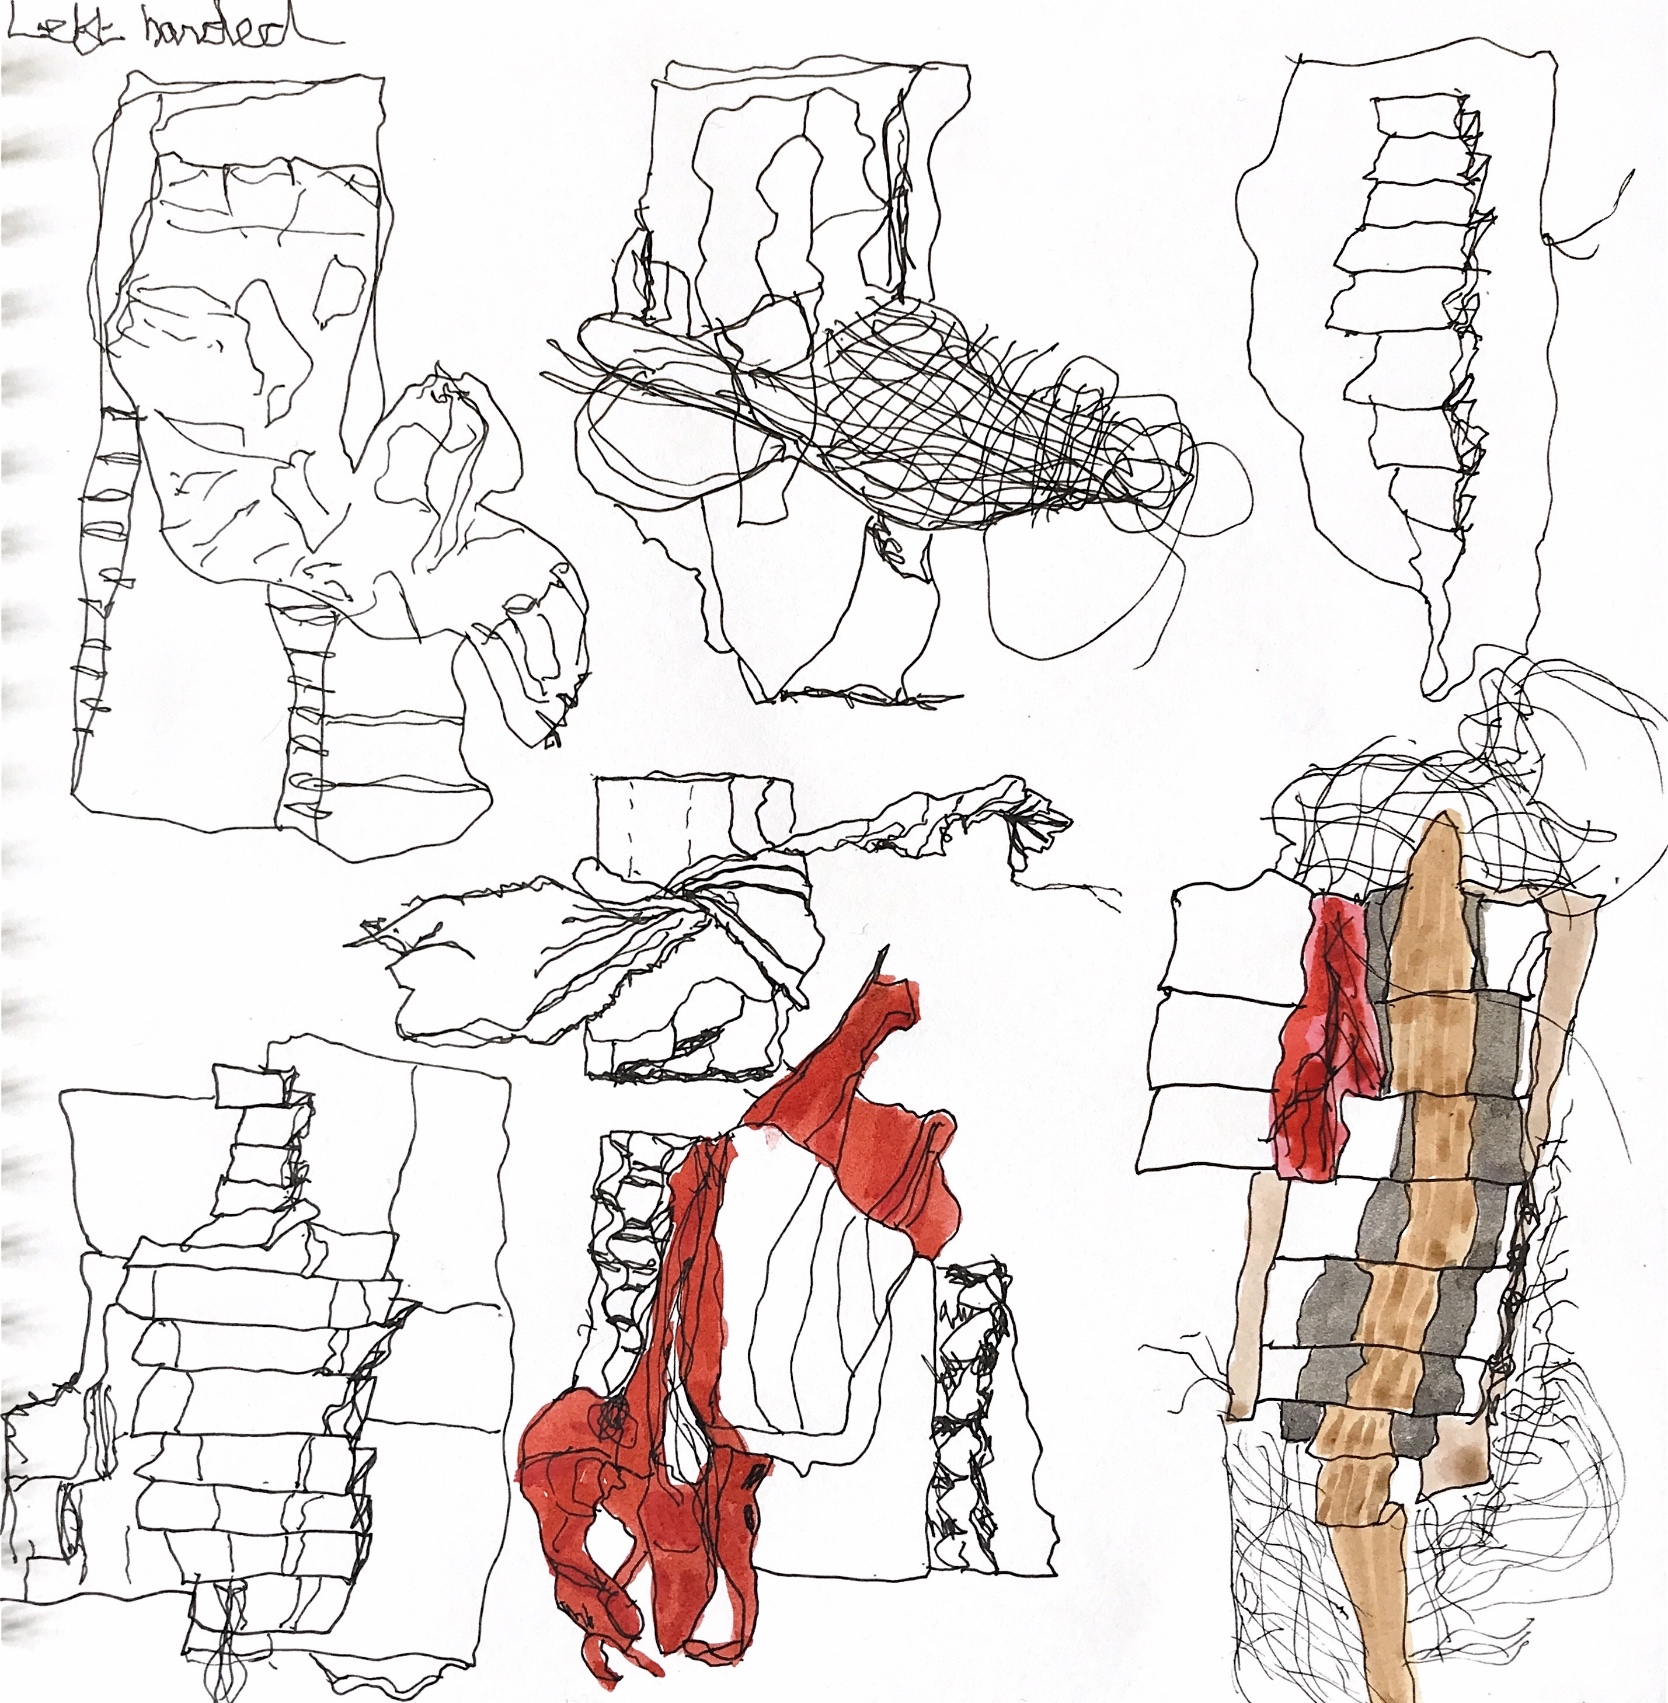
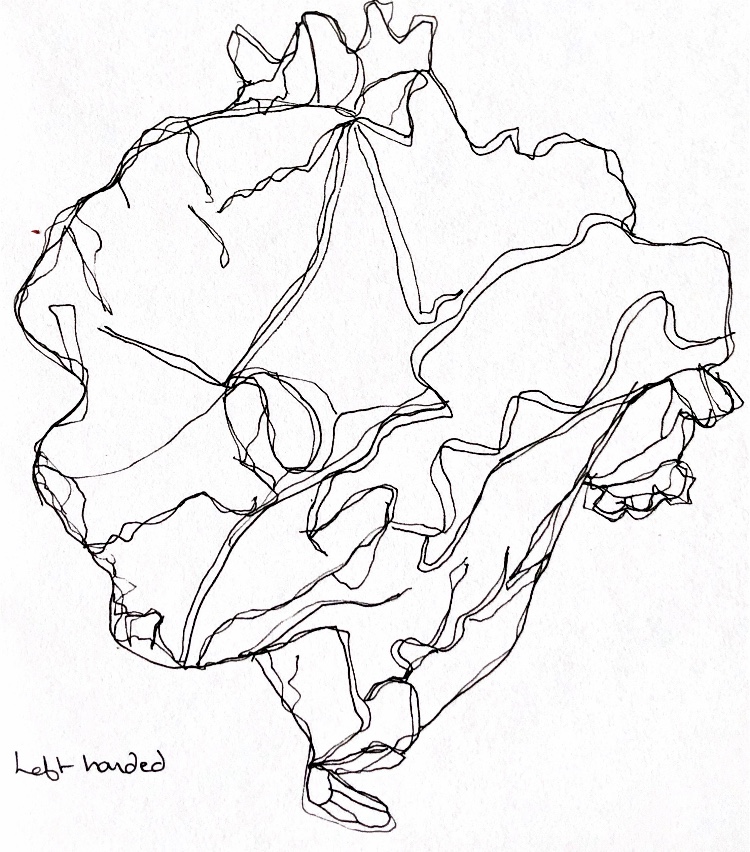
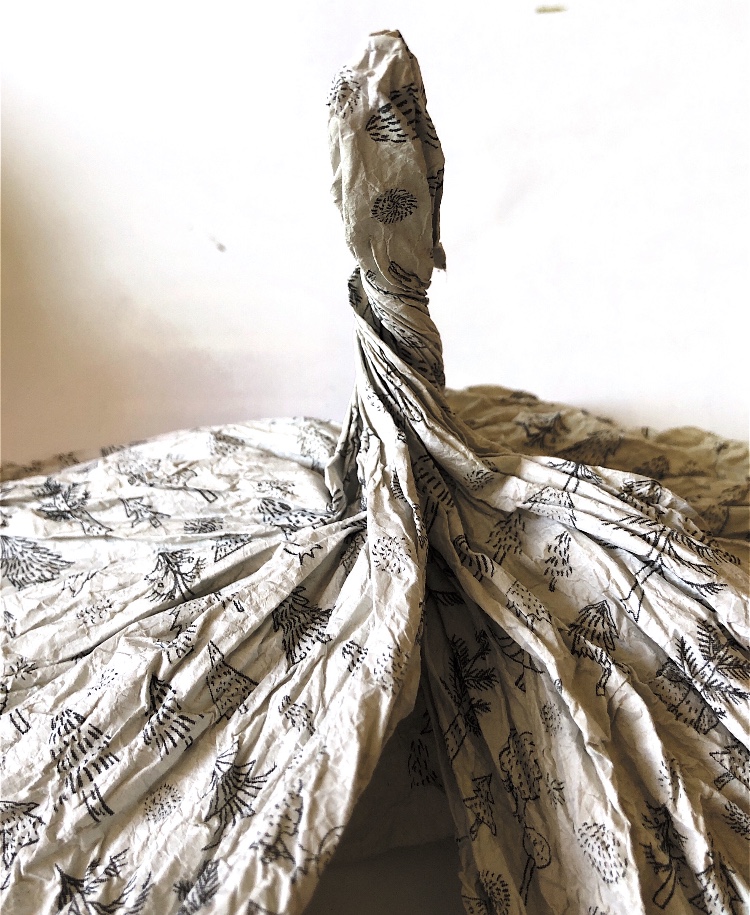
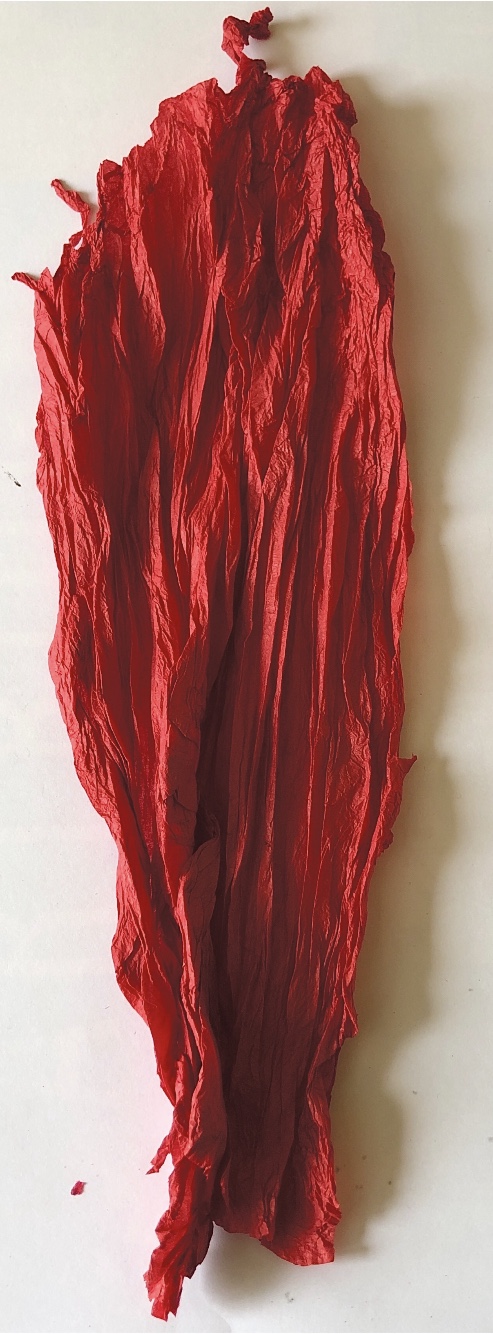
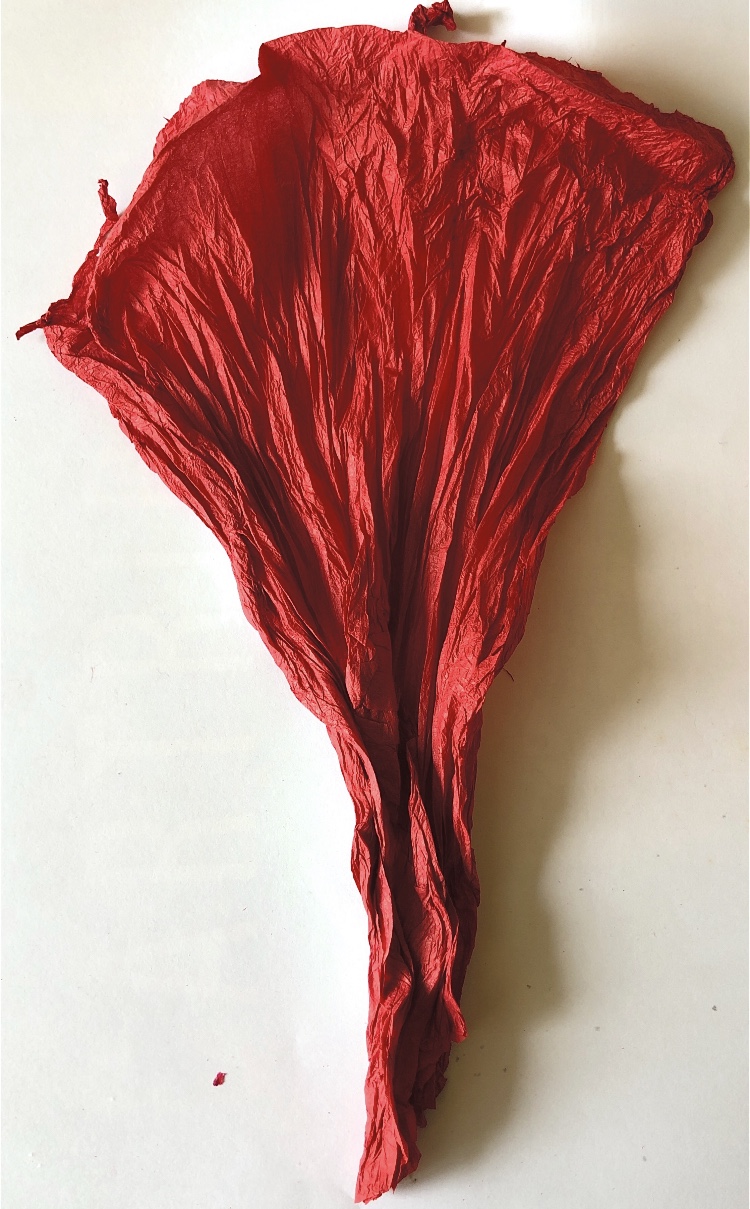
The second sample I have chosen was interesting to draw with my left hand. The scrunched gathers at each end remind me of smocking, and the messy middle is intriguing.
The experiment of stitching ribs on one of the samples worked well and the use of red thread on the monochrome paper emphasised the sharp folds. Because the stitching held the folded ribs in place, the paper could be further crumpled without destroying the sharp creases.
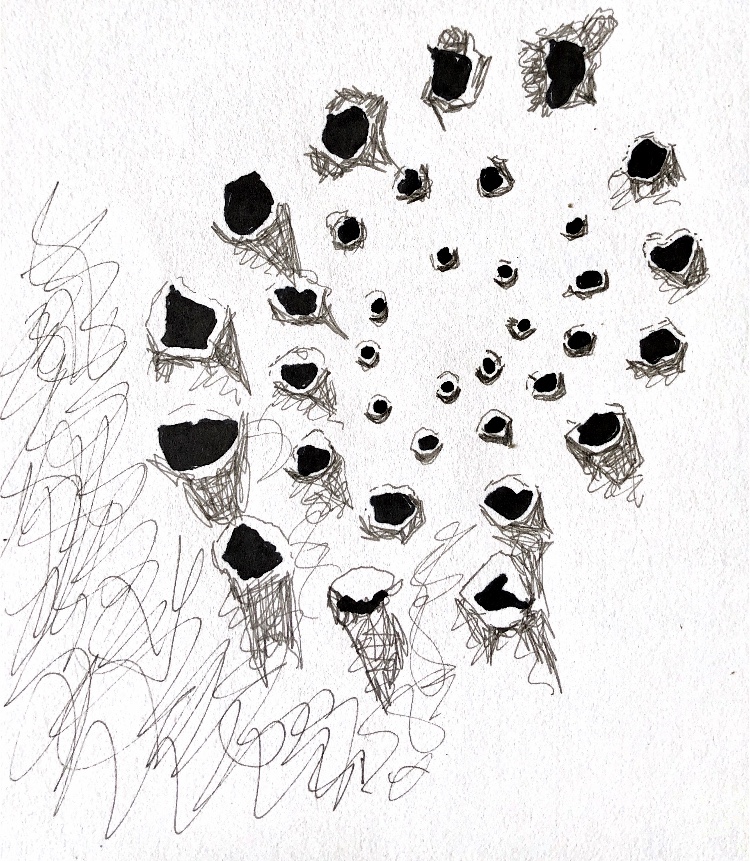
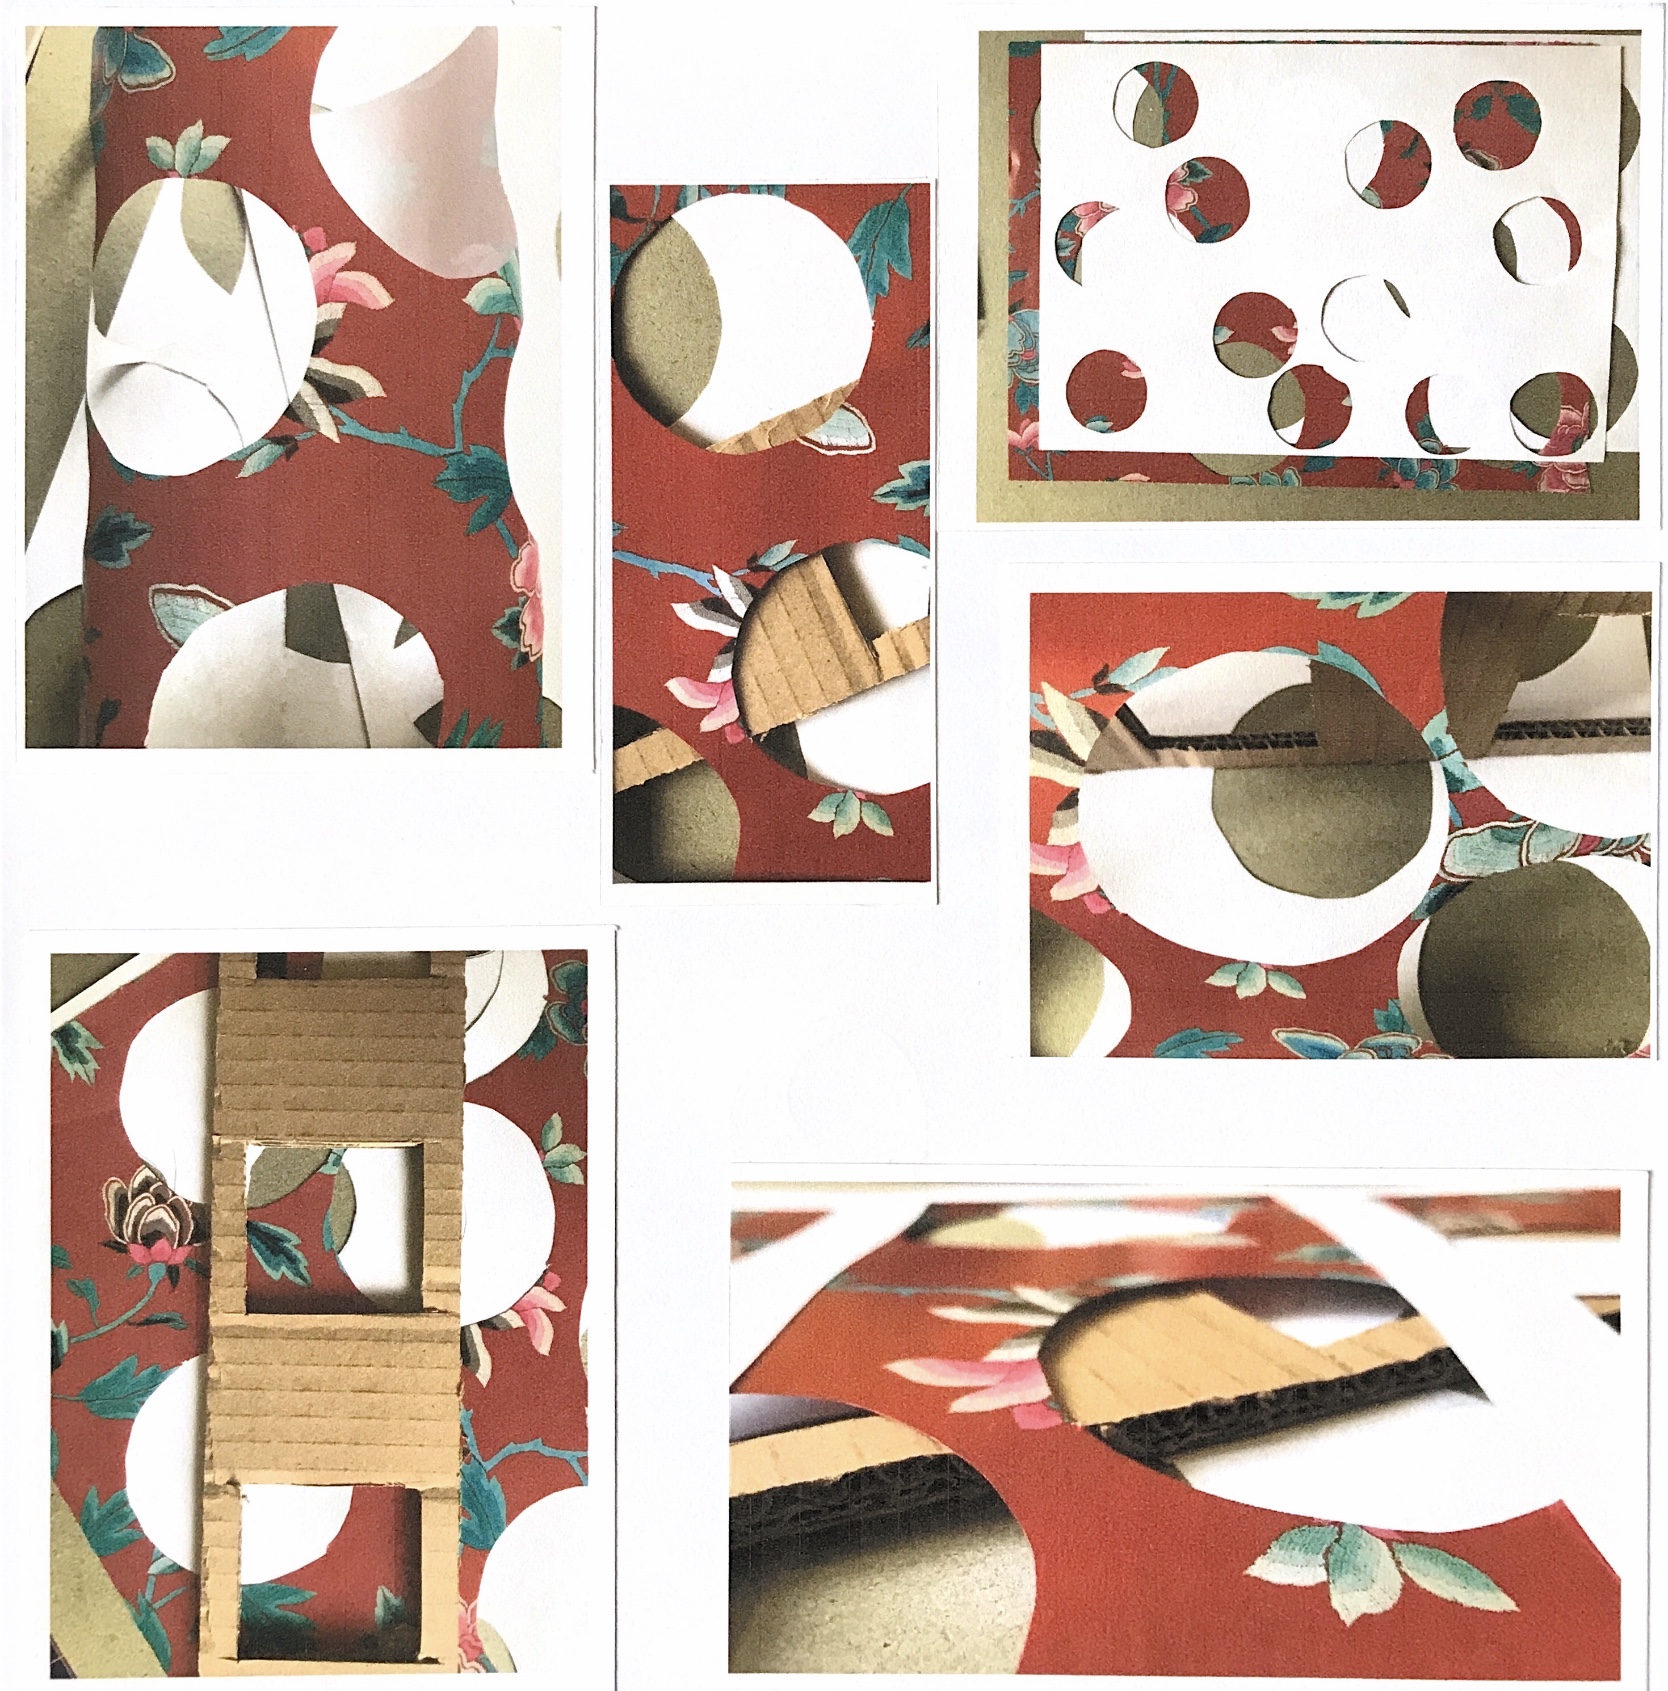
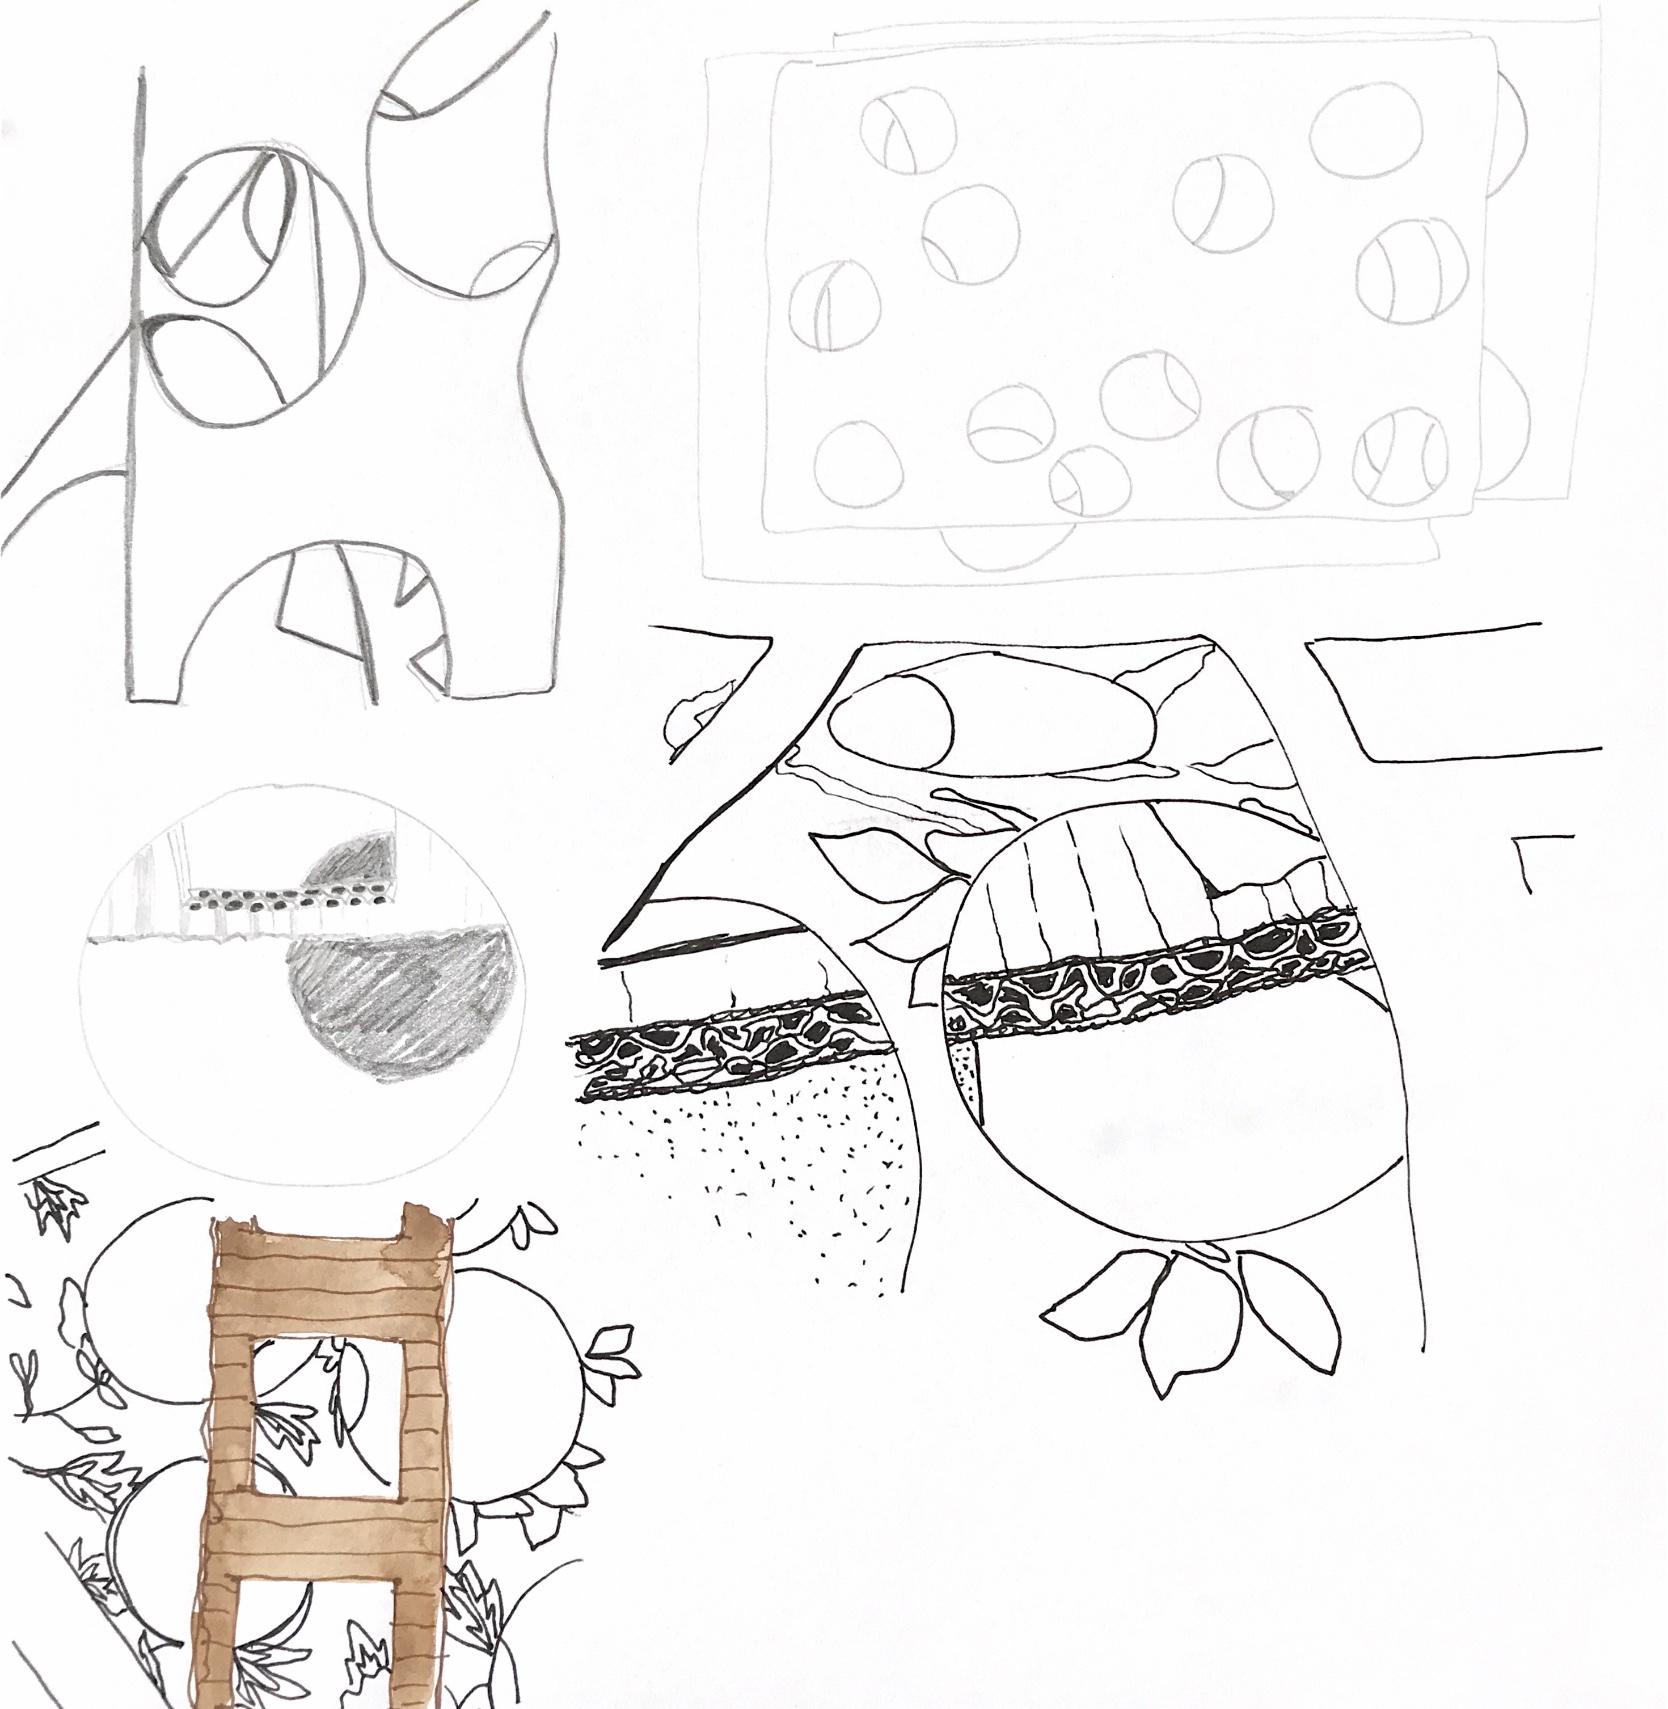
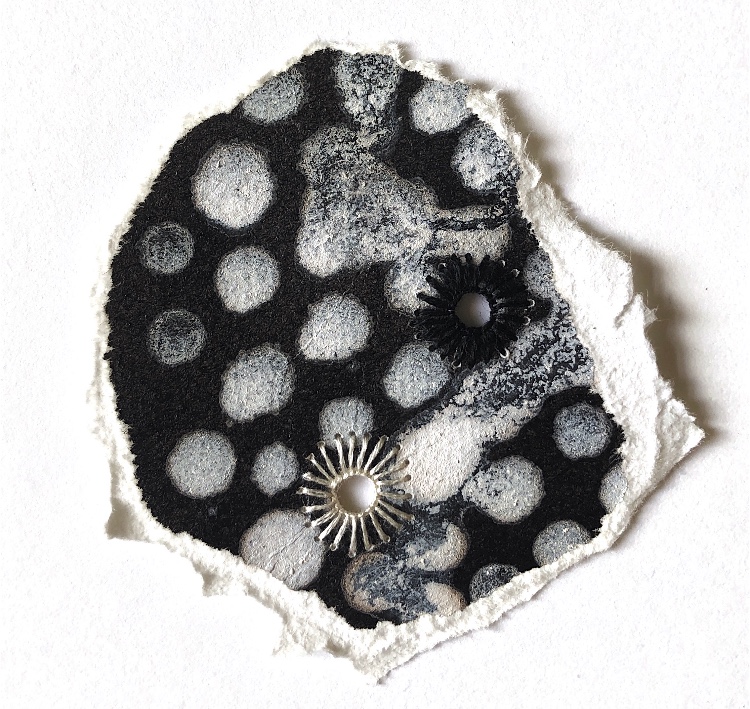
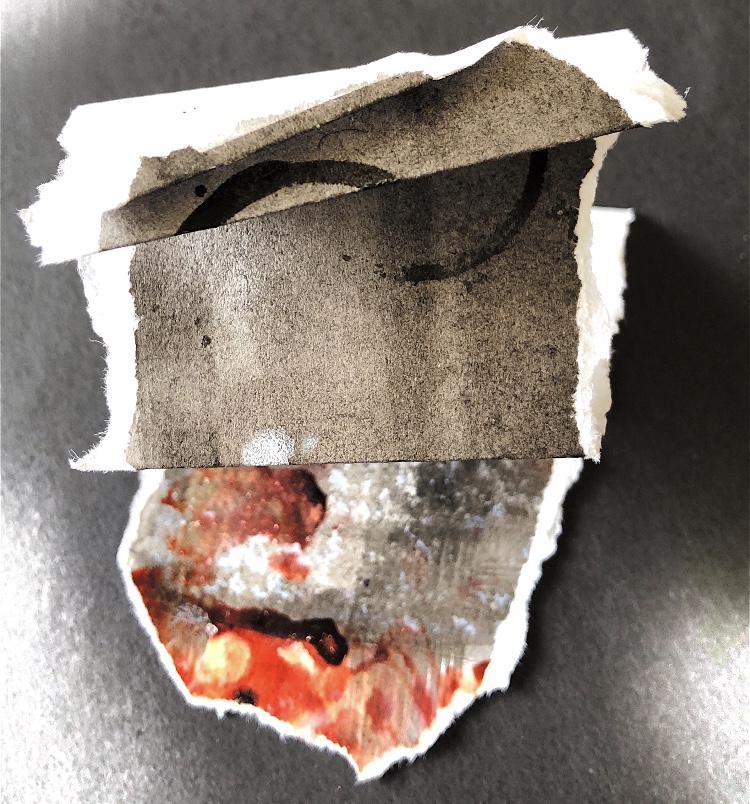
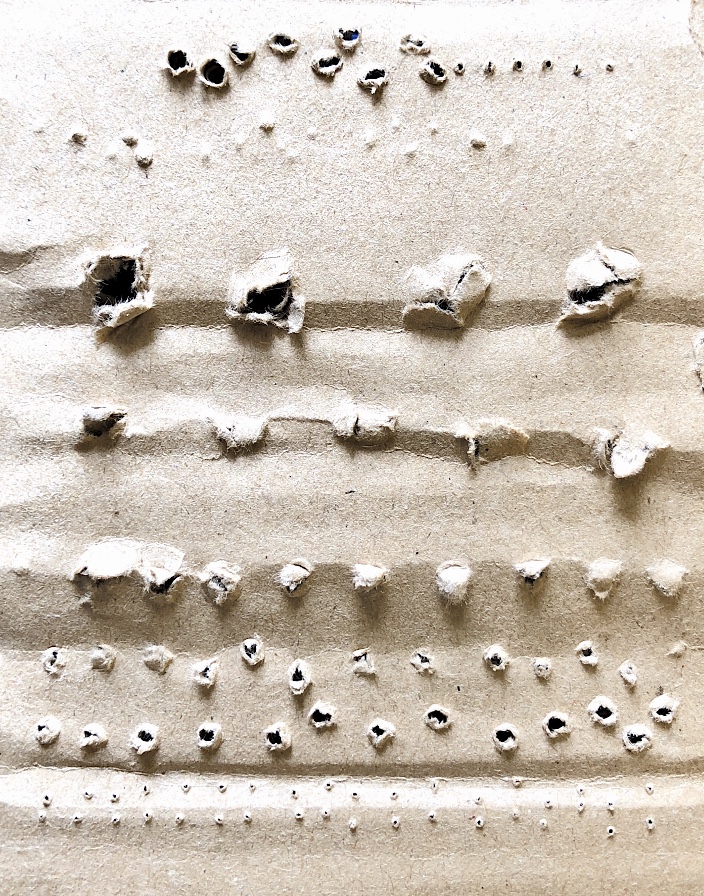
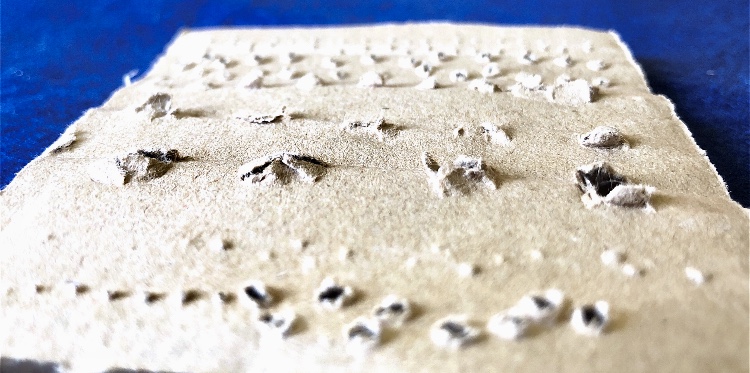
2. Project 2 Tearing and cutting Exercise 4 Cutting holes This was not my favourite technique, but to make it more satisfying and interesting I used patterned materials, and manipulation to make the samples more inspiring to draw. The drawings concentrate on the patterns and shapes and I particularly like the black and white pen drawings with a little bit of colour introduced. There is lots of potential here for pattern making for quilting or applique with lines for stitch.
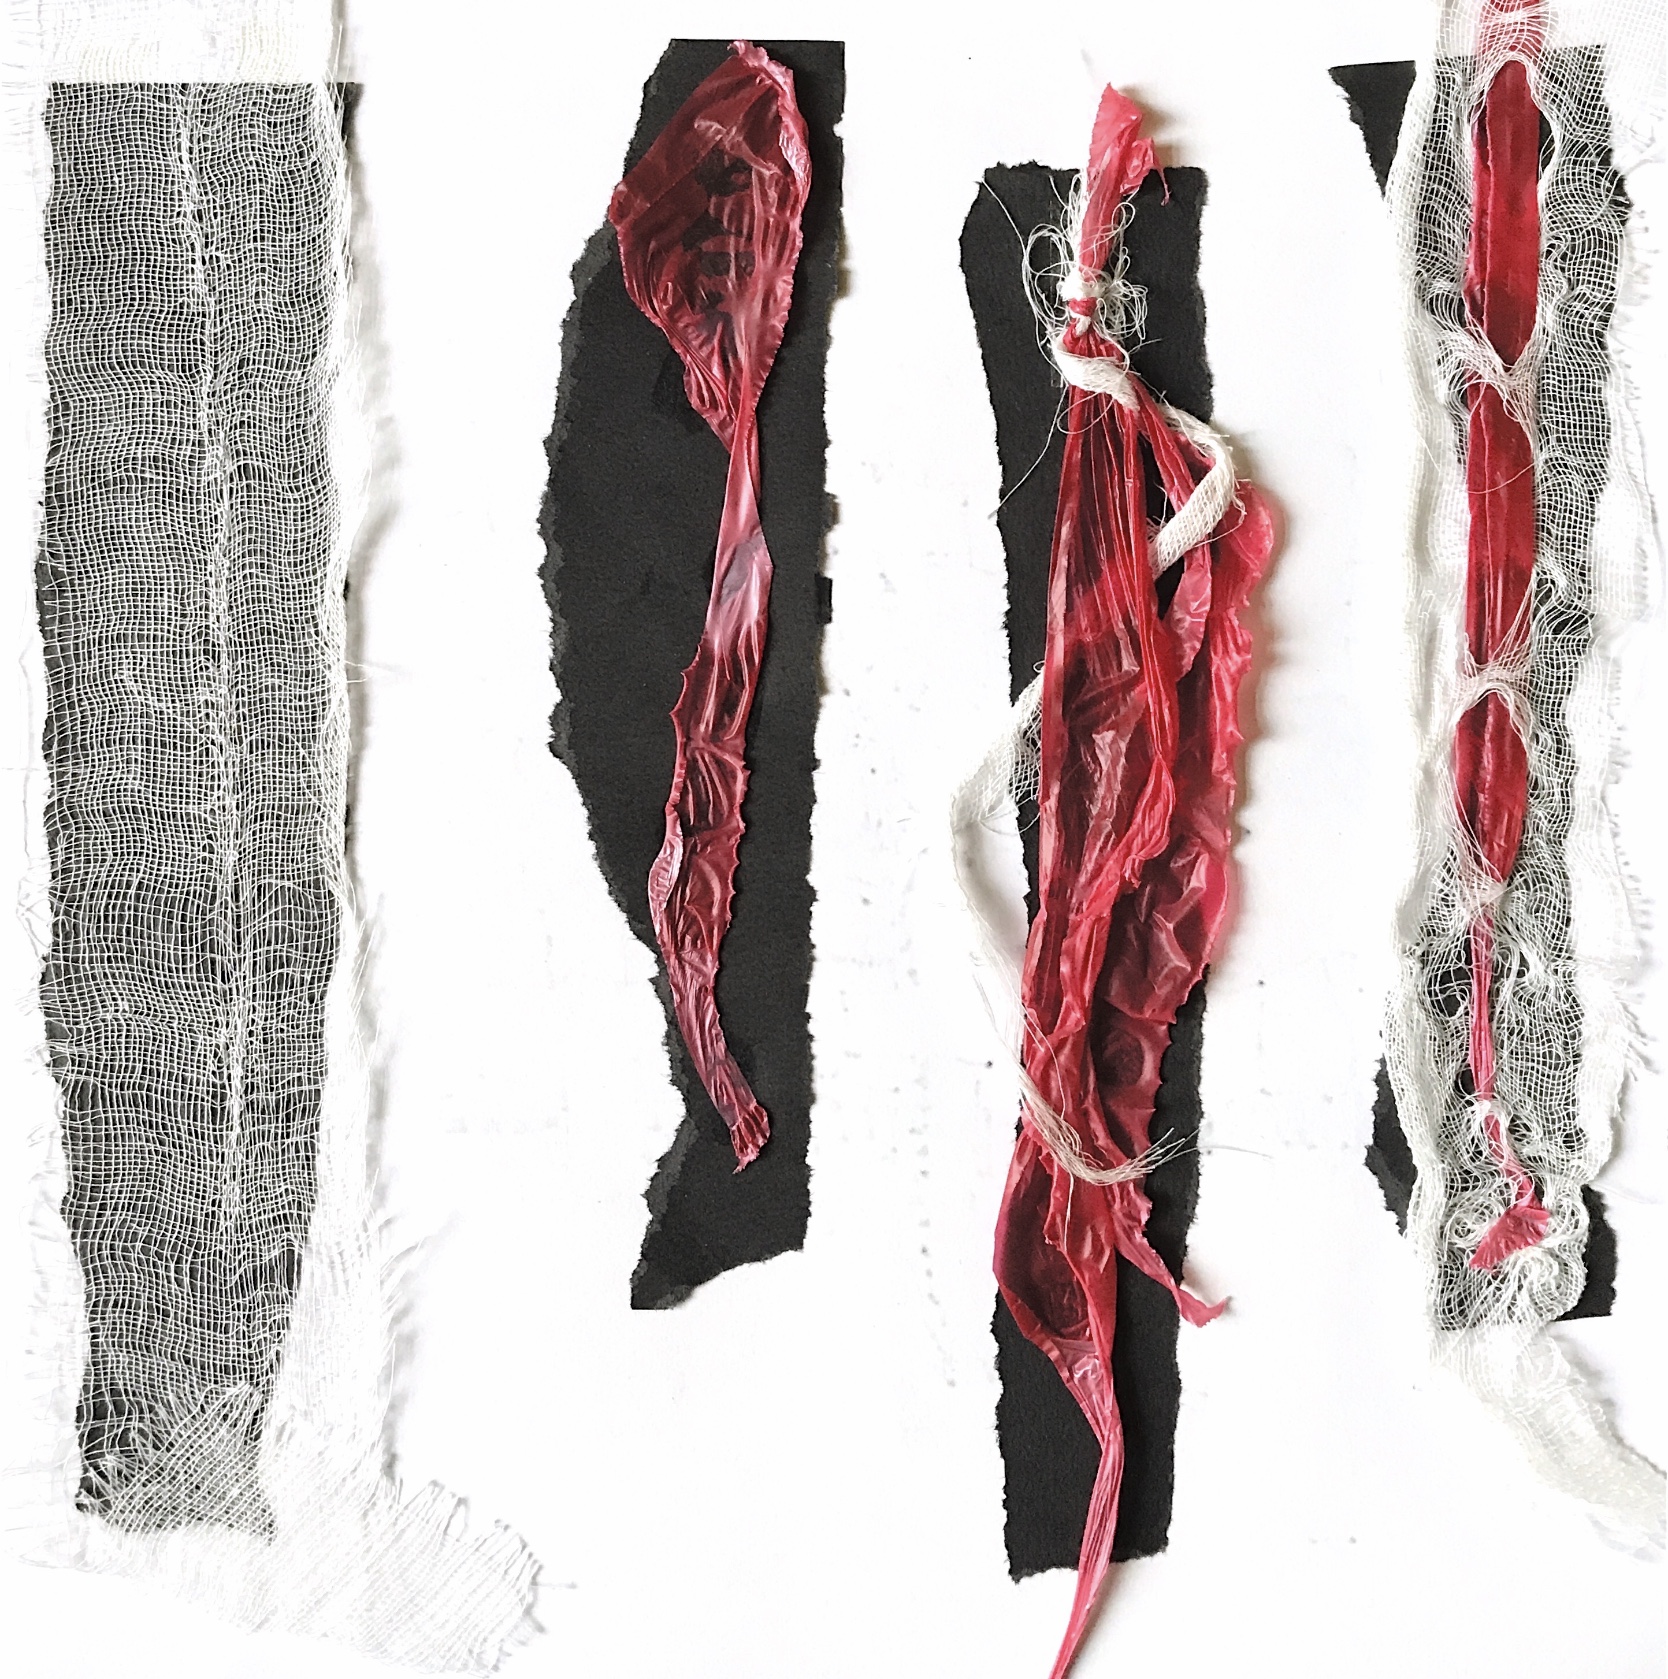
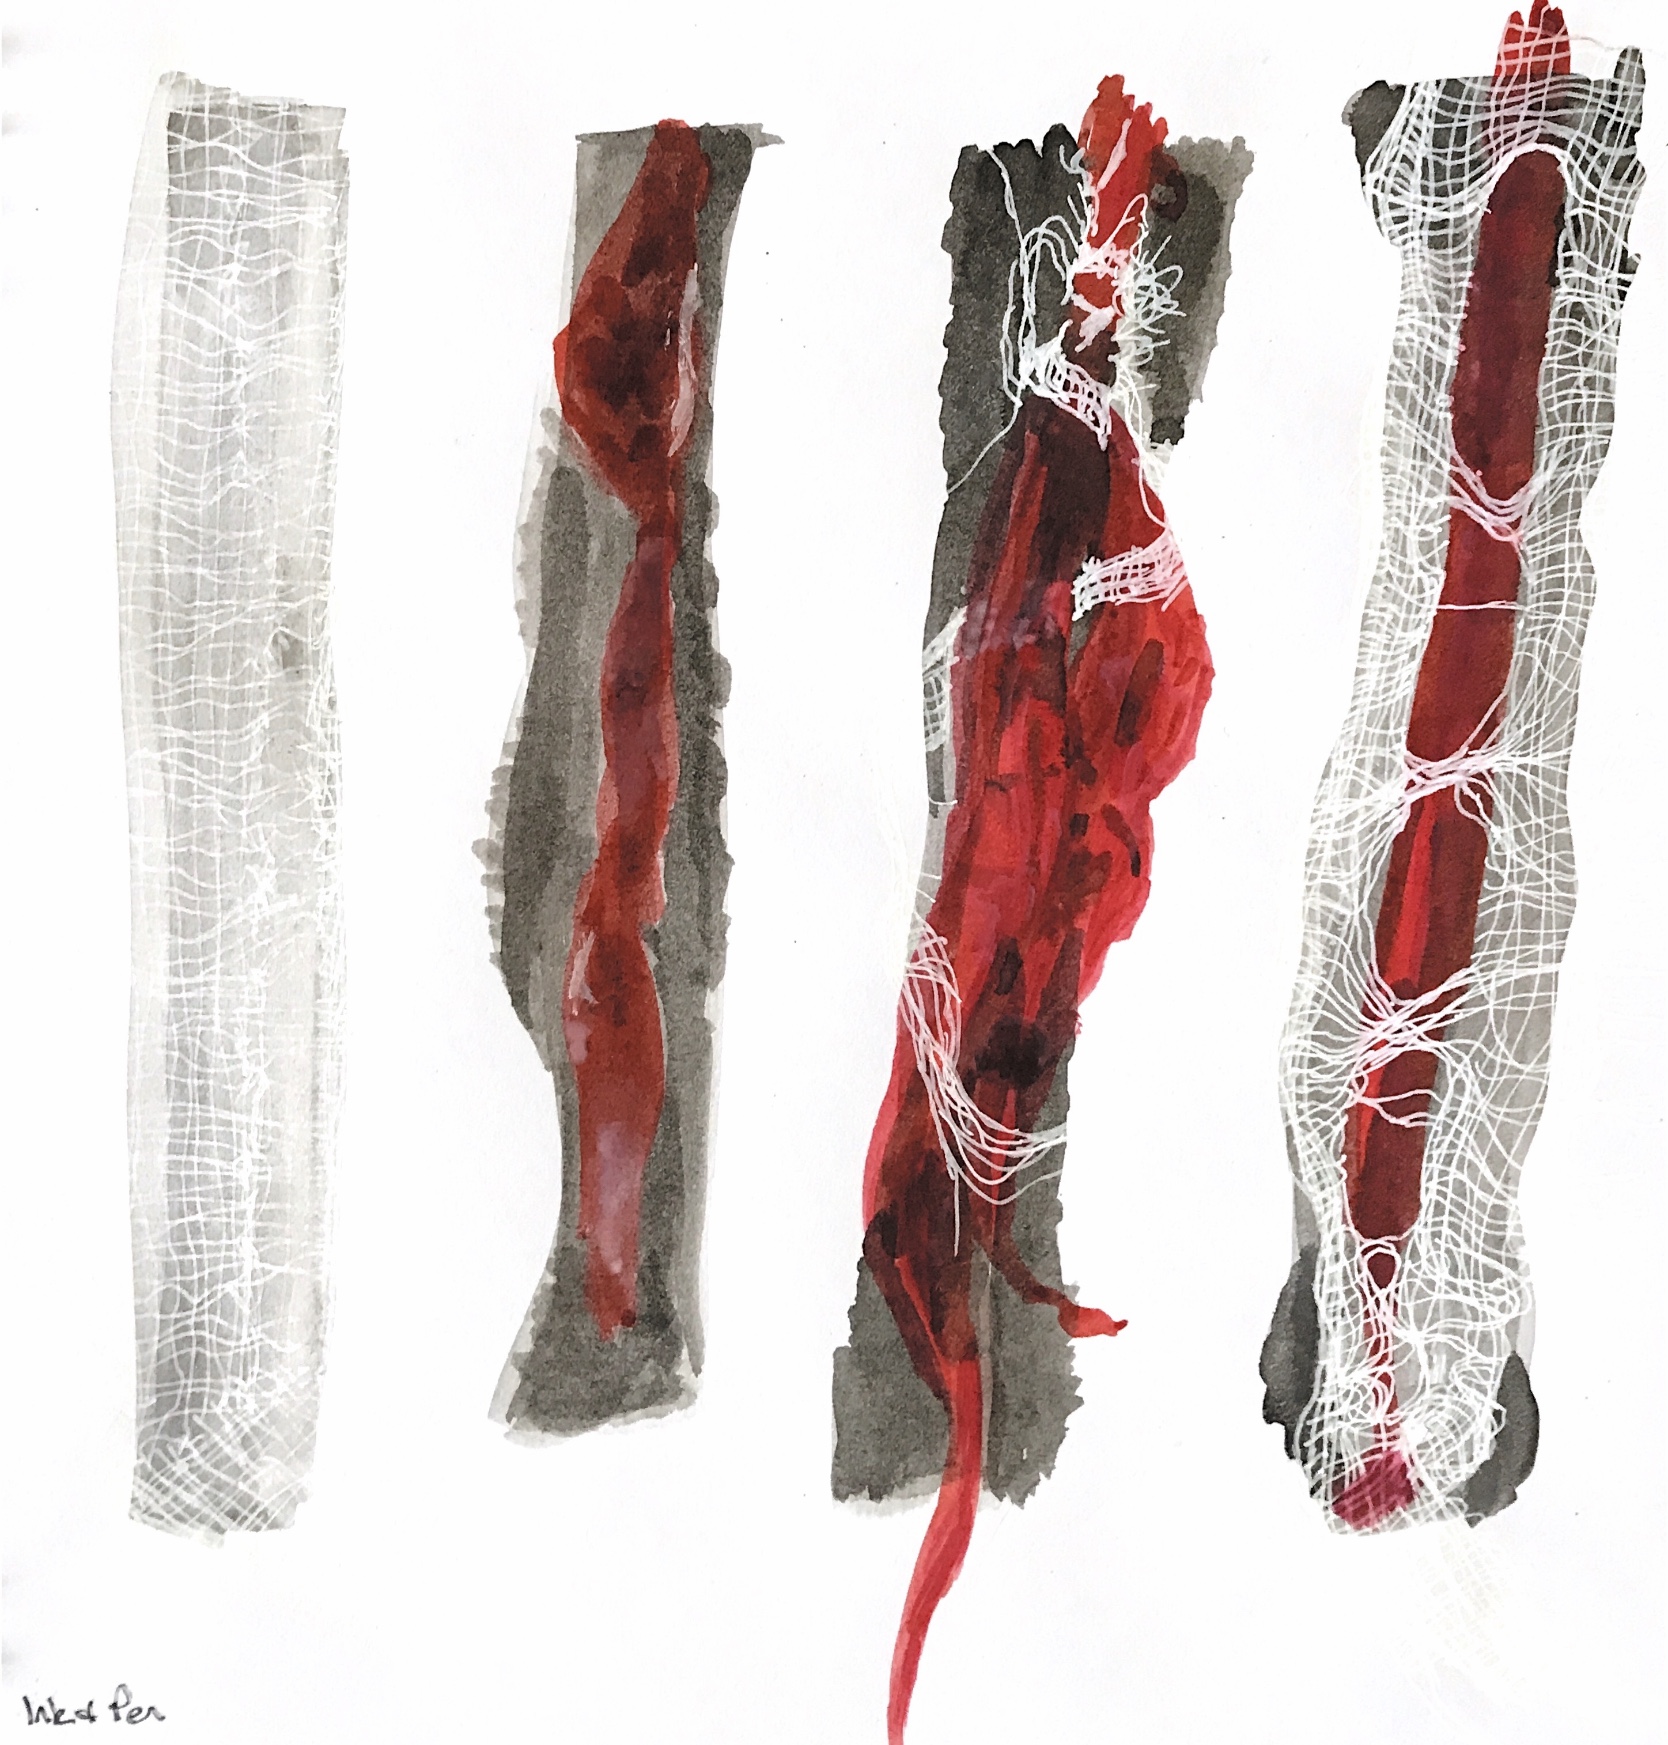
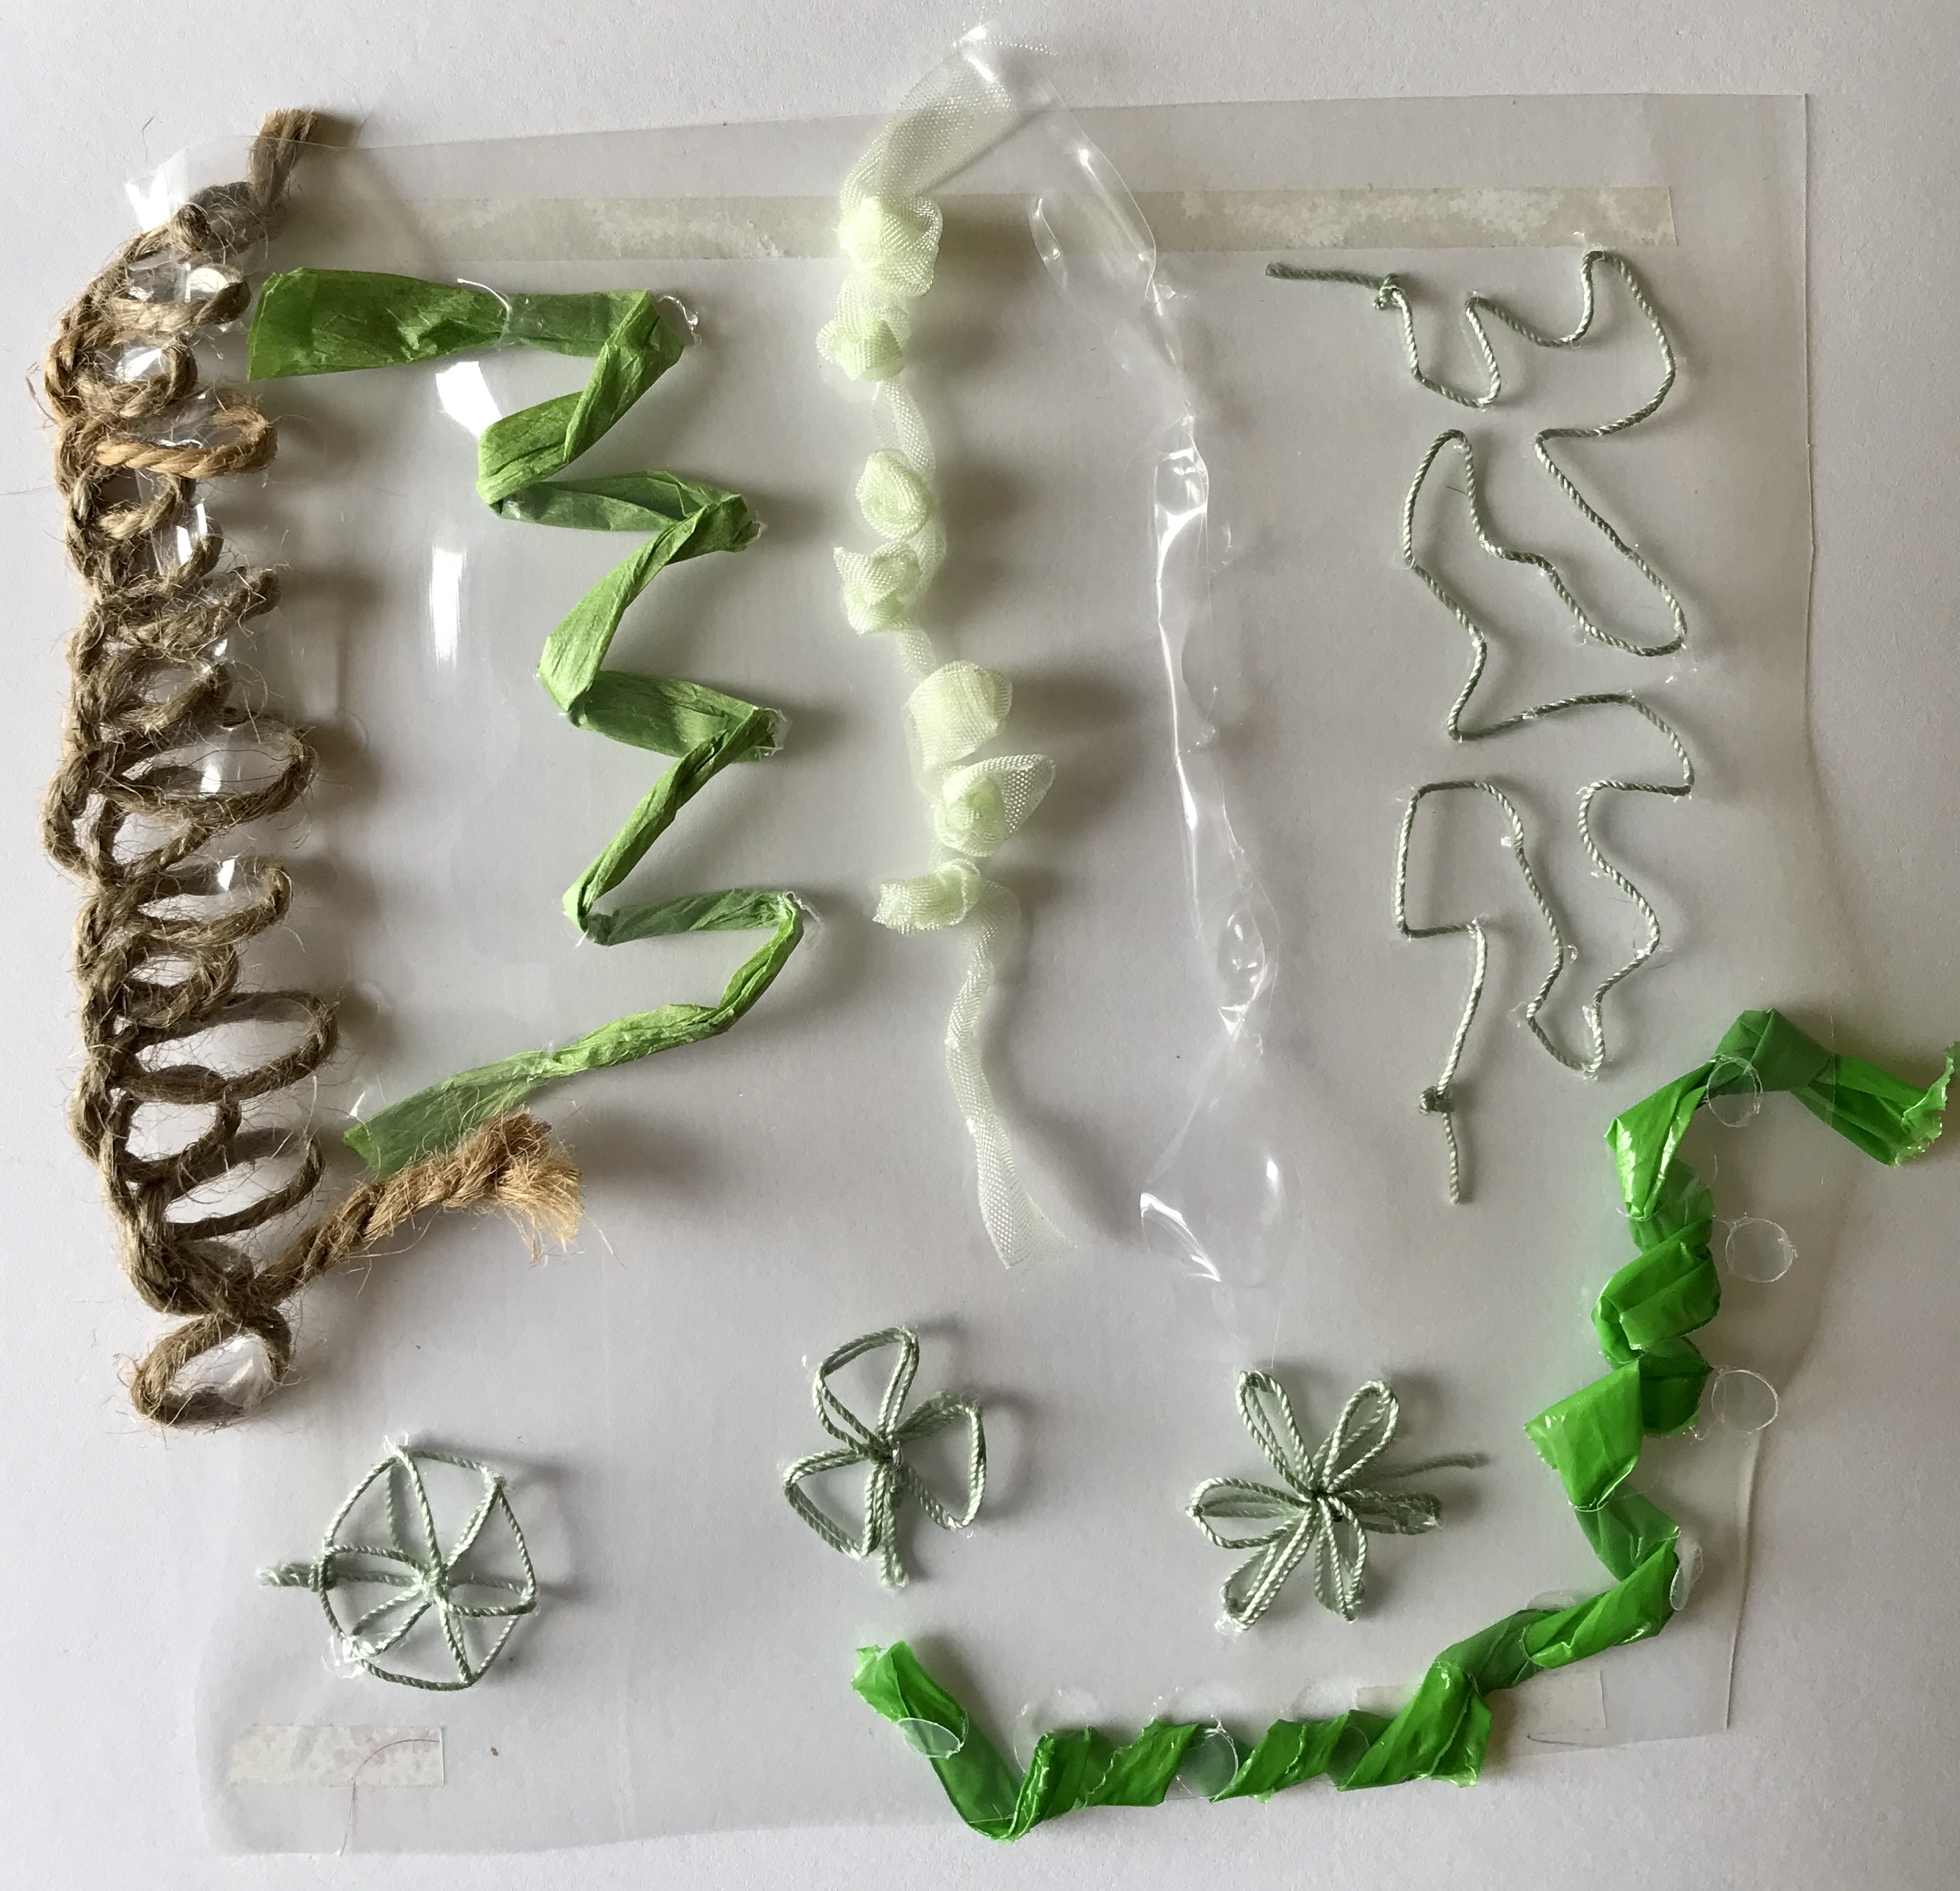
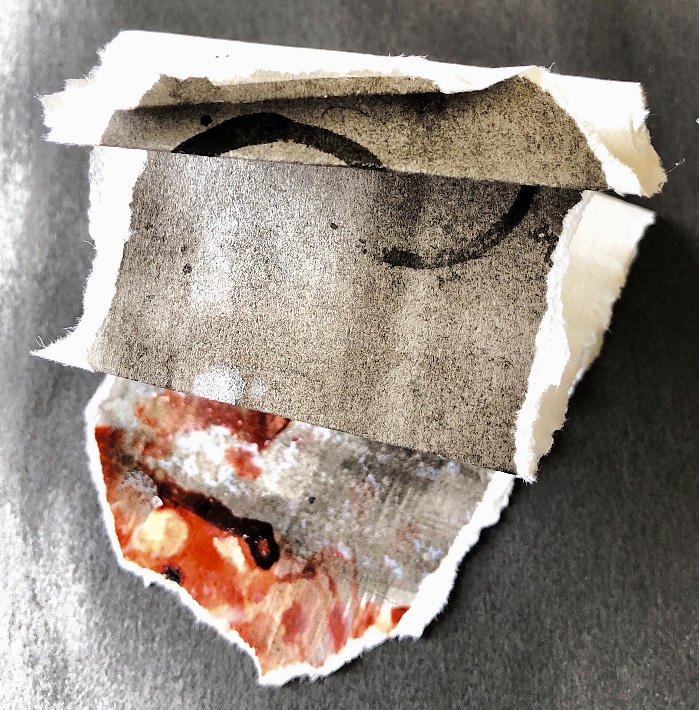
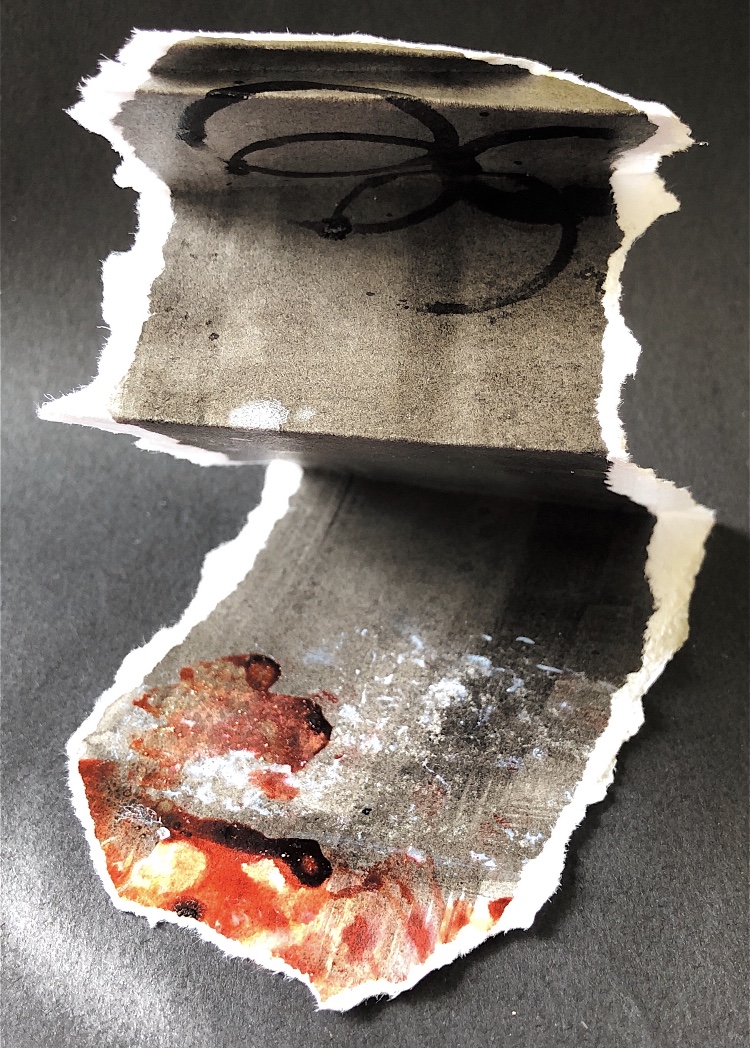
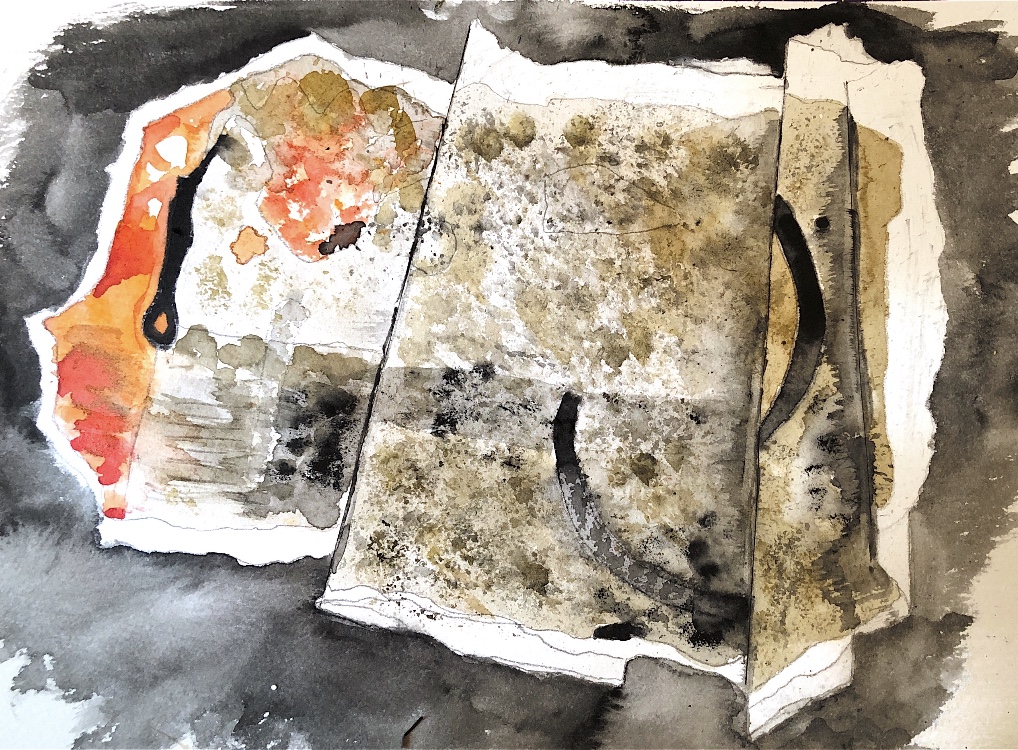
Exercise 6 Tearing Here I got the chance to be more messy. The series of torn mini samples are lively and fun, using card, paper and plastic. I drew these with my left hand to retain the messy, free shapes and lines. I was not initially keen to use plastic bags to tear but the way in which the plastic pulls apart with a rippled edge is very satisfying and adds another dimension.
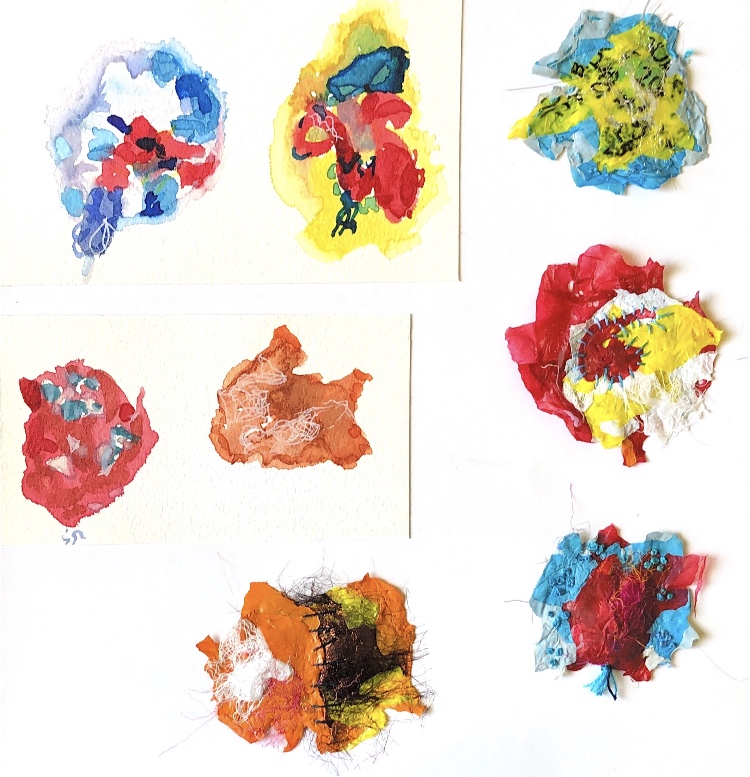
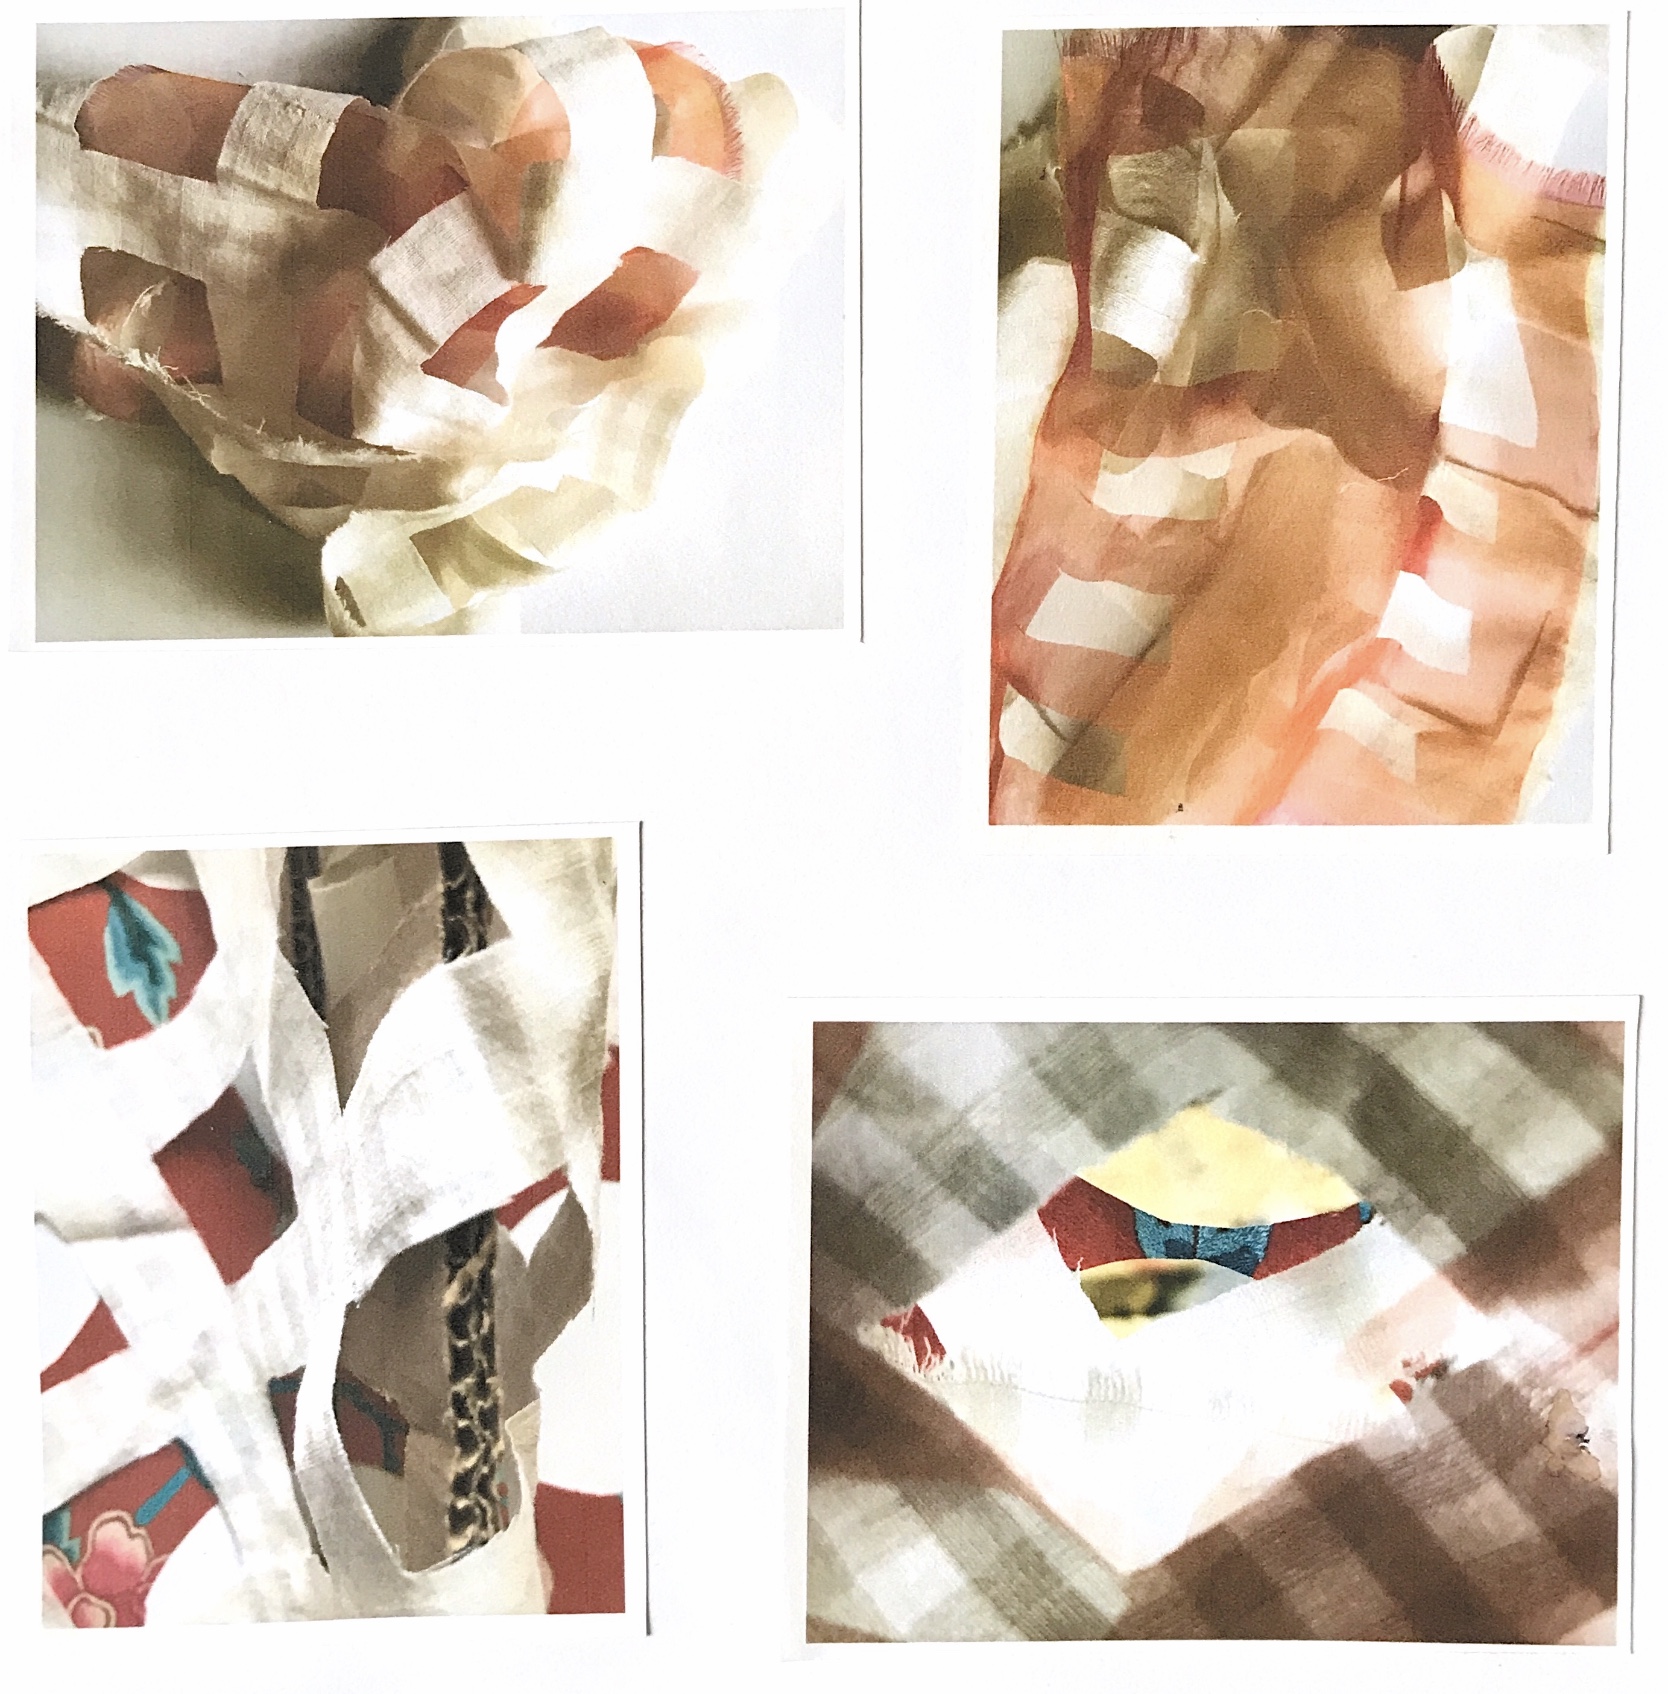
The second series of samples uses just three materials – paper, plastic and muslin, in black, red, and white, torn and arranged simply in different ways. The balance of the arrangements is very simple and pleasing but on closer inspection there is lots of detail due to the torn edges. This was fun to draw using inks and a white drawing pen.
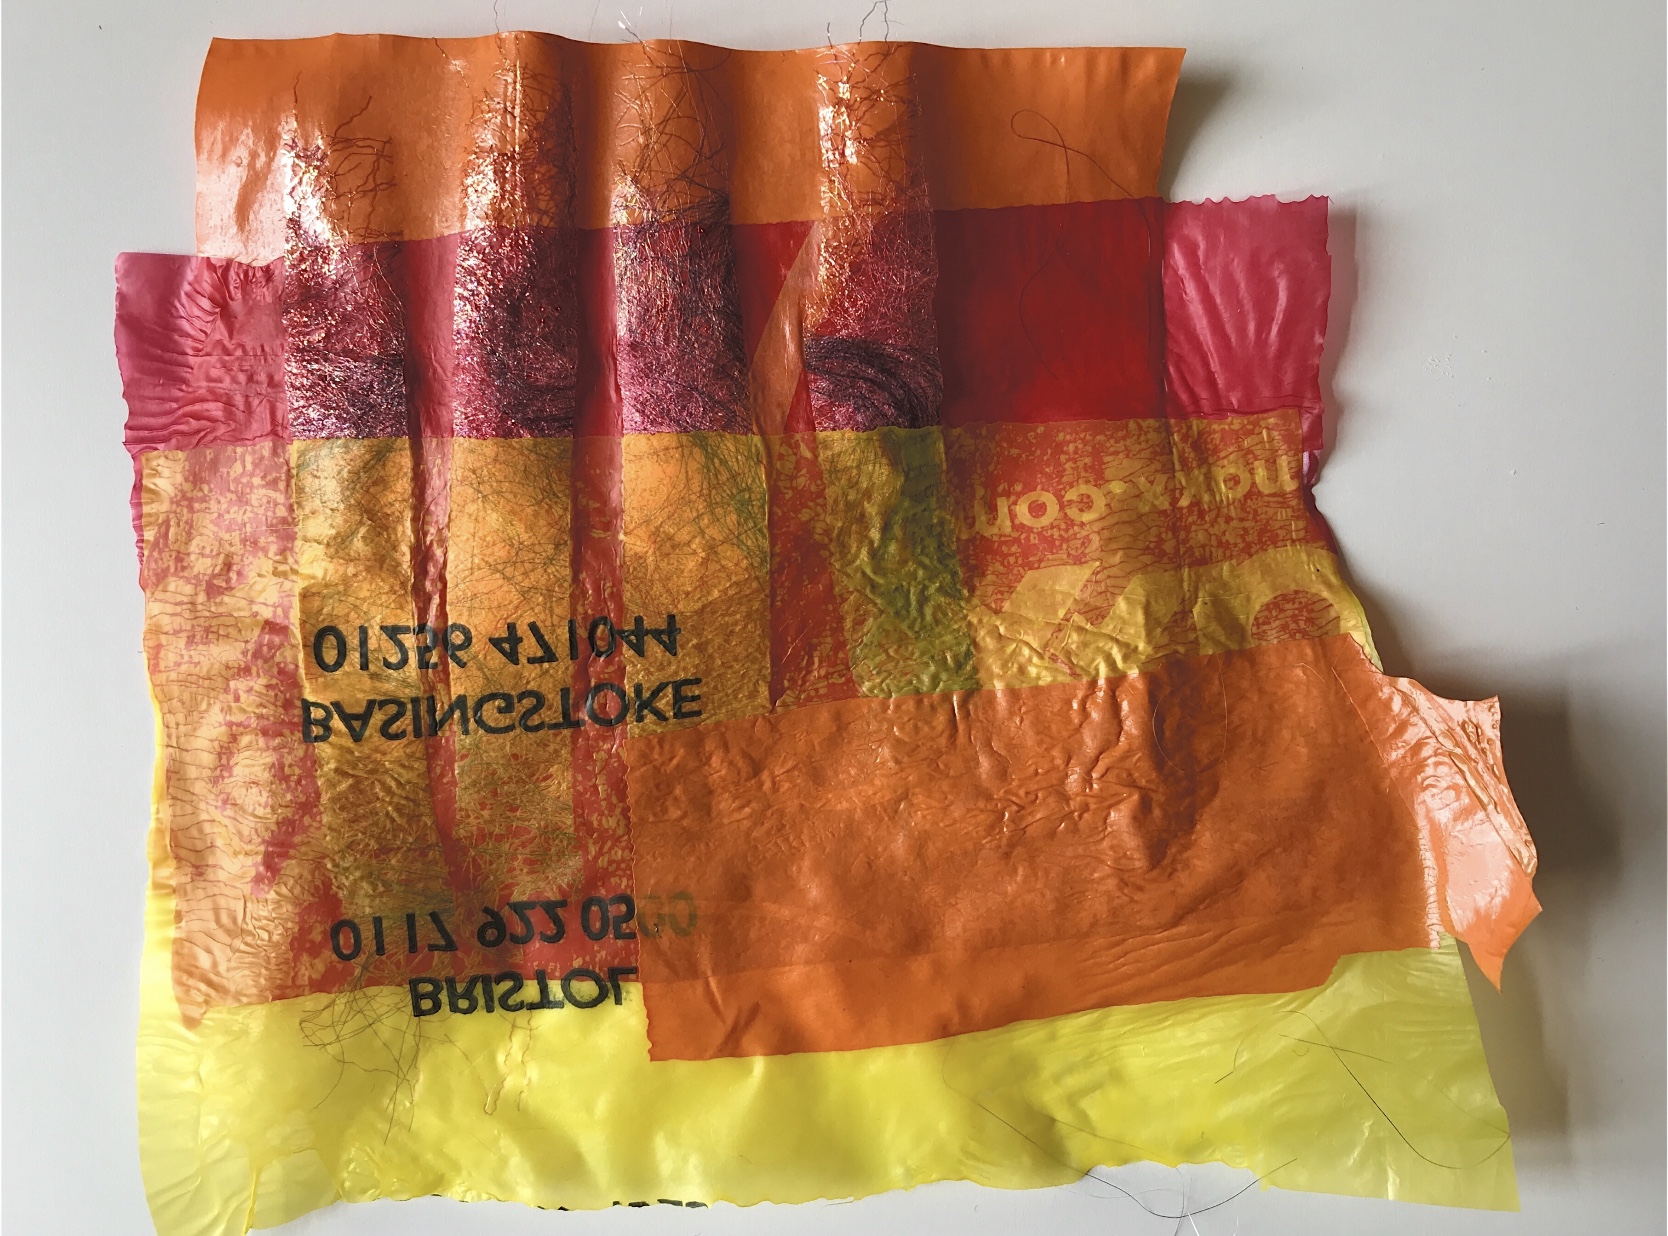
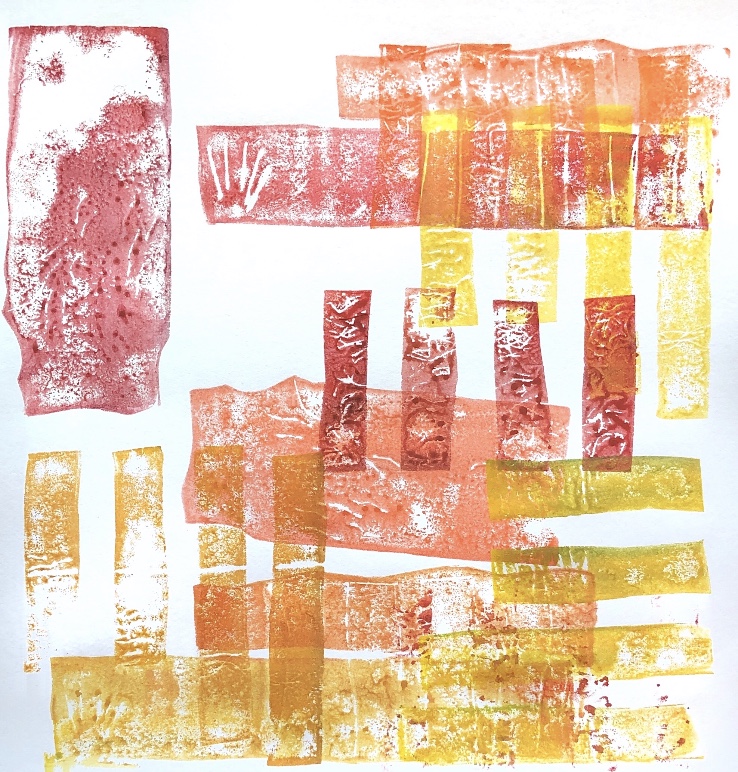
3. Project 3 Heating and fusing Exercise 1 Fusing plastic Again plastic was not something I really wanted to work with but I found this exercise really inspiring. Using just coloured plastic bags cut into strips and ironed, The samples were easily translated into print blocks. The printing using Inktense sticks echoed the textured wrinkles on the plastic created by the ironing process.
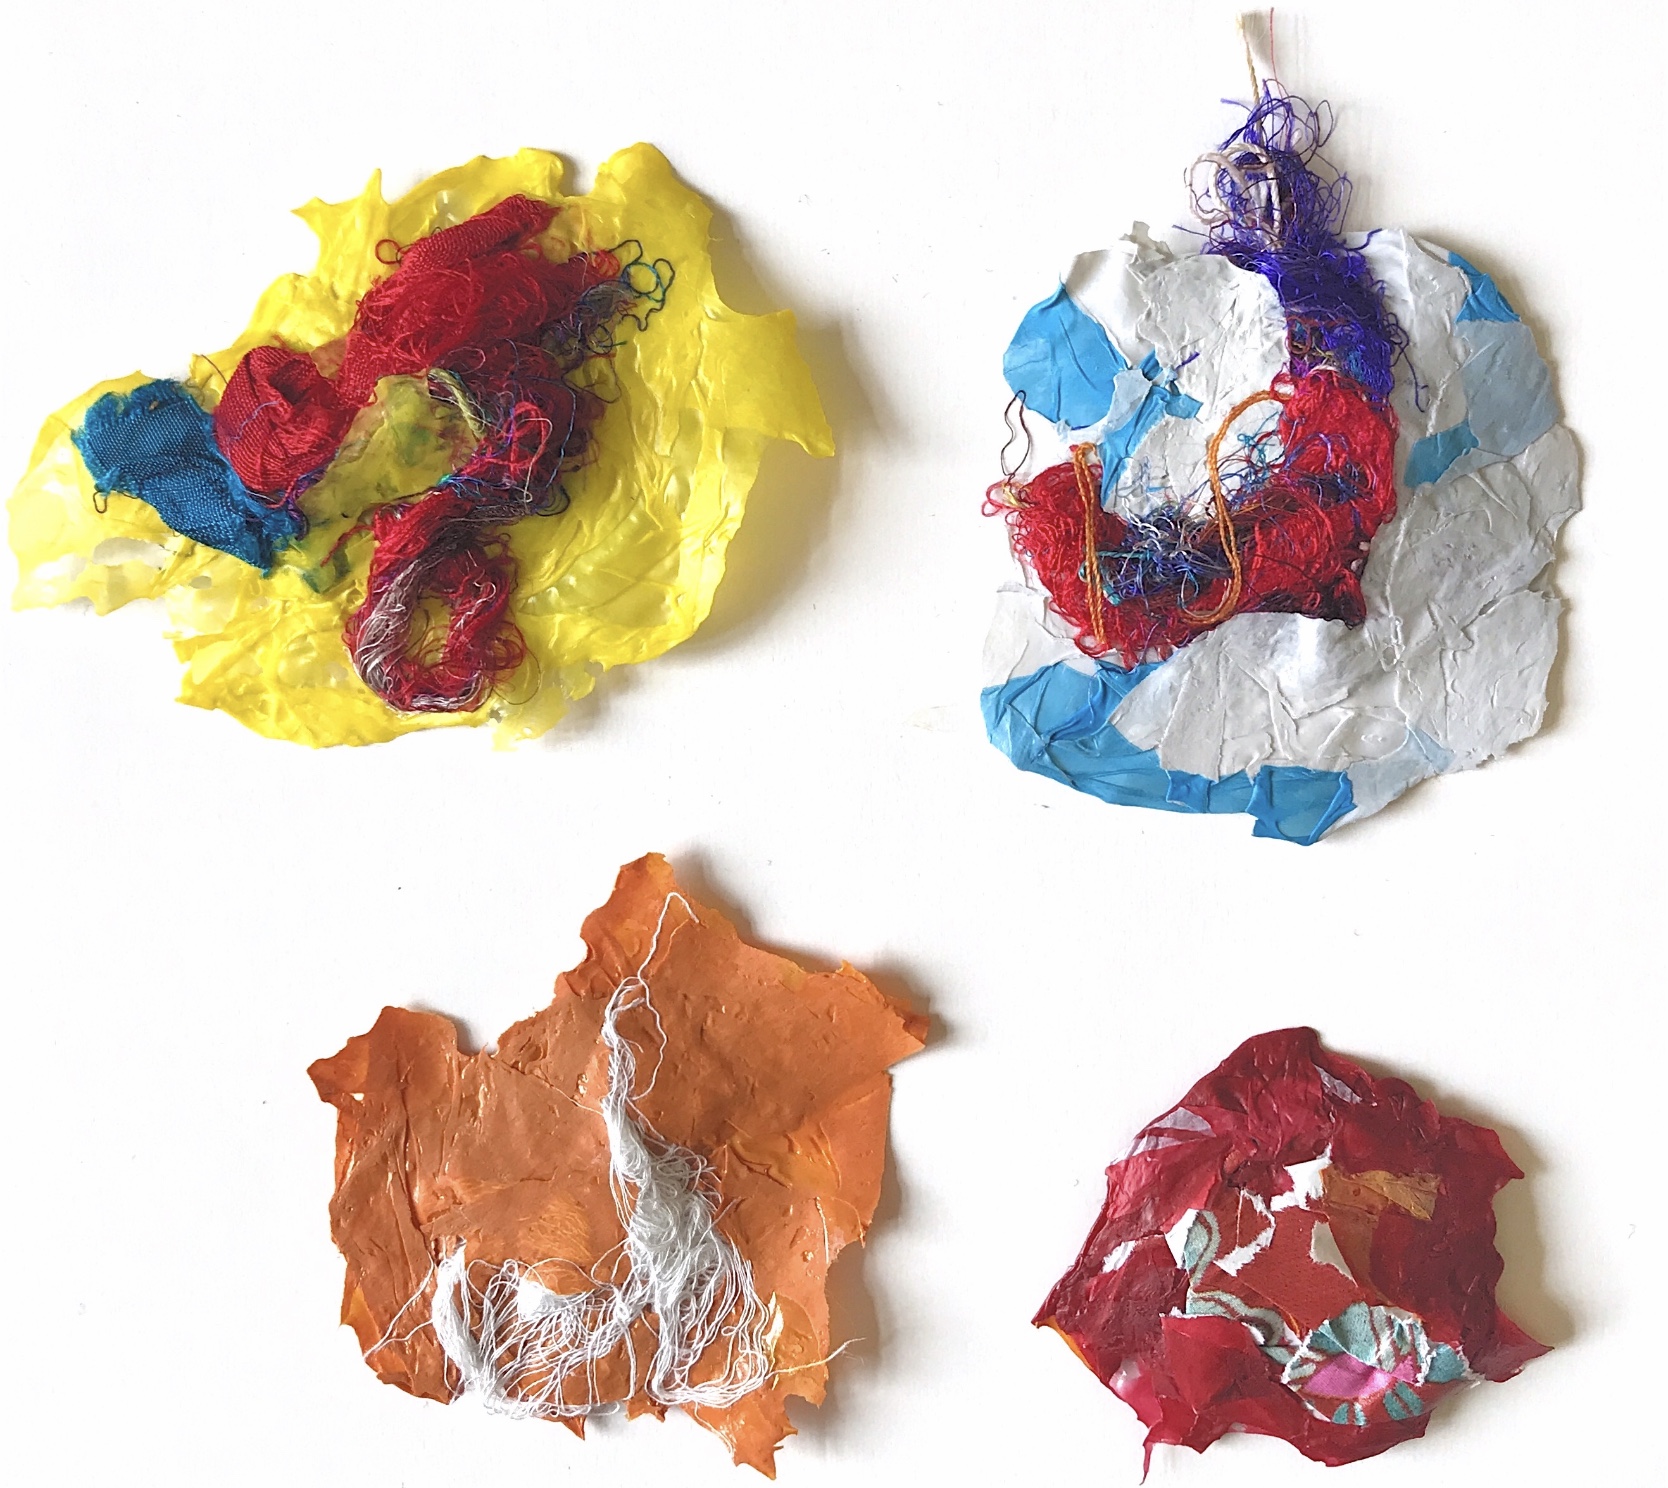
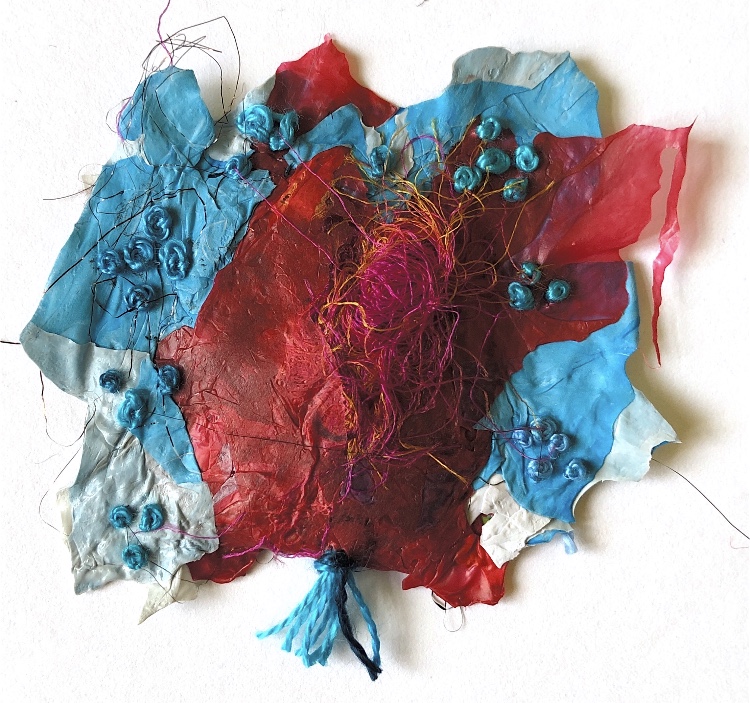
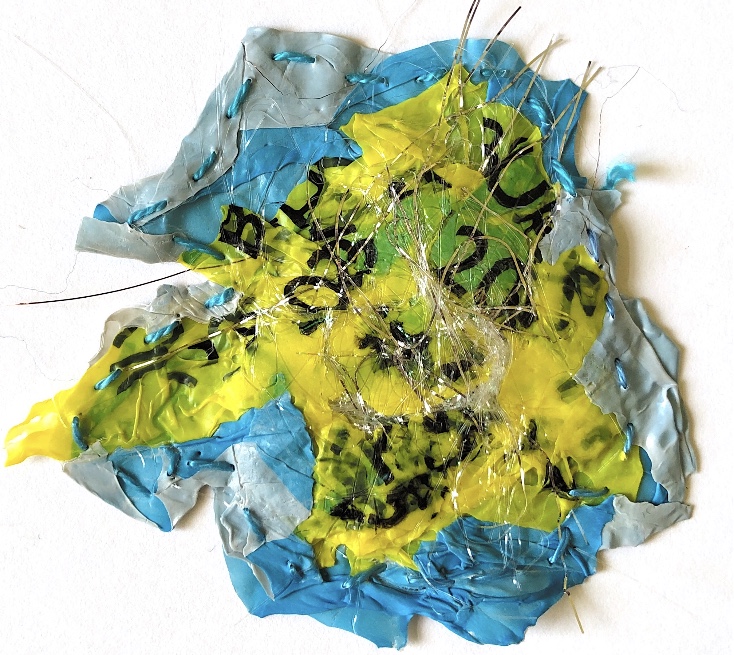
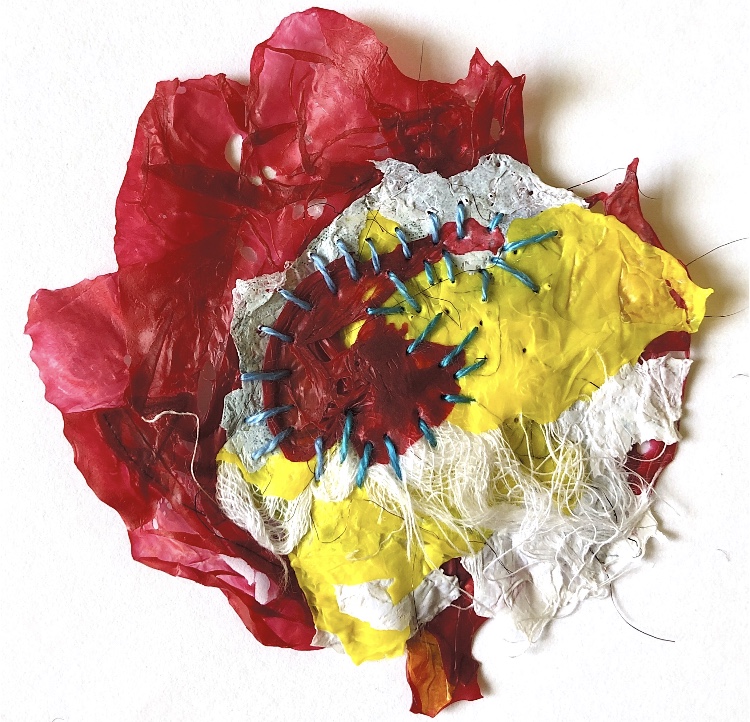
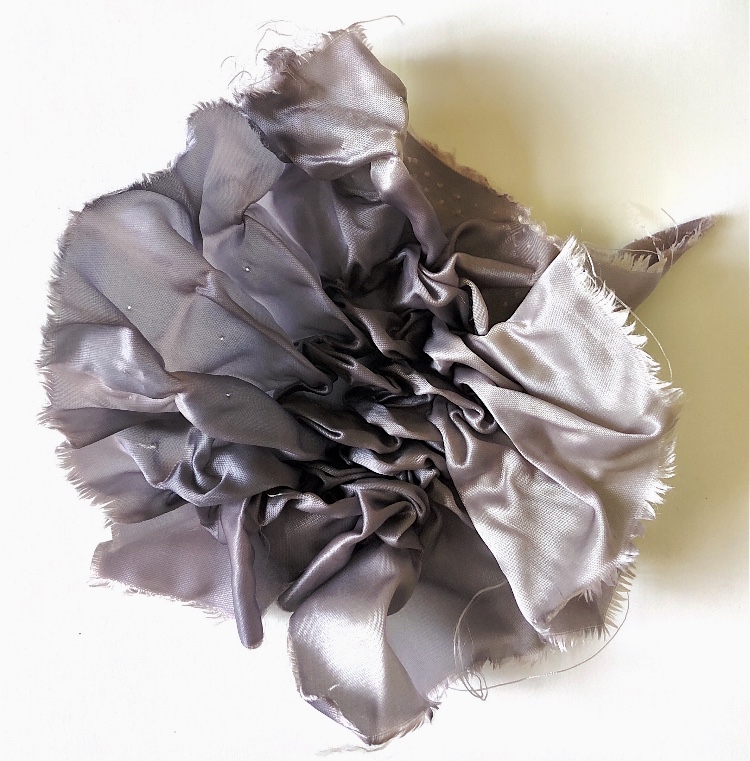
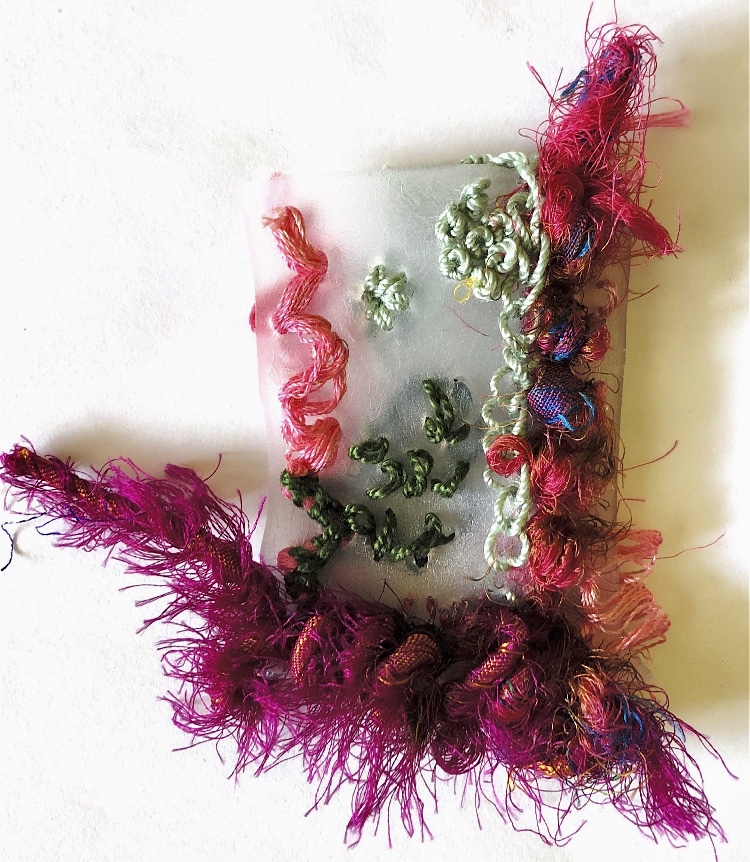
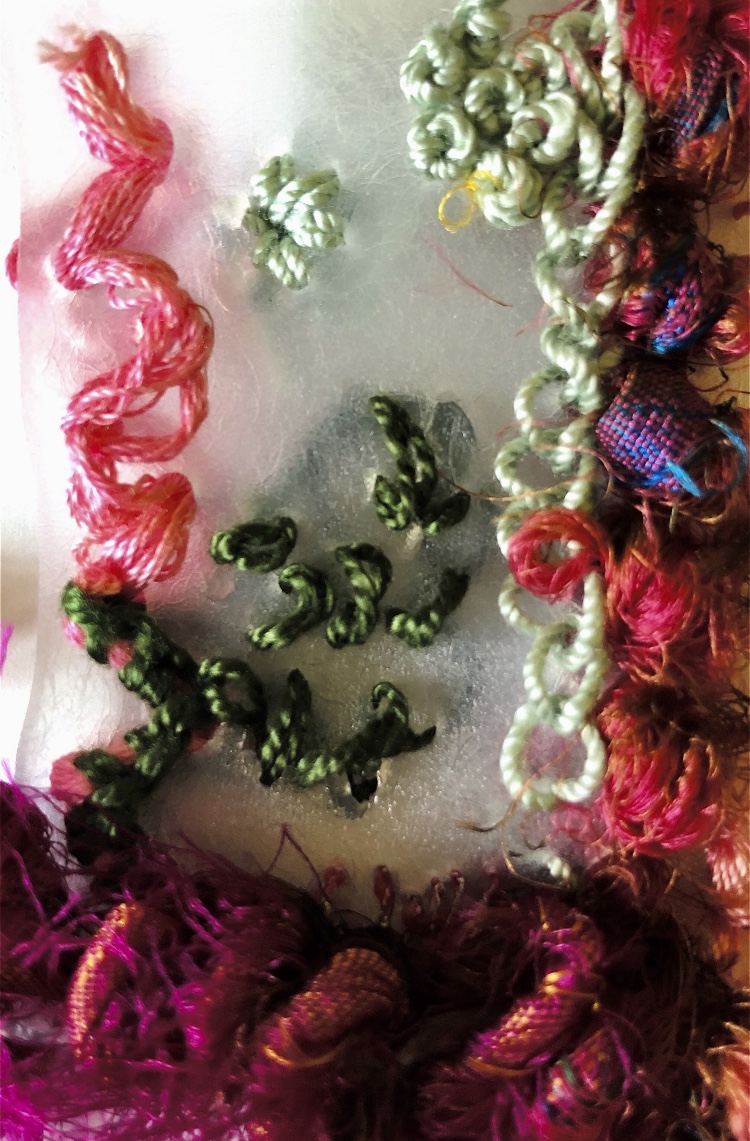
Fusing scrunched up coloured pieces of plastic was very exciting – I incorporated bits of muslin and sari silk for a different texture, and the resulting samples remind me of jewelled brooches. They were fun to paint with watercolours, and this gave me the idea to make more and stitch into them. Hand stitching through the layers was not difficult, I tried different stitches on each sample. I am sure that this technique could be explored further with different coloured plastic and much more stitching to really intensify the embellishment to make beautiful, decorative, wearable art.
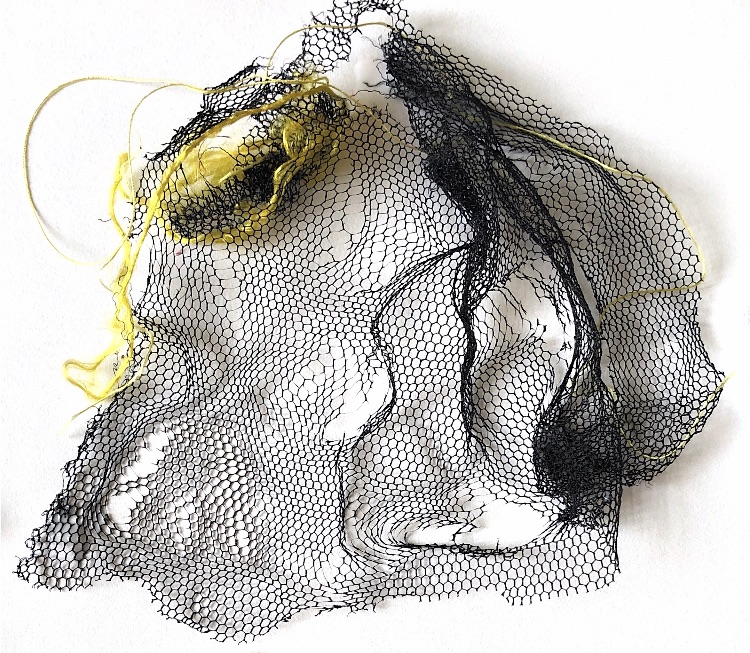
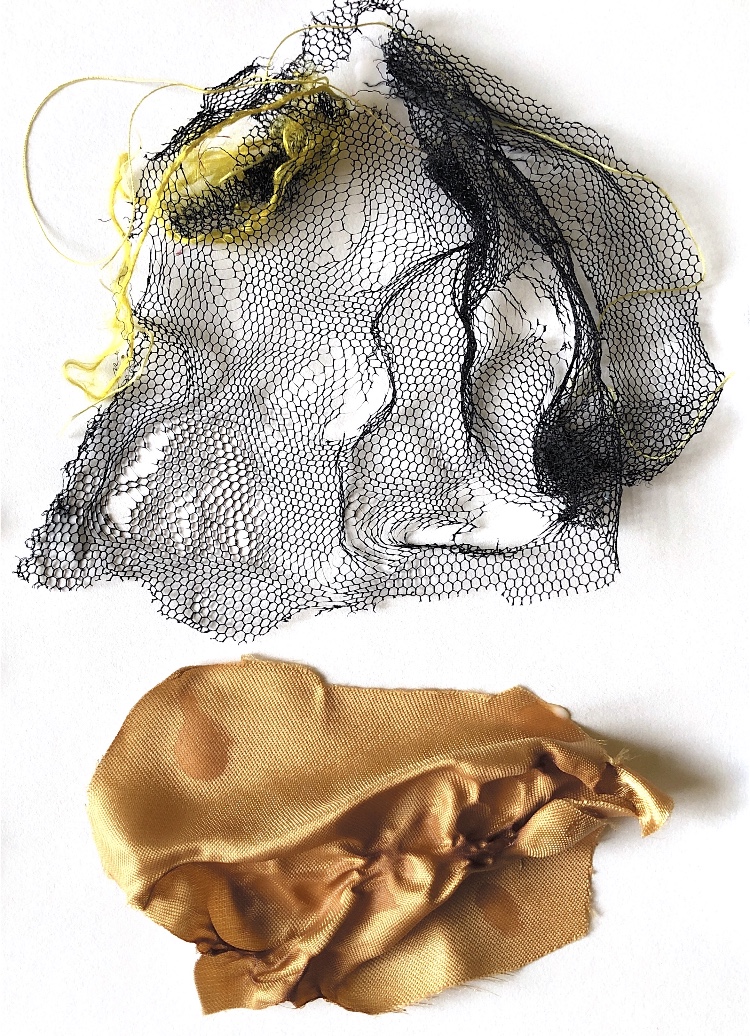
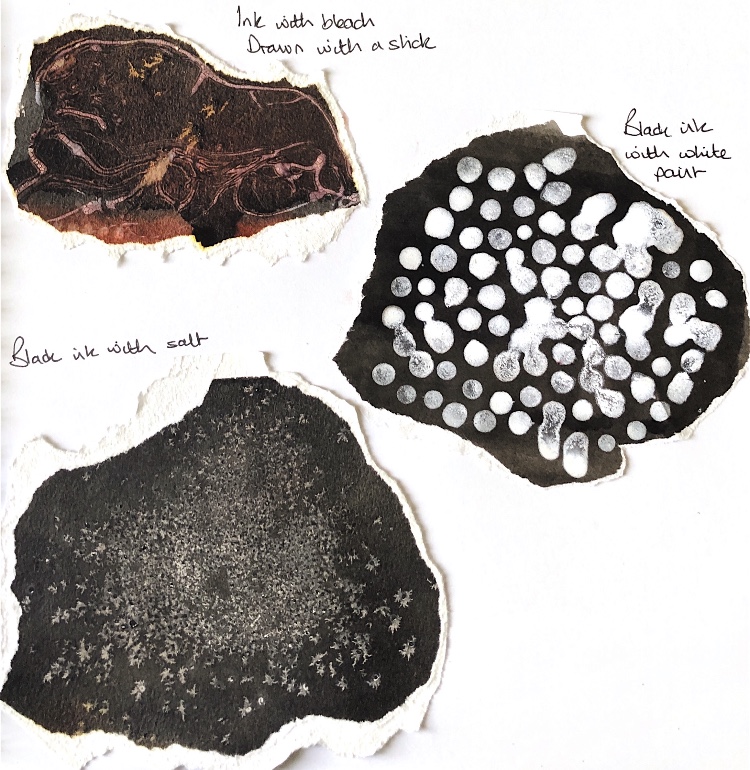
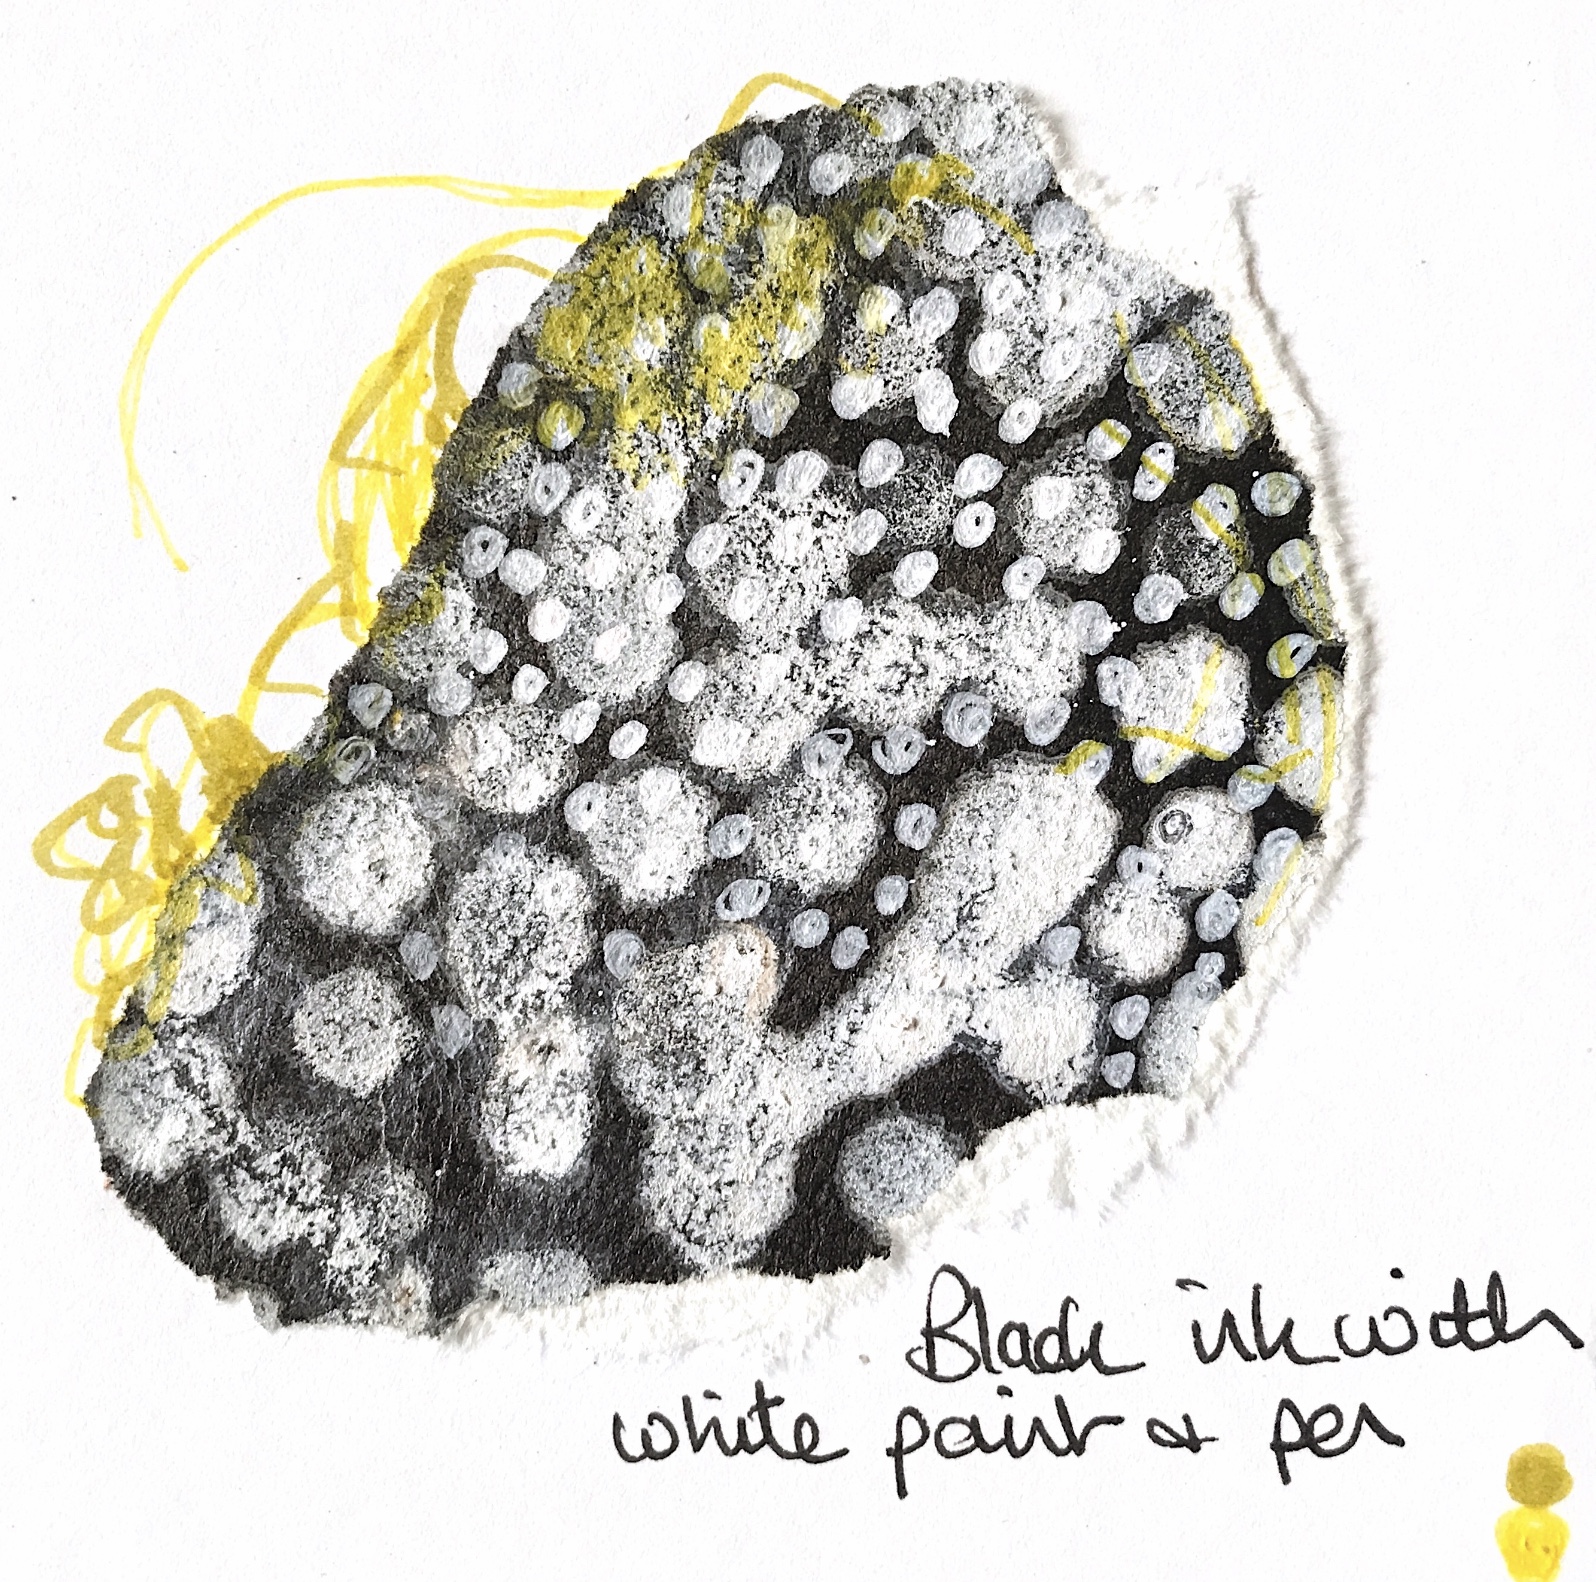
Exercise 2 Using a heat gun Having tried a variety of materials, the sample that excited me most to draw and work with was the black net. The large ragged holes made by the heat gun contrasted with the small neat holes in the net. This was very different to the other sample shown below which is heated satin. Having drawn and painted the sample using made tools and using salt on watercolour, I chose to stitch on one piece of watercolour paper. I love stitching on paper – the feel of the needle pushing through the paper is very satisfying and the stitch is firmly held in place by the paper to make a prominent mark whatever the thickness of thread.
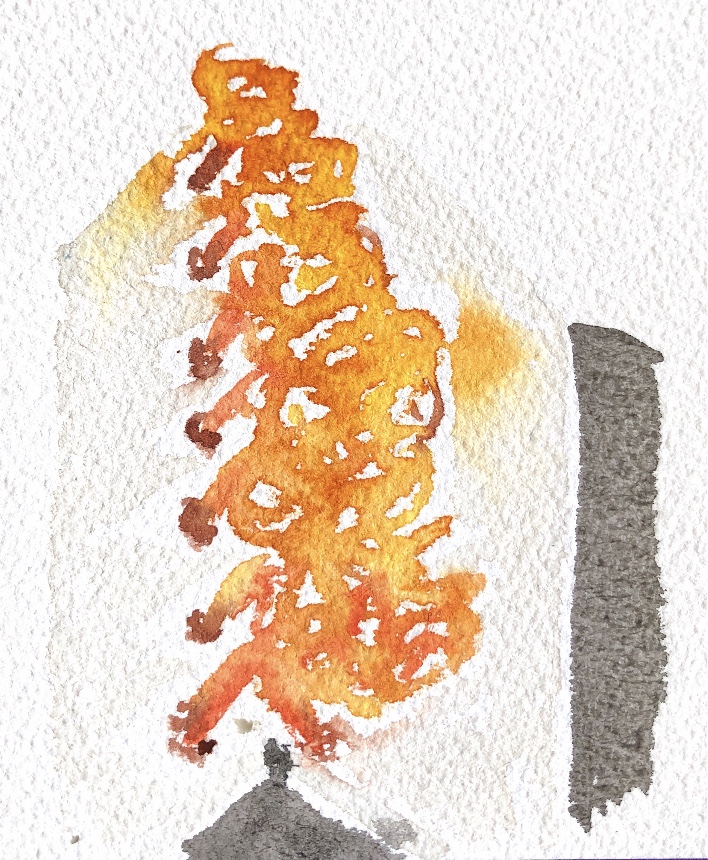
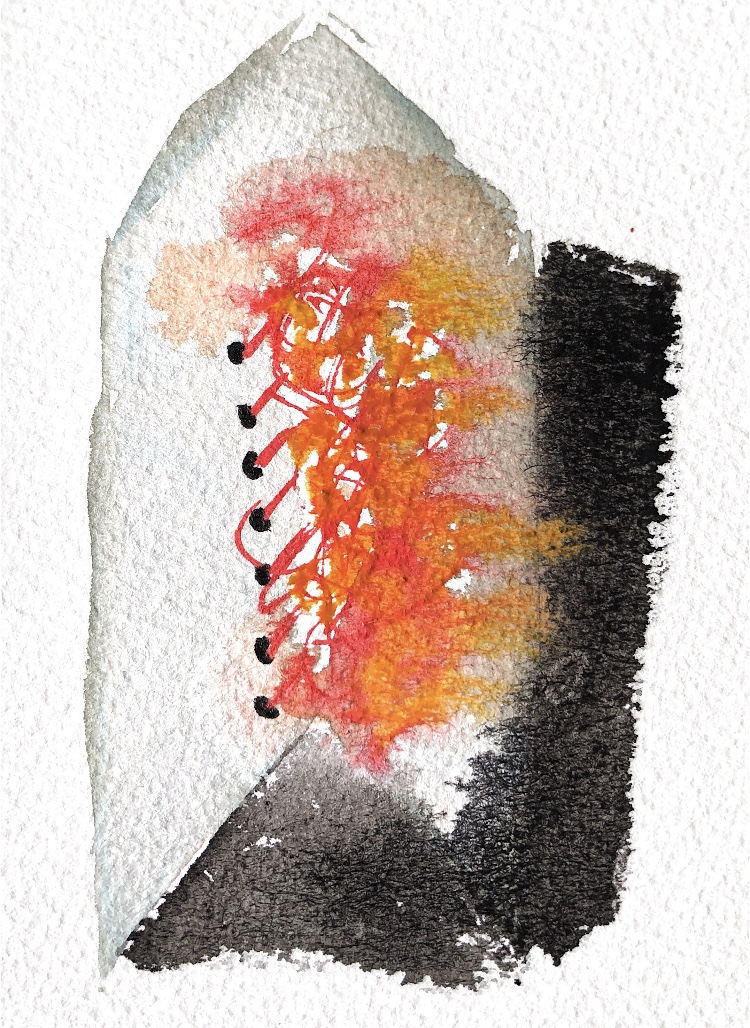
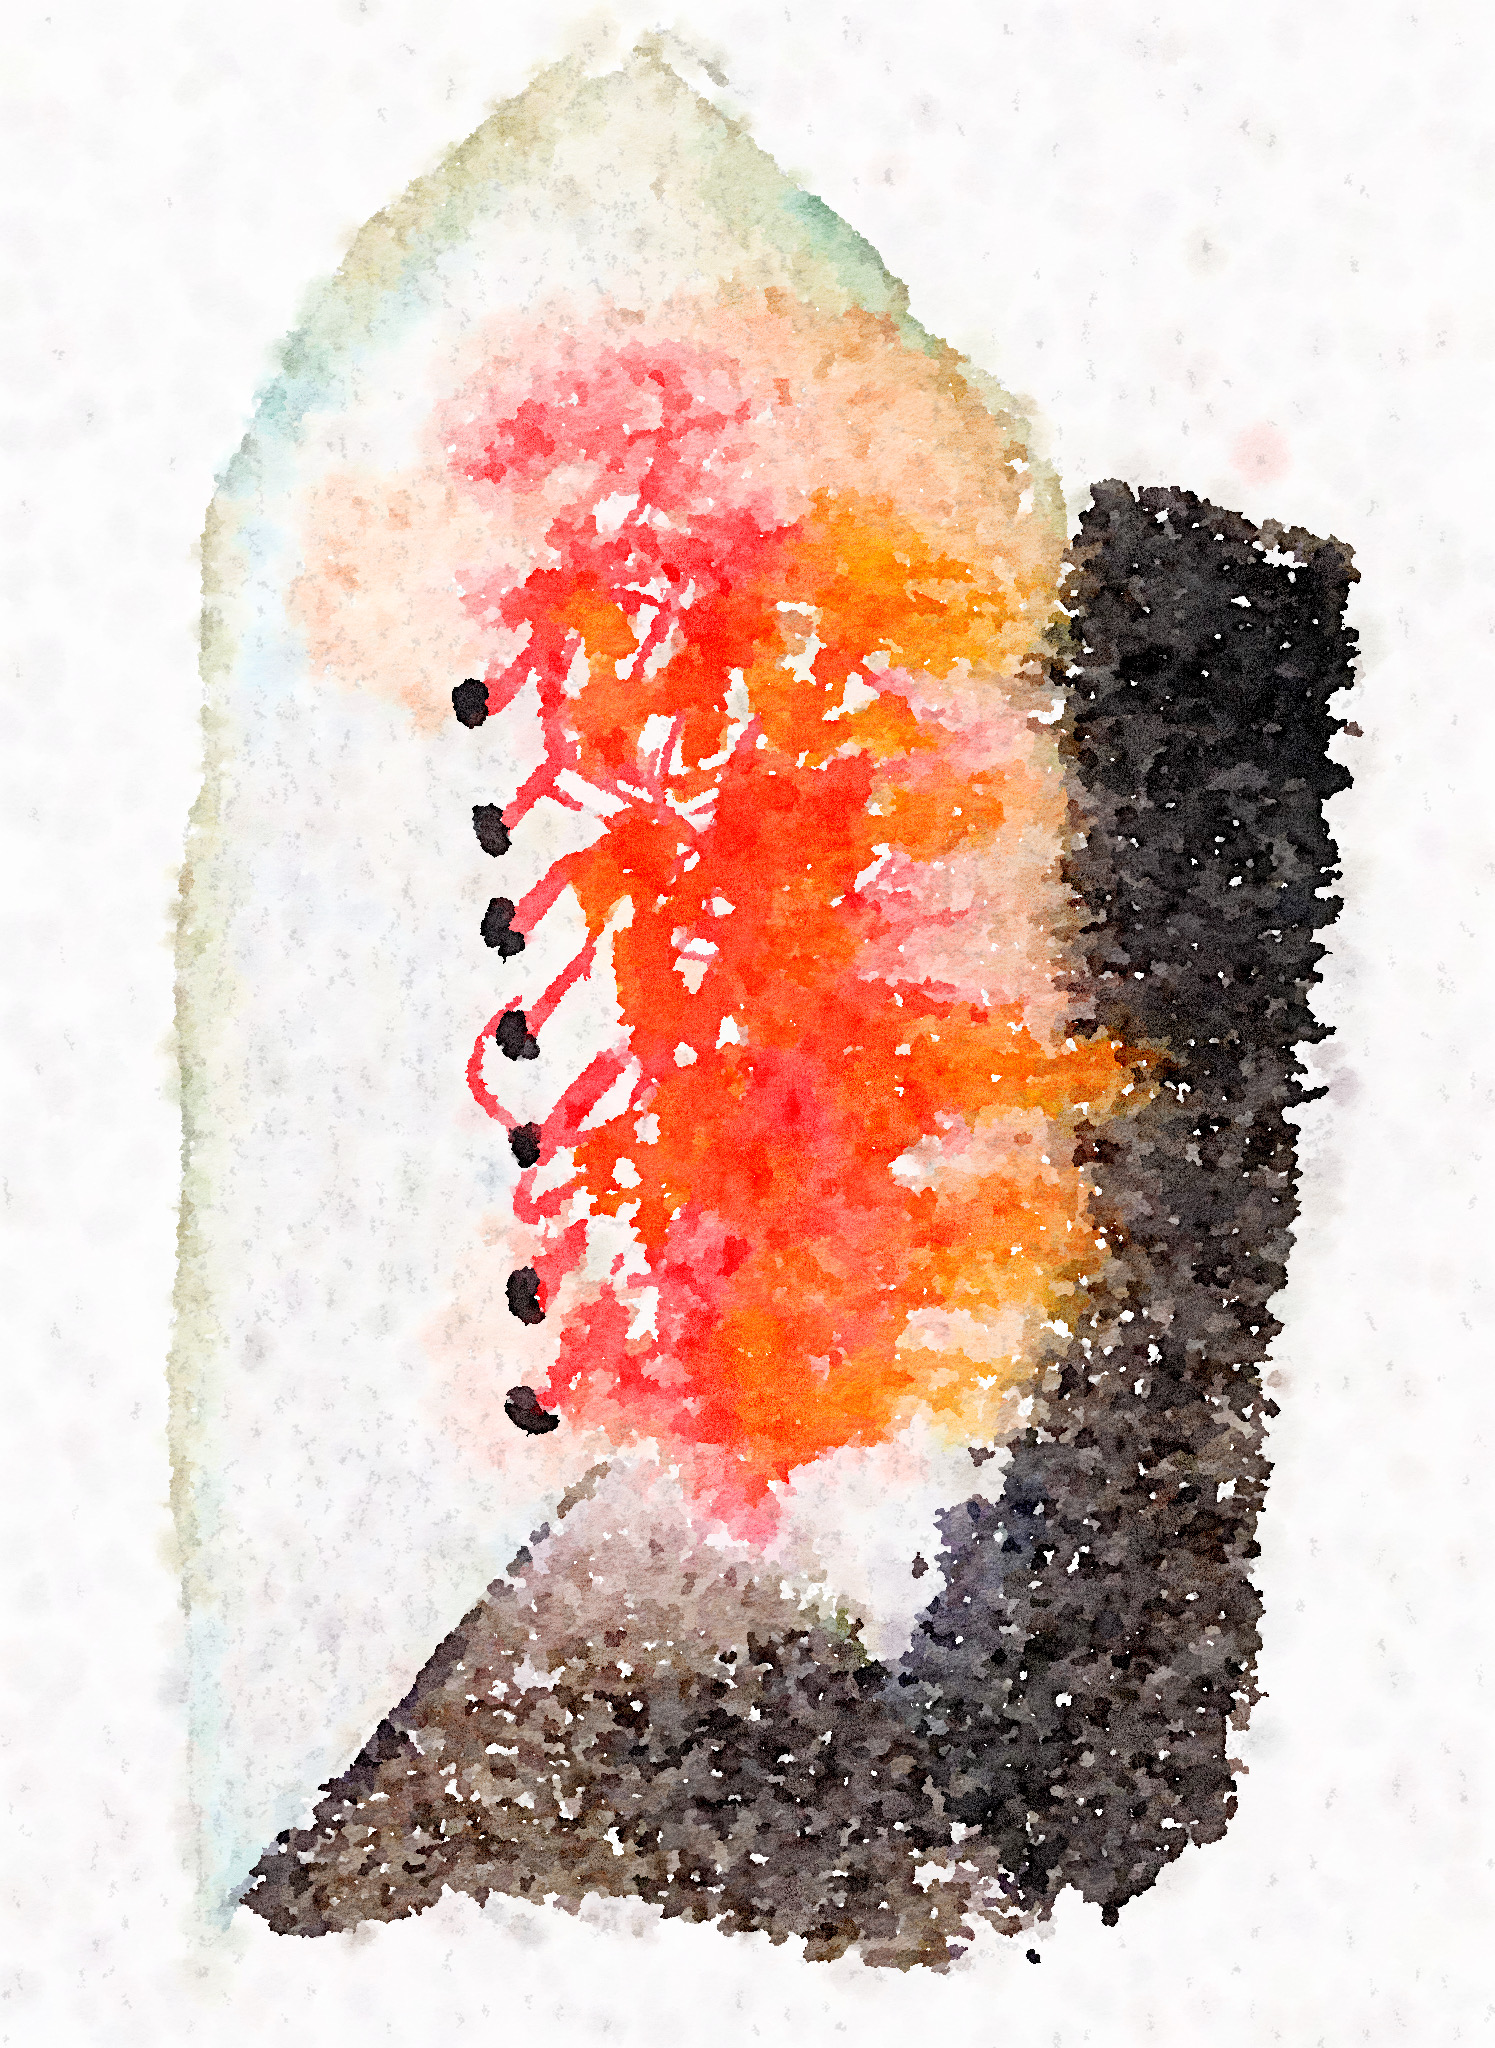
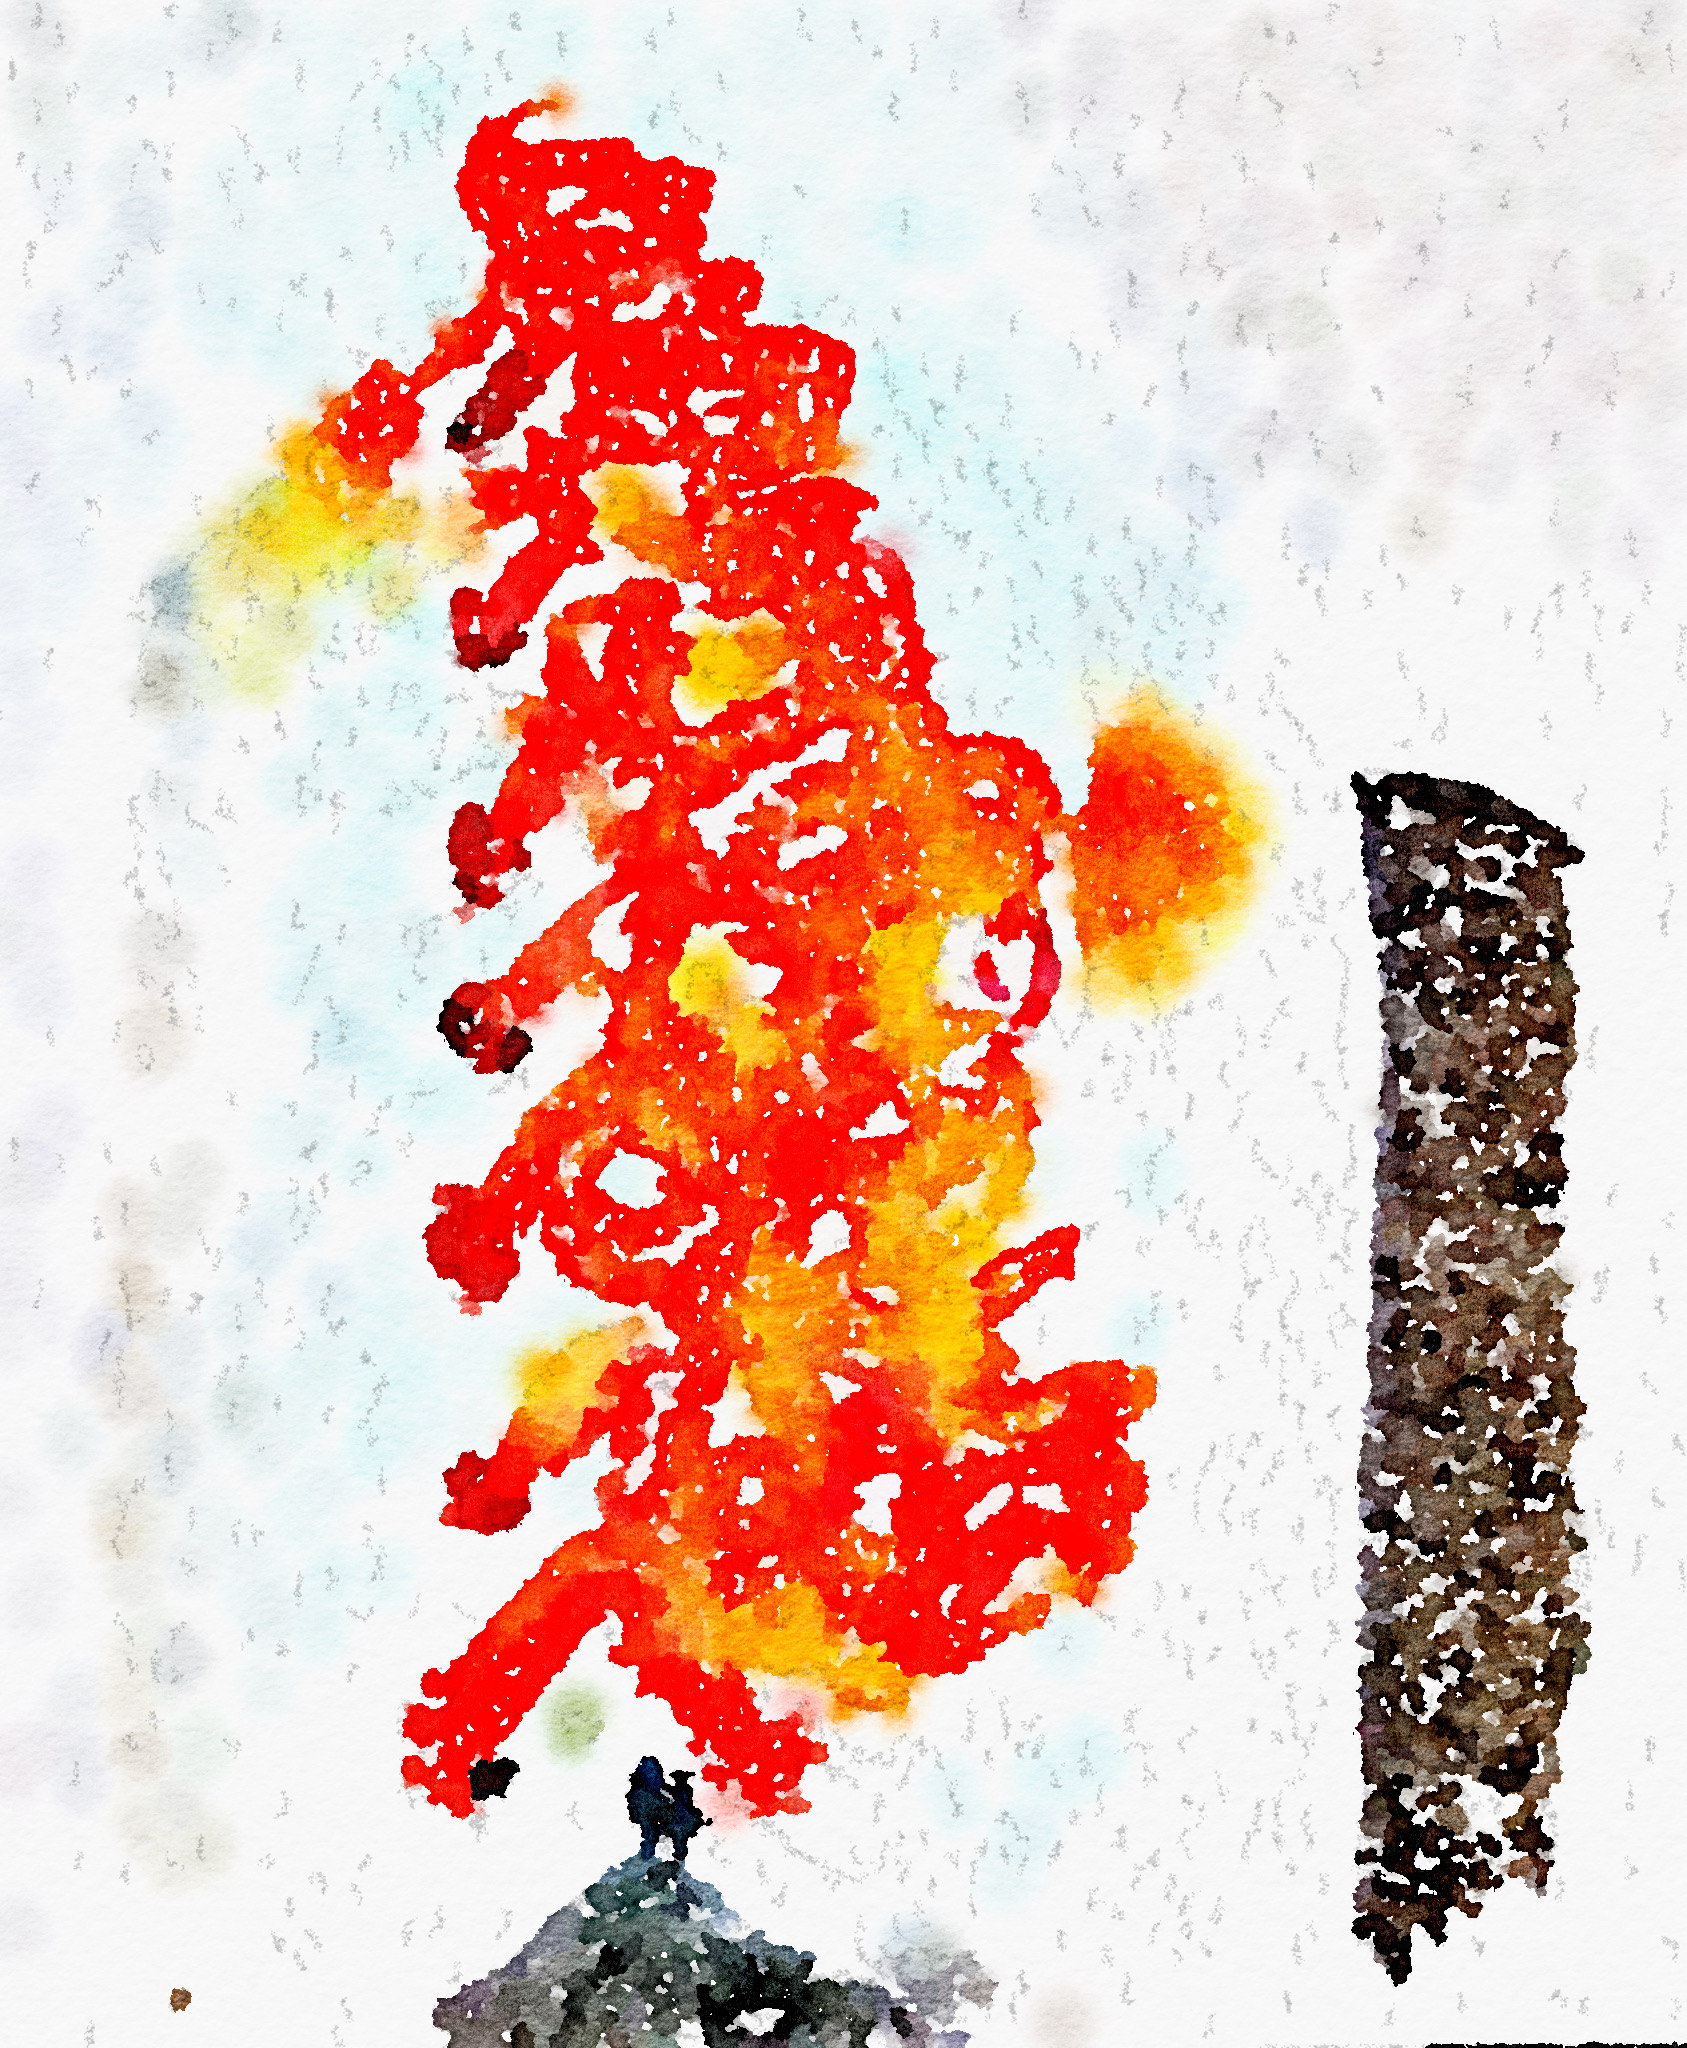
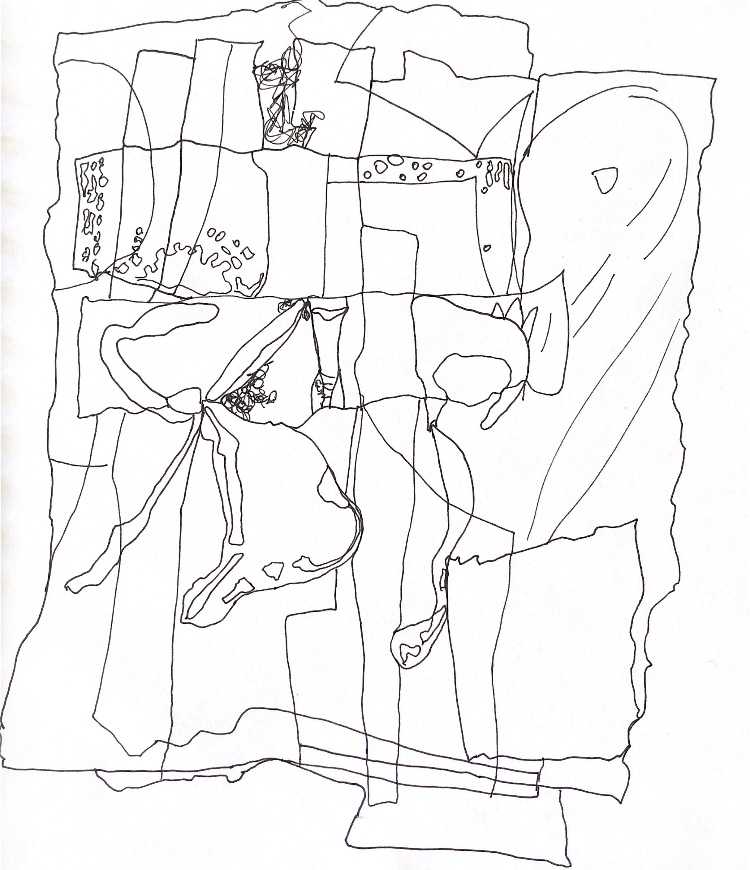
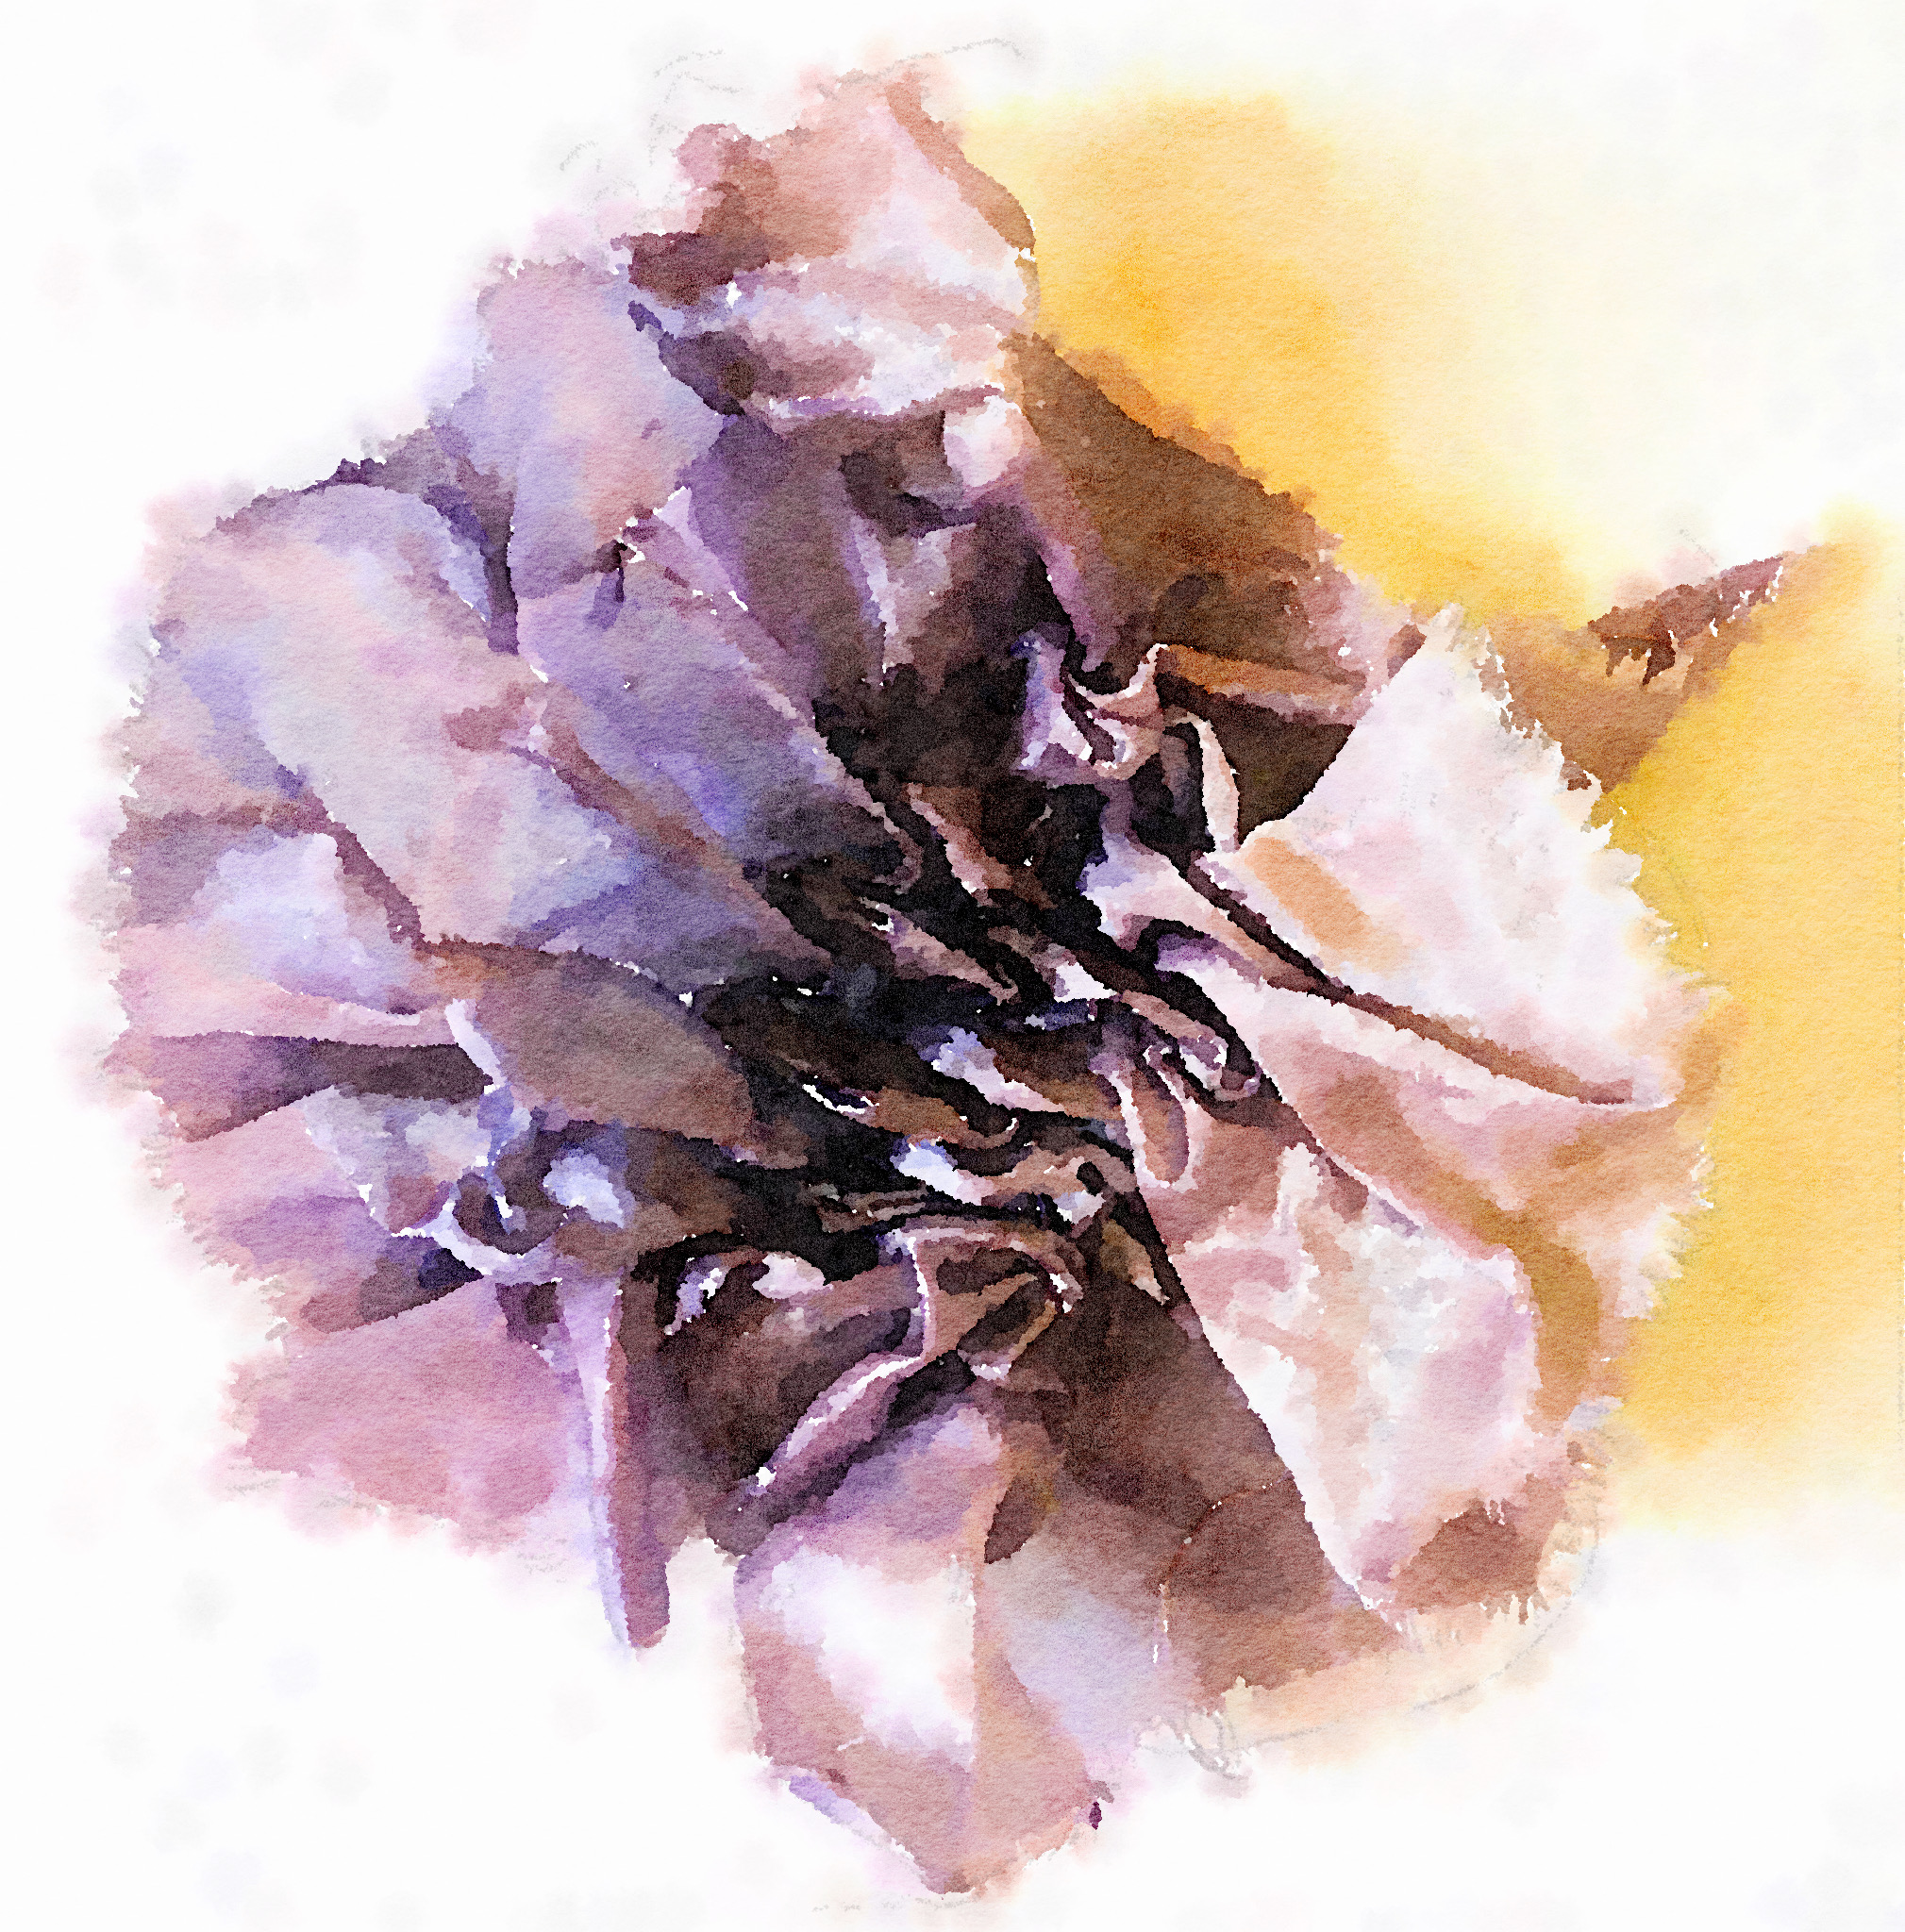
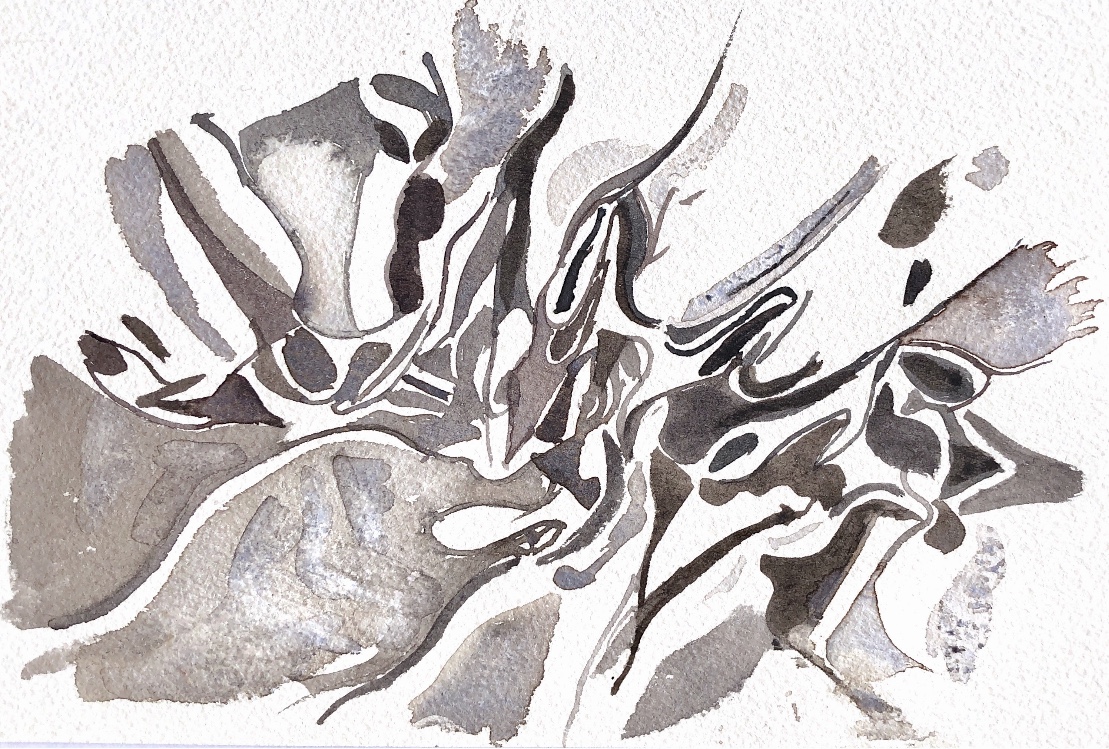
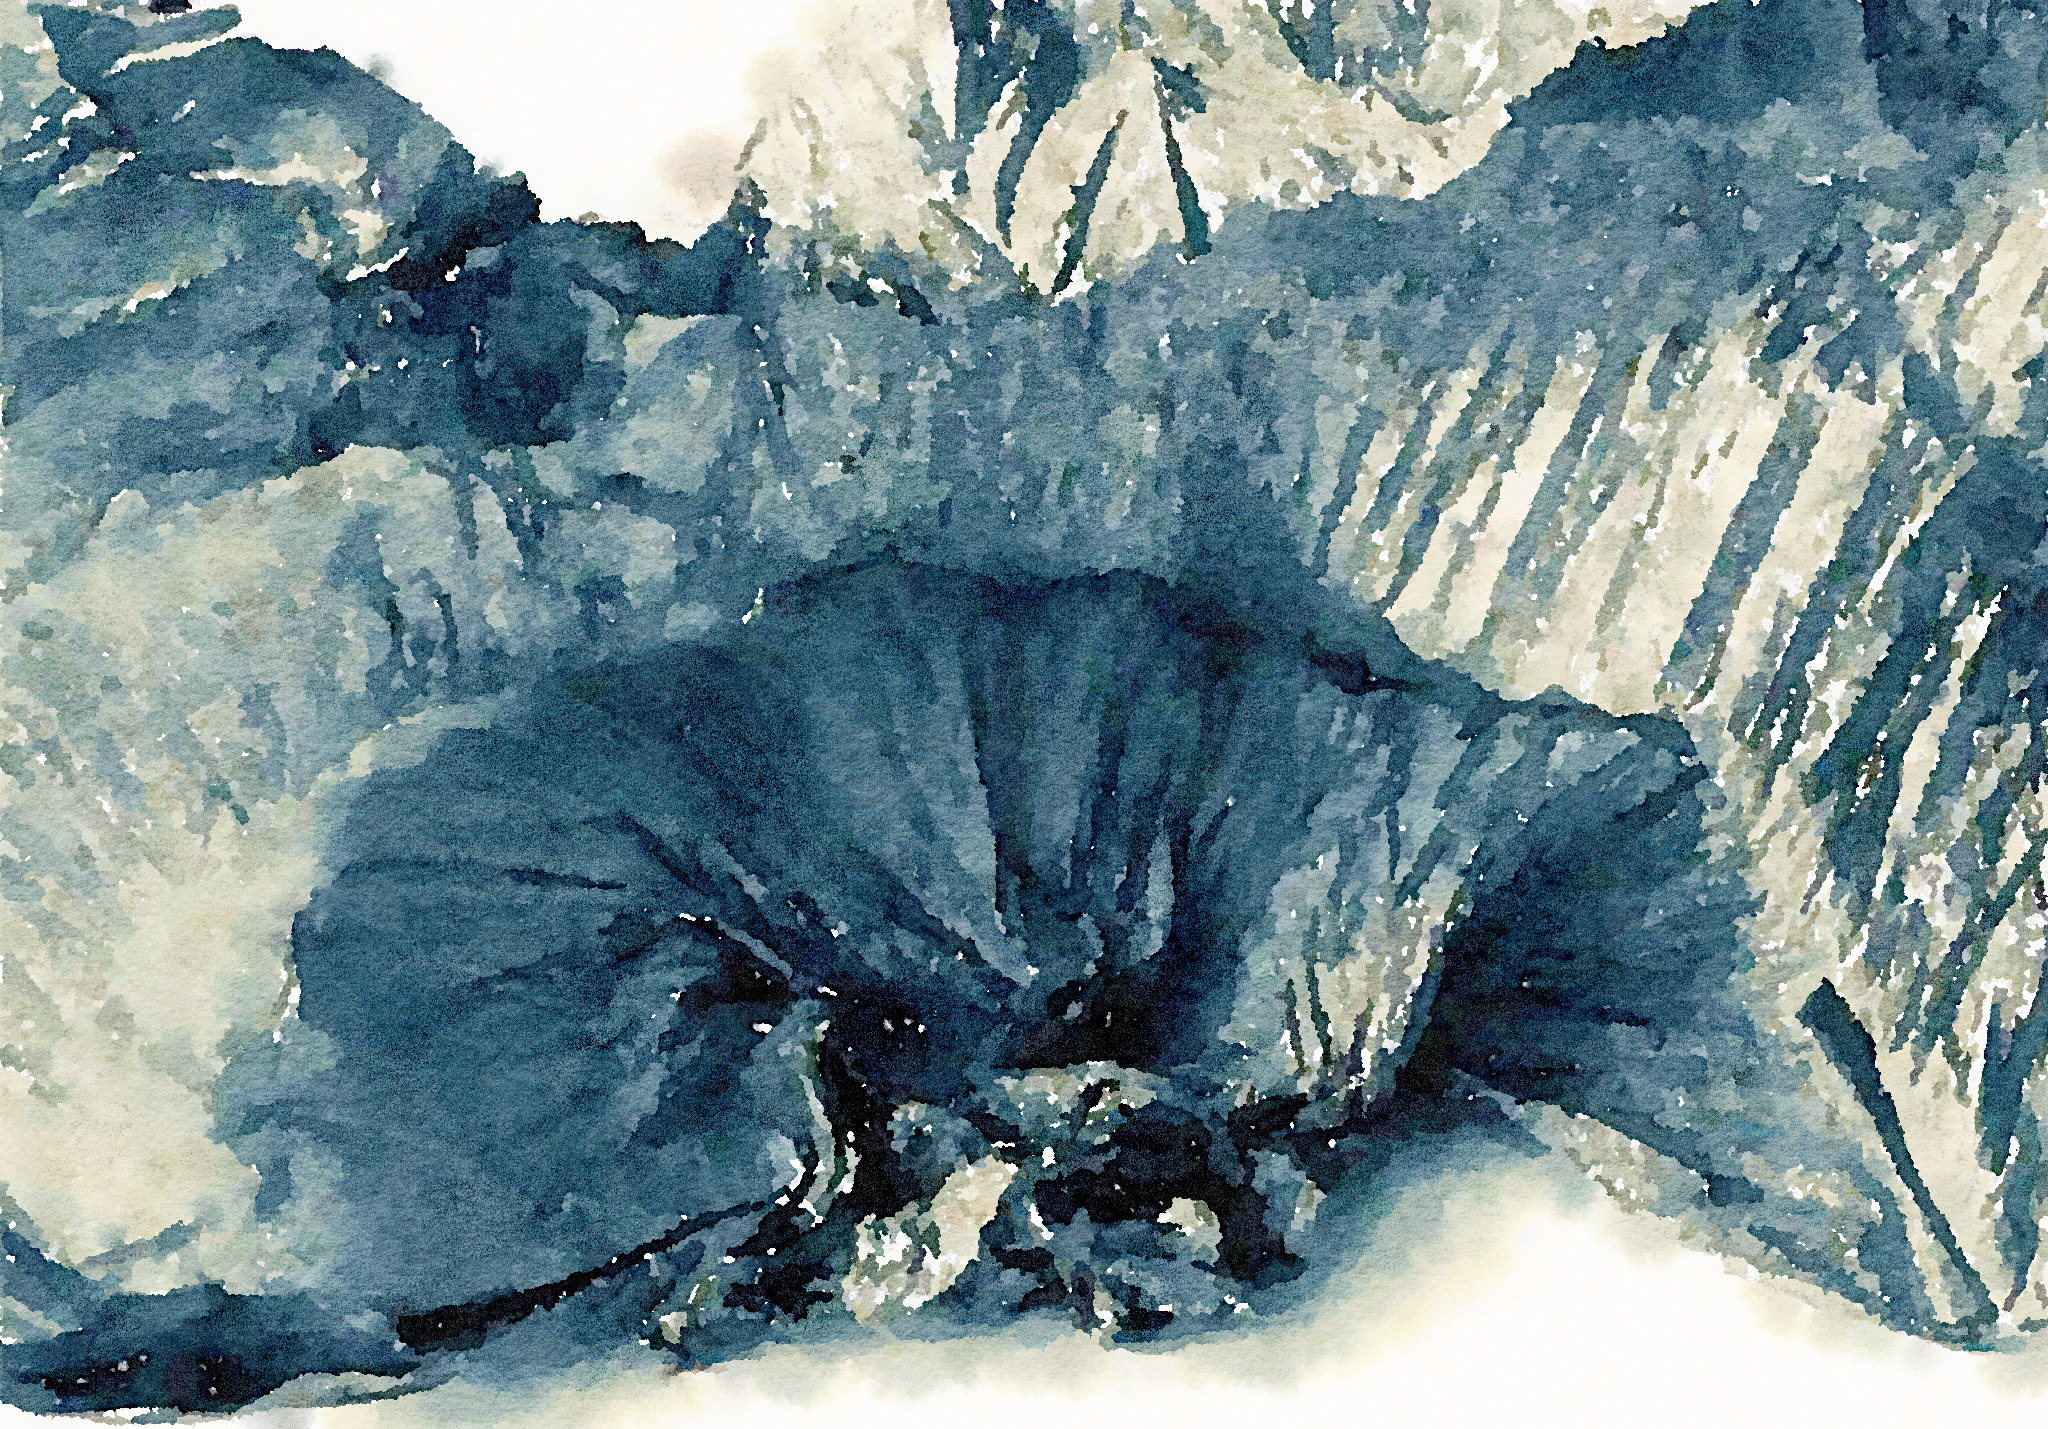
Exercise 3 Using hot water Using a meandering hand stitch pattern on polyester satin I gathered up the fabric and then boiled it for 30 minutes. The result was an intriguing scrunched up fabric that could be pulled open and would crease up again when let go. The dark shadows created by the folds are full of pattern and captured clearly in the ‘Waterlogue’ app manipulation shown below. It was not an easy thing to draw but observing closely produced a drawing full of movement.
The sample is very reminiscent of the work of Jules Waibel who I researched at the beginning of these exercises – particularly her vases and underwear.
I also boiled a piece of prefelt I had made with buttons tied into it, however boiling alone did not fully felt the sample ,so I needed to handfelt it more fully with rubbing and rolling before taking out the buttons. Simple wax circles with a watercolour wash over captured some of the organic feel of this sample.
4. Project 4 Scratching and embossing Exercise 1 Embossing This did not prove to be a satisfying technique for me despite trying wet and dry paper and metal to emboss. This was my initial sample and probably the one I found most in to draw but I didn’t really manage to transform the other samples into anything more inspiring.
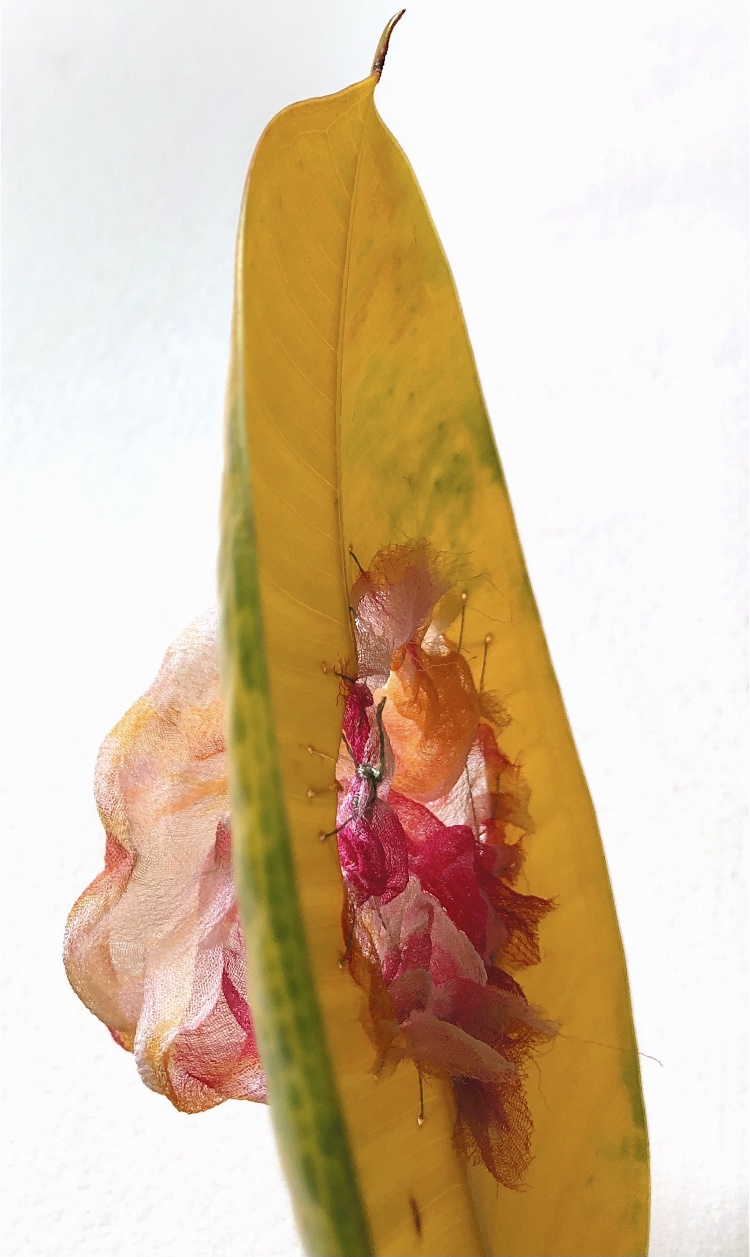
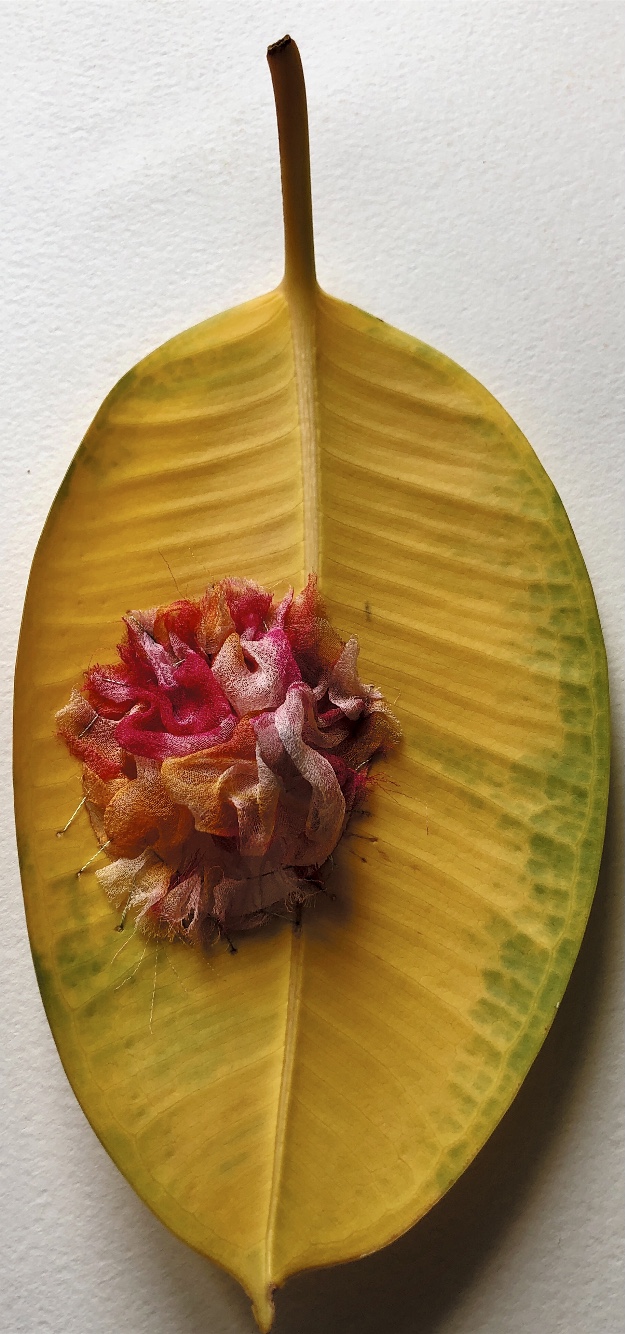
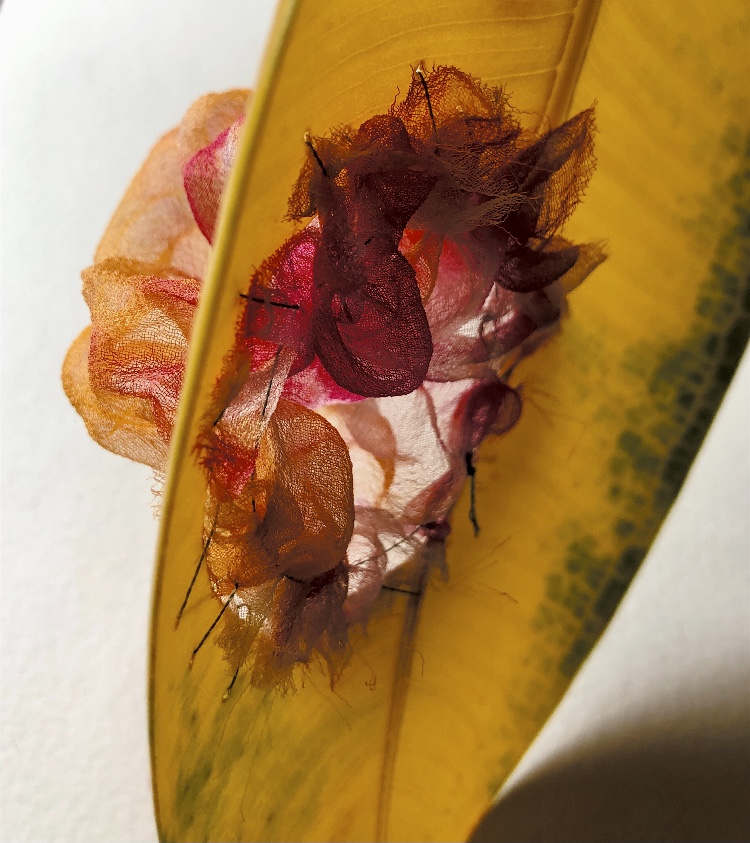
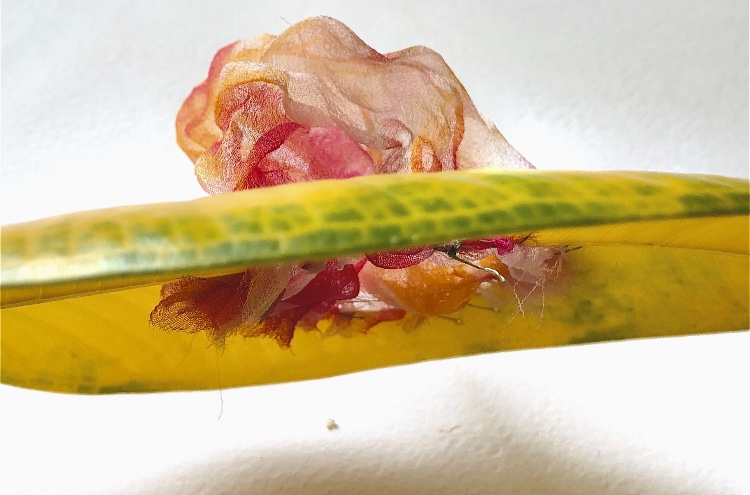
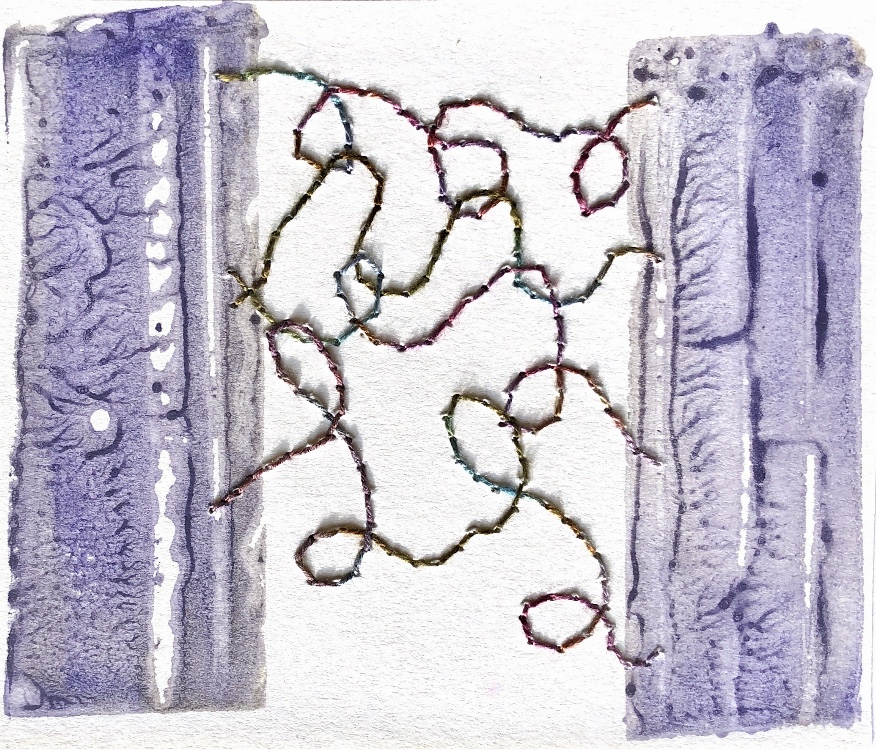
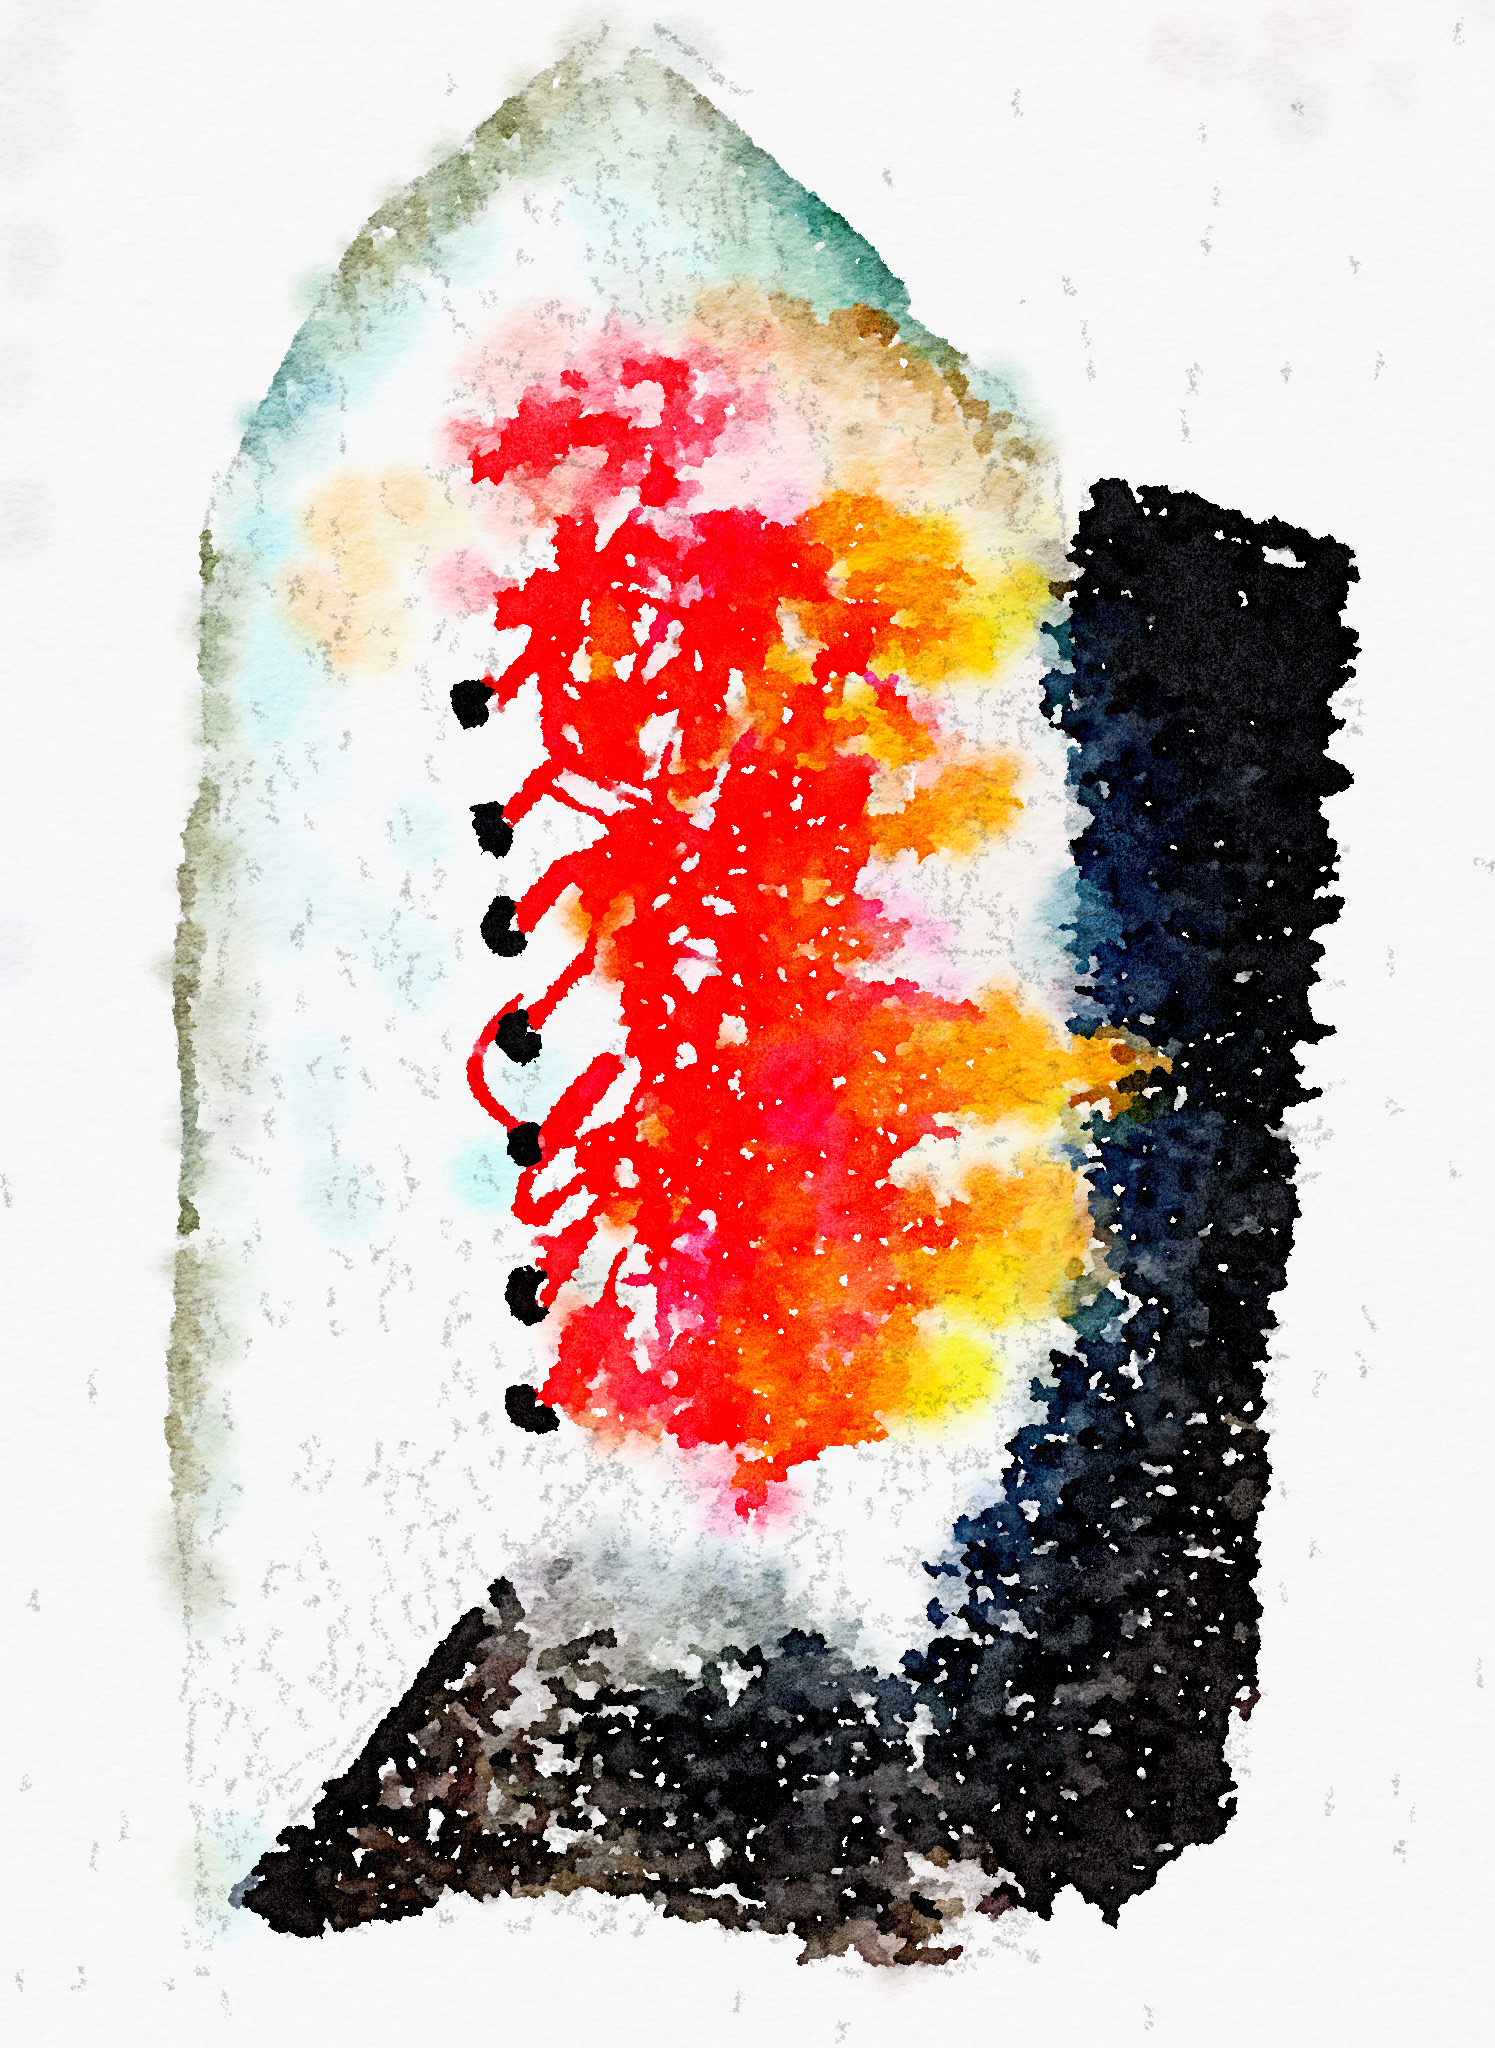
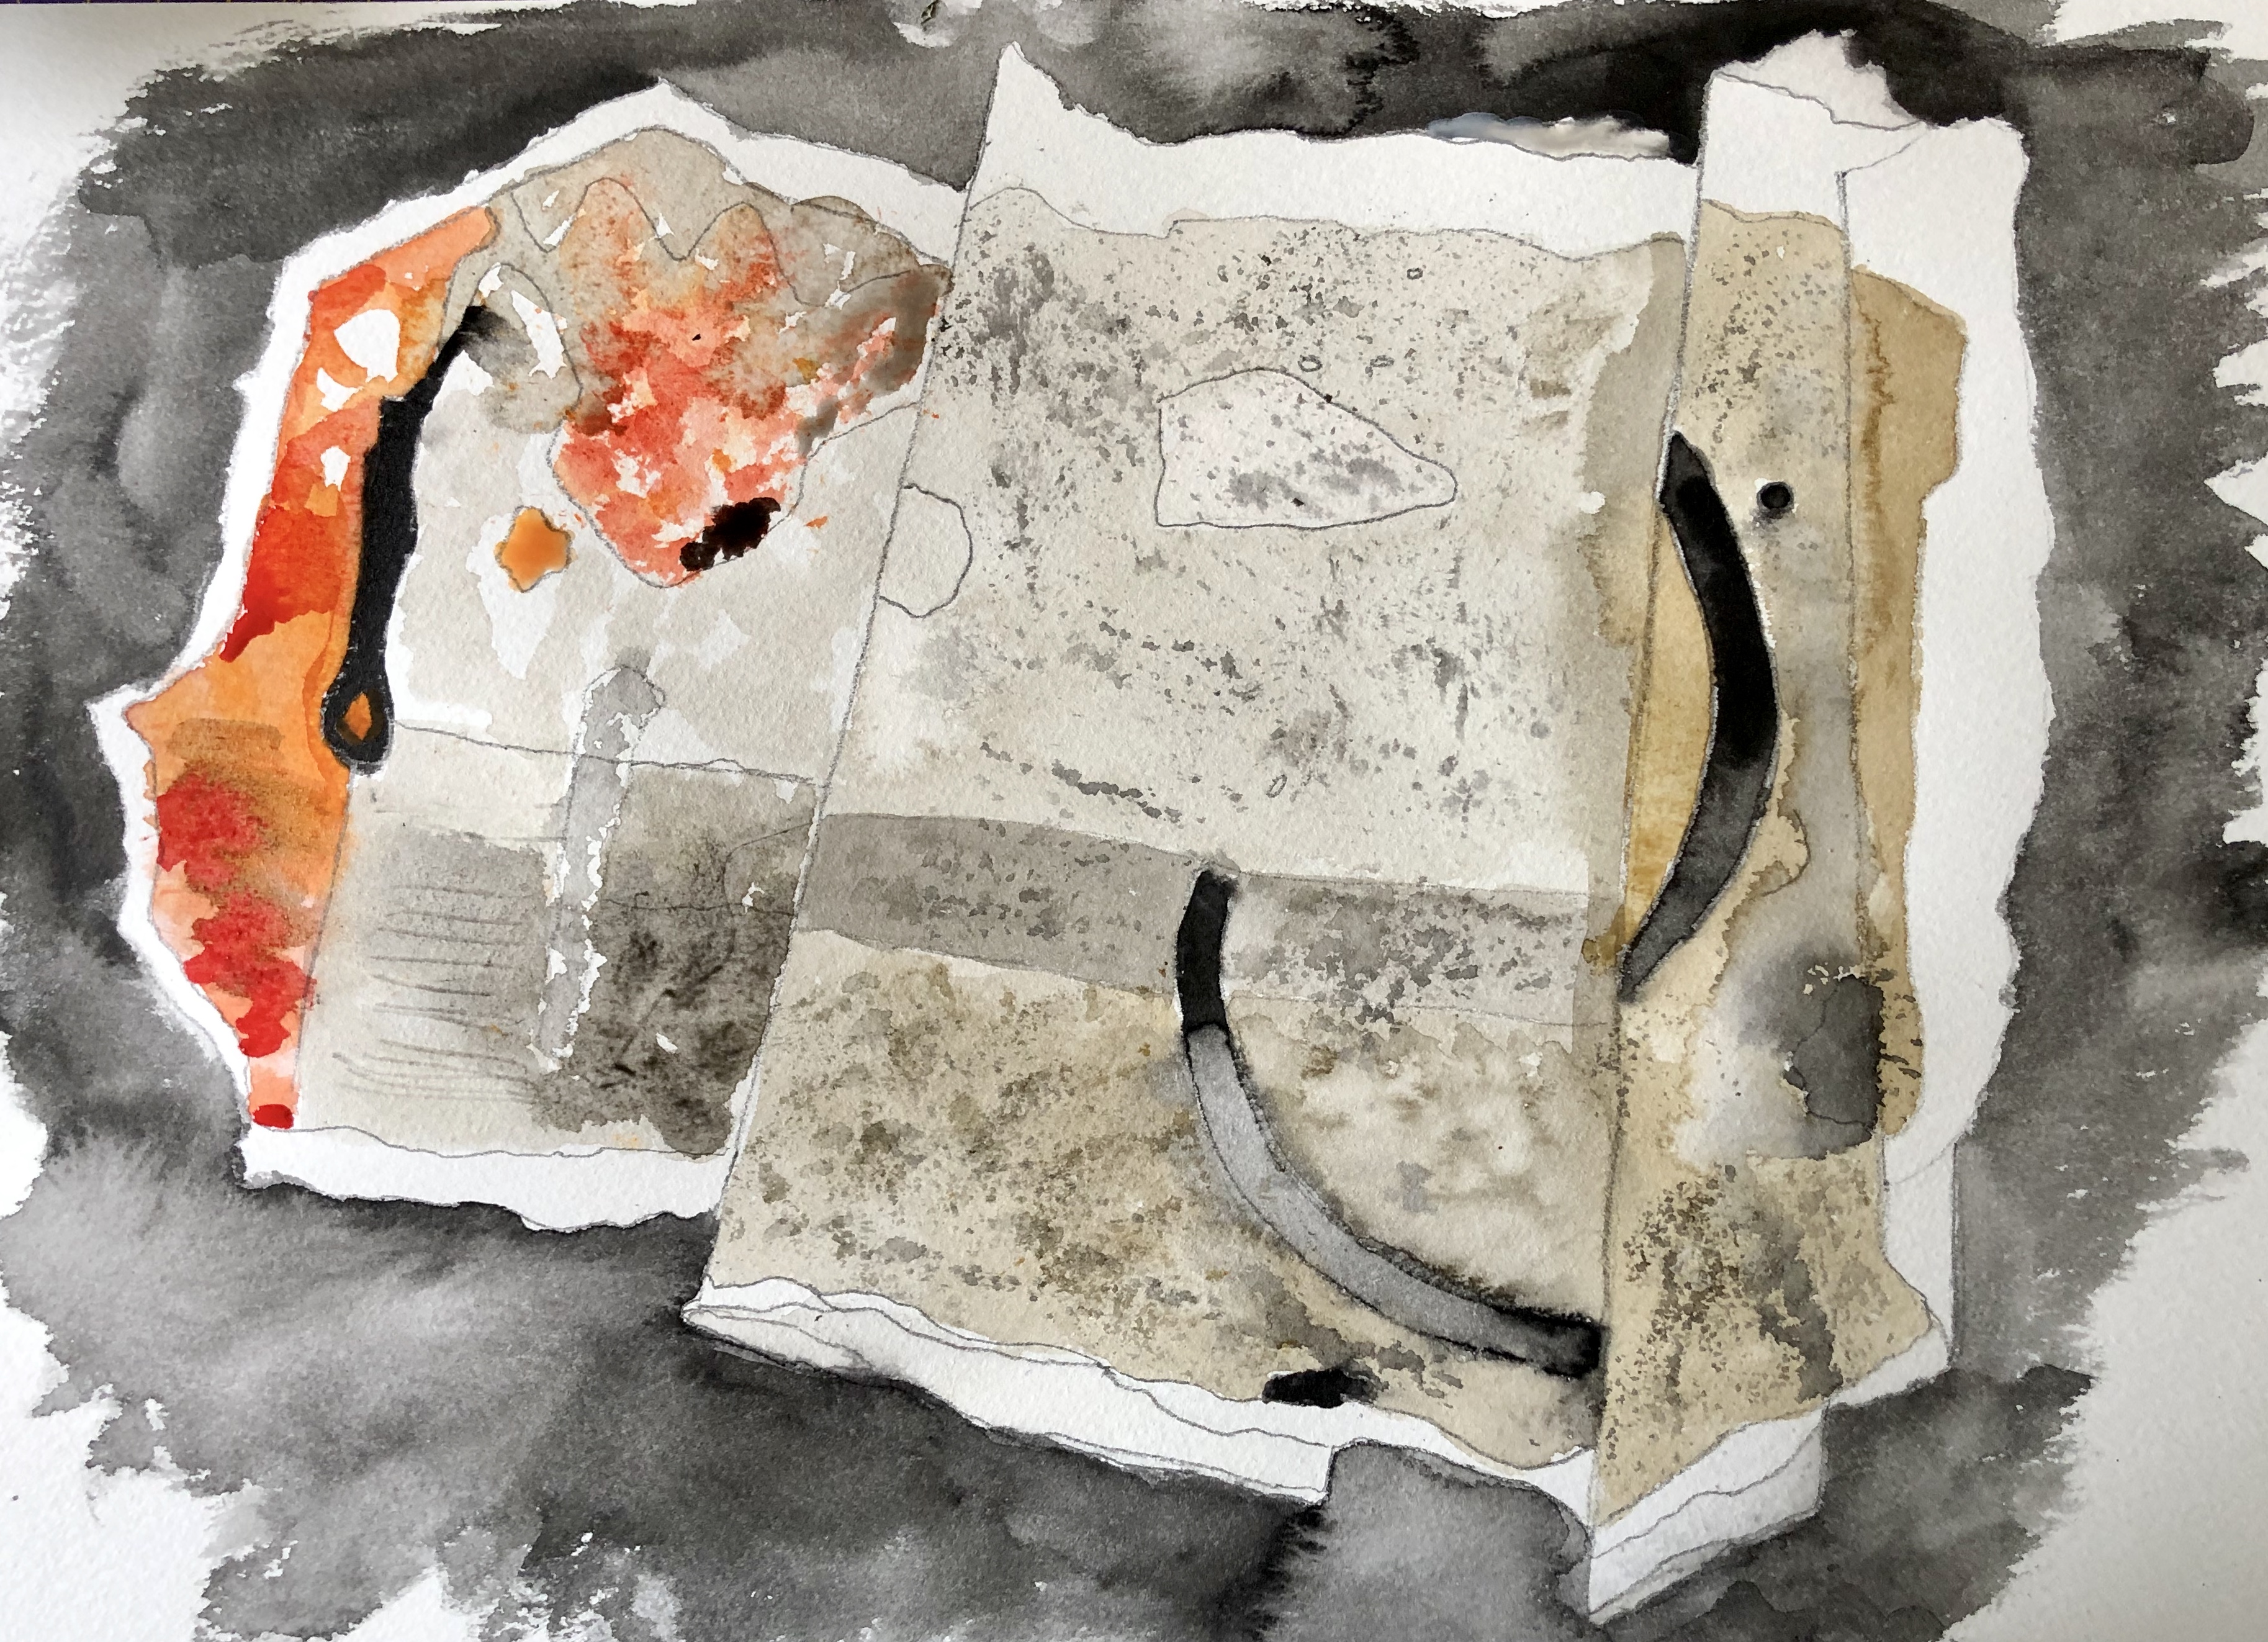
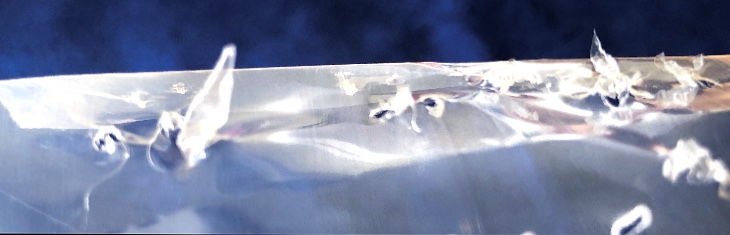
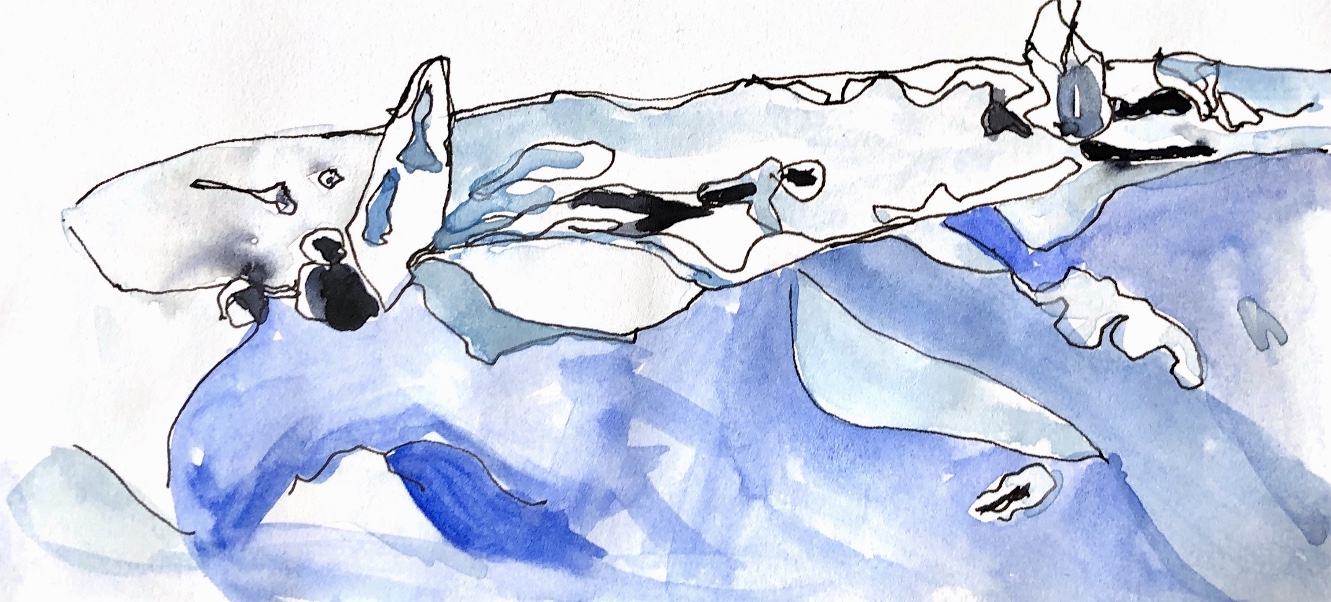
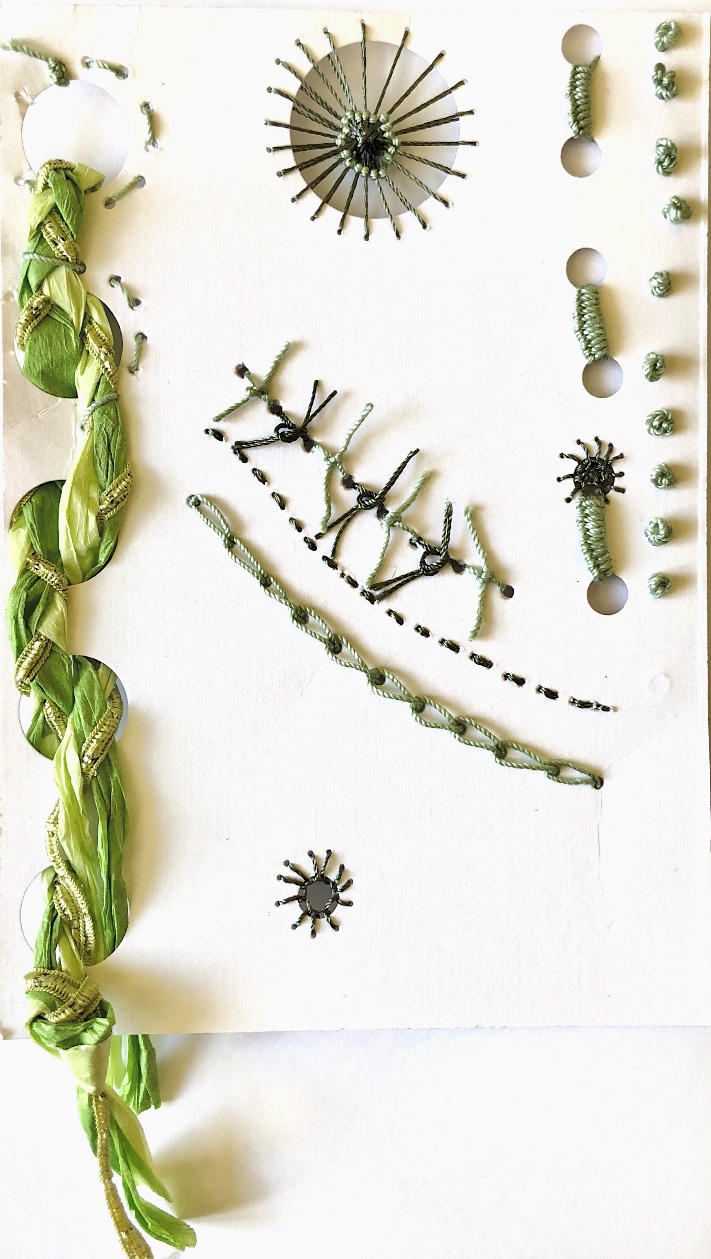
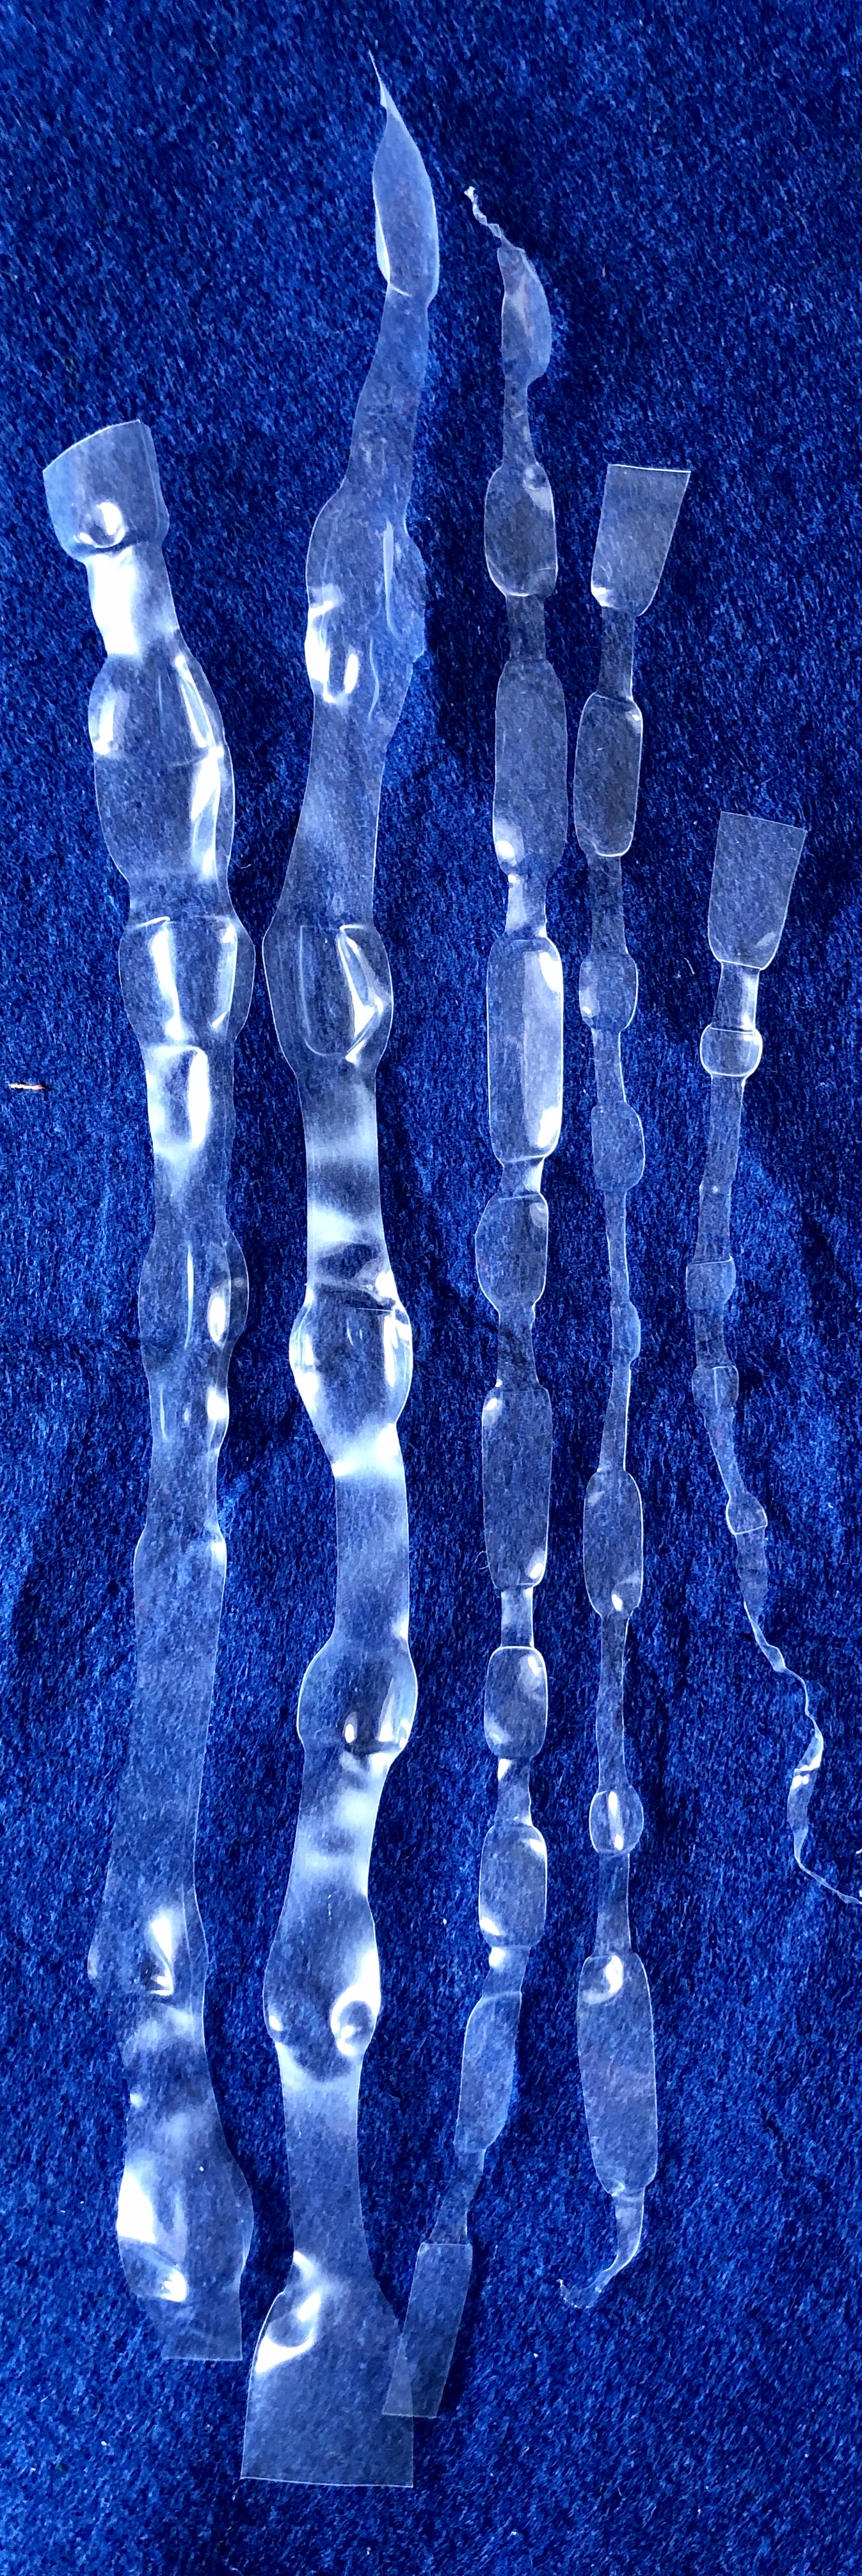
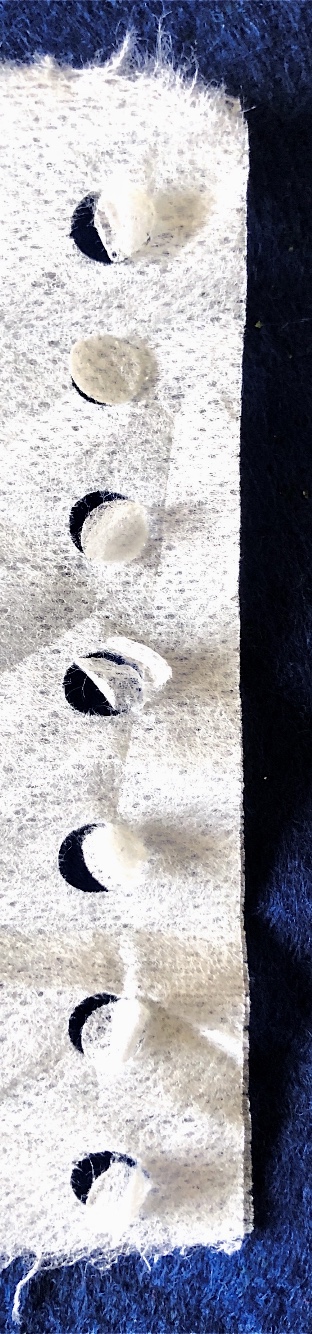
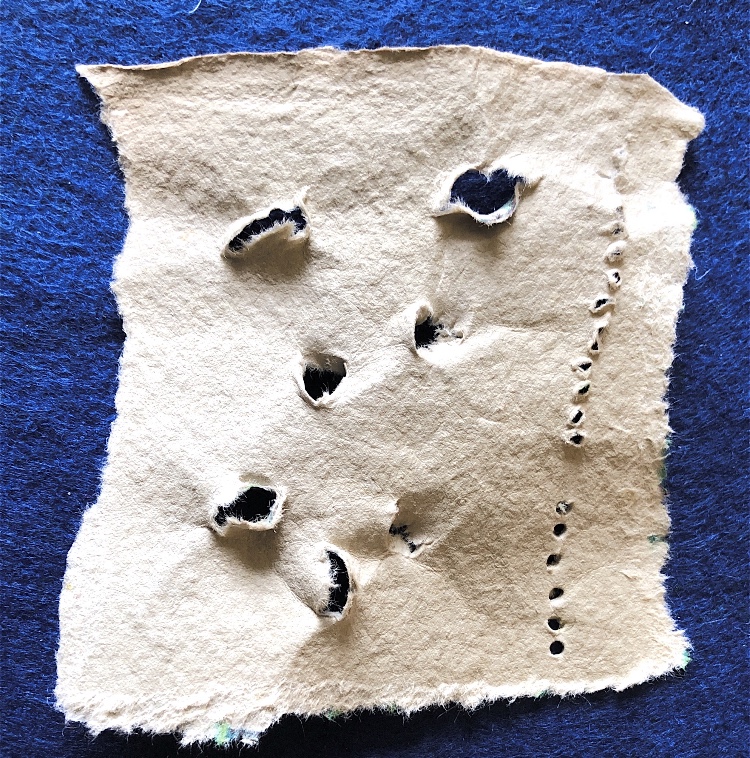
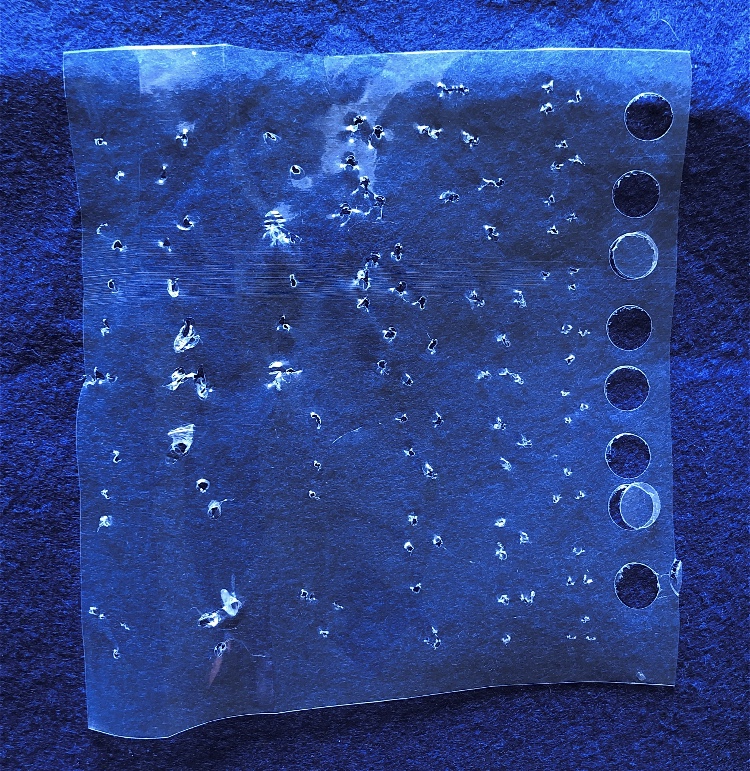
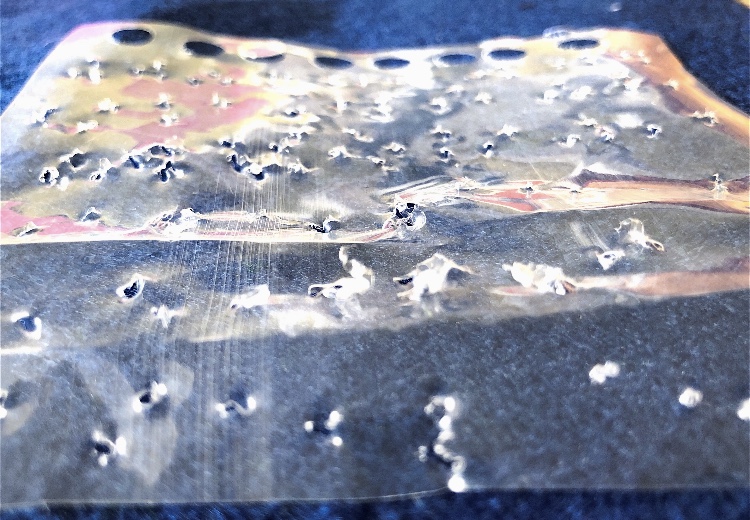
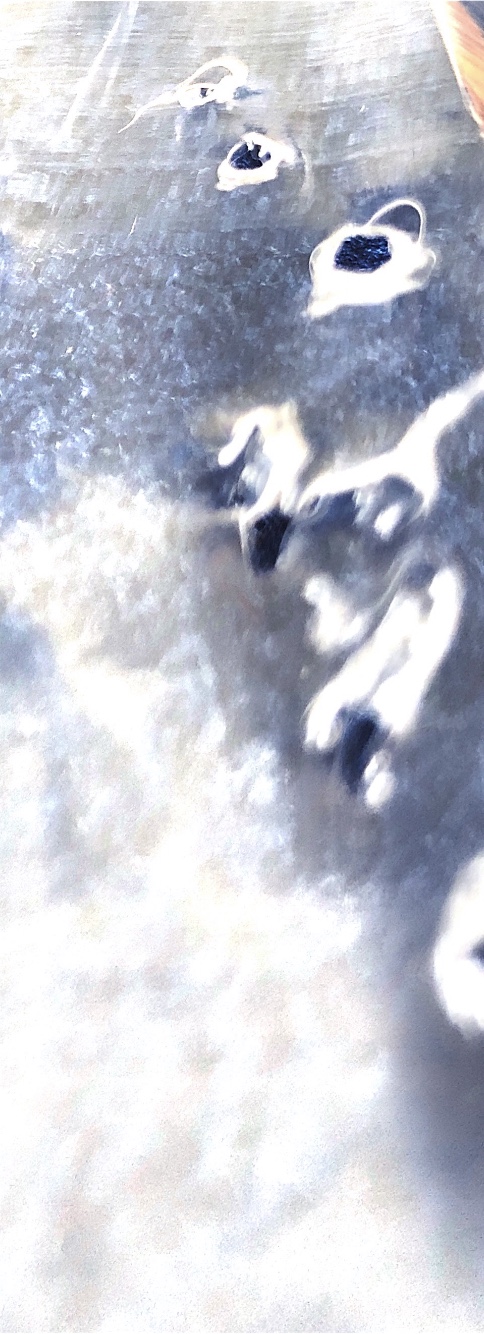
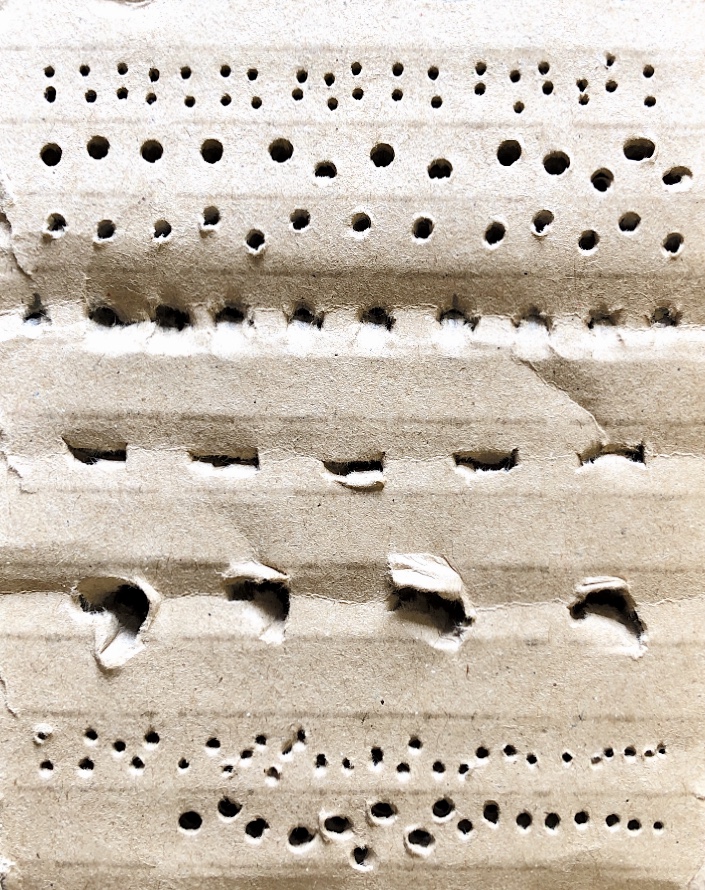
5. Project 5 Puncturing and stitching Exercise 1 Puncturing Here I have chosen two very different samples to focus on. The first is a fairly heavy transparent plastic which pulled and spiked when punctured with a tapestry needle. The photographs show a smooth, shiny surface which looks like ice, with cracks and icicles rupturing the surface. It almost looks like the surface of the moon. I’m not sure how to progress this sample but I chose it as it is so different to anything else I have produced both in texture and colour. It is laid on a piece of blue felt to photograph but also reflects coloured light from other surfaces – a bit like an oil spill. On reflection I can see that I did not fully explore the colour possibilities in my drawing.
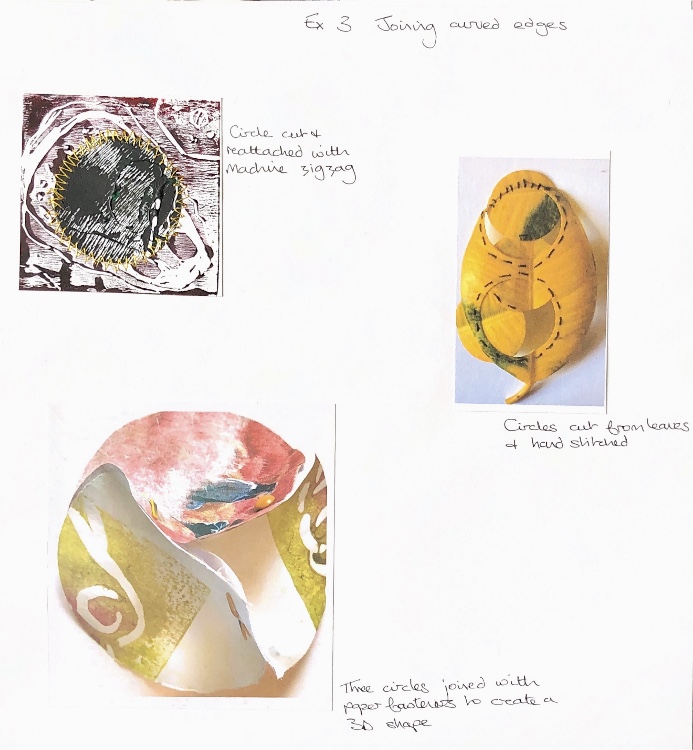
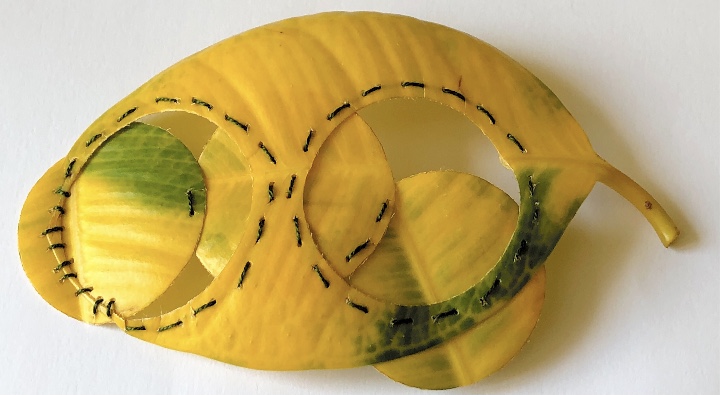
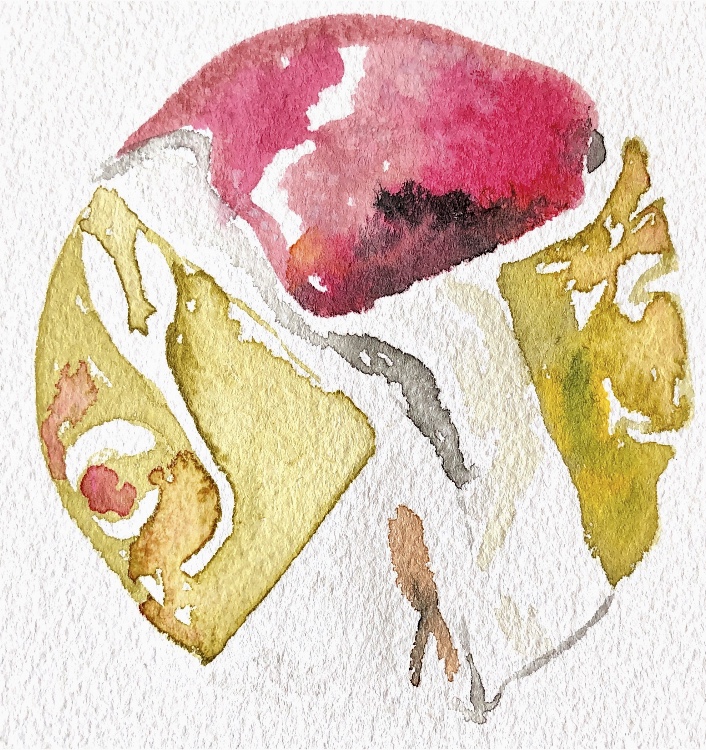
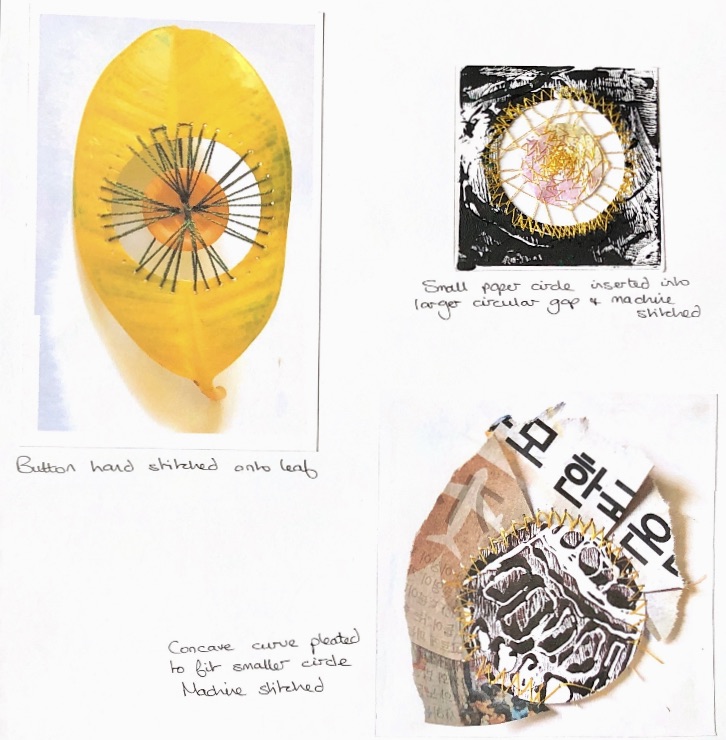
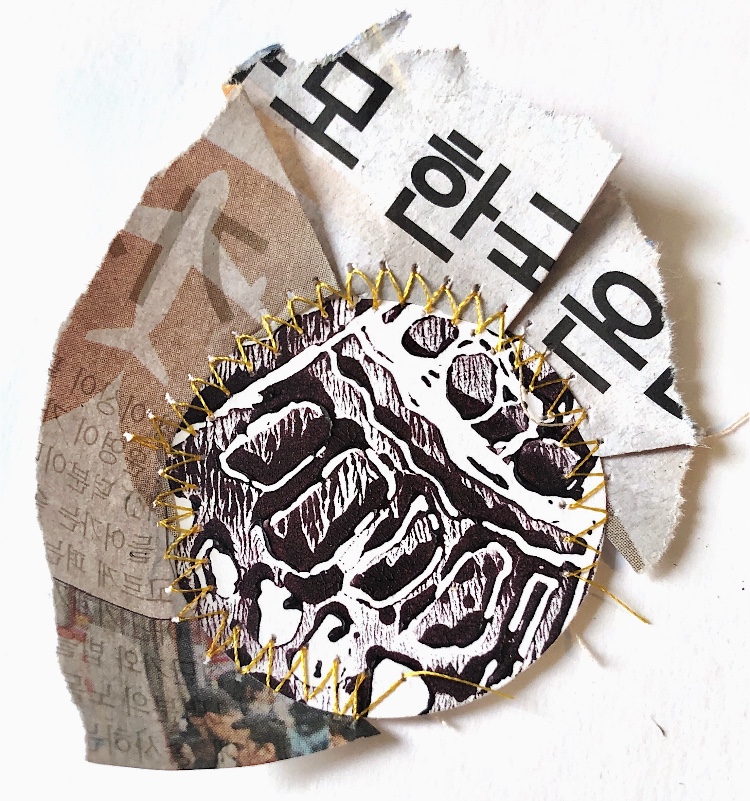
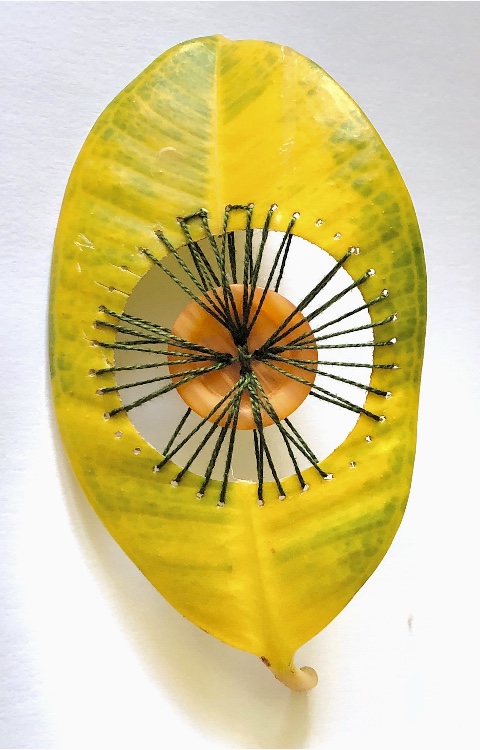
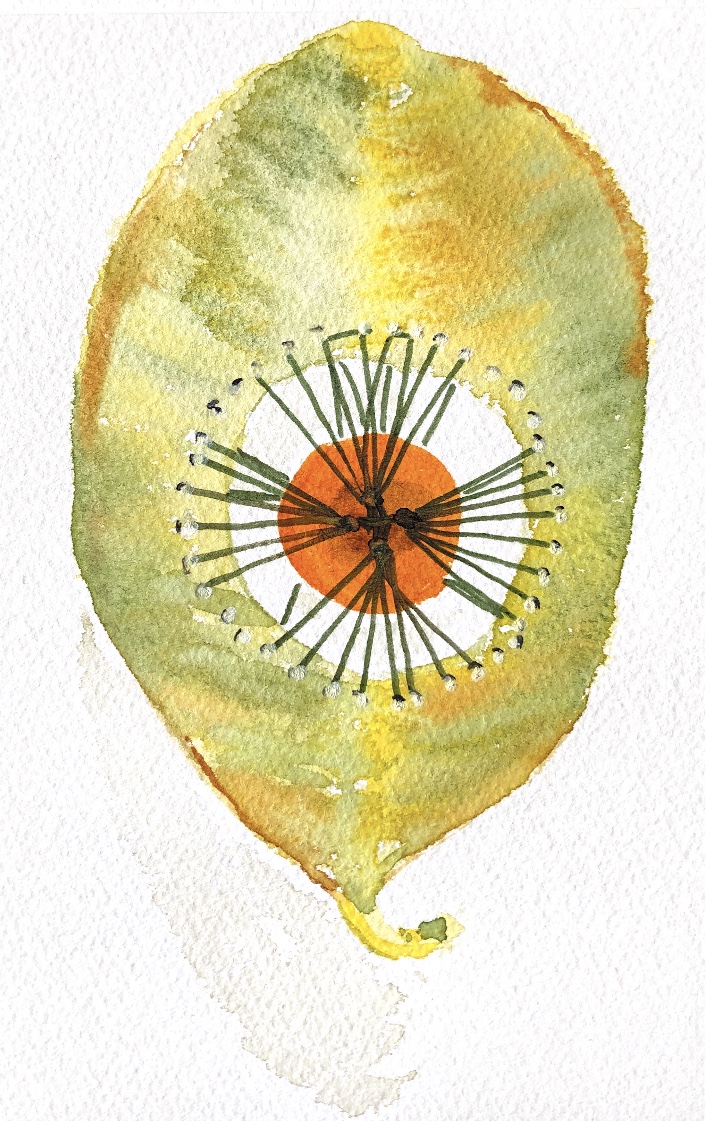
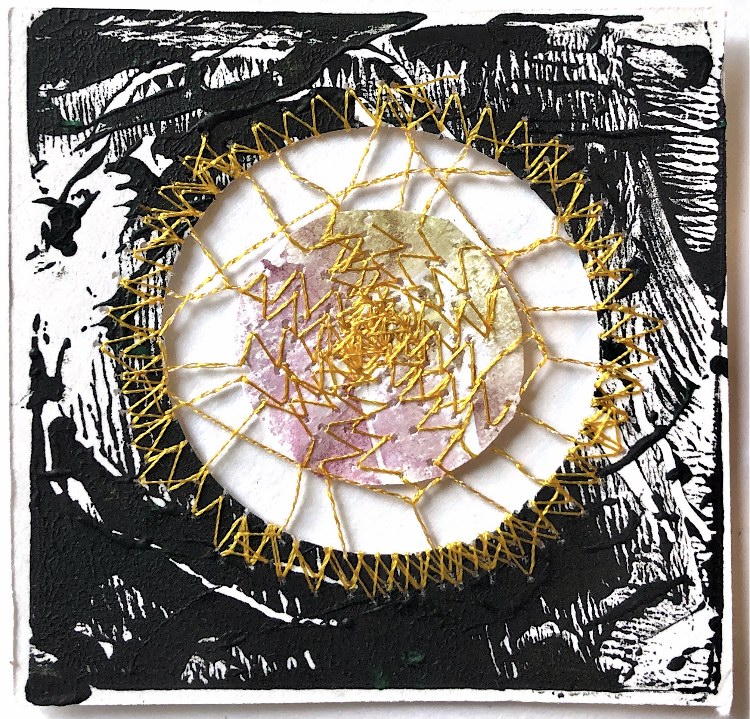
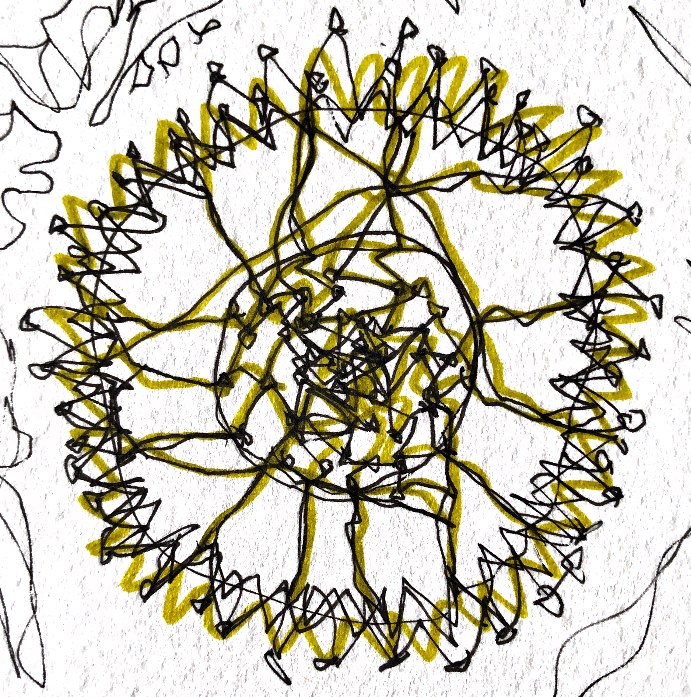
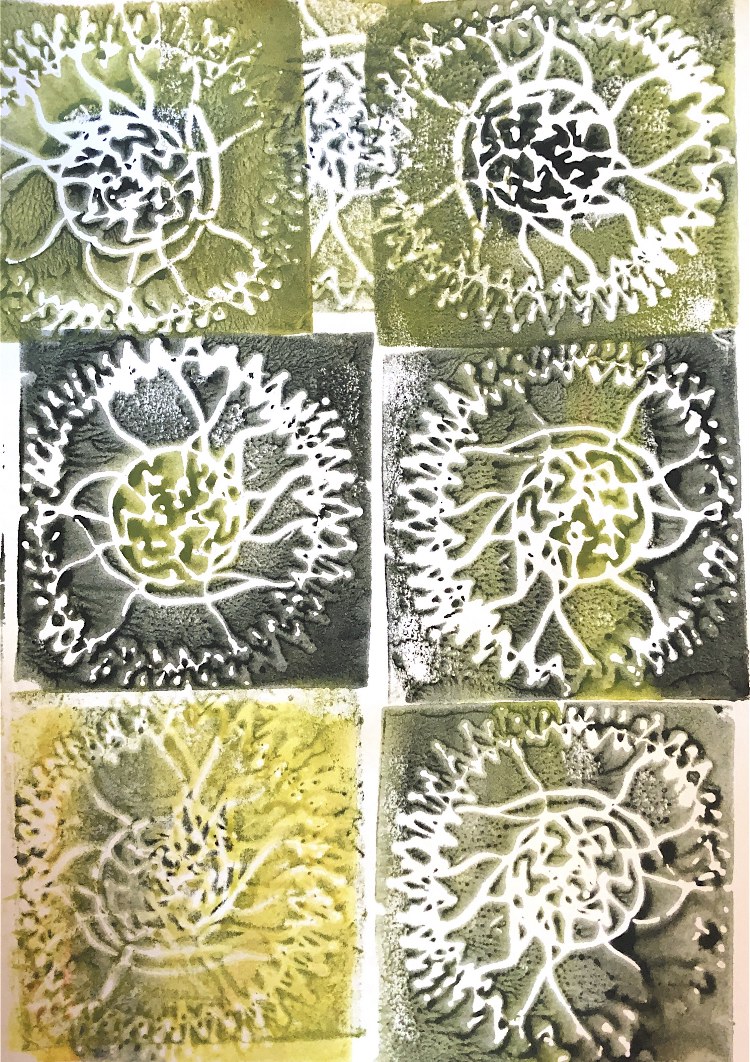
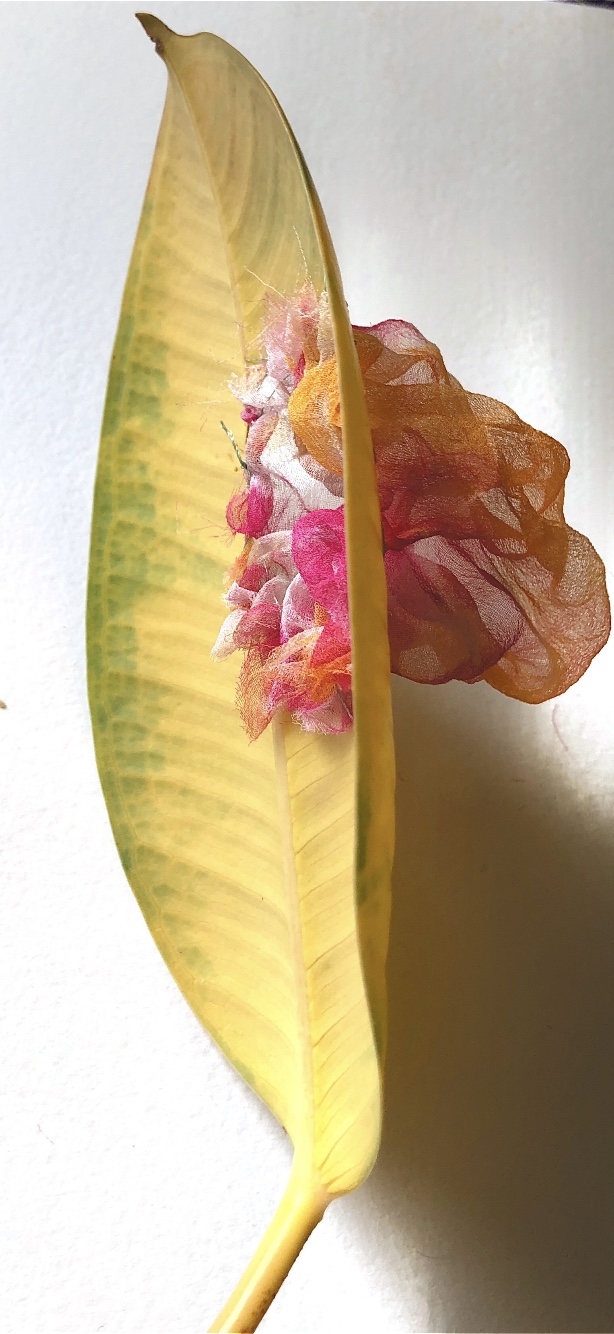
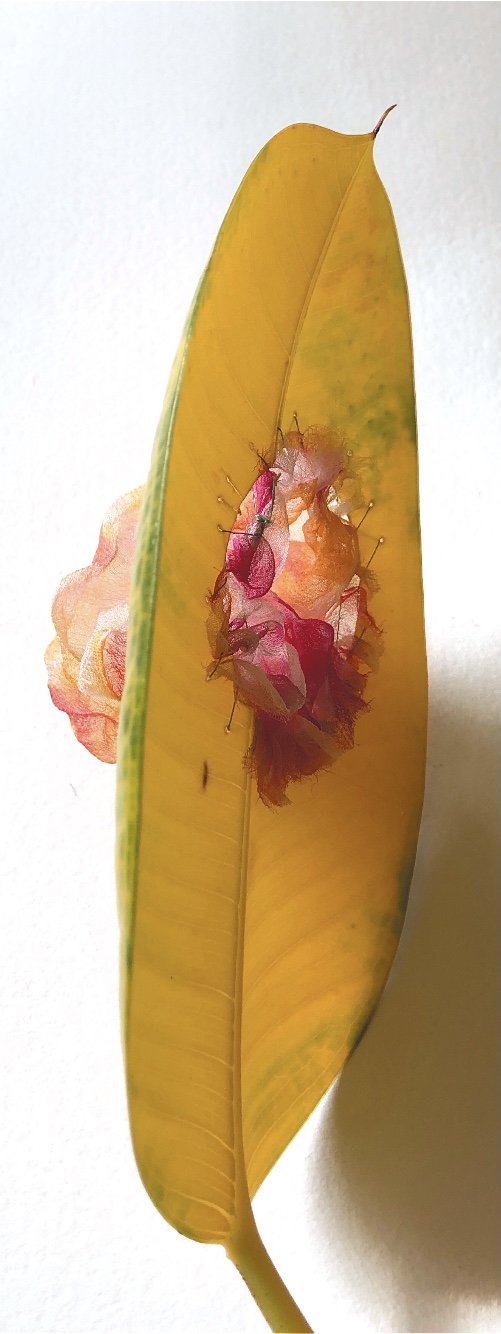
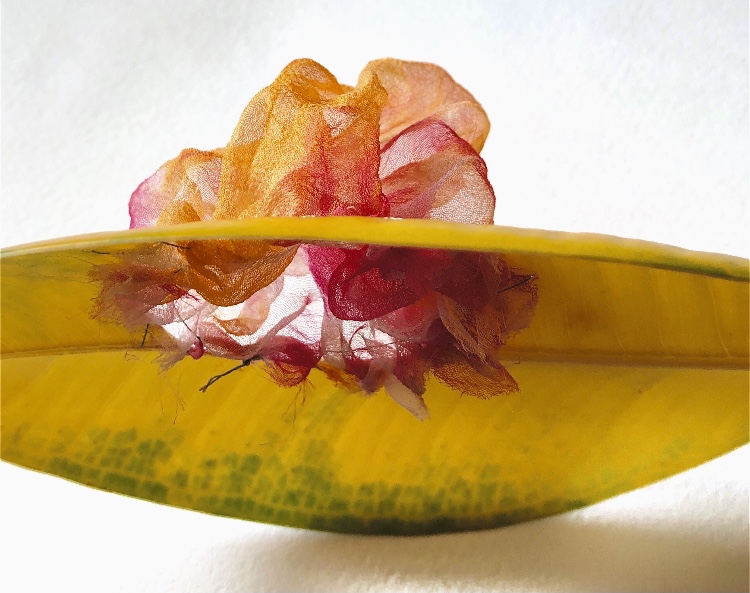
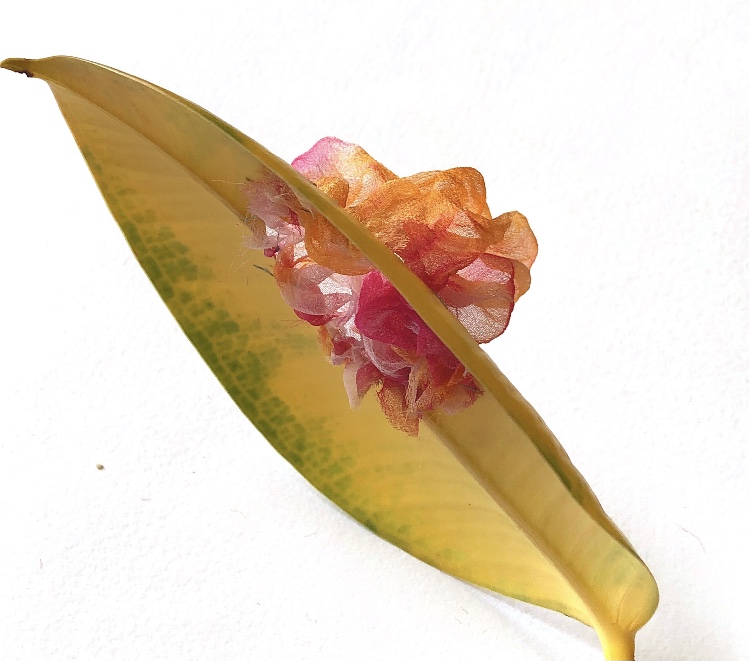
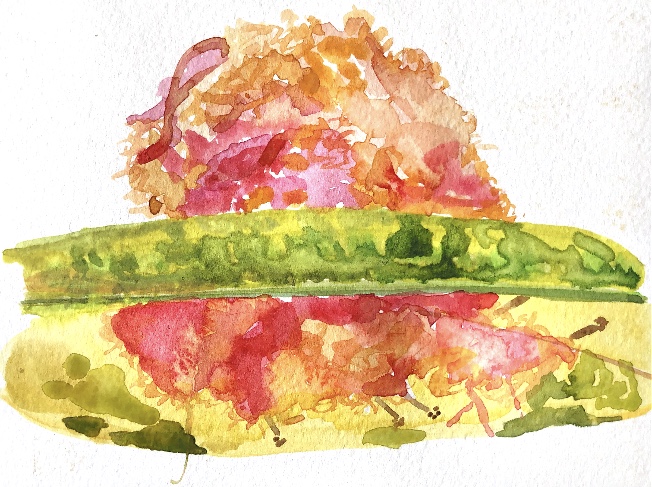
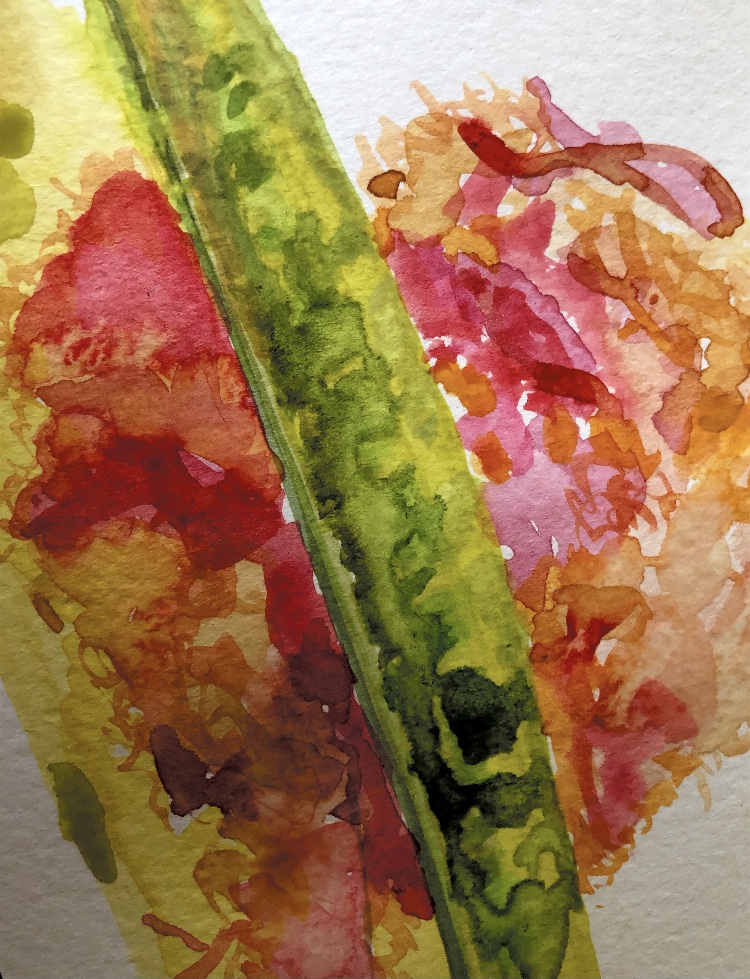
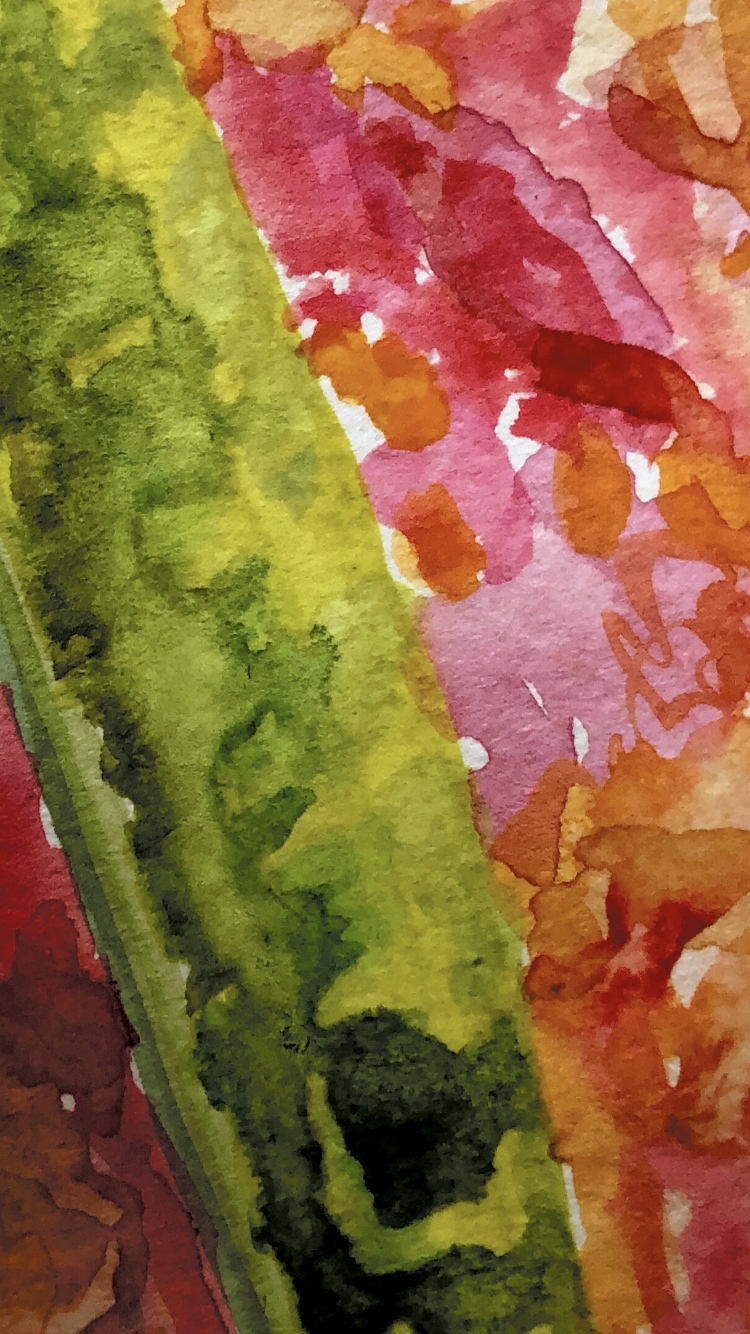
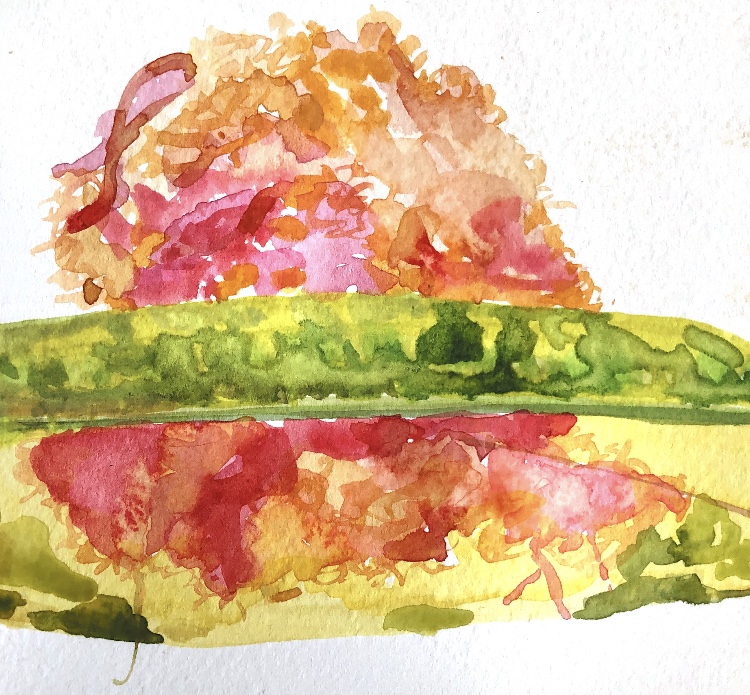
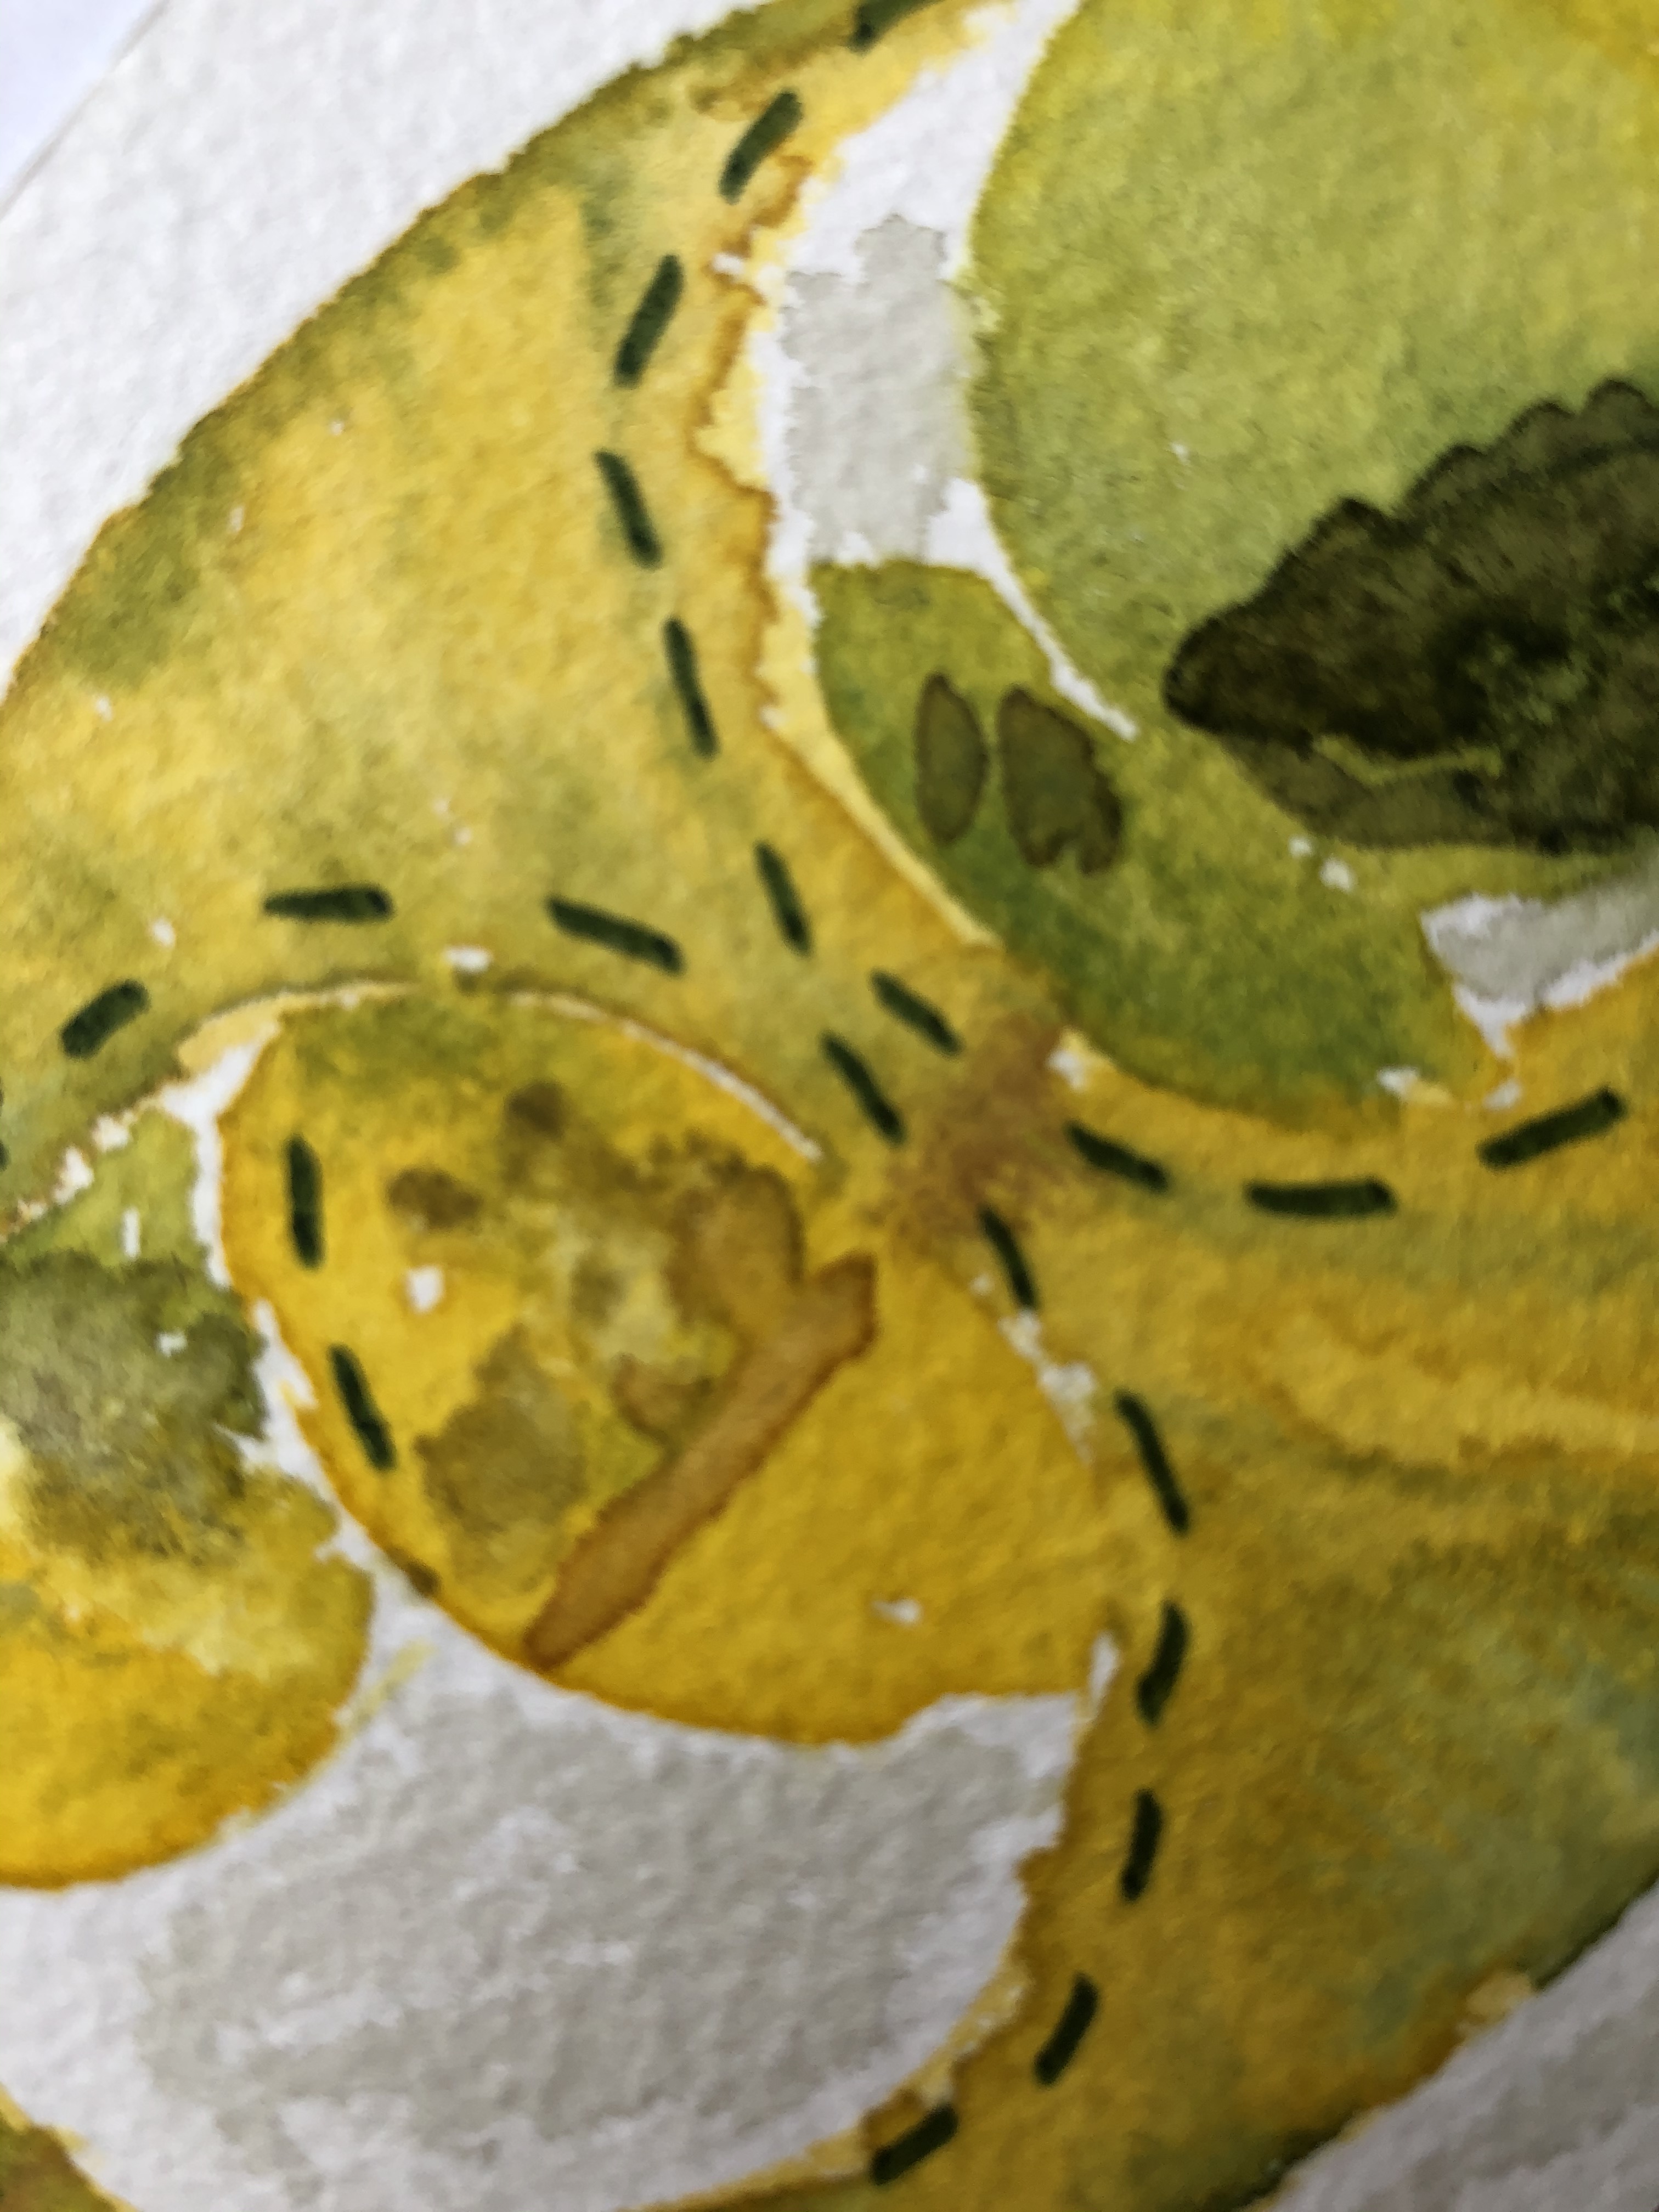
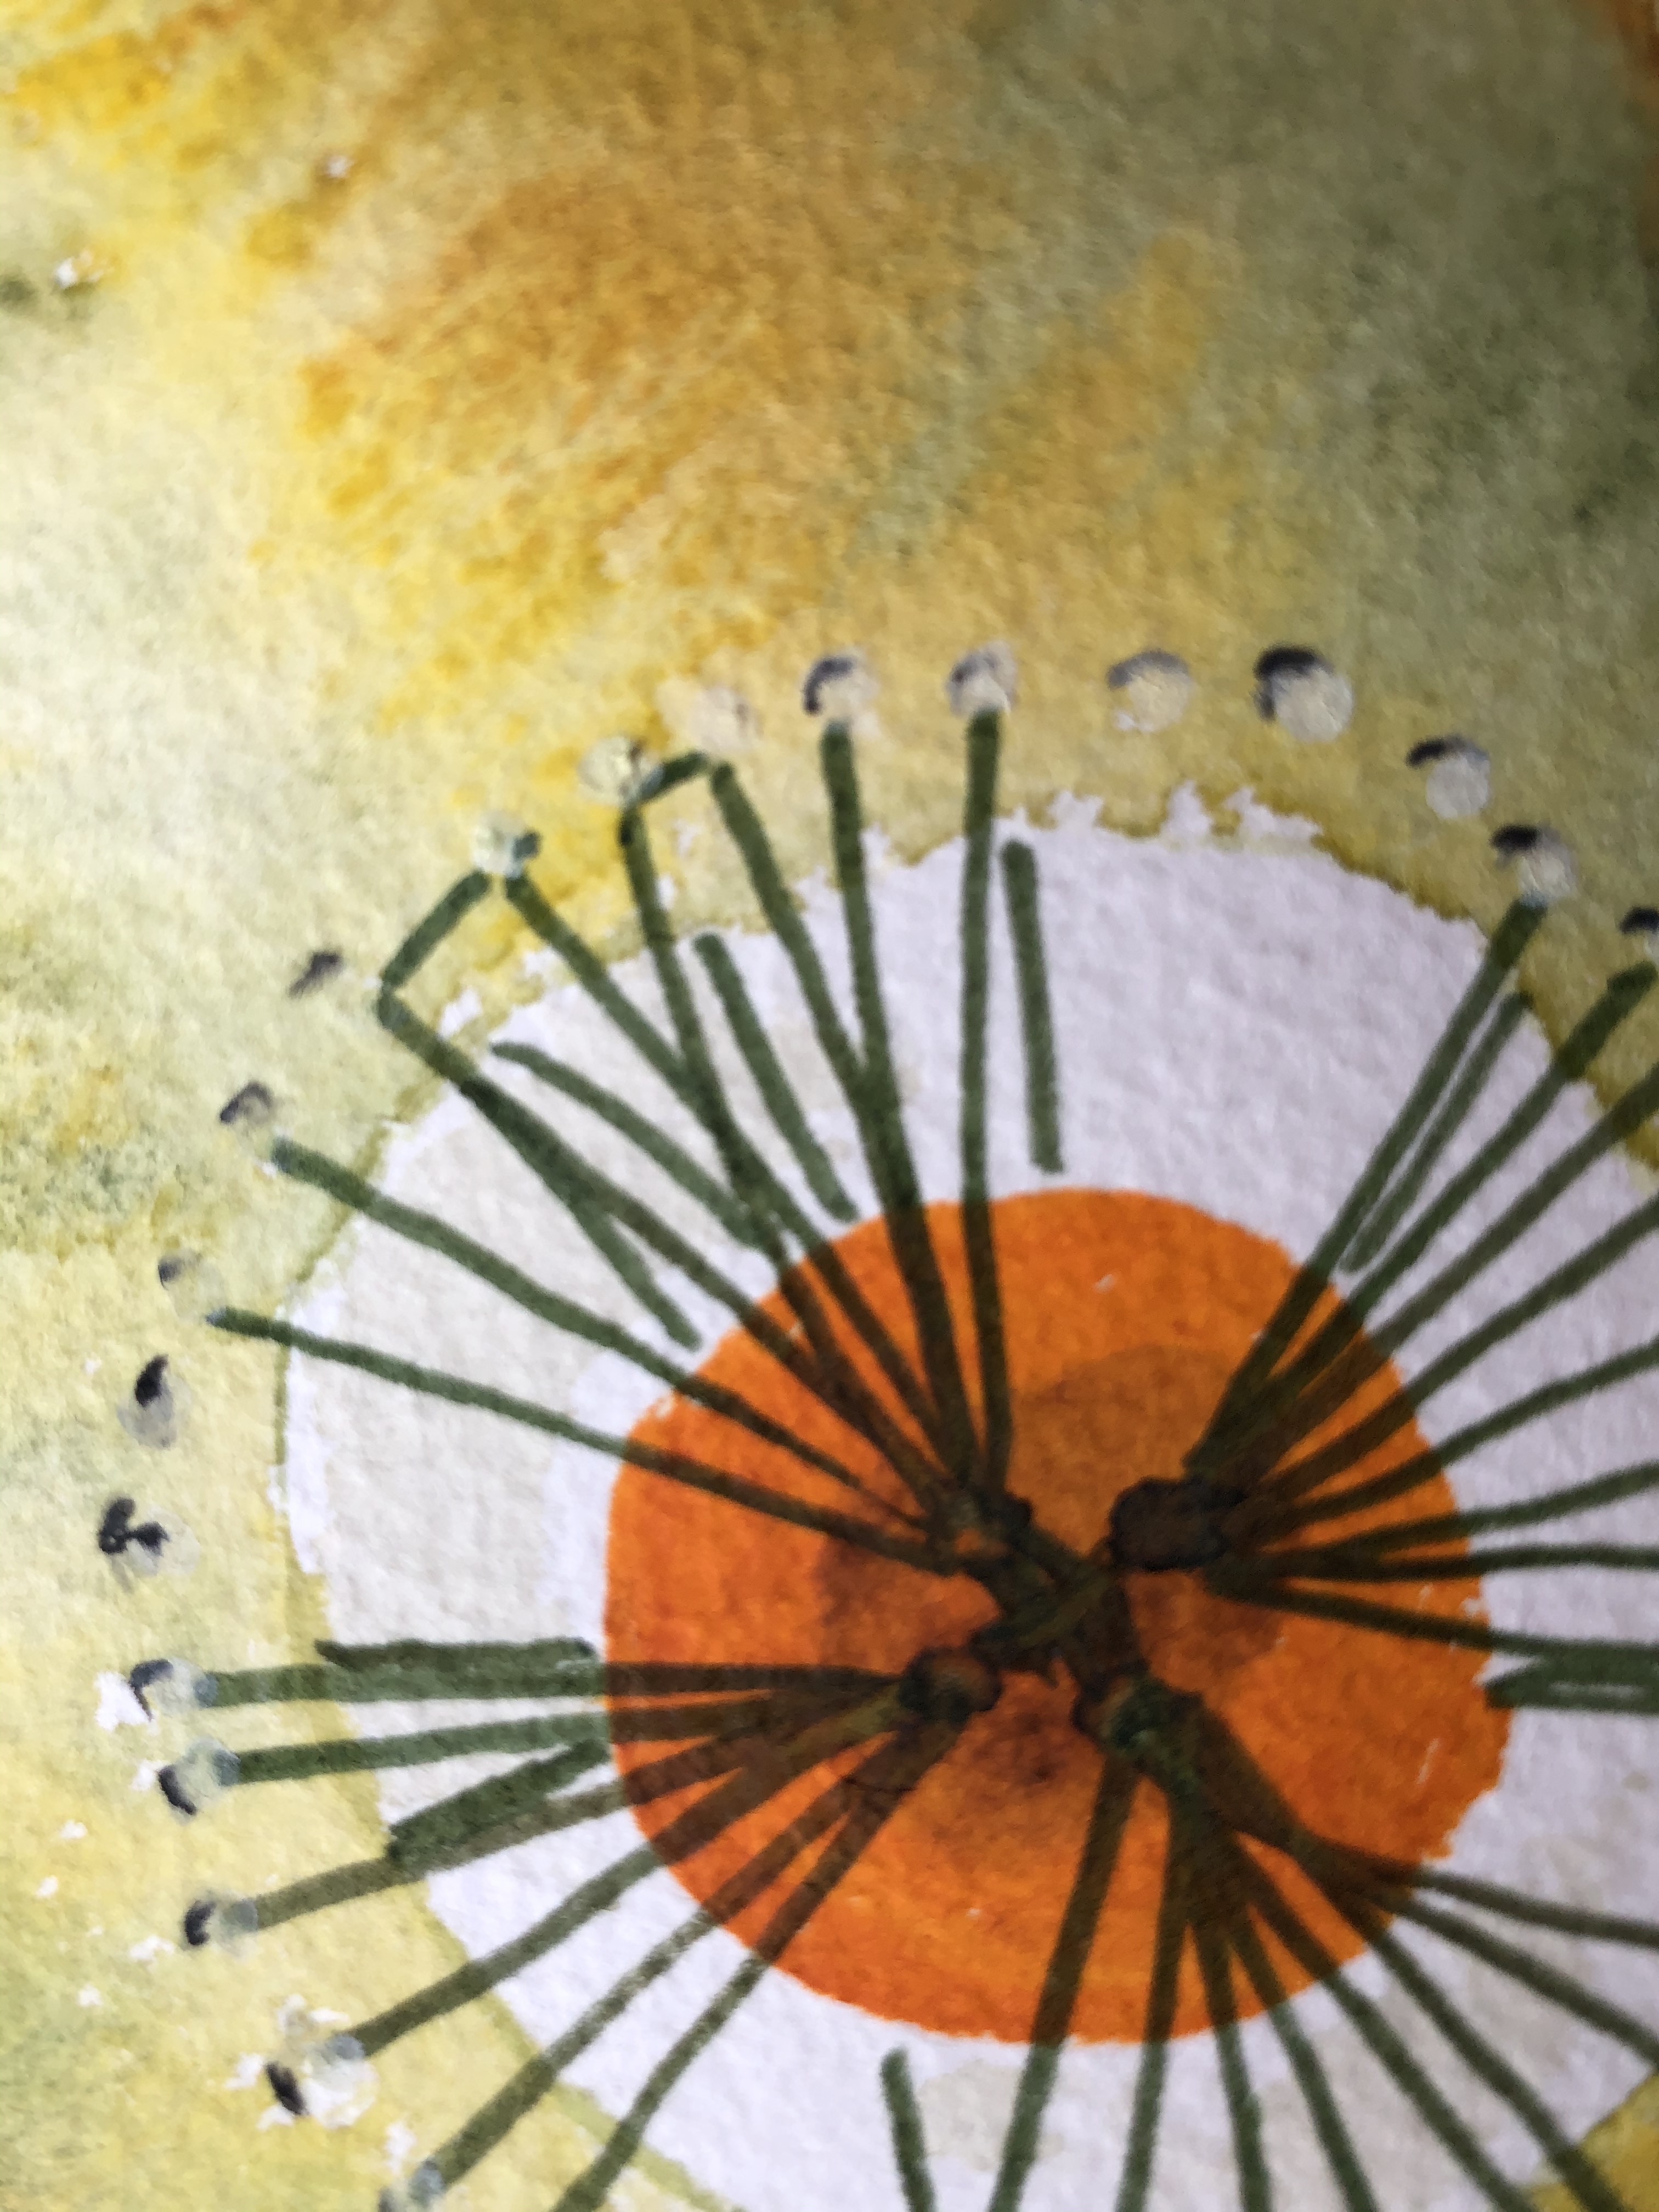
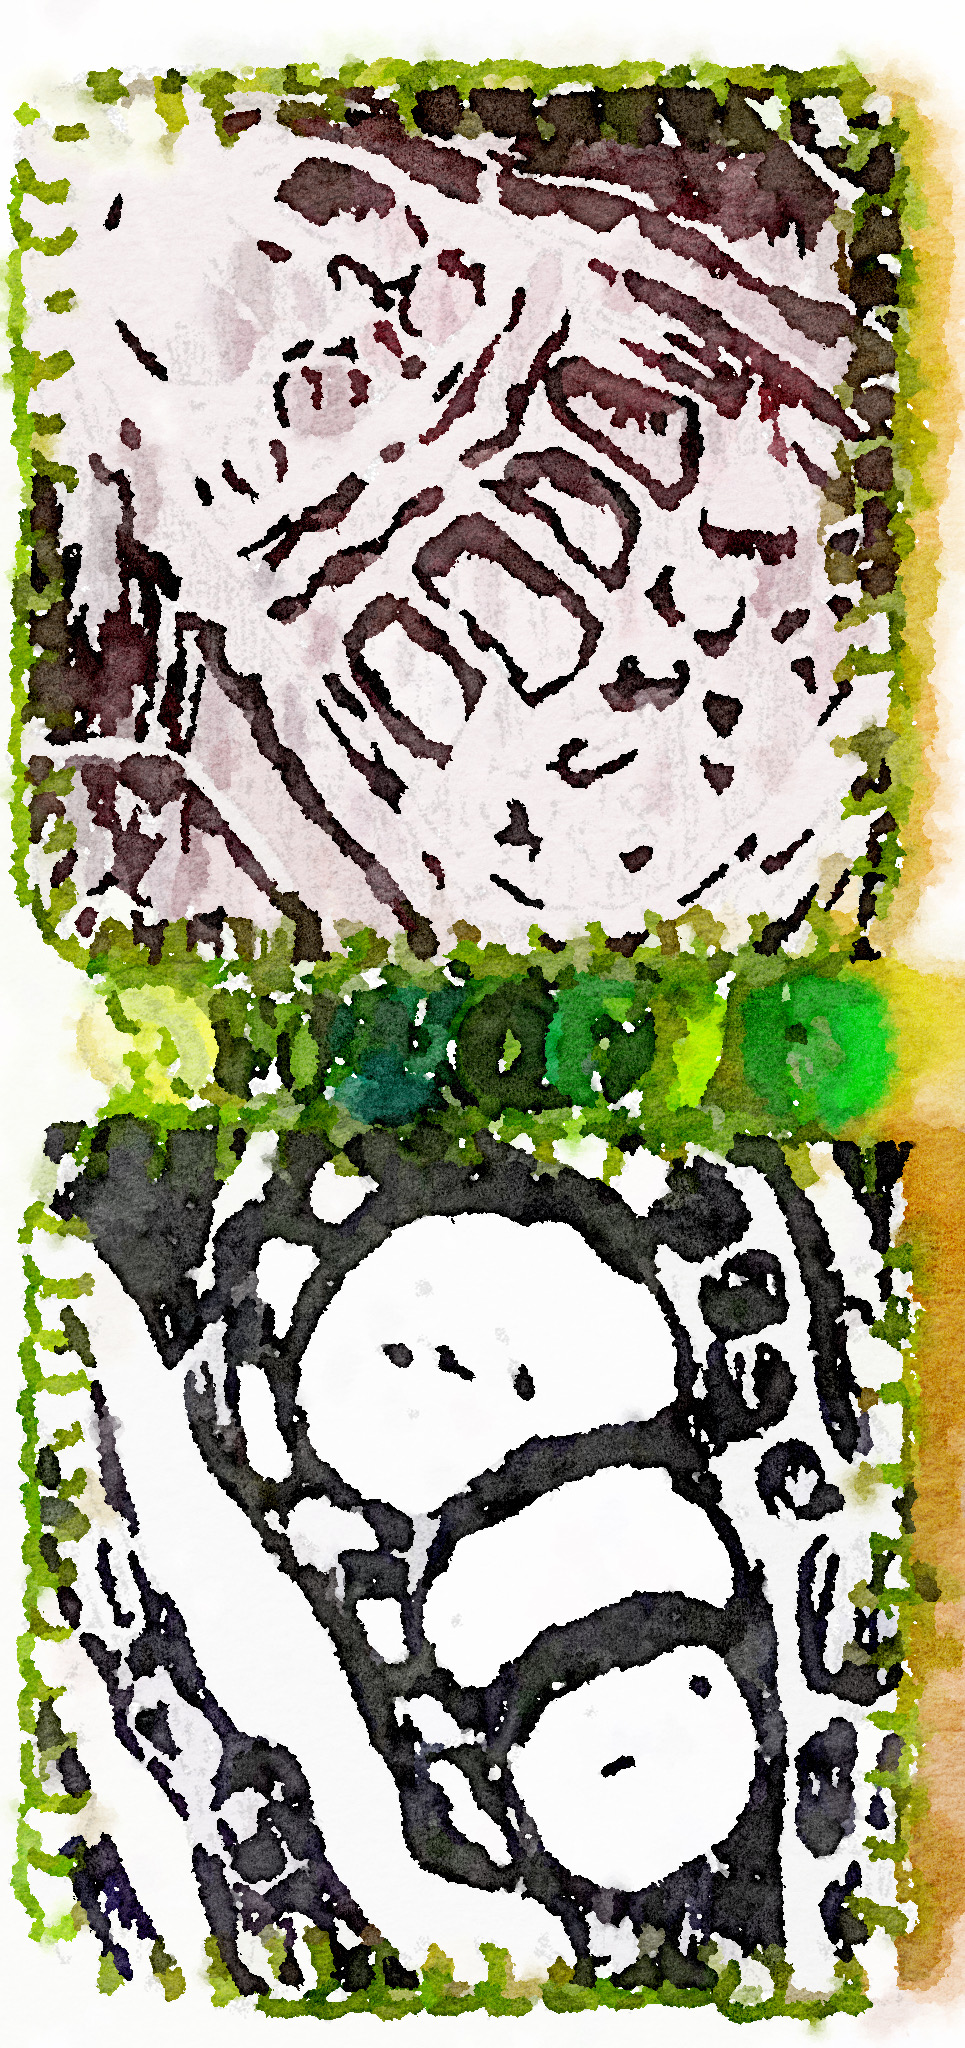
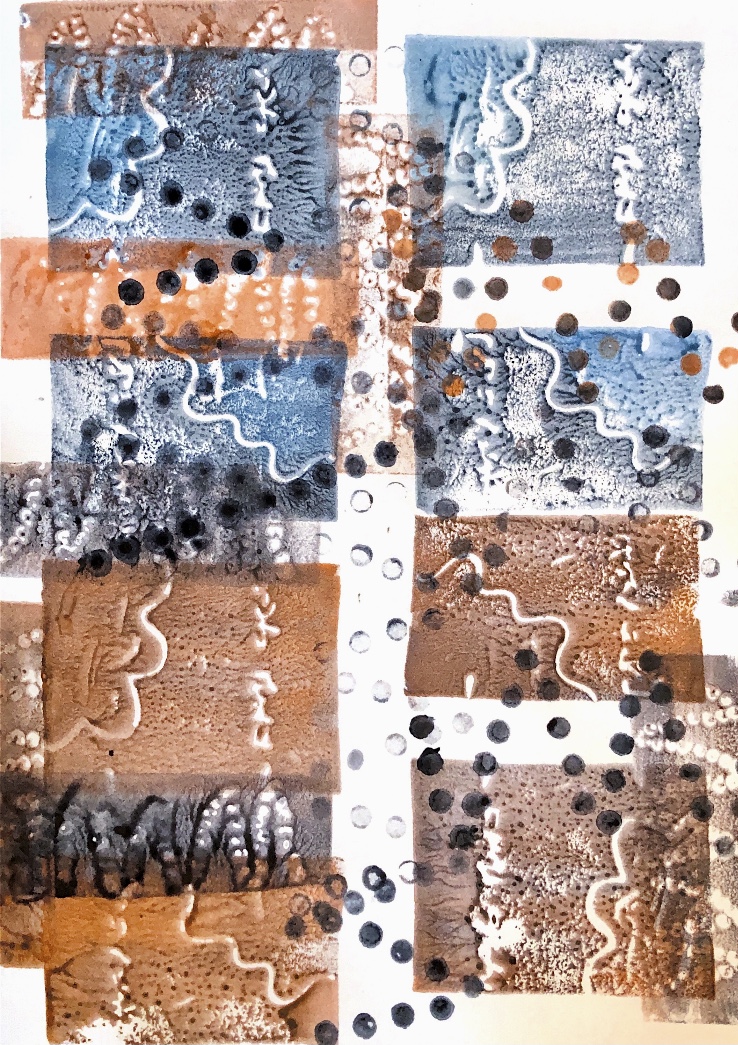
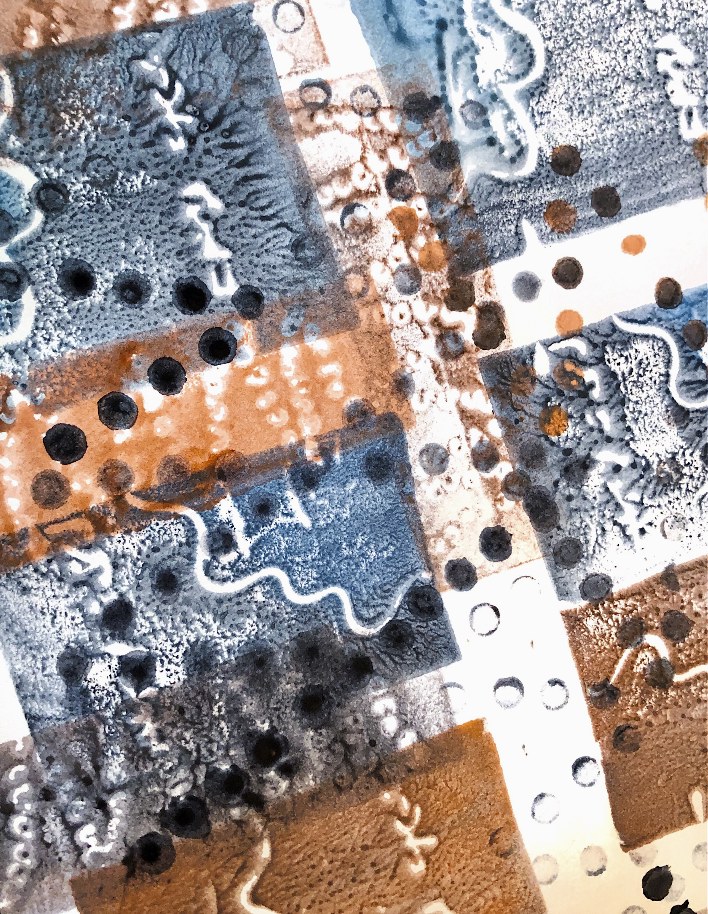
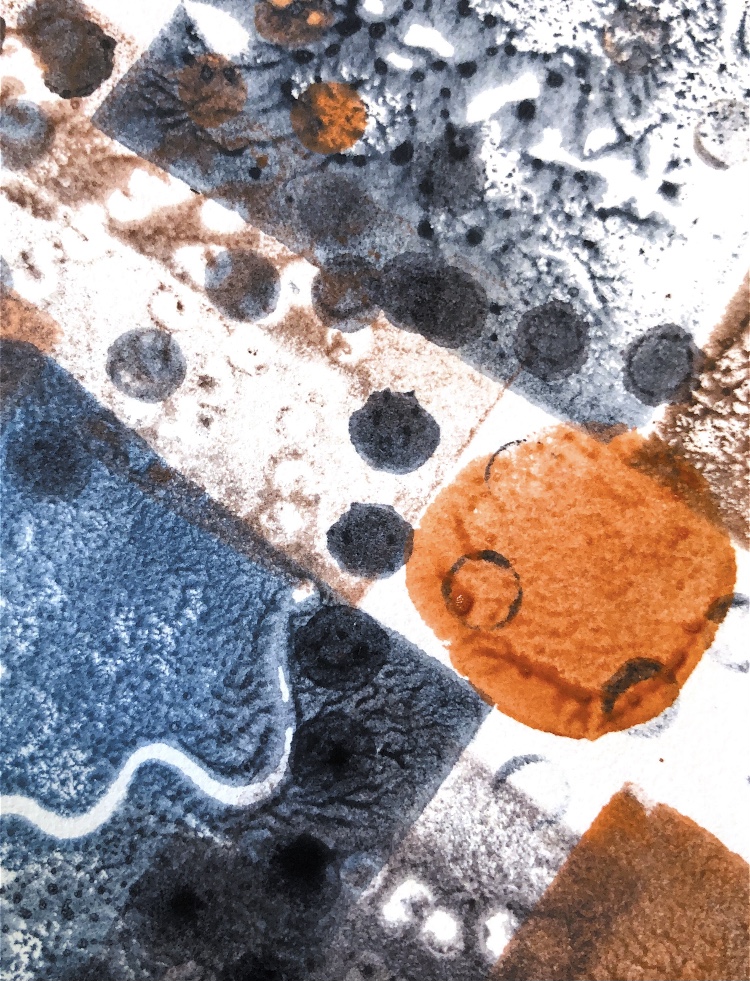
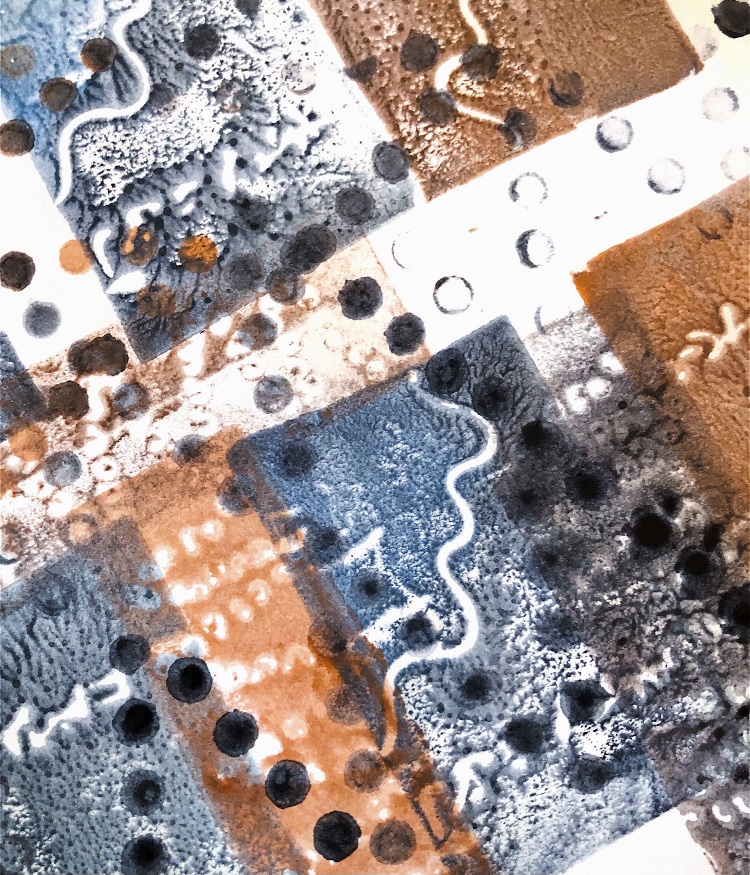
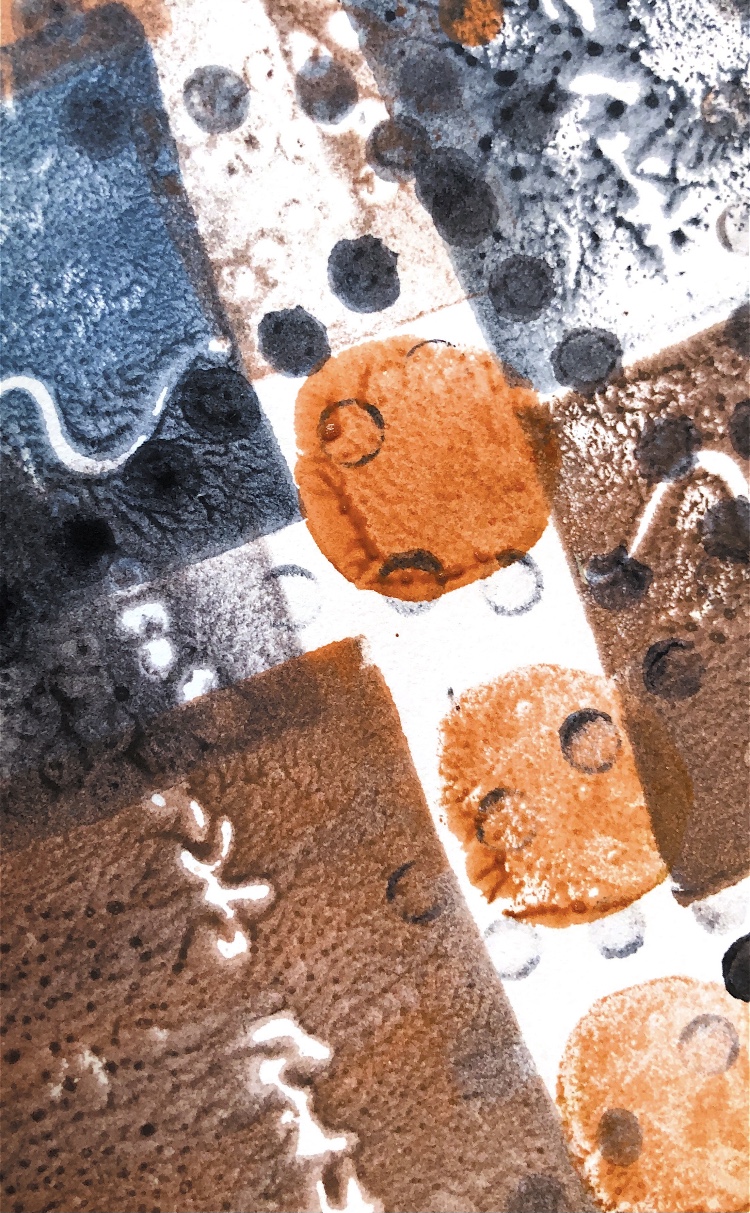
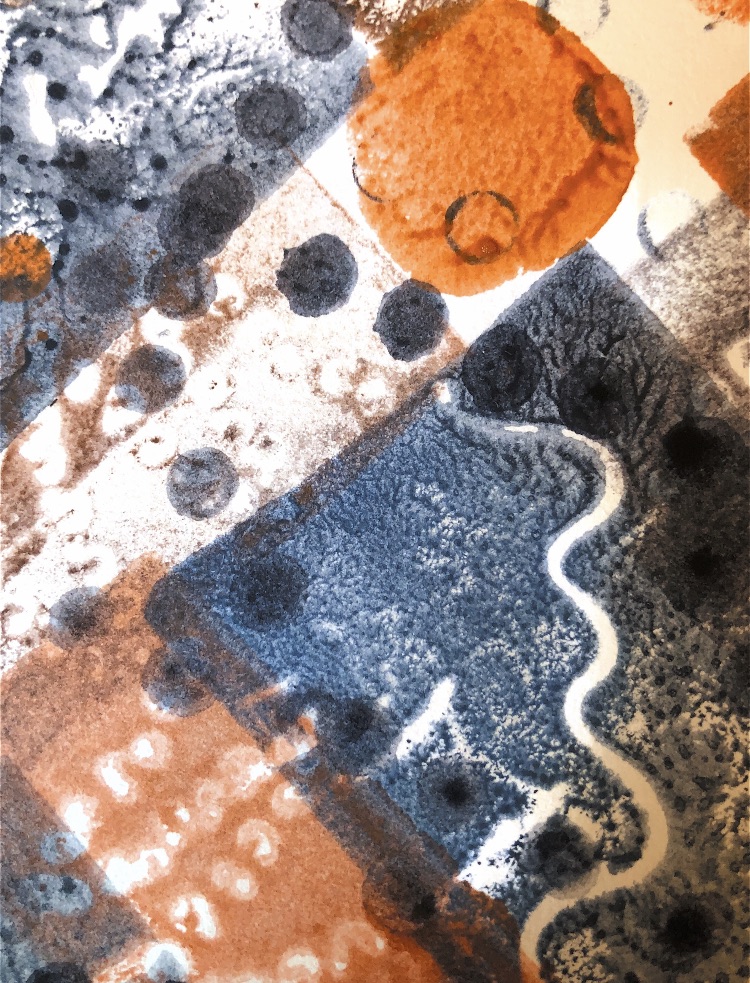
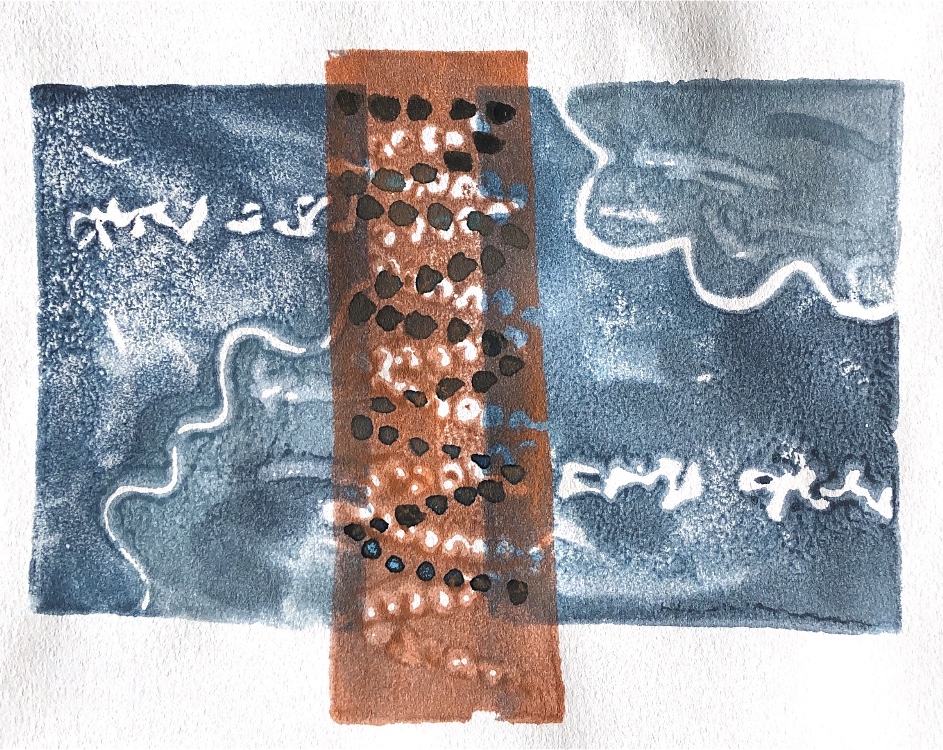
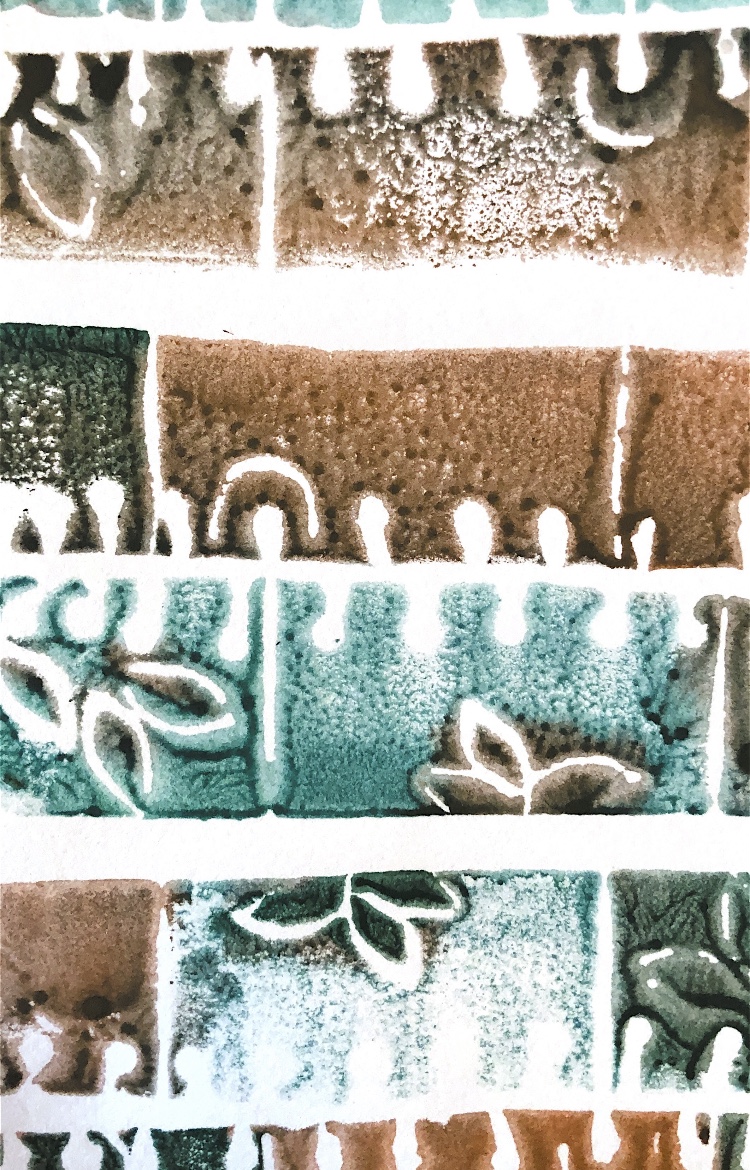
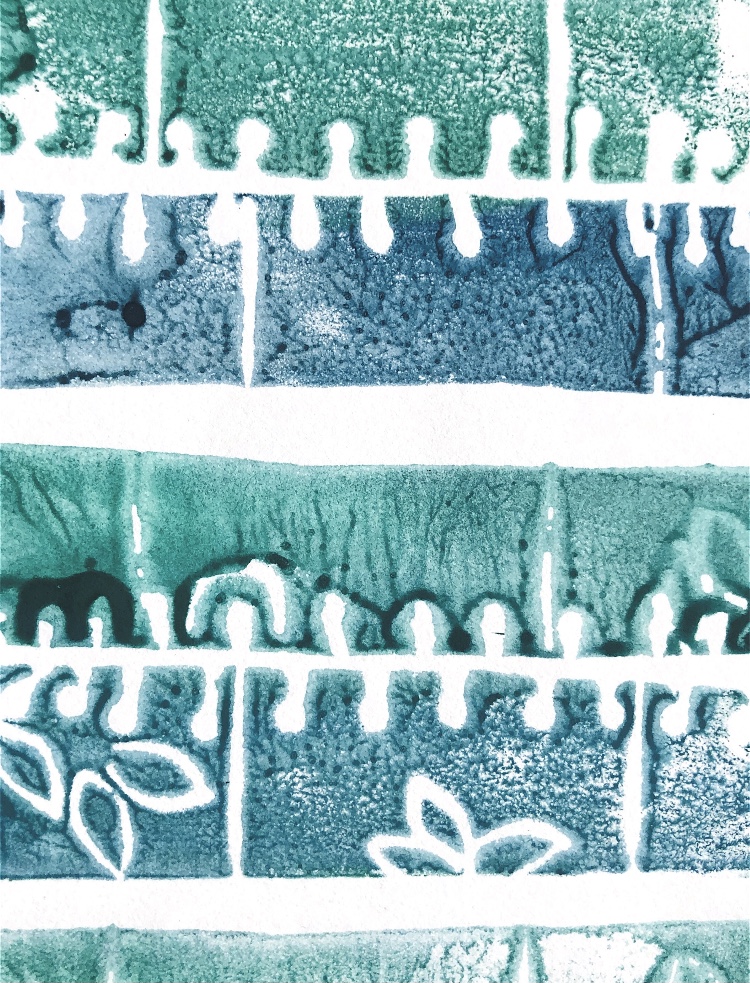
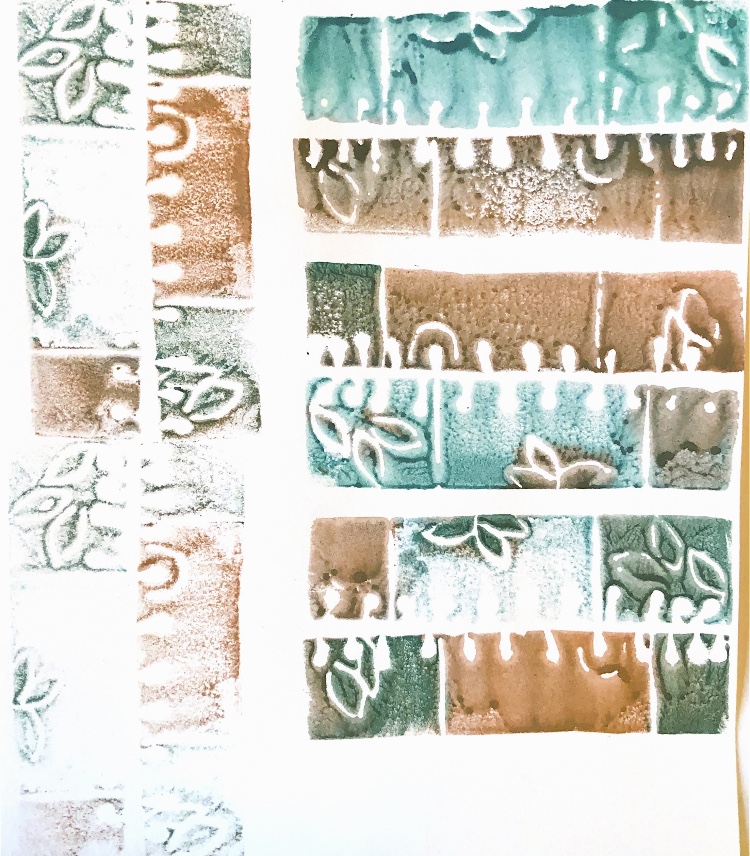
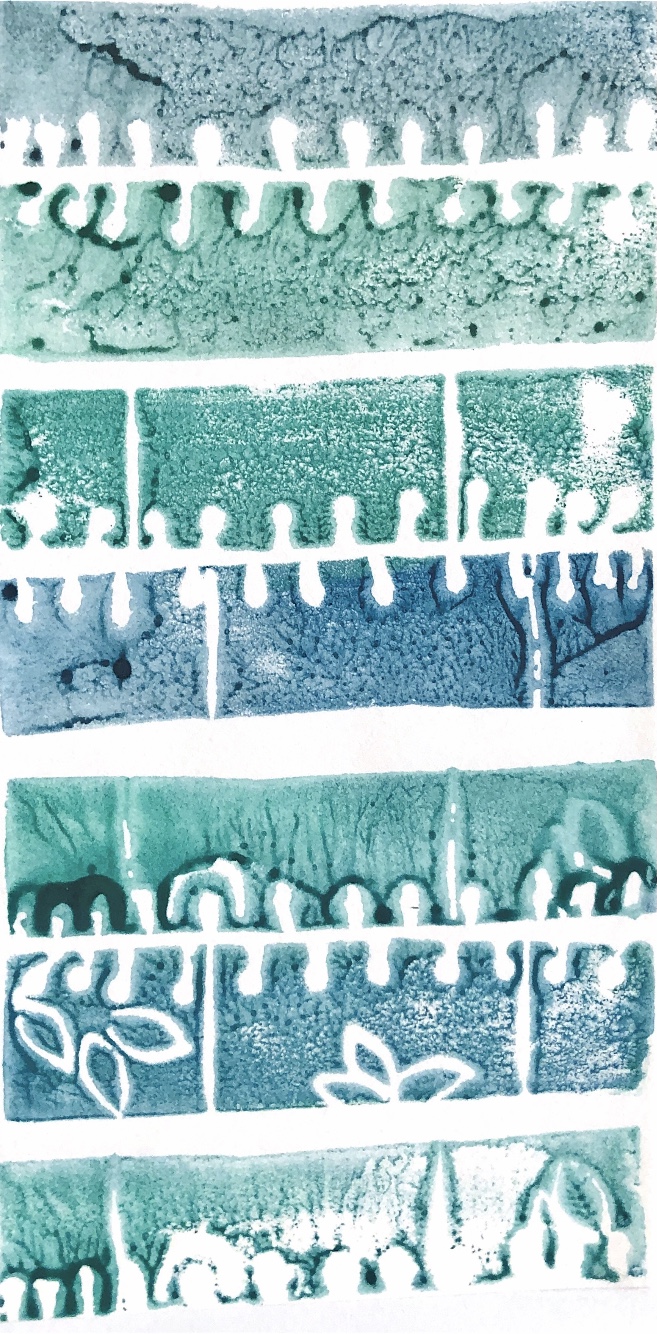
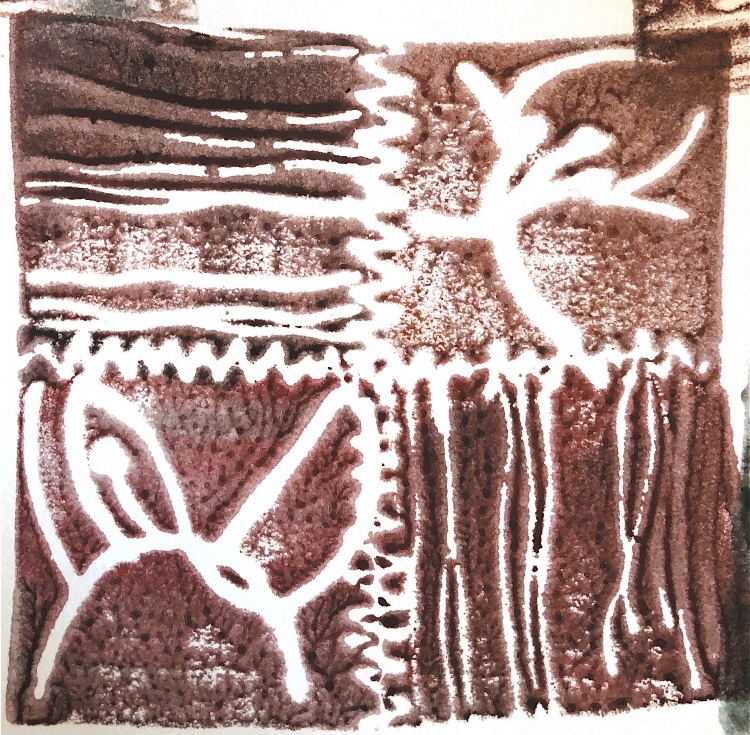
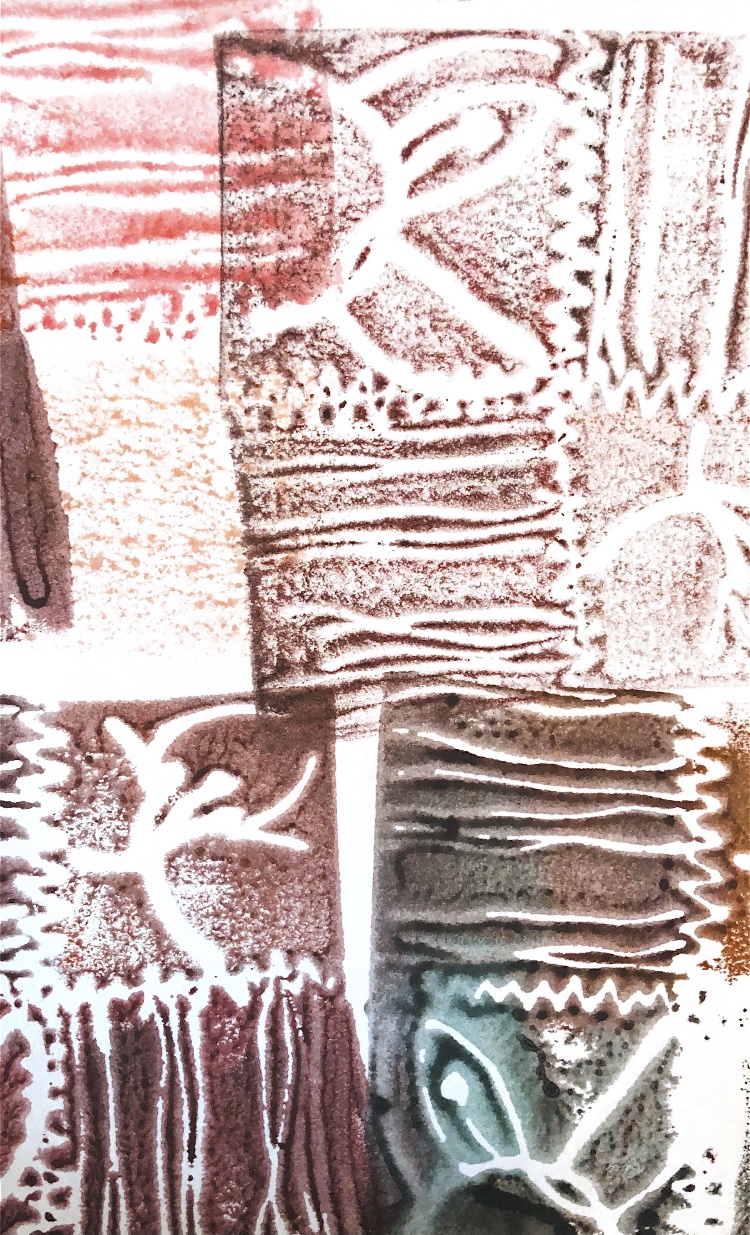
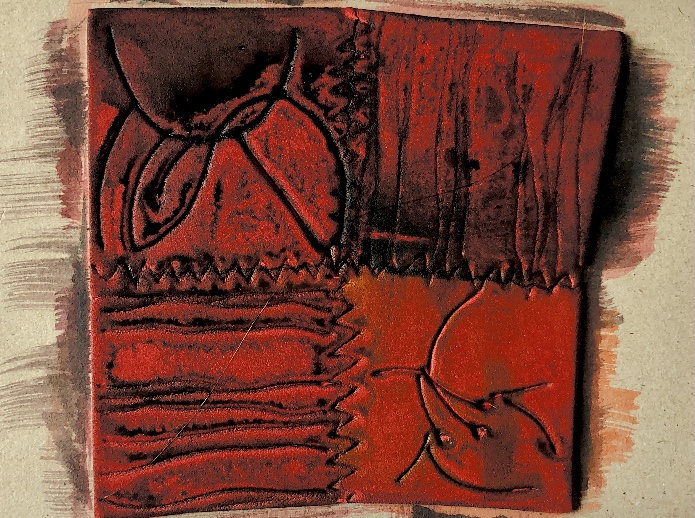
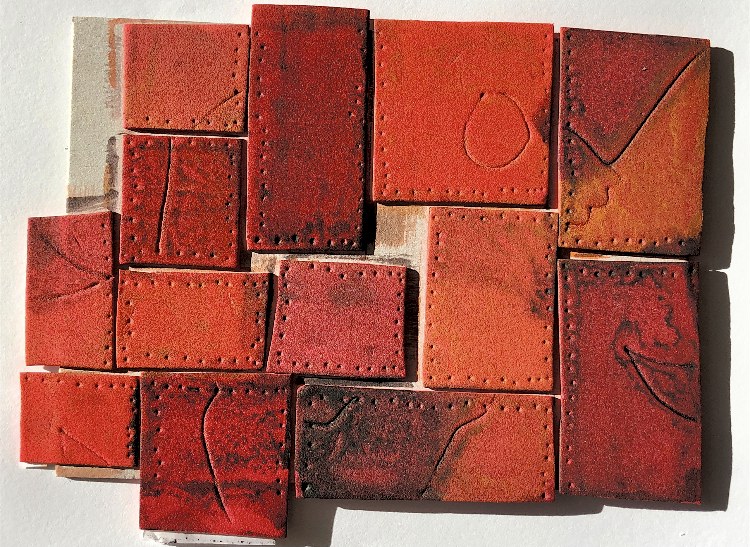
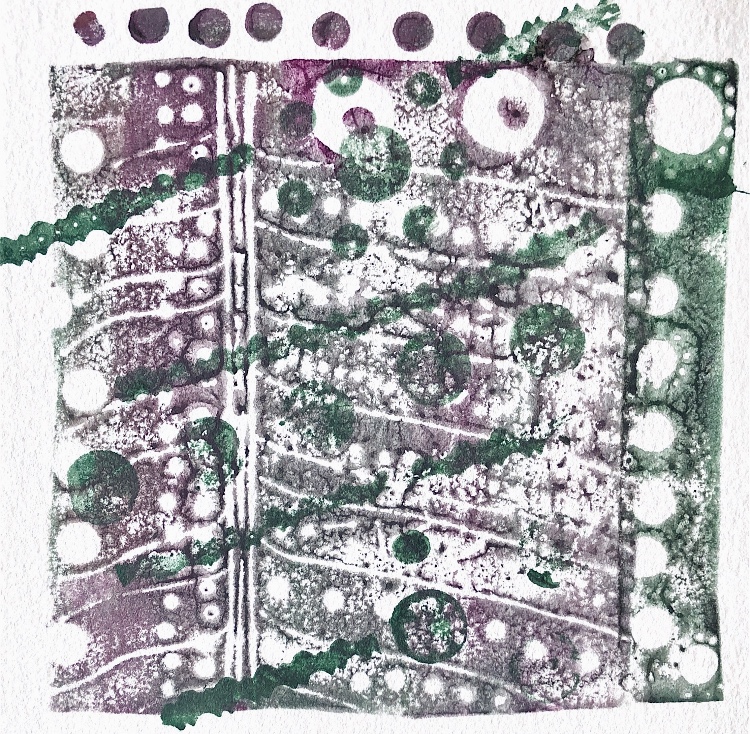
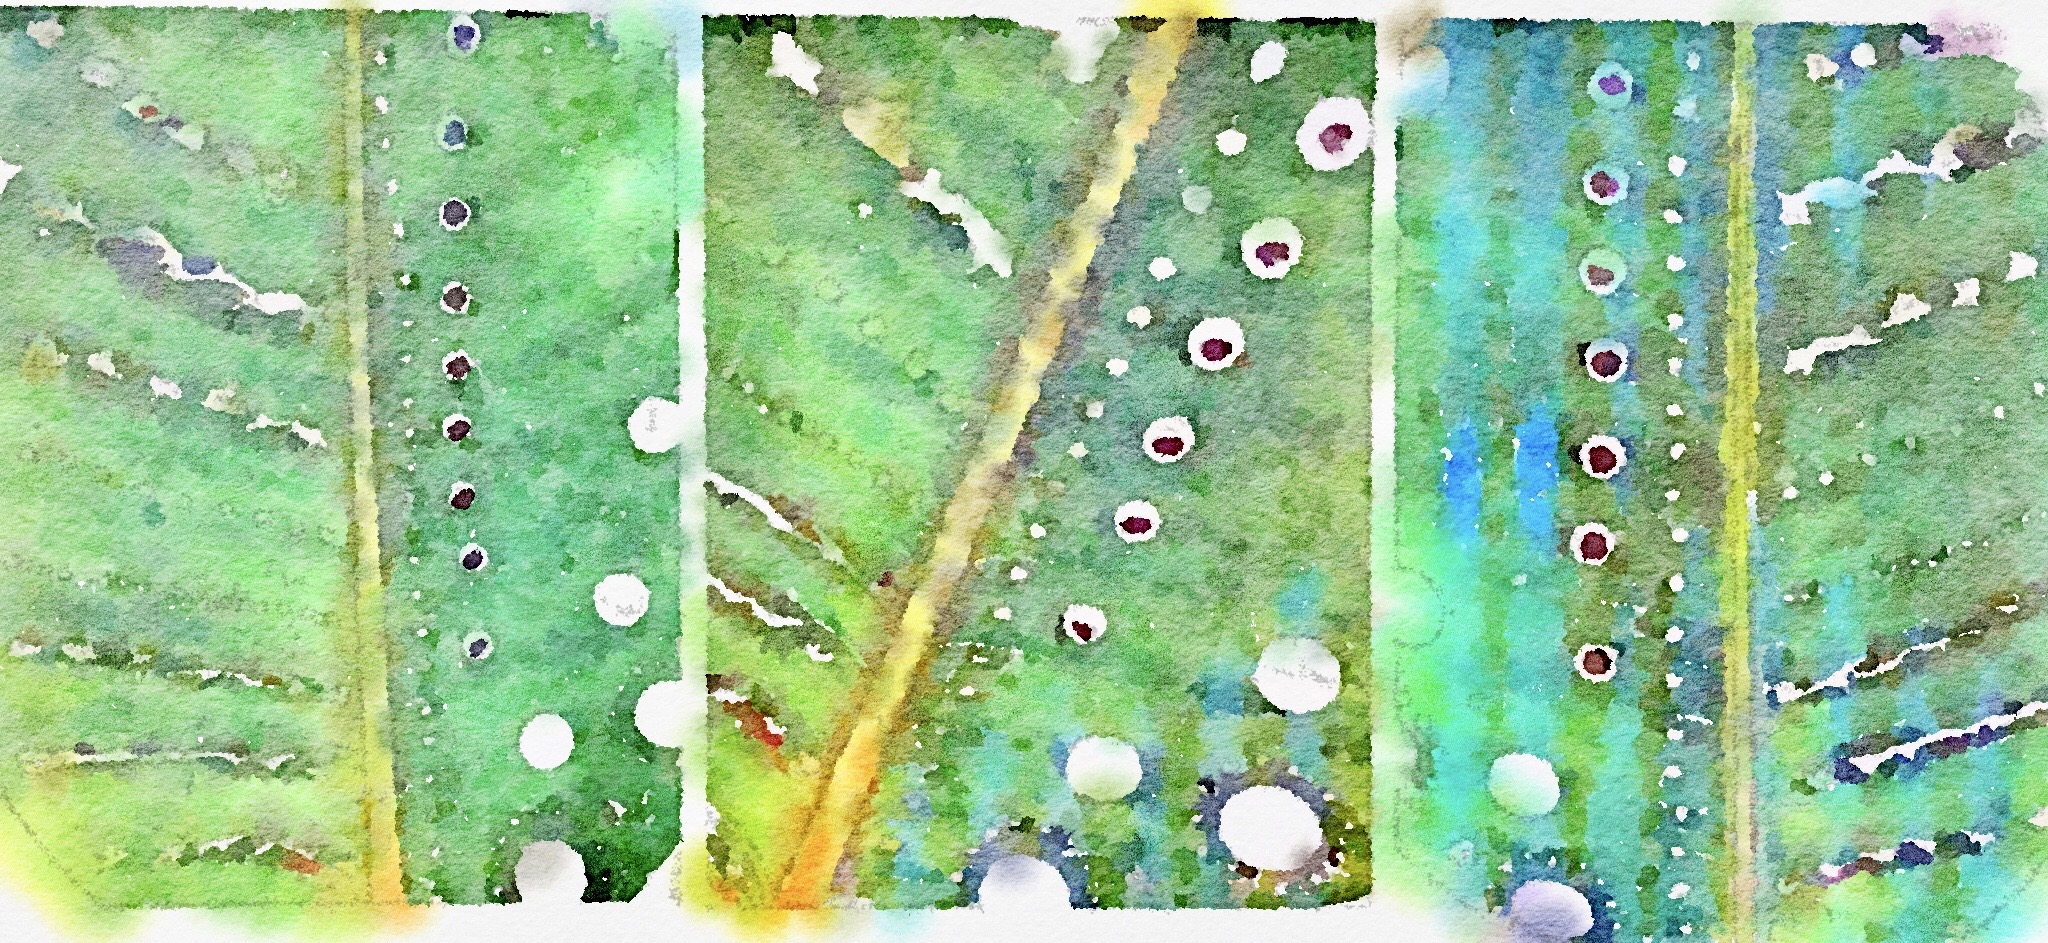
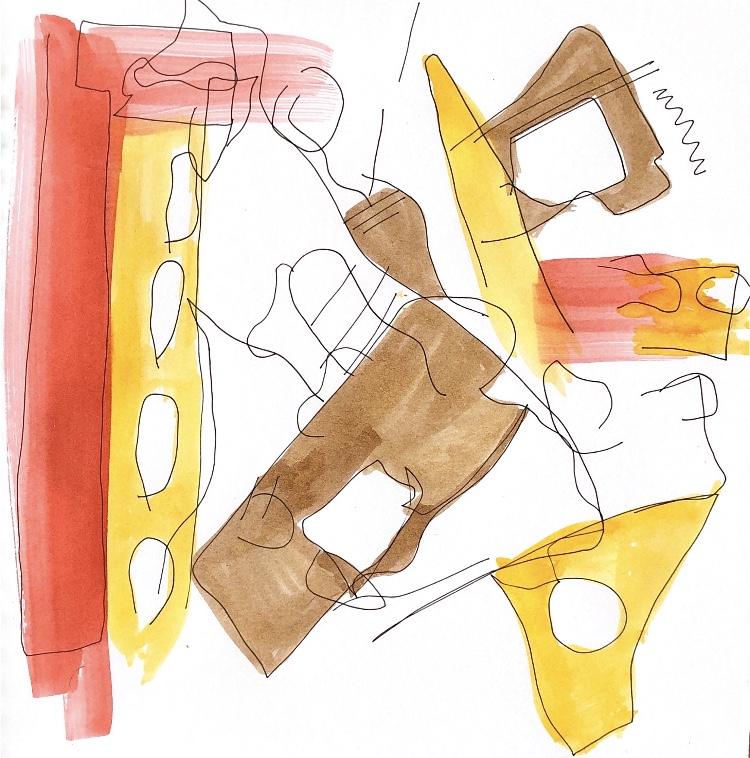
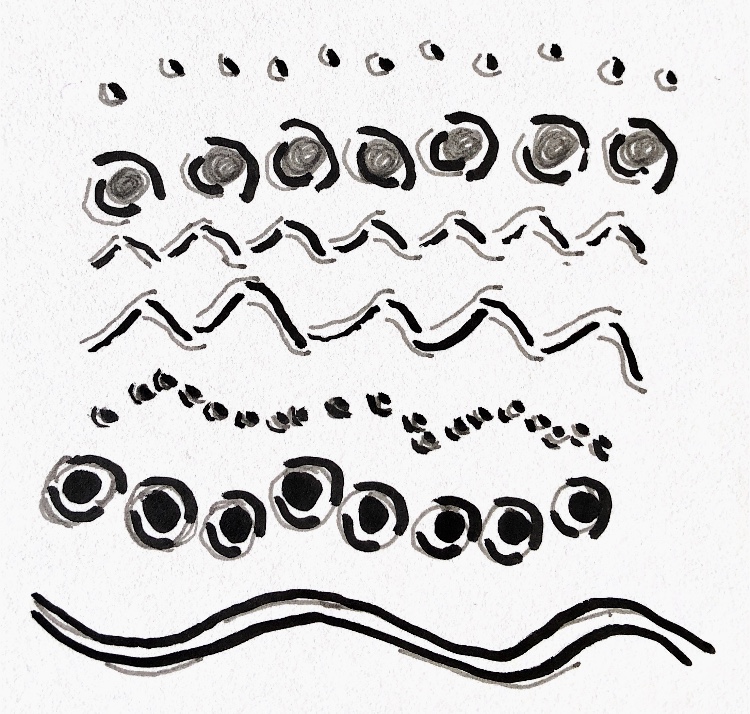
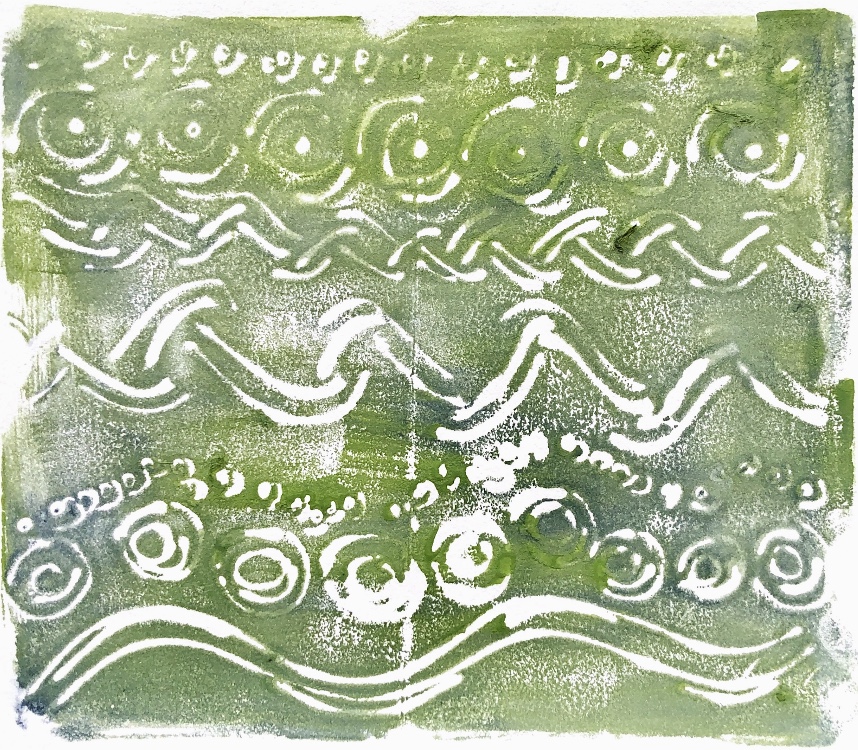
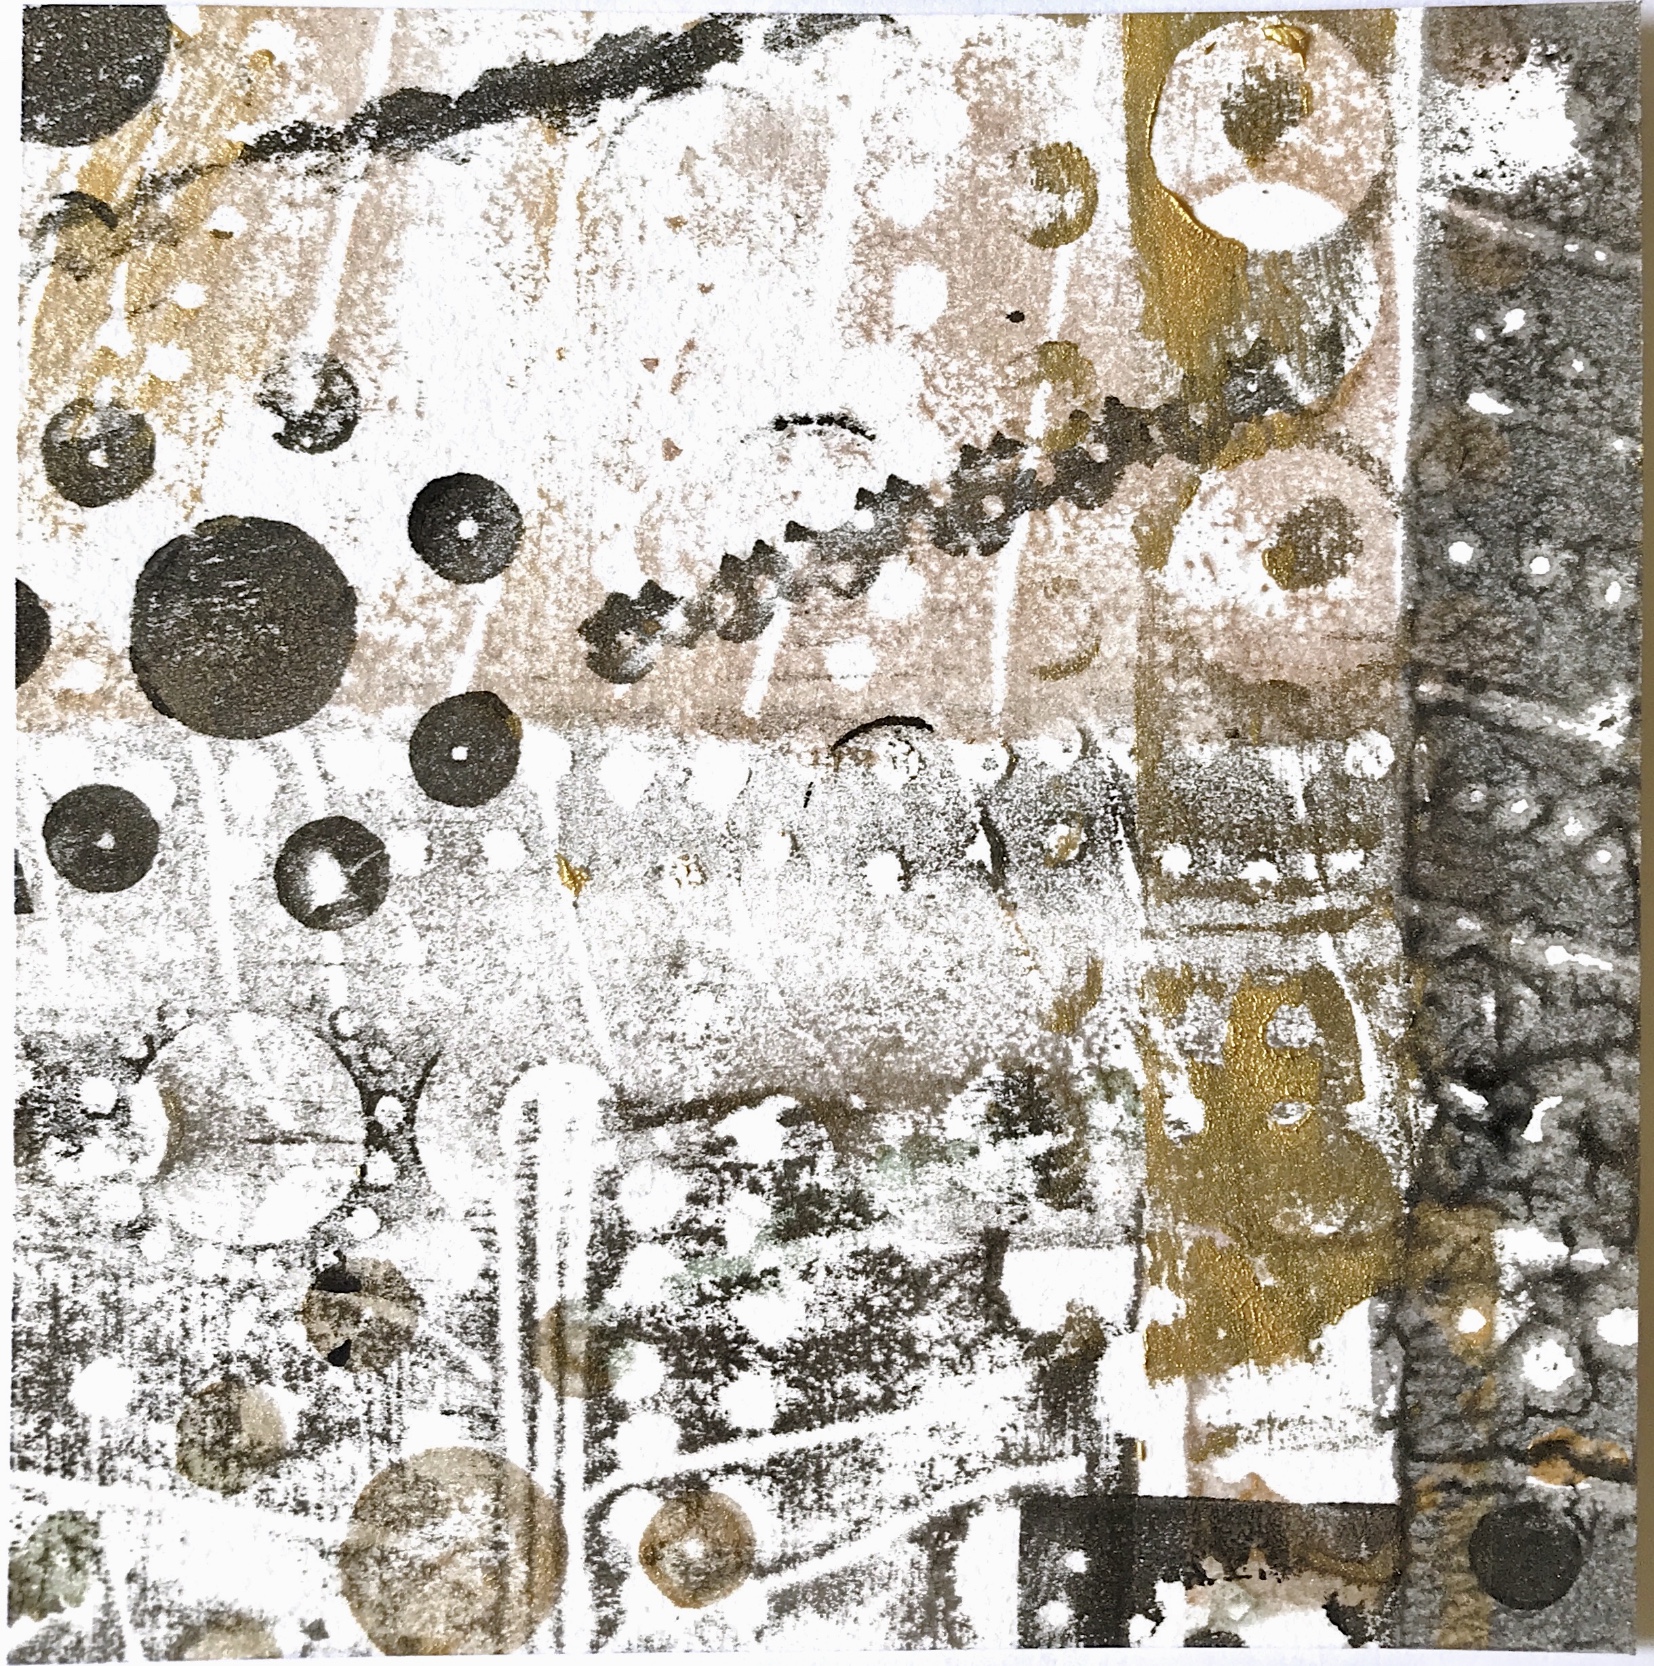
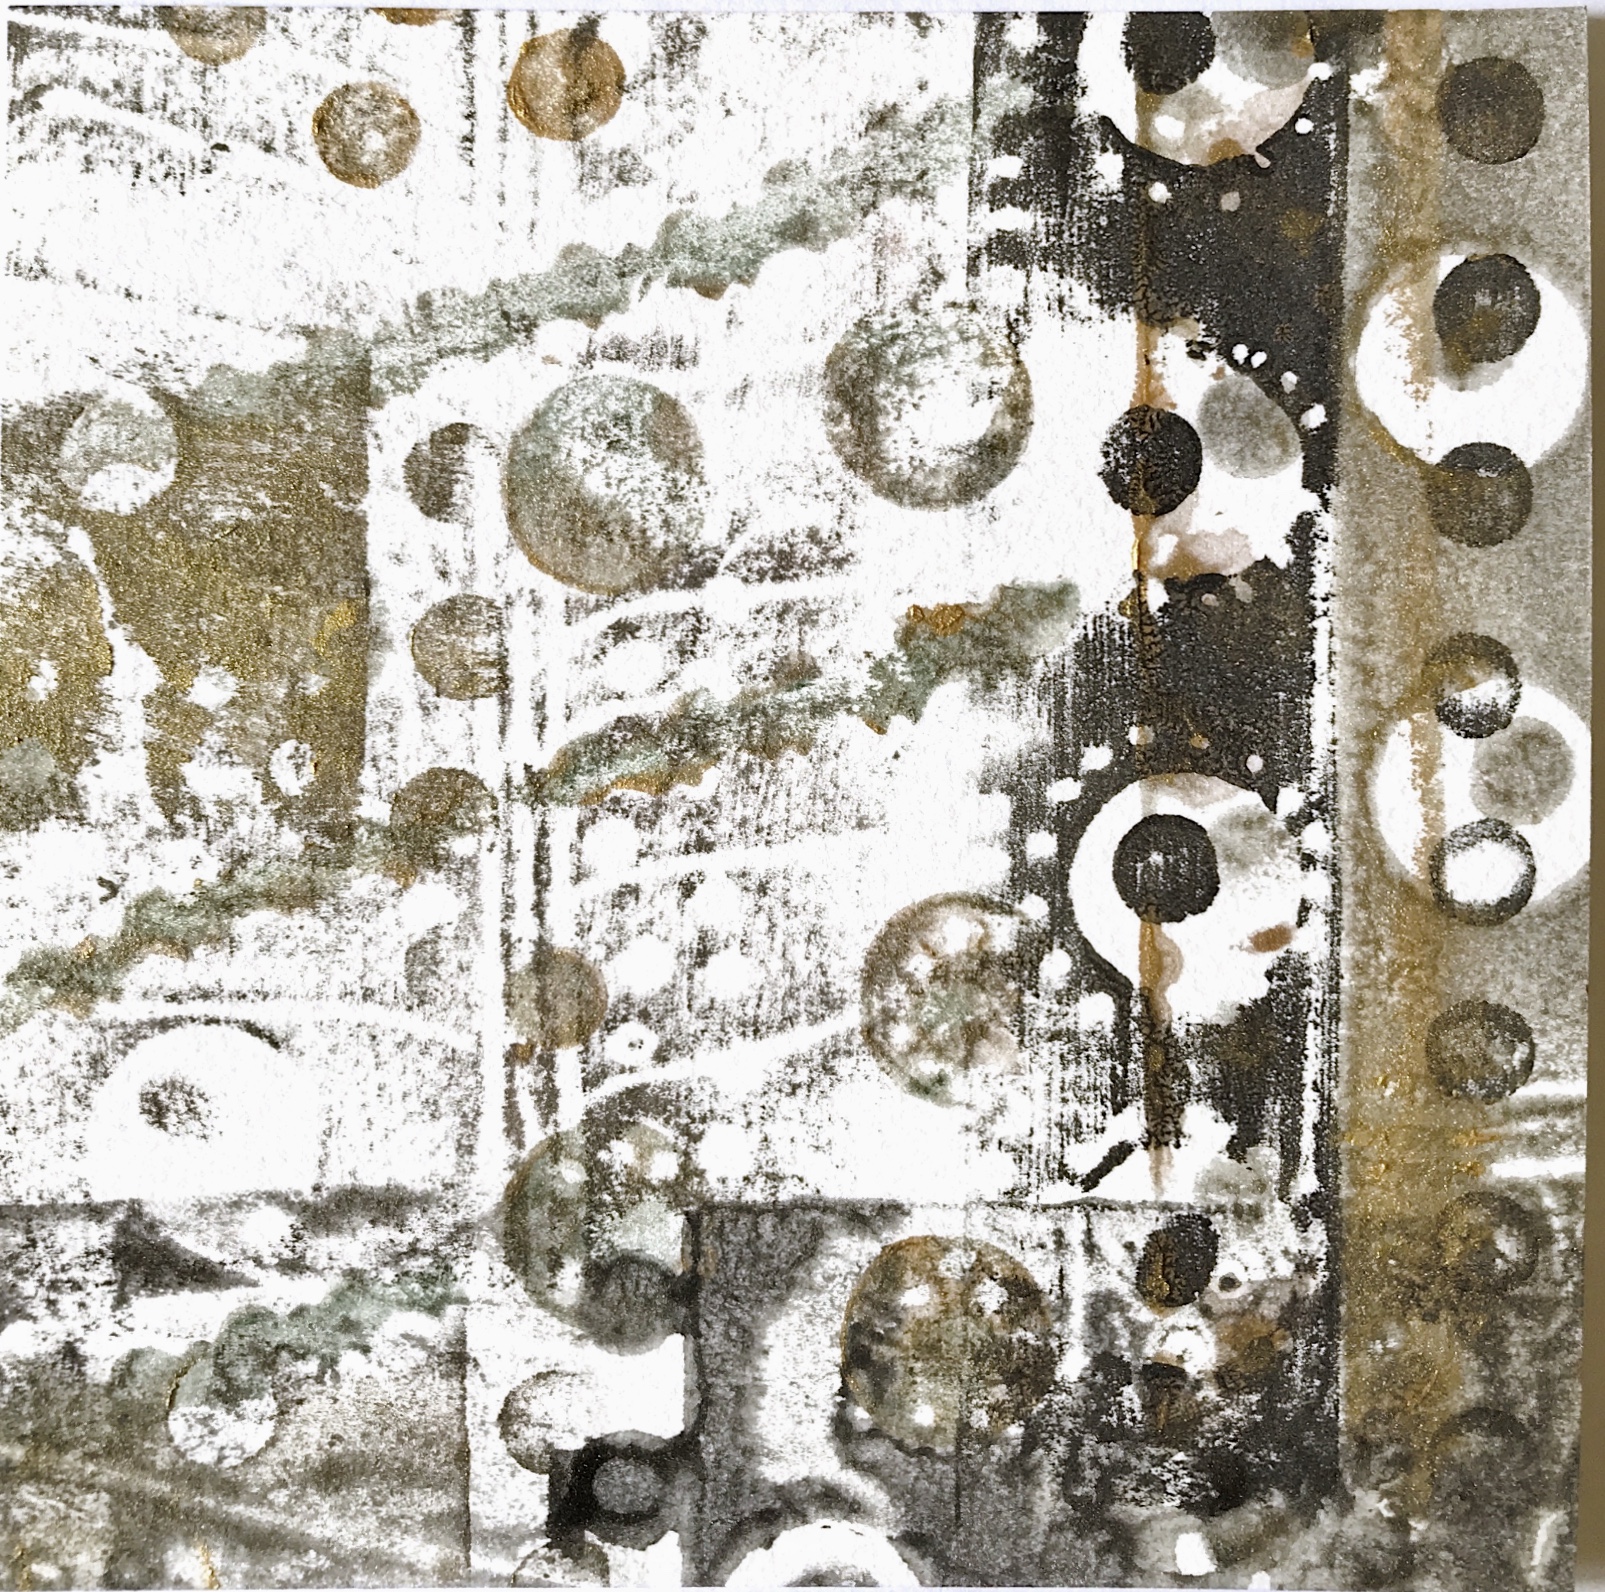
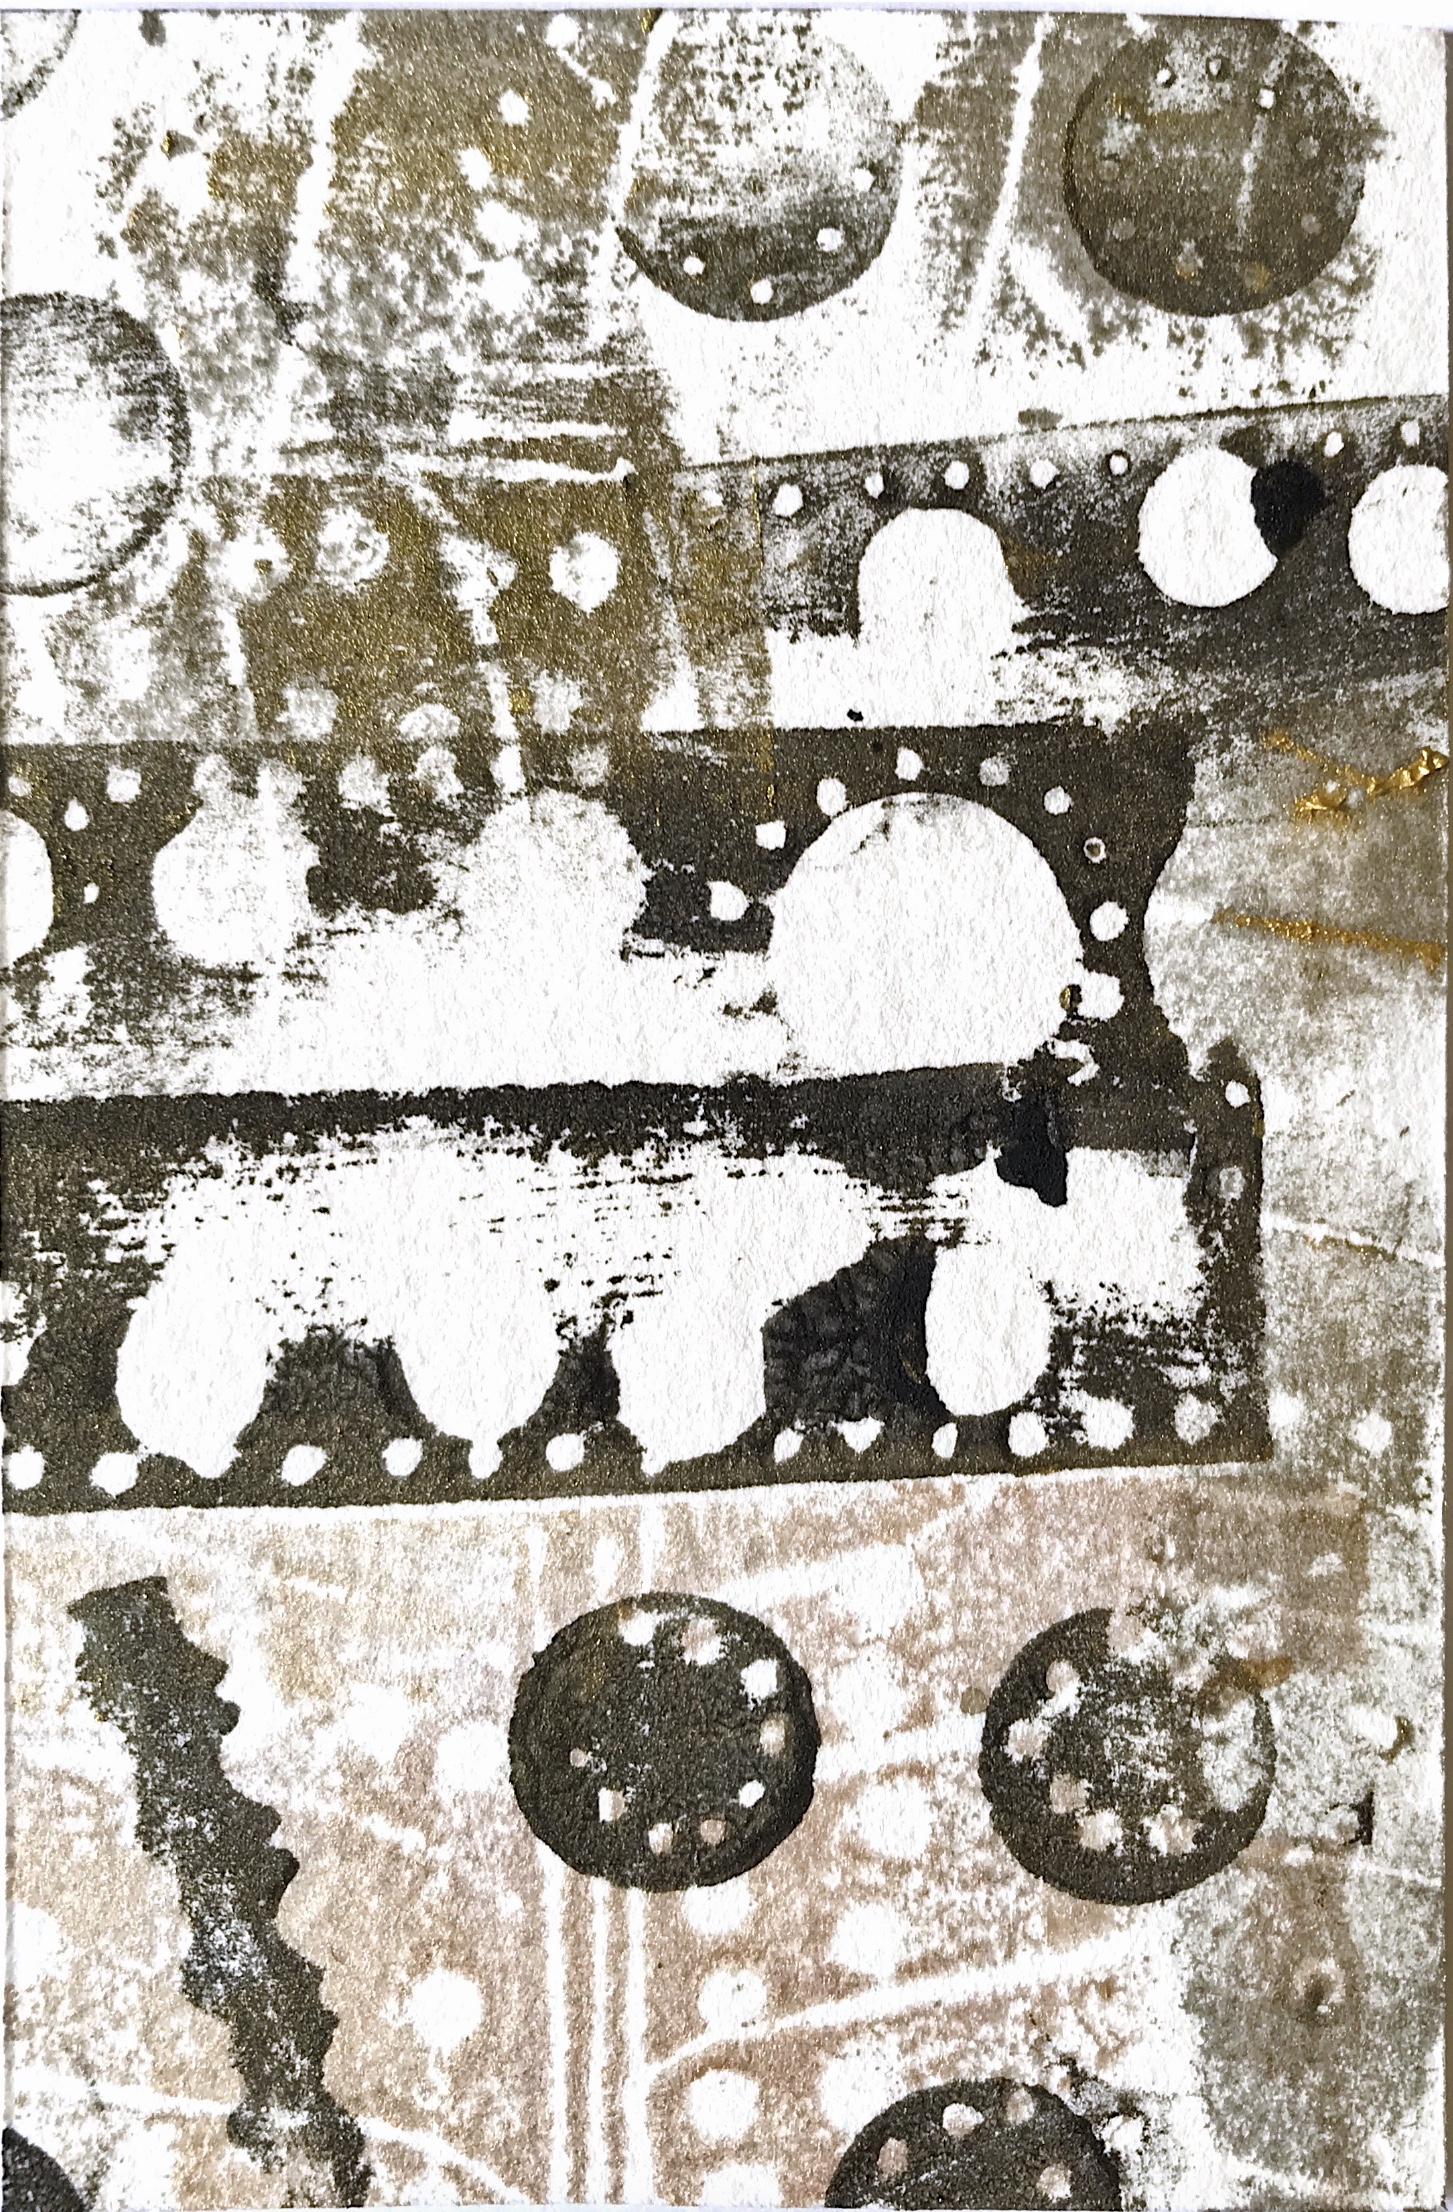
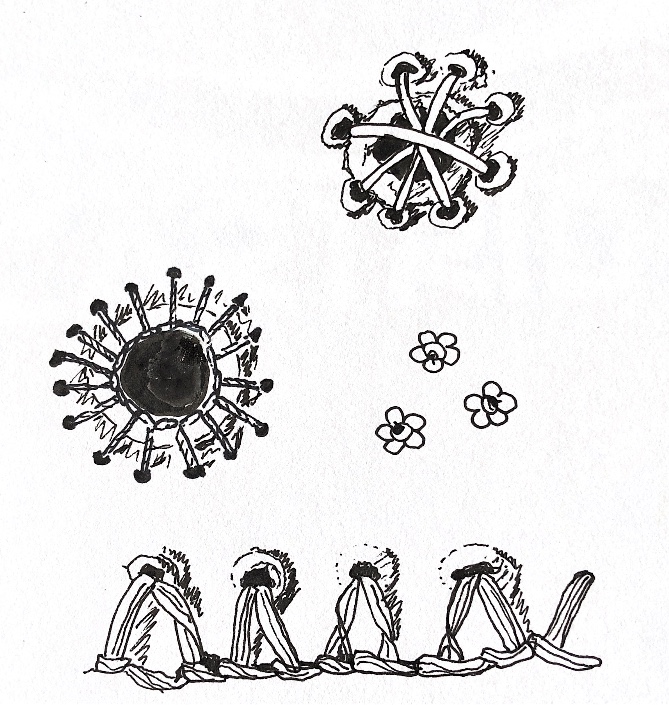
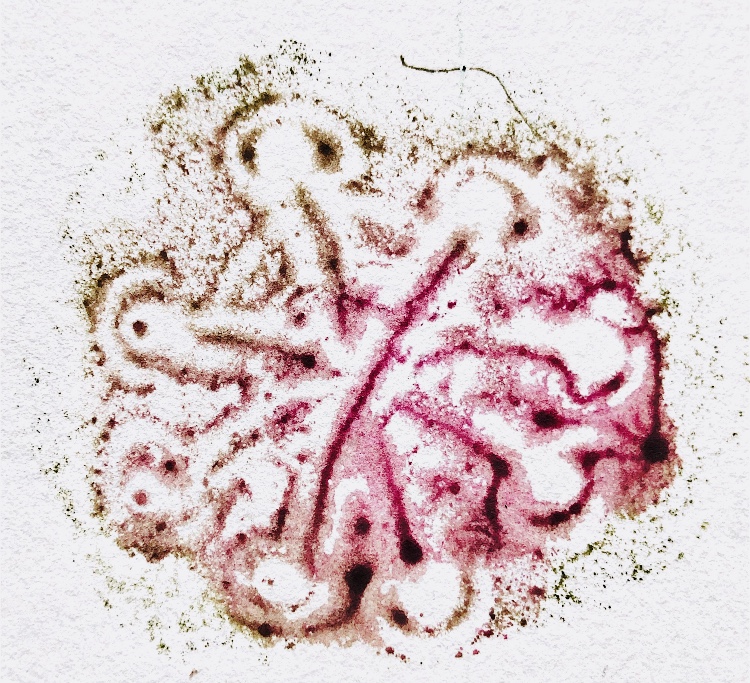
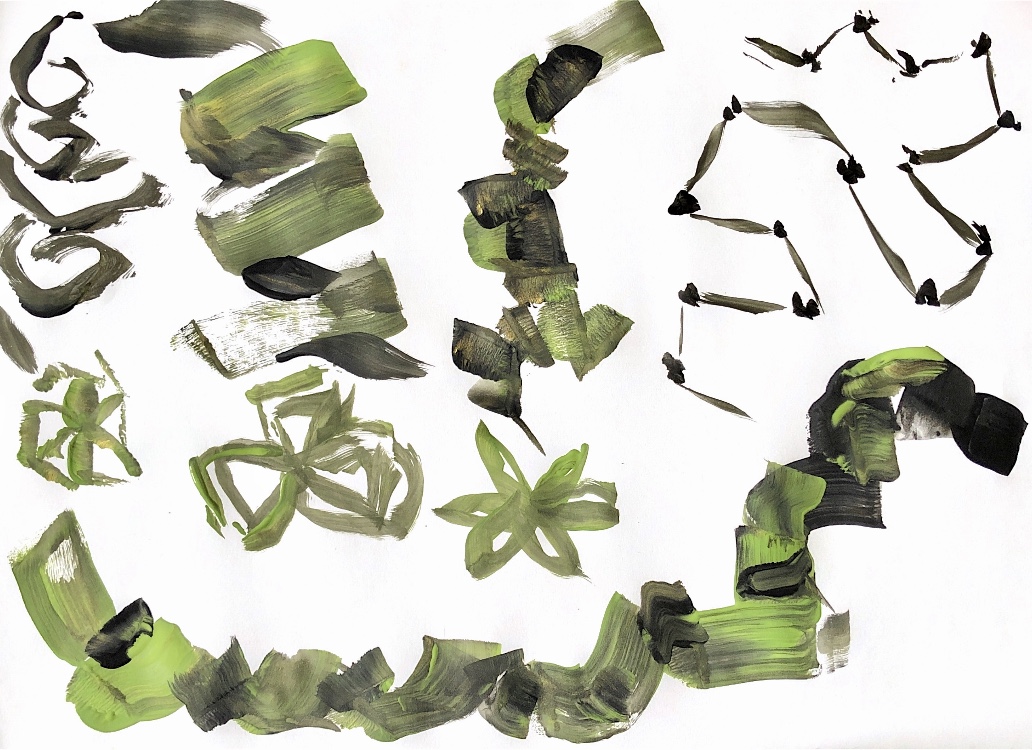
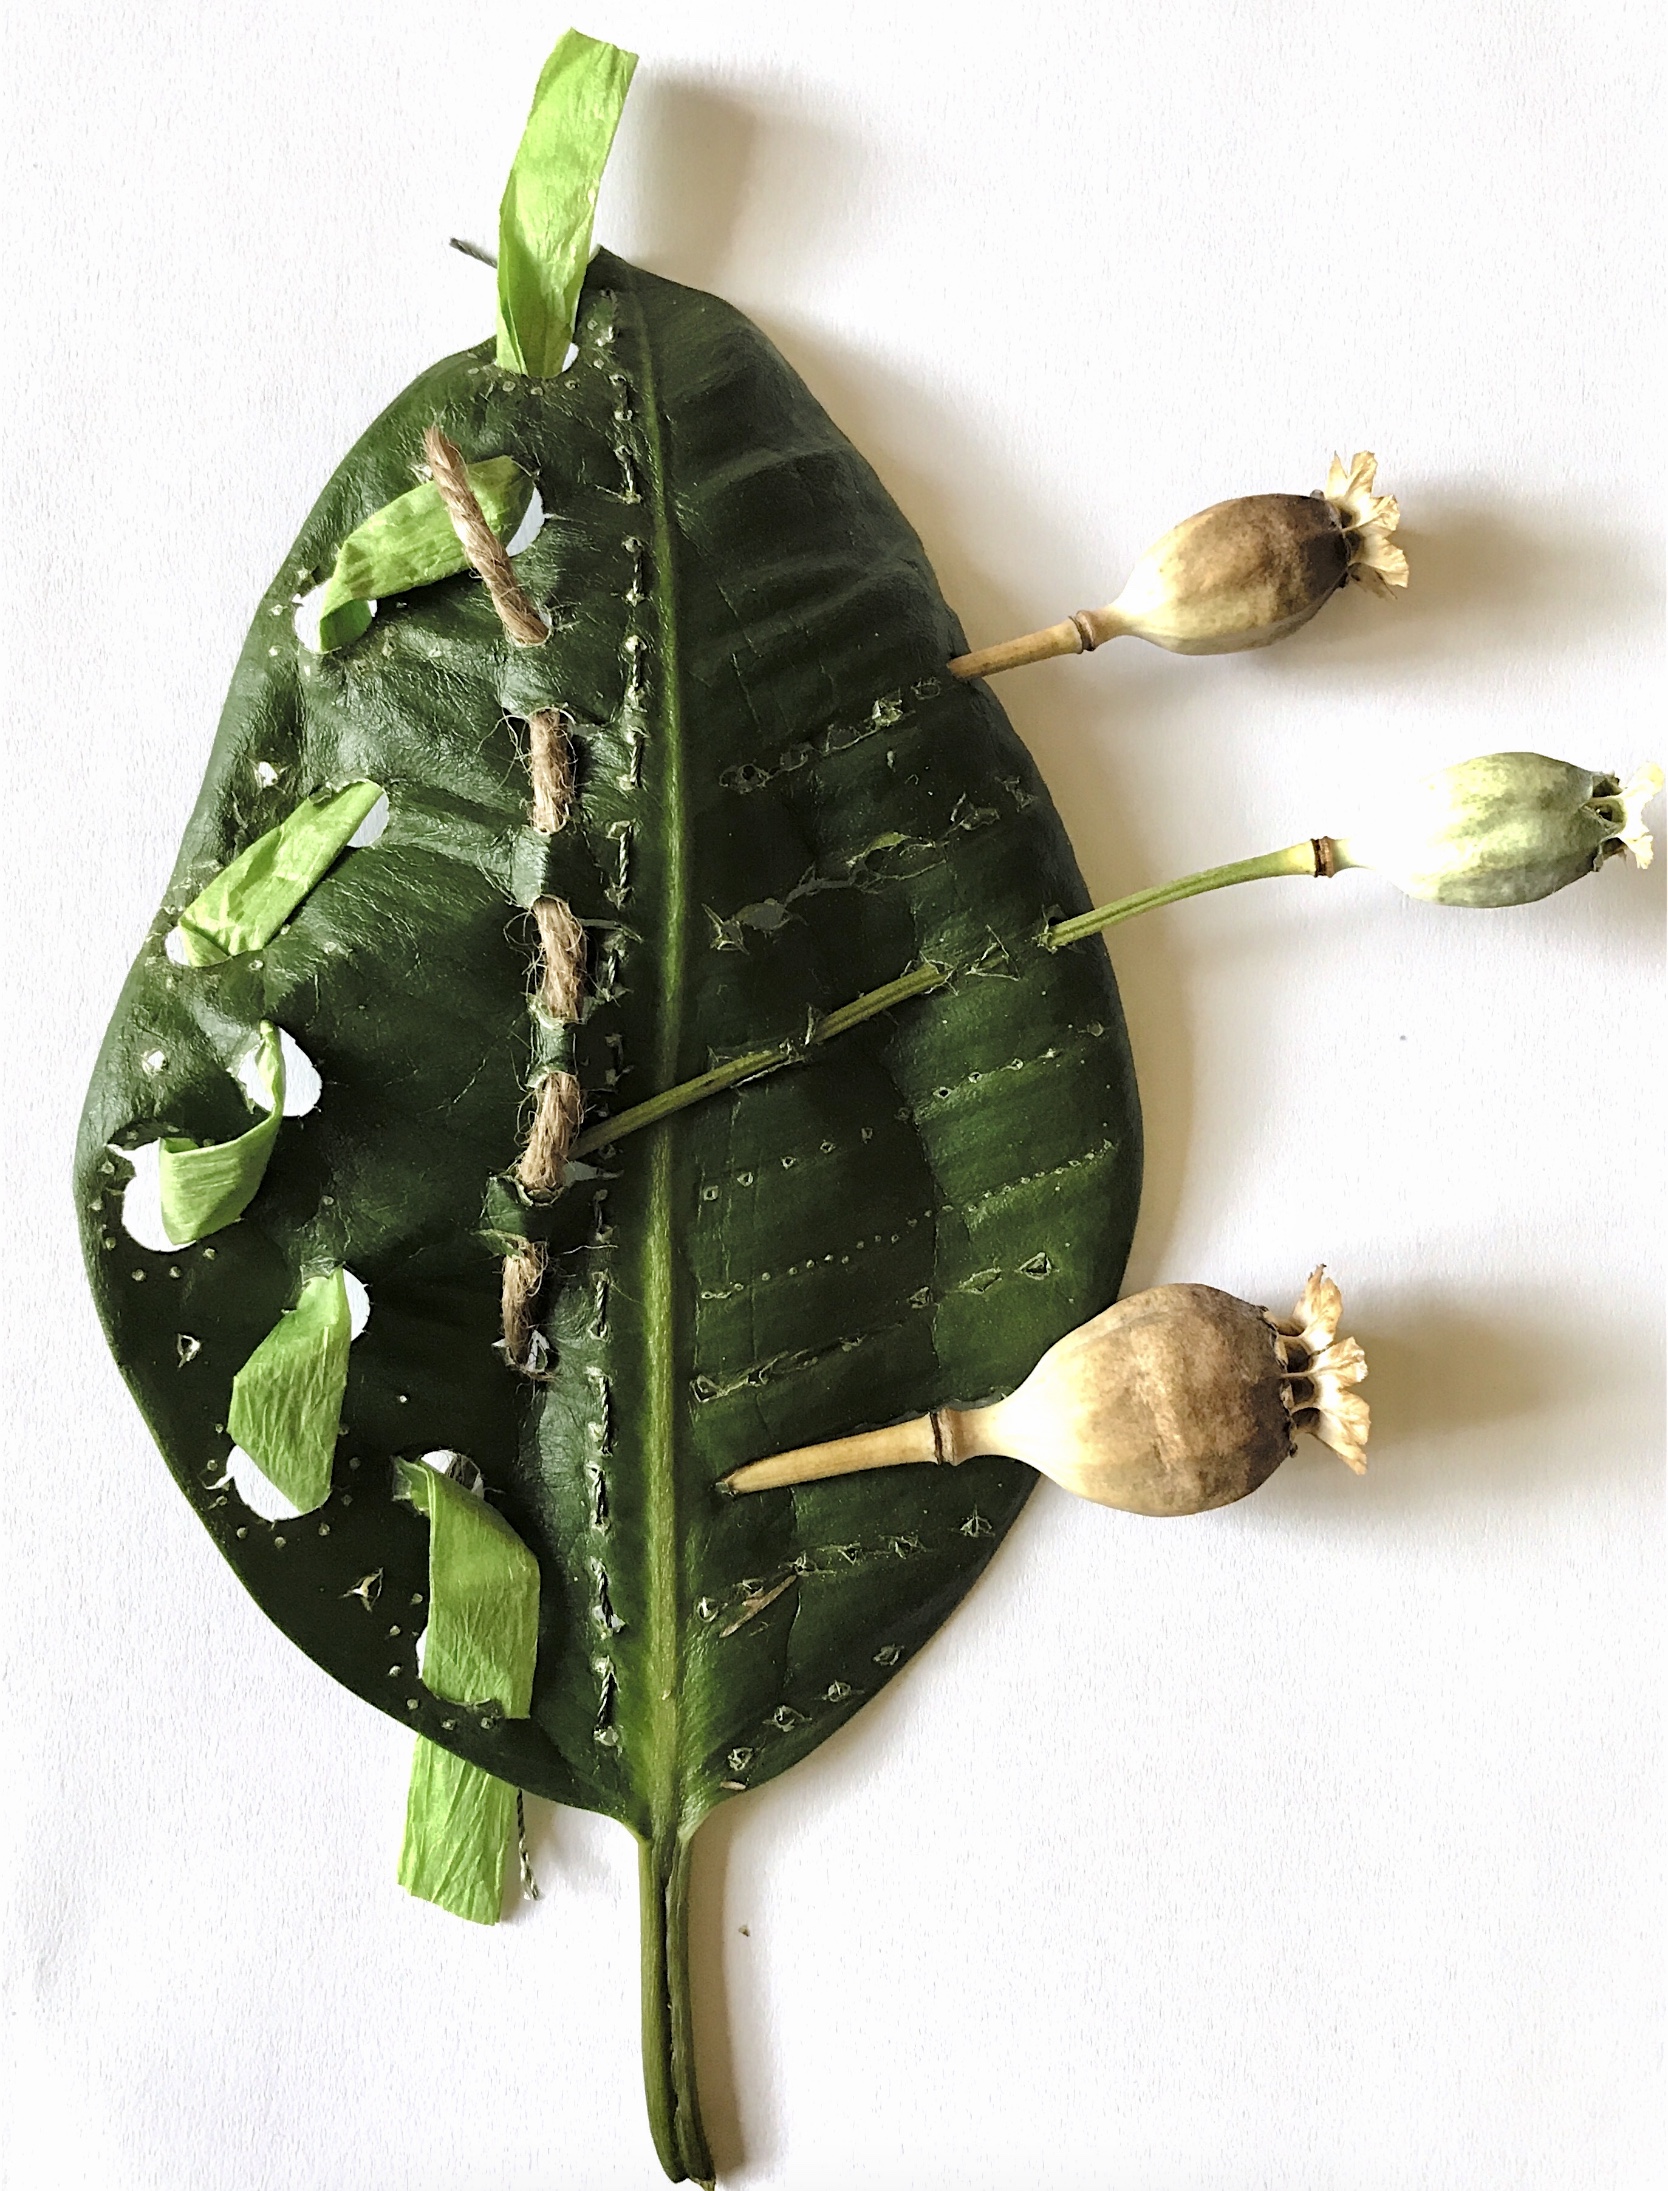
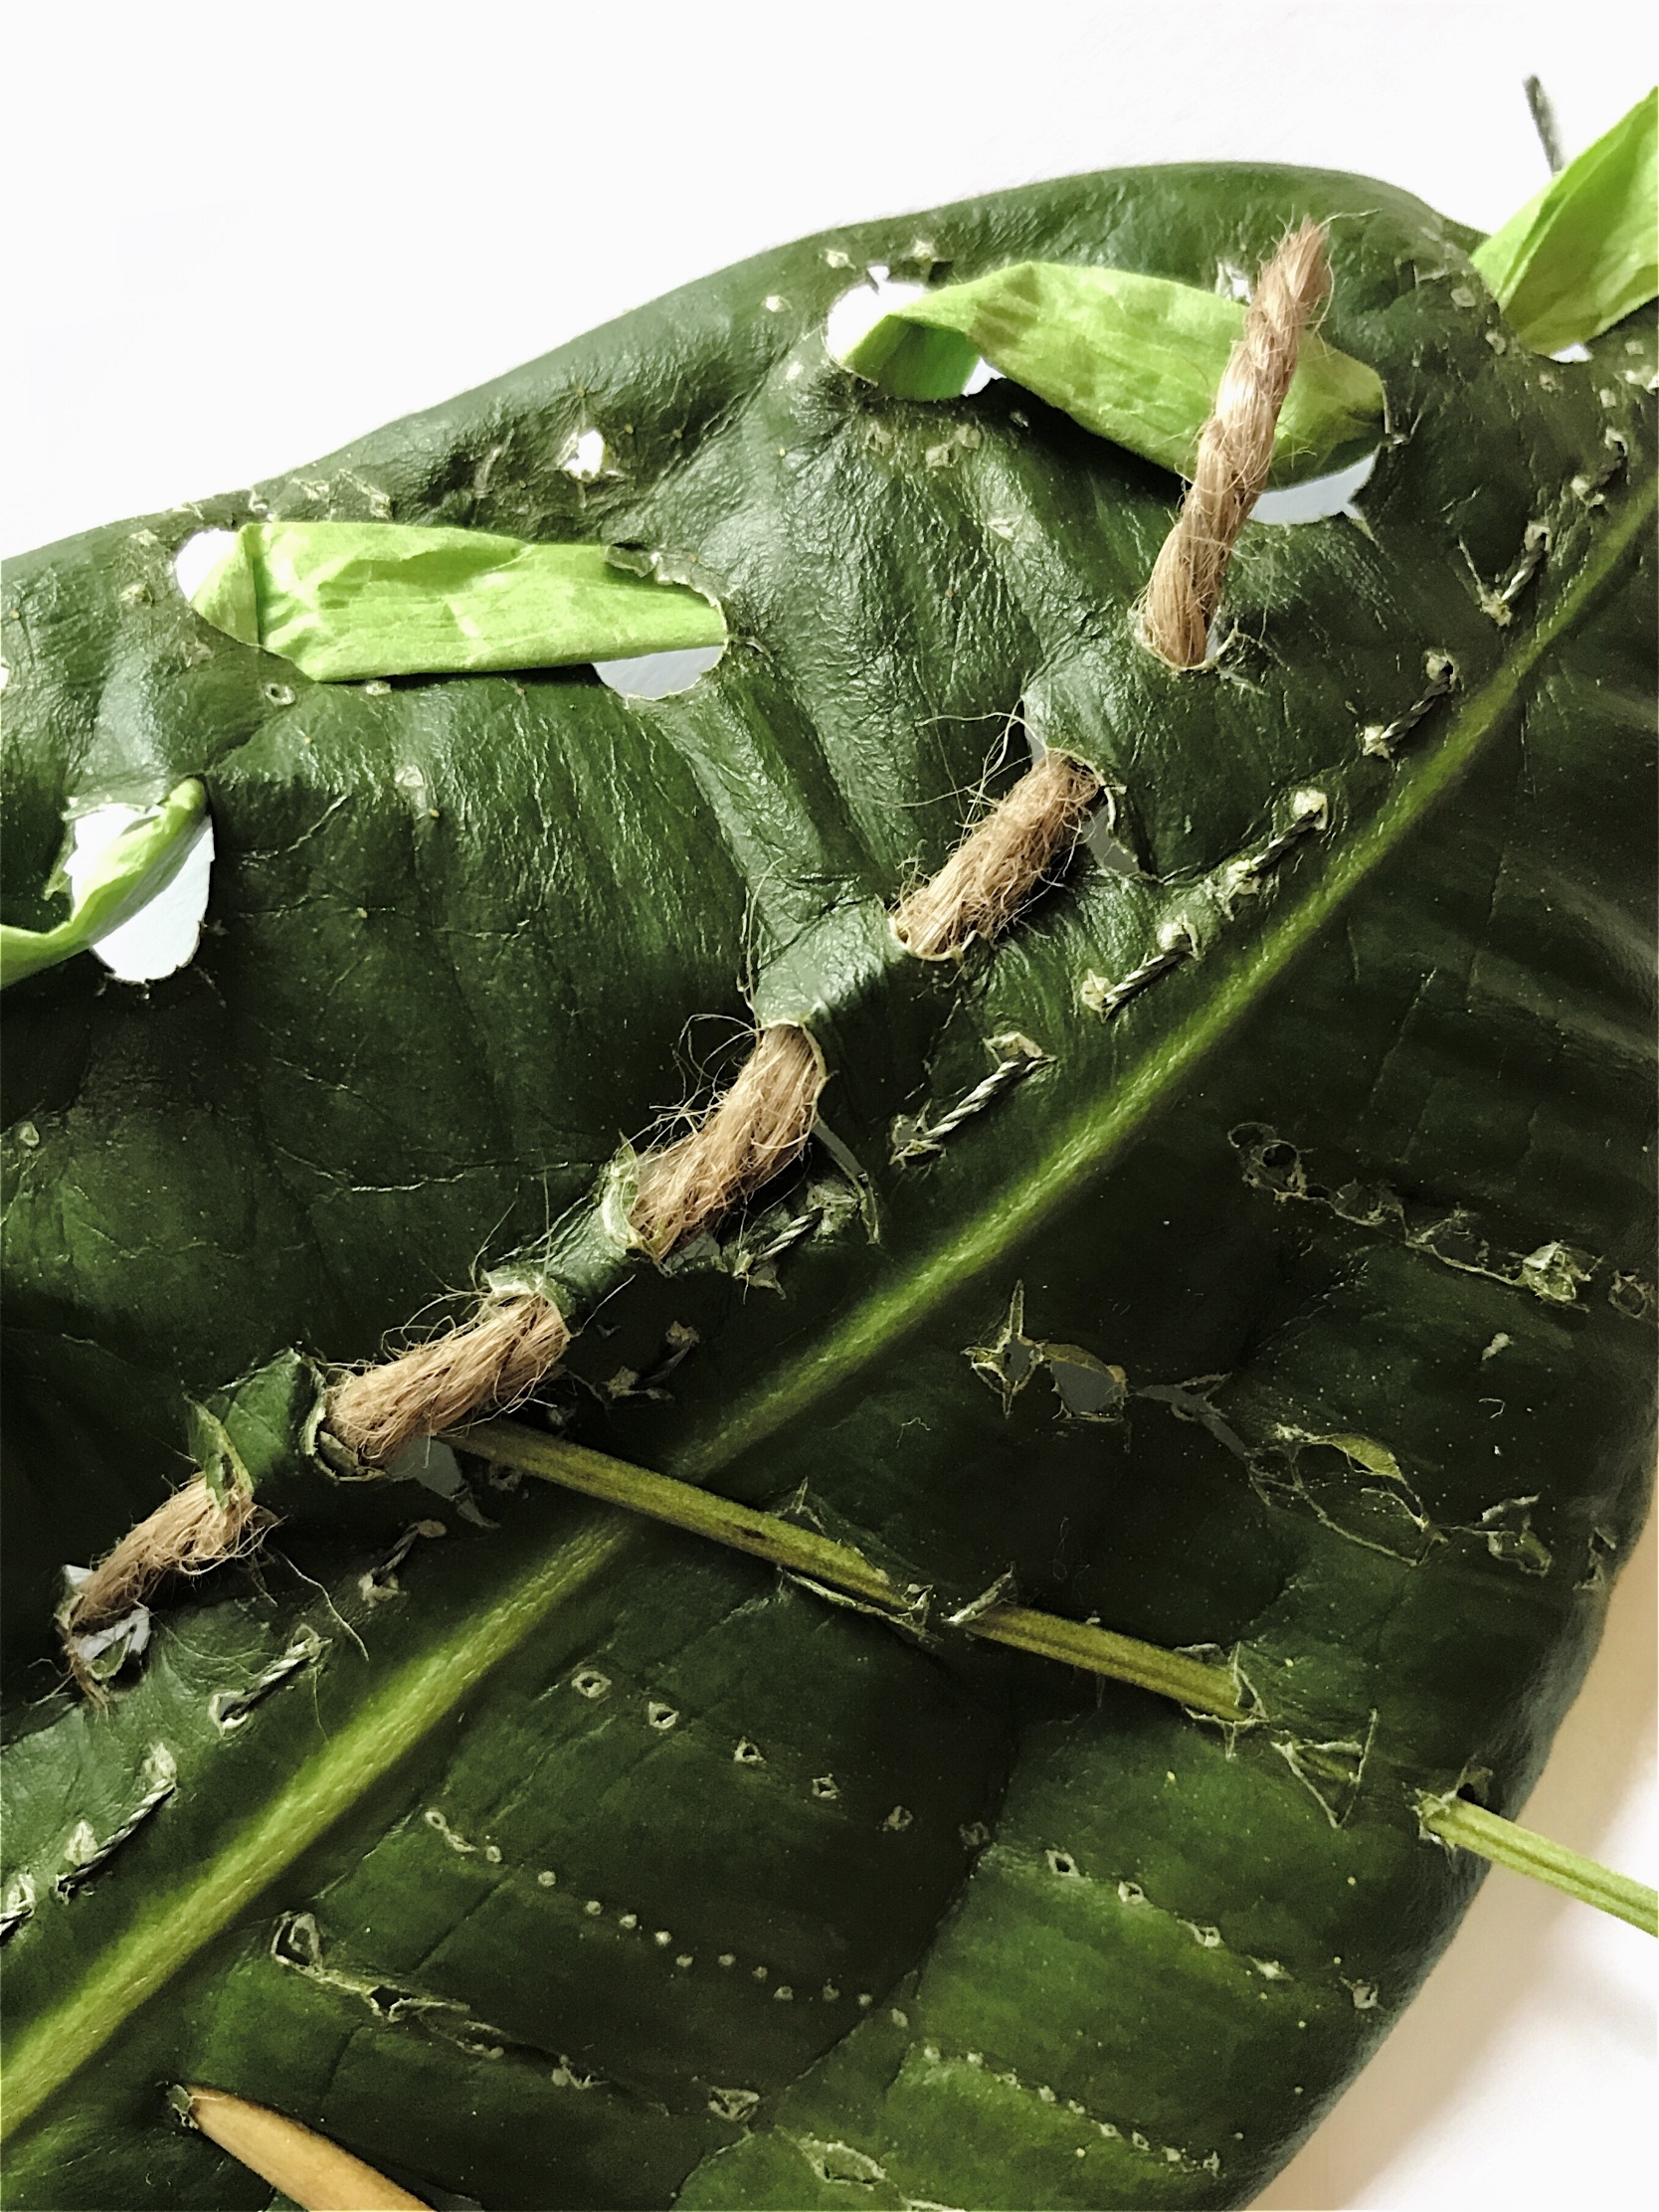
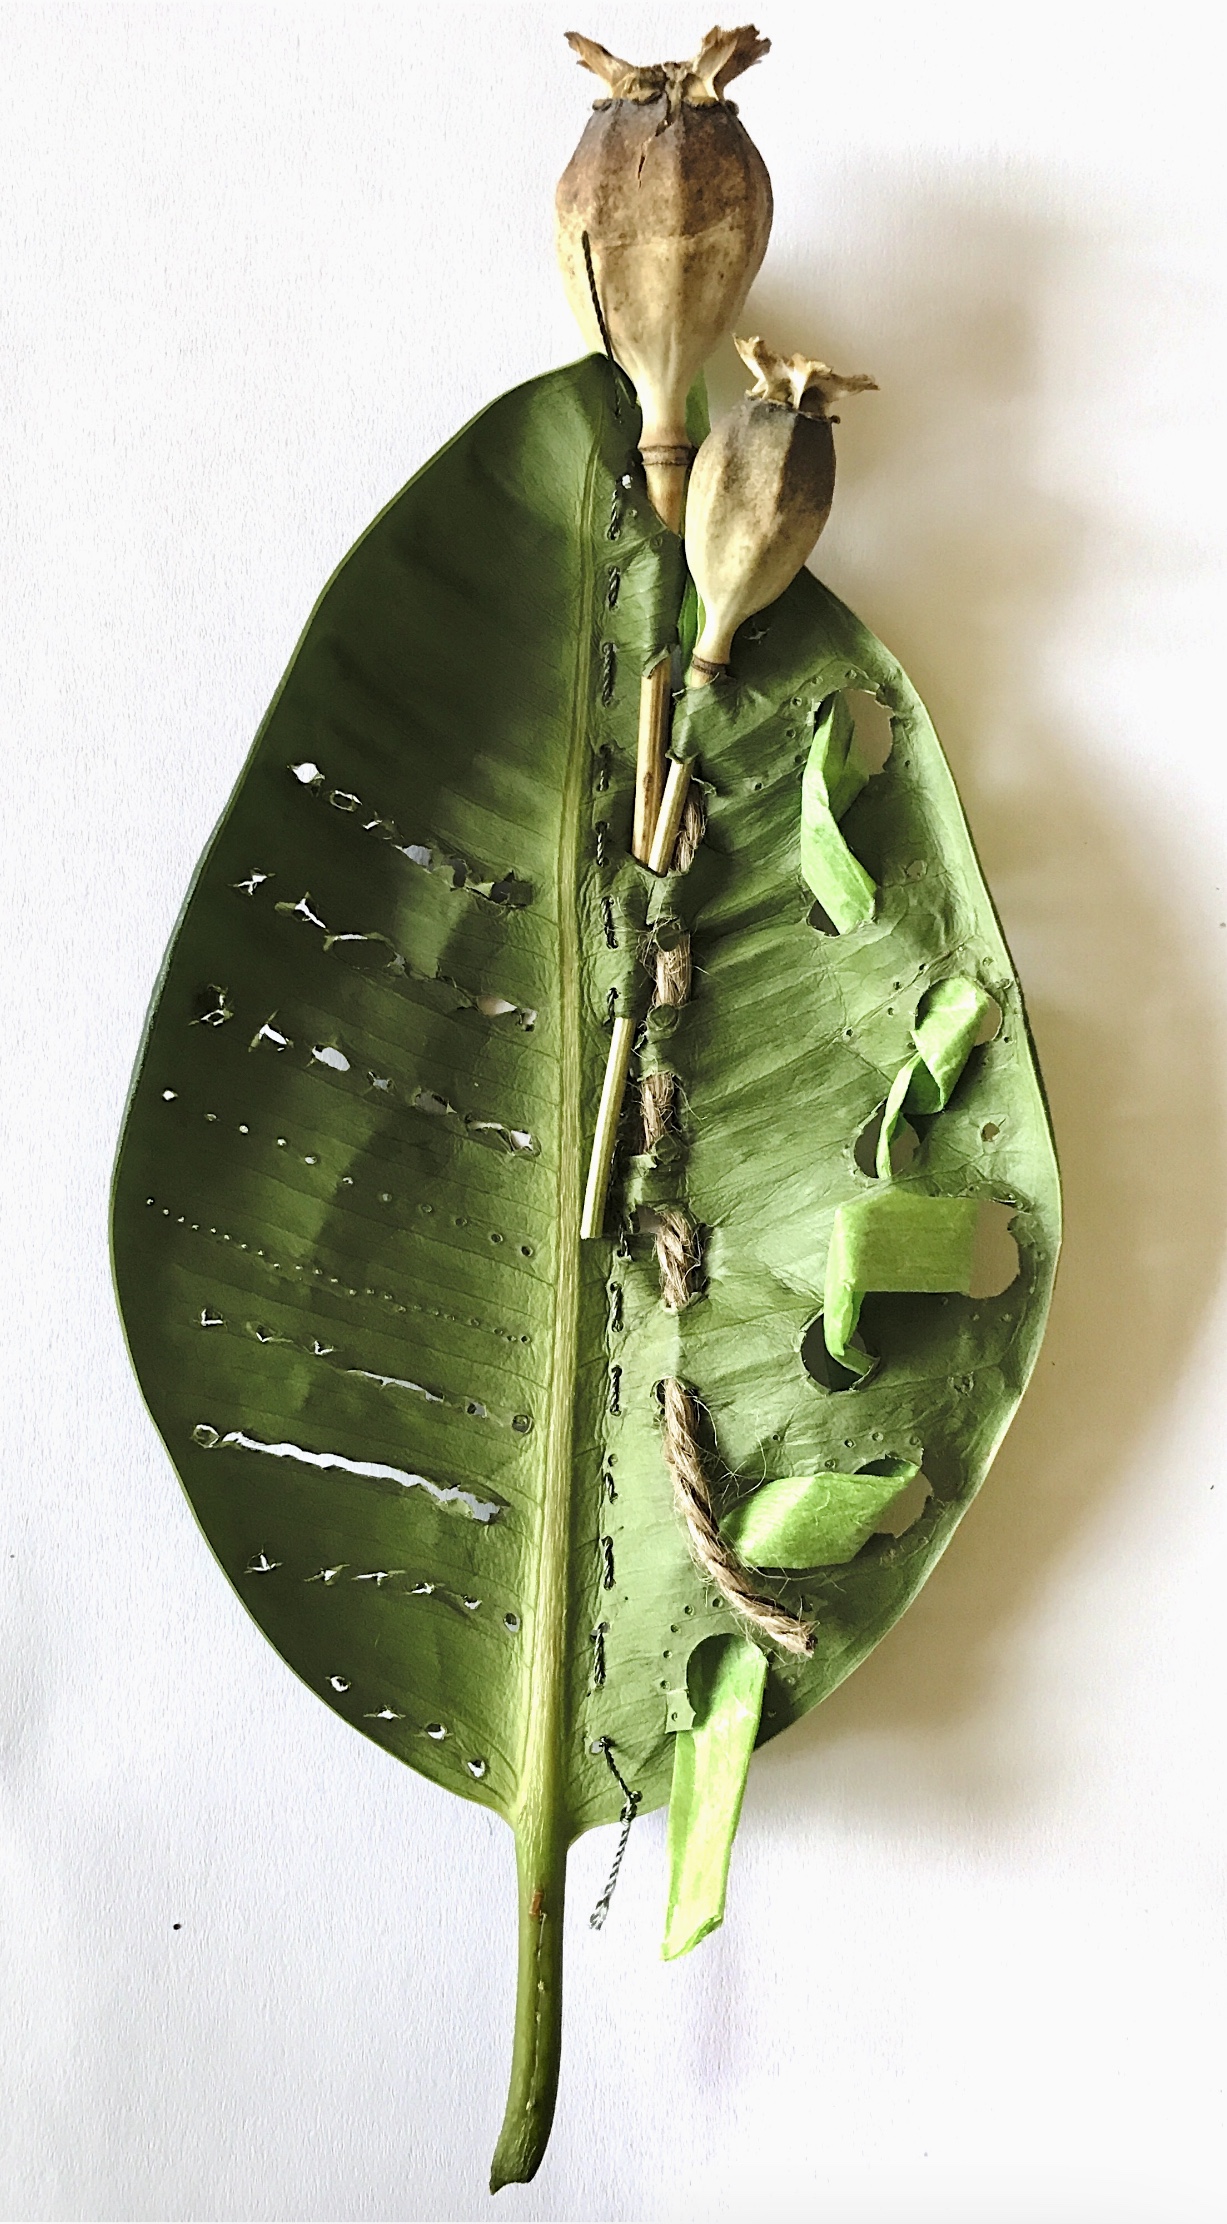
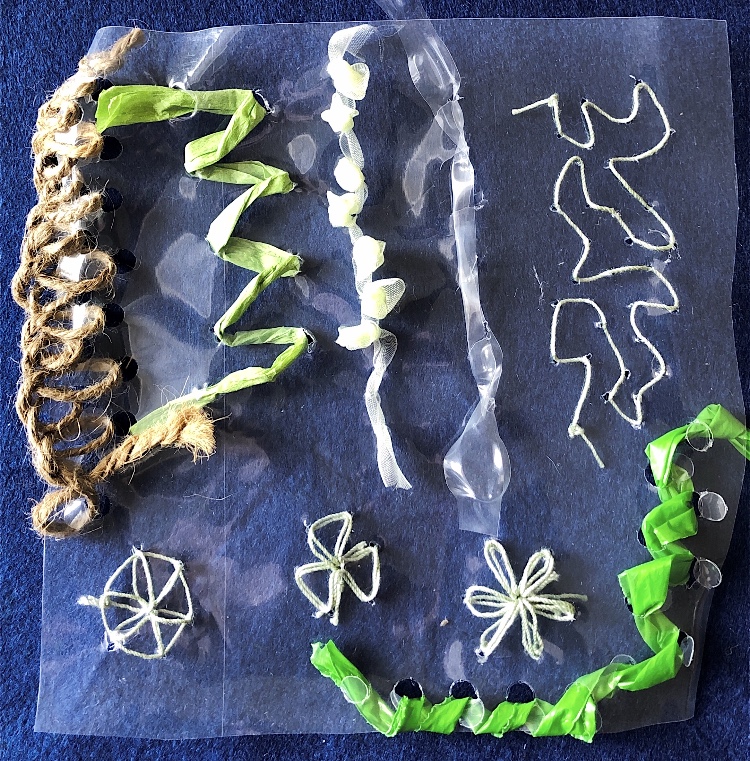
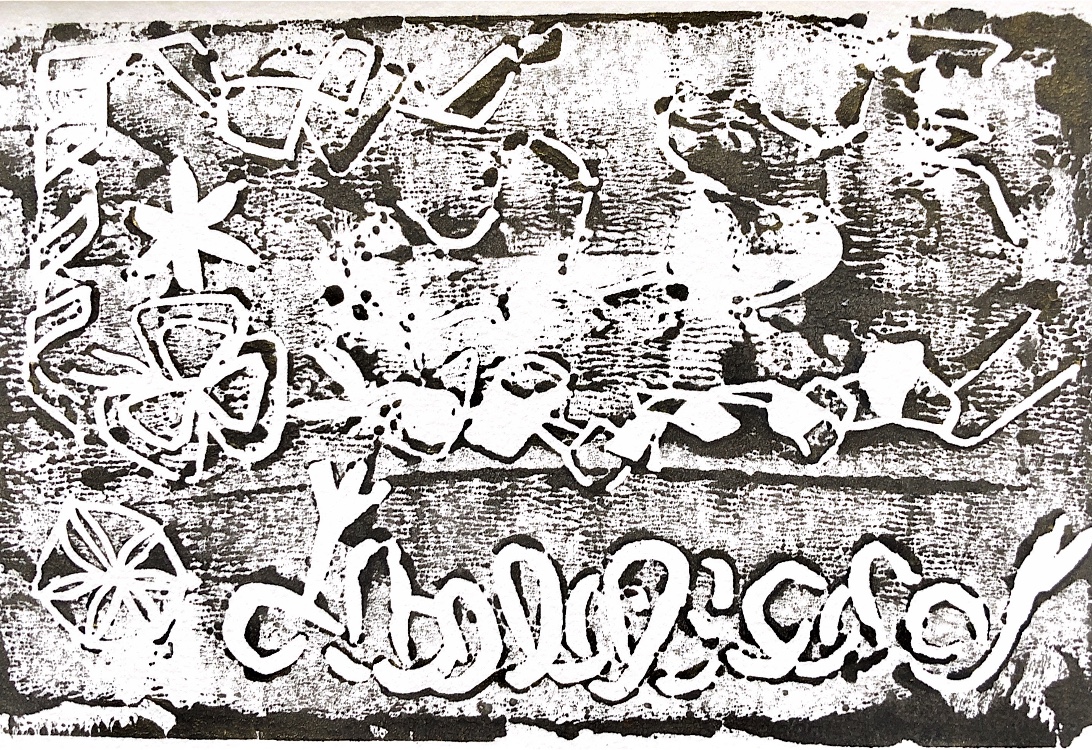
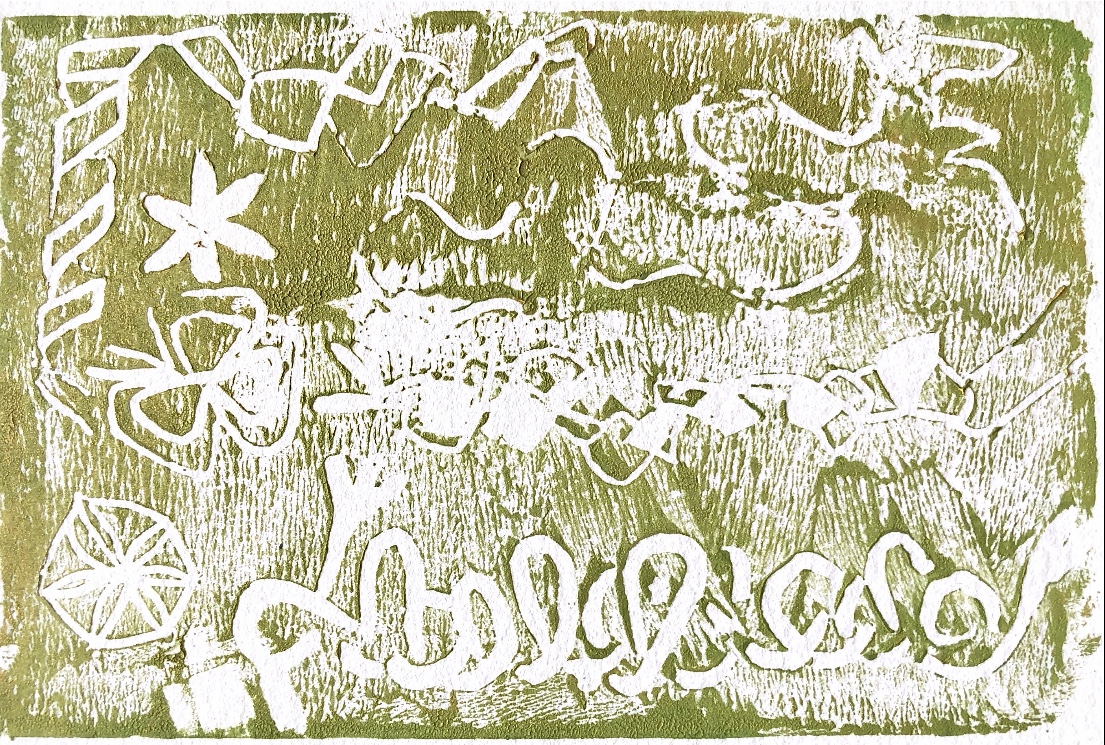
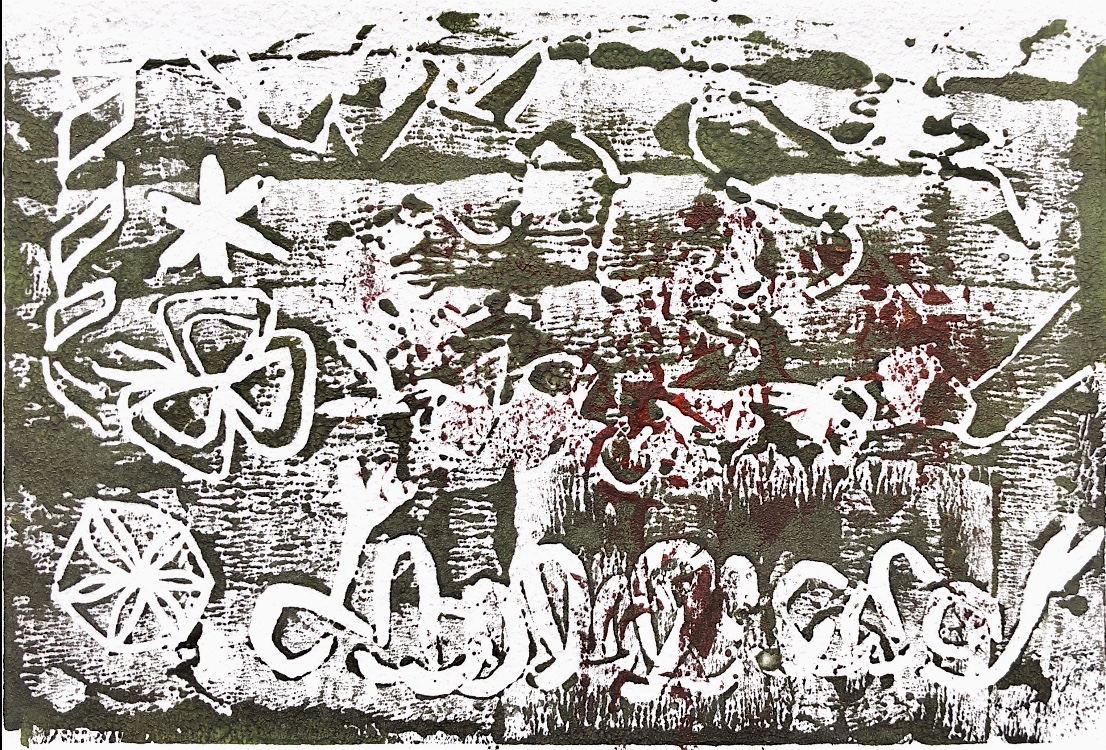
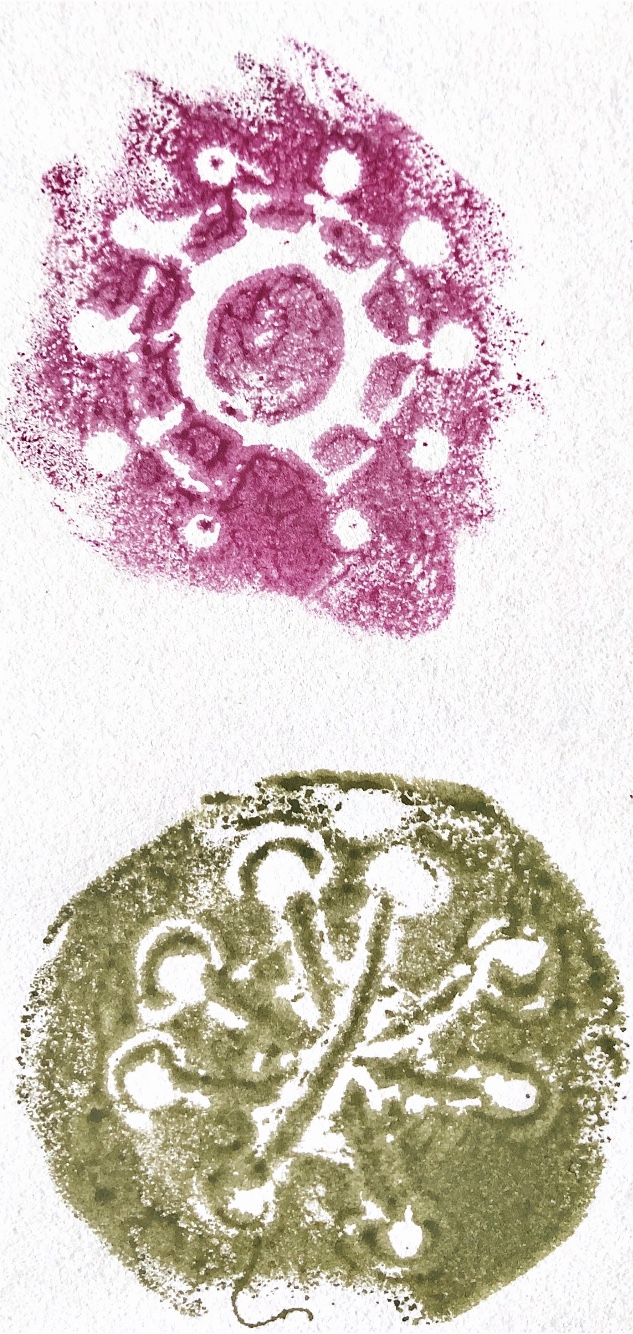
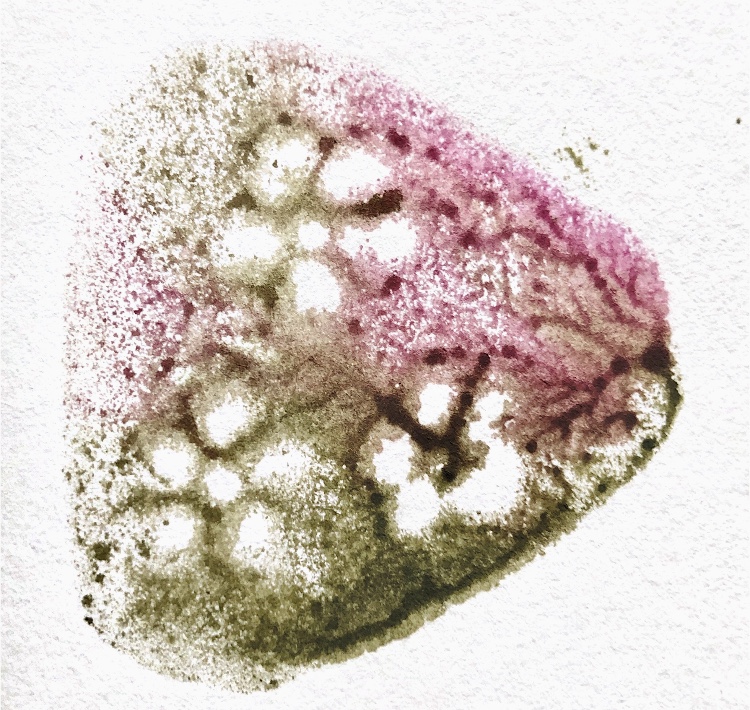
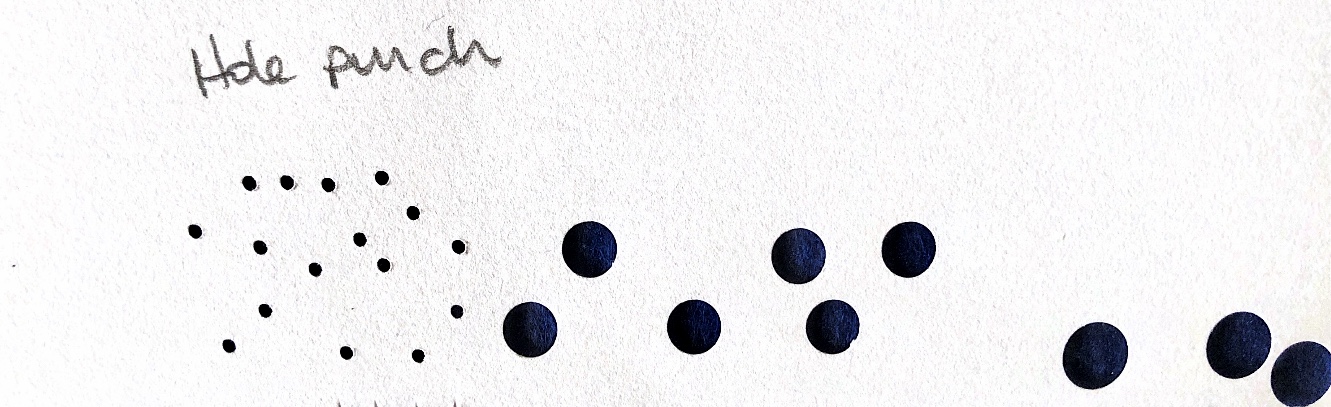
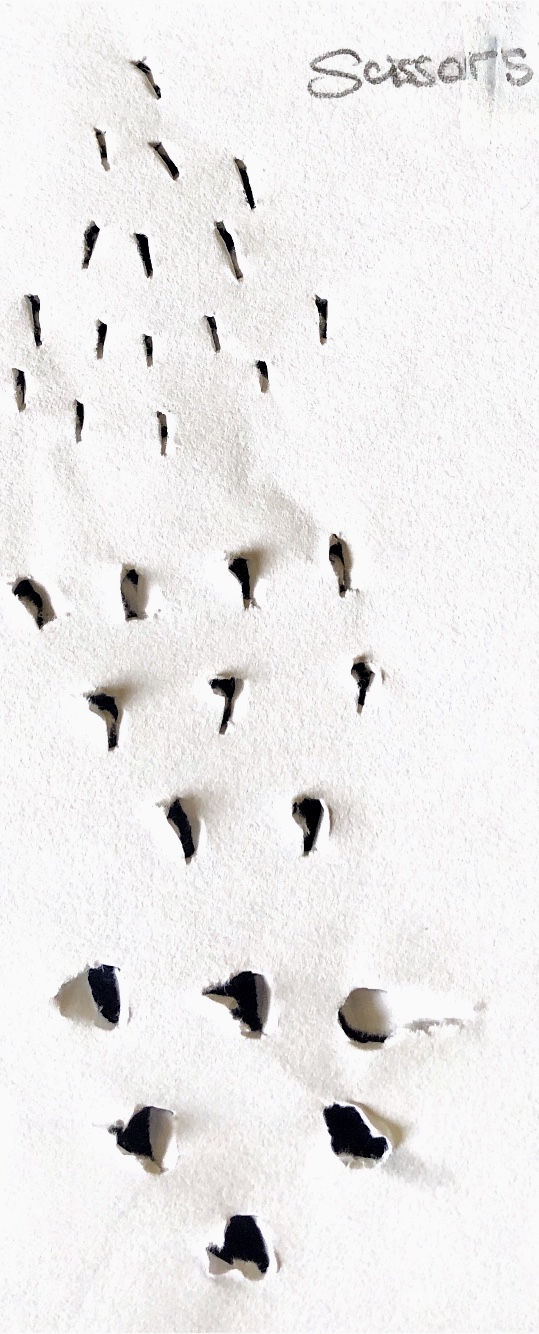
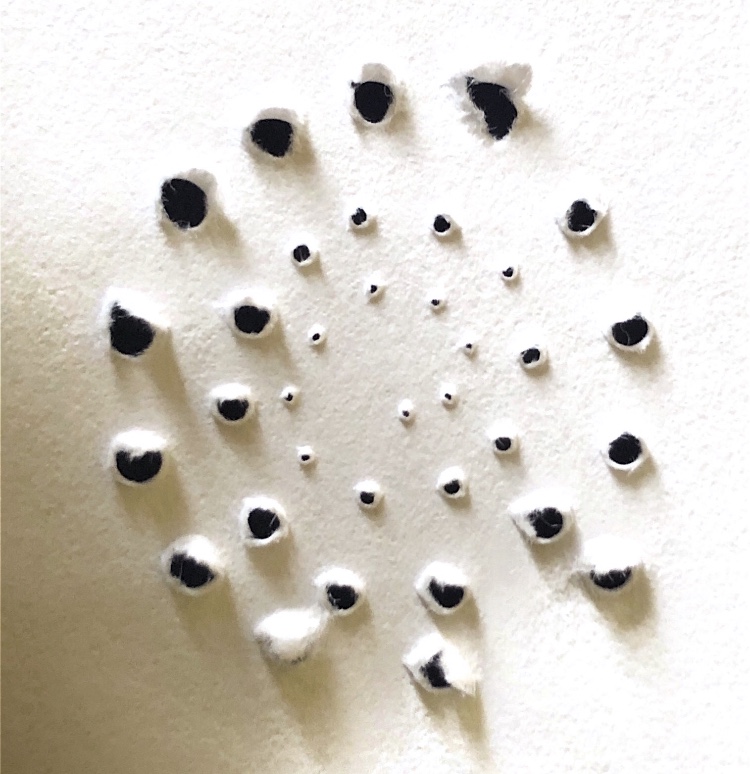
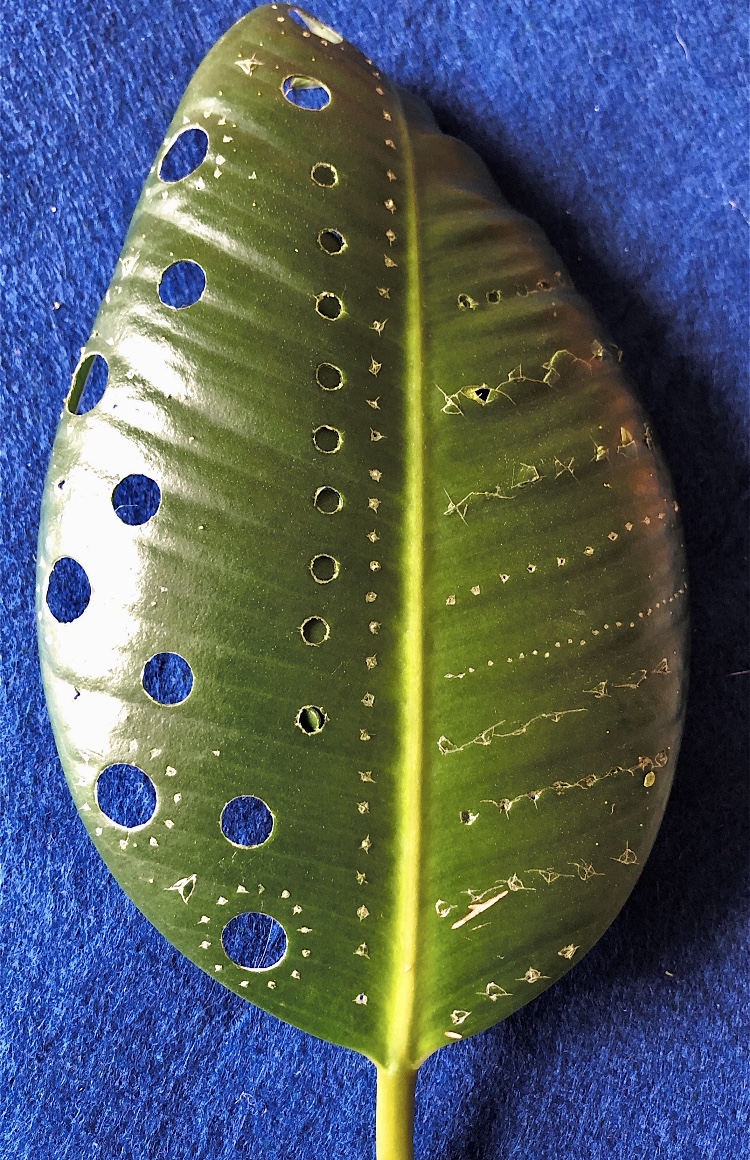
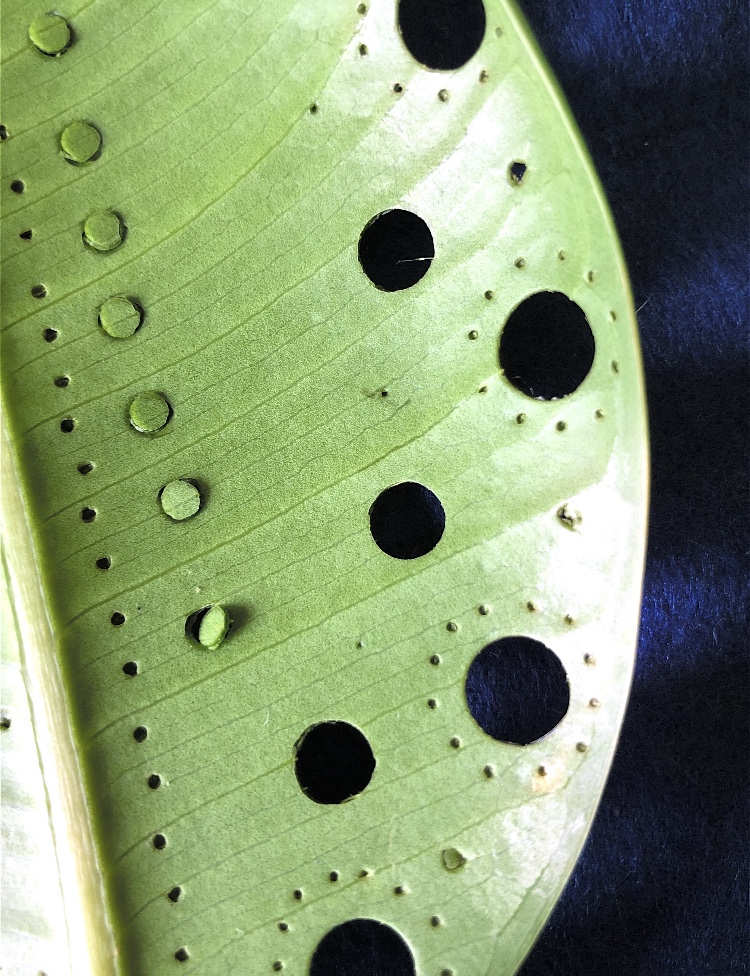
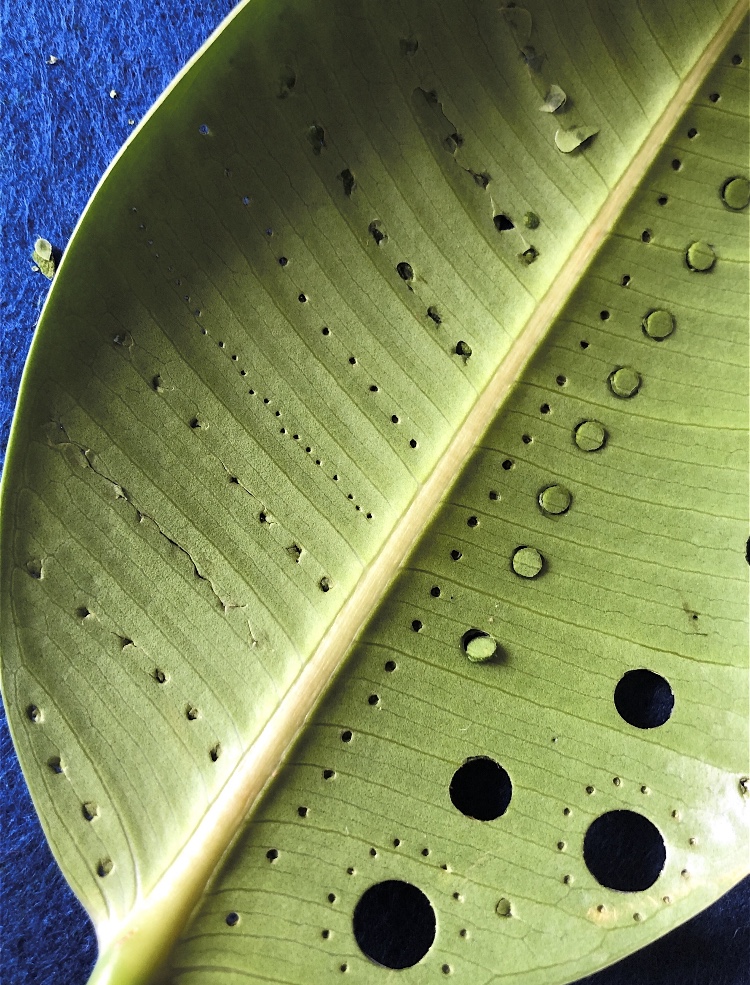
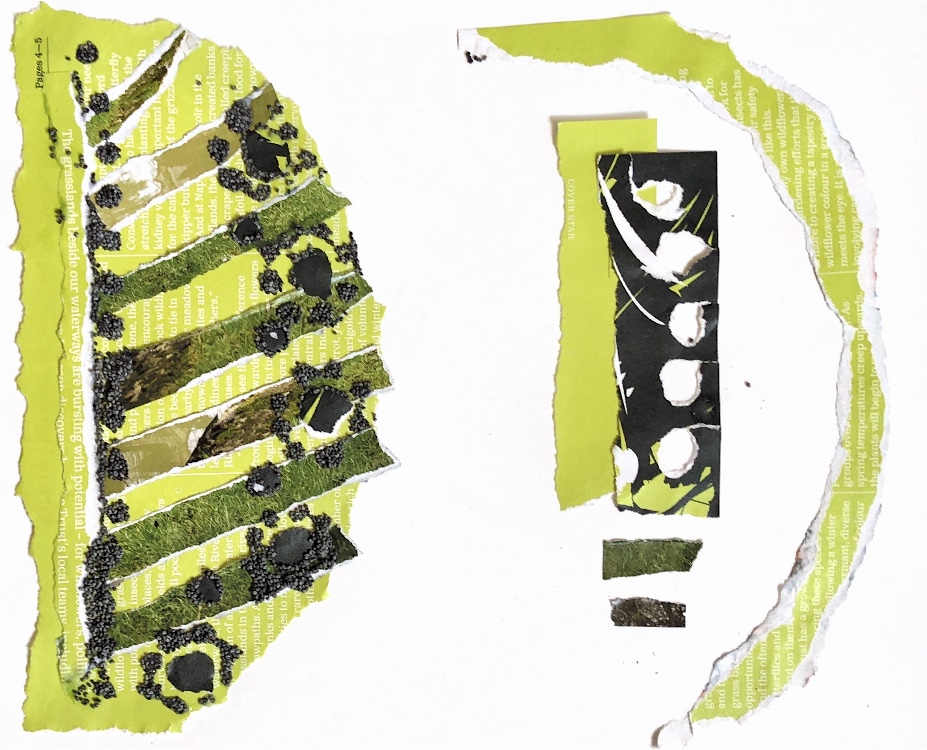
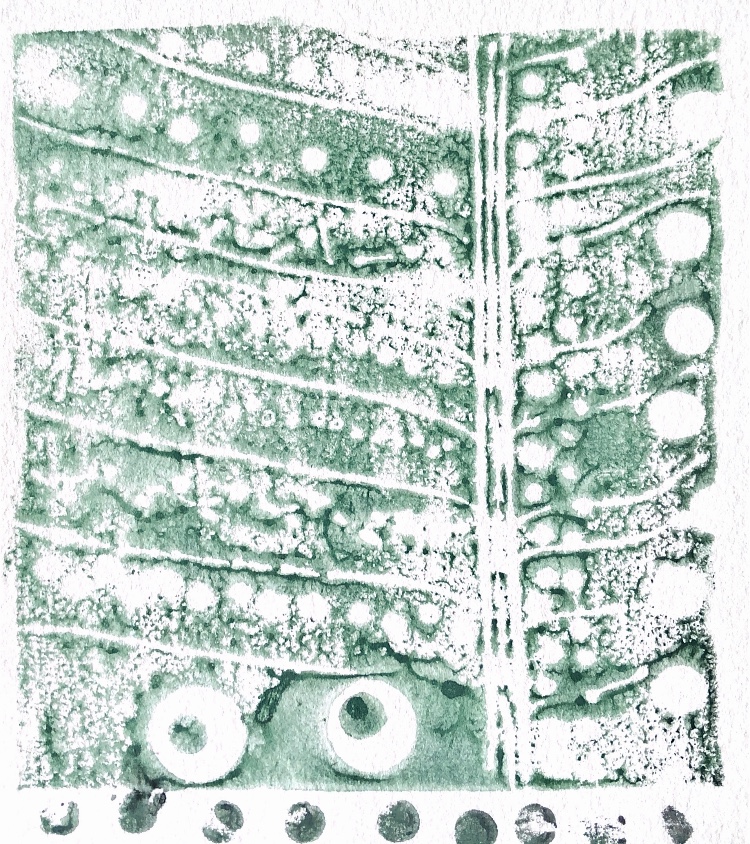
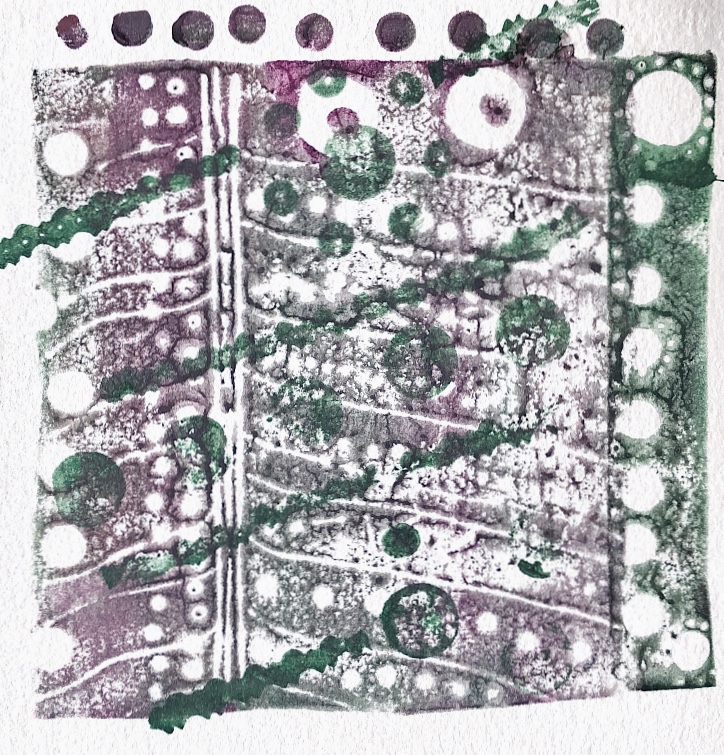
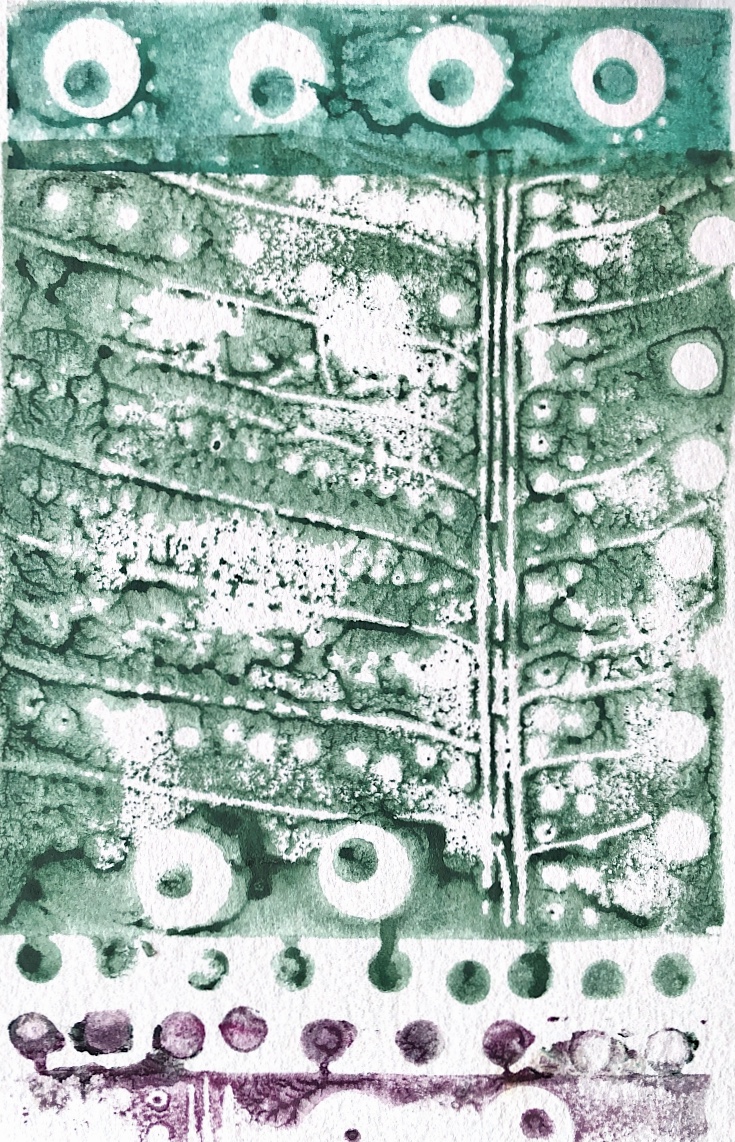
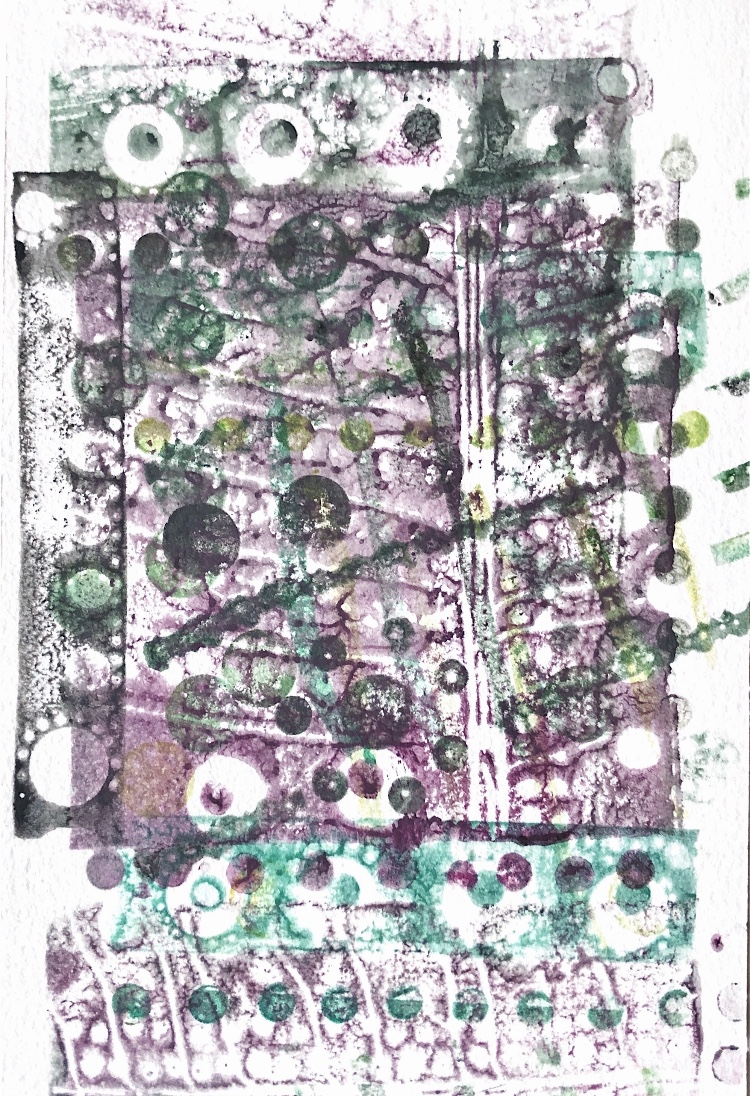
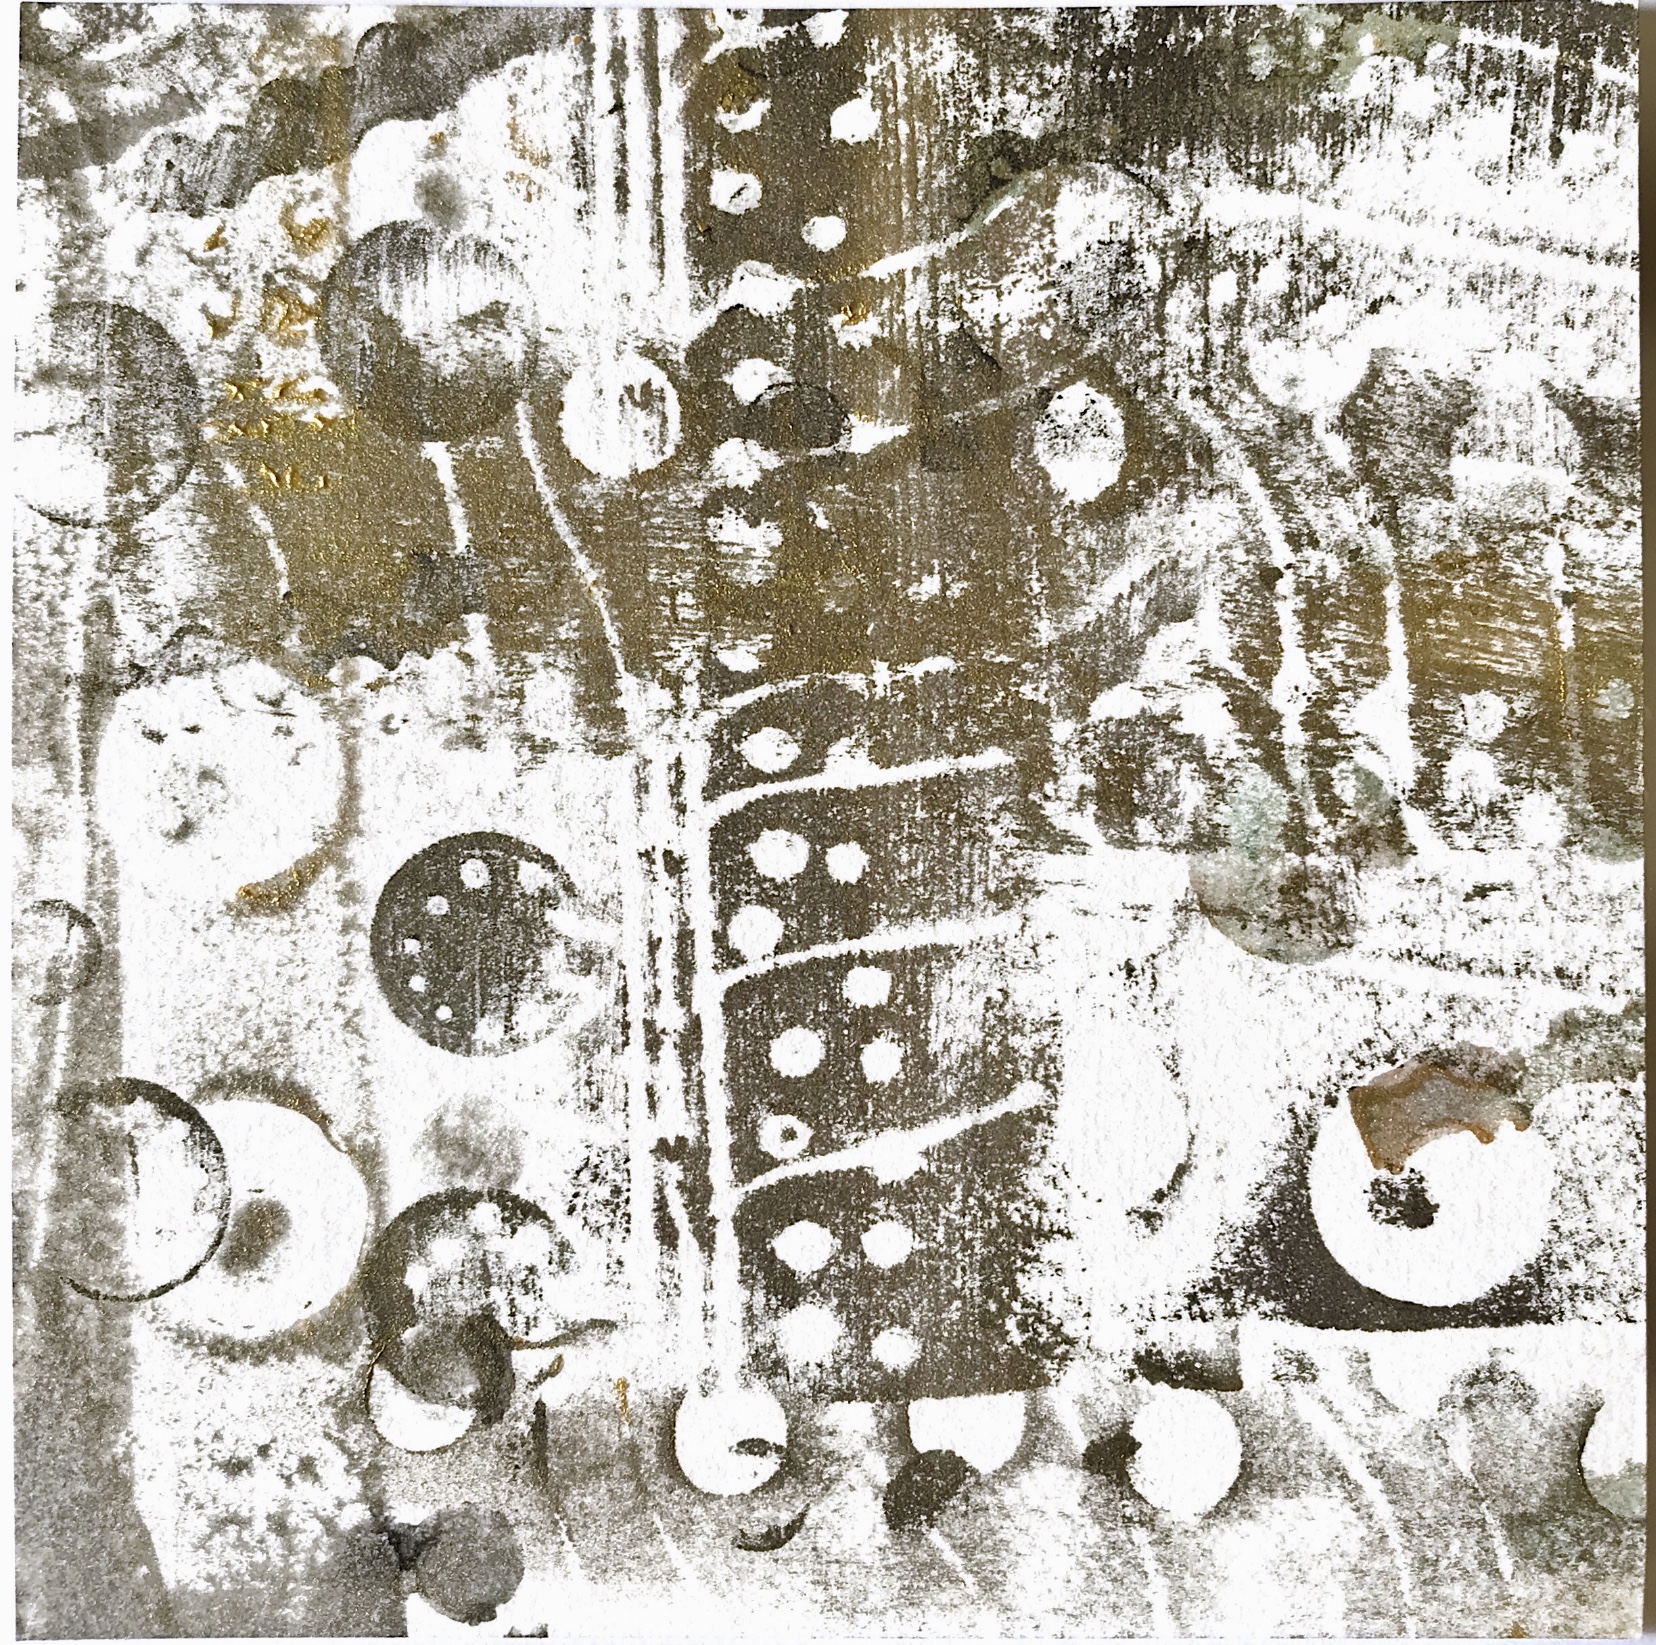
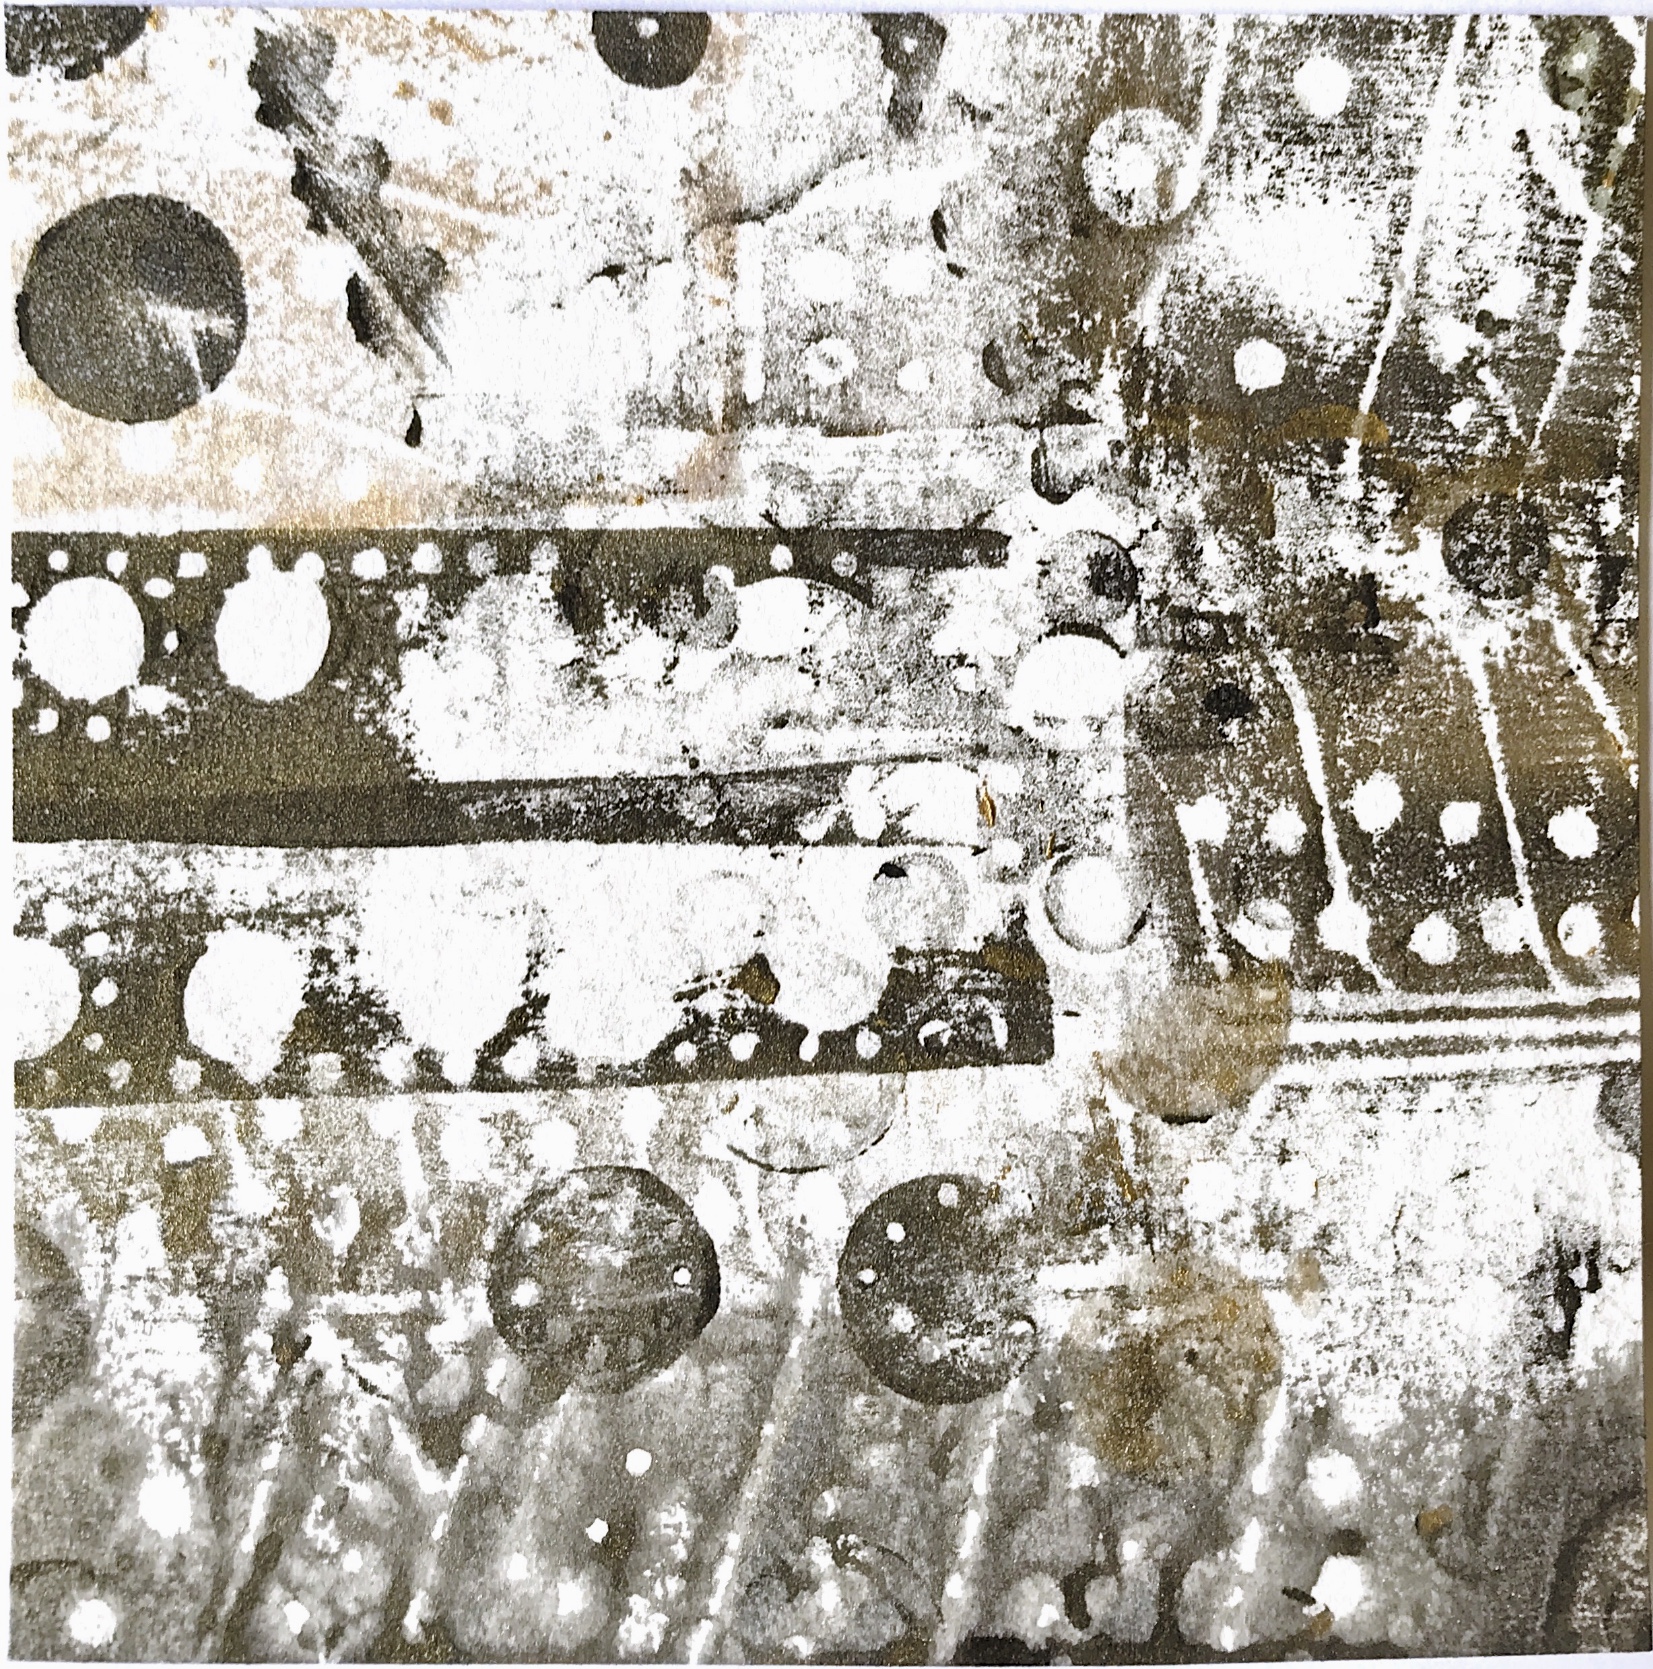
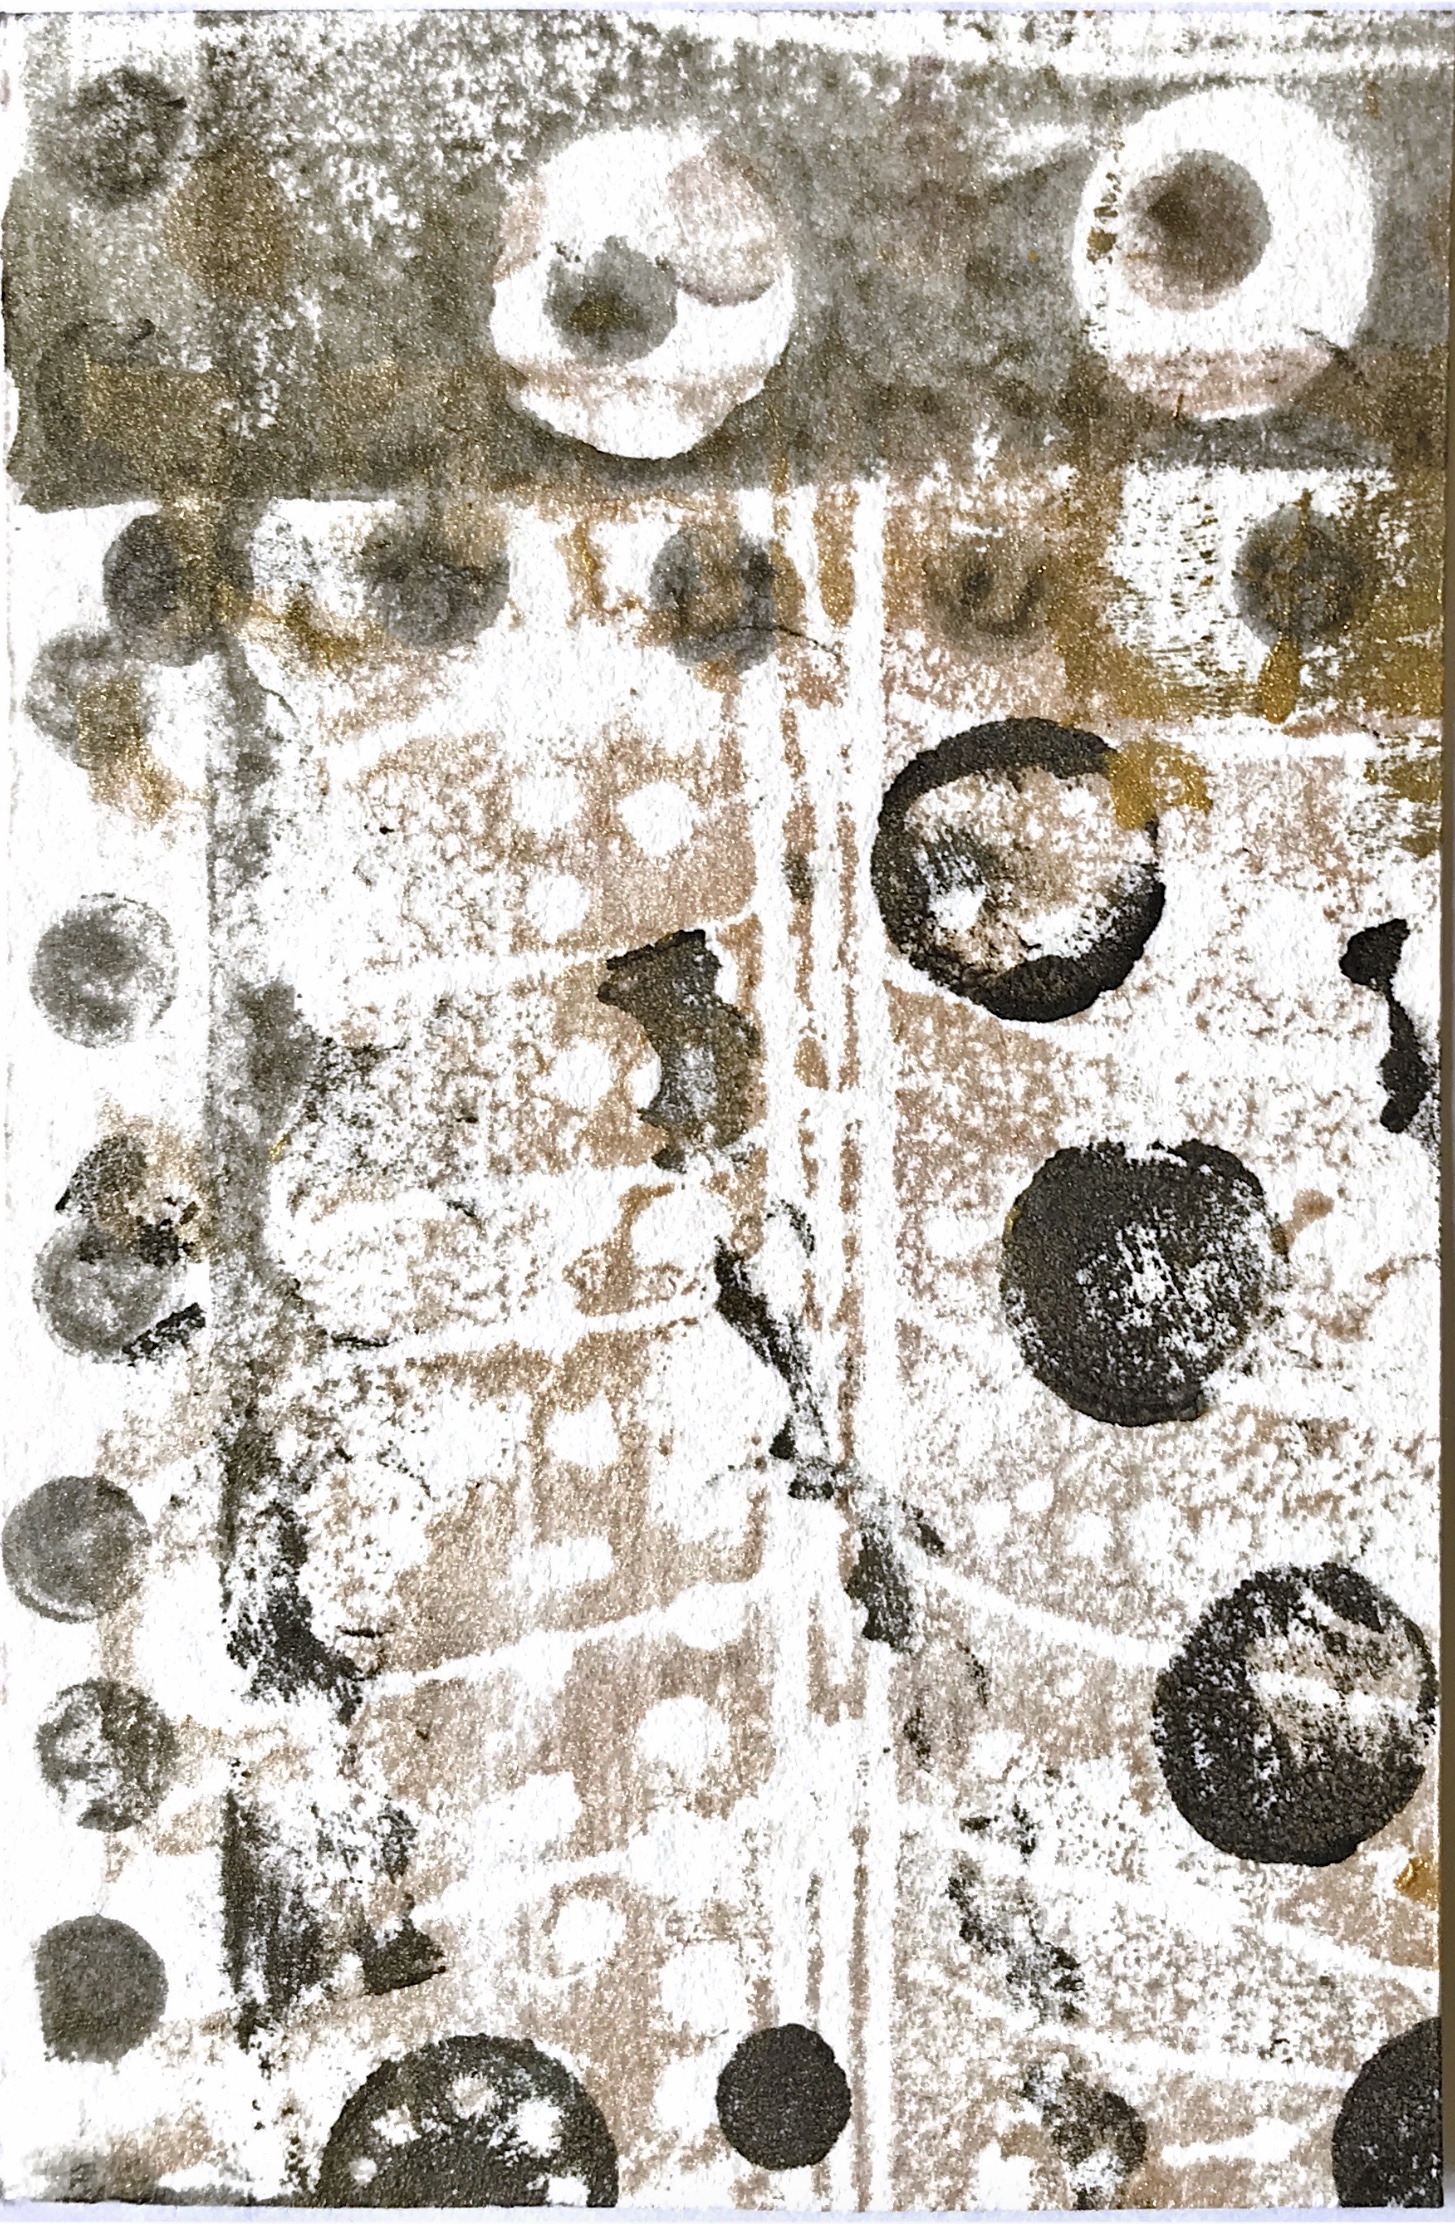
I was very excited by the range of shapes created when puncturing a leaf from one of my houseplants. Clear round holes were made with a hole punch while ragged tears were made by a needle – some of which look like barbed wire. The patterns looked great when manipulated on the computer, and created fabulous print blocks as seen below. With a few simple print blocks the overlaid patterns are exciting and appealing even when printed with a couple of drab colours.
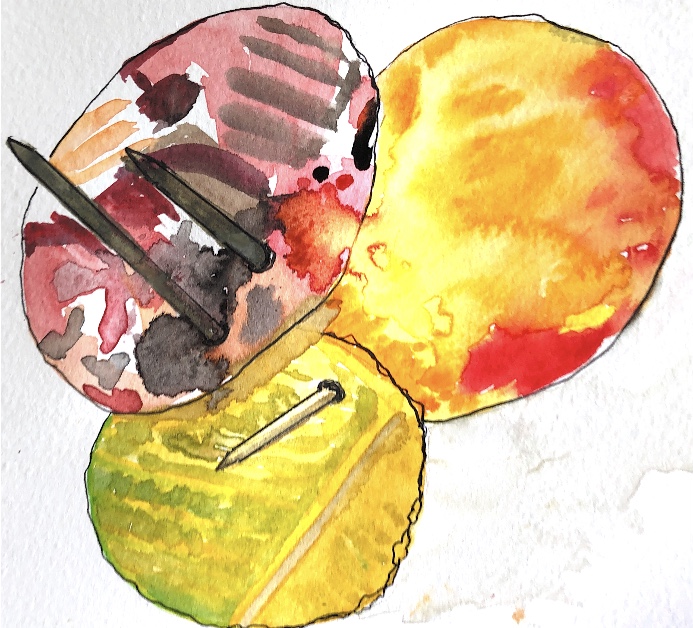
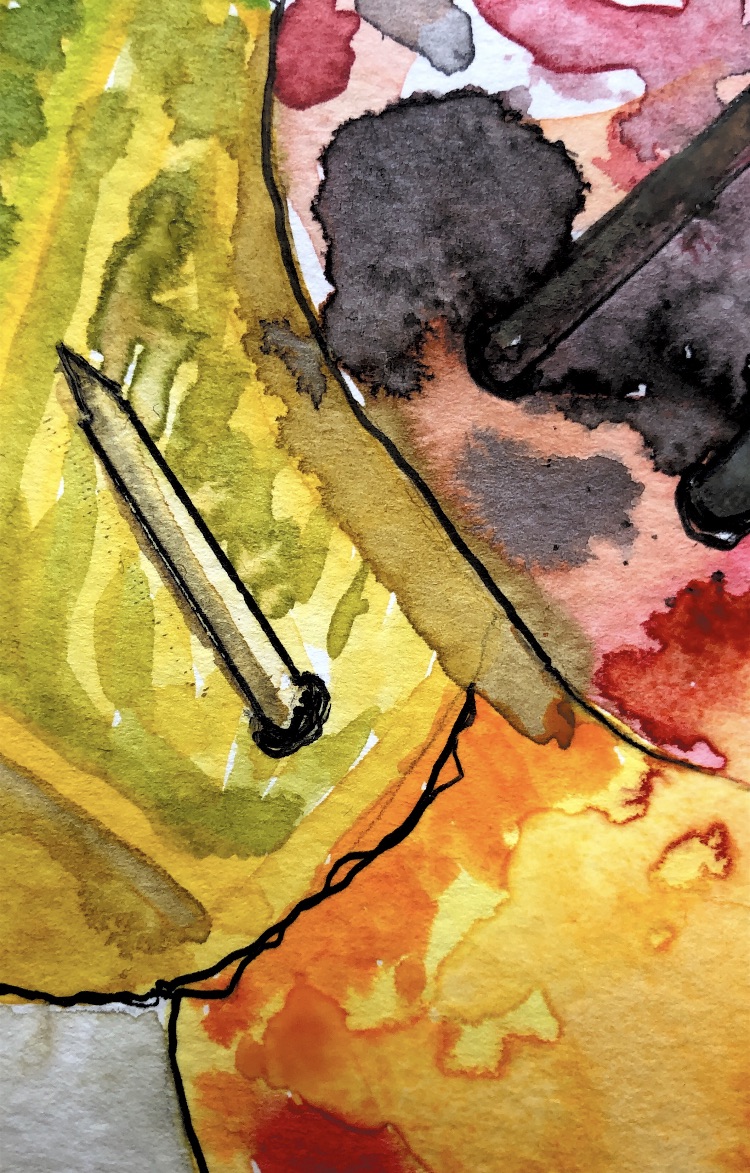
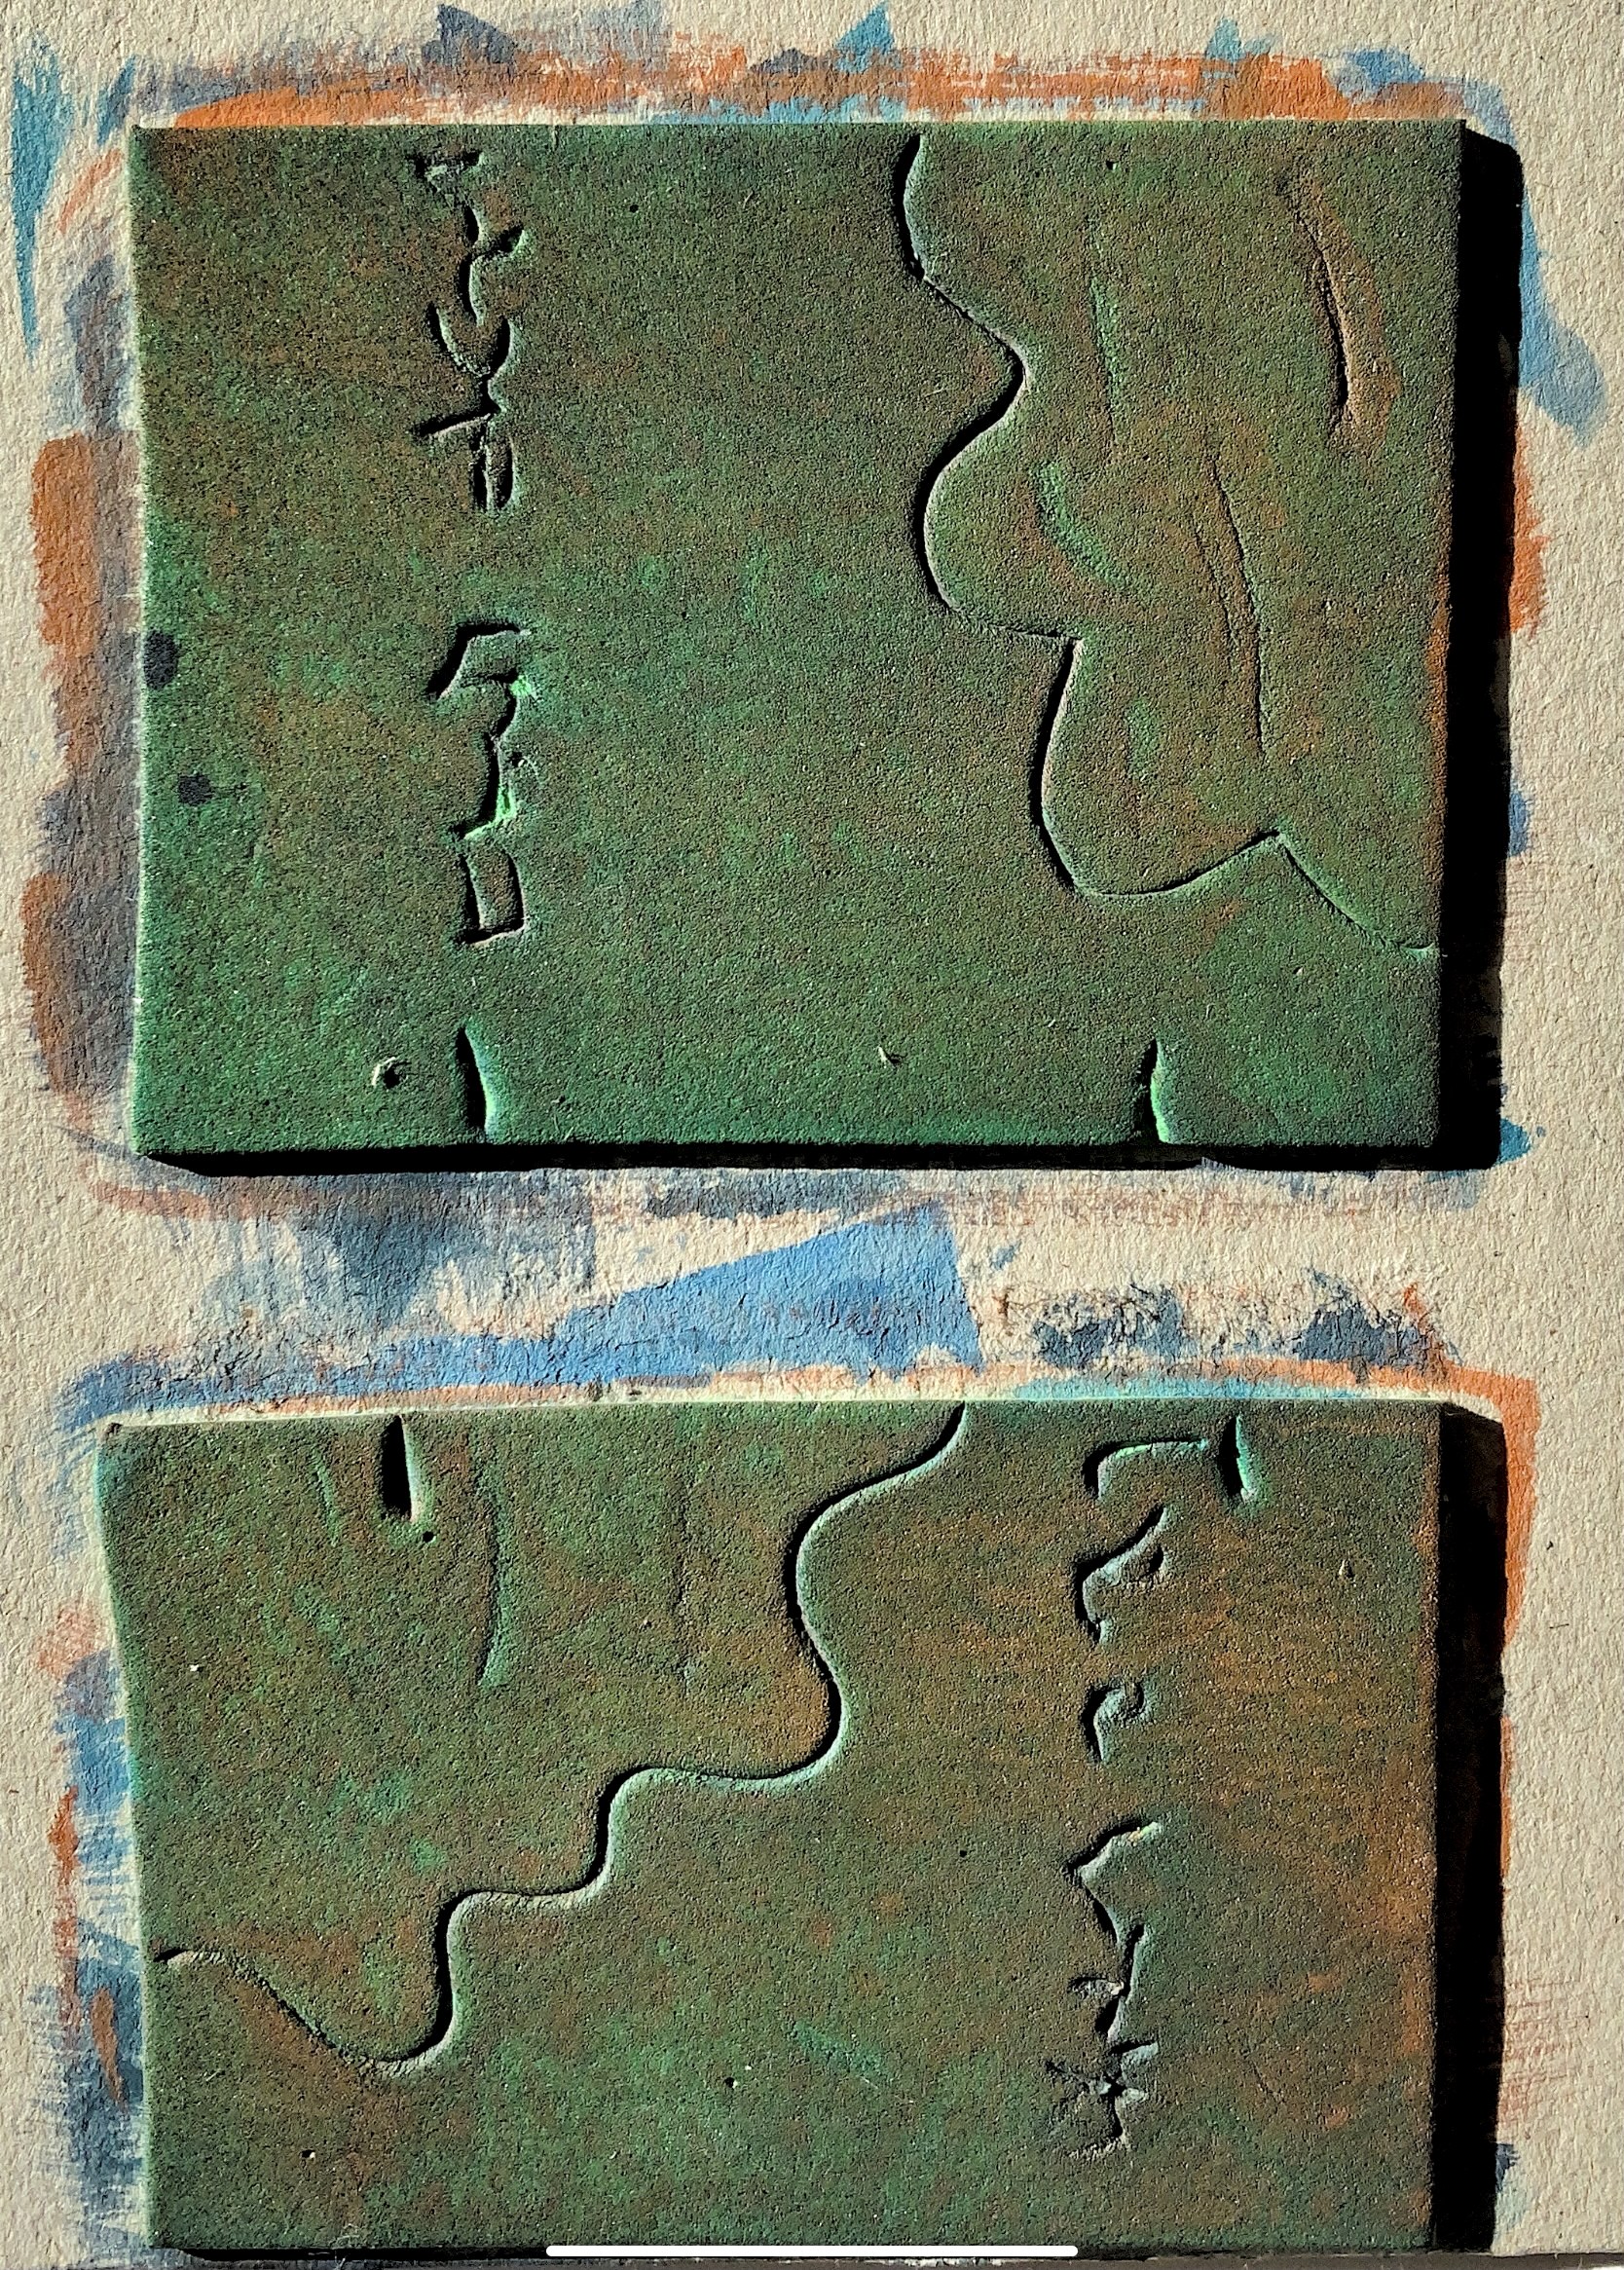
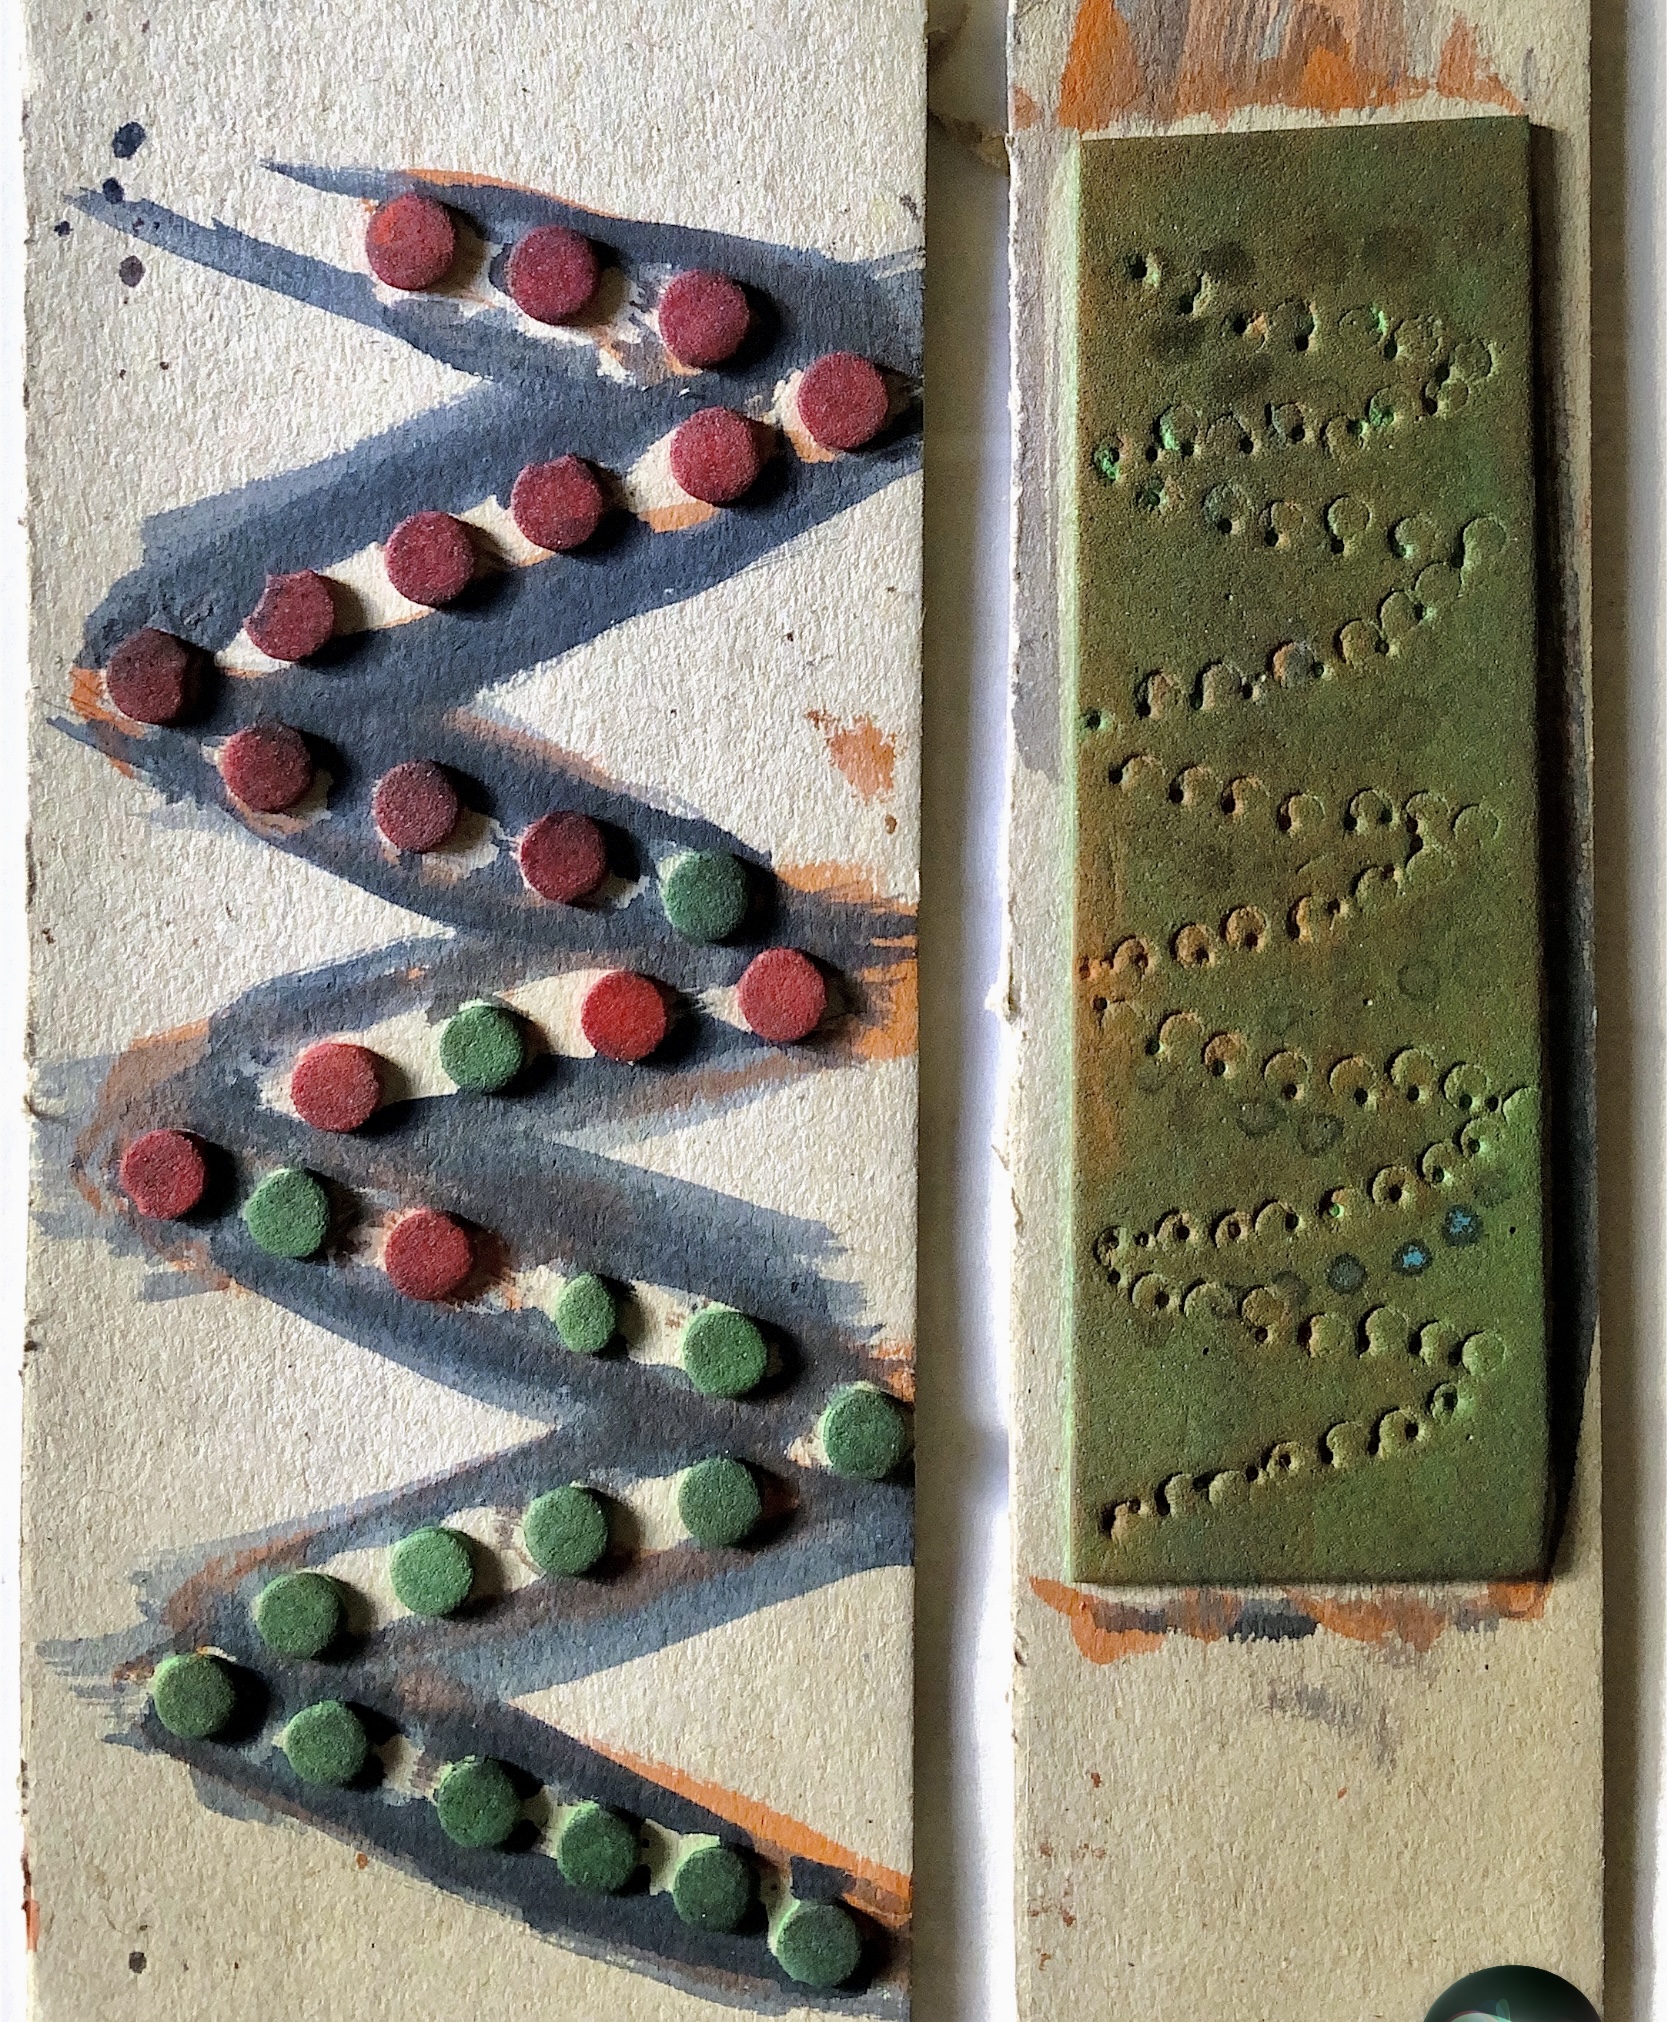
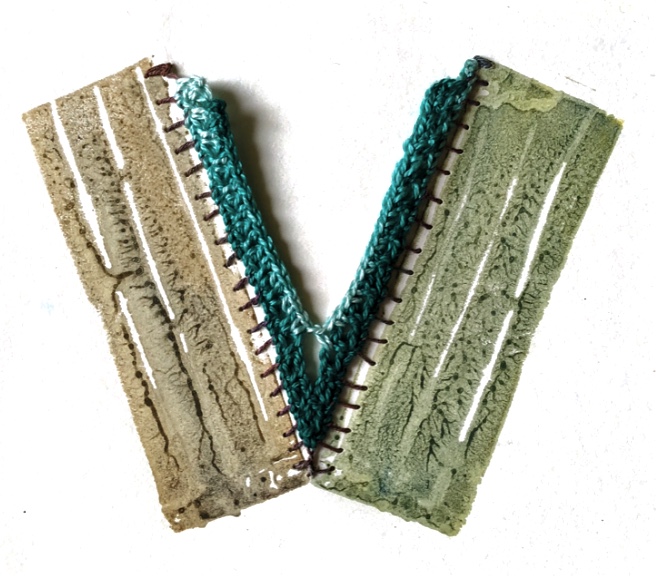
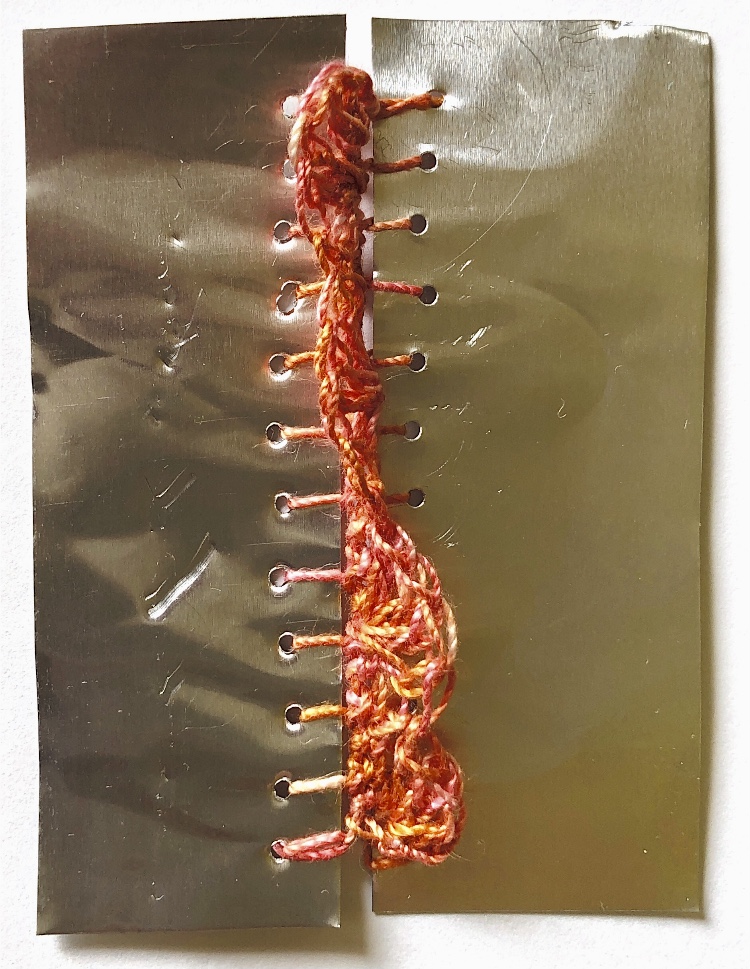
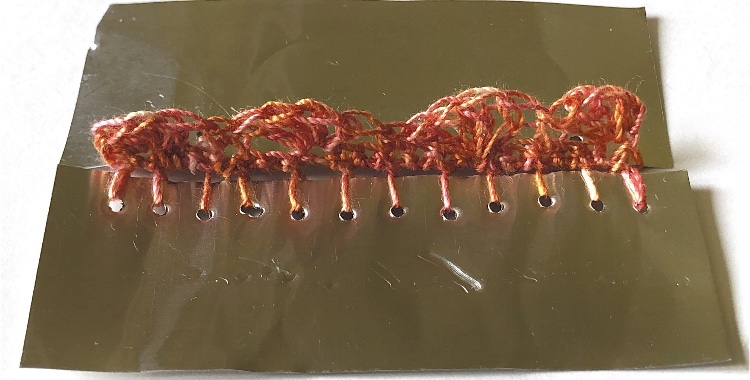
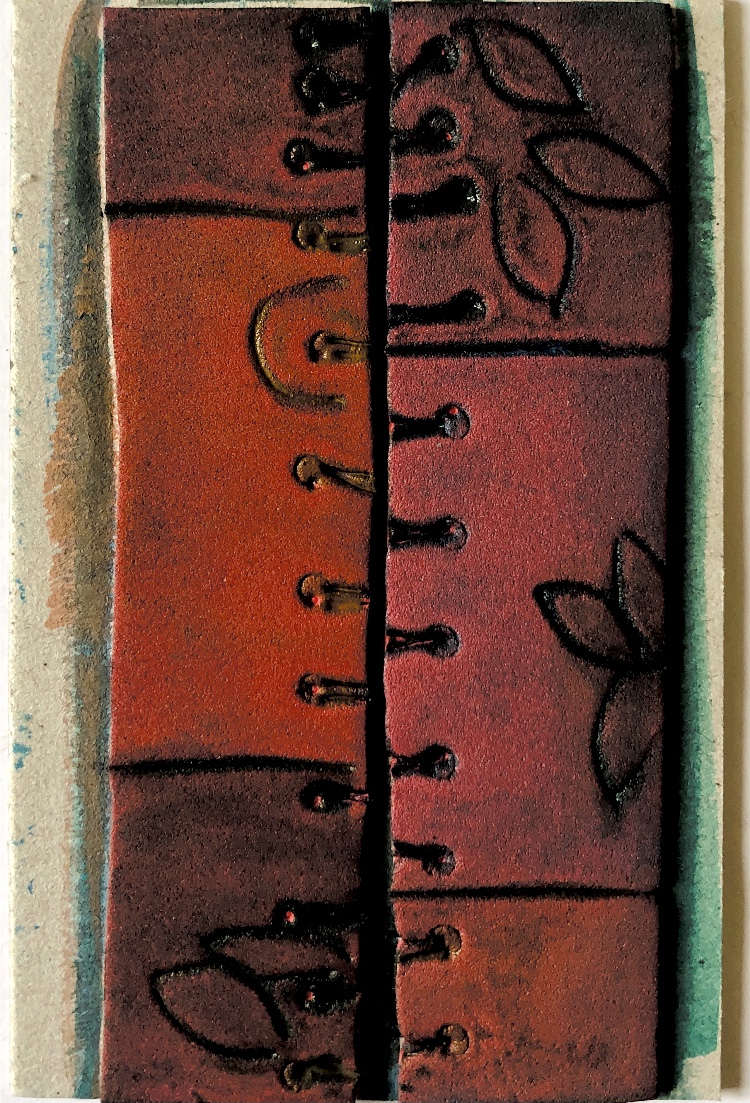
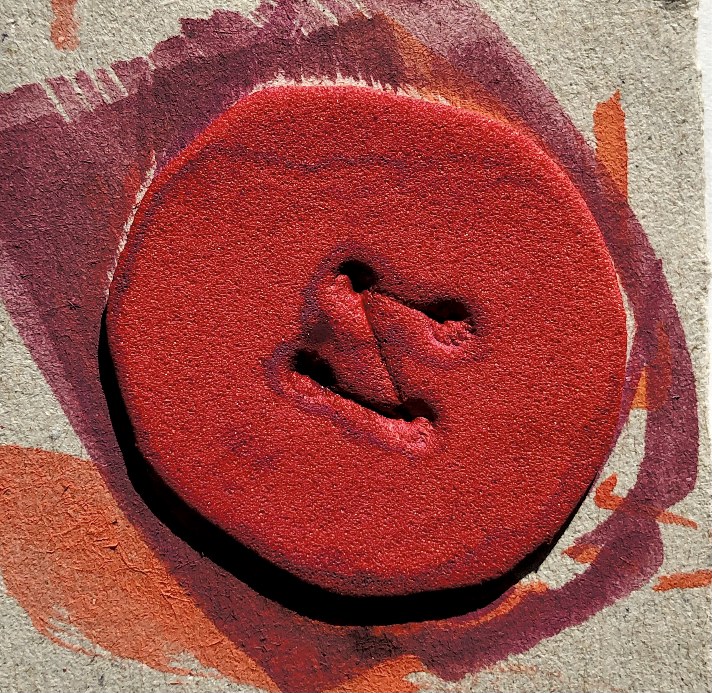
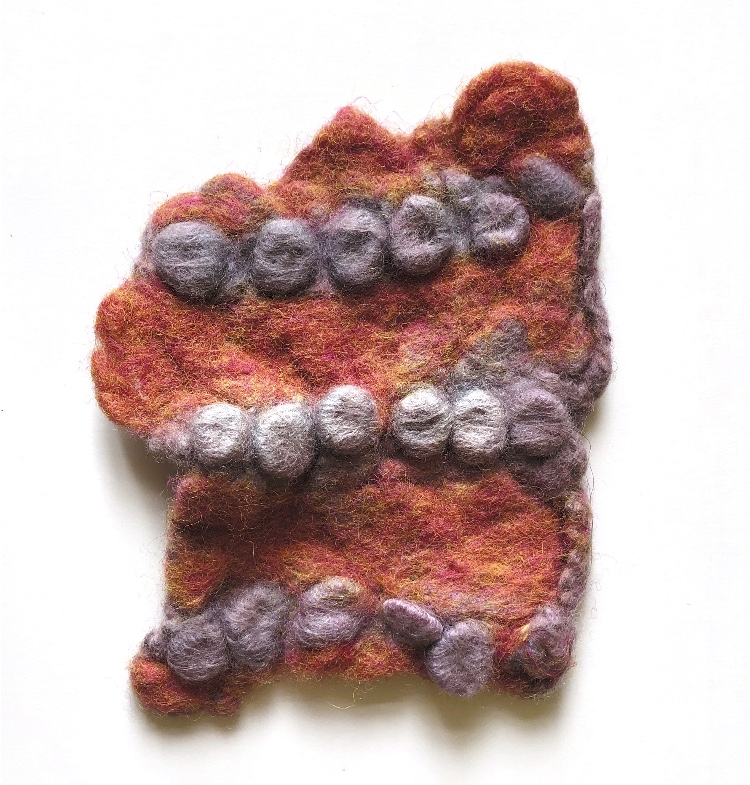
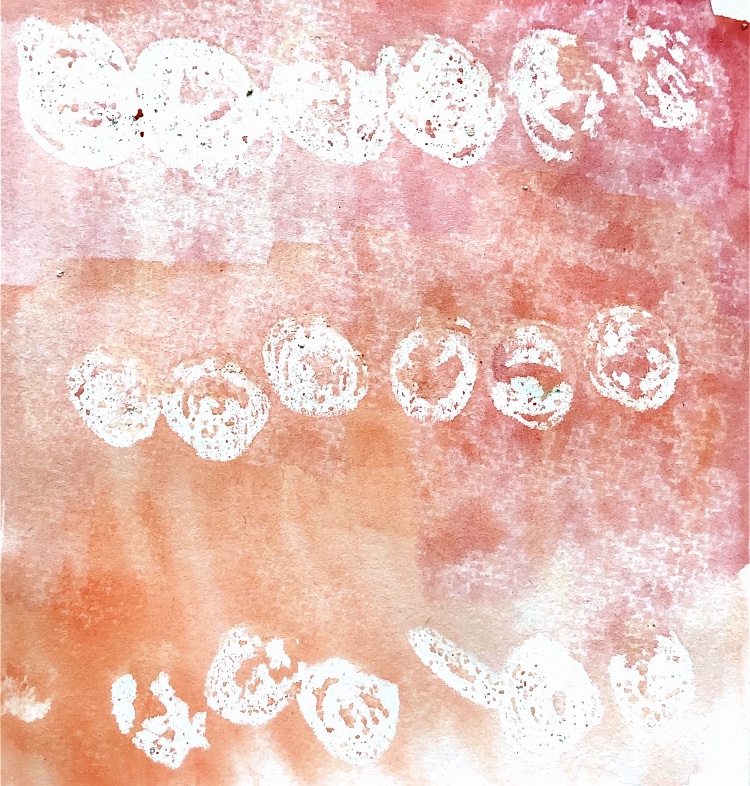
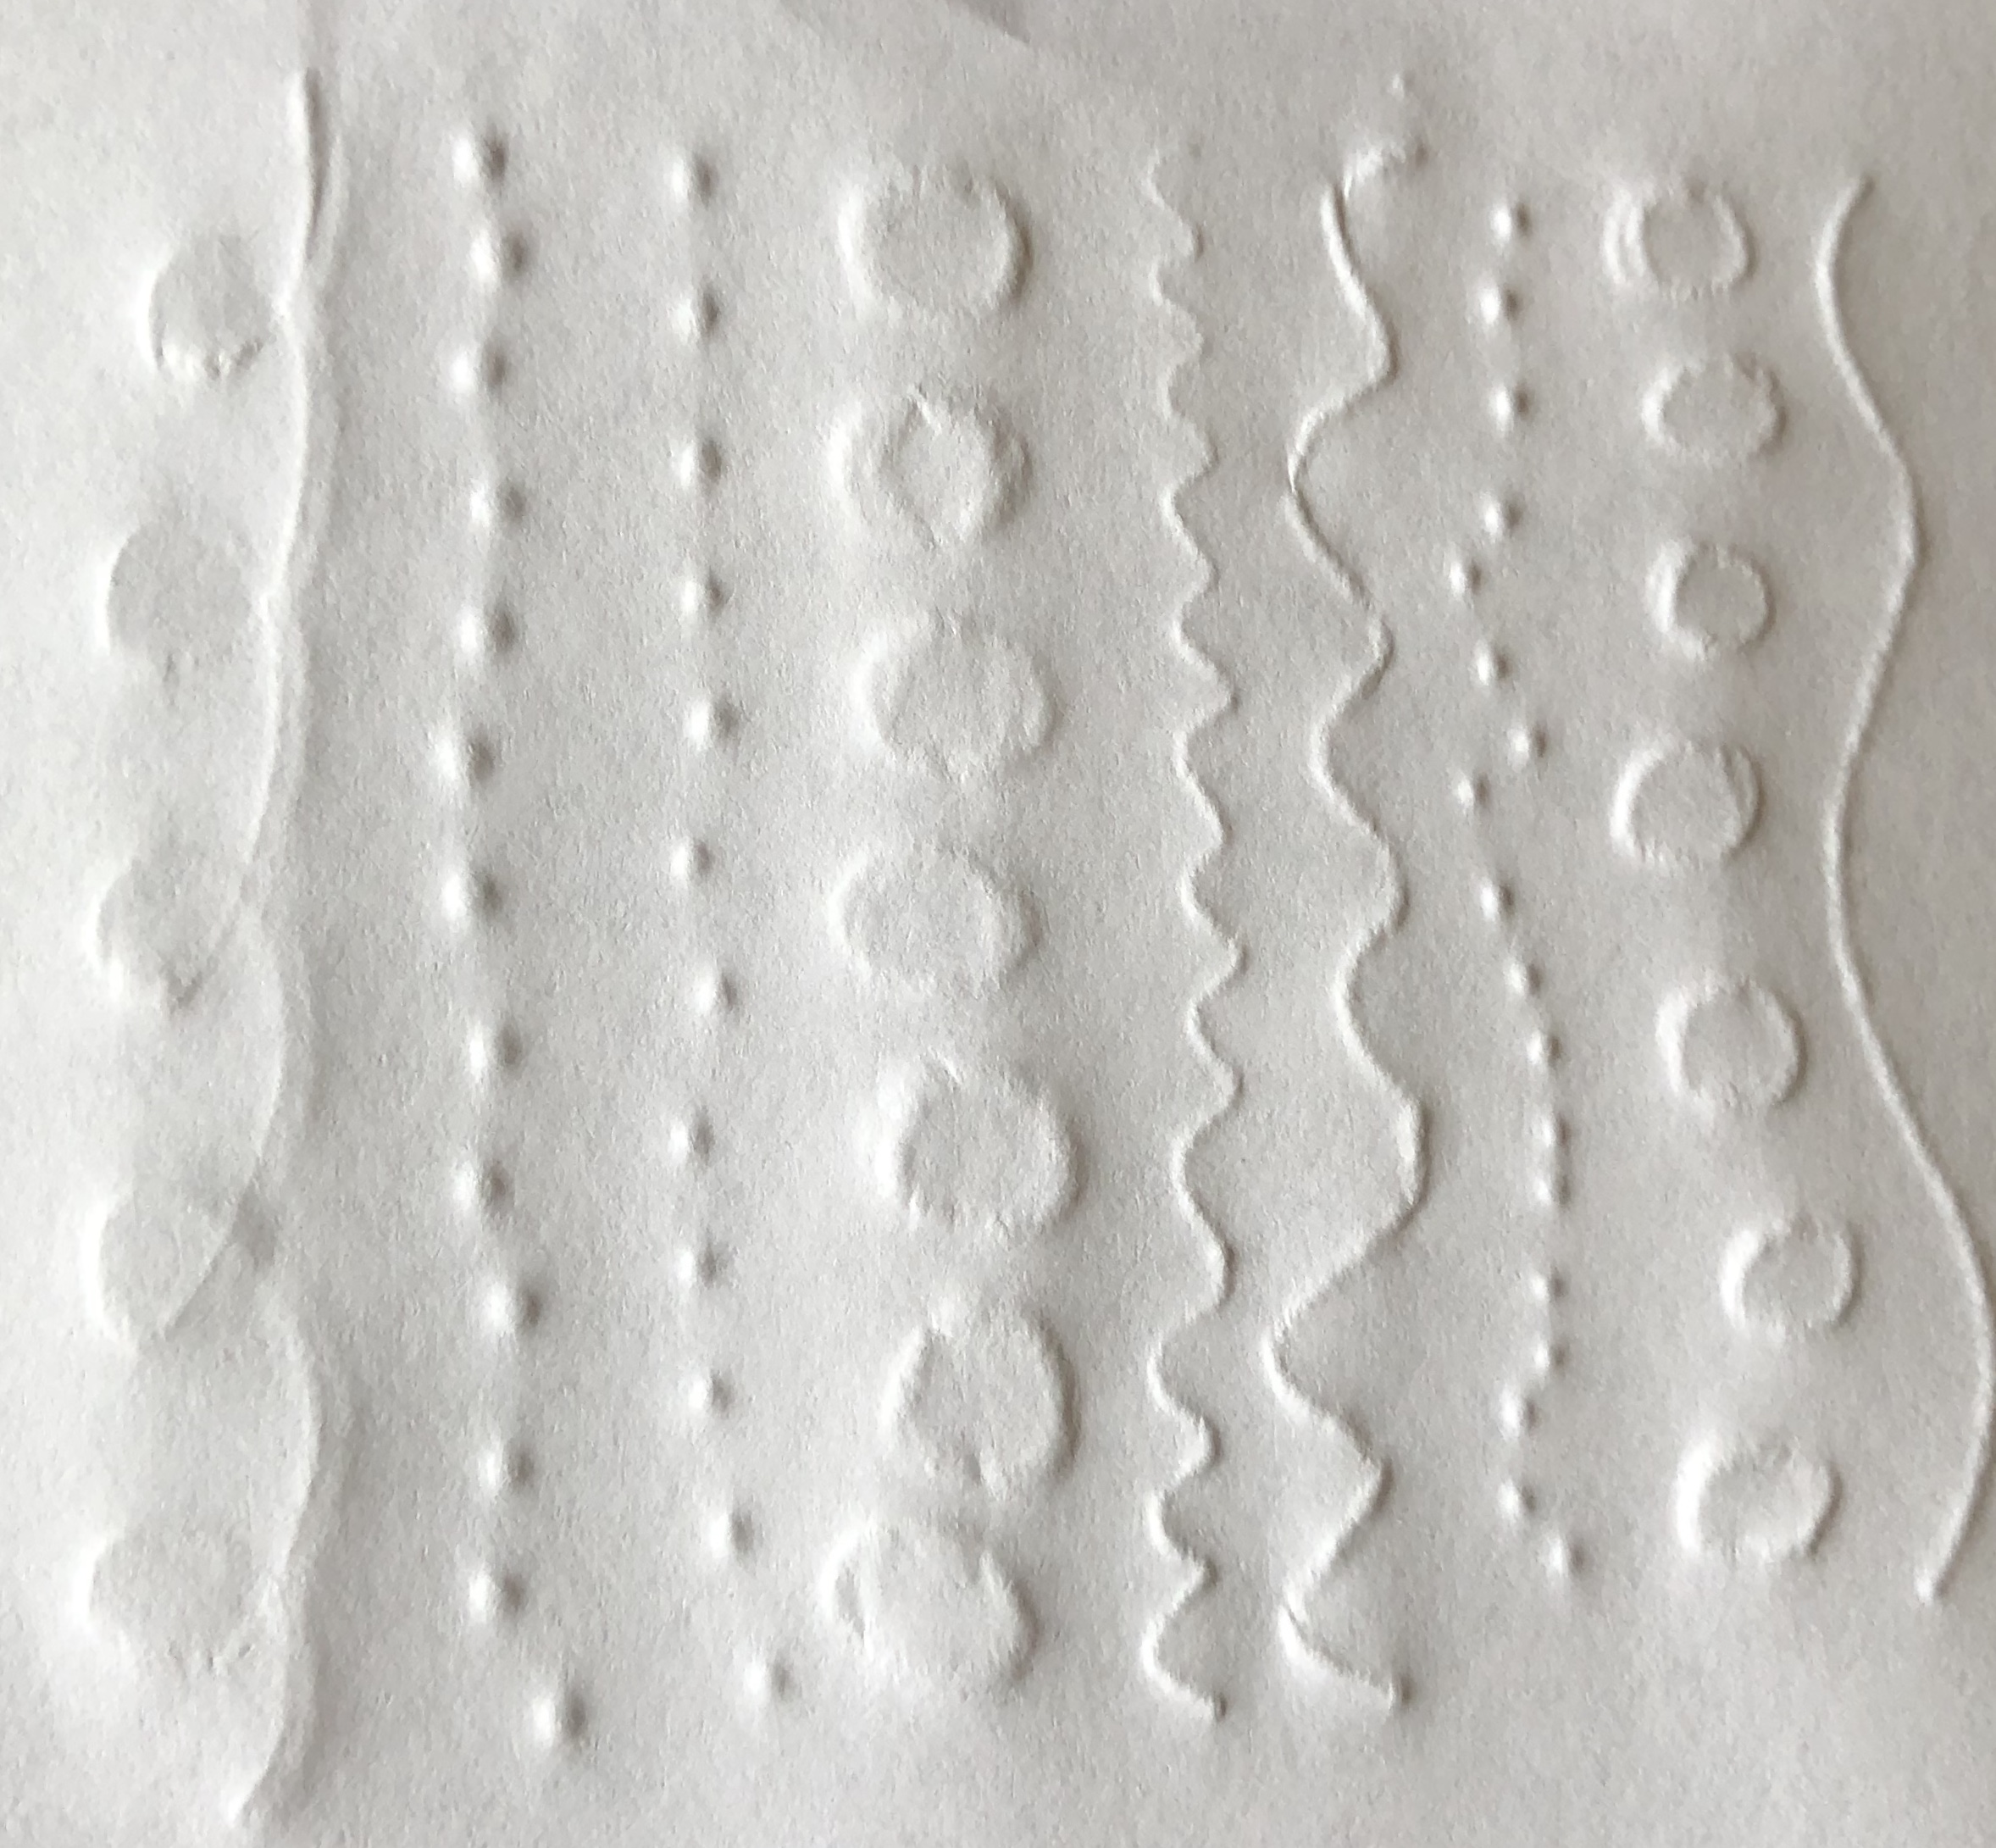
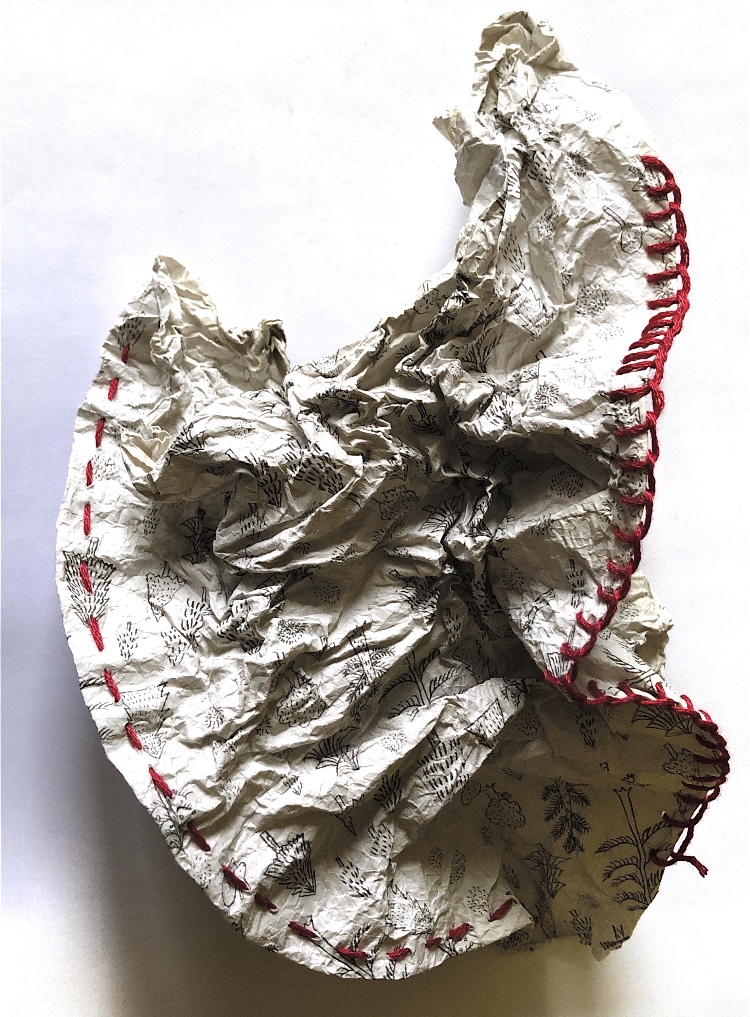
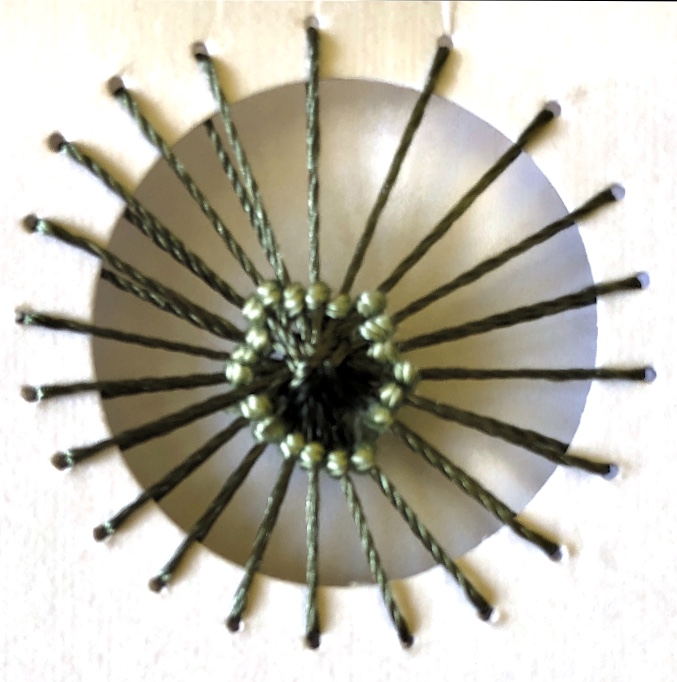
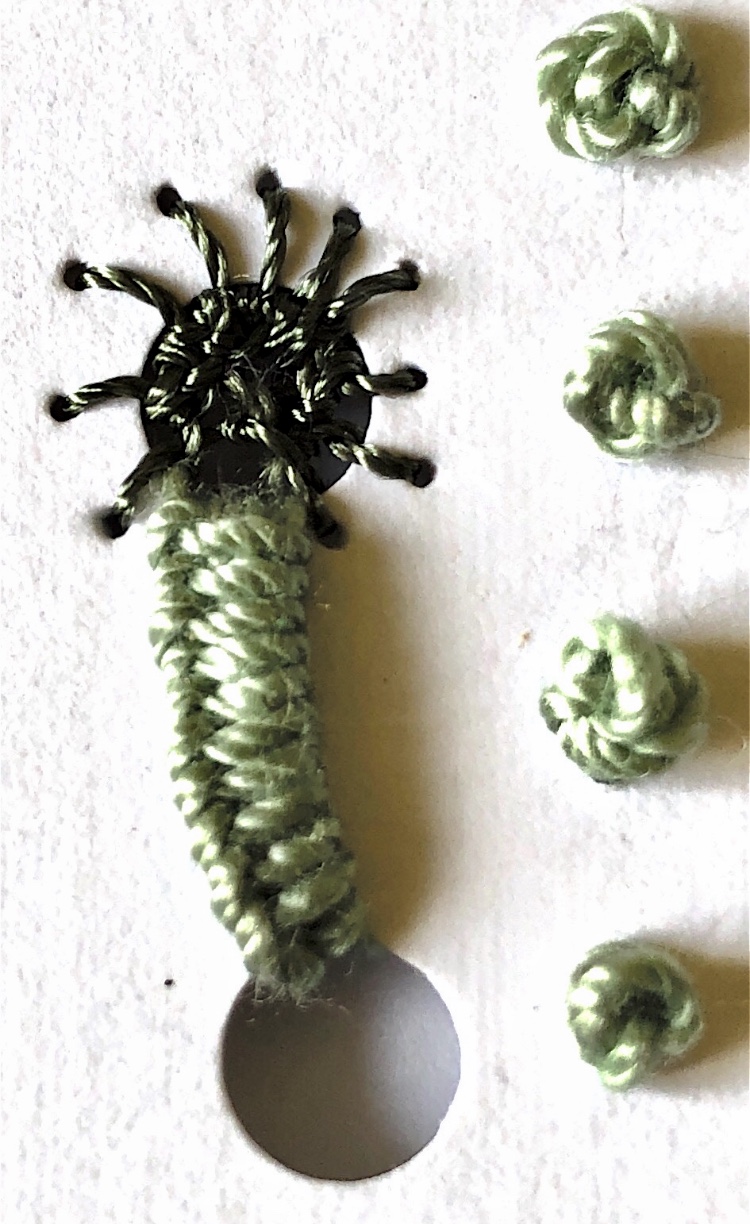
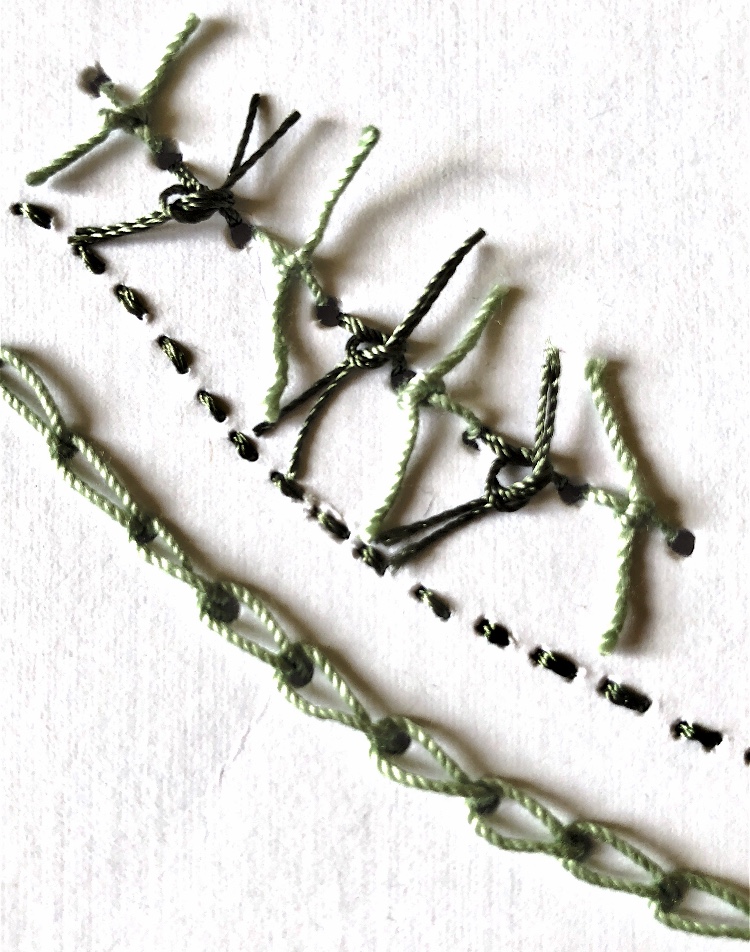
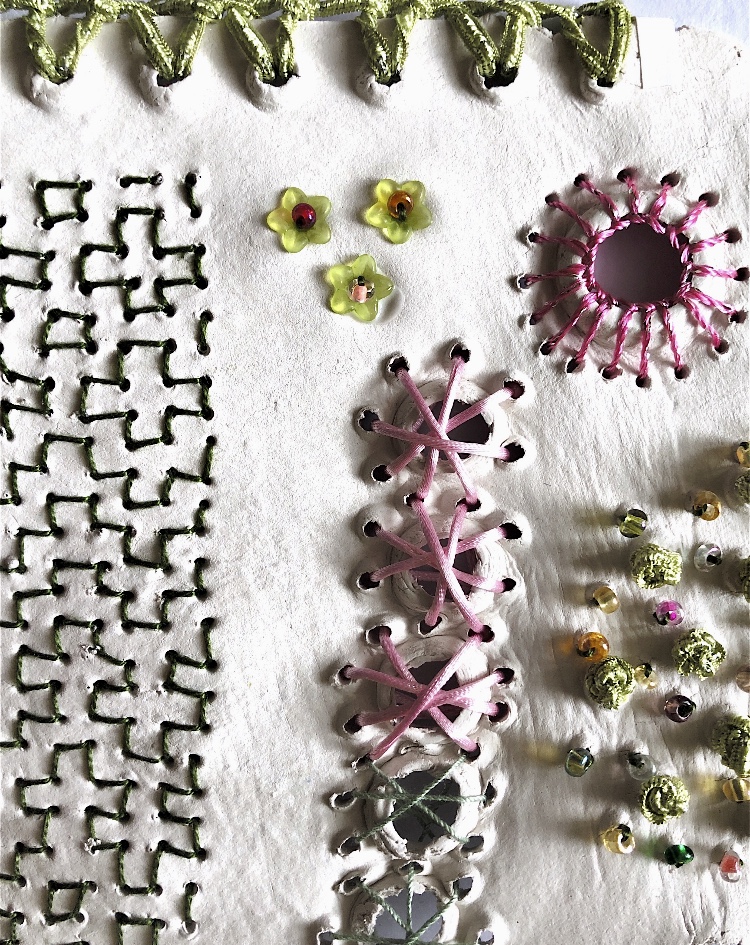
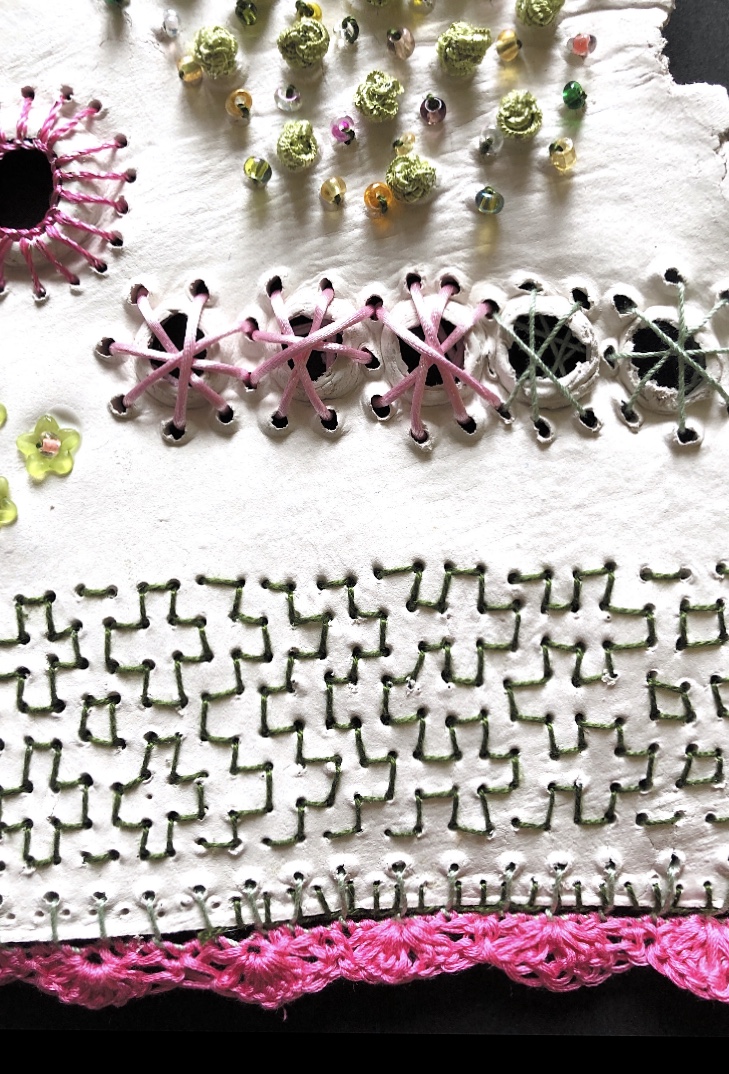
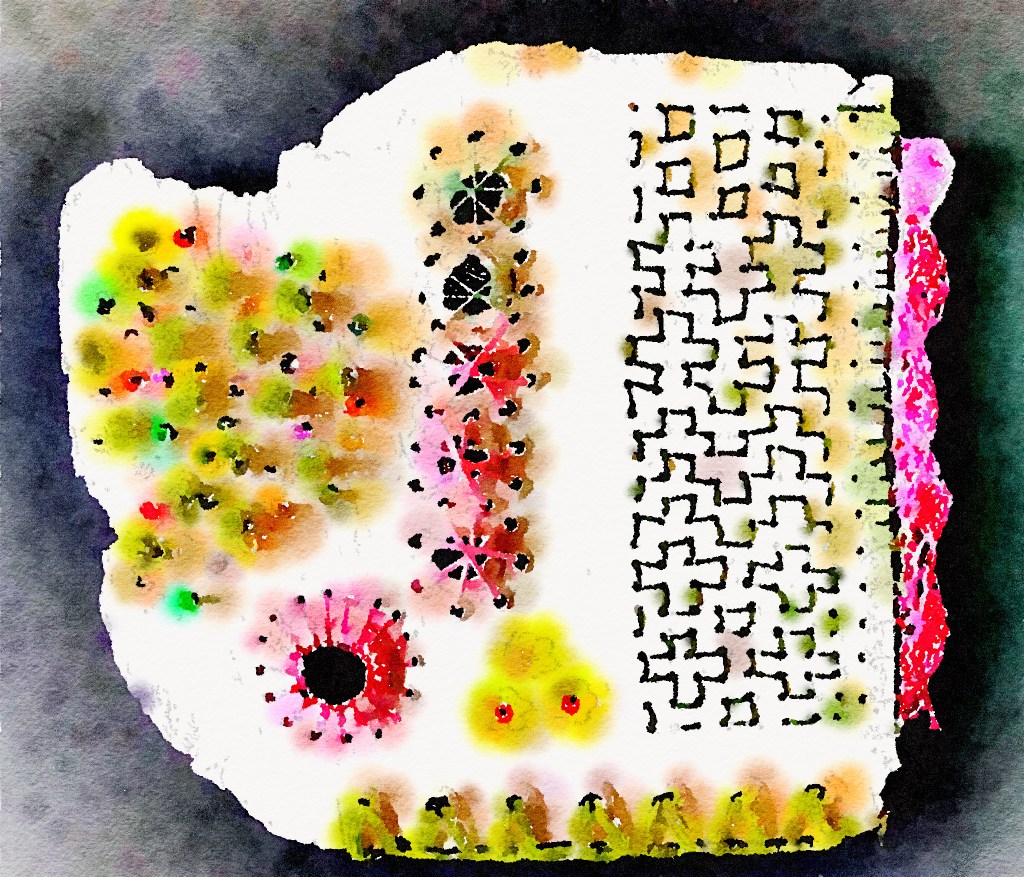
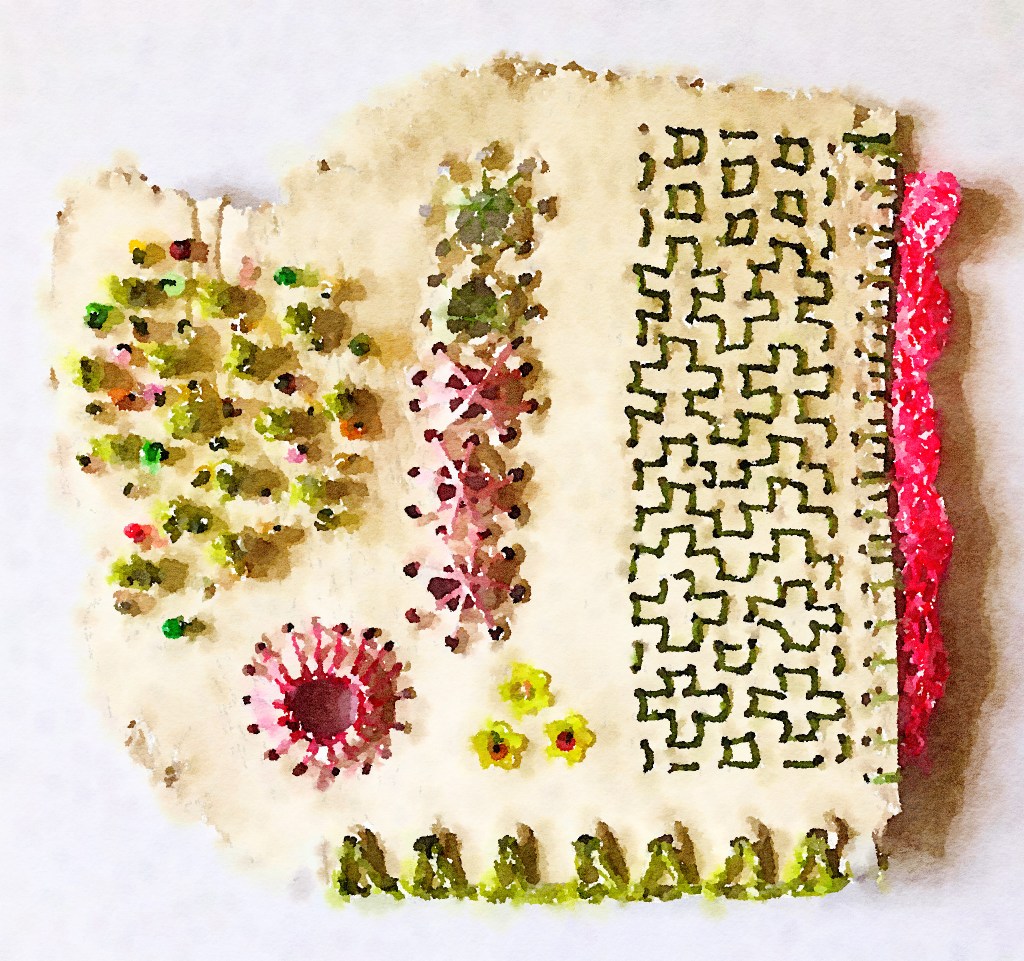
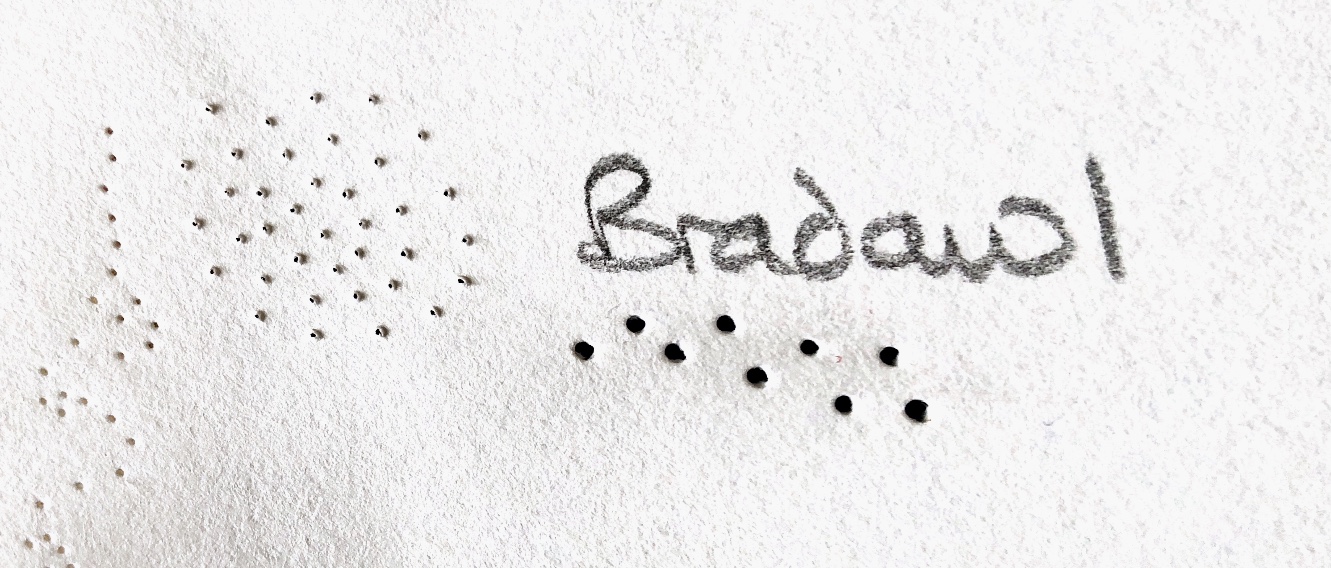
Exercise 2 Stitching I chose to make my first sample from a different material and chose air drying clay. I punctured lots of holes before it dried with needles, a bradawl and the wrong end of a pencil, with patterns for stitch in mind. The puncturing process created an undulating surface which I then used to hold beads and to emphasise some stitches. Kantha stitching, blanket stitch and running stitch worked well together with a crochet edging. The dried clay was still fairly fragile but it was interesting to stitch on and the smooth surface shows off the stitches really well. The surface could be further distorted by pressing materials into the clay before it is dry to create a pattern.
Stitching into plastic was a complete contrast as I needed to consider the reverse side which shows through the transparent plastic sheet. A left handed painting captured the exuberance of this piece but I am not sure the print block has the same impact.
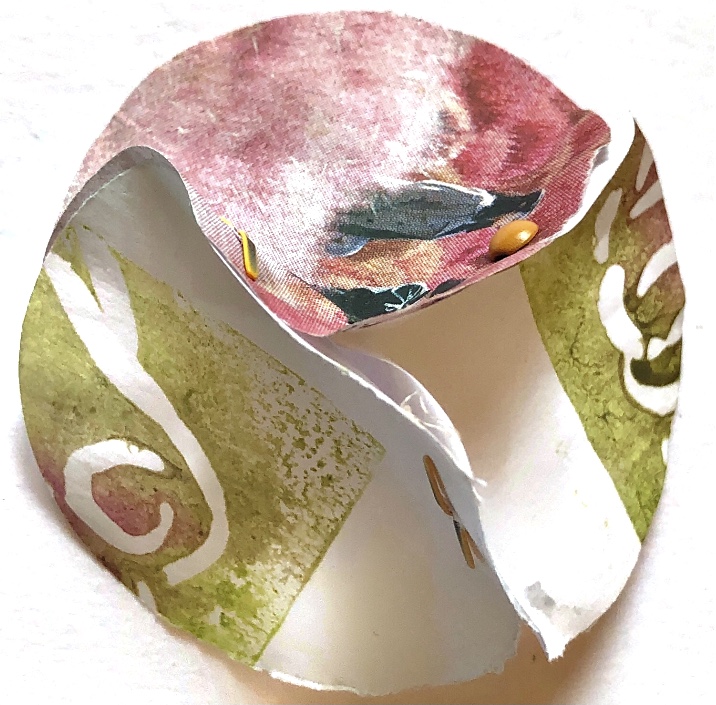
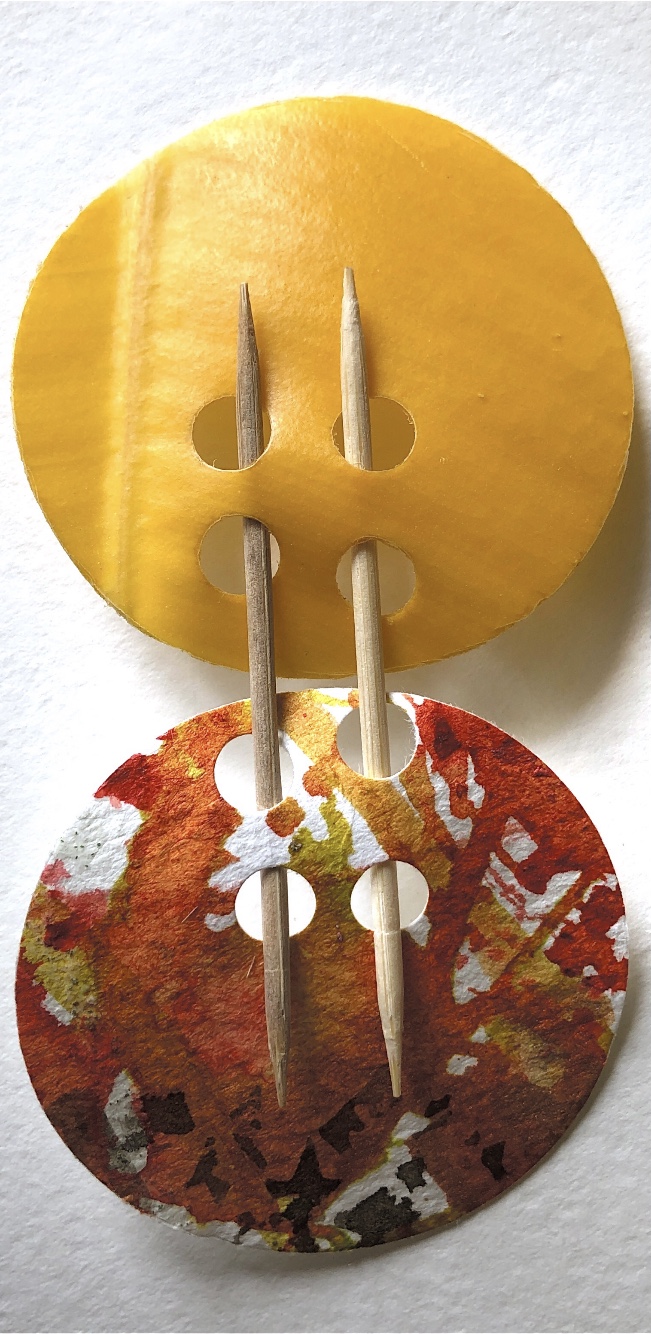
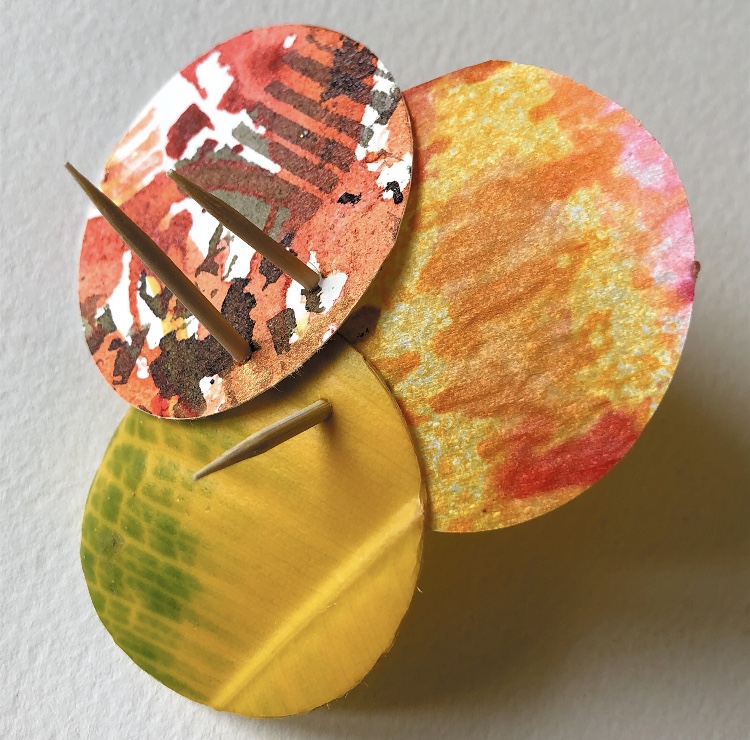
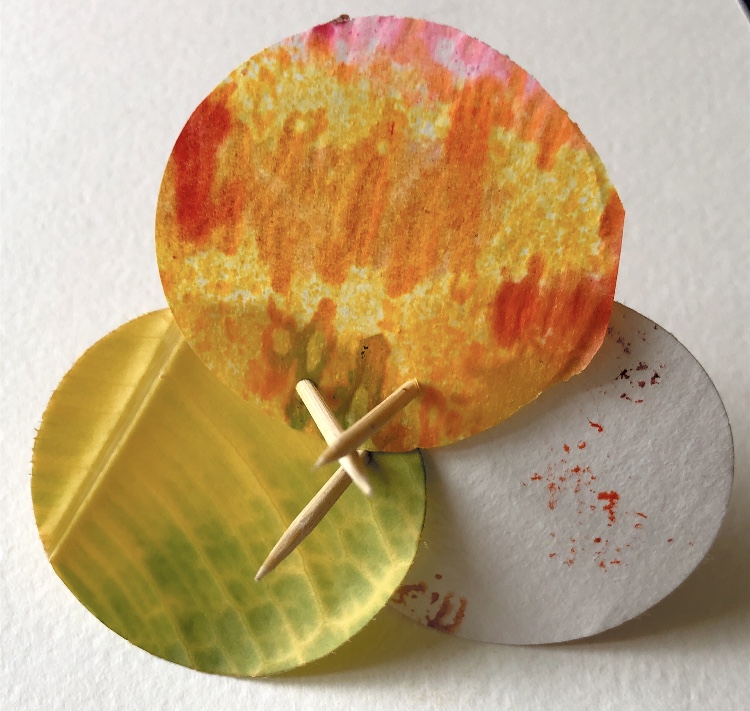
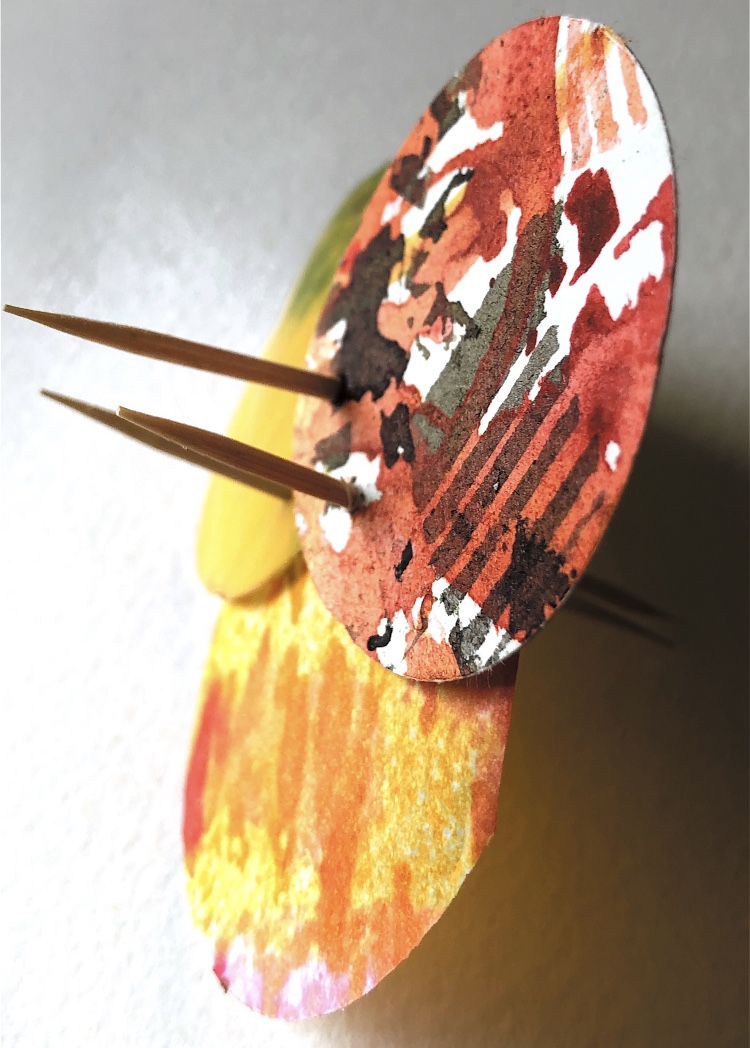
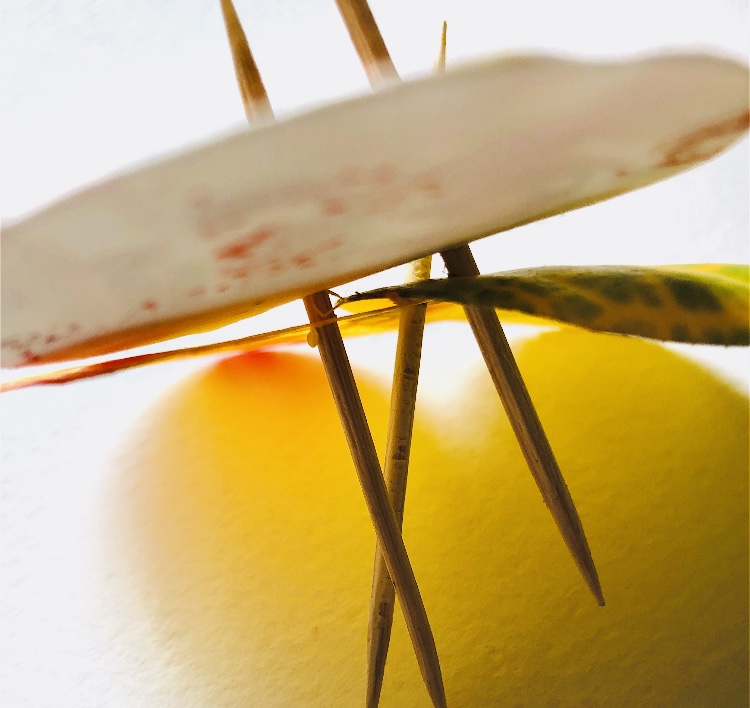
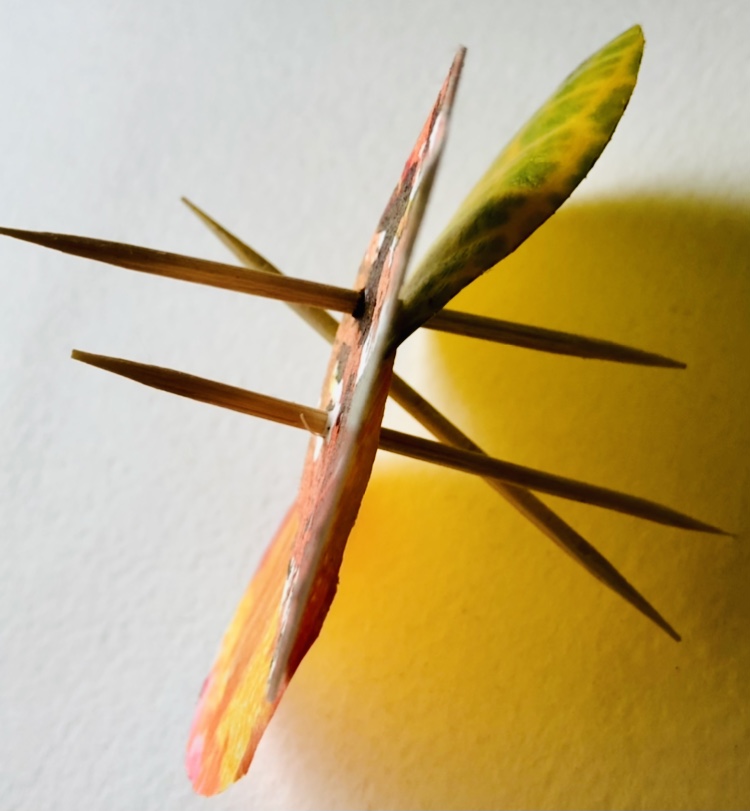
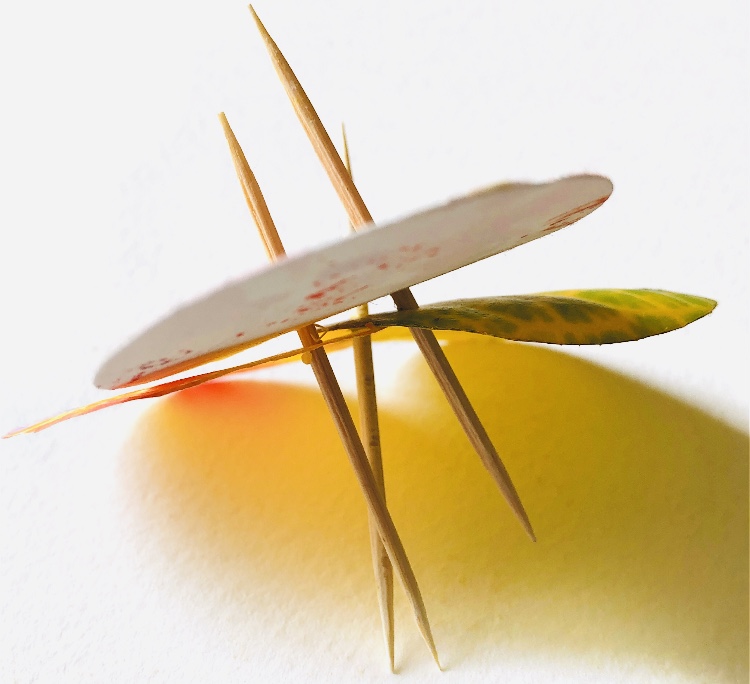
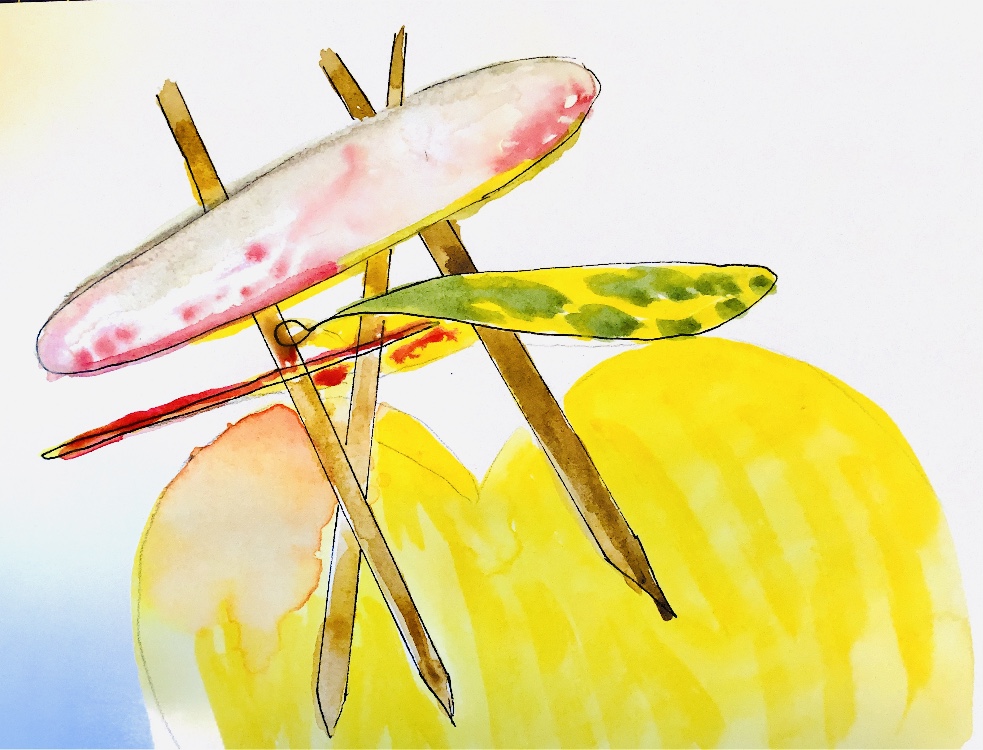
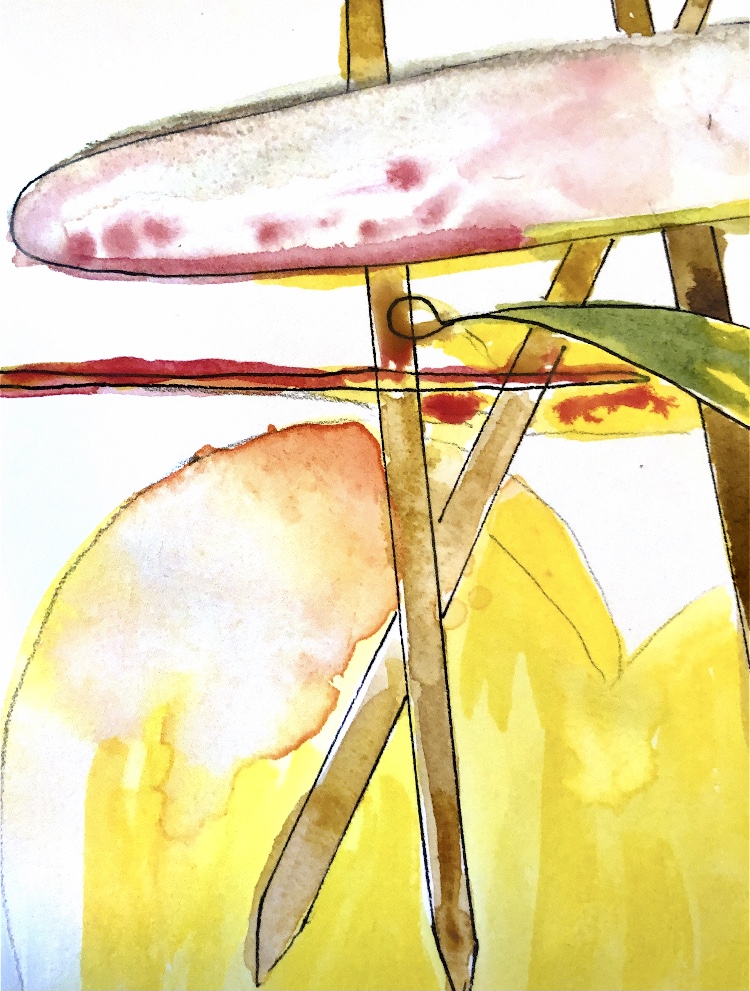
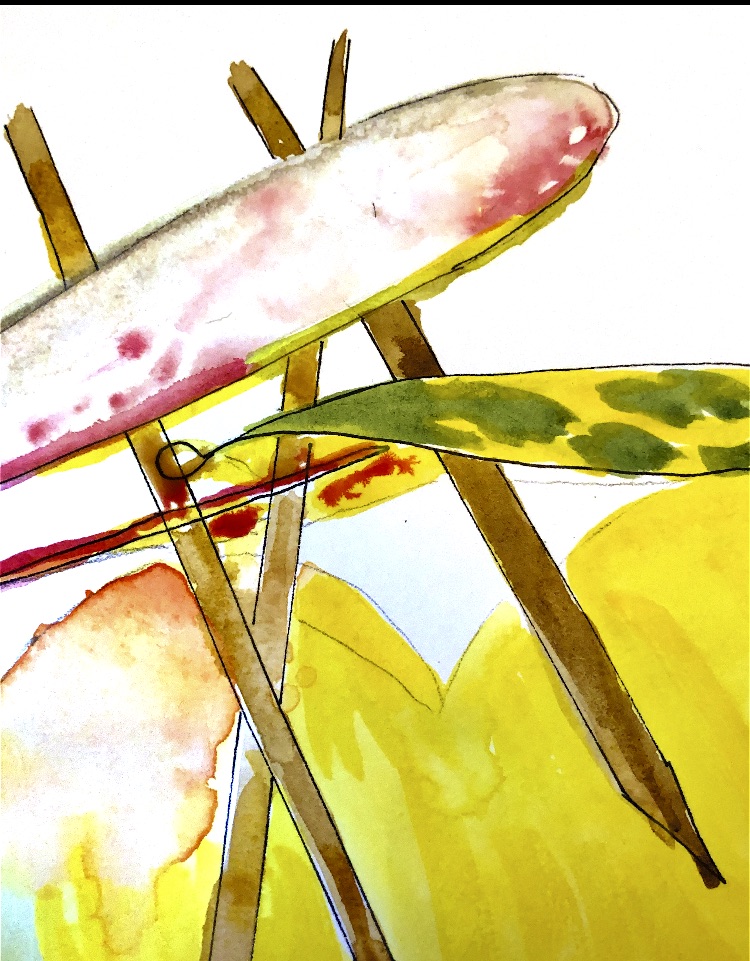
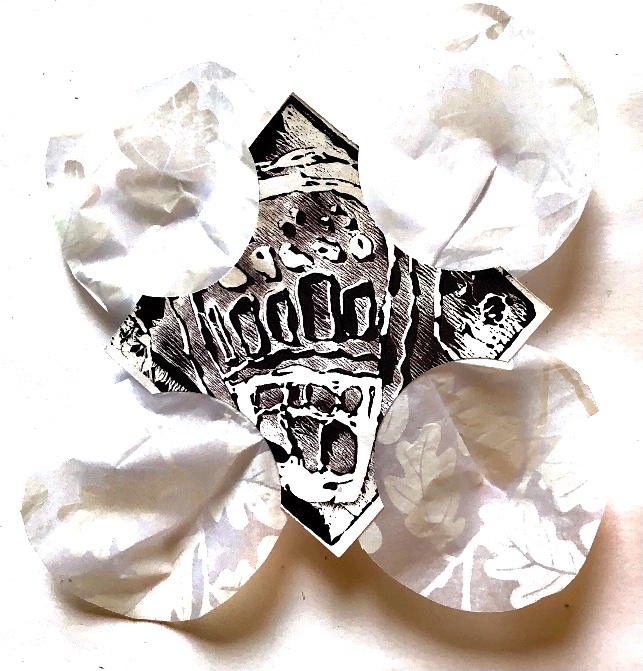
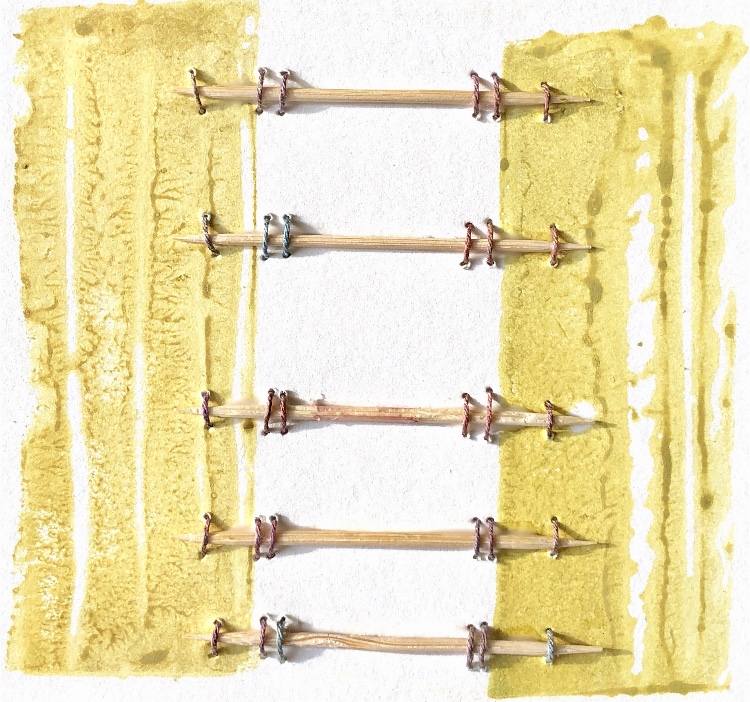
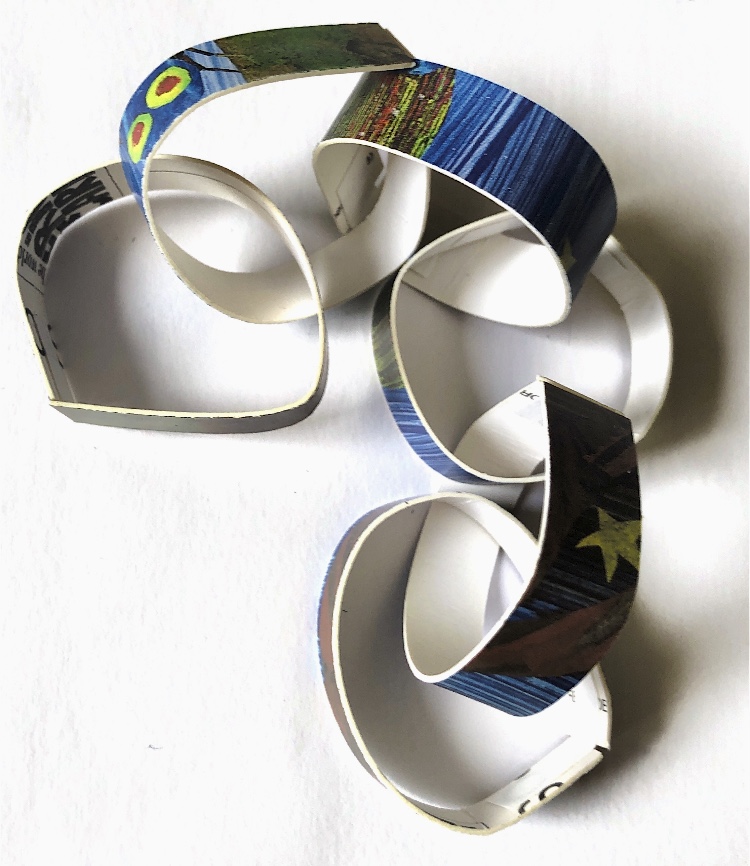
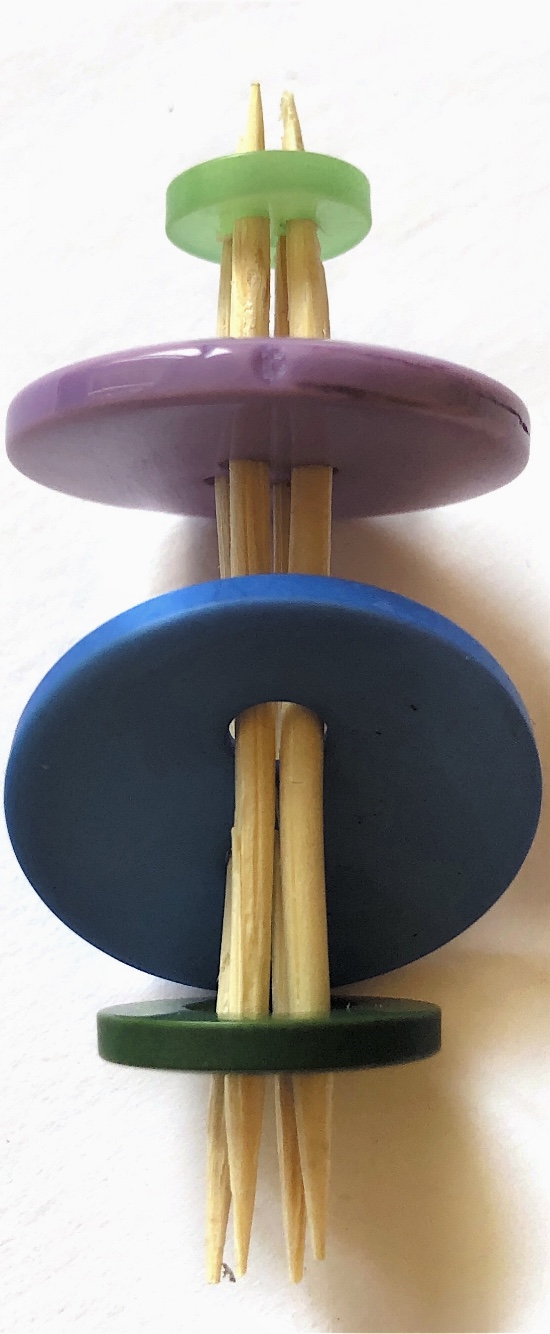
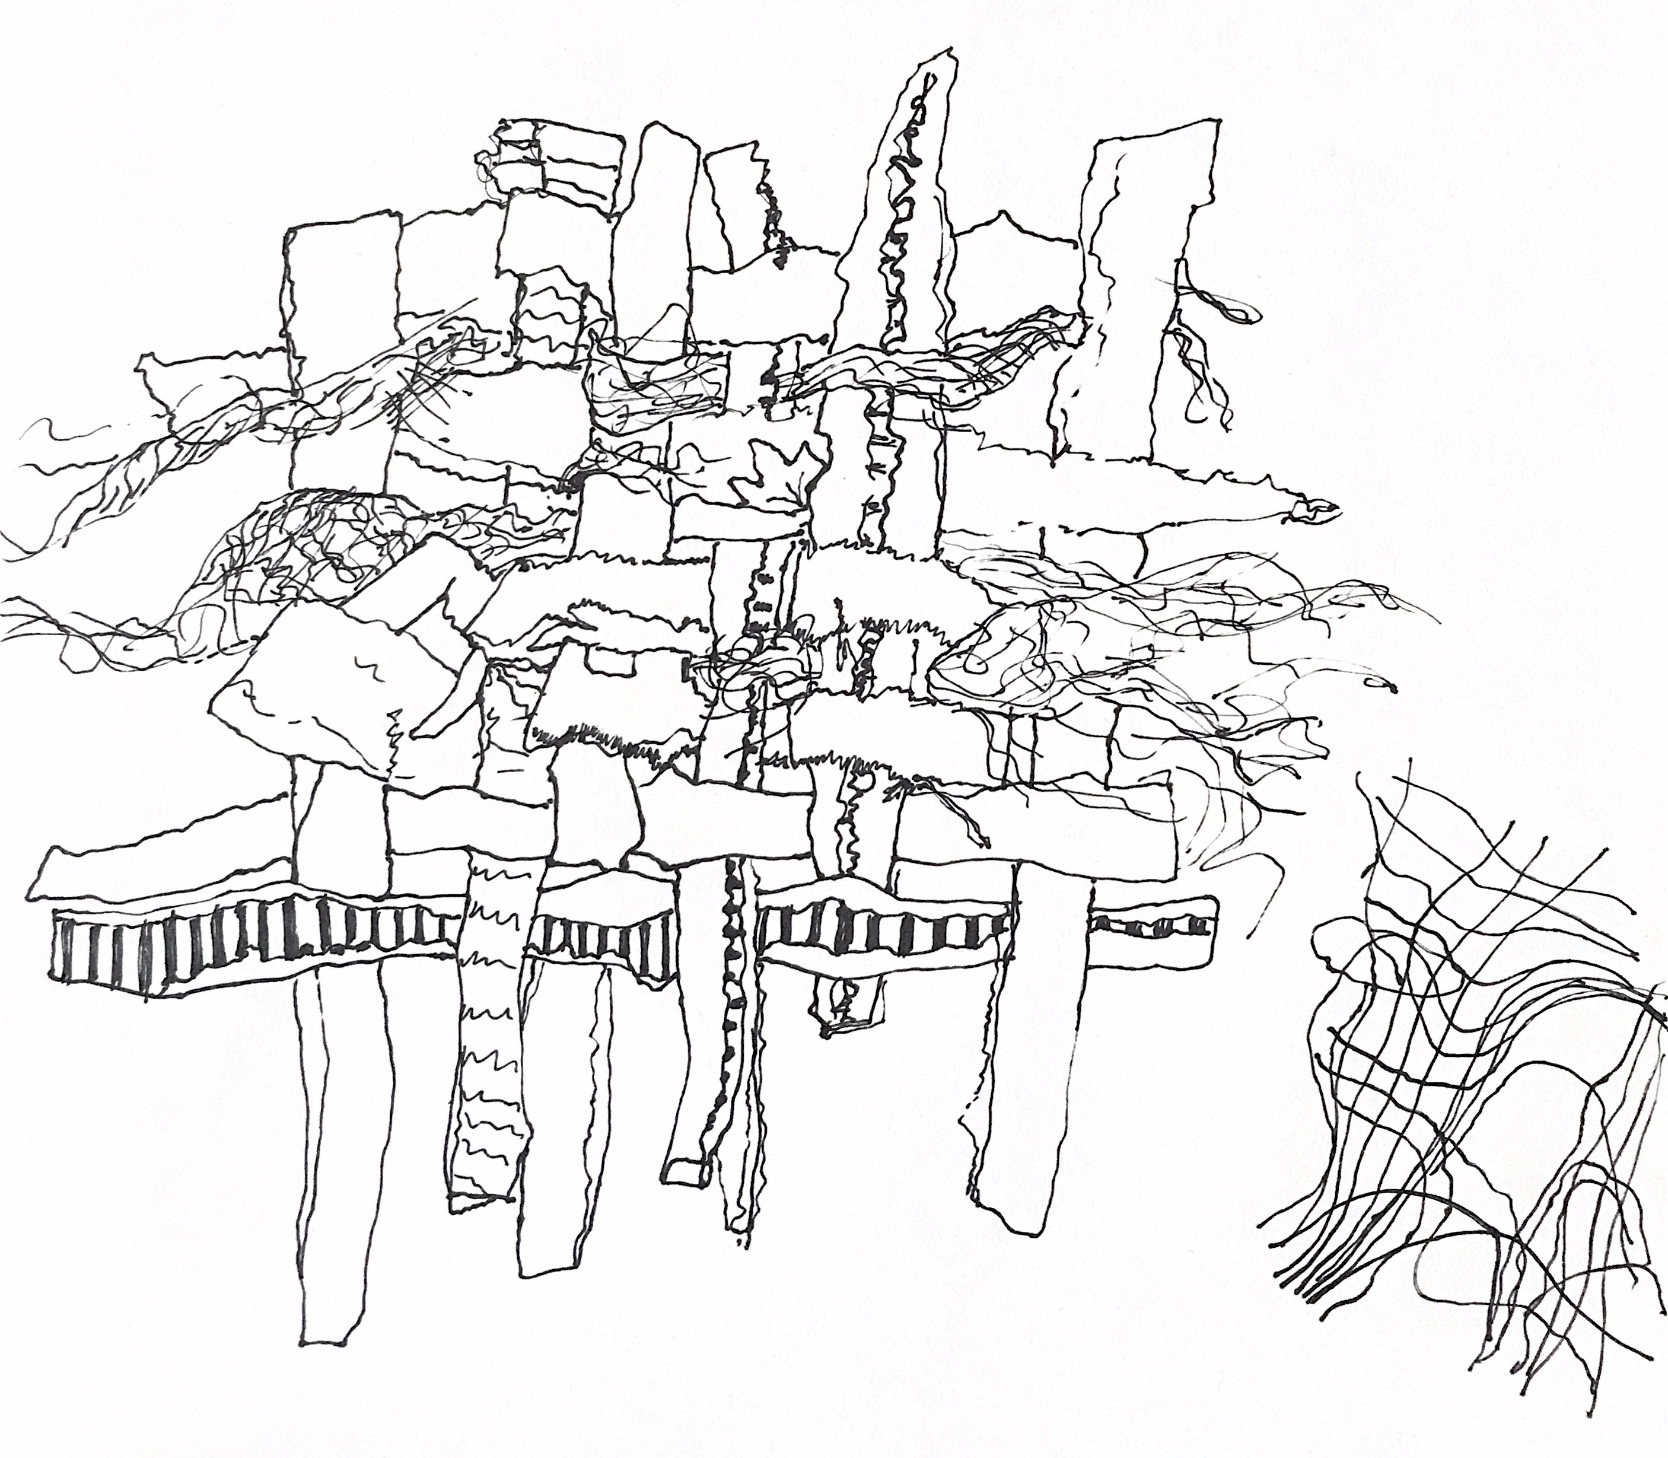
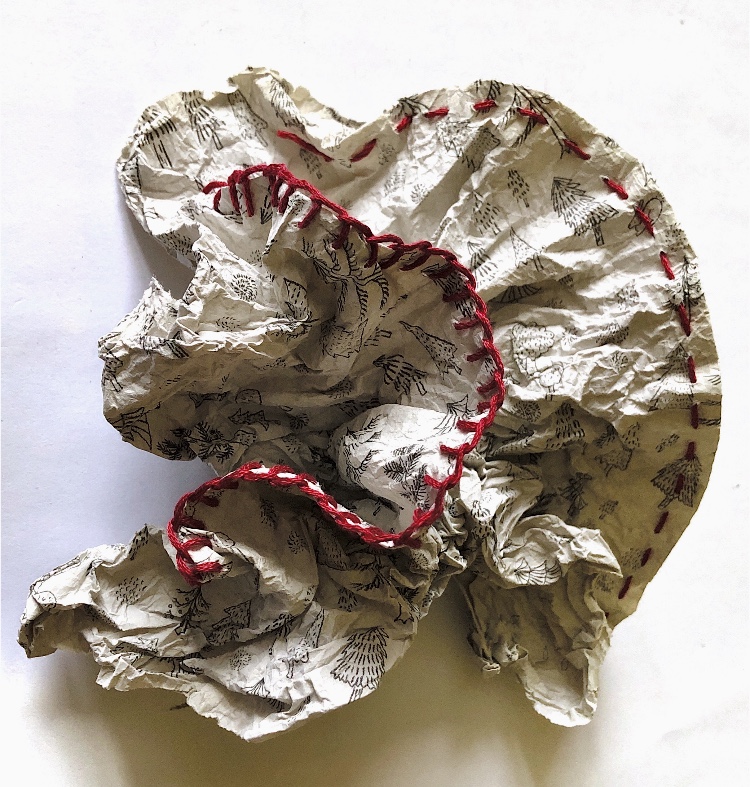
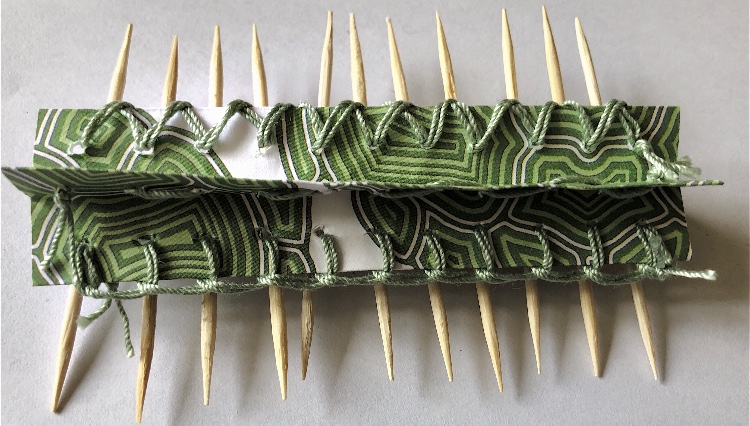
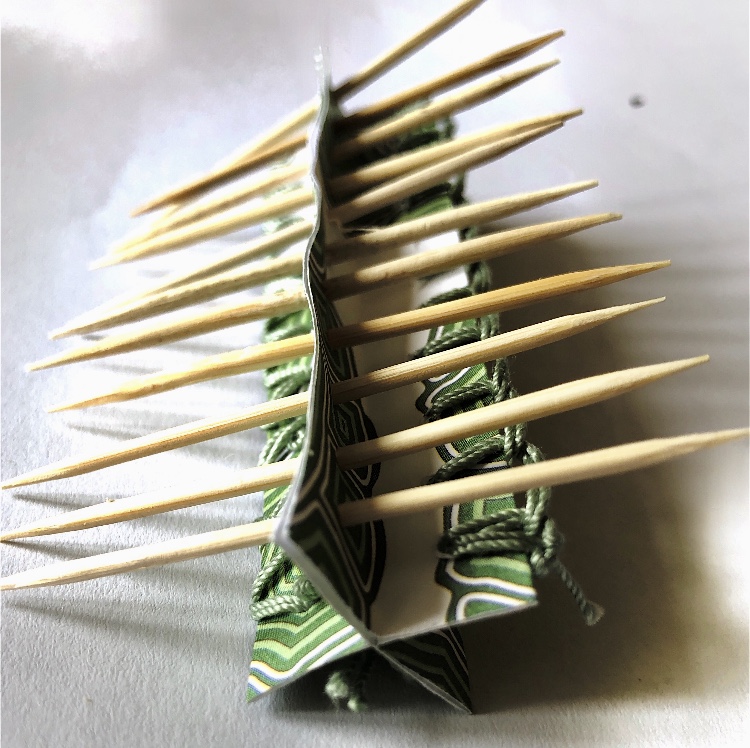
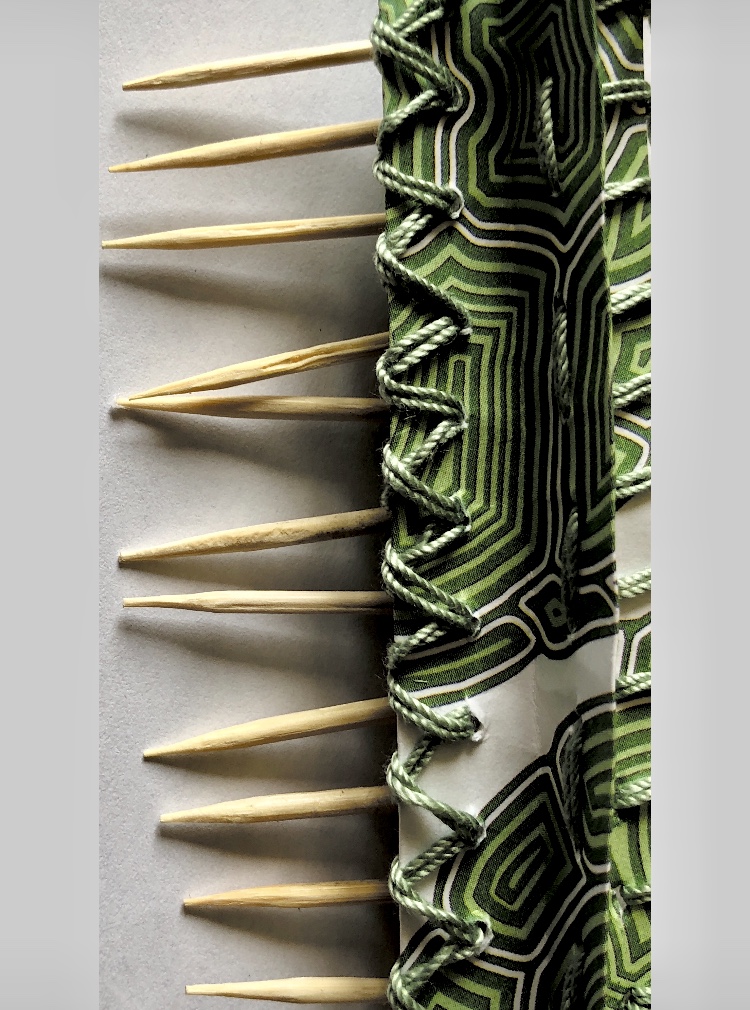
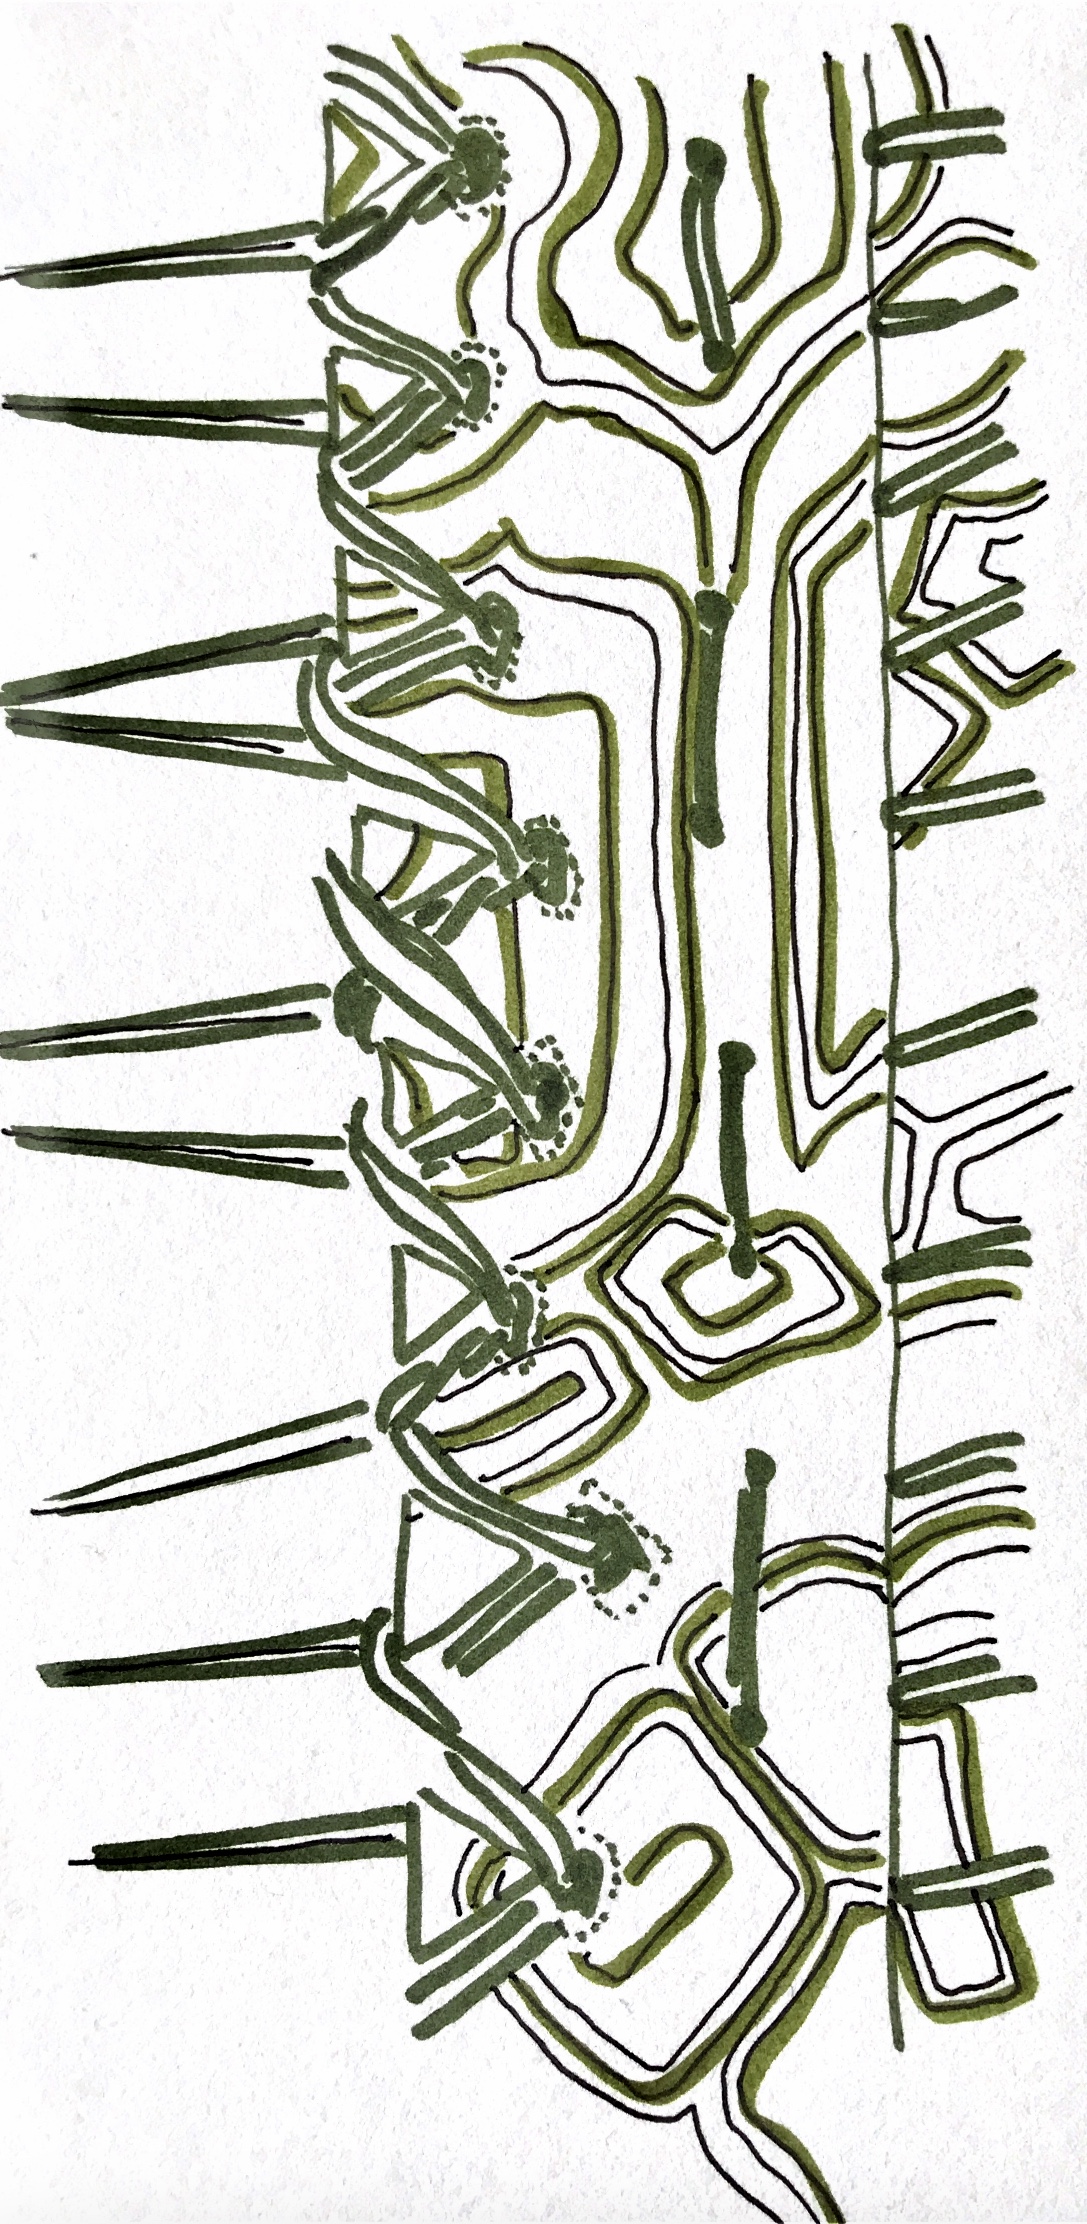
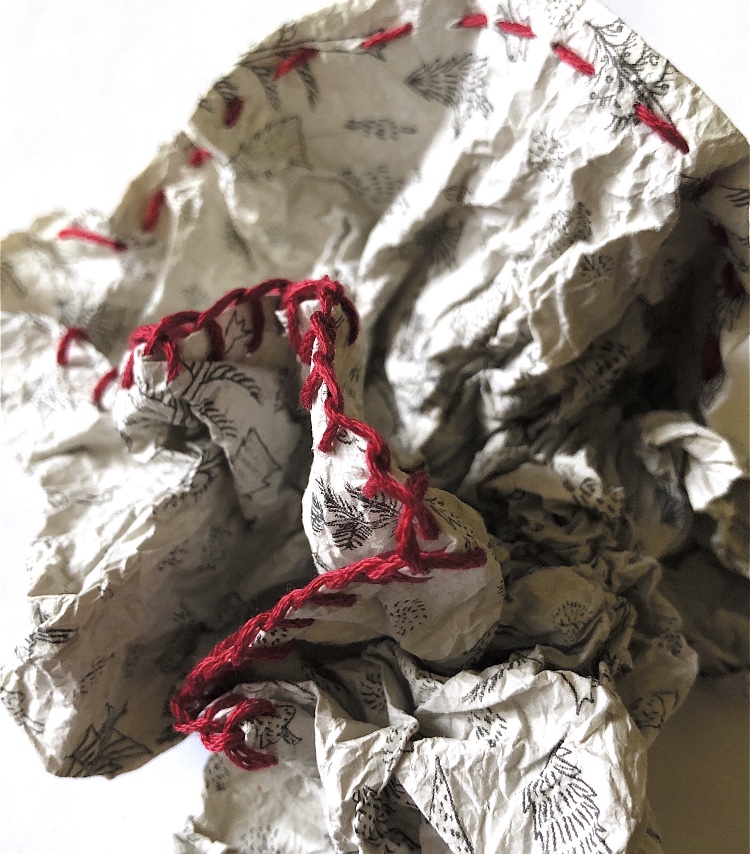
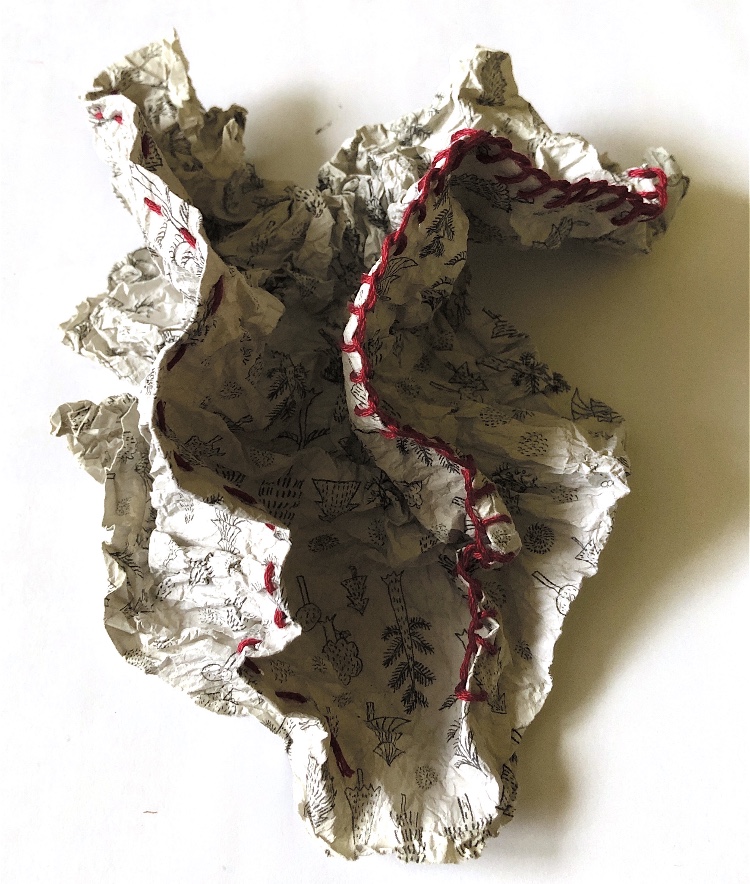
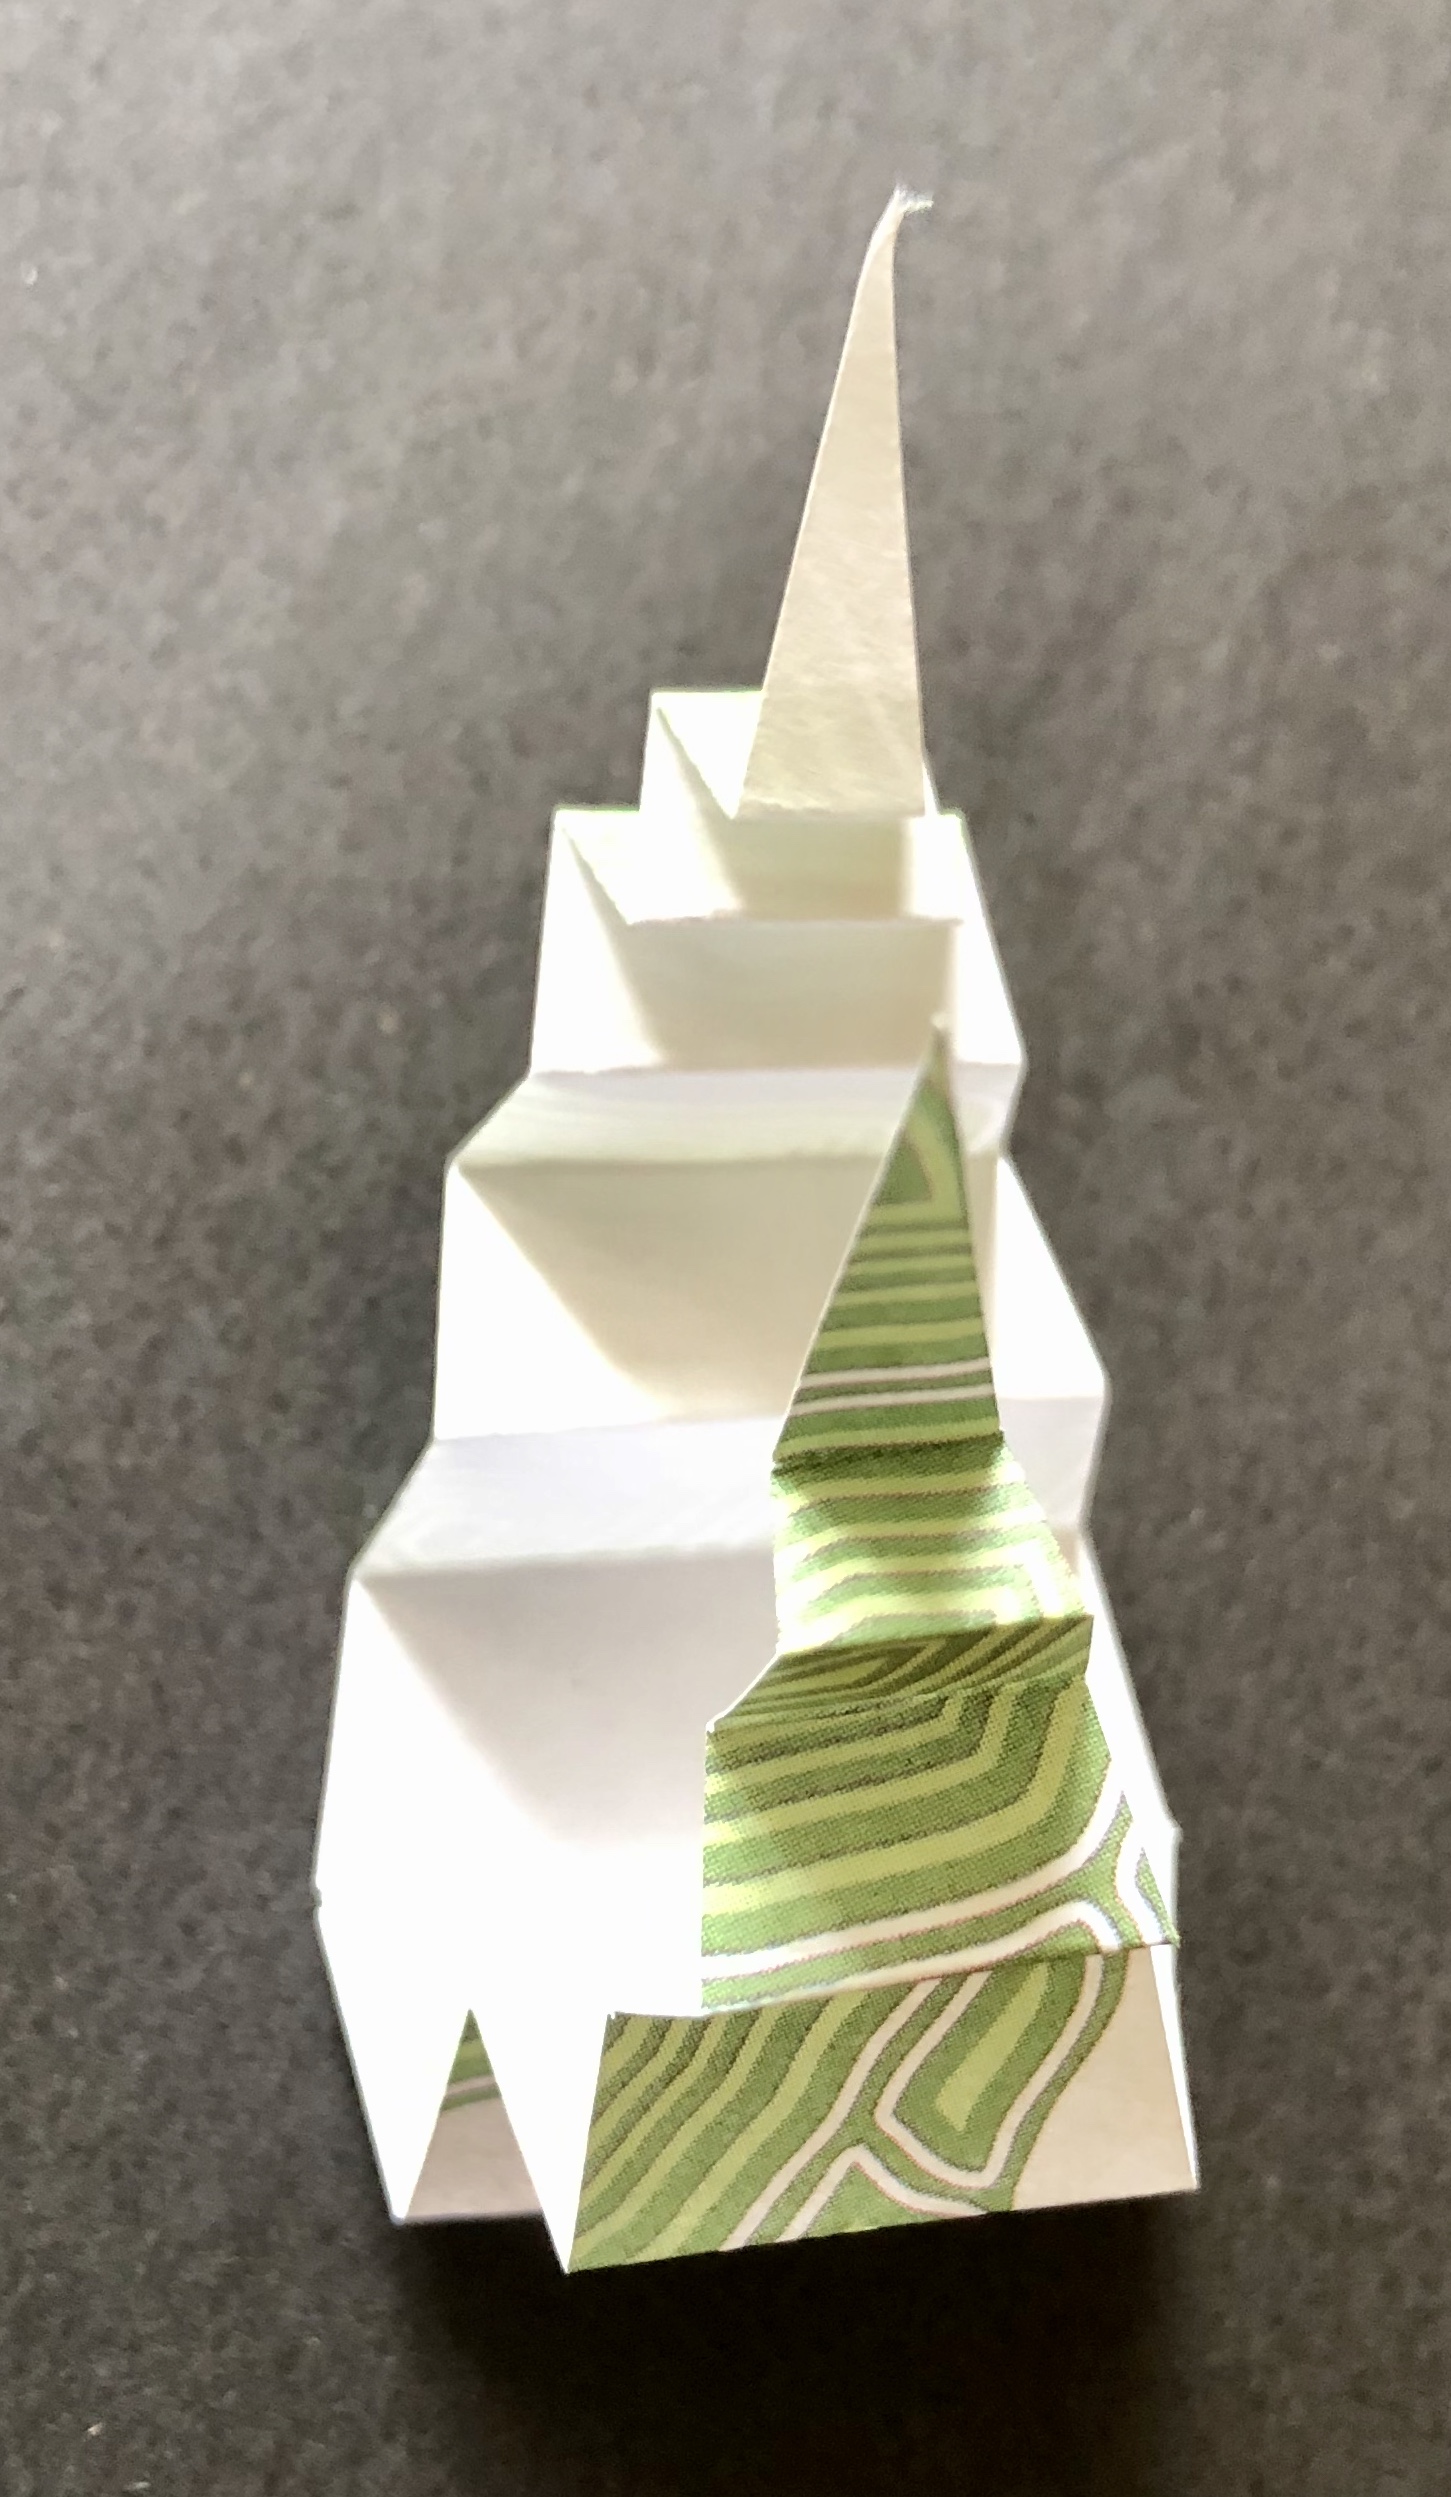
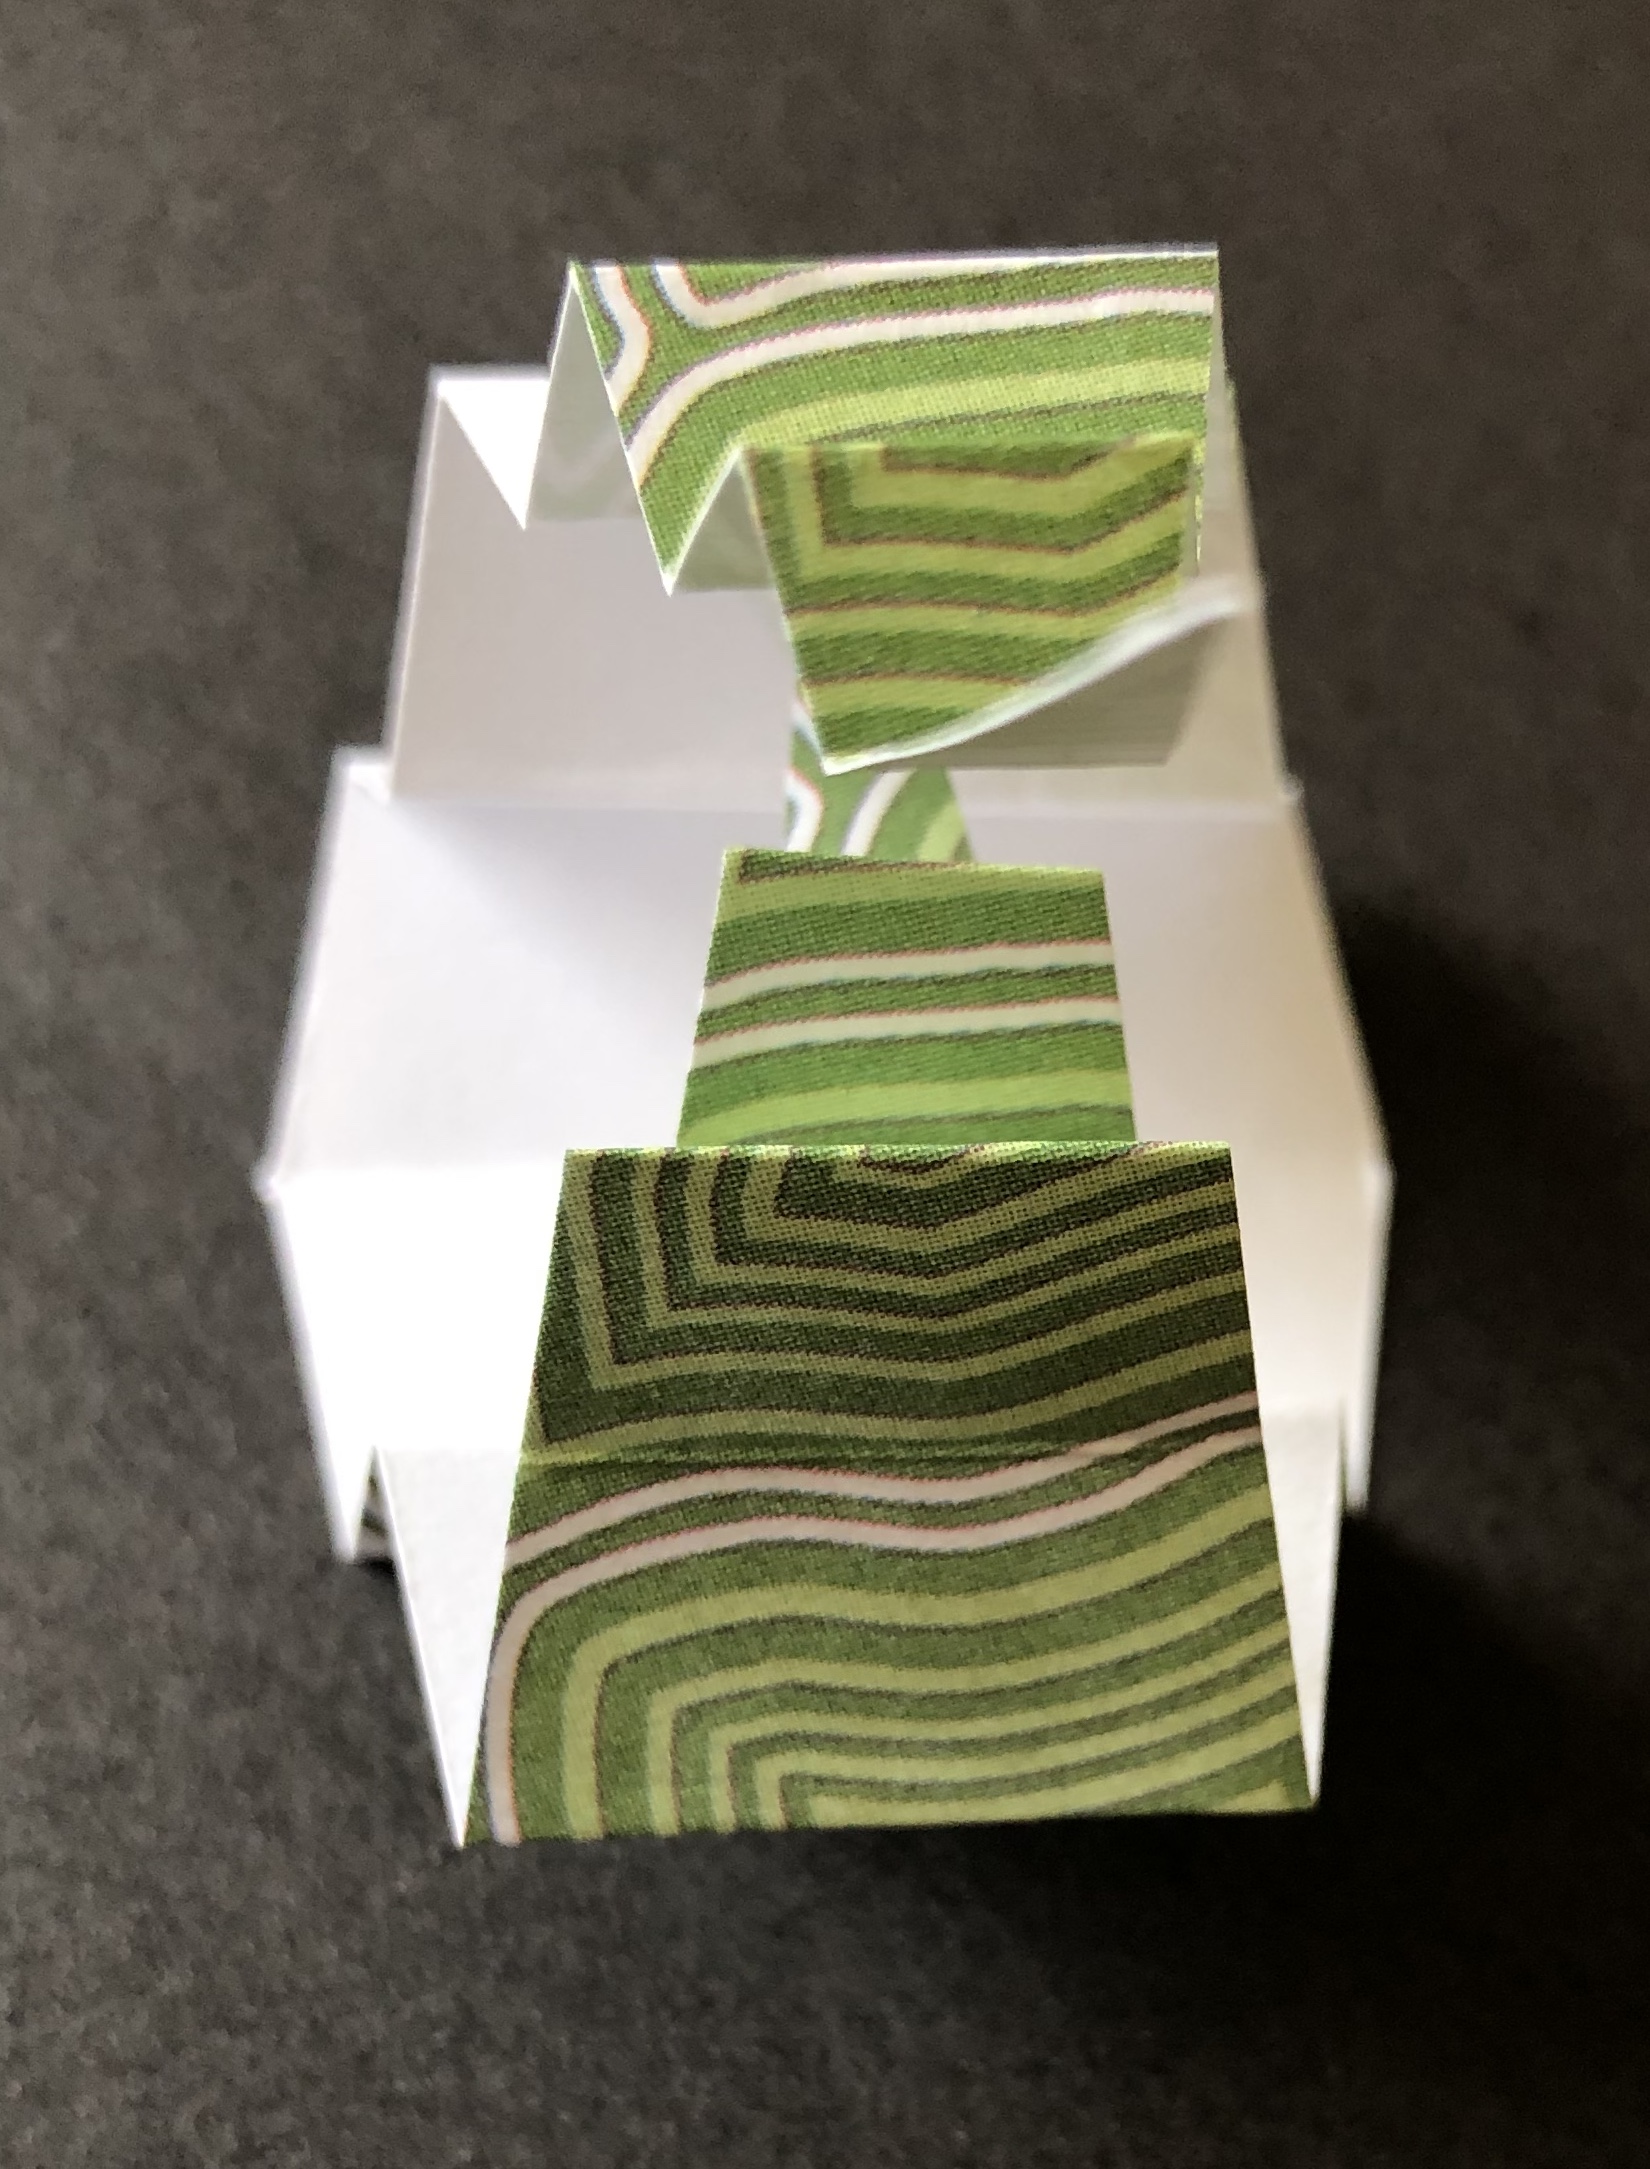
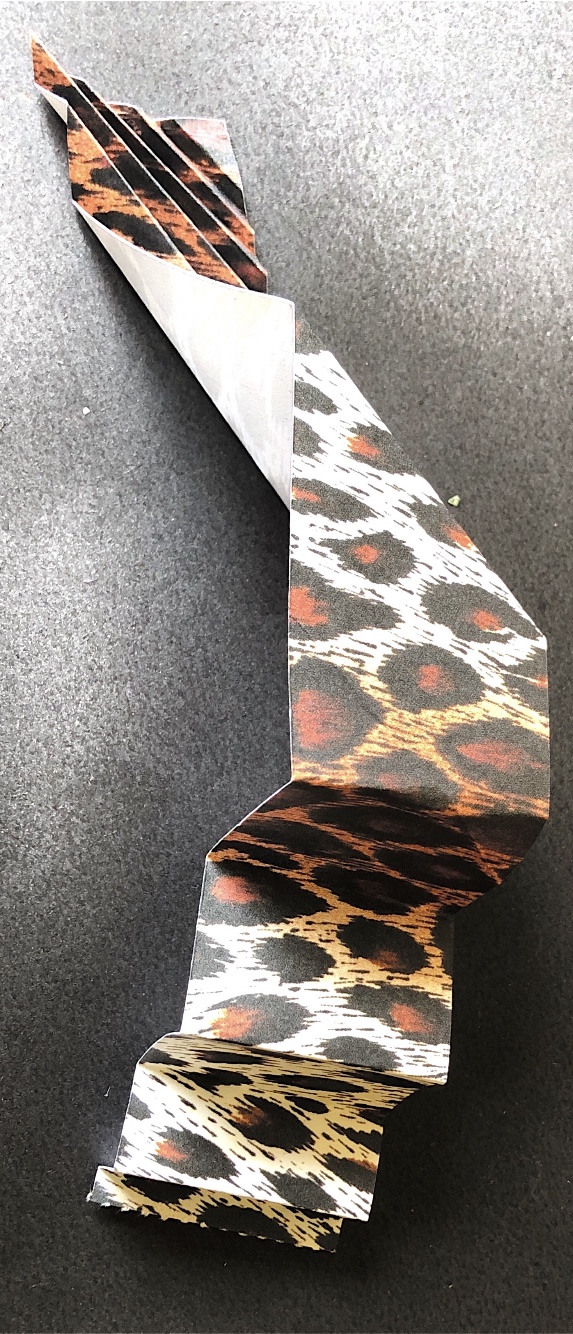
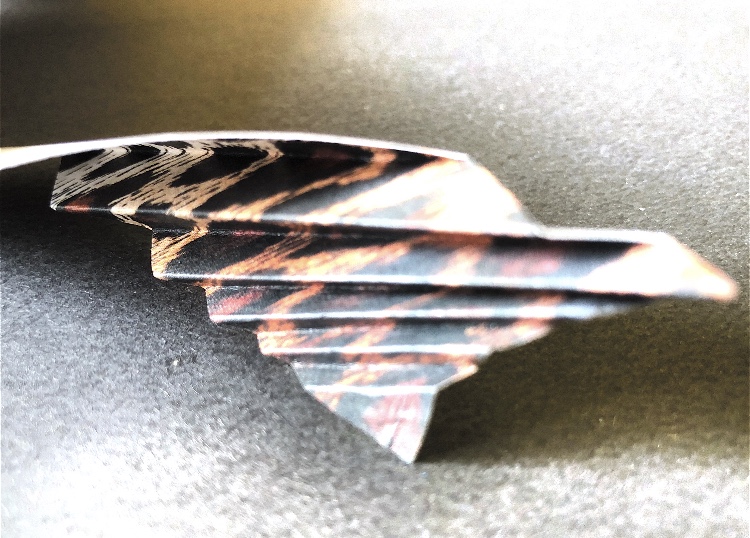
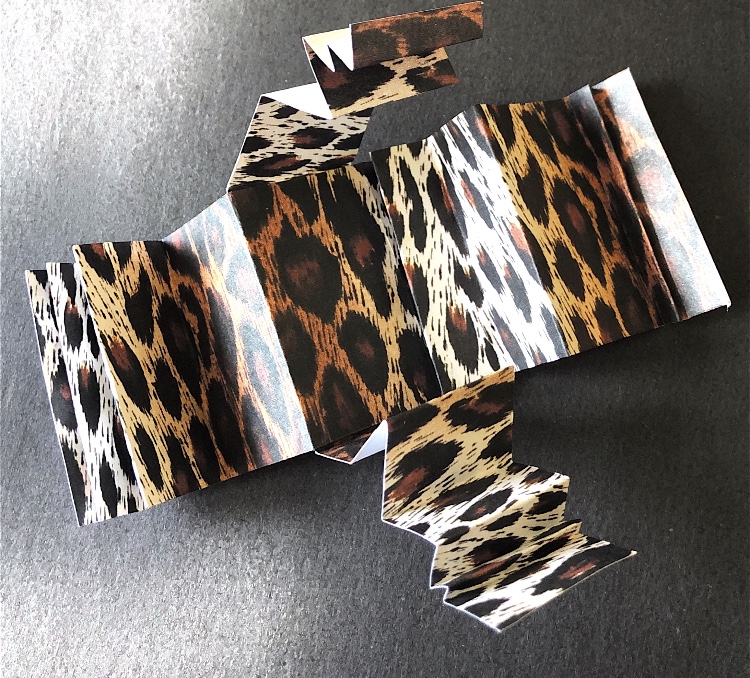
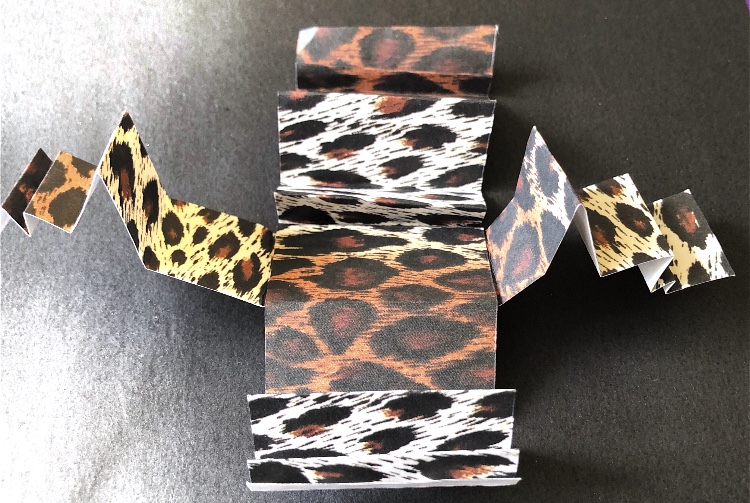
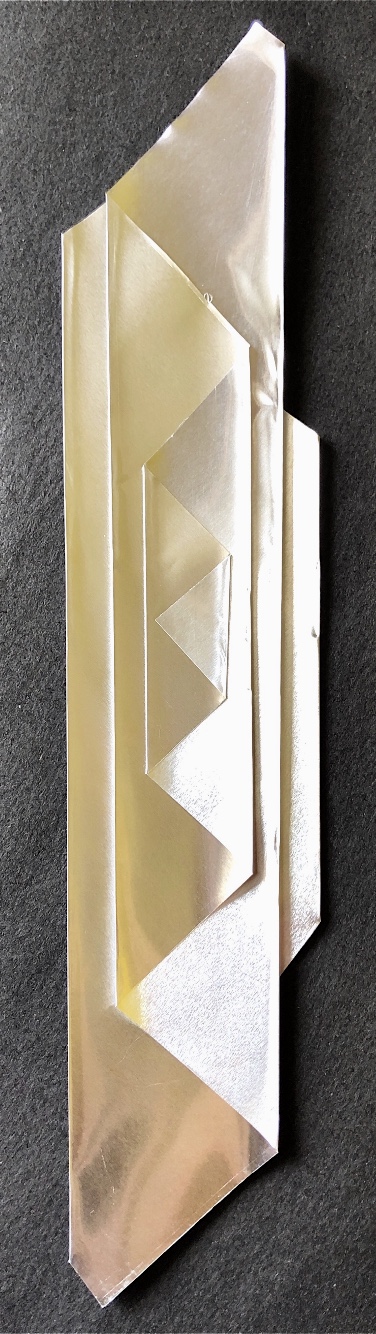
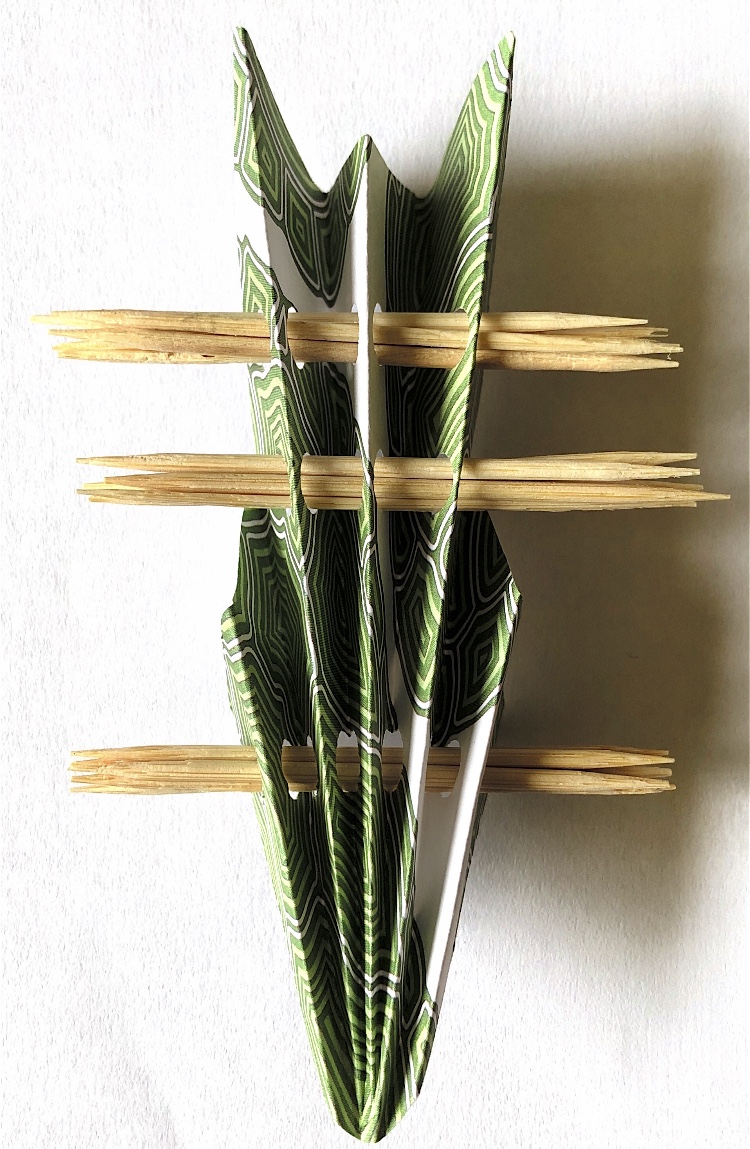
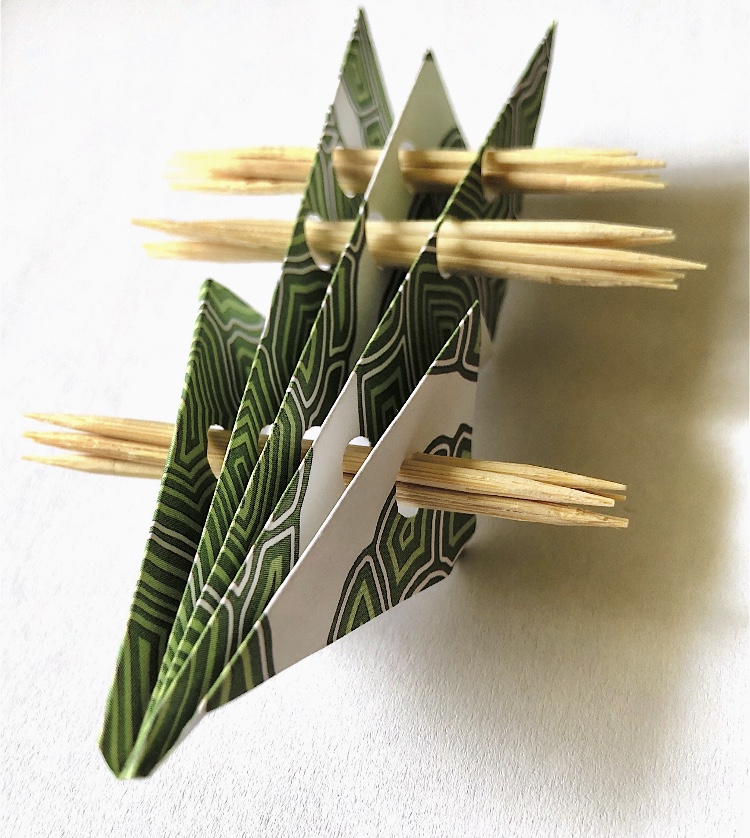
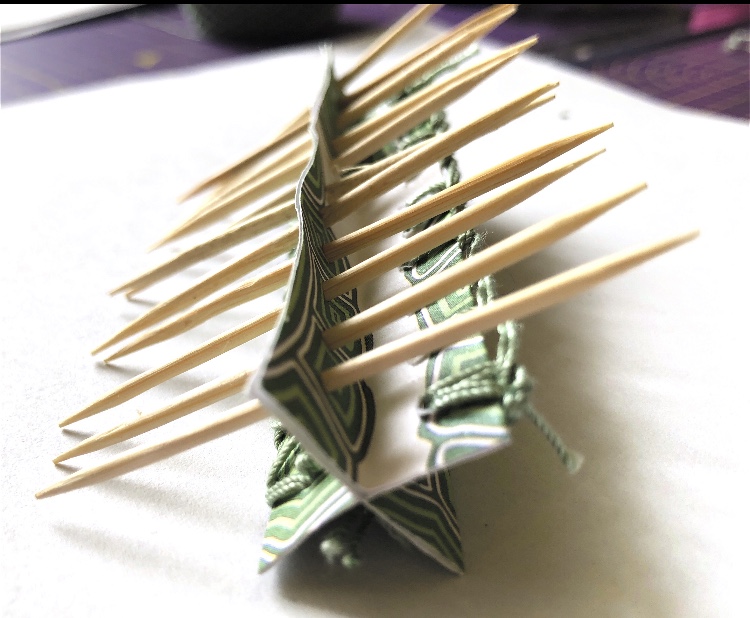
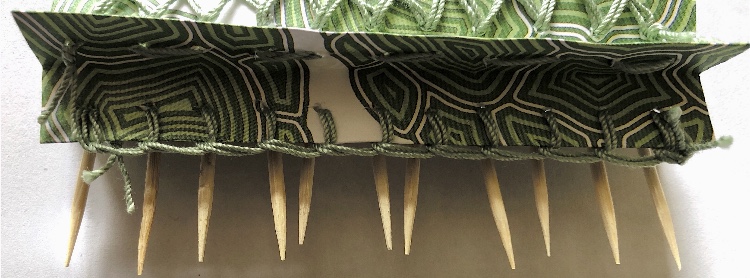
Finally I have chosen a 3d piece folded and secured with cocktail sticks with stitching along the folds, as it nicely uses a number of techniques and makes use of a bold printed paper for added interest. I like the way this looks so different when viewed from another angle.